

Page 1

TABLE
Caution : You must read this before you proceed
CAUTION : This Table is NOT a TOY.
Keep your child / children at bay in the process of assembly.
For turning the Table and to prevent damage to the Table, 02 persons may be needed
to execute this action.
Page 1 of 8
Page 2

Label Picture Description QTY
(M8.5/14x2mm)
Flat Washer
(M8.5/20x2mm)
A Table Top 1
B First leg 2
C Second leg 2
D Wooden pad 4
Label Picture Description QTY
j
k
l
m
n
Bolt
(M8x50mm)
Long Screw
(M6x55mm)
Short Screw
(M5x40mm)
Spring Washer
9
5
13
9
9
Allen Key 1
Screw driver Not provided
Page 2 of 8
Page 3

Before Beginning Assembly:
Page 3 of 8
Page 4
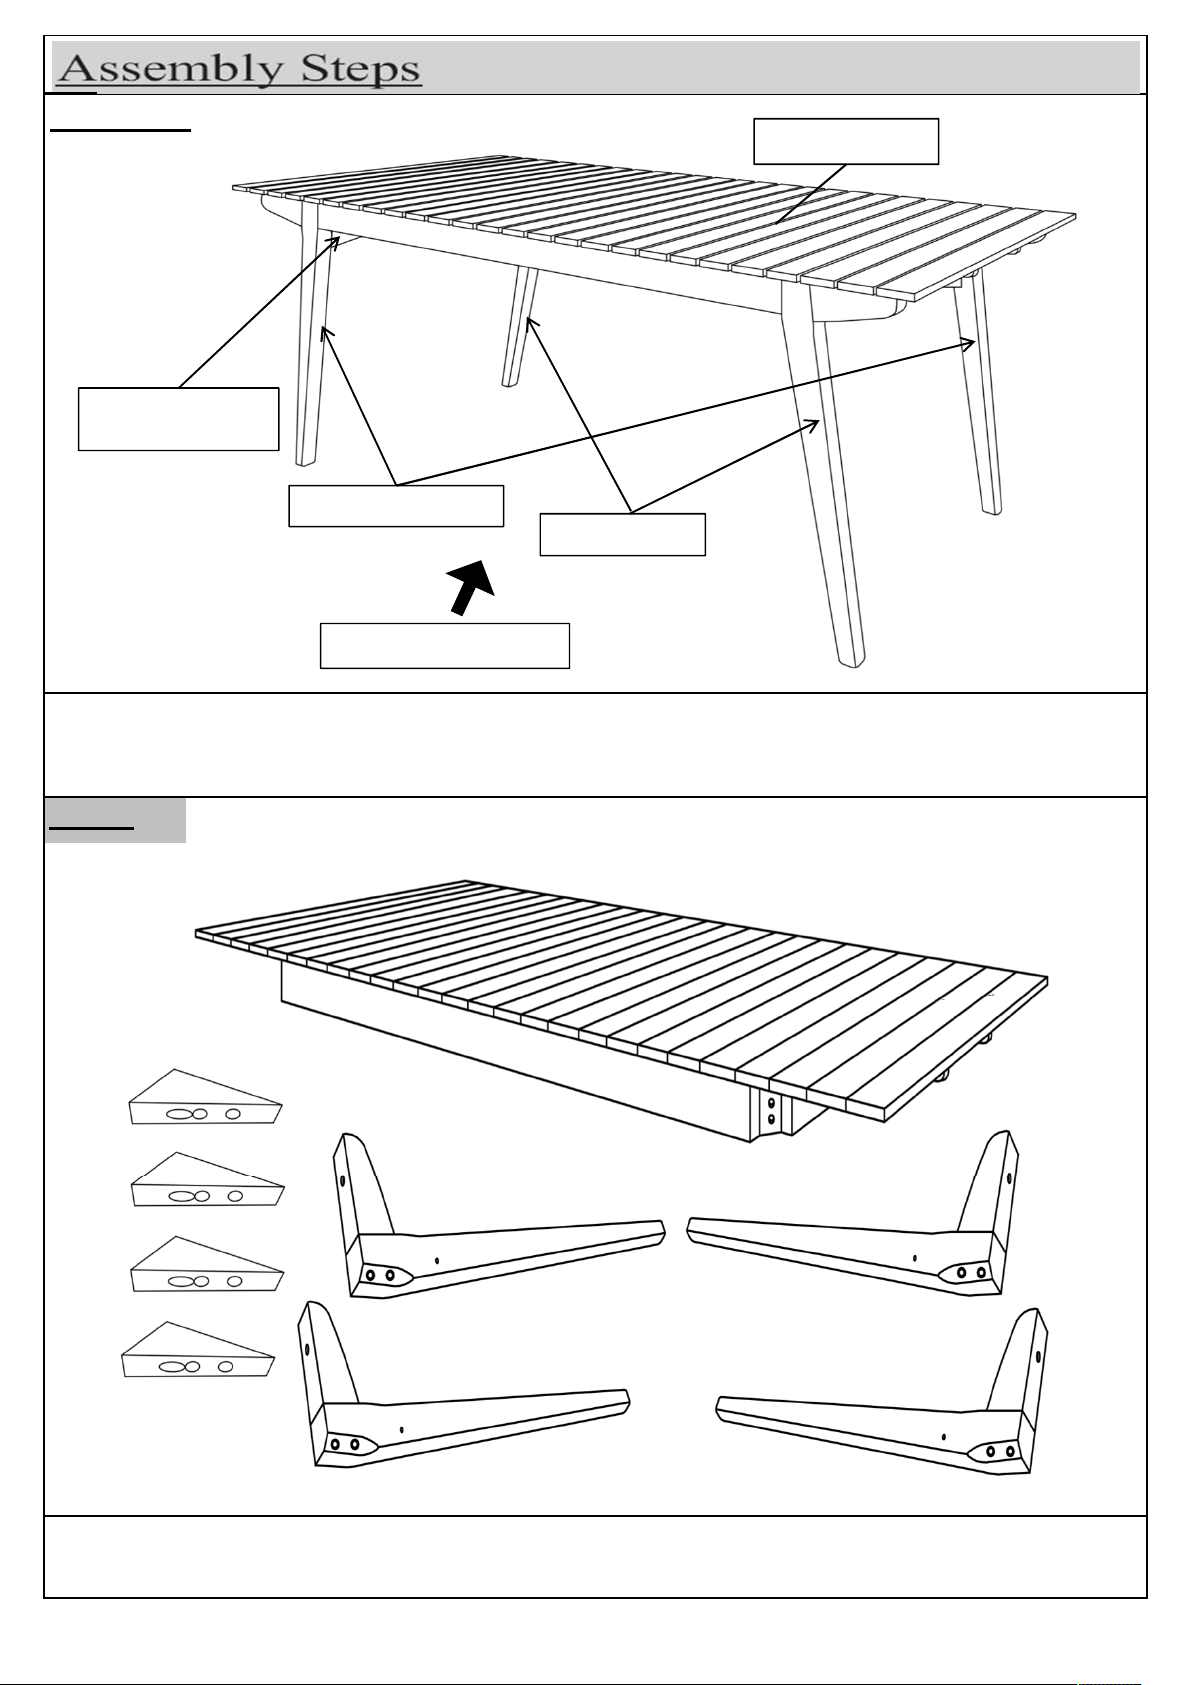
Overview
Page 4 of 8
Wooden pad (D)
Table top (A)
Second leg (C)
First leg (B)
FRONT FACING
This Table has multiple parts and may require up to 30 minutes to assemble. To give you an overview
of the Table parts, the above picture is to help you put the various parts into perspective. Please read
through the instructions below to familiarise yourself with the parts and steps before assembly.
Step 1
Unpack and place all parts on a clean, non-marring surface.
Page 5

Step 2
Step 2.2
Step 2.1
k
B
A
2.1) With assistance from your adult partners, turn the Table Top (A) up side down as picture shown
2.2) Attach First Leg (B) to Table Top (A) as shown in picture above.
Affix the leg (B) with the block by using Bolts (①), Spring Washer (④), Flat Washer (⑤) and Allen
Key (⑥) as shown in picture above.
Affix the leg (B) with the table top (A) by using Long Screw (②) and Allen Key (⑥) as shown in
picture above.
Repeat the same process to attach the other 1 First Leg (B) into the opposite corner of the Tabe Top.
Do not fully tighten the Bolts/Screws.
Page 5 of 8
Page 6

Step 3
C
A
k
A
Attach Second Leg (C) to Table Top (A) as shown in picture above.
Affix the leg (C) with the block by using Bolts (①), Spring Washer (④), Flat Washer (⑤) and Allen
Key (⑥) as shown in picture above.
Affix the leg (C) with the table top (A) by using Long Screw (②) and Allen Key (⑥) as shown in
picture above.
Repeat the same process to attach the remaining Legs (C) into the Table Top (A).
Do not fully tighten the Bolts/Screws.
Step 4
C
B
D
Attach the Wooden pad (D) to the table by using Short Screws (③) and Screw driver (⑦) as shown in
picture below.
Repeat the same process to attach 3 remaining Wooden pads (D) to the table.
Do not fully tighten the Screws.
Page 6 of 8
Page 7

Step 5
With assistance from your adult partners, turn the Table back to normal flat ground
EXERT pressure, floorwards, onto the Table.
This pressure will help the Legs and Table Top reach alignment at all joints.
Check for wobbles.
In a sequential manner, gradually tighten all Bolts until evenly secured.
Inspect the Table and make sure all parts are adequately connected.
Your Table is ready for use.
This Table can only be used on a flat, level surface.
Page 7 of 8
Page 8

Page 8 of 8
 Loading...