

Page 1

GB
USE AND MAINTENANCE MANUAL
HERBICIDE SPRAYERS
TRACTOR-MOUNTED SPRAYERS
CAMPO 11 - 16 - 22 - 32
DSP 11 - 16 - 22 - 32
Read this manual carefully
before use
ISO
Color code
10/2007
Page 2

Summary
1 USING AND KEEPING THE USE AND MAINTENANCE MANUAL ....................................... 4
1.1 COMPOSITION OF THE MANUAL .............................................................................................................4
1.2 GUARANTEE ............................................................................................................................................. 4
1.3 PRODUCT RESPONSIBILITY ....................................................................................................................4
1.4 WARNING SIGNS IN THE MANUAL AND ON THE MACHINE ................................................................... 4
2 SAFETY REGULATIONS AND RESIDUAL RISKS ................................................................. 5
2.1 INTENDED USE ......................................................................................................................................... 6
2.2 PROHIBITED USE ..................................................................................................................................... 6
2.3 USING CHEMICAL PRODUCTS ................................................................................................................ 6
2.3.1 REGULATIONS FOR THE USE OF CHEMICAL PRODUCTS ..................................................................... 6
2.4 RECOMMENDATIONS ............................................................................................................................... 6
2.4.1 TAKING PRECAUTIONS AGAINST FIRE HAZARDS ................................................................................. 7
2.5 WEATHER CONDITIONS ...........................................................................................................................7
2.6 MACHINES DESIGNED TO BE USED ONLY WITH CLEAN WATER .......................................................... 7
2.7 DRIVING ON THE ROAD ........................................................................................................................... 7
3 CHARACTERISTICS AND SPECIFICATIONS ........................................................................ 7
3.1 TABLES OF FITTINGS ALLOWED.............................................................................................................7
3.2 NOISE LEVEL OF THE MACHINE .............................................................................................................8
3.3 STANDARDS OF REFERENCE: ................................................................................................................. 8
4 USER’S INSTRUCTIONS .......................................................................................................... 8
4.1 DESCRIPTION OF THE MACHINE ........................................................................................................... 8
4.1.1 WORK STATIONS ......................................................................................................................................9
4.1.2 HAND WASHING TANKS ............................................................................................................................ 9
4.2 PRELIMINARY CHECKS............................................................................................................................ 9
4.3 TRANSPORTING AND MOVING THE MACHINE ....................................................................................... 9
4.3.1 TOWED SPRAYERS ................................................................................................................................10
4.4 TRACTOR COUPLING ............................................................................................................................. 10
4.4.1 STANDARD VERSION (ELEVATOR COUPLING) ...................................................................................... 10
4.4.2 HOOK VERSION (HOMOLOGATED) ........................................................................................................ 11
4.4.3 PARKING FOOT ...................................................................................................................................... 11
4.4.4 WHEEL SPACING ADJUSTMENT ........................................................................................................... 11
4.4.5 HYDRAULIC CONNECTION TO THE DISTRIBUTORS ............................................................................. 12
4.5 CARDAN SHAFT ...................................................................................................................................... 12
4.6 PUMP ....................................................................................................................................................... 13
4.7 SUCTION FILTER .................................................................................................................................... 13
4.8 PRESSURE REGULATOR ........................................................................................................................ 14
4.8.1 COMPONENTS OF THE PRESSURE REGULATOR ................................................................................ 14
4.8.2 GENERAL INSTRUCTIONS ..................................................................................................................... 14
4.9 DELIVERY FILTERS (ONLY EQUIPPED MODELS) ................................................................................. 15
4.10 SPRAYING COMPUTER (OPTIONAL) ..................................................................................................... 15
4.11 FILLING THE TANK .................................................................................................................................. 16
4.12 MIXING .................................................................................................................................................... 16
4.12.1 MANUAL PREMIXING.............................................................................................................................. 16
4.12.2 PREMIXER ON COVER (OPTIONAL): ..................................................................................................... 16
4.12.3 PREMIXER ON HOPPER WITH TIN WASHER (OPTIONAL)................................................ 17
4.12.4 TOP-MIX PREMIXER FOR CAMPO 11-16-22E (OPTIONAL) ................................................................... 18
4.12.5 TOP-MIX CALIBRATED NOZZLE FOR CAMPO 11-16-22E ...................................................................... 18
4.12.6 HOW TO USE THE LP83 INCORPORATOR.............................................................................................. 18
4.13 WASHING THE SPRAYER ....................................................................................................................... 19
4.13.1 CIRCUIT WASHER AND TANK WASHER ................................................................................................. 19
4.13.2 WASHING WITH FULL TANK (OPTIONAL) ............................................................................................... 19
5 HORIZONTAL BOOMS FOR HERBACIOUS CULTIVATIONS ............................................. 20
5.1 HYDRAULIC HERBICIDE BOOMS ........................................................................................................... 20
5.1.1 INDIPENDENT HYDRAULIC PLANT ........................................................................................................ 20
5.1.2 OIL FEED FROM TRACTOR .................................................................................................................... 20
5.2 AIR-ASSISTED BOOMS .......................................................................................................................... 21
5.3 SELF-LEVELING DEVICES ..................................................................................................................... 21
5.3.1 VARIABLE GEOMETRY ........................................................................................................................... 21
2 unigreen
Page 3

5.4 LIFTING ................................................................................................................................................... 22
5.5 DISTRUBUTION WITH HERBICIDE BOOM .............................................................................................. 22
5.5.1 DESCRIPTION OF TYPE OF JETS ......................................................................................................... 22
5.5.2 DESCRIPTION OF TYPE OF NOZZLES ..................................................................................................22
5.5.3 DISTRUBUTION ....................................................................................................................................... 22
5.6 MARKER .................................................................................................................................................. 24
6 HAND LANCES ....................................................................................................................... 24
7 HOSE REEL ............................................................................................................................. 24
8 MAINTENANCE ....................................................................................................................... 25
8.1 PROGRAMMED MAINTENANCE ............................................................................................................. 25
8.2 ROUTINE MAINTENANCE ....................................................................................................................... 25
8.3 EXTRAORDINARY MAINTENANCE ........................................................................................................ 25
8.4 MAINTENANCE OF THE HERBICIDE BOOM - SELF-LEVELLING DEVICE - LIFTING SYSTEM .......... 25
8.5 REPAIRS .................................................................................................................................................. 25
8.6 STORAGE IN A WAREHOUSE AND TRANSPORTATION ........................................................................ 25
8.7 PUTTING BACK INTO SERVICE AFTER WINTER LAYUP ...................................................................... 26
8.8 DEMOLITION AND DISPOSAL ................................................................................................................ 26
8.8.1 MATERIALS FOR DEMOLITION .............................................................................................................. 26
8.8.2 INDICATIONS FOR A SUITABLE TREATMENT OF WASTE ..................................................................... 26
8.8.3 ELECTRICAL AND ELECTRONIC APPARATUS WASTE (EEAW) ............................................................ 26
TAB.1 CHARACTERISTICS NOZZLES ISO ...................................................................................... 28
TAB.2 CHARACTERISTICS NOZZLES CONICAL ISO ................................................................... 29
TAB.3-4 CAPACITY HAND LANCES ..................................................................................................... 30
TAB.5-6 SPRAYING TABLES ................................................................................................................ 31
TABLE 8 PROBLEMS, CAUSES AND SOLUTIONS ............................................................................. 32
TABLE 7 TABLE OF PROGRAMMED MAINTENANCE ....................................................................... 32
TAB.12A ALLOWED FITTINGS .............................................................................................................. 33
TAB.12B ALLOWED FITTINGS .............................................................................................................. 34
unigreen 3
Page 4

Thank you for having chosen UNIGREEN.
The product you purchased has been designed and built with the greatest
attention to the safety of the operator and the environment, nevertheless there
are still some residual risks due to the nature of the product used.
For this reason we recommend reading all of this manual to avoid making
mistakes in the first period of use and to get the most out of the working life of
the sprayer in time, doing the programmed maintenance at regular intervals.
1 USING AND KEEPING THE USE AND MAINTENANCE MANUAL
The manual is an integral part of the machine and should be kept in a safe
place where it can be reached easily for consultation.
1.1 COMPOSITION OF THE MANUAL
This manual consists of various parts to make it easier to consult by subject
and to avoid repetitions; the following are part of the manual:
a) pump handbook
b) pressure regulator handbook (manual or electric)
c) spraying computer handbook (if fitted)
d) optional accessories handbooks (marker, premix, cardan shaft, etc.)
UNIGREEN reserves the right to make changes to the manual without prior
warning and the normal printing cycles may vary slightly.
1.2 GUARANTEE
The enclosed card indicates the conditions of the UNIGREEN guarantee. The
UNIGREEN guarantee covers the repair or replacement of parts considered
manufacturing flaws, according to the unquestionable judgement of
UNIGREEN, only after the authorised agent for that zone has verified the fault.
Ambit of the guarantee
The guarantee doesn’t cover cases of normal wear, negligent use, poor
maintenance and/or improper use.
The following materials subject to normal wear are not covered by the
guarantee: gaskets and seals, diaphragms, seal rings, tubes and pipes,
nozzles, pressure gauges, oil, tyres, friction material of the clutches.
Evident cases of negligence include: work speed over that indicated in the
spraying tables in the handbook (or too high for the conditions of the terrain),
use of herbicide booms without an auto-levelling system or with the autolevelling system blocked, power-takeoff speed over 540 rpm.
Mounted sprayers: activation of the three-point elevator with cardan shaft
engaged and power-takeoff operational.
And anything else indicated in the present Use and Maintenance Manual.
Maintenance:
The guarantee is void if the maintenance indicated in the tables in this manual
isn’t respected, regarding the period and deadline of the interventions, washing
the machine and the circuit at the end of the treatment.
Improper use:
The use the UNIGREEN machines are designed for is indicated in this manual,
any other use is forbidden and makes the guarantee void.
4 unigreen
Composite handbook, consult the
specific files on the various
components
1.3 PRODUCT RESPONSIBILITY
UNIGREEN spa is not responsible if:
a) During the working life of the machine the normal maintenance operations
aren’t performed and documented as indicated in this handbook, in the
enclosed handbooks of the pumps-motors-regulators-etc. and in any case as
is customary for the normal maintenance of mechanical machinery.
b) The machine is equipped with non original accessories or components or
parts that aren’t acknowledged by UNIGREEN as their own.
c) The machine is equipped with original accessories or components that are
unsuitable in the measurements, weight or version for the same.
Please consult the page of available and recommended fittings.
d) Not following the instructions in the manual whether totally or partially.
e) Modifications made to the machine that haven’t been authorised by
UNIGREEN.
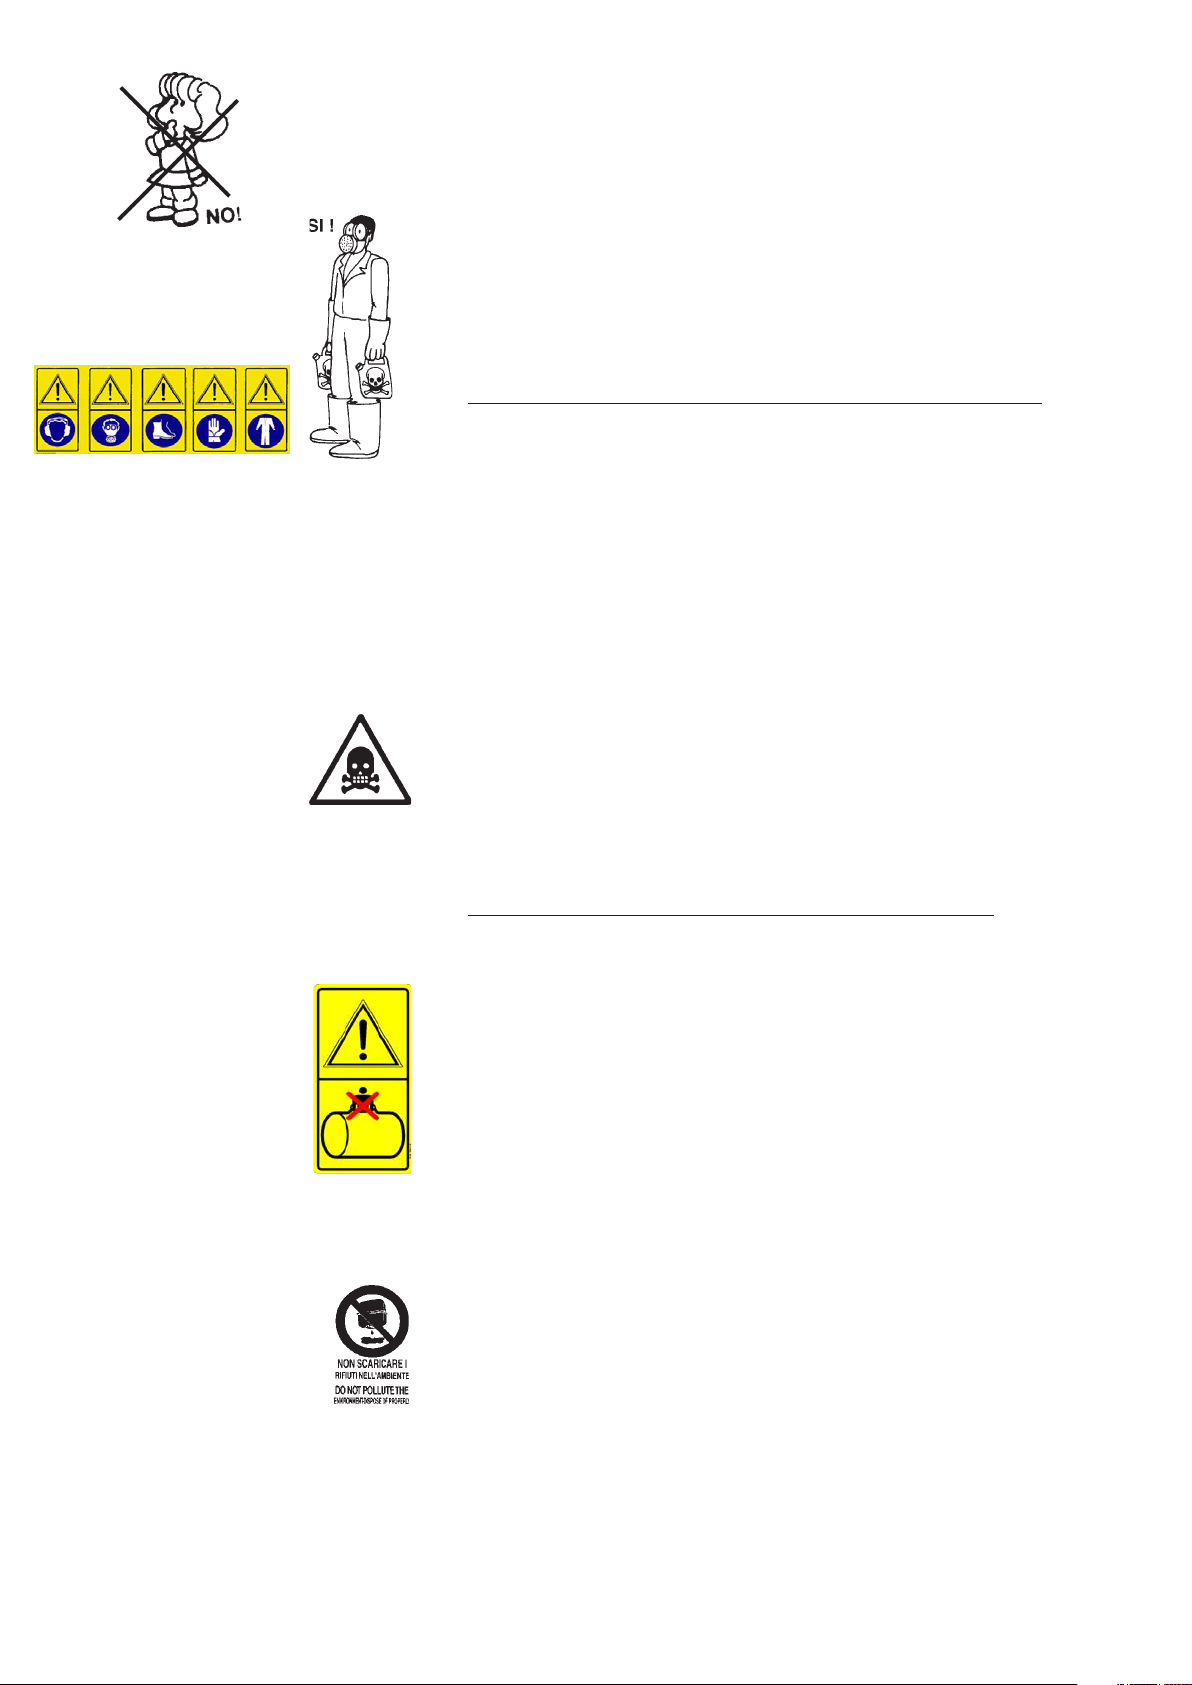
1.4 WARNING SIGNS IN THE MANUAL AND ON THE MACHINE
Below you will find all of the pictograms on the machine, in order to illustrate
the warnings, the prohibitions and the correct method of use.
The operations that require particular attention are shown in the images beside
the text.
Page 5

1
7
13
2
8
14
3
9
15
4 5
10 11
16 17
6
12
18
2019 2221 23 24
Key to the symbols
1- Read the Use and Maintenance manual
2- Stop the machine and read the manual before
every intervention
3- Don’t lubricate while running
4- Don’t drink
5- Don’t dispose of residue liquids in the environment
6- No smoking
7- Danger, risk or injury, don’t get near the machine
until the moving machine members have stopped
8- Danger of crushing, don’t get your hands near the
moving mechanical machine members
9- Danger, risk or injury caused by fluids under
pressure
10- Don’t climb on the machine during work or
transfers
11- Don’t climb on the tank
12- Don’t enter in the tank
13- Wearing earmuffs is obligatory
14- Wearing a face mask is obligatory
15- Wearing safety footwear is obligatory
16- Wearing protective gloves is obligatory
17- Wearing protective overalls is obligatory
18- Use a working pressure under that indicated in
red on the manometer.
19- Don’t get your hands near the moving cardan
shaft
20- Make sure power-takeoff of the tractor turns in the
right direction and runs at the right speed.
21- Beware of the possibility of the raised boom
falling
22- Danger of contact with the electric power lines
23- Don’t stand between the machine and the tractor
24- Danger of lateral skidding
2 SAFETY REGULATIONS AND RESIDUAL RISKS
In relation to safety, the following terms will be used:
Dangerous zones: any zone inside and/or near the machine where the
presence of a person exposed constitutes a risk for the safety and health of
the same person.
Person exposed: any person who has their body or any part of their body in a
dangerous zone.
Before starting the machine, the operator must check for any visible faults in
the safety devices and the machine itself.
Never start the machine until you have told anyone in the range of action of
the machine to move away and they have done so.
The protective devices must not be removed or disabled when the machine is
running.
It is obligatory to keep all the plates with danger and safety signs in perfect
conditions. If they get damaged or deteriorate, replace them in good time.
Replace parts believed to be faulty with others indicated by UNIGREEN.
NEVER try makeshift or hazardous solutions.
Don’t wear clothes, jewellery, accessories, or anything else that can get
caught in the moving machine members.
Pay the greatest attention to all the warning and danger signs on the
machine.
Don’t use the machine for any other purpose other than that indicated in the
manual.
The machine has been designed and built with the appropriate devices to
guarantee the safety of the user.
In any case there are some residual risks associated with the improper use
of the machine by the operator; for this purpose danger signs and symbols
and prohibitions are applied near some parts of the machine (see previous
pictograms).
da 1 a 18
19+20
8+23+24
INDICATIVE POSITION
OF THE WARNING SIGNS ON THE SPRAYER
NB: the position may vary on the basis of the
characteristics of the model.
21+2211+12
FIG.1
unigreen 5
Page 6
2.1 INTENDED USE
The sprayer in this series is built for agricultural use. The materials used are
resistant to normal chemical products used in agricultural spraying (or herbicides)
at the time of construction.
Any other use is not allowed and the manufacturer is not responsible for any
damage caused by aggressive, dense or sticky chemicals.
THE USE OF THE MACHINE BY PERSONS UNDER 18 YEARS OF AGE IS
STRICTLY FORBIDDEN
The use of liquid fertilizers in suspension is not allowed, while the use of the
same in a solution is possible if requested when the machine is ordered from
Unigreen and in any case changing some of the parts described in the handbooks
of the regulator, such as the manometer (stainless steel), the nozzles (large
diameter ceramic) and eliminating the fine mesh filters to prevent blockages.
2.2 PROHIBITED USE
Using the machine with the following products is strictly forbidden:
= Paints of any kind and type
= Solvents or thinners for paints of any kind and type
= Combustibles or lubricants of any kind and type
= LPG or gas of any kind and type
= Flammable liquids of any kind and type
= Liquid foodstuffs, whether for animals or humans
= Liquids containing granules or consistent solids
= Mixtures of various incompatible chemical products
= Liquid fertilizer or manure in suspension with lumps and/or that is particularly
dense
= Liquids with a temperature of over 40°C
= Any products that aren’t suitable for the specific use of the machine.
2.3 USING CHEMICAL PRODUCTS
All pesticides or herbicides can be dangerous to humans and the environment if
used erroneously or inadvertently.
Therefore we recommend that only suitably trained persons should use these
products (license) and in any case only after having carefully read the instructions
on the container.
2.3.1 REGULATIONS FOR THE USE OF CHEMICAL PRODUCTS
Some recommendations for avoiding damage and accidents:
= Keep the machine in a suitable, protected place with no access for children or
strangers
= Handle the products with care, wearing rubber acid-proof gloves, goggles- face
masks or filtering helmets, overalls made of water-repellent fabrics or TIVEK and
boots made of rubber or similar materials.
= If chemical products or mixtures of product come into contact with the eyes or
are swallowed consult a doctor immediately, taking the label of the product with
you.
= Wash all clothes that come into contact with the chemical, whether diluted or
undiluted, thoroughly before using them again.
= Don’t smoke, drink or eat when preparing or spraying the mix or near or in the
fields treated.
= DON’T ENTER THE TANK: the residues of a chemical product can cause
poisoning and suffocation.
= When spraying, respect safe distances from residential areas, water courses,
roads, sports centres and public parks or paths.
= Thoroughly wash the containers of plant protection products using the relevant
accessories, rinsing several times with clean water. The liquids used for washing
can be used for treatment.
= Collect the washed containers and send them to the relevant collection
centres. Never dispose of them in the environment and don’t use them again for
any other purpose. It is good practice to knock a hole in the bottom of the tins so
they can’t be used again.
= When you have finished spraying, wash the sprayer thoroughly, diluting the
residues with a quantity of water at least 10 times that of the residues, spraying
the resulting mix over the treated field.
6 unigreen
2.4 RECOMMENDATIONS a) Refer to the present handbook for the use and maintenance of the frame, tank,
auto-levelling systems, elevators, mechanical and hydraulic herbicide booms,
spray booms and hose reels.
Page 7

Refer to the enclosed handbooks for the use and maintenance of the pump and
pressure regulator and any accessories or motors.
b) Please contact the agent in your zone, the nearest authorised workshop or
UNIGREEN S.p.A. directly for any repairs the user feels they aren’t capable of
performing alone. (see point 8.5)
c) Due to the complexity of the equipment and the variety of technologies used
(mechanical, hydraulic, oil-pressure and electrotechnical) operators must not
dismantle or modify the equipment. All of the relevant operations must be performed
by specialised personnel, authorised by UNIGREEN S.p.A.
2.4.1 TAKING PRECAUTIONS AGAINST FIRE HAZARDS
Don’t use naked flames or heat sources near the machines.
The sprayers are made with many materials that derive from petroleum: tanks,
tubes, pipes and hoses, wheels and plastic parts; furthermore the presence of
oils of various nature and residues of chemical products make them potentially
flammable.
2.5 WEATHER CONDITIONS
We recommend spraying in the early hours of the morning or late in the afternoon,
avoiding the hottest time of day.
Never do any spraying if it’s raining or rain is forecast.
Don’t spray in strong wind or in any case, in winds above 3/5 m/second.
If you have to spray in windy conditions, use relatively low pressures to obtain
quite large drops that are less sensitive to drifting (being heavier the wind has
less effect). There are also special anti-drift nozzles available from UNIGREEN
S.p.A.; for information, please contact our offices.
2.6 MACHINES DESIGNED TO BE USED ONLY WITH CLEAN WATER
There are versions of the machines designed only to be used with a hose reel for
washing with cold clean water.
These machines cannot be used with chemical products as they don’t have some
of the devices or accessories that are needed to use these products safely.
These machines are identified by the word “washing” on the CE plate.
2.7 DRIVING ON THE ROAD
The CAMPO series atomisers are not specifically designed for road use.
Nevertheless, many models are also available in the version homologated for
road traffic with the tank empty.
You should check with your local reseller on the correct couplings to use and use
tractors that meet the regulations in force.
3 CHARACTERISTICS AND SPECIFICATIONS
This handbook is valid for tractor-mounted sprayers to be used with:
a) horizontal booms per herbaceous cultivations (herbicides, insecticides,
fungicides, foliage nutrient, etc.)
d) treatments with hand lances with or without a hose reel
e) hand lances for washing with or without a hose reel
The UNIGREEN S.p.A. sprayers are identified by the CE plate (FIG. 2) bearing
one of the marks indicated in the tables of the allowed fittings (TABLE N° 12 pag.
33-34). The tables above contain a summary of the indications envisaged for the
markings.
TYPE : .......................................................................
code: ........................................ N˚ ...........................
massa a vuoto: ..........................Kg. max press. : ........... bar
net mass
massa totale ammessa: .............................. Kg.
total mass
via Rinaldi, 105 - Reggio Emilia ITALIA
ANNO
YEAR
20 .......
made in
Italy
FIG. 2
3.1 TABLES OF FITTINGS ALLOWED
Table N° 12 let you identify the version of your machine indicating the basic
equipment and all the possible fittings available (optional).
You can also find the other fittings allowed or other versions to meet your requirements in the future.
THE FITTING DEFINED IN TABLES N° 12 (pages 33-34) SHOULD BE CONSIDERED BINDING FOR THE VALIDITY OF THE DECLARATION OF CONFORMITY.
Other fittings or setups of basic components and optionals should be considered
unsafe and therefore are not covered by the guarantee and aren’t UNIGREEN’s
responsibility.
The same goes for fittings realised with components or accessories that aren’t
original UNIGREEN parts.
UNIGREEN accessories can easily be identified by the label with the yellow
background “ORIGINAL UNIGREEN ACCESSORY”
unigreen 7
Page 8

3.2 NOISE LEVEL OF THE MACHINE
Use earmuffs to protect your ears when using the machine,
Sprayers that are equipped with just a pump and hydraulic plant
ACOUSTIC POWER LEVEL emitted by the machine: 106,0 dBA
ACOUSTIC PRESSURE LEVEL AT THE OPERATOR’S POSITION emitted by
the machine: 91,4 dBA
Sprayers that are equipped of air sleeve (VENTO)
ACOUSTIC POWER LEVEL emitted by the machine with impeller Vento: 114,8
dBA
ACOUSTIC PRESSURE LEVEL AT THE OPERATOR’S POSITION emitted by
the machine with impeller Vento: 97,6 dBA
Readings taken in accordance with the following standards:
Machines Directive 98/37/CE (89/392 CE Dir. re-codified).
Legislative Decree D.Lgs. n°292 of the 4th of September 2002 concerning the
environmental acoustic emission of machines and equipment for use outdoors.
Italian Legs. Decree no. 195 of 10/4/2006 on the subject of the protection of
workers against the risks deriving from exposure to chemical, physical and
biological agents. UNI EN 1553:2001 appendix D
3.3 STANDARDS OF REFERENCE:
- MACHINES DIRECTIVE 98/37/CEE (89/392 CE Dir. re-codified).
- Directive 86/188/CEE: risks deriving from exposure to noise (implemented in
Italy by Legislative Decree D.L 277/1991)
- DPR 547/1955: Regulations for the prevention of accidents and hygiene at work.
- Legislative Decree D.Lgs. n°292 of the 4th of September 2002 concerning the
environmental acoustic emission of machines and equipment for use outdoors.
-UNI EN ISO 12100-1/Apr.2005 : Machinery safety - Fundamental concepts,
general design principles - Part 1: basic terminology, methodology
-UNI EN ISO 12100-2/Apr.2005 : Machinery safety - Fundamental concepts,
general design principles - Part 2: Technical principles
-UNI EN 294/July 1993: Machinery safety, safe distances to avoid reaching
hazardous areas with upper limbs.
-UNI EN 349/June 1994: Machinery safety, minimum spaces to prevent crushing
of body parts
-UNI EN 907/Nov.1998: Agricultural and forestry machinery - Sprayers and
spreaders of liquid fertilizers - Safety.
-UNI EN 954-1/Dec. 1998 : Machinery safety - Fundamental concepts, general
design principles
-UNI EN 982/July 1997: Machinery safety. Safety requisites relevant to systems
and their components for hydraulic and pneumatic transmissions. Hydraulics.
-UNI EN ISO 4254-1/June 2006: Agricultural machines - Safety - Part 1: General
requisites
-ISO 11684/1995: Pictograms - general principles.
8 unigreen
4 USER’S INSTRUCTIONS
4.1 DESCRIPTION OF THE MACHINE
The sprayers are made of a structural steel frame and a polyester tank reinforced
with fibreglass or high-density polyethylene.
The frame is painted with special fired epoxy paints or, depending on the
versions, hot galvanised. The tank is easy to empty and this makes it possible to
use the machine even on hillsides.
The pumps are generally diaphragm pumps but in some cases fitted with pistons.
The accessories that can be used to complete the sprayer include: lifting devices,
self-levelling devices, mechanical or hydraulic herbicide booms, jets and nozzles
and this makes the UNIGREEN sprayer a highly qualified and efficient piece of
equipment.
Page 9
4.1.1 WORK STATIONS
The use of this machine does not envisage an operator standing constantly
near the same, the operator normally sits in the cab of the tractor.
During calibration and maintenance operations the operator will be working near
the machine at ground level (for all the calibration and maintenance operations
refer to the relevant chapters).
In case of operations that request the entry to parts of the machines located
at 1,5 mt. height ,it is advised to use a ladder at rule; the ladder shall be
positioned steady on a flat ground not yielding and with the machine at a
standstill and braked.
In some special models with controls above 1.5 metres there is a platform to
make these operations easier.
This platform must only be used with the machine stopped.
NOTE: Put the ladder back into the correct operating position after use,
securing it with the hook; make sure not to pinch or crush your hands during
these operations.
4.1.2HAND WASHING TANKS
The sprayers are supplied with an auxiliary hand-washing tank with clean water
and a hand tap.
This tank must always be supplied with water and the inside must be clean so
you can wash any parts of the body that come into contact with the chemical
product used.
Never drink the liquid inside.
4.2 PRELIMINARY CHECKS
When you receive the machine, check that it is complete and no parts are
missing.
If there are any damaged parts, inform your local reseller or UNIGREEN
directly in good time.
When the machine is delivered, make sure you ask:
a) that the machine is delivered with all of its parts fitted and that the fitting
meets the requisites in table N° 12 pag. 33-34. (This procedure is necessary
because for reasons of space during transportation the machine is often
delivered partially dismantled).
b) that it is tested in your presence in particular checking:
= that the suction filter and the inside of the tank are clean and free of work
residues.
= that the connections are made correctly following the basic layout (FIG. N°
11).
= that the hose clips and all the unions and connections are tightened
properly.
= that any herbicide boom is mounted in the centre.
= that all of the protective covers are fitted solidly to the machine, in particular
the protective cover of the power-takeoff of the pump.
= Check the proper tyres inflation (pressure are indicated on tyres)
This symbol identifies the
clean water tank on the
machine used to wash
your hands
4.3 TRANSPORTING AND MOVING THE MACHINE
Every time you have to lift the machine, before starting the operation, always
make sure the lifting gear and the relevant tools and equipment (cables,
hooks, etc..) are suitable for lifting the load and check the stability of the
same.
It is forbidden to unhook and move the machine with the tank full.
The dry weight of the machine at the maximum level of fitting and with all the
accessories allowed is stamped on the nameplate (Fig. 2); use slings and
lifting gear with a adequate load-bearing capacity.
Don’t stand the sprayer on soft ground or steep slopes.
Never lift or move the sprayers by hand if there is liquid in the tank. The
machine will weigh more and the movement of the liquid can change the centre
of gravity causing uncontrolled movements.
We recommend using slings as shown in the figure, the lifting points to use on
the machine are indicated with the relevant symbol.
Don’t lift the machine with the forks of a forklift truck because the machine can
tip over due to the overhanging weight of the booms.
Don’t pass or stand under the machine when it is being lifted.
This symbol
identifies the
coupling points of
the machine
unigreen 9
Page 10
FIG.3
Hinged parking wheel
4.3.1 TOWED SPRAYERS
PARKING
Don’t stand the sprayers on unstable ground or steep slopes, the machine is
designed to be parked safely on compact ground with a slope of up to 8.5°
using the relevant chocks (FIG. 3) in the following way:
- Machine parked with drawbar uphill (max 8.5°), place the chocks behind
the wheels.
- Machine parked with drawbar downhill (max 8.5°), place the chocks in front of
the wheels.
- Machine parked across the slope (max 8.5°), place one chock in front of the
drawbar wheel (in the direction of the slope) and the other in front of the wheel
uphill.
MOVING THE MACHINE
For lifting, please refer to the general notes above.
CAMPO sprayer models 11 and 16 are fitted with a tilting parking wheel which
allows the machine to be pushed over firm, flat ground when the tank is empty.
CAMPO sprayer models 22 and 32 are fitted with a tilting parking foot.
To make it easier to move the sprayer when it is not attached to the tractor, the
machine and the drawbar are specially equipped for stowing:
- The cardan shaft: swivelling cradle on drawbar.
- The electrical pressure regulator: hosereel support (the pushbutton panel is
normally attached to the tractor or stored in the product basket).
Hinged parking stand
Tractor coupling for Towed machines:
standard version, with elevator coupling.
Tractor coupling for homologated Towed
machines in work position (not suitable for
road use).
4.4 TRACTOR COUPLING = The tractor must be equipped with a 1”3/8 ASAE DIN 9611/A at 550 rpm
power-takeoff capable of supplying the power necessary for operating the
machine.
= It must have a towing hitch (towed mistblowers with a towing eye or fork
drawbar) and a three-point elevator (for mounted machines and a steering
drawbar for towed machines) suitable for safely bearing the weight of the
mistblower.
= It must be able to tow the maximum overall mass of the machine.
All of the characteristics required are indicated in the fittings tables N° 12
pages 33-34 (the total mass is also indicated on the CE plate on the machine).
WARNING: make sure there are no persons or things near the
mistblower before starting the machine and while you are using it.
4.4.1 STANDARD VERSION (ELEVATOR COUPLING)
= Check the diameter of the elevator coupling pins. If necessary position the
double diameter pins correctly; there are also appropriate adapter bushes
available.
= Check that the weight on the hook can be supported by the tractor (the
maximum weights on the drawbar are indicated in the fittings tables N° 12
pages 33-34).
= Check that the steering joint is lubricated with grease.
= Keep the towed machine level with the control of the elevator.
= Retract the parking drawbar wheel (or foot) so it doesn’t get damaged during
work.
B: to perform these operations, check the stability of the machine and observe
all the indications relevant to safety in the paragraphs 4.3 TRANSPORTATION
AND MAINTENANCE, 8 MAINTENANCE, and 8.5 REPAIRS.
= Position the pressure regulator in a place where it is easy to reach from the
driver’s seat. Don’t carry liquids under pressure inside the cabin; use the
relevant electrical or cable controls for these tractors.
= Check that the pipes of the pressure regulator (or the electrical cables on a
pushbutton control panel) don’t get in the way and are positioned at a safe
distance from the cardan shaft and the wheels of the tractor.
10 unigreen
Page 11

4.4.2 HOOK VERSION (HOMOLOGATED) = Check that the weight on the hook can be supported by the tractor (the
maximum weights on the drawbar are indicated in the fittings tables N° 12
pages 33-34).
= If the machine is coupled to the tractor by a tow hook, adjust the height of
the hook to keep the tank of the sprayer horizontal.
= When you have connected the drawbar proceed as for the towing steering
drawbar.
Tractor coupling for Towed machines:
homologated version, coupled to tow hook
4.4.3 PARKING FOOT
After attaching the drawbar to the tractor, you must retract the parking foot (or
wheel) to prevent damage during operation.
Retract the foot as follows:
= lift the machine up about 20 cm using the tractor’s elevator (if the machine
is instead attached to the trailer hook, retract the parking foot by turning the
knob)
= Take out the blocking pin and push the foot up towards the back of the
machine.
= Hold the foot horizontal and put the blocking pin back in, inserting the
handle in the slot to keep it from accidentally slipping out.
NOTE: to put the foot back into parking position when you unhook the machine
from the tractor after operation, make sure that you follow these instructions:
= hold up the foot with one hand, while pulling out the blocking pin with the
other (guide the foot all the way down with your hand).
= put the blocking pin back in, adjust the height to keep the tank of the sprayer
horizontal.
Estrarre la spina di
blocco e ribaltare il
piede verso il retro
della macchina.
Sostenere il piede
orizzontalmente e
riposizionare la
spina di blocco
facendo alloggiare
la maniglia
nell'apposito incavo
per evitare
sfilamenti
accidentali.
4.4.4 WHEEL SPACING ADJUSTMENT
To adjust the wheel spacing, you must lift up the machine as described in 4.3,
or use a jack underneath the machine chassis; if you use a jack, the machine
must be hooked up to the tractor so it is properly braked.
The correct position for the jack is shown on the machine in the illustration to
the side. Check that the jack is resting steadily on a firm, solid surface.
To adjust the spacing, just loosen the screws holding the axle and pull the hub
out to the desired position, then secure it again with the screws.
WARNING: axle track should be adjusted by authorized Unigreen personnel.
The length (L) of the axle section inserted in the chassis must never be less
than the one indicated in the chart, and the overhang (S) must not be greater;
incorrect positioning of the hubs could weaken the axle and cause breakage.
Hub chart (measurements in mm)
series S (max) L (min) T hub
Campo 11 200 350 550 60x60x550 6c
Campo 16 175 375 550 60x60x550 6c
Campo 16 Riso 200 500 700 70x70x700 8c
Campo 22 C/E 250 450 700 70x70x700 8c
Campo 22 Riso 250 450 700 80x80x700 8c
Campo 22 P 250 450 700 80x80x700 8c
Campo 32 C/P 250 450 700 80x80x700 8c
Campo 22/32 S 300 400 700 100x100x700 8c
unigreen 11
Page 12

4.4.5 HYDRAULIC CONNECTION TO THE DISTRIBUTORS
The machines that need a hydraulic connection to drive the herbicide booms
are equipped with 1/2", “Push-Pull”, quick-fit male couplings. You can connect
the pipes by simply pushing them in, making sure you:
- proceed only with the engine turned off;
- lower any tools connected to the elevator of the tractor;
- carefully clean the two parts that will be coupled
Warning: the hydraulic cylinders used are the “Double Effect” type.
Consult the use and maintenance manual of the tractor.
4.5 CARDAN SHAFT
In some models this is supplied on request.
The cardan shaft must bear the CE mark.
It must always have its own instructions that must be followed scrupulously
and it should come with a cover bearing the mark, integrated in every part.
You should have previously checked the length to avoid:
= if it is too long, DANGEROUS THRUST ON THE PUMP SHAFT
= if too short, the POSSIBILITY OF DANGEROUS BREAKAGES
THE MINIMUM OVERLAP OF THE TWO TELESCOPIC TUBES MUST
NEVER BE LESS THAN 1/3 OF THE LENGTH OF THE TUBES.
FIG. 4
The power that can be transmitted by the cardan shaft must be at least equal
to that required to run the sprayer. Consider that the power necessary to run a
sprayer without the fan is practically the same as that of the pump, the power
rating can be found in the pump instructions handbook. Generally 20 bar
pumps need 20 hp; 50 bar pumps need 30 hp. These power ratings can be
found in tables N° 12 pages 33-34.
NEVER USE THE CARDAN TRANSMISSION IF THE FOLLOWING
PROTECTIVE COVERS ARE MISSING:
12 unigreen
a)TRACTOR POWER-TAKEOFF PROTECTIVE COVER
b) CARDAN SHAFT PROTECTIVE COVER
c) FIXED PROTECTIVE COVER ON THE PUMP SHAFT
d) Hook any safety chains to solid anchor points
e)Check that the button or ringnut “E” (FIG. 4) is correctly engaged and
blocked both on the pump side and on the tractor side.
f) Don’t exceed an inclination of 30°-35° in any direction for any reason
g) With the machine stopped, periodically grease the spiders and the pipes,
keeping the connecting zone particularly clean.
h) Avoid letting the end of the cardan shaft come into contact with the ground
with the machine stopped; use the relevant support on some versions for this,
if your machine has no support, hook the external safety chain to a part of the
frame of the machine (ex. control unit support).
Page 13

4.6 PUMP
When using the pump scrupulously observe the instructions in the enclosed
handbook supplied by the manufacturer.
The pump can be identified by the ratings plate on the same; the main data on
the pressure and delivery are easy to find on this plate.
Normally the pumps mustn’t exceed 550 RPM; a higher speed won’t improve
performance but there is a risk of compromising the life and safety of the
pump.
There is a safety valve on the pump, calibrated to prevent overpressure. Don’t
tamper with this valve for any reason and don’t block or obstruct the pipes
connected to it in any way.
4.7 SUCTION FILTER
The sprayer is fitted with a suction filter with filter cartridges that have roughly
a 50-gauge mesh, which is equivalent to a hole of 0.4 at 0.35 mm.
An efficient filter lets the sprayer work properly.
You should periodically check that the filter cartridge is clean, this check
should be done more often if there are impurities in the liquid.
To inspect the filter cartridge wear rubber acid-proof gloves as the liquid in the
filter can come into contact with your hands when you open the filter.
Don’t perform this operation with the pump running as the depression produced
blocks the cover preventing the removal.
Before removing the cover of the filter, make sure that the same is isolated
from the tubing by unscrewing the relevant rear valve (FIG. N° 5) or on the 3way deviator (FIG. N° 11 - pos A).
After washing the cartridge, reassemble the cover making sure you connect
the same to the circuit again, using the valves described above in the opposite
order.
WARNING!: Don’t disperse the washing residues in the environment!!
FIG. 5
Valve
unigreen 13
Page 14

Don’t use the sprayer
without having consulted the
enclosed handbook
GCP 3-way
4.8 PRESSURE REGULATOR
To use the pressure regulator, follow the instructions in the enclosed handbook
scrupulously. The pressure regulator controls all of the most important spraying
functions, the thorough knowledge of its functions makes work easier and
more precise.
The working pressure and the maximum pressure of the sprayer are
determined by the pressure regulator which also protects the circuit from
overpressure in any work conditions. (In serious but very rare cases, if the
connecting pipes get blocked the pressure relief valve lets the pressure off)
In some setups there may be a pump that can reach a pressure of 50 bar
controlled by a regulator designed for 20 bar. In this case the maximum
pressure that can be reached is 20 bar.
The regulators can be manual, mounted on the sprayer or at a distance to
make the controls easier to use; or electrical with a control panel in the cabin.
There are also regulator versions with mechanical remote controls with a cable.
If the tractor has a waterproof cabin the use of electrical controls is obligatory.
4.8.1 COMPONENTS OF THE PRESSURE REGULATOR
Below you will find the indications for the main models fitted on Unigreen
products.
A main ON-OFF command: “open” lets the fluid flow into the circuit in use;
“closed” empties the tank.
B maximum pressure valve: adjusted by hand with the relevant knob (drains
the excess liquid when the set pressure is reached).
C boom section tap: opens the corresponding boom or drains to the
compensation regulator (G).
D auxiliary tap: can be used for various accessories (it is always manual).
E volumetric pressure valve (proportional):
(when present) it regulates the spraying pressure. The valve automatically
compensates variations in speed (within the scope of the same gear ratio),
keeping the quantity of liquid supplied per surface unit (litres/hectare)
unchanged.
F self-cleaning filter: filters the delivery liquid.
G compensation regulators: suitably regulated, these make it possible to
keep the pressure constant when one or more sections of jets is closed, they
don’t influence treatments with the boom fully open.
H manometer: indicates the working pressure.
14 unigreen
Connections:
R1 supply union
R2 drain union
R3 volumetric drain union
R4 boom section delivery union
R5 auxiliary delivery union
Control box for ERGO and REMO electrical regulators
I1 main control valve switch
I2 volumetric pressure valve switch (proportional)
I3 boom section valves switches
4.8.2 GENERAL INSTRUCTIONS
When using the pressure regulator, scrupulously observe the instructions in the
enclosed handbook, below you will find generic indications for the major models fitted by Unigreen.
All the regulation and adjustment tests must be carried out with clean water.
Pressure regulators without a volumetric valve (GCP3-way - RPN - RVA)
Adjusting the maximum pressure valve
= put main control A in the drain position (“OFF”).
= loosen the hand wheel of maximum pressure valve B completely (anticlock-
wise).
= start the pump by activating the power-takeoff of the tractor at 540rpm
= open main control A (position “ON”), the manometer will be activated
= open all of the section valves C (position “ON”)
= adjust maximum pressure valve B to the working value (in any case less
than the safe maximum pressure the system can reach).
Page 15

Pressure regulators with a volumetric valve (RPN-DPR-ERGO-REMO)
Adjusting the maximum pressure valve
= put main control A in the drain position (“OFF”).
= loosen the hand wheel of maximum pressure valve B completely
(anticlockwise).
= open volumetric valve E completely.
= start the pump by activating the power-takeoff of the tractor at 540rpm
= open main control A (position “ON”), the manometer will be activated
= open the drain tap on filter F slightly (only ERGO and REMO)..
= close volumetric valve E completely. If the pressure rises over the
maximum limit of the system, make sure maximum pressure valve B is open
(see previous indications)
= open all of the section valves C (position “ON”)
= adjust maximum pressure valve B to a value over that of the working
pressure (generally 10-14 bar) and in any case lower than the safe maximum
pressure that the system can reach.
Adjusting the volumetric pressure.
= with the volumetric pressure valve E adjust the pressure to the value the
treatment will be done at (the pressure is indicated on the nozzles tables on
the basis of the tractor speed and litres/hectare to spray)
Warning! The working pressure must be adjusted with the volumetric
valve and not with the maximum pressure valve. In the case the working
pressure is too near to the calibrated pressure of the maximum pressure
valve, the proportional valve may not be able to compensate the speed
variations correctly.
Adjusting the compensated returns
= close only one tap of section C (position “OFF”).
= adjust the corresponding compensator G until you return to the pressure set
previously (displayed on the manometer).
= open and close the tap of section C and check that the pressure remains
constant.
= repeat the above operations for all the section taps.
If the types of nozzles aren’t changed the regulations carried out will guarantee
a constant spraying of the liquid also per treatments that are done at different
working pressures.
NB: if the type of nozzle is changed then the calibrating will have to be done
again.
4.9 DELIVERY FILTERS (ONLY EQUIPPED MODELS)
Particularly useful when using small (low volume) nozzles.
In a central position with a manometer after the filter that shows any blockages
in the cartridge. On the RVA version there is also a manometer before the cartridge to make it easier to find the problem.
The cleaning of the cartridge in the RPV-DPR-ERGO-REMO series is fully automatic (for ERGO and REMO see the previous paragraph), for the model RVA
you should open the drain with the relevant lever (Fig. N° 6) for 2-3 minutes
during the washing operations, as in the enclosed instructions.
You should clean the cartridge by hand periodically, on the basis of the product
used. To clean, stop the pump. Wear rubber gloves and the other personal protective equipment when cleaning. Follow the instructions in the enclosed
manual.
FIG. 6
4.10 SPRAYING COMPUTER (OPTIONAL)
Scrupulously follow the instructions in the relevant manual when using.
We don’t recommend using the sprayer with the computer until you have had
at least one lesson from the UNIGREEN technicians.
unigreen 15
Page 16

4.11 FILLING THE TANK
The machines for defensive crop treatments, in consideration of the safety
of persons, animals and the protection of the environment, must only be
filled indirectly from open water courses and only by free-falling water from
the waterworks.
The pipe used for filling must never come into contact with the liquid
inside the tank and therefore the water must always fall over the upper
edge of the filling inlet and through the filter installed on it.
The tank is fitted with a transparent graduated band that shows the exact
quantity of liquid inside. This reading is precise if the tank is on flat ground;
the actual total capacity coincides with the highest number. All the filling
systems fitted by Unigreen on their production machines or on request are
antipollution and stop the liquid overflowing out of the tank.
Level indicator and
graduated band
3-way deviator for filling tank
FIG. 7
a)FILLING WITH THE 3-WAY DEVIATOR (Fig. 7).
It is possible to fill the tank using the pump and the floating filter kit G
(cod.1002/0080F) with 6 metres of rubber hose (the floating filter lets you
always and only suck up clean water).
= connect hose T to deviator D using the union hose adaptor supplied.
= turn the lever of deviator D to the filling position.
= place the other end of the hose, on which you fitted filter G, in the watering
point.
= start the power-takeoff leaving pressure regulator C in the draining position
(you don’t have to put the pump under pressure).
= the filling speed in litres/minute is equal to the delivery of pump P.
= visually check the level of the liquid in the tank and after filling stop the
pump and put the lever of deviator D back in the working position.
= disconnect pipe T from deviator D.
4.12 MIXING
The active principle can be mixed using the relevant stirrers before and during
the treatment. Correct mixing and stirring is the basis of the correct distribution
on the crops. We recommend some useful accessories such as the premixer
for powders and liquids (see the following paragraph).
To mix the product in the tank proceed as follows:
FIG. 8a
FIG. 8b
COLORI IDENTIFICATIVI RUBINETTI
Tap identif cation colours
Couleurs pour identif er les robinets
Farbe un Die Hähne zu identif zieren
Colores identif caciòn grifos
AGITATORE
Agitator - Agitateur
Ruhrwerk - Agitador
EIETTORE
Ejector - Ejecteur
Ejektor - Eiecteur
PREMISCELATORE
Premixer - Pré-mélangeur
Vormischer - Premezclador
LAVACISTERNA
Tank-rinsing - Lave-reservoir
Behalterwaschung-duse
Limpia-deposito
WARNING: using the taps on the pump or in any
case on the front of the machine puts the operator
near the cardan shaft. Despite the presence of
protections at CE rule, it is compulsory to switch off
the engine and to take the key off.
16 unigreen
a) high-pressure machines from 30 to 60 bar (FIG. N° 8a): run the stirrer (RED
tap) or the ejector (GREEN tap) for roughly 10-15 minutes at the maximum
pressure available
b) low pressure machines, max 20 bar
= with a drilled pipe on the drain, run the pump at roughly 540 RPM with the
pressure regulator on drain for at least 10-15 minutes. (FIG. N° 8b)
= with the stirrer on a delivery, run the pump supplying the stirrer (or ejector) at
the maximum pressure available for at least 10-15 minutes. (FIG. N° 7)
4.12.1 MANUAL PREMIXING
Dilute the active principle by hand before introducing it into the tank, (you must
wear suitable protective clothing such as rubber gloves, a mask or goggles,
overalls, etc.).
4.12.2 PREMIXER ON COVER (OPTIONAL):
Open the cover and pour all of the chemical powder into the filter, close the
cover and open the supply tap until all of the powder has dissolved.
Page 17

4.12.3 PREMIXER ON HOPPER WITH TIN WASHER (OPTIONAL)
Campo 22-32 machines come equipped with the TOP-MIX S-41 premixer
(FIG. No. 10); this version of the premixer allows independent adjustment of
pressure knob, avoiding having to change the work settings of the machine
every time you have to do the premixing.
To mix the product in the tank proceed as follows:
= turn the lever of the delivery deviator to the TOP-MIX position as shown in
the pictogram on the machine.
= adjust Top-Mix pressure to approximately 10-12 bar by turning control M
(the manometer allows you to check the actual pressure)
= press lever 4 for a few seconds introducing 3-4 litres of water into the
hopper.
= open the premix, overturning the cover as shown in the photo and introduce the product to mix into the hopper 1, close the cover again.
= press lever 4 to mix the product in the hopper, watching the level of the
liquid which could overflow. To prevent overflowing and to help powder
products dissolve, open tap 6) to drain into the tank.
= after emptying, close tap 6.
To wash the tin, proceed as follows:
= open the premix, overturning the cover as shown in the photo
= supply the premix using the control to regulate a pressure to under 3-4
bar
= introduce the tin into the hopper, insert washing pipe 2 into the tin, press
the tin onto the pipe until it has been completely washed.
= open tap 6 to drain into the tank at the same time.
= after emptying, close tap 6.
11
M
Deviator Top Mix
NB: If the tin washer isn’t supplied with clean water and isn’t fitted with the
optional electrical pump, you must rinse again by hand with clean water.
THE LIQUIDS USED FOR RINSING SHOULD BE
INTRODUCED INTO THE TANK AND BE SPRAYED ON
THE FIELD.
At the end of the operations, wash the hopper:
= check that the cover and all the taps of the premix are
closed and open the supply tap on the sprayer, delivering
liquid at a pressure of roughly 10-12 bar (never exceed 15
bar).
= open safety tap 10.
= press lever 4 to activate jets 3 and 9, watching the
level of the liquid which could overflow. To prevent
overflowing, open tap 6) to drain into the tank.
= after washing, release lever 4 and close taps 6 and 10.
NB: At the end of all of the operations put the lever of
the deviator back into the work position.
4
PRESSIONE
PRESSURE
TOP-Mix S41
3
9
11
LP83
FIG. N°10
1
12
2
3
3
6
9
ALLA CISTERNA
TO THE TANK
unigreen 17
Page 18

TOP-MIX S41(Campo 11-16-22E)
4.12.4 TOP-MIX PREMIXER FOR CAMPO 11-16-22E (OPTIONAL)
The Top-Mix S41 premixer is also available for Campo 11-16-22E machines
as an optional feature.
Its operation is slightly different from the standard version on Campo 22-32
machines; this version of the premixer maintains an independent pressure
setting, eliminating the need to change the machine’s operating calibration
every time one has to premix.
The differences with the version described above have to do with the
calibrated nozzle (see paragraph 4.12.5) and the manometer on the premixer.
The TOP-MIX version for Campo 11-16-22E should be used as follows:
a) push the lever of the delivery deviator to the TOP-MIX position as
illustrated on the machine.
b) keep the pressure of the Top-Mix at approximately 9-12 bar by adjusting
the speed of the cardan shaft (the manometer allows you to check the actual
pressure)
c) to mix and to wash the tin, proceed as indicated in the paragraph above.
NB: At the end of all of the operations put the lever of the deviator back
into the work position.
4.12.5 TOP-MIX CALIBRATED NOZZLE FOR CAMPO 11-16-22E
The TOP-MIX S41 premixer comes with a delivery calibration nozzle mounted
on the lower block (see photo to the side); two standard nozzles are supplied,
to be mounted depending on the pump:
Comet pumps BP125-BP151-BP171-BP205 = Ø7.5 nozzle
Comet pumps BP235-BP265-BP280-BP305 = Ø10 nozzle
NOTE: when the Top-Mix is in use with the BP305 pump, pump speed must
be limited to 400 rpm.
Example of assembly delivery calibration
nozzle
For pumps from other manufacturers, refer to the equivalent delivery.
4.12.6 HOW TO USE THE LP83 INCORPORATOR
The TOP-MIX S41 premixer comes with an LP83 chemical incorporator,
which makes it possible to suck the product up directly from the container.
It is used as follows:
- turn pressure on in TOP-MIX premixer (see paragraph above)
- turn lever 6 down and suck the product up.
- the product is suctioned, mixed with water under pressure, and directly
incorporated in the tank of the machine.
- after incorporating the product in the tank, lift lever 6 back to a horizontal
position.
NOTE: To wash the incorporator, put it in the premixer for a few seconds,
performing the hopper washing operations described in paragraph 4.4.
18 unigreen
Page 19

4.13 WASHING THE SPRAYER
A
B
D
C
Thoroughly wash the machine after each treatment pumping clean water
through the circuit and clean the suction and delivery filters.
Warning: Dirty equipment is very dangerous for the people and environment.
Discharging the residues of washing in the environment without taking
precautions is forbidden as this pollutes watercourses. Distribute the residues
on the treated field.
WARNING: The tank washing is controlled by tap N. 1, premix N. 2 and stirrer
N. 3.
4.13.1 CIRCUIT WASHER AND TANK WASHER
CAMPO machines can be equipped with with a circuit washer tank (FIG.11).
This tank must be filled with clean water and used to rinse the entire circuit
including the suction, delivery, pump, pressure regulator, jets and nozzles.
Thanks to the practical rotary nozzle it also rinses the inside surfaces of the
tank.
NB: To completely clean the tank and the pipes of any residues of the various
active principles, we recommend adding 2kg of soda to the washing liquid for
every 100 L of water.
At the end of the treatment, wash the circuit and the tank.
a) Stop the diaphragm pump disengaging the power-takeoff.
b) Check you have filled the circuit washer tank (C).
c) Make sure the main control of the pressure regulator is OFF and that all
the boom sectors are closed.
d) Turn suction deviator A to the circuit washer position (H2O).
e) Start the diaphragm pump by engaging the power-takeoff.
f) Increase the engine speed until all of the liquid in circuit washer tank C has
been sucked up.
g) Turn the diaphragm pump off and turn deviator A to the work position
(TANK).
h) Turn the main control to ON, so there is pressure in the circuit.
i) Start the diaphragm pump again and use the tank washing tap (BLUE) on
the regulator (or on pump) that supplies jet B.
j) After a few minutes you can close the tank washing tap
k) Distribute the washing residues over a portion of the field where it won’t
cause damage.
l) After you have finished washing, stop the diaphragm pump.
This symbol identifies the clean
water tank on the machine used
to wash the circuit
FIG. N°11
A
Suction deviator Campo 22-32
A
Tank washing tap
(BLUE)
NB: at the end of the washing cycle, if there is the risk of frost, pour roughly
500 grams of normal antifreeze for auto vehicles into the tank.
4.13.2 WASHING WITH FULL TANK (OPTIONAL)
CAMPO machines can be equipped with a discharge deviator that makes it
possible to wash the pump and circuit even with a full tank.
a) Stop the diaphragm pump by disengaging the power-takeoff.
b) Check that you have filled the circuit washing tank (C).
c) Check that the main control of the pressure regulator is OFF and that all
the boom sectors are closed.
d1) Turn discharge deviator S to the WASH position
d) Turn suction deviator A to the circuit washer position (H2O).
e) Start the diaphragm pump by engaging the power-takeoff.
f1) Increase the engine speed until all of the liquid in circuit washer tank C
has been sucked up.
g) After 1-2 minutes, turn the main control to ON, so there is pressure in the
circuit.
i) Open the section taps to spray the liquid in circuit washer tank C.
k) Distribute the washing residue over a portion of the field where it will not
cause damage.
l) After you have finished washing, stop the diaphragm pump.
NOTE: Before using the machine again for spraying, turn taps A and S back
to the correct operating position
Suction deviator Campo 11-16-22E
S
A
Suction and descarge deviators
Campo 22-32
unigreen 19
Page 20

5 HORIZONTAL BOOMS FOR HERBACIOUS CULTIVATIONS
5.1 HYDRAULIC HERBICIDE BOOMS
These are made in of steel painted with epoxy paint or hot galvanised. The jet
booms are made of stainless steel with the jets mounted normally ever 50 cm.
All of the booms are folded onto the central body and the external arms have
safety joints to prevent breakages.
In the case of a knock the boom bends to avoid the obstacle and normally returns to the working position automatically. In any case the operator should try
to avoid knocking against objects as this could damage both the boom and the
obstacle in time; all the more so if the two elements get stuck.
Check that no one and nothing is in the area where the booms will open; particular attention should be paid to the presence of any electric power lines.
WARNING: limit movements when in proximity of power lines so as not to
exceed a height of 4 meters.
The hydraulic plant can be fed from the hydraulic pump of the tractor or be
fully independent.
- The hydraulics are controlled by a hydraulic distributor with mechanical or
electro-hydraulic controls and switches in the cabin.
- All of the controls on both versions are sustained action controls and each
lever or switch has a pictogram of the relevant operation it controls.
See the enclosed handbook for instructions on the use of the electrohydraulic
version (Elettroil).
WARNING: with hydraulic booms, don’t stand in the range of action of the
machine.
Tank Hydraulic pump
Oil level
Elettroil connection to quick-fit couplings of the tractor
20 unigreen
Pay attention to the integrity and efficiency of the hydraulic components and in
particular to the pipes to prevent the risk of bursting.
Do a full check on the pipes and components at least once a year, we
recommend replacing hydraulic pipes every 3-4 years.
5.1.1 INDIPENDENT HYDRAULIC PLANT
In this case there is a tank, a filter and a hydraulic pump fitted with a flange
behind the main pump of the sprayer.
IMPORTANT:The entire plant is designed to be used at 540 RPM. Periodically
check the oil level in the tank and avoid filling it over 3/4 full as the oil might
overflow.
The tank has a filler cap with a breather, when the need arises (for repairs or to
replace a component) you can drain the oil by disconnecting the suction pipe
of the pump and collecting the oil in a recipient.
WARNING: the oil used mustn’t be dispersed in the environment and must be
collected in the relevant containers.
5.1.2 OIL FEED FROM TRACTOR
Consult the use and maintenance manual of the tractor.
Connect the delivery and discharge quick-fit coupling to the respective
connections, respecting the direction of flow.
= On booms that have a direct connection to the quick-fit couplings, each pair
of couplings feeds a cylinder.
= For booms equipped with EDR electro-deviators, follow the diagram of the
couplings supplied.
= For manual or electric distributors (Elettroil), the distributor inlet pipe is
connected to the aluminium flow separator valve next to the distributor (see
photo).
The flow separator must be adjusted correctly so it send less than 4-5 L/1° to
the distributor.
To prevent the cylinders moving at a dangerous speed, adjust the relevant
chokes near the cylinders. If the registration ring nuts aren’t visible then fixed
chokes are fitted. The chokes are fitted on the discharge line of the movement
to slow.
Any impurities in the oil could block the chokes and as a consequence block
the cylinder; remove the dirt if necessary.
The maximum pressure valves of the distributors are regulated to a pressure
of around 150 bar.
To prevent the excessive heating of the oil we recommend supplying the
Page 21

distributor of the sprayer only when the cylinders are being used.
We recommend having qualified personnel do any adjustments.
5.2 AIR-ASSISTED BOOMS
These are booms that use air to make the treatment more effective
and decrease wind drift.
They are equipped with a fan (normally hydraulic) and an AIRSLEEVE that transports the airflow along the entire length of the
boom.
They come with their own use and maintenance handbook, enclosed with the machine.
5.3 SELF-LEVELING DEVICES
The self-levelling device keeps the boom parallel to the ground to be treated.
It works thanks to the effect of gravity in all the models (except TDL). The
oscillation can be blocked mechanically (TDE-TDM) or hydraulically (TDI).
The Work boom has a self-levelling device with an automatic block based on
cables and springs.
The self-levelling device only works on flat ground, for hilly terrain we
recommend the version with trim corrector (TDI 2P) or hydraulic LEVELING
(TDL), which lets the operator position the boom with an inclination that is
suitable for the ground.
To use, check:
a)that the boom has been mounted in the centre, the weight of the boom must
be supported equally on the two halves. To check this, free the self-levelling
device from the mechanical (or hydraulic) block and by moving the boom make
sure it automatically adjusts its position to be parallel to the ground.
b) in the models that have an adjustable connecting rod, by adjusting the
same, it is possible to obtain small variations in trim that can be useful on
slightly uneven terrain.
c) in the hydraulic versions it is possible to fit a hydraulic cylinder (TDI 2P)
instead of the connecting rod that is adjusted by hand.
d) to complete the self-levelling device we recommend the dragging jet-saver
protections
e)keep the sliding parts well greased.
Air-assisted booms
Self-levelling
Self-levelling blocking system
5.3.1 VARIABLE GEOMETRY
Some models of hydraulic boom are equipped with a variable geometry system
of the side arms for independent inclination, this system can be used as an
alternative to the trim correction or combined with the same.
The angle of the arms is controlled by the operator with electrohydraulic
controls.
Variable geometry
unigreen 21
Page 22

5.4 LIFTING
The lifting devices are very useful to adjust the height of the boom on the
basis of the height of the vegetation to be treated.
The height of the boom is adjusted as follows:
= the hydraulic version has a double-effect cylinder controlled by a special
parachute stop valve.
= to lift and lower the boom use the control on the elettroil pushbutton panel
or the quick-fit couplings connected to the lifting cylinder.
= periodically lubricate the sliding guides with grease and check the guide
bolts are tightened properly, with a suitable play.
Sistema di Sollevamento ed Autolivellamento
Suggested
Nozzle-tips size pressure range
Min Max
XR 01-015 1 bar 2 bar
02-025 1,5 bar 3 bar
03 2 bar 3,5 bar
04-15 3 bar 5,5 bar
TurboTeejet all 1,5 bar 5 bar
AI-AIC all 2 bar 7 bar
TXA cone all 5 bar 15 bar
5.5 DISTRUBUTION WITH HERBICIDE BOOM
5.5.1 DESCRIPTION OF TYPE OF JETS
Various types of jets are fitted; with a single fixed (threaded or quick-fit) or
with multiple heads.
Generally they have a non-drip diaphragm and are made out of reinforced
plastic, suitable for pressures up to 15-20 bar, some models are nickel plated
brass for pressures up to 40 bar. There are versions with 2-3-4 plastic nozzle
heads and 2 brass heads.
5.5.2 DESCRIPTION OF TYPE OF NOZZLES
The nozzles are extremely important to obtain a correct distribution on the
vegetation to be treated. Poor quality or worn nozzles have a tendency to
create unevenly treated strips.
The nozzles are produced in various sizes, to work with a precise pressure
range, to create certain types of larger or smaller drops; using nozzles for a
purpose they are not envisaged for prejudices the precision and duration of
the nozzles.
a)Fan nozzles
Available in various materials: plastic-brass-stainless steel-ceramic.
They are used at pressures from 1-5 bar producing medium-large drops;
particularly suitable for pre-emergency and post-emergency weeding.
b) Conical nozzles
Generally made of ceramics, these nozzles consist of two parts; the actual
nozzle and the slinger. They are particularly resistant to wear and designed to
work from 1 to 16 bar producing a high density of small drops with a strong
turbulence. This turbulence makes them suitable for penetrating luxuriant
vegetation and so they are suitable for fungicides and insecticides. When
necessary they can also support slightly higher pressures.
c) Anti-drift nozzles
There are various models of nozzles that make it possible to reduce the
effect of drift.
d) Mirror nozzles for liquid fertilizers.
22 unigreen
5.5.3 DISTRUBUTION a)Check that all the nozzles are in a good condition and are positioned
correctly on the boom. The automatic positioning with quick heads is done for
threaded heads with the relevant adjustment wrench.
Check that the total capacity of the nozzles is at least 25% less than the
capacity of the pump.
b) Make sure the suction and delivery filters, as well as the non-drip
membranes are clean and in a good condition and that the same quantity of
liquid is supplied along the entire width of the boom.
c) Check that the height of the boom from the crops is suitable for regular
distribution. For a boom with fan nozzles fitted at 50 cm from each other; this
height is roughly 50 cm.
d) Working pressure.
The working pressure must allow for the indications in points 5.5.2 and the
following of this handbook and also allow for the speed of the tractor to obtain
the desired spraying in litres/hectare.
To assess the data, consult tables N° 1-2.
These tables are valid for spaces between the nozzles of 50cm.
Page 23

To meet particular requirements UNIGREEN can supply booms with different
spaces between the nozzles and setups suitable for running at pressures
over 20 bar.
See the table below for the data conversion.
OTHER SPACING (Cm) 75 60 50 45 42,5 40 35 33 30
CONVERSION FACTOR 0,666 0,833 1,000 1,111 1,176 1,250 1,428 1,515 1,666
USEFUL INFORMATION
During the distribution of the product watch the pre-established speed and
pressure, following the data in the nozzles table.
The tables indicate the volume distributed per hectare for each type of
nozzle at the desired speed and pressure and are calculated as follows:
V=600xQ / IxV where: V=volume to distribute (L/HA)
Q=capacity of the nozzle (L/MIN)
I=distance between the nozzles in metres (0.5)
V = tractor speed (Km/h)
e)Considering the wear of the nozzles and a possible pressure drop in time,
to check them proceed as follows:
With the pump running at the pre-established pressure, measure the quantity
of liquid that comes out of the nozzles in L/min. Multiply this by the figure in
the table indicated below corresponding to the chosen treatment speed. The
resulting figure is the exact quantity of liquid to distribute per hectare.
THIS GOES FOR Km / hour 23456789101112
A DISTANCE
BETWWEN THE VALUE
NOZZLES OF 0.5 m
600 400 300 240 200 172 150 133 120 109 100
EXAMPLE: the nozzle delivers 2.2 L. per minute. The speed chosen for the
treatment is 6 km/h, the quantity to distribute per hectare is
2.2 x 200 = 440 L/ha
f ) For a quick and immediate spraying check use QUICK CHEK (code 5030/
0174F )
unigreen 23
Page 24

Marker
5.6 MARKER
The marker indicates the zone where the treatment has been applied.
It produces a chemical foam that doesn’t damage the crops, which is
deposited on the ground and disappears after roughly an hour. The marker is
an accessory available on request. For the use and maintenance of the
system follow the instructions in the specific handbook in the package or
enclosed with machine manual.
WARNING: the foam liquid is ruined by frost, very hard water can change the
yield and function.
A
B
C
6 HAND LANCES
When using hand lances bear in mind the following notes:
= Don’t direct the jet of liquid towards electric power lines or zones where
there is electrical current, houses or where people might pass.
= Don’t point the jet at people or animals.
The jet can cause serious injuries simply due to the mechanical force of the
liquid under pressure.
= Never block the spraying lever of the lance in an open position because if
the lance falls it will be uncontrollable.
= At the end of work after you have stopped the pump, make sure that any
residual pressure in the pipes under pressure has been drained to avoid
unexpected jets when putting the lance away.
There are various types of lances; with a lever, mitra spray gun and pistol
grip.
For further information please refer to the handbook in the package.
The lever lance is controlled by opening lever A which, depending on how
much it’s pressed, produces a conical spray or direct jet. The standard
nozzle is Ø 1.5
The mitra spray gun can produce a direct jet or a conical spray and the type
of spray is selected by pushing lever B forwards or backwards. Use lever C
to open the jet. The standard nozzle is Ø 2.5
Replacement nozzles are available for all of the lances and the capacities
are indicated in the tables N° 3 e N° 4.
7 HOSE REEL
Available in the following sizes 20-50-100 , with mechanical, electrical and
hydraulic rotation.
To use the system, consult the enclosed handbook as there are significant
differences between each.
After work it is important to block the winding roller to stop the hose
unwinding while you are moving the sprayer.
24 unigreen
Page 25

8 MAINTENANCE
(To be done with the machine and cardan shaft stopped)
The maintenance of the sprayer is essential for maintaining a high level of safety.
Also consult the single handbooks of the main components of the sprayer.
All of the maintenance operations and repairs must be carried out with the machine
and cardan shaft stopped and the tank and circuit clean of any residues of chemical
products.
8.1 PROGRAMMED MAINTENANCE
( TAB. N° 7)
We recommend using a table of programmed maintenance to follow in time to keep
the sprayer in an efficient working condition.
For major and important maintenance jobs we recommend using the normal
UNIGREEN assistance service available from your reseller, using original
UNIGREEN spare parts.
8.2 ROUTINE MAINTENANCE = After every treatment, wash the inside of the tank and the entire circuit as
indicated in paragraph 4.13
= Periodically check that the suction and delivery filters are clean (see figure)
= Check the oil level in the volumetric compensator of the pump, as indicated in
paragraph 5.1.1
= The use of chemical products that are particularly damaging for a nitrile rubber mix
(ex.. herbicides and products for rice fields) can cause the diaphragm to break before
time.
In these conditions check the state of the components more often.
8.3 EXTRAORDINARY MAINTENANCE
At the end of a season of intense use, or every two years of normal use, it is a good
idea to have a specialised service technician perform a general check on the
machine.
8.4 MAINTENANCE OF THE HERBICIDE BOOM - SELF-LEVELLING DEVICE
- LIFTING SYSTEM
(to be done with the machine and cardan shaft stopped)
a)Check the state of wear of the nozzles and replace them when the delivery is over
30-35% of the theoretical level. Don’t clean with nails, bradawls or punches. Use
small brushes or compressed air.
- drain the pressure and stop the machine
- dismantle the screw or bayonet ring nuts holding the nozzles
- clean with a small brush or compressed air, don’t use nails, punches or bradawls
- reassemble the nozzles and the ring nuts, replacing the filters and seals.
b) Keep the joints greased.
c) If you are using the boom and you notice excessive pitching or the same closing
on sloping ground, you can load the spring more by screwing in the relevant nut.
d) If the external arms droop downwards after some use you can realign them using
the relevant adjustment screws:
- unscrew the locknut
- adjust the inclination by screwing in the screw
- tighten the locknut again to stop it unscrewing accidentally.
8.5 REPAIRS
We recommend having the normal UNIGREEN assistance service available from our
reseller perform any repairs or contact a specialised workshop. During all of the
repairs, in particular when welding, the machine and the circuit must be clean of any
residues of chemical product.
If the machine has to be lifted (for example to change a wheel) follow the instructions
in point 4.3 of the present handbook.
Also make sure the machine is stopped, connected to the tractor, and use the
relevant chocks to block the wheel still on the ground.
If you use a jack (manual or hydraulic) make sure you use a jack that is suitable for
the frame so it can’t slip and put it in the right position. The jack must be placed under
the main frame of the machine near the wheel to change. Make sure the ground is
compact: if necessary use wooden beams or other sufficiently resistant material to
broaden the supporting base of the jack.
Dismantling the Suction Filter
8.6 STORAGE IN A WAREHOUSE AND TRANSPORTATION
The sprayer must be kept in a closed place away from excessive humidity and
protected from frost. Especially if electrical pressure regulators, electrical motors, a
spraying computer or similar components are fitted.
Before storing the machine, after you have washed it, apply a light coat of oil.
If the temperature might drop to below zero, drain any residual liquid or add roughly
0.5 L of normal antifreeze for auto vehicles.
To transport the machine follow the instructions in point 4.3 of the present handbook.
unigreen 25
Page 26
8.7 PUTTING BACK INTO SERVICE AFTER WINTER LAYUP
Before using the machine again after a long period of inactivity you should perform some
general checks, following the instructions in point 4.4 and drain any antifreeze.
Never start the shaft of the pump if you think there may by ice inside. To check this,
make sure you can turn the shaft by hand without connecting it to the tractor.
After you have connected the machine to the tractor (see point 4.5) following the instructions
in the present user’s handbook and in the enclosures of the pump, pressure regulator and
accessories.
8.8 DEMOLITION AND DISPOSAL
When the sprayer will be put out of service you should wash it with great care to remove any
residues of chemical product, follow the instructions in point 4.13 of the present handbook.
ATTENTION: It is necessary to adopt appropriate Individual Protection Devices in
manipulating waste.
The disposal of waste deriving from the demolition of the machine must be carried out
respecting the environment, avoiding soil, air and water pollution.
Local legislation in force in the matter must be respected in any case.
Remember that waste is understood as any substance or object that enters into the
categories shown in attachment A in part IV of Legislative Decree 152/2006, that the holder
has destroyed, has decided or is obliged to destroy.
Waste deriving from the demolition of the machine is classifiable as special waste.
8.8.1 MATERIALS FOR DEMOLITION
Non-dangerous special waste is that which can be recovered, according to the February 1998
Ministerial Decree:
· Iron, aluminium, stainless steel and copper materials
· Plastic materials
· Electronic cards
· Hydraulic oil
· Electrical plant
8.8.2 INDICATIONS FOR A SUITABLE TREATMENT OF WASTE
The Correct management of special waste envisages:
- stocking in suitable places, avoiding mixing dangerous waste with the non-dangerous.
- ensuring that authorised carriers and receivers carry out its transport and disposal/
recovery.
Transport of one's waste to authorised collection centres is allowed exclusively if you are
enrolled in the Environmental Management Register.
8.8.3 ELECTRICAL AND ELECTRONIC APPARATUS WASTE (EEAW)
The Italian government has adopted the European Parliament directives in the matter of the
disposal of electrical and electronic waste (EEAW) (2002/95/CE and 2003/108/CE Directives)
with Legislative Decree n° 151,July 25 2005).
The measures: in particular, the decree established measures and procedures aimed at:
a) forestalling the production of EEAW;
b) promoting the re-use, recycling and other forms of EEAW recovery, in order to reduce the
quantity to send for disposal;
c) improving, in terms of the environment, the actions of the subjects who participate in the
life-cycle of these apparatuses (producers, distributors, consumers and operators directly
involved in the treatment of EEAW);
d) reducing the use of dangerous substances in electrical and electronic apparatus.
The decree imposes the limitation and elimination of several substances present in EEAW:
lead, mercury, cadmium, chrome, hexavalent chrome, polybrominated biphenyl,
polybrominated diphenyl and polybrominated diphenyl ethers.
The machine has been designed and created in conformity with this directive. Follow the
indications shown below.
The symbol to the side, showing a barred garbage can on wheels, indicates the separate
collection of the electrical and electronic apparatuses of the machine.
26 unigreen
The user of the present machine can contact the collection centres instituted by the Local
Authorities or the UNIGREEN Company directly, or request withdrawal by the dealer, in order
to carry out correct disposal of the waste.
Page 27

unigreen 27
Page 28

TAB.1 CHARACTERISTICS NOZZLES ISO
ISO
Pressure bar
Pressione in bar
ROSSO - RED
ISO - 04
5678910
Km/hKm/hKm/hKm/hKm/hKm/h
Delivery litres/1'
Portata in litri/1'
BLU - BLUE
ISO - 03
5678910
Km/hKm/hKm/hKm/hKm/hKm/h
Delivery litres/1'
Portata in litri/1'
2
1,28 307 256 219 192 170 153
0,97 232 194 166 145 129 116
2,5
1,43 343 286 245 214 190 171
1,08 259 216 185 162 143 129
3
1,57 376 314 269 235 209 188
1,19 285 238 203 178 158 142
3,5
1,70 408 340 291 255 226 204
1,28 307 256 219 192 170 153
4
1,82 436 364 311 273 242 218
1,37 328 274 234 205 182 164
4,5
1,93 463 386 330 289 257 231
1,45 348 290 248 217 193 174
5
ISO - 15
2,03 487 406 347 304 270 243
ISO - 10
1,53 367 306 262 229 203 183
Pressure bar
Pressione in bar
2
2,5
VERDE GIALLO-
YELLOW GREEN
5678910
Km/hKm/hKm/hKm/hKm/h Km/
Delivery litres/1'
Portata in litri/1'
4,83 1158 966 828 725 644 580
3,25 780 650 557 448 433 390
5,40 1296 1080 926 810 720 648
3,61 888 722 619 542 481 433
h
AZZURRO-LIGHT BLUE
5678910
Km/hKm/hKm/hKm/hKm/h Km/
Delivery litres/1'
Portata in litri/1'
h
3
5,92 1421 1184 1015 888 789 710
3,95 848 780 677 593 527 474
3,5
6,39 1534 1278 1095 859 852 767
4,27 1025 854 732 641 569 512
4
6,84 1642 1368 1173 1026 912 821
4,56 1094 912 782 684 608 574
4,5
7,25 1740 1450 1243 1088 967 870
4,83 1159 966 828 725 644 580
5
7,64 1834 1528 1310 1146 1019 817
5,10 1224 1020 874 765 680 612
ISO - 02
ISO - 015
ISO - 01
ISO fan nozzles tips specifications (delivery in Lt./ha, with nozzles distance 500 mm., at the stated speed)
Caratteristiche ugelli a ventaglio ISO (portata in Litri/ettaro, con distanza getti 50cm., alla velocità indicata)
GIALLO - YELLOW
VERDE - GREEN
ARANCIO - ORANGE
5678910
Km/hKm/hKm/hKm/hKm/h Km/
Delivery litres/1'
Portata in litri/1'
h
Km/hKm/hKm/hKm/hKm/h Km/
h
Km/hKm/hKm/hKm/hKm/h Km/
h
0,65 156 130 111 97 86 78
5678910
Delivery litres/1'
Portata in litri/1'
0,48 115 96 82 72 64 58
5678910
Delivery litres/1'
Portata in litri/1'
0,32 77 64 55 48 43 38
Pressure bar
2
Pressione in bar
0,73 175 146 125 109 97 87
0,54 130 108 93 81 72 65
0,36 86 72 62 54 48 43
2,5
ISO - 08
BIANCO - WHITE
5678910
Km/hKm/hKm/hKm/hKm/h Km/
Delivery litres/1'
0,80 192 160 137 120 106 96
0,87 208 174 149 130 115 104
0,93 223 286 159 139 123 111
0,98 235 296 167 147 130 117
1,04 249 208 178 156 138 124
ISO - 06
GRIGIO - GREY
0,59 142 118 101 88 79 71
0,64 154 128 110 96 85 77
0,68 163 136 117 102 91 82
0,72 173 144 124 108 96 86
0,76 182 152 131 114 101 91
Portata in litri/1'
h
5678910
Km/hKm/hKm/hKm/hKm/h Km/
Delivery litres/1'
Portata in litri/1'
h
2,58 619 516 442 387 344 310
1,91 458 382 327 286 254 229
2,88 691 576 494 432 384 346
2,14 513 478 366 321 285 256
3,16 758 632 542 474 421 379
2,34 561 468 401 351 311 280
3,41 818 682 584 512 455 409
2,53 607 506 433 379 337 303
3,65 876 730 626 547 487 438
2,71 650 542 464 406 361 325
3,86 926 772 662 579 515 463
2,87 688 574 491 430 382 344
4,07 977 814 698 610 543 488
3,03 727 606 516 454 403 363
ISO - 05
MARRONE - BROWN
0,39 94 78 67 58 52 47
0,43 103 86 74 64 57 52
0,46 110 92 79 69 61 55
0,48 115 96 82 72 64 58
0,50 120 100 86 75 66 60
3
3,5
4
4,5
5
5678910
Km/hKm/hKm/hKm/hKm/hKm/h
Delivery litres/1'
Portata in litri/1'
1,61 386 322 276 242 215 193
Pressure bar
2
Pressione in bar
1,80 432 360 309 270 240 216
2,5
1,97 473 394 338 296 263 236
3
2,13 511 426 365 320 284 256
3,5
2,28 547 456 391 342 304 274
4
2,35 564 470 404 352 313 282
4,5
2,50 600 500 430 375 332 300
5
28 unigreen
Page 29

TAB.2 CHARACTERISTICS NOZZLES CONICAL ISO
ISO
Pressure bar
Pressione in bar
VERDE - GREEN
TXA - TR 015
5678910
Km/h Km/h Km/h Km/h Km/h Km/h
Delivery litres/1'
Portata in litri/1'
0,48 115 96 82 72 64 58 2
0,59 142 118 101 89 79 71 3
0,68 163 136 117 102 91 82 4
Pressure bar
Pressione in bar
TR 05
MARRONE - BROWN
5678910
Km/h Km/h Km/h Km/h Km/h Km/h
Delivery litres/1'
0,76 182 152 130 114 101 91 5
0,83 199 166 142 125 111 100 6
0,90 216 180 154 135 120 108 7
0,96 230 192 165 144 128 115 8
1,07 257 214 183 161 143 128 10
1,18 283 236 202 177 157 142 12
1,31 314 262 225 197 175 157 15
1,52 365 304 261 228 203 182 20
Portata in litri/1'
1,61 386 322 276 242 215 193 2
1,97 473 394 338 296 263 236 3
2,28 547 456 391 342 304 274 4
2,55 612 510 437 383 340 306 5
2,79 670 558 478 419 372 335 6
3,01 722 602 516 452 401 361 7
3,22 773 644 552 483 429 386 8
3,60 864 720 617 540 480 432 10
3,94 946 788 675 591 525 473 12
4,41 1058 882 756 662 588 529 15
5,09 1222 1018 873 764 679 611 20
ARANCIO - ORANGE
TXA - TR 01
5678910
Km/h Km/h Km/h Km/h Km/h Km/h
Delivery litres/1'
Portata in litri/1'
0,32 77 64 55 48 43 38
0,39 94 78 67 59 52 47
0,45 108 90 77 68 60 54
TXA - TR 0067
VRDE OLIVA - OLIVE GREEN
5678910
Km/h Km/h Km/h Km/h Km/h Km/h
Delivery litres/1'
Portata in litri/1'
0,22 53 44 38 33 29 26
0,27 65 54 46 41 36 32
0,31 74 62 53 47 41 37
ROSSO - RED
TXA - TR 04
5678910
Km/h Km/h Km/h Km/h Km/h Km/h
Delivery litres/1'
0,51 122 102 87 77 68 61
0,55 132 110 94 83 73 66
0,60 144 120 103 90 80 72
0,64 154 128 110 96 85 77
0,72 173 144 123 108 96 86
0,78 187 156 134 117 104 94
0,88 211 176 151 132 117 106
1,01 242 202 173 152 135 121
BLU - BLUE
Portata in litri/1'
1,29 310 258 221 194 172 155
1,58 379 316 271 237 211 190
1,82 437 364 312 273 243 218
2,04 490 408 350 306 272 245
2,23 535 446 382 335 297 268
2,41 578 482 413 362 321 289
2,58 619 516 442 387 344 310
2,88 691 576 494 432 384 346
3,16 758 632 542 474 421 379
3,53 847 706 605 530 471 424
4,08 979 816 699 612 544 490
TXA - TR 03
5678910
Km/h Km/h Km/h Km/h Km/h Km/h
Delivery litres/1'
0,35 84 70 60 53 47 42
0,38 91 76 65 57 51 46
0,41 98 82 70 62 55 49
0,44 106 88 75 66 59 53
0,49 118 98 84 74 65 59
0,54 130 108 93 81 72 65
0,60 144 120 103 90 80 72
0,70 168 140 120 105 93 84
Portata in litri/1'
0,97 233 194 166 146 129 116
1,19 286 238 204 179 159 143
1,37 329 274 235 206 183 164
1,53 367 306 262 230 204 184
1,68 403 336 288 252 224 202
1,81 434 362 310 272 241 217
1,94 466 388 333 291 259 233
2,17 521 434 372 326 289 260
2,38 571 476 408 357 317 286
2,66 638 532 456 399 355 319
3,07 737 614 526 461 409 368
TXA - TR 005
Caratteristiche ugelli a cono ISO (portata in Litri/ettaro, con distanza getti 50cm., alla velocità indicata)
ISO cone nozzles tips specifications (delivery in Lt./ha, with nozzles distance 500 mm., at the stated speed)
LILLA - LILLA
5678910
Km/h Km/h Km/h Km/h Km/h Km/h
Delivery litres/1'
Portata in litri/1'
Pressure bar
Pressione in bar
2 0,16 38 32 27 24 21 19
GIALLO - YELLOW
TXA - TR 02
5678910
Km/h Km/h Km/h Km/h Km/h Km/h
Delivery litres/1'
Portata in litri/1'
Pressure bar
3 0,20 48 40 34 30 27 24
4 0,23 55 46 39 35 31 28
5 0,25 60 50 43 38 33 30
6 0,28 67 56 48 42 37 34
7 0,30 72 60 51 45 40 36
8 0,32 77 64 55 48 43 38
10 0,36 86 72 62 54 48 43
12 0,39 94 78 67 59 52 47
15 0,44 106 88 75 66 59 53
20 0,51 122 102 87 77 68 61
Pressione in bar
2 0,65 156 130 111 98 87 78
3 0,80 192 160 137 120 107 96
4 0,92 221 184 158 138 123 110
5 1,03 247 206 177 155 137 124
6 1,13 271 226 194 170 151 136
7 1,22 293 244 209 183 163 146
8 1,30 312 260 223 195 173 156
10 1,45 348 290 249 218 193 174
unigreen 29
12 1,60 384 320 274 240 213 192
15 1,79 430 358 307 269 239 215
20 2,07 497 414 355 311 276 248
Page 30

TAB.3-4 CAPACITY HAND LANCES
TABLE OF DELIVERY IN LITRES / MIN. OF THE CONICAL NOZZLES FOR LEVER LANCE
DIAMETER NOZZLE Ø 1,0 Ø 1,2 Ø 1,5 Ø 1,75 Ø 2,0 Ø 2,2 Ø 2,5
PRESSURE (BAR) JET CAPACITY ( Lt / min )
5 cone 1,16 1,40 1,90 2,25 2,65 2,90 3,50
direct jet 1,40 1,70 2,50 3,95 4,7 6,00 7,70
8 cone 1,40 1,80 2,60 2,80 3,40 3,65 4,45
direct jet 1,70 2,20 3,40 4,85 6,00 7,60 9,80
10 cone 1,50 1,96 2,90 3,10 3,90 4,10 5,00
direct jet 1,90 2,40 3,75 5,40 6,95 8,55 11,0
15 cone 1,88 2,40 3,40 3,80 4,50 5,00 6,10
direct jet 2,30 3,00 4,50 6,65 8,30 10,4 13,4
30 cone 2,60 3,40 4,80 5,40 6,30 7,10 8,70
direct jet 3,20 4,20 6,40 9,40 11,7 14,7 19,1
note: standard Ø1,5 nozzle
TABLE. 3
TABLE OF DELIVERY IN LITRES / MIN. OF THE CONICAL NOZZLES FOR MITRA SPRAY GUN
DIAMETER NOZZLE Ø 1,0 Ø 1,2 Ø 1,5 Ø 1,8 Ø 2,0 Ø 2,3 Ø 2,5 Ø 3,0
PRESSURE (BAR) JET CAPACITY ( Lt / min )
TABLE. 4
50 cone 3,40 4,40 6,20 6,80 8,10 9,20 11,2
direct jet 4,10 5,40 8,30 11,8 15,1 19,1 24,6
note: standard Ø2,5 nozzle
15 cone 2,45 3,60 4,60 5,90 6,90 8,10 9,20 11,5
direct jet 2,50 3,80 5,10 7,30 8,80 10,8 13,0 18,4
25 cone 3,00 4,25 5,70 7,20 8,10 10,2 11,4 14,4
direct jet 3,10 4,60 6,50 9,30 11,7 14,1 16,4 24,1
35 cone 3,40 4,70 6,60 8,50 10,2 12,9 14,0 18,0
direct jet 3,50 5,40 7,40 10,8 13,4 16,8 19,1 28,2
40 cone 3,55 5,20 6,90 9,20 10,9 13,7 14,5 18,8
direct jet 3,65 5,90 7,80 11,7 14,3 17,9 21,0 30,1
50 cone 4,00 5,60 7,70 10,5 12,5 14,9 16,4 20,9
direct jet 4,10 6,30 8,60 12,7 15,8 19,7 23,0 33,0
30 unigreen
Page 31

TAB.5-6 SPRAYING TABLES
DISTANCE BETWEEN 22,533,544,555,566,57 8 9 10
THE ROWS (m)
SPEED (Km/hour) MINUTES/HECTARE
2,0 150 120 100 87 75 67 60 55 50 45 43 37 33 30
2,5 120 96 80 70 60 53 48 44 40 36 34 30 26 24
3,0 100 80 66 58 50 44 40 36 33 30 28 25 22 20
3,5 86 69 57 50 43 38 34 31 29 26 24 21 19 17
4,0 75 60 50 44 37 33 30 27 25 22 21 19 17 15
4,5 67 53 44 39 33 30 27 24 22 20 19 17 15 13
5,0 60 48 40 35 30 27 24 22 20 18 17 14 13 12
5,5 55 44 36 32 27 24 22 20 18 16 15 13 12 11
6,0 50 40 33 29 25 22 20 18 17 15 14 12 11 10
6,5 47 37 30 27 23 20 18 17 15 14 13 11 10 9
7,0 43 34 28 25 21 19 17 16 14 13 12 10 9 9
8,0 38 30 25 22 19 17 15 14 12 11 10 9 8 8
9,0 33 27 22 19 17 15 13 12 11 10 9 8 7 7
TABLE 5
WORK TIME (Min) 10 15 20 25 30 35 40 45 50 55 60 65 70 80 90
LITRES/HECTARE LITRES/MINUTE
10,0 30242017151312111098776
100 10 6,5 5,0 4,0 3,2 2,7 2,5 2,2 2,0 1,6 1,6 1,5 1,5 1,0 0,8
150 15 10 7,5 6,0 5,0 4,5 4,0 3,5 3,0 2,5 2,5 2,5 2,0 2,0 1,5
200 20 13 10 8,0 6,5 5,5 5,0 4,5 4,0 3,5 3,5 3,0 3,0 2,5 2,0
250 25 16 12 10 8,5 7,0 6,0 5,5 5,0 4,5 4,0 4,0 3,5 3,0 3,0
300 30 20 15 12 10 9,0 8,0 7,0 6,0 5,0 5,0 5,0 4,0 4,0 3,0
400 40 27 20 16 13 11 10 9,0 8,0 7,0 7,0 6,0 6,0 5,0 4,0
500 50 33 25 20 17 14 12 11 10 9,0 8,0 8,0 7,0 6,0 6,0
600 60 40 30 24 20 17 15 13 12 11 10 9,0 9,0 8,0 7,0
TABLE 6
700 70 47 35 28 23 20 17 16 14 13 12 11 10 9,0 8,0
800 80 53 40 32 27 23 20 18 16 15 13 12 11 10 9,0
1000 100 67 50 40 33 29 25 22 20 18 17 15 14 12 11
1200 120 80 60 48 40 35 30 27 24 22 20 18 17 15 13
1400 140 95 70 55 45 40 35 30 28 25 24 22 20 17 15
1600 160 106 80 64 53 45 40 35 32 29 27 25 23 20 18
1800 180 120 90 70 60 50 45 40 36 33 30 28 25 23 20
2000 200 134 100 80 67 57 50 45 40 36 33 30 29 25 22
2200 220 150 110 90 70 60 55 50 44 40 37 34 32 27 24
2500 250 170 125 100 85 70 60 55 50 45 42 39 36 30 28
unigreen 31
Page 32

TABLE 7 TABLE OF PROGRAMMED MAINTENANCE
OPERATION 8 h 50 h 300 h END
OF SEASON
Check the level and state of the oil 0
Check the accumulator pressure 0
Check the suction (hoses, pipes, unions) 0
Check and clean the suction 0
and delivery filters
Check the pump fixing feet 0
and screws in general
Check the diaphragm and the oil X (1) X (2)
and change if necessary
Check the suction/delivery valves X X
Check the pump screws and bolts are tight X
Check and clean the nozzles and the non-drip diaphragm 0
Check the wear of the nozzles 0
Check the hydraulic oil level 0
Check any failures or cracking of the welds, 0
especially on herbicide booms
Grease the articulated joints and the wheel hubs 0
Check the tyre pressure 0
NOTE: 0 Operation to be carried out by the operator
X Operation to be carried out by a specialised technician or in an authorised workshop
(1) First oil change
(2) Change at the same time a changing the diaphragm
TABLE 8 PROBLEMS, CAUSES AND SOLUTIONS
PROBLEMS CAUSES SOLUTIONS
The pump won’t charge Air suction Check the suction system
Adjustment valve closed Position the lever correctly
(Command group isn’t at
zero pressure)
Valves and/or valve seats Replace or clean ( * )
suction and delivery worn
or dirty
The pump doesn’t reach the set Valve and/or valve seat Replace ( * )
pressure adjustment worn
Valves and/or valve seats suction Replace or clean ( * )
and delivery worn or dirty
Insufficient rpm Bring speed up to correct rpm
The nozzles used are worn or have Replace
holes that are too big
Suction blocked Clean the cartridge of the
Irregular pressure (with impulses) Valves and/or valve seats Replace or clean ( * )
Excessive vibrations at delivery Pressure accumulator discharged Bring the air pressure back up to the right
Noisiness and the level of the oil Blocked suction Check the suction system
has dropped
Water in the oil Breakage of one or more diaphragms Replace ( * ) If the replacement isn’t
No liquid comes out of the nozzles Delivery filter dirty Clean
suction and delivery worn
or dirty
Air suction Check the suction system
or incorrect air pressure value (see pump handbook) ( * )
Non-drip filters dirty
Nozzles blocked
always in the field of 350 ÷ 550 rpm.
filter or remove the blockage
done immediately, drain the water out
of the pump and introduce clean oil
without water (also used) or diesel to
stop rust attacking the internalparts
NOTE: ( * ) Only specialised technician
32 unigreen
Page 33

TAB.12A ALLOWED FITTINGS
2006
TYPE OF
TAB. 12 a
FITTING
PUMPS
COMET
PUMPS
ANNOVI
REVERBERI
PISTON PUMP YA 120
PUMPS " " Y 180 - 240
PRESSURE
REGULAT.
MECHANICAL
WEEDING BOOM
HYDRAULIC
WEEDIN G
BOOM
LIFT. Mechanical (only BD mech.)
SELF-LEV.
JETS UNIJET JET
NOZZLES ISO FAN NOZZLES
WHEELS
DRAWBAR FIXED TOWING EYE
OPTIO NALS independ. Hyd. PUMP
TOTAL MASS EMPTY MAX FITINGS
in Kg FULL MAX FITTING S
Max on the tow-eye FULL MAX FITTINGS
P HP POWER NECESSAR Y
" " BP 171 X X X X X
" " BP 235 X X X X X X X
" " BP 280 X X X X X X
" " BP 265 X XXX
" " BP 305 X XXX
" " IDS 1400 X X X
" " IDS 2000 X X
" " AR 160 X X X X X
" " AR 250 X X X X X X
" " BH 160 X X X
" RPV 206 X X X
" DPR 206 XXX XXX XX X X X X X X
" RV 250 XXXXXXXXXXX X X X X X X
" ERGO X X
" REMO X X X XXXXXX
NOVA 101-121-126 X X X
BD Probo 14-16 Mt X X X X X X X X
BD WORK 12MT XXXX X
BD WORK 14-15MT XXXX X
ALA 12 Mt XXX XXX XX
ALA 14-16 Mt X X X X X X X X
ALA 18 Mt XX X X
ALA 21 - 24 Mt. XXXXXX
BIT 16-18 STD XXXXXXXX
BIT 21 CF -SH - 24 SH XXXXXX
FUCINO 14-16 Mt XX XX XX
Hydr aulic
TDM X X X X X X
TDI - TDL XXXXXXXXXXX X X X X X X
BRASS DOUBLE
TREEJET JET
QUADRIJET JET
" " ATR CONE
" " ISO CONE
ANTI-DRIFT NOZZLES
8.3.32 6 HOLE XXXXXXXX
8.3.38 6 HOLE XXXXXXXX
9.5.36 6 HOLE - 8 HOLE XXXXXX X
9.5.44 6 HOLE - 8 HOLE X X X
11.2.48 8 HOLE XXXXXXXX
12.4.46 8 HOLE XXXXXX
13.6.48 8 HOLE XXXXXX
16.9.38 8 HOLE XXXXXX
STEER ING
ELETTRO IL
COMPUTER
PREMIXER
CIRCUIT WASHER
ROW MARKER
MACHINE
Fiberglass half trailed sprayers Poly ethylene half trailed s prayer s
CAMPO 11 CAMPO 16 CAMPO 22 C CAMPO 22 P-S CAMPO 32 C CAMPO 32 P-S
DSP 11 DSP 16 DSP 22 C DSP 22 P-S DSP 32 C DSP 32 P-S
XXX
XXX
XXXXX
XXXXXXXXXX X X X X X X X
XXX XXX XX X X X X X X
XXXXXXXXXX X X X X X X X
XXX XXX XX X X X X X X
XXX XXX XX X X X X X X
XXXXXXXXXX X X X X X X X
XXXXXXXXXX X X X X X X X
XXXXXXXXXX X X X X X X X
XXXXXXXXXX X X X X X X X
XXXXXXXXXX X X X X X X X
XXXXXXXXXX X X X X X X X
XXX XXX XXX X X X X X X
XXX XXX XXX X X X X X X
XX XX X XXXXXX
XXXXXXXXXX X X X X X X X
XXXXXXXXXX X X X X X X X
XXXXXXXXXX X X X X X X X
800 1500 1730 1730 900 1200 1850 1850 1500 2150 2150 2610 2610 2610 2610 2800 2800
2080 2780 3000 3000 2950 3250 3900 3900 4250 4900 4900 5100 5100 6150 6150 6300 6300
210 260 270 270 260 380 400 400 700 870 870 900 900 1650 1650 1650 1650
12 12 15 20 12 12 15 20 12 15 20 15 15 15 15 15 15
unigreen 33
Page 34

TAB.12B ALLOWED FITTINGS
2006
TYPE OF sprayers
TAB. 12 b
FITTING
PUMPS
COMET
PUMPS ANNO VI
REVERBERI
PRESSURE
REGULATOR
HYDRAULIC
WEEDING
BOO OM
" " BP 235 X X X
" " BP 280 X X X X X X
" " BP 265 X X X X X X
" " BP 305 XXX
" " AR 250 X X X X X X
" DPR 206 XXXXXX
" RV 250 X X X X X X
" REMO XXXXXX X X X X X X
ALA 12 Mt XXXXXX
ALA 14-16 Mt XXXXXX X X X X X X
ALA 18 Mt XXXXXXXX
ALA 21 - 24 Mt. XXX
BIT 16-18 STD XXXXXXX
BIT 21 CF -SH - 24 SH XXX
MACHINE
Fiberglass half trailed Polyethylene half trailed sprayers
CAMP O-DSP 11 CAMPO-DSP 16 CAMPO-DSP 22 C CAMPO-DSP 22 P-S CAMPO-DSP 32 C CAMPO-DSP 32 P-S
VENTO VENTO VENTO VENTO VENTO VENTO
AIR ASSISTED
LIFTING Hydraulic
SELF-LEV.
JETS UNIJET JET
NOZZLES ISO FAN NOZZLES
WHEELS
DRAWBAR FIXED TOWING EYE
OPTIO NAL Indipend. Hyd. PUMP
TOTAL MASS EMPTY MAX FITINGS
in Kg FULL MAX FITTINGS
Max on the tow-ey e FULL MAX FITTING S
P HP POWER NECESSARY
VENTO Ø700 XXXXXXX X X X X X
VENTO Ø820 XXX
TDI - TDL XXXXXXX X X X X X
BRASS DOUBLE
TREEJ ET JET
QUADRIJET JET
" " ATR CO NE
" " ISO CO NE
ANTI-DRIFT NOZZLES
8.3.32 6 HOLE X X X X
8.3.38 6 HOLE X X X X
9.5.36 6 HOLE - 8 HOLE X X X X
9.5.44 6 HOLE - 8 HOLE X X
11.2.48 8 HOLE XXXXXX
12.4.46 8 HOLE XXXXXX
13.6.48 8 HOLE XXXXXX
16.9.38 8 HOLE XXXXXX
STEERING
ELETTROIL
COMPUTER
PREMIXER
CIRCUIT WASHER
ROW MARKER
XXXXXXX X X X X X
XXXXXXX X X X X X
XXXXXXX X X X X X
XXXXXXX X X X X X
XXXXXXX X X X X X
XXXXXXX X X X X X
XXXXXXX X X X X X
XXXXXXX X X X X X
XXXXXXX X X X X X
XXXXXXX X X X X X
XXXXXXX X X X X X
XXXXXXX X X X X X
XXXXXXX X X X X X
XXXXXXX X X X X X
XXXXXXX X X X X X
XXXXXXX X X X X X
XXXXXXX X X X X X
1730 1730 1850 1850 2200 2200 2660 2660 2660 2660 2850 2850
3000 3000 3900 3900 5000 5000 5200 5200 6200 6200 6400 6400
230 230 360 360 870 870 900 900 1650 1650 1650 1650
40 40 40 40 40 40 40 40 40 40 40 40
34 unigreen
Page 35

IL POLIETILENE ROT AZIONALE
ROTATIONAL MOULDED POLYETHYLENE
La Unigreen SpA produce un'alta percentuale di polverizzatori con
cisterna in polietilene rotazionale a media densità, di seguito
riportiamo alcune caratteristiche del materiale:
- altissima resistenza agli urti
- superfici interne lisce che ne garantiscono la facilità di pulizia
- spessore uniforme
- resistenza a tutti i prodotti in uso per agricoltura
- facile riparabilità
Unigreen SpA produces a high percentege of sprayers with tanks of
medium-density lInear polyethylene made by rotational moulding.
Here is a list of some of the characteristics of the material:
- high impact resistance
- smooth internal surface to guarantee easy cleaning
- uniform thickness
- resistance to the chemicals used in agriculture
- easy to repair
BOLLA D'ARIA
AIR BUBBLE SECTION
FESSURA
CRACK
FORO SBAGLIAT O
INCORRECT HOLE
GENERATORE D'ARIA CALDA
UGELLO OTTIMALE Ø 5÷6 mm
Leister Kombi "TRIAC"
A
B
C
ISTRUZIONI PER LA
RIP ARAZIONE DI UNA
CISTERNA
IN POLIETILENE
- In caso di danneggiamento si consiglia di
procedere alla riparazione procurandosi un
generatore d'aria calda (reperibile presso
qualsiasi idraulico) e chiedendo alla Unigreen il seguente Kit :
Bacchette di polietilene lineare (vari colori)
Blocchetti superficie piana (da cui ricavare tasselli per la riparazione di fori di grandi dimensioni)
- Utilizzando un taglierino, allargare in forma conica la zona da riparare per arrivare
al 60 ÷ 70% dello spessore.
Le parti devono essere assolutamente pulite.
Nel caso in cui qualche liquido abbia sporcato la zona, se necessario, tagliare per
tutto lo spessore.
- Ammorbidire la bacchetta di polietilene
utilizzando il generatore d'aria calda.
Scaldando l'area immediatamente circostante la rottura con il generatore, appoggiare la bacchetta sulle parti da riparare e
ruotarla fino a fonderle insieme e
rendenderle omogenee.
Prestare attenzione ad ottenere una buona fusione fra la bacchetta ed il pezzo. La
linea di saldatura dovrà essere il meno visibile possibile.
- Per rendere le superfici più omogenee ci
si può aiutare con un rullo metallico. Questo favorisce anche l'eliminazione di eventuali bolle d'aria.
Prima di eseguire la riparazione, si consiglia di fare una prova su un campione di
polietilene che troverete nel kit.
HOW TO REPAIR A
POLYETHYLENE TANK
- In case you have a damaged
polyethylene tank and you want to repair
it, you need the following:
-a hot air generator (obtainable from
hardware stores)
-the Unigreen basic repair kit containing
the following:
-Sticks of polyethylene in various colours
- Flat blocks of polyethylene to make plugs
and stops for larger repairs.
- Widen the area to repair in the form of a
"V", using a cutter, to 60-70% of the depth
of the material.
The opening must be absolutely clean, if
necessary cut away some of the material
all around the damaged area if it has been
dirtied by chemical products.
- Heat a stick of polyethylene to soften it
and place it in the cut, heating both the
stick and the cut to assist the weld.
For best results rotate the stick during the
operation.
Be careful to ensure good fusion and keep
the weld smooth and flat to make the
repair as least noticeable as possible.
-To assist in smooting the repair a metal
roller can be used, this will also help in
eleminating any air bubbles.
Before undertaking any repairs it is
advisable to practice on a flat piece of
material included in the kit.
unigreen 35
Page 36

via Rinaldi, 105 - Loc. Cavazzoli (Reggio Emilia) - ITALY
Tel. +39 0522 369811
Fax. +39 0522 369898
e-mail: info@unigreen-spa.com
internet: www.unigreen-spa.com
member of the group
Descriptions, indicative illustrations, UNIGREEN S.P.A. reserves the right to make variations or modifications without prior warning.
UNI 16100005F - GB Apr.-08
 Loading...