

Page 1

OpenScape DECT Phone S5
on HiPath Cordless IP
User Guide
A31003-D1000-U103-2-7619
Page 2

Our Quality and Environmental Management Systems are
implemented acco rding t o the req uirement s of th e ISO9 001 and
ISO14001 standard s and are certified by an external certification
company.
© Unify Software and Solutions GmbH & Co. KG 12/2015
Mies-van-der-Rohe-Str. 6, 80807 Munich/Germany
All rights reserved.
Reference No.: A31003-D1000-U103-2-7619
The information provided in this docum e nt contains merely general descriptions or
characteristics of performance which in case of actual use do not always apply as
described or which may change as a result of further development of the products.
An obligation to provide the respective characteristics shall only exist if expressly agreed in
the terms of contract.
Availability and technical specifications are subject to change without notice.
Unify, OpenScape, OpenStage and HiPath are registered trademarks of Unify Software
and Solutions GmbH & Co. KG. All other company, brand, product and service names are
trademarks or registered trademarks of their respective holders.
unify.com
Page 3

Contents 3
Contents
Overview . . . . . . . . . . . . . . . . . . . . . . . . . . . . . . . . . . . . . . . . . . 5
Using the user guide effective ly. . . . . . . . . . . . . . . . . . . . . . . . . 6
Safety notes. . . . . . . . . . . . . . . . . . . . . . . . . . . . . . . . . . . . . . . .7
Getting started . . . . . . . . . . . . . . . . . . . . . . . . . . . . . . . . . . . . . . 8
Installing the charging cradle . . . . . . . . . . . . . . . . . . . . . . . . . . . . . . . . . . . . . . . . . . . . . . . . . . . 8
Connecting the charging cradle (if included). . . . . . . . . . . . . . . . . . . . . . . . . . . . . . . . . . . . . . . . 8
Setting up the handset for use . . . . . . . . . . . . . . . . . . . . . . . . . . . . . . . . . . . . . . . . . . . . . . . . . . 8
Changing the display language . . . . . . . . . . . . . . . . . . . . . . . . . . . . . . . . . . . . . . . . . . . . . . . . 9
Setting the date and time . . . . . . . . . . . . . . . . . . . . . . . . . . . . . . . . . . . . . . . . . . . . . . . . . . . . . 9
Connecting the headset . . . . . . . . . . . . . . . . . . . . . . . . . . . . . . . . . . . . . . . . . . . . . . . . . . . . . . 10
Connecting the USB data cable . . . . . . . . . . . . . . . . . . . . . . . . . . . . . . . . . . . . . . . . . . . . . . . . 10
Getting to know your telephone. . . . . . . . . . . . . . . . . . . . . . . . 11
Control key . . . . . . . . . . . . . . . . . . . . . . . . . . . . . . . . . . . . . . . . . . . . . . . . . . . . . . . . . . . . . . . . 11
Volume keys . . . . . . . . . . . . . . . . . . . . . . . . . . . . . . . . . . . . . . . . . . . . . . . . . . . . . . . . . . . . . . . 11
Menu guidance . . . . . . . . . . . . . . . . . . . . . . . . . . . . . . . . . . . . . . . . . . . . . . . . . . . . . . . . . . . . . 12
Entering text . . . . . . . . . . . . . . . . . . . . . . . . . . . . . . . . . . . . . . . . . . . . . . . . . . . . . . . . . . . . . . . 12
Incoming calls . . . . . . . . . . . . . . . . . . . . . . . . . . . . . . . . . . . . . . . . . . . . . . . . . . . . . . . . . . . . . . 14
Directory. . . . . . . . . . . . . . . . . . . . . . . . . . . . . . . . . . . . . . . . . . 15
Opening the directory . . . . . . . . . . . . . . . . . . . . . . . . . . . . . . . . . . . . . . . . . . . . . . . . . . . . . . . . 15
Directory entries . . . . . . . . . . . . . . . . . . . . . . . . . . . . . . . . . . . . . . . . . . . . . . . . . . . . . . . . . . . . 15
Creating an entry . . . . . . . . . . . . . . . . . . . . . . . . . . . . . . . . . . . . . . . . . . . . . . . . . . . . . . . . . . 15
vCard. . . . . . . . . . . . . . . . . . . . . . . . . . . . . . . . . . . . . . . . . . . . . . . . . . . . . . . . . . . . . . . . . . . . . 17
Calendar . . . . . . . . . . . . . . . . . . . . . . . . . . . . . . . . . . . . . . . . . 18
Resource Directory . . . . . . . . . . . . . . . . . . . . . . . . . . . . . . . . . 23
Bluetooth . . . . . . . . . . . . . . . . . . . . . . . . . . . . . . . . . . . . . . . . . 24
Additional function s us ing the PC interface . . . . . . . . . . . . . . . 26
Multiple handsets. . . . . . . . . . . . . . . . . . . . . . . . . . . . . . . . . . . 28
Registering a handset to multiple base stations . . . . . . . . . . . . . . . . . . . . . . . . . . . . . . . . . . . . 28
Registering/de-registering the handset . . . . . . . . . . . . . . . . . . . . . . . . . . . . . . . . . . . . . . . . . . . 28
Page 4

4 Contents
Adjusting the handset settings. . . . . . . . . . . . . . . . . . . . . . . . .29
Display and keypad. . . . . . . . . . . . . . . . . . . . . . . . . . . . . . . . . . . . . . . . . . . . . . . . . . . . . . . . . . 29
Large font. . . . . . . . . . . . . . . . . . . . . . . . . . . . . . . . . . . . . . . . . . . . . . . . . . . . . . . . . . . . . . . . 29
Color scheme. . . . . . . . . . . . . . . . . . . . . . . . . . . . . . . . . . . . . . . . . . . . . . . . . . . . . . . . . . . . . 29
Activating/deactivating auto answer . . . . . . . . . . . . . . . . . . . . . . . . . . . . . . . . . . . . . . . . . . . . . 30
Changing the earpiece and speaker volume. . . . . . . . . . . . . . . . . . . . . . . . . . . . . . . . . . . . . . . 30
Ringtones . . . . . . . . . . . . . . . . . . . . . . . . . . . . . . . . . . . . . . . . . . . . . . . . . . . . . . . . . . . . . . . . . 30
Activating/deactivating the ringtone . . . . . . . . . . . . . . . . . . . . . . . . . . . . . . . . . . . . . . . . . . . . 31
Activating/deactivating advisory tones . . . . . . . . . . . . . . . . . . . . . . . . . . . . . . . . . . . . . . . . . . . 31
Fast access to numbers and functions . . . . . . . . . . . . . . . . . . . . . . . . . . . . . . . . . . . . . . . . . . . 31
Assigning a number to digit keys (quick dial). . . . . . . . . . . . . . . . . . . . . . . . . . . . . . . . . . . . . 31
Changing the handset PIN . . . . . . . . . . . . . . . . . . . . . . . . . . . . . . . . . . . . . . . . . . . . . . . . . . . . 32
Resetting the handset to the default settings . . . . . . . . . . . . . . . . . . . . . . . . . . . . . . . . . . . . . . 32
System. . . . . . . . . . . . . . . . . . . . . . . . . . . . . . . . . . . . . . . . . . .33
Own area code . . . . . . . . . . . . . . . . . . . . . . . . . . . . . . . . . . . . . . . . . . . . . . . . . . . . . . . . . . . . . 33
Restoring the phone to default settings. . . . . . . . . . . . . . . . . . . . . . . . . . . . . . . . . . . . . . . . . . . 33
Questions and answers . . . . . . . . . . . . . . . . . . . . . . . . . . . . . . 34
Manufacturer's advice . . . . . . . . . . . . . . . . . . . . . . . . . . . . . . . 34
Authorization . . . . . . . . . . . . . . . . . . . . . . . . . . . . . . . . . . . . . . . . . . . . . . . . . . . . . . . . . . . . . . . 34
Care . . . . . . . . . . . . . . . . . . . . . . . . . . . . . . . . . . . . . . . . . . . . . . . . . . . . . . . . . . . . . . . . . . . . . 35
Contact with liquid . . . . . . . . . . . . . . . . . . . . . . . . . . . . . . . . . . . . . . . . . . . . . . . . . . . . . . . . . . 35
Technical data. . . . . . . . . . . . . . . . . . . . . . . . . . . . . . . . . . . . . . . . . . . . . . . . . . . . . . . . . . . . . . 36
General specifications . . . . . . . . . . . . . . . . . . . . . . . . . . . . . . . . . . . . . . . . . . . . . . . . . . . . . . 36
Character charts . . . . . . . . . . . . . . . . . . . . . . . . . . . . . . . . . . . . . . . . . . . . . . . . . . . . . . . . . . . . 37
Standard characters. . . . . . . . . . . . . . . . . . . . . . . . . . . . . . . . . . . . . . . . . . . . . . . . . . . . . . . .37
Central Europe. . . . . . . . . . . . . . . . . . . . . . . . . . . . . . . . . . . . . . . . . . . . . . . . . . . . . . . . . . . . 37
Cyrillic . . . . . . . . . . . . . . . . . . . . . . . . . . . . . . . . . . . . . . . . . . . . . . . . . . . . . . . . . . . . . . . . . . 37
Greek . . . . . . . . . . . . . . . . . . . . . . . . . . . . . . . . . . . . . . . . . . . . . . . . . . . . . . . . . . . . . . . . . . . 37
Turkish . . . . . . . . . . . . . . . . . . . . . . . . . . . . . . . . . . . . . . . . . . . . . . . . . . . . . . . . . . . . . . . . . . 37
Arabic. . . . . . . . . . . . . . . . . . . . . . . . . . . . . . . . . . . . . . . . . . . . . . . . . . . . . . . . . . . . . . . . . . . 38
Display icons . . . . . . . . . . . . . . . . . . . . . . . . . . . . . . . . . . . . . . 39
Menu overview. . . . . . . . . . . . . . . . . . . . . . . . . . . . . . . . . . . . .40
Making calls to multiple parties . . . . . . . . . . . . . . . . . . . . . . . . 42
Transferring a call . . . . . . . . . . . . . . . . . . . . . . . . . . . . . . . . . . . . . . . . . . . . . . . . . . . . . . . . . . . . 42
Toggling (switching between calls) . . . . . . . . . . . . . . . . . . . . . . . . . . . . . . . . . . . . . . . . . . . . . . . 43
Conducting a conference . . . . . . . . . . . . . . . . . . . . . . . . . . . . . . . . . . . . . . . . . . . . . . . . . . . . . . 44
Index . . . . . . . . . . . . . . . . . . . . . . . . . . . . . . . . . . . . . . . . . . . . 45
Page 5

Overview 5
Overview
1Display
2Status bar
Icons display current settings and operating
status of the phone
3Volume keys
for receiver/headset, ringtone, handsfree mode,
alarm clock and appointment reminders
4Display keys
5 End call key, On/Off key
End call; cancel function;
Go back one level
Return to idle status
Switch the handset on/off
(in idle status)
Press briefly
Press and hold
Press and hold
6Message key
Access to calls and message lists;
Flashes: new message or new call
7Profile key
Switch between sound
profiles
Press briefly
Switch the microphone off/on Press and hold
8Hash key
Lock/unlock the keypad
(in idle status)
Press and hold
Toggles between upper/
lowercase and digits
(when inputting text):
Press briefly
9 USB connection socket
For exchanging data between the handset and
PC
10 Microphone
11 Star key
Open special characters
table (when inputting text)
Press briefly
Disable all ringtones Press and hold
12 Headset port
(2.5 mm jack)
13 Recall key
Insert a dialing pause (only
for HiPath Cordless Office)
Press briefly
14 Talk key / Handsf ree key
Accept call; dial number displayed; switch
between receiver and handsfree mode
Open redial list
Start dialing
Press briefly
Press and hold
15 Control key / Menu key
2
4
5
8
15
1
14
INT 1
Calls Calendar
3
13
6
12
10
7
9
11
Page 6

6 Using the user guide effectively
Using the user guide effectively
Icons
Keys
Display keys ( p. 11), e.g. OK, Back, Select, Change, Save
Select/confirm functions
Procedures
Example: Activating/deactivating automatic call answering
Illustration in the user guide
¤ . . . use to select Settings OK Telephony OK Auto Answer
Change ( = on)
War nin gs t hat i f no t he eded can resu lt i n inj ury to p erso ns o r da mag e to d evi ces o r al so gi ve r ise
to costs.
Prerequisite for being able to carry out the following action.
Important information regarding function and appropriate handling.
Talk key / Handsfree key End call key
Number / letter keys to Star key / Hash key
Message key / Recall key Control key rim / center
Microphone key
Confirm selection using OK
Go back one level using Back
Change to idle display using Press and hold
Switch function on/off using Change on / off
Activate/deactivate option using Select activated / deactivated
Step Follow this procedure
¤ When in idle status, press the center of the control key.
The main menu opens.
¤
¤ OK
Use the control key to navigate to the icon.
Select OK to confirm (or press the center of the control key ).
The submenu Settings opens.
Alternative icon for the submenu Settings on some handsets: .
¤ Tel eph ony
¤ OK
Use the control key to select the entry Te l ep ho ny .
Select OK to confirm (or press the center of the control key ).
The submenu Te l ep ho ny opens.
¤ Auto Answer The function to switch auto answer on/off appears as the first menu item.
¤ Change Select Change to activate or deactivate (or press the center of the control key ).
Function is activated / deactivated .
Not all of the functions described in this user guide are available in all countries or from all
network providers and systems.
Recent manuals in PDF format under
wiki.unify.com/wiki/OpenScape_DECT_Phone_S5
Page 7

Safety notes 7
Safety notes
Be sure to read this user guide and the safety precautions before using your telephone.
Explain their content and the potential hazards associated with using the device to your children.
The device cannot be used in the event of a power failure. It is not possible either to make
emergency calls.
Emergency numbers also cannot be called when the keypad lock is activated.
Do not use the device in environments with a potential explosion hazard (e.g. paint shops).
The devices are not splash-proof. For this reason, do not install them in a damp environment such
as bathrooms or shower rooms.
Use only the power adapter indicated on the device.
Use only rechargeable batteries that correspond to the specification (see "Technical data"), as this
could otherwise result in significant health risks and personal injury. Rechargeable batteries that
are noticeably damaged must be replaced.
If you give your handset to a third party, make sure you also give them the user guide.
Remove faulty devices from use or have them repaired by our Service team, as they could interfere
with other wireless services.
Do not use the device if the display is cracked or broken. Broken glass or plastic can cause injury to
the hands or face. Send the device to our Service department to be repaired.
Do not hold the rear of the handset to your ear when it is ringing or when speaker mode is activated. Otherwise you may seriously and permanently impair your hearing.
Your handset is compatible with the majority of digital hearing aids on the market. However, perfect function with all hearing aids cannot be guaranteed.
The telephone may cause interference in analog hearing aids (humming or whistling) or cause
them to overload. If you require assistance, please contact the hearing aid supplier.
Using your telephone may affect nearby medical equipment. Be aware of the technical conditions
in your particular environment, e.g. doctor's surgery.
If you use a medical device (e.g. a pacemaker), please contact the device manufacturer. They will
be able to advise you regarding the susceptibility of the device to external sources of high frequency energy (for the specifications of your handset, see "Technical data").
To prevent loss of hearing, avoid listening at high volume over long periods of time.
Page 8

8 Getting started
Getting started
Contents of the package
• One handset,
• One battery cover,
• Two batteries,
• One charging cradle,
• One belt clip,
• One user guide.
Installing the charging cradle
The charging cradle is designed for operation in closed, dry rooms within a temperature range of +5 °C to
+45 °C.
The phone's feet do not usually leave any marks on surfaces. However, due to the multitude of different
varnishes and polishes used on today's furnishings, the occurrence of marks on the surfaces cannot be
completely ruled out.
Connecting the charging cradle (if included)
¤ Connect the flat plug of the power adapter .
¤ Plug the power adapter into the power socket .
To remove the plug from the charging cradle again:
¤ Disconnect the power adapter from the mains
power supply.
¤ Press the release button .
¤ Pull out the plug .
Setting up the handset for use
The display is protected by a plastic film. Please remove the protective film!
Inserting the batteries
Never expose the telephone to the influence of heat sources, direct sunlight or other electrical
devices.
Protect the telephone from moisture, dust, corrosive liquids and fumes.
Pay attention to the range of the base station. This is up to 300 m in unobstruc ted outdoor areas
and up to 50 m inside buildings. The range is reduced when Maximum Range is deactivated.
Only use rechargeable batteries as this could otherwise result in significant health risks and personal injury. For example, the outer casing of the batteries could be destroyed or the batteries
could explode. The phone could also malfunction or be damaged as a result of using batteries
that are not of the recommended type.
2
1
3
4
1
2
3
4
Page 9

Getting started 9
Charging the batteries
¤ Charge the batteries fully prior to first use in the base
station/charging cradle. The batteries are fully charged
when the power icon disappears from the display.
Attaching the belt clip
The handset has notches on each side for attaching the belt clip.
• Attaching the belt clip: Press the belt clip onto the back of the handset
until the tabs on the clip engage in the notches.
• Removing the belt clip: Press the center of the belt clip firmly with your
thumb. Press the nail of the thumb on your other hand up between the
clip and the casing. Slide the clip upwards to remove.
Changing the display language
You can change the display language if the telephone has been set to an incomprehensible language.
¤ Press the middle of the control key .
¤ Press the keys an d slowly in succession . . . the language settings
display appears and the set language (e.g. English) is highlighted ( =
selected).
¤ Select a different language: Press the control key until the desired
language is marked in the display, e.g. French press the key on the right
directly underneath the display to activate the language.
¤ To revert to idle status: Press the End call key and hold
Setting the date and time
Set the date and time so that the date and time can be assigned correctly to incoming calls and to enable
the alarm to be used.
¤ Press the display key Time
or, if the date and time have already been set:
¤ . . . use to select Settings OK Date/Time OK
The active cursor position flashes . . . use to change the cursor
position . . . use to switch between cursor positions
Enter date:
¤ . . . use to enter the day, month and year in 8-digit format,
e.g. for 15/08/2014.
Enter the time.
¤ . . . use to enter hours and minutes in 4-digit format, e.g.
for 07:15.
To save settings:
¤ Press the display key Save . . . the message Saved is shown on the display
and you hear a confirmation tone . . . the telephone returns to the Settings menu item.
¤ Insert the batteries (for correct
+/- direction, see diagram).
¤ Fit the battery cover from the
top.
¤ Press the cover until it clicks into
place.
To re-open the battery cover:
¤ Insert a fingernail behind the
notch at the top of the cover
and slide the cover downwards.
The handset may only be placed on the designated base station or charging cradle.
The battery may heat up during charging. This is not dangerous.
After a while, the charge capacity of the battery will decrease for technical reasons.
Handsets contained in the package have already been registered to the base station. In the
event that a handset is not registered however (indicated by "Please register handset"), please
contact the administrator.
7 h
Deutsch
English
Fran cais
Calls Time
Date/Time
Date:
8/15/2014
Time:
12:00 AM
Back Save
Page 10

10 Getting started
Connecting the headset
¤ Connect a headset with a 2.5 mm jack to the left side of the handset .
The headset volume corresponds to the setting for the earpiece volume
( p. 30).
Connecting the USB data cable
For exchanging data between the handset and PC:
¤ Connect the USB data cable with micro-USB plug into the USB
socket at the bottom of the handset .
Connect the handset directly to the PC, not via a
USB hub.
1
111
Page 11

Getting to know your telephone 11
Getting to know your telephone
Switching the handset on/off
Locking/unlocking the keypad
The keypad lock prevents any accidental use of the telephone.
Lock/unlock the keypad: Press and hold
Control key
In the description below, the side of the control key (up, down, left, right) that you have to press in the
different operating situations is marked in black, for example for "press right on the control key" or
for "press the center of the control key".
In idle status
In submenus, selection and entry fields
During a conversation
Volume keys
Set volume for receiver/headset, ringtone, handsfree mode and indicating appointments: Press the vol-
ume keys / on the right side of the handset
Display keys
The display keys perform a range of functions depending on the operating situation.
Display key icons
p. 39
Switch on:
¤ When the handset is switched off, press the End call key and hold
Switch off :
¤ When the telephone is in idle status, press the End call key and hold
When a call is indicated on the handset, the keypad automatically unlocks and you can accept
the call. It then locks again when the call is finished.
It is not possible to call emergency numbers either when the keypad lock is activated.
The control key enables you to navigate the menus and input fields and also to call up
certain functions depending on the situation.
Open the directory Press briefly
Open the main menu or
Open the system menu
Confirm a function
Open the directory
Switch the microphone off/on
Select the left display
(only for HiPath Cordless Enterprise)
Adjust the loudspeaker volume for receiver and handsfree
mode
The display keys have a function preset by default in idle status. Change the assignment:
p. 32
Current display key
functions
Display keys
Back Save
Page 12

12 Getting to know your telephone
Menu guidance
The functions of your telephone are displayed on a menu that consists of several levels. Menu overview
p. 40.
Main menu
In idle status: Press the center of the control key . . . use the
control key or number keys 1 to 9 to select a submenu OK
The main menu functions are shown in the display as icons. The icon
for the selected function is highlighted in color and the name of the
associated function appears in the display header.
Submenus
The functions in the submenus are displayed as lists.
To access a function: . . .
use the control key to select a function
OK
Return to the previous menu level:
¤ Press the display key Back
or
¤ Press the End call key briefly
Returning to idle status
¤ Press the End call key and hold
Entering text
Input position
¤ Use to select an input field. A field is activated when the cursor is
flashing inside it.
¤ Use to move the position of the cursor.
Correcting incorrect entries
• Delete characters to the left of the cursor: Press briefly
• Delete words to the left of the cursor: Press and hold
Entering letters/characters
Multiple letters and numbers are assigned to each key between and
and the key. As soon as a key is pressed, the possible characters
are displayed at the bottom of the display. The selected character is highlighted.
• Select letters/digits: Press the key briefly several times in succession
• Switch between lowercase, uppercase and number entry mode: Press the hash key
When editing a directory entry, the first letter and each letter following a space are automatically in
uppercase.
• Enter special characters: Press the star key . . . use to navigate to the desired character
Insert
If no key is pressed, the display will automatically change to idle status after around 2 minutes.
The availability of special characters depends on the character set of the handset,
Character
set tables p. 37.
Example
Audio Settings
Back OK
Settings
Date/Time
Display & Keypad
Language
Registration
Tel e ph on y
Back OK
Example
New Entry
First Name:
Peter|
Surname:
Phone (Home):
Abc
‚
Save
Page 13

Making calls 13
Making calls
Making calls
¤ . . . use to enter a number press the Talk key briefly
Cancel dialing: Press the End call key
Dialing from the directory
¤ . . . use to open the directory . . . use to select an entry press the Talk key
If multiple numbers are entered:
¤ . . . use to select a number press the Talk key . . . the number is dialed
Dialing from the redial list
The redial list contains the 20 numbers last dialed with the handset.
¤ Press the Talk key briefly . . . th e redia l list is ope ned . . . use to s elect an entry press th e
Talk ke y
If a name is displayed:
¤ View . . . the number is displayed . . . use to browse numbers if required . . . when the desired
number is reached, press the Talk key
Managing entries in the redial list
¤ Press the Talk key briefly . . . the redial list is opened . . . use to select an entry Options
. . . possible options:
Dialing in to extension systems (Delayed Extension Dialing)
When dialing in to a large corporate network (PBX systems), it is possible to dial an extension number
directly after dialing the dial-up number.
When the display backlight is off ( p. 29), the display lights up again the next time any key is
pressed. Digit keys appear on the display for pre-dialing, other keys have no further function.
For fast access (quick dial): Assign numbers from the directory to the digit or display keys
(
p. 31).
Copy an entry to the directory: Copy to Dire ctory OK
Copy the number to the display:
¤ Display number OK . . . use to amend or add numbers if necessary . . . use to save
as an entry in the directory
Delete the selected entry: Delete entry OK
Delete all entries: Delete all OK
Set automatic line seizure:
¤ Automatic Redial . . . The selected number is automatically dialed at fixed intervals (at least
every 20 seconds). The handsfree key flashes; "open listening" is activated.
The participant answers: Press the Talk key . . . the function is terminated
The participant does not answer: The call is terminated after approx. 30 seconds. The function is
terminated after pressing any key or after ten unsuccessful attempts.
The telephone number is saved in the directory as follows: Dial-in number, 2 stars,
extension number (e.g. 1234567**128).
Page 14

14 Making calls
¤ Open directory . . . use to select an entry press the Talk
key . . . the phone dials the number before the ** . . . possible
options:
Dial a saved extension: Dial Ext.
Dial a different extension: . . . use to enter a number Dial Ext.
Incoming calls
An incoming call is indicated by ringing, by a display on the screen and by the flashing Talk key .
Accept a call:
• Press the Talk key or or Accept
• If Auto Answer is activated ( p. 30): Remove the handset from the charging cradle
• Accept a call on the bluetooth headset p. 24
Switch off ringtone: Silence . . . the call can be accepted for as long as it is shown on the display
Information about the caller
The caller's phone number is displayed. If the caller's phone number is saved in the directory, the name is
displayed.
During a conversation
Handsfree mode
Activating/deactivating handsfree mode during a call and when establishing a connection:
¤ Press the handsfree key
Placing the handset in the charging cradle during a call:
¤ Press the handsfree key and hold down . . . place the handset in the charging cradle hold . . .
for a further 2 seconds
Call volume
Applies for the current mode (handsfree, receiver or headset):
¤ Press the volume keys / or . . . use / or to set the volume Save
Muting the microphone
When the microphone is switched off, callers will no longer hear you.
Switch the microphone on/off during a call:
¤ Press and hold the microphone key .
The setting is automatically saved after around 3 seconds, even if Save is not pressed.
Dial Number
1234567**128
Dial Ext. Options
Page 15

Directory 15
Directory
The local directory is unique to the handset. However, it is possible to send entries to other handsets
( p. 17).
Opening the directory
¤ Press briefly in idle status
or
¤ . . . use to select Directory OK
Directory entries
Creating an entry
¤ <New Entry> OK . . . use to s witc h be twe en th e en try
fields and enter data for the entry:.
Names / numbers:
¤ . . . use to enter first nam es and/or surnames, at least one number
(personal, office or mobile) and an e-mail address, if applicable
Anniversary:
¤ . . . use to activate/deactivate Anniversary . . . use to enter
the date and time . . . use to select the type of alert (Visual only
or a ringtone)
Caller Melody (VIP):
¤ . . . use to select the ringtone that will indicate a call from the par-
ticipant . . . if a Caller Melody (VIP) has been assigned, the entr y will appear in the directory with the
icon.
Caller Picture:
¤ . . . use to select a picture that is to be displayed during a call from the par ticipant ( Resource
Directory, p. 23).
Save entry: Save
Searching for/selecting a directory entry
¤ . . . use to browse searched names
or
¤ . . . use to enter initial letters (max. 8 letters) . . . the display jumps to the first name starting
with these initial letters . . .
use to continue browsing to the desired entry, if needed
Scroll through directory: Press and hold
Displaying/changing an entry
¤ . . . use to select an entry View . . . use to select the field to be changed Edit
or
¤ . . . use to select an entry Options Edit entry OK
Number of entries: up to 500
Information: First name and surname, up to three telephone numbers, e-mail address,
anniversary with alert, VIP ringtone with VIP icon, CLIP picture
Length of the entries: Numbers: max. 32 digits.
First name, surname: max. 16 characters
E-mail address: max. 64 characters.
An entry is only valid if it contains at least one number.
For Caller M elody (VI P) and Caller Picture: the telephone number of the caller must be supplied.
Example
New Entry
First Name:
Robert
Surname:
I
Phone (Home):
Abc
‚
Save
Page 16

16 Directory
Deleting entries
Delete the selected entry: . . . use to select an entry Options Delete entry OK
Delete all entries: Options Delete all OK
Setting the order of the directory entries
Directory entries can be sorted by first name or surname.
¤ Options Sort by Surname / Sort by First Name
If no name was entered, the default telephone number is shown i n the surname field. These entries app ear
at the beginning of the list, regardless of how the entries are sorted.
The sort order is as follows:
Space | Digits (0-9) | Letters (alphabetically) | Other characters.
Displaying the number of entries available in the directory
¤ Options Avai lable Memory OK
Page 17

Directory 17
Copying number to the directory
The number is displayed or highlighted.
• When dialing a number:
¤ Press the display key .
• From a list, e.g. the call list or the redial list.
¤ Options Copy to Directory OK.
Create a new entry:
¤ <New Entry> OK . . . use to select a number type OK complete entry Save
Add number to an existing entry:
¤ . . . use to select an entry OK . . . use to select a number type OK . . . the number is
entere d or a pr ompt to ove rwri te an ex isting nu mber i s displ ayed . . . if requi red, an swer th e prom pt
with Yes /No Save
vCard
Copying a vCard using Bluetooth
Copy directory entries in vCard format, for example to exchange entries with a mobile phone.
¤ . . . use to select an entry if needed Options Copy Entry / Copy All vCard via
Bluetooth
. . . the Known Devices list is displayed ( p. 25) . . . use to select a device OK
Receiving a vCard using Bluetooth
If a device in the Known Devices list ( p. 25) sends a vCard to your handset, a directory entry is automatically created and a message is shown on the display.
If the sending device is not in the list: . . . use to enter the PIN of the sending Bluetooth device OK
. . . the copied vCard is available as a directory entry
An external call interrupts the transfer.
Caller pictures and sounds are not transferred. Only the date is transferred for an anniversary.
Both handsets support vCards:
• No entry with the name is available: a new entry is created.
• An entry with the name is already available: the entry is expanded to include the new
numbers. If the entry contains more numbers than allowed by the recipient handset,
a second entry is created with the same name.
The recipient handset does not support vCards:
A separate entry is created and sent for each number.
The sending handset does not support vCards:
A new entry is created on the receiving handset and the transferred number is added to the
Phone (Home) field. If an entry with this number already exists, the copied number is discarded.
Bluetooth mode is activated ( p. 24)
The other handset/mobile phone supports Bluetooth.
Page 18

18 Calendar
Calendar
You can remind yourself of up to 30 appointments.
The current day is outlined in white in the calendar, while numbers are
highlighted in color on days with appointments. When a day is selected, it
will be outlined in color.
Assign calendar call-up to a display key
p. 32.
Saving appointments to the calendar
¤ . . . use to select Organiser OK Calendar OK . . . use to select the
desired day OK . . . then
Notification of appointments/anniversaries
Anniversaries are transferred from the directory and displayed as an appointment. An appointment/
anniversary is displayed in idle status and the selected ringtone plays for 60 seconds as a notification.
• Acknowledge and stop the reminder: Press the display key OFF
• Modify the ringtone volume permanently: . . . Press the volume keys / during the reminder
Displaying missed (unacknowledged) appointments/anniversaries
The following appointments and anniversaries are saved in the Missed Alarms list:
• The appointment/anniversary call was not acknowledged.
• The appointment/anniversary was notified during a call.
• The handset was switched off at the time of the appointment/anniversary.
The last 10 entries are stored. The icon and the number of new entries are shown on the display. The
most recent entry appears at the top of the list.
Opening the list
¤ Press the message key Missed Alarms: OK . . . use to browse through the list of
any appointments
or
¤ . . . use to select Organiser OK Missed Alarms OK
The date and time have been set.
Switch on/off:
¤ Activation: . . . use to select On or Off
Enter date:
¤ Date . . . the selected date is set by default . . . use to enter a new date
Enter the time:
¤ Time . . . use to enter the hours and minutes of the appointment
Set the name:
¤ Tex t . . . use to enter a description of the appointment (e.g. evening
meal, meeting)
Set alarm tone:
¤ Signal . . . use to select the melody of the reminder alarm or
deactivate acoustic signaling
Enter information for the appointment:
¤ . . . use to select Date, Time, Te xt and Signal in succession . . . use or
in each case to set the value Save
Save appointment:
¤ Save
If an appointment has already been entered: <New Entry> OK . . . then enter information for the appointment.
During a call, a reminder is indicated once with an advisory tone on the handset.
July 2014
Mo Tu We Th Fr Sa Su
01 02 03 04 05 06
07 08 09 10 11 12 13
14 15 16 17 18 19 20
21 22 23 24 25 26 27
28 29 30 31
Back OK
Page 19

Calendar 19
Every entry is displayed with number or name, date and time. The most recent entry appears at the top of
the list.
• Delete an appointment/anniversary: Delete
Displaying/changing/deleting stored appointments
¤ . . . use to select Organiser OK Calendar OK . . . use to select the
day OK . . . the appointment list is displayed . . . use to select the date . . . possible options:
Display appointment details:
¤ View . . . The appointment settings are displayed
Change
appointment:
¤ View Edit
or Options Edit entry OK
Activate/deactivate appointment:
¤ Options Activate/Deactivate OK
Delete
appointment:
¤ Options Delete entry OK
Delete all appointments for a day:
¤ Options Delete all Appoints. OK Ye s
Page 20

20 Alarm clock
Alarm clock
Activating/deactivating the alarm clock and setting the wake-up time
¤ . . . use to select Alarm Clock OK . . . then
The icon and the wake-up time are displayed on the idle display when the alarm clock is activated.
Alarm
An alarm is shown on the display and indicated by the selected ringtone melody. The alarm sounds for
60 seconds. It is then repeated after 5 minutes if no key is pressed. The alarm is disabled for 24 hours after
the second retry.
Switching off / repeating the alarm after an interval (snooze mode)
Deactivate the alarm: OFF
Repeat the alarm (snooze mode): Snooze Press or any key . . . the alarm is switched off and repeated after
5 minutes.
The date and time have been set.
Switch on/off:
¤ Activation: . . . use to select On or Off
Set wake-up time:
¤ Time . . . use to enter hours and minutes
Set days:
¤ Occurrence . . . use to switch between Monday-Friday and Daily
Set the volume:
¤ Volume . . . use to set the volume in 5 increments or select cre-
scendo (increasing volume)
Set alarm:
¤ Melody . . . use to select a ringtone for the alarm
Enter wake-up data:
¤ . . . use to enter Time, Occurrence, Volu me and Melody in succession
. . . use or in each case to set the value Save
Save setting:
¤ Save
During a call, the alarm is only indicated by a short tone.
Page 21

Protecting against unwanted calls 21
Protecting against unwanted calls
Time control for external calls
Enter a time period during which the handset is not to ring to indicate
external calls, for example during the night.
¤ . . . use to selec t Audio Settings Ringtones (Handset)
OK Time Control OK . . . then
Switching off the ringtone when in the charging cradle
The handset will not ring when placed in the charging cradle. A call is only indicated on the display.
¤ . . . use to select Audio S ettings Ringtones (Handset) OK Silent Charging
Change ( = ringtone is switched off when in charging cradle)
The date and time have been set.
Switch on/off:
¤ use to select On or Off
Enter the time:
¤ use to switch between Suspend
ring. from and Suspend ring. until . . .
use to enter the start and end of the
period in 4-digit format
Save:
¤ Save
Time control only applies to the handset for which the setting is configured.
The telephone will continue to ring for numbers that have been assigned to a VIP group in the
directory.
Time Control
For external calls:
On
Suspend ring. from:
10:00 PM
Suspend ring. until:
7:00 AM
Back Save
Example
Page 22

22 Other functions
Other functions
The phone also offers other functions:
• Resource Directory for saving sounds for ringtones and images that can be used as caller images (CLIP
pictures) or as screensavers
• Additional functions via the PC interface with Gigaset QuickSync: sync handset phonebook with
Outlook, download images and sounds from the computer to the handset, update the firmware
Page 23

Resource Directory 23
Resource Directory
Sounds for ringtones and images that can be used as caller images (CLIP pictures) or as screensavers are
saved in the handset's resource directory. A range of monophonic and polyphonic sounds and pictures
have been pre-set but further images and sounds can be downloaded using a PC (
¢ p. 26).
Media types:
If th er e is no t en ou gh me mor y a va il abl e, you mu st fir st de let e o ne or m or e p ic tur es or s ou nd s be fo re o th er s
can be saved.
Managing CLIP pictures/sounds
¤ . . . use to select Additional Features OK Resource Directory OK . . . possible
options:
Type Fo rmat
Sound Ringtones
Monophonic
Polyphonic
Imported sounds
Internal
Internal
Internal
WMA, MP3, WAV
Picture CLIP picture
Screensaver
BMP, JPG, GIF
128 x 86 pixels
128 x 160 pixels
View CLIP picture:
¤ Caller Pictures OK . . . use to select picture View . . . the
selected picture is displayed
Play sound:
¤ Sounds OK . . . use to select sound . . . the selected sound is
played
Set volume: Options Vol ume OK . . . use to select the volume
Save
Rename picture/sound:
¤ select Caller Pictures / Sounds OK . . . use to select sound/
image Options Rename . . . use to delete name, use to enter a
new name Save . . . the entry is saved with the new name
Delete picture/
sound:
¤ Select Caller Pictures / Sounds OK . . . use to select sound/image
Options Delete entry . . . the selected entry is deleted
The relevant options are not available if a picture/sound cannot be deleted.
Page 24

24 Bluetooth
Checking the memory
Display the available memory for screensavers and CLIP pictures.
¤ . . . use to select Additional Features OK Resource D irectory OK
Capacity OK . . . the percentage of available memory is displayed
Bluetooth
The handset is able to use Bluetooth™ to communicate wirelessly with other devices that also use this
technology, for example for exchanging directory entries.
The following devices can be connected:
• A Bluetooth headset
It may take 5 seconds to establish a connection, whether a call is accepted using the headset or
transferred to the headset, or a call is made from the headset.
• Up to 5 data devices (PCs, PDAs or mobile telephones) for the transmission of address book entries as
a vCard or for the exchange of data with the computer (
¢ S. 26).
To use the phone numbers, dialing codes (international and local area code) must be saved to the
telephone.
Operating Bluetooth devices
User guides for devices
Activating/deactivating Bluetooth mode
¤ . . . use to select Bluetooth OK Activation Change ( = activated)
If the local area code is still not saved: . . . use to enter the local area code OK (
¢ p. 33)
When in idle status, the activated Bluetooth mode is indicated on the handset by the icon.
Bluetooth is activated and the devices have been registered to the handset.
The headset features the Headset or Handsfree Profile. If both profiles are available, the
handsfree profile is used to communicate.
Page 25

Bluetooth 25
Registering Bluetooth devices
The distance between the handset in Bluetooth mode and the acti vated Bluetooth device (headset or data
device) should be no more than 10 m.
¤ . . . use to select Bluetooth OK Search for Headset / Search Data Device OK
. . . the search starts (may take up to 30 seconds) . . . the names of found devices are displayed . . . pos-
sible options:
Editing the list of known (trusted) devices
Opening the list
¤ . . . use to select Bluetooth OK Known Devices OK . . . the known devices are
listed, an icon indicates the type of device
If a device is connected, the corresponding icon is shown in the display header instead of .
Editing entries
¤ . . . use to select Bluetooth OK Known Devices OK . . . use to select an
entry . . . possible options:
Rejecting/accepting a non-registered Bluetooth device
If a Bluetooth device that is not registered in the list of known devices tries to connect with the handset,
you will be prompted on the display to enter the PIN for the Bluetooth device (bonding).
Changing the Bluetooth name of the handset
The handset is shown by this name on another Bluetooth device.
¤ . . . use to select Bluetooth OK Own Device OK . . . the name and the device
address are shown Change . . . use to change the name Save
The registration of a headset overwrites a previously registered headset.
If a headset is to be registered that is already registered with a different device, this connection
must be deactivated before registering.
Register device:
¤ Options Trust Devi ce OK . . . use to enter the PIN of the Blue-
tooth device to be registered OK . . . the dev ice is ad ded to th e li st o f kn own
devices
Display information about a device:
¤ . . . use to select a device, if necessary View . . . the device name and
device address are displayed
Repeat search:
¤ Options Repeat Search OK
Cancel search:
¤ Cancel
Bluetooth headset
Bluetooth data device
View an entry:
¤ View . . . the device name and device address are displayed To go back,
press OK
De-register a Bluetooth device:
¤ Options Delete entry OK
Edit name:
¤ Options Edit Name OK . . . use to edit the name Save
If an active Bluetooth device is de-registered, it may try to re-connect as a "non-registered
device".
Reject:
¤ Press the End call key briefly.
Accept:
¤ . . . use to enter the PIN of the Bluetooth device to be accepted OK . . . wait for
PIN confirmation . . . then
Add the device to the list of known devices: Ye s
Use the device temporarily: No . . . the Bluetooth connection can be used as long as the
device is located within the transmission range or until it is switched off
Page 26

26 Additional functions using the PC interface
Additional functions using the PC interface
QuickSync functions:
• Sync the handset's directory with Outlook
• Upload CLIP pictures (.bmp) from the computer to the handset
• Upload pictures (.bmp) as screensavers from the computer to the handset
• Upload sounds (ringtone melodies) from the computer to the handset
• Update the firmware
¤ Connecting the handset to the computer via Bluetooth ( p. 24) or via a USB data cable ( p. 10).
Transferring data
¤ Launch the Gigaset QuickSync program on the computer.
The mes sage Data transfer in progress is shown on the display while data is b eing transferred between the
handset and PC. During this time, it is not possible to enter any data using the keypad and incoming calls
are ignored.
Carrying out a firmware update
¤ Connect the telephone and PC using a USB data cable ( p. 10) Launch Gigaset QuickSync
Establish the connection to the handset
¤ Start the firmware update in Gigaset QuickSync . . . Information about this can be found in the Gigaset
QuickSync help
The update process may take up to 10 minutes (not including the download time).
The data is first downloaded from the online update server. The amount of time this takes depends on the
speed of the Internet connection.
The display on your phone is switched off and the Message key and the Talk key start flashing.
Once the update is complete, your phone will automatically restart.
Procedure in the event of an error
If the update procedure fails or the phone does not work properly following the update, repeat the update
procedure:
¤ End the "Gigaset QuickSync" program on the PC Remove the USB data cable from the phone
Remove the battery ( p. 8) Replace the battery
¤ Carry out the firmware update again as described above
If the update procedure fails several times or you can no longer connect to the PC, carry out an Emergency
Update:
¤ End the "Gigaset QuickSync" program on the PC Remove the
USB data cable from the phone Remove the battery ( p. 8)
¤ Press and hold keys and at the same time with the
forefinger and middle finger Replace the battery
¤ Release keys and . . . the Message key and the
Talk key flash alternately
¤ Carry out the firmware update as described above
The Gigaset QuickSync program has been installed on the computer.
Free to download at wiki.unify.com/wiki/OpenScape_DECT_Phone_S5
Connect the handset directly to the PC, not via a USB hub.
Data transfer using Bluetooth:
• The computer has Bluetooth capability.
• A USB data cable is not plugged in. If a USB data cable is plugged in during an existing
Bluetooth connection, the Bluetooth connection is interrupted.
Do not interrupt the process and do not remove the USB data cable.
Page 27

Additional functions using the PC interface 27
Always save pictures and sounds uploaded onto the handset on the PC also, as they
are deleted during an Emergency Update.
Page 28

28 Multiple handsets
Multiple handsets
Registering a handset to multiple base stations
The handset can be registered to up to four base stations. The active base station is the base station to
which the handset was last registered. The other base stations remain saved in the list of available base
stations.
¤ . . . use to select Settings OK Registration OK Select Base OK . . . pos-
sible options:
Registering/de-registering the handset
A handset can be registered to up to four base stations (systems).
Change active base
station:
¤ . . . use to select the base station or Best Base Select ( = selected)
Best Base: The handset chooses the base station with the best reception as
soon as it loses connection to the current base station.
Change name of a base station:
¤ . . . use to select a base station Select ( = selected) Name
change name Save
Please contact your service engineer concerning registering and de-registering handsets.
Page 29

Adjusting the handset settings 29
Adjusting the handset settings
Changing the language
¤ . . . use to select Settings OK Language OK . . . use to select the
language Select ( = selected)
If the handset has been changed to an incomprehensible language:
¤ Press the keys slowly in succession . . . use to select the correct language
press the right display key
Display and keypad
Screensaver
A dialog or analog clock, Info Services and a range of pictures can be selected to be displayed as
a screensaver when in idle status.
¤ . . . use to select Settings OK Display & Keypad OK Screensaver Edit
( = on) . . . then
The screensaver is activated approx. 10 seconds after the display has changed to idle status.
End screensaver
¤ Press the End call key briefly . . . the idle display appears
Large font
You can increase the font size of text and icons in call lists and in the directory in order to improve legibility.
Only one entry is shown in the display and names are abbreviated if necessary.
¤ . . . use to select Settings OK Display & Keypad OK Large Font Edit
(= on)
Color scheme
The display may appear in a range of color combinations.
¤ . . . use to select Settings OK Display & Keypad OK Colour Schemes
OK . . . use to select the desired color scheme Select ( = selected)
Display backlight
The display backlight always illuminates when the handset is taken out of the base station/charging cradle
or a key is pressed. Any digit keys that are pressed appear on the display for pre-dialing.
Switch the display backlight on/off when in idle status:
¤ . . . use to select Settings OK Display & Keypad OK Display
Backlight OK . . . then
Switch on/off:
¤ Activation: . . . use to select On or Off
Select screensaver:
¤ Selection . . . use to select a screensaver (Digital Clock / Analog
Clock / <Pictures > / Slideshow)
View screensaver:
¤ View
Save selection:
¤ Save
All pictures from the Screensaver folder of the Resource Directory (
¢ p. 23) are available for
selection.
Backlight in the charging cradle:
¤ In Charger: . . . use to select On or Off
Backlight when not in the charging cradle:
¤ Out of Charger . . . use to select On or Off
Save selection:
¤ Save
Page 30

30 Adjusting the handset settings
Switching the keypad illumination on/off
¤ . . . use to select Settings OK Display & Keypad OK Key
Illumination Change (= on)
Activating/deactivating automatic keypad lock
Automatically lock the keypad when the handset has been in idle status for around 15 seconds.
¤ . . . use to select Settings OK Display & Keypad OK Auto
Keypadl ock Change (= on)
Activating/deactivating auto answer
When set to auto answer, the handset accepts an incoming call as soon as it is removed from the charging
cradle.
¤ . . . use to select Settings OK Te lep hon y OK Auto Answer Change
( = on)
Regardless of the Auto Answer setting, the connection ends as soon as you place the handset back in the
charging cradle. Exception: Press and hold the handsfree key for a further 2 seconds while placing the
handset in the charging cradle.
Changing the earpiece and speaker volume
You can set the volume of the earpiece and speaker at 5 levels independently of each other.
During a conversation
¤ Press the volume keys / on the right side of the handset
or
¤ Handset Volume . . . use to select the volume Save . . . the setting is saved
In idle status
¤ . . . use to select Audio Settings OK Handset Volume OK . . . then
Ringtones
Ringtone volume
¤ . . . use Audio Settings OK Ringtones (Handset)
OK Volume OK . . . use to select For internal calls and alarms
or External Calls . . . use to set the volume in 5 increments or in cre-
scendo mode (increasing volume) Save
The handset's standby time may be significantly reduced if the display backlight is activated.
The setting will be saved automatically after approx. 3 seconds without saving.
For the earpiece:
¤ Earpi ece: . . . use to set the volume
For the speaker:
¤ Speaker . . . use to set the volume
Save setting:
¤ Save
When the telephone rings, you can permanently change the ringtone volume using volume
keys (louder) or (quieter).
Volume
For internal calls
and alarms:
< >
External Calls:
Back Save
Example
Page 31
Adjusting the handset settings 31
Ringtone melody
Set a variety of ringtones for internal and external calls.
¤ . . . use Audio Settings OK Ringtones (Handset) OK Melodies OK . . .
use to select the connection . . . use to select the ringtone/melody in each case Save
Activating/deactivating the ringtone
Deactivating the ringtone permanently
¤ Press and hold the key. The icon appears in the status bar
Activating the ringtone permanently
¤ Press and hold the key.
Deactivating the ringtone for the current call
¤ Silence Press Silence or the End call key
Activating/deactivating the vibration alarm
Incoming calls and other messages are indicated by a vibration.
¤ . . . use Audio Settings OK Silent Alert Change ( = on)
Activating/deactivating advisory tones
The handset notifies acoustically about different activities and statuses. These advisory tones can be
activated/deactivated independently of each other.
¤ . . . use Audio Settings OK Advisor y Tones OK . . . then
Fast access to numbers and functions
Number keys: The keys and to can each be assigned a number from the directory.
Display keys: The left and right display keys have a function preset by default, but the keys can be re-
assigned.
The number is then dialed or the function started by simply pressing a key.
Assigning a number to digit keys (quick dial)
¤ Press and hold the digit key
or
¤ Press the digit key briefly Press the display key Quick Dial
The directory opens.
¤ . . . use to select an entry OK . . . use to select a number if required OK . . . the entry is
saved to the digit key
Tone when keys are
pressed:
¤ Key Tones: . . . use to select On or Off
Confirmation/error tone after making entries, advisory tone when a new message has been
received:
¤ Co nfirmation . . . use to select On or Off
Warning tone when there are fewer than 10 minutes of talktime remaining (every
60 seconds):
¤ Battery . . . use to select On or Off
Warning tone when the handset is moved out of range of the base station:
¤ Out of Range: . . . use to select On or Off
Save setting:
¤ Save
You have to assign a number to the digit key.
If you delete or edit the entry in the directory at a later date, this will not affect the assignment
to the number key.
Page 32

32 Adjusting the handset settings
Dialing a number
¤ Press and hold the digit key . . . the number is dialed immediately
or
¤ Press the digit key briefly . . . the number/name (possibly in abbreviated form) is shown on the left dis-
play key . . . press the display key . . . the number is dialed
Changing the digit key assignment
¤ Press the digit key briefly Change . . . the directory is opened . . . possible options:
Assigning display keys, changing assignments
¤ Press and hold the left or right display key in idle status . . . the list of possible key assignments is
opened . . . use to select a function OK . . . possible options:
Starting a function
With the telephone in idle status: Press the display key briefly . . . the assigned function is executed
Changing the handset PIN
The handset is PIN-protected to prevent unauthorized use (default setting: 0000). Each time you turn on
the handset, the PIN is requested.
Change the handset's 4-digit PIN (default setting: 0000):
¤ . . . use to select Se ttings OK System OK Handset PIN OK . . . use
to enter the current handset PIN OK . . . use to enter the new handset PIN OK
Resetting the handset to the default settings
Reset any individual settings and changes that you have made.
¤ . . . use to select Settings OK System OK Handset Reset OK Ye s
. . . the handset's settings are reset
The following settings are not affected by the reset:
• Registration of the handset to the base station
• Date and time
• Directory entries and call lists
• SMS lists
Change the
assignment:
¤ . . . use to select an entry OK . . . select a number if
required OK
Delete the
assignment:
¤ Clear Key
Quick Dial Assign a number from the directory to the display key ( p. 31)
Alarm Clock Set and activate/deactivate the alarm clock ( p. 20)
Calendar Open the calendar ( p. 18)
Bluetooth Open the Bluetooth menu ( p. 24)
Redial Show the redial list ( p. 13)
More Functions...
¤ OK . . . use to select other function
Call Lists Show the call list
( p. 54)
Call Divert Activate/deactivate call forwarding ( p. 77)
Page 33

System 33
System
Date and time
To ensure you have the correct time for incoming calls and to use the alarm clock and calendar, for
example, the date and time have to be set.
If the date and time have not yet been set on the handset, the display key Time appears.
¤ Press the display key Time
or
¤ . . . use to select Settings OK Date/Time OK . . . then
Own area code
The area code (international and local area code) must be saved on the
phone in order to transfer phone numbers (e.g. in vCards)
Some of these numbers are already preset.
¤ . . . use to sele ct Se ttings OK Telephony OK
Area Codes OK Check (pre-)set area code
Edit the number:
¤ . . . use to select/switch entry field . . . use to change entry
position . . . delete digit if appropriate . . . use to enter
digit Save
Restoring the phone to default settings
When the settings are reset
• the date and time are retained,
• handsets are still registered,
• the system PIN is retained,
• Maximum Rangeis activated and No Radiation is deactivated.
¤ . . . use to select Settings OK Sy stem OK Base Reset OK . . . use
to enter the system PIN OK Ye s . . . the base station i s restarted. The restar t takes around 10 sec-
onds.
Sett the date:
¤ Date: . . . use to enter the day, month and year in 8-digit format.
e.g. for 14/01/2014
Set the time:
¤ Time . . . use to enter hours and minutes in 4-d igit format
e.g. for 07:15
Save setting:
¤ Save
Area Codes
International code:
00 - 49
Local area code:
0 - [8 ]
Save
Example
Page 34

34 Questions and answers
Questions and answers
Manufacturer's advice
Authorization
Depending on the variant, this device is intended for analog phone lines in the German/Luxembourg or
Austrian network (see device label).
Country-specific requirements have been taken into consideration.
We, Unify Software and Solutions GmbH & Co. KG, declare that this device meets the essential requirements and other relevant
regulations laid down in Directive 1999/5/EC.
The EU declaration of conformity for your country under 1999/5/EC can be found at:
wiki.unify.com/wiki/Declarations_of_Conformity#Cordless_Phones.
This declaration may also be available in the files "International Declarations of Conformity" or "European
Declarations of Conformity" in some cases.
Therefore please also read these files.
The display is blank.
• The handset is not switched on. Press and hold
• The battery is empty. Charge the battery or replace it ( p. 8)
"No Base" flashes on the display.
• The handset is outside the range of the base. Reduce the distance between the handset and base
"Please register handset" flashes on the display.
• The handset is not yet registered or was de-registered when another handset was registered.
Register the handset again
The handset does not ring.
• The ringtone is deactivated. Activate the ringtone ( p. 31)
• The phone does not ring during a specific period or for certain numbers.
¤ Check the time control for external calls ( p. 21)
The other party cannot hear you.
• The handset is "muted". Reactivate the microphone ( p. 14)
The caller's number is not displayed.
• Calling Line Identification (CLI) is not enabled for the caller. The ca ller should ask the network
provider to enable Calling Line Identification(CLI).
• Calling Line Identification Presentation (CLIP) is not supported or enabled by the network provider.
Ask the network provider to enable Calling Line Identification Presentation (CLIP).
• The phone is connected via a PABX or a router with an integrated PABX (gateway) that does not forward
all information.
¤ Reset the system: Pull out the power plug briefly. Reinsert the plug and wait until the device restarts.
¤ Check the settings on the PABX and activate phone number display if necessary. To do this, search
for terms such as CLIP, calling line identification, telephone number identification, caller ID, ... in the
system user guide or ask the system manufacturer.
You hear an error tone when keying in (descending tone sequence).
• Action has failed/invalid input. Repeat the process. Read the display and refer to the user guide if
necessary.
No time is specified for a message in the call list.
• The date/time are not set. Set the date and time.
Registration or connection problems with a Bluetooth headset.
¤ Reset the Bluetooth headset (see the user guide for the headset).
¤ Delete the registration data on the handset by de-registering the device ( p. 24).
¤ Repeat the registration process ( p. 25).
Page 35

Manufacturer's advice 35
Disposal
Batteries should not be disposed of in general household waste. Observe the local waste disposal regulations, details of which can be obtained from your local authority. Dispose of batteries in the green boxes
designated as "common collection system for batteries" at specialist retailers.
All electrical and electronic products should be disposed of separately from the municipal waste stream
via designated collection facilities appointed by the government or the local authorities.
This crossed-out wheeled bin symbol on the product means the product is covered by the
European Directive 2002/96/EC.
The correct disposal and separate collection of your old appliance will help prevent potential
negative consequences for the environment and human health. It is a precondition for reuse and
recycling of used electrical and electronic equipment.
For more detailed information about disposal of your old appliance, please contact your local authority
refuse center or waste disposal service.
Care
Always use a damp or antistatic cloth to clean the device. Do not use solvents or microfiber cloths.
Never use a dry cloth as this can cause a static charge.
In rare cases, contact with chemical substances can cause changes to the device's exterior. Not all
substances have been tested due to the wide variety of chemical products available on the market.
Impairments to high-gloss finishes can be carefully removed using display polishes for mobile phones.
Contact with liquid
If the device comes into contact with liquid:
1 Disconnect it from the power supply.
2 Remove the batteries and leave the battery compartment open.
3 Allow the liquid to drain from the device.
4 Dab all components dry.
5 Place the handset in a dry, warm place for at least 72 hours with the battery compartment open and
keypad (if applicable) facing down (not in a microwave, oven, etc...).
6 Do not switch on the device aga in until it is completely dry.
When it has fully dried out, you will usually be able to use it again.
!
Page 36

36
Technical data
Batteries
Handset operating times/charging times
The operating time of your handset depends on the capacity and age of the battery and the way it is used.
(All times are maximum possible times).
Power consumption of base station
General specifications
Bluetooth
Technology: 2 x AAA NiMH
Voltage: 1.2 V
Capacity: 750 mAh
Standby time (hours) * 165
Talktime (hours) 12
Operating time with 1.5 hrs of calls per day (hours) * 95
Charging time in base station (hours) 5
Charging time in charging cradle (hours) 7
* without display backlight (Setting the display backlight
p. 29)
The operating times of the phone can be extended by using a more powerful battery.
In standby mode: Handset in charging cradle
Handset not in charging cradle
approx. 1.2 W
approx. 0.55 W
During a call: approx. 0.65 W
DECT standard Supported
GAP standard Supported
No. of channels 60 duplex channels
Radio frequency range 1880-1,900 MHz
Duplex mode Time division multiplexing, 10 ms frame length
Pulse repetition rate 100 Hz
Pulse transmission length 370 µs
Channel grid 1728 kHz
Bit rate 1152 kbit/s
Modulation GFSK
Language code 32 kbit/s
Transmission power 10 mW, average power per channel, 250 mW pulse power
Range Up to 50 m indoors, up to 300 m outdoors
Base station power supply 230 V ~/50 Hz
Environmental conditions for operation +5 °C to +45 °C; 20 % to 75 % relative humidity
Dialing mode DTMF (tone dialing)/ PD (pulse dialing)
Radio frequency range 2402-2480 MHz
Transmission power 4 mW pulse power
Page 37

37
Character charts
Standard characters
Press the relevant key the
indicated number of times.
Central Europe
Press the relevant key the
indicated number of times.
Cyrillic
Press the relevant key the
indicated number of times.
Greek
Press the relevant key the
indicated number of times.
Tur ki sh
Press the relevant key the
indicated number of times.
1) Space
2) Line break
1x 2x 3x 4x 5x 6x 7x 8x 9x 10x
1
abc2дбавгз
def 3лйик
gh i4ïíìî
jkl5
mno6цсутфх
pq r s7ß
tuv8üúùû
wx y z 9ÿ ýæøå
.,?! 0
1)
2)
1) Space
1x 2x 3x 4x 5x 6x 7x 8x 9x 10x
1$¤
abc2ąäáâćç
def 3ďęëéě
gh i 4 í î
jkl5ł
mno6ńňóöőô
pq r s7 ř ß ś š
tuv8t'űüúů
wx y z 9ý ź ż ž
-.0
1)
1) Space
2) Line break
1x 2x 3x 4x 5x 6x 7x 8x 9x 10x
1
a2abc
ë3de f
4gh i
5 j k l
6mno
yx7pqrs
8tuv
l 9 w x y z
.,?! 0
1)
2)
1) Space
2) Line break
1x 2x 3x 4x 5x 6x 7x 8x 9x 10x 11x 12x
1
αβά2abc
δεφέ3de f
γηιήίϊΐ4ghi
κλ5j kl
νοωόώ6mno
πρ σψ7pqr s
θτ8t uv
ζξυχύϋΰ9wx yz
.,?! 0
1)
2)
1) Space
2) Line break
1x 2x 3x 4x 5x 6x 7x 8x 9x 10x
1
abcз2дбавг
def 3лйик
gğh ıi4ïíìî
jkl5
mnoц6сутфх
prs ş7qß
tuüv8úùû
yz9wxÿæøå
.,?! 0
1)
2)
Page 38

38
Arabic
Press the relevant key the
indicated number of times.
1) Space
2) Line break
1x 2x 3x 4x 5x 6x 7x 8x 9x 10x 11x
1
abc2
de f 3
gh i 4
jkl5
mn o 6
pq r s
tuv
wx y z
., ! 0
1)
2)
Page 39

Display icons 39
Display icons
The following icons are displayed dependent on the settings and the operating status of your telephone.
Icons in the status bar
Display key icons
Display icons to indicate . . .
Other display icons
Icon Meaning
Signal strength (No Radiation off)
1% -100%
white, if Maximum Range on;
green, if Maximum Range off
Red: no connection to the base
station
No Radiation activated:
white, if Maximum Range on;
green, if Maximum Range off
Profile Silent activated (ringtone
switched off)
"Beep" ringtone activated
Keypad lock activated
Battery charge status:
White: between 11% and 100%
charged
Red: less than 11% charged
Flashing red: battery almost empty
(approx. 5 minutes of talktime left)
Battery is charging
(current charge status)
0% - 100%
Icon Meaning
Icon Meaning
Last number redial
Delete text
Open the directory
Copy number to the directory
Icon Meaning
Icon Meaning
External call
Internal call
Establishing a call (outgoing call)
Connection established
No connection established/
connection terminated
Reminder for appointment
Reminder for anniversary
Wake-up call
Icon Meaning
Icon Meaning
Alarm clock is on, display with alarm
time
Action complete (green)
Action failed (red)
Information
(Security) prompt
Please wait...
Icon Meaning
Page 40

40 Menu overview
Menu overview
Open the main menu: press this key when the handset is in idle mode
Not all of the functions described in this user guide are available in all countries or from all
network providers.
Alarm Clock
p. 20
Bluetooth
p. 24
Activation p. 24
Search for Headset p. 25
Search Data Device p. 25
Known Devices p. 25
Own Device p. 25
Additional Features
Resource Directory p. 18
Call Lists
p. 54
Audio Settings
Handset Volume p. 30
Advisory Tones p. 31
Silent Alert p. 31
Ringtones (Handset) Volume p. 30
Melodies p. 31
Time Control p. 21
Silent Charging
p. 21
Answer Machine
No function
Organiser
Calendar p. 18
Missed Alarms p. 18
Directory
p. 15
Page 41

Menu overview 41
Settings
Date/Time p. 33
Display & Keypad Screensaver p. 29
Large Font p. 29
Colour Schemes p. 29
Display Back light p. 29
Key Illumination p. 30
Auto Keypadlock p. 30
Language p. 29
Registration Register Handset p. 28
De-register Handset p. 28
Select Base p. 28
Telephony Auto Answer p. 30
Area Codes p. 33
System Handset Reset p. 31
Handset PIN p. 32
Base Reset p. 33
Page 42

42 Making calls to multiple parties
Making calls to multiple parties
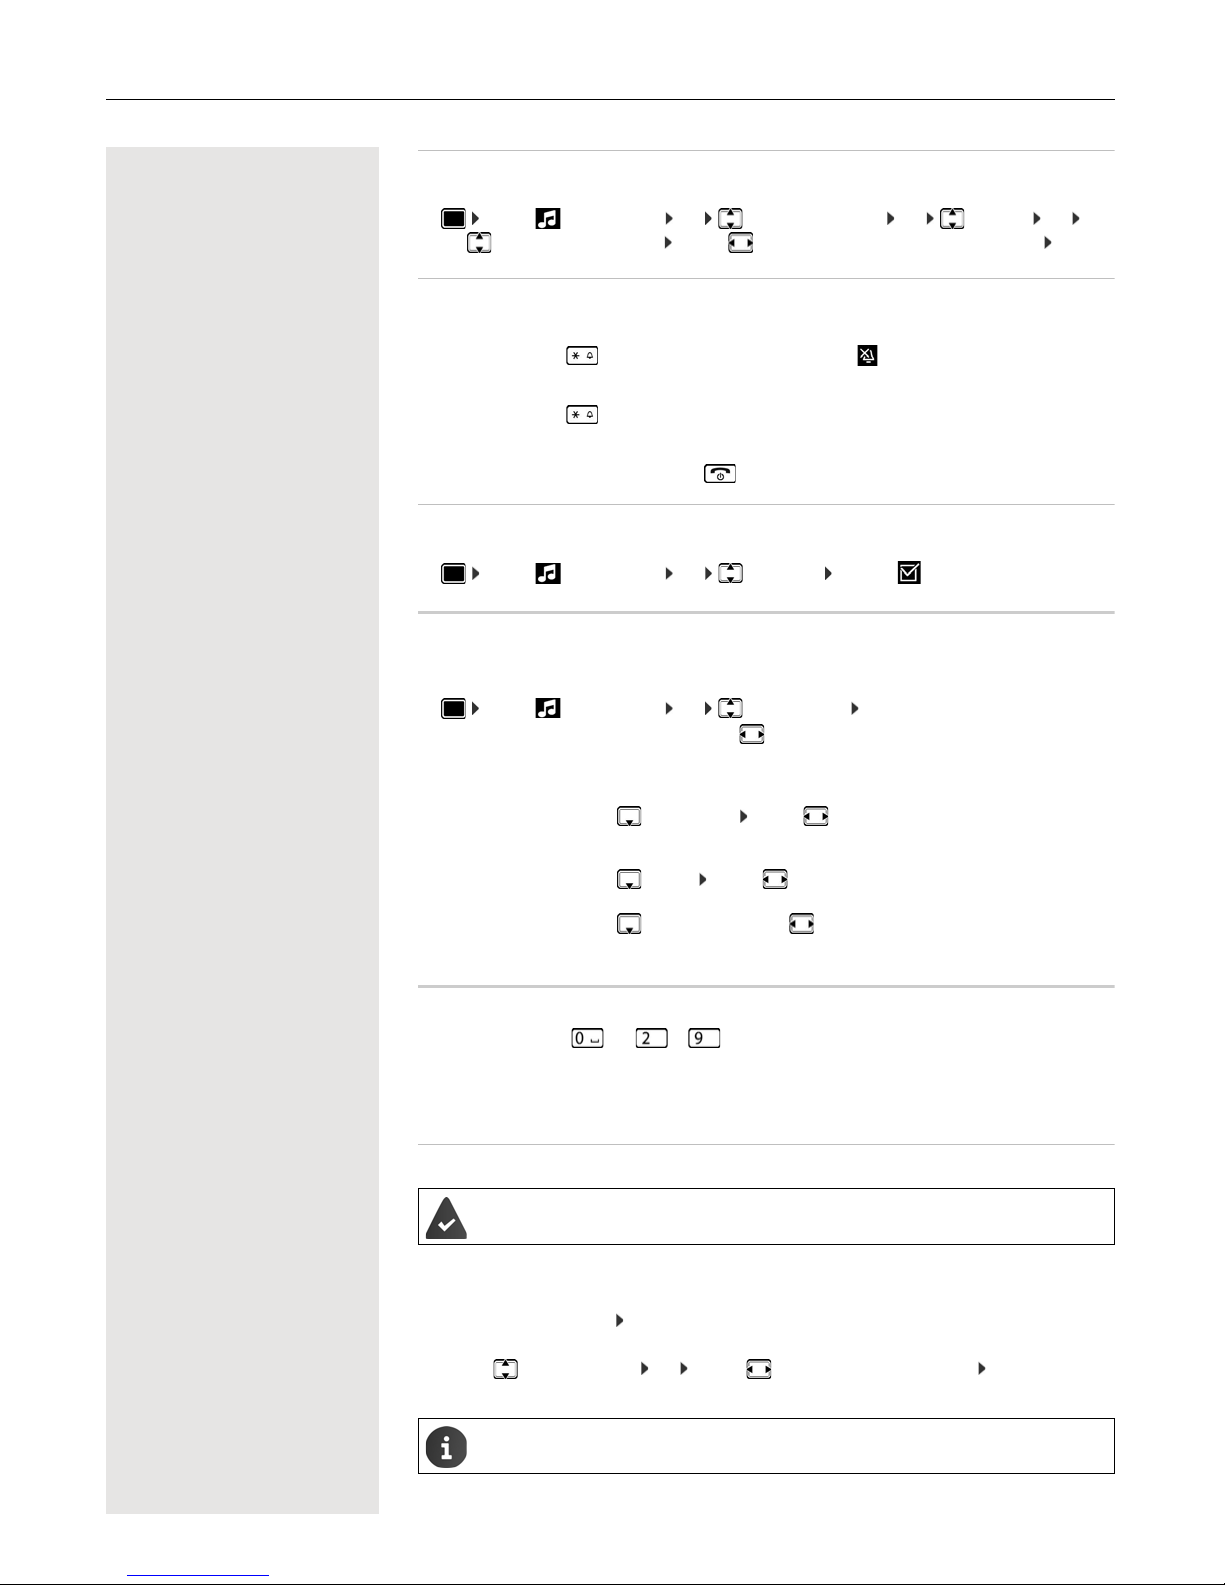
Transferring a call
Transferring a call means that you wish to hand over a call you are conducting
on your handset to another user.
Transfer (without announcing the transfer)
p You can use this function to forward a call you answered to another user.
S Press the key shown.
or Press the display key. The current call is placed "on hold", so that the first user
waits.
o Enter the phone number of the user to whom the call is to be transferred. The
current call is placed "on hold", so that the first user waits.
p The number is dialed.
a Press the End call key. The destination user's phone rings. He or she picks up
the call by lifting the handset.
You receive a recall:
• If the required user does not answer for some time after the transfer.
Transfe r (announcing the transfer)
p You can use this function to forward a call you answered to another user.
S Press the key shown.
or Press the display key. The current call is placed "on hold", so that the first user
waits.
o Enter the phone number of the user to whom the call is to be transferred.
p The number is dialed. The station answers. You announce the call presently on
hold.
a Press the End call key. The user takes the call.
Inquiry
Inquiry
Page 43

Making calls to multiple parties 43
Toggling (switchin g between calls)
The Toggle function allows you to switch between two users without allowing
them to speak to each other directly. The two users can be either external or
internal users. You can also withdraw from the calls and connect the two users
with each other. You can also start a conference.
p You are conducting a call.
S Press the key shown.
or Press the display key. The current call is placed "on hold", so that the first user
waits.
o Enter the phone number of the second user.
p The second user answers.
Press the display key to switch between the two c alls.
When you end a call, the two users are connected with each other (not possible
when both users are external).
Inquiry
Toggle
Page 44

44 Making calls to multiple parties
Conducting a conference
You can connect up to 3 internal or external partners with each other in a
telephone conference.
Setting up a c onference
You decide to set up a conference while talking to a user.
p You are on a call and wish to start a conference.
S Press the key shown.
or Press the display key.
o Enter the phone number of the new user.
p The user is free and answers the phone. You announce the conference.
Open the system menu.
> < [Select the menu item and confirm.
You and your two partners are connected in a conference call.
Ending a conference
p You are connected with two or more partners in a conference call.
Open the system menu.
> < [Select the menu item and confirm. The first party is disconnected from the
conference.
> < [Select the menu item and confirm. The second party is disconnected from the
conference.
a Press the End call key. The conference is ended.
Leaving a co nference
a Press the End call key. You exit the conference.
When one user leaves the conference, the other two users remain connected.
Enquiry
Menu
Conference
Menu
Sub. 1 hang up?
Sub. 2 hang up?
Page 45

Index 45
Index
A
Advisory tones ......................................... ...... ....... ... 31
Alarm .............................. .......................... ................ 20
Alarm clock .............................................................. 20
switching on/off ..... ...... ...... ....... ...... ....... ...... ....... ... 20
Anniversary, see Appointment
Appointment
displaying missed .................................................. 18
missed ......................... ................... .................... ... 18
notification ................... .......................................... 18
setting ................................................................... 18
Assigning number key .............................................. 31
Authorization ............................................................ 34
Automatic
answer .................................................................. 30
redial ..................................................................... 13
B
Base station
changing ............................................................... 28
changing the name ............................................... 28
restoring to default settings ...................................33
setting ................................................................... 33
Battery
charge status ........................................................ 39
charging .................................................................. 9
inserting .................................................................. 8
Best Base ................................................................. 28
Bluetooth ........................ .......................................... 24
activating ............... ............................................. ...24
changing device name .......................................... 25
copying directory (vCard) ...................................... 17
de-registering devices ........................................... 25
list of known devices ............................................. 25
registering devices ................................................ 25
C
Calendar ..................................................................18
Call
accepting ..................... ................... .................... ... 14
external ................................................................. 13
Call answering ......................................................... 30
Caller Melody (VIP) ..................................................15
Calling
external ................................................................. 13
Caring for your device ..............................................35
Changing
display language ................................................... 29
earpiece volume ................................................... 30
speaker volume .................................................... 30
Changing device names (Bluetooth) ........................ 25
Character charts ...................................................... 37
Charge status of the batteries .................................. 39
Charging cradle (handset)
connecting .............................................................. 8
installing ......................... ......................................... 8
CLIP picture ............................................................. 31
viewing in resource directory ................................ 23
CLIP picture, in directory .......................................... 15
Color scheme ........................................................... 29
Conference
ending ................................................................... 44
leaving .................................................................. 44
setting up .............................................................. 44
Connect with base station ........................................ 28
Connecting the headset ............................................. 9
Contact with liquid .................................................... 35
Control key .... ....... ...... ....... ...... ....... ...... ....... ...... ... 5, 11
Correcting incorrect entries ...................................... 12
D
Delayed extension dialing ........................................ 13
De-registering devices (Bluetooth) ........................... 25
Dialing
from the directory ........................ ...... ....... ...... ....... 13
from the redial list ................................................. 13
using quick dial ..................................................... 31
Directory .................................................................. 15
copying numbers .................................................. 17
copying vCard (Bluetooth) .................................... 17
creating an entry ................................................... 15
dialing numbers .................................................... 13
entry ............................... ....................................... 15
memory ................................ ................................. 16
opening ................................................................. 15
order of entries ...................................................... 16
searching .............................................................. 15
selecting an entry ........... ...... ....... ...... ....... ...... ....... 15
sending entry/list to handset ................................. 17
Display
backlight ............................... .......................... ....... 29
changing display language ................................... 29
color scheme ........................................................ 29
memory in the directory ........................................ 16
missed appointment/anniversary .......................... 18
screensaver .......................................................... 29
setting ................................................................... 29
Display icons ............................................................ 39
Page 46

46 Index
Display keys .........................................................5, 11
assigning ............... ............................................. ...31
icons ............................ ................... .................... ... 39
Do not disturb ........................................................... 31
switching off ringtone when in charging cradle ..... 21
time control ........................................................... 21
E
Earpiece volume ......................................................14
End call key .......................................................... 5, 13
Entering special characters ......................................12
Entering special letters ............................................. 12
Entering text ............................................................. 12
Entering umlauts ...................................................... 12
Environment ................... .......................................... 35
Extension systems, dialing in
(delayed extension dialing) ...................................... 13
F
Fast access ........................................................13, 31
Firmware update ......................................................26
G
Getting started ........................................................... 8
Gigaset QuickSync .................................................. 22
H
Handset
advisory tones .......................................................31
automatic keypad lock .......................................... 30
changing the settings ............................................ 29
changing to a different base station ...................... 28
changing to best reception ....................................28
color scheme ......... ...... ...... ....... ...... ....... ...... ....... ... 29
connecting the charging cradle ............................... 8
display backlight .................................................... 29
display language ................................................... 29
earpiece volume .... ...... ...... ....... ...... ....... ...... .... 14, 30
idle status ..............................................................12
keypad illumination ............................... ...... ....... ... 30
muting ................................................................... 14
registering ............................................................. 28
registering to another base station ........................28
restoring to default setting .....................................31
setting up for use .................................................... 8
speaker volume ...............................................14, 30
switching on/off ..... ...... ...... ....... ...... ....... ...... ....... ... 11
using multiple ........................................................ 28
Handset charging time ....................................... 36, 37
Handset operating time ......................................36, 37
Handsfree key .......................................................... 14
Handsfree mode ...................................................... 14
Hash key ..................................................... ...... ....... .. 5
Headset (Bluetooth) ................................................. 24
Headset port ............................................................ 10
Hearing aids ............................................................... 7
Help ......................................................................... 34
I
Icons
alarm clock ............................................................ 20
indications ............... .............................................. 39
on display keys .............. ...... ....... ...... ....... ............. 39
status bar .............................................................. 39
Idle status
returning to .............. ....... ...... ....... ...... ....... ...... ....... 12
Illumination, keypad ................................................. 30
Indications, icons ..................................................... 39
K
Key 1 (fast access) .................................................... 5
Key, assigning ......................................................... 31
Keypad illumination ........................ ...... .................... 30
Keypad lock, automatic ........................ ....... ...... ....... 30
Keys
control key ........................................................ 5, 11
display keys ...................................................... 5, 11
end call key ....................................................... 5, 13
fast access .............................................................. 5
handsfree ............................. ................................. 14
hash key .................................................. ...... ....... .. 5
menu .............................. ....................................... 11
message key ........................................................... 5
on/off key ................................................................ 5
profile key ............................................................... 5
recall key ................................................................. 5
star key ................................................................... 5
talk key .................... ....... ...... ....... ...... ....... ...... ......... 5
volume .................................................................. 11
volume keys ............................................................ 5
L
Language, display ................................................ 9, 29
Liquids ..................................................................... 35
List
known devices (Bluetooth) .................................... 25
Locking/unlocking the keypad .................................. 11
Lower/uppercase ..................................................... 12
Page 47

Index 47
M
Making calls
accepting a call ........... ...... ....... ...... ....... ...... ....... ... 14
external ................................................................. 13
Medical equipment .....................................................7
Melody
ringtone for internal/external calls .........................31
Memory in the directory ........................................... 16
Memory, resource directory ..................................... 24
Menu key .......................................... ....... ...... ....... ... 11
Message key ..............................................................5
Microphone ................................................................ 5
switching on/off ..... ...... ...... ....... ...... ....... ...... ....... ... 14
Missed appointments/anniversaries ......................... 18
Muting the handset ..................................................14
N
Number
copying to the directory ......................................... 17
saving in the directory ........................................... 15
Numbers
entering ................................................................. 12
O
On/off key ................................................................... 5
P
Package contents ...................................................... 8
PC interface .............................................................26
Phone
setting ................................................................... 33
Picture
as CLIP image ...................................................... 23
as screensaver ......................................................23
deleting ................................................................. 23
formats .............................. .................................... 23
renaming ............................................................... 23
Picture CLIP ............................................................. 31
Power adapter ............................................................ 7
Power consumption ................................................. 36
Profile key ..................................................................5
Protection from calls ................................................ 31
Q
Questions and answers ........................................... 34
R
Range ........................................................................ 8
Recall ................................ ....................................... 42
Recall key .................................................................. 5
Redial list ................................................................. 13
Registering (handset) ............................................... 28
Registering devices (Bluetooth) ............................... 25
Resource directory ..... ....... ........................... 22, 23, 31
memory ................................ ................................. 24
viewing CLIP picture ............................................. 23
Ringtone
changing ............................................................... 30
melody for internal/external calls .......................... 31
switching off when in charging cradle ................... 21
time control ........................................................... 21
Ringtones .......................... .......................... ............. 30
S
Safety notes ............................................................... 7
Screensaver ............................ ................................. 29
Searching in directory .............................................. 15
Setting the date .............................................. 9, 33, 41
Setting the system ................................................... 33
Setting the time .............................................. 9, 33, 41
Setting up for use, handset ........................................ 8
Signal strength ..... ...... ....... ...... ....... ...... ....... ...... ....... 39
Signal tone, see Advisory tones
Snooze mode (alarm clock) ..................................... 20
Sound
deleting ................................................................. 23
format ............................. ................... .................... 23
playback ............................... .......................... ....... 23
renaming ........................ ....................................... 23
Sounds for ringtones ............................ ....... ............. 23
Speaker ................................................................... 14
Speaker volume ....................................................... 14
Star key ...................................................................... 5
Status bar .................................................................. 5
icons ..................................................................... 39
Switching between calling partners ................... ....... 43
T
Talk key ..................................................................... 5
Technical data ............................... ...... ....... ...... ....... 36
Time control for external calls .................................. 21
Toggle/connect ........................................................ 43
Transfer ................................................................... 42
Troubleshooting
general ........................... ....................................... 34
Page 48

48 Index
U
Update .....................................................................26
Upper/lowercase ...................................................... 12
V
Vibration alarm .........................................................31
VIP group, classify directory entry ...........................15
VIP ringtone ...... ....... ...... ...... ....... ...... ....... ...... ....... ... 15
Volume
earpiece ................................................................ 30
handset speaker volume ....................................... 30
handset speaker/earpiece volume ........................14
speaker ................................................................. 30
Volume keys ........................................................ 5, 11
W
Warning tone, see Advisory tones
 Loading...