

Unifi OpenScape Mobile Pro V10 User Manual

OpenScape Mobile Pro V10, Android Devices
User Guide
A31003-M40A0-U101-03-7619

Provide feedback to further optimize this document to edoku@unify.com
As reseller please address further presales related questions to the responsible presales organization at Unify or
at your distributor. For specific technical inquiries you may use the support knowledgebase, raise - if a software
support contract is in place - a ticket via our partner portal or contact your distributor.
Our Quality and Environmental Management Systems
are implemented according to the requirements of the
ISO9001 and ISO14001 standards and are certified by an
external certification company.
Copyright © Unify Software and Solutions GmbH & Co. KG 08/07/2020
All rights reserved.
Reference No.: A31003-M40A0-U101-03-7619
The information provided in this document contains merely general descriptions or
characteristics of performance which in case of actual use do not always apply as described
or which may change as a result of further development of the products. An obligation to
provide the respective characteristics shall only exist if expressly agreed in the terms of
contract.
Availability and technical specifications are subject to change without notice.
Unify, OpenScape, OpenStage and HiPath are registered trademarks of Unify Software
and Solutions GmbH & Co. KG. All other company, brand, product and service names are
trademarks or registered trademarks of their respective holders.
unify.com

Contents
Contents
1 Introduction........................................................................................................................................................ 6
2 Getting Started...................................................................................................................................................8
2.1 How to Install OpenScape Mobile Pro.............................................................................................................8
2.2 How to Login to OpenScape Mobile Pro V10..................................................................................................8
2.3 How to Configure OpenScape Mobile Pro.......................................................................................................9
2.3.1 Permissions............................................................................................................................................. 10
2.3.2 Certificates...............................................................................................................................................11
3 Using Integrated or UC-only Configurations................................................................................................12
3.1 Call History..................................................................................................................................................... 12
3.1.1 How to Refresh the Call History List...................................................................................................... 13
3.1.2 How to Delete All Call History Records..................................................................................................13
3.2 Contacts..........................................................................................................................................................13
3.2.1 How to Add a Contact............................................................................................................................ 14
3.2.2 How to Edit a Contact.............................................................................................................................14
3.2.3 How to Delete a Contact........................................................................................................................ 15
3.2.4 Chat......................................................................................................................................................... 15
3.3 Conference.................................................................................................................................................... 15
3.3.1 How to Start a Conference..................................................................................................................... 16
3.3.2 How to Display Information about a Conference....................................................................................16
3.3.3 How to Chat with a Group......................................................................................................................16
3.3.4 How to Mail Confernece Participants..................................................................................................... 17
3.3.5 How to Remove a Conference............................................................................................................... 17
3.4 User................................................................................................................................................................ 17
3.4.1 How to Choose your Presence Status................................................................................................... 18
3.4.2 How to Edit your Timezone and Location.............................................................................................. 18
3.4.3 How to Choose your Preferred Device...................................................................................................18
3.4.3.1 How to Add a New Device.............................................................................................................. 19
3.4.4 How to Administer your Voicemail.......................................................................................................... 19
3.5 Settings tab.....................................................................................................................................................20
3.6 Making a Call................................................................................................................................................. 20
3.6.1 How to make a Call using Call History...................................................................................................21
3.6.2 How to make a Call using Contacts.......................................................................................................21
3.6.3 How to make Call using Search............................................................................................................. 22
3.7 Receiving a Call............................................................................................................................................. 23
3.7.1 How to Answer Calls on your Wi-Fi Device........................................................................................... 23
4 Using Voice-Only Configuration.................................................................................................................... 25
4.1 Call History..................................................................................................................................................... 25
4.2 User................................................................................................................................................................ 25
4.3 Settings tab.....................................................................................................................................................26
4.4 Making a Call................................................................................................................................................. 26
4.4.1 How to Make a Call using Dialpad.........................................................................................................27
4.5 Receiving a Call............................................................................................................................................. 27
4.5.1 How to Answer Calls on your Wi-Fi Device........................................................................................... 28
5 Handling Calls..................................................................................................................................................29
5.1 More on Making Calls.................................................................................................................................... 29
5.1.1 How to Make a Call in Callback mode................................................................................................... 29
5.2 More on Receiving Calls................................................................................................................................ 30
5.2.1 Changing where you can be Reached................................................................................................... 32
A31003-M40A0-U101-03-7619, 08/07/2020
OpenScape Mobile Pro V10, Android Devices, User Guide iii

Contents
5.2.2 Changing How Much Time each Device will Ring..................................................................................32
5.2.3 Receiving Calls from an OpenScape Voice Hunt Group........................................................................33
5.3 Moving Calls................................................................................................................................................... 34
5.3.1 How to Move a Call from the Wi-Fi Device to another Device...............................................................34
5.3.2 How to Move a Call from the Wi-Fi Device to another Wi-Fi Device (with the same number)................ 35
5.3.3 How to Move a Call from the Desk Phone to another Device................................................................36
5.3.4 How to Move a Call from the Cell Phone to another Device..................................................................36
5.3.5 How to Move a Call from any Preferred Device to another Device (UC-Only and Integrated
Configurations).............................................................................................................................................37
5.3.6 How to Cancel the Call Move................................................................................................................. 37
5.3.7 When Calls Cannot be Moved................................................................................................................38
5.3.7.1 Specific Scenarios........................................................................................................................... 38
5.4 Transferring Calls - Voice-Only and Integrated Configurations......................................................................39
5.4.1 How to Transfer a Call............................................................................................................................39
5.5 Secure Calls................................................................................................................................................... 40
5.6 Operating without OSV desk phone.............................................................................................................. 40
5.6.1 Additional Services..................................................................................................................................41
5.7 How to Use a Bluetooth Device.....................................................................................................................42
5.8 How to Retrieve Voice Mail Messages - Voice-Only and Integrated Configurations......................................42
5.9 How to Prevent Losing Wi-Fi Coverage while in a Wi-Fi Call....................................................................... 43
6 Settings.............................................................................................................................................................44
6.1 Application Settings........................................................................................................................................ 44
6.1.1 How to Clear Move History.....................................................................................................................45
6.1.2 How to Configure Voicemail....................................................................................................................45
6.1.3 How to Configure Call Forwarding..........................................................................................................45
6.2 Mobile Data Network Settings........................................................................................................................46
6.3 Notices and Disclaimers................................................................................................................................. 46
6.4 Advanced Settings........................................................................................................................................ 47
6.4.1 UC Options..............................................................................................................................................47
6.4.2 Ringtones.................................................................................................................................................47
6.4.3 Call Progress Tones................................................................................................................................48
6.4.4 More Options...........................................................................................................................................48
6.4.5 Certificate Management.......................................................................................................................... 49
6.4.6 Logging.................................................................................................................................................... 49
7 Certificates....................................................................................................................................................... 51
7.1 Root CA Certificate.........................................................................................................................................51
7.1.1 How to Install a Root CA Certificate.......................................................................................................52
7.1.2 How to Display an installed Root CA Certificate.................................................................................... 53
7.1.3 How to Remove a Root CA Certificate...................................................................................................53
7.2 Client Certificate............................................................................................................................................. 53
7.2.1 How to Install a Client Certificate........................................................................................................... 54
7.2.2 How to Manage the installed Client Certificates.....................................................................................55
7.3 Server Certificate............................................................................................................................................56
7.3.1 How to configure Server Certificate validation........................................................................................56
8 Troubleshooting...............................................................................................................................................57
8.1 Diagnostic Messages..................................................................................................................................... 57
8.1.1 How to Display Diagnostics messages...................................................................................................57
8.2 Displaying the quality of audio/video calls..................................................................................................... 58
8.3 Troubleshooting Specific Issues.....................................................................................................................58
8.3.1 OpenScape Mobile Pro loses Connection to the Server while in Wi-Fi Mode........................................58
8.3.2 OpenScape Mobile Pro unable to connect to OpenScape Voice Server................................................59
8.3.3 Calls go Directly to Desk Phone Intermittently....................................................................................... 59
8.3.4 With Good Wi-Fi Reception, Some Calls are Ringing on the Desk and Cell Phone Only...................... 59
8.3.5 Cannot Change the Ringtone................................................................................................................. 60
A31003-M40A0-U101-03-7619, 08/07/2020
iv OpenScape Mobile Pro V10, Android Devices, User Guide

Contents
8.3.6 OpenScape Mobile Pro does not Show Option to Move a Call............................................................. 60
8.3.6.1 Specific Scenarios........................................................................................................................... 60
8.3.7 Ring-back is Played on Top of Announcement or Voice........................................................................ 61
8.3.8 First Call after Device is Turned On takes Several Seconds to Ring, Sometimes goes Directly to Desk
Phone...........................................................................................................................................................61
8.3.9 OpenScape Mobile Pro is not Showing the Contacts Stored in My Device........................................... 61
8.3.10 OpenScape Mobile Pro Rings when "Do Not Disturb" is Turned On....................................................61
8.4 How to Report an Issue................................................................................................................................. 62
9 Security Checklist........................................................................................................................................... 63
Index..................................................................................................................................................................... 64
A31003-M40A0-U101-03-7619, 08/07/2020
OpenScape Mobile Pro V10, Android Devices, User Guide v

Introduction
1 Introduction
This book explains how to configure and then use the OpenScape Mobile Pro
V10 application on your Android based devices.
OpenScape Mobile Pro V10 Features
With OpenScape Mobile Pro V10:
• you can make and receive VoIP calls using the Wi-Fi network
• you can choose the device to receive your calls: Wi-Fi, desk, cell, corporate
voice mail
• you can be reached using just the one number assigned to your desk phone
(outgoing calls see only that one identity)
• the best method to reach you is seamlessly and automatically chosen: Wi-Fi
network, desk phone, or cell phone
• you can move calls between your Wi-Fi, desk, or cell phone and other
devices as many times as needed
• you can access OpenScape UC features like presence status, conference,
and centralized call log over Wi-Fi and data connections (3G, 4G, etc.).
IMPORTANT:
Fees for data usage may apply. Check with your service
provider when using OpenScape UC over data plans.
OpenScape Mobile Pro V10 is available in the following three configurations:
OpenScape Mobile Pro V10- UC-only
OpenScape Mobile Pro V10 is connected to the HAProxy Server and supports
UC features like call control functionalities. However, this configuration does not
support OpenScape Voice features, like for example VoIP calls.
OpenScape Mobile Pro V10 - Voice-only
OpenScape Mobile Pro V10 is connected to OpenScape Voice features,
supports making and receiving calls on your Wi-Fi device and also supports
connection with OpenScape 4000. However, this configuration does not support
UC features.
OpenScape Mobile Pro V10 - Intergrated
OpenScape Mobile Pro V10 is connected to the OpenScape UC HAProxy
Server. The account is also configured for mobile features in OpenScape Voice
via SBC connection like in Voice-Only mode. The Integrated configuration
supports all the features of both the Voice-only and UC-only configurations and
also supports connection with OpenScape 4000.
When the term “Wi-Fi phone" is used it describes phone calls made over Wi-Fi
with the OpenScape Mobile Pro V10 application. The term “cell phone" is used
to describe phone calls made over the cellular network with the Android native
phone application. The term "desk phone" is used to describe your OpenScape
Voice IP phone (typically an OpenStage or optiPoint desktop phone).
Related Documentation
The following technical documentation is available in HTML and PDF:
A31003-M40A0-U101-03-7619, 08/07/2020
6 OpenScape Mobile Pro V10, Android Devices, User Guide

Introduction
• OpenScape Mobile V10 Android Devices User Guide (the book you are
reading)
• OpenScape UC Application Web Client User Guide.
• OpenScape 4000, IP Solutions, Service Documentation
A31003-M40A0-U101-03-7619, 08/07/2020
OpenScape Mobile Pro V10, Android Devices, User Guide 7

Getting Started
How to Install OpenScape Mobile Pro
2 Getting Started
This section describes the basic steps and configurations that you will need in
order to get started with OpenScape Mobile Pro V10 for Android devices.
2.1 How to Install OpenScape Mobile Pro
Prerequisites
• You must be running Android at least Lollipop 5.0 (API 20) which refers to
Android Pro version 10. Earlier versions are not supported.
Step by Step
1) Download the OpenScape Mobile Pro application from Google Play Store to
install it onto your device.
NOTICE:
If you are connected to your corporate Wi-Fi network and
you do not have an http proxy configured, turn off Wi-Fi to
download the application and turn Wi-Fi back on before
proceeding.
2) The application is not yet running and configured. Perform the steps in the
following section to configure it and pair it up with your desk phone.
2.2 How to Login to OpenScape Mobile Pro V10
This section describes how to login to the OpenScape Mobile Pro V10
application using an Android phone and how to perform its basic configuration.
Prerequisites
You must have installed OpenScape Mobile Pro V10.
You must have acquired your OpenScape Mobile Pro credentials from your
system’s administrator.
Step by Step
1) Tap on the OpenScape Mobile Pro V10 application’s icon on your device’s
main interface.
2) Once you open the application two pop-up windows will appear.
3) The first window asks you to allow OpenScape Mobile Pro to make and
manage phone calls. Tap Allow.
4) The second window asks you to allow OpenScape Mobile Pro to record
audio. Tap Allow.
5) In the screen you see the End User License Agreement. Read it and tap
Agree to enter the application..
6) A pop-up window will appear asking you to allow OpenScape Mobile Pro to
access photos,media and files on your device. Tap Allow.
7) The first tab that you see is the User tab. You need to configure OpenScape
Mobile Pro. In order to do that you tap on Account. At the Account
A31003-M40A0-U101-03-7619, 08/07/2020
8 OpenScape Mobile Pro V10, Android Devices, User Guide

Getting Started
How to Configure OpenScape Mobile Pro
screen you need to enter the following information (contact your System
Administrator if necessary):
a) Subscriber
This is the field where you have to enter your username. Depending on
your configuration it can be one of the following:
• - Integrated/UC-only configurations: Enter your UC credentials
provided by your System Administrator.
• - Voice-only configuration: Enter your desk phone number, e.g
+15615556789.
b) Password
This is the section where you have to enter your own personal password,
received from your System Administrator .
c) Remember me
If you enable this option, the application will save your credentials and
wont ask you to enter them everytime you start the application.
d) Cell Number
Here you enter your cellural number if you are using an Android Phone.
Not needed if you are using a tablet..
e) Server Address
This is the field where you have to enter your IP Address. Depending on
your configuration it can be one of the following:
• - Integrated/UC-only configurations: Enter the IP address or the
server hostname of the HAProxy Server.
• - Voice-only configuration: Enter the IP address or server hostname
of the Session Border Controller (SBC).
NOTICE:
IP or server hostname address should be preceded by
http:// or https:// as defined by your System Administrator.
NOTICE:
If you don’t know any of the information needed to enter your
user credentials please contact your System Administrator.
8) Make sure that you have entered all of your credentials correctly and tap
Save.
9) Tap Sign in back to the User tab, to sign in with your credentials.
2.3 How to Configure OpenScape Mobile Pro
This section describes some basic configurations and information that you need
in order to make better use of the OpenScape Mobile Pro V10 application.
Example
The first time that you will enter your Account’s credential, OpenScape Mobile
Pro will try to connect and validate the information that was enterend in the User
screen.
A31003-M40A0-U101-03-7619, 08/07/2020
OpenScape Mobile Pro V10, Android Devices, User Guide 9

Getting Started
2.3.1 Permissions
You can understand the status of the connection between OpenScape Mobile
Pro and the HAProxy server by swiping down your finger on your device’s
screen and watch the indication on the OpenScape Mobile Pro notification bar.
The following indications may appera:
• Connected
• Wifi Mode
• Cellular Mode
• No Data connection
This sections describes how you can give permission to the OpenScape Mobile
Pro V10 application to handle contacts, microphone and the camera. You have
perform the following so you can grant OpenScape Mobile Pro V10 the needed
permissions to perform smoothly.
NOTICE:
You are asked for permissions when you first login into
OpenScape Mobile Pro V10 after download. If you have already
configured them then you don’t need to follow the actions bellow.
NOTICE:
Please notice that this section does not apply to all android
devices. However, keep in mind that regardless your Android
device, you can always manage OpenScape Mobile Pro V10
from the App Info interface. The easiest way to access the App
Info interface, is to tap and hold the OpenScape Mobile Pro V10
application icon on your device’s home screen.
More specifically, you can give OpenScape Mobile Pro V10 permission to:
• Read contacts from your device
Tap the device’s "Home" button, go toSettings > Privacy > Contacts and
tap OpenScape to turn it ON.
• Use the microphone
Tap the device’s "Home" button, go to Settings > Privacy > Microphone
and tap OpenScape to turn it ON.
• Use the camera
Tap the device’s "Home" button, go to Settings > Privacy > Camera then
tap OpenScape to turn it ON.
• Use the location
Tap the device’s "Home" button, go to Settings > Privacy > Location then
tap OpenScape to turn it ON.
NOTICE:
In order to identify that the client has switched from one
hotspot to an other it is required to grant permission to read
the SSID and BSSID of the connected hotspot. This is due
A31003-M40A0-U101-03-7619, 08/07/2020
10 OpenScape Mobile Pro V10, Android Devices, User Guide

2.3.2 Certificates
Getting Started
to many location services using Wi-Fi networks for location
identification in mobile systems have this information linked
with the location permission.
A Digital certificate contains name, serial number, expiration date and the
certif-icate holder's public key along with the digital signature of the certificate
issuing authority. By default, the OpenScape Mobile Pro devices communicate
to these servers: the OpenScape HAProxy server, OpenScape Session Border
Controller (SBC).
The OpenScape Mobile Pro Application uses the following certificates:
• Root CA Certificate - a digital certificate that issues the Client and Server
certificates. The Root CA Certificate is installed on your device, as well as
the server
• Server Certificate - a digital certificate that identifies the Server to your
device. The Server certificate is not installed on the device, but on the
Servers.
• Client Certificate - a digital certificate that identifies your device as
legitimate device to the Server. The Client certificate is installed on the
device.
IMPORTANT:
Certificates are an important part of the configuration of
the OpenScape Mobile Pro. Please refer to the chapter
Certificates at the end of this document for further information
and instructions on how to install the appropriate certificate.
A31003-M40A0-U101-03-7619, 08/07/2020
OpenScape Mobile Pro V10, Android Devices, User Guide 11
Using Integrated or UC-only Configurations
Call History
3 Using Integrated or UC-only Configurations
This chapter describes the features of OpenScape Mobile Pro V10 Integrated
and UC-only configurations. The features are described through the navigation
tabs of the main interface of the application. The Integrated and UC-only
modes have almost identical interfaces and thus if you have either of these two
configurations you can refer to the following sections. However, since there
are some basic differences between these two modes, you will find specific
information for each configuration based on their features.
3.1 Call History
The first tab on the left side of the navigation bar is the Call History tab. This is
a list that displays your incoming, outgoing, and missed calls categorized in two
main sections:
• All
• Missed
For each call you can see the avatar and name of that contact as well as the
type of call (i.e incoming, outgoing, missed) and the date and time.
In the bottom right corner of the avatar icon of each contact, there is a small
sign indicating the Presence status. The Presence states are:
State symbol
Available
Do not disturb
Be right back
Away
Busy
in a meeting
Using the Call History view, you can:
• Refresh the list
• Access call log details by pressing the > symbol on the right corner of any
call history entry.
• Call a phone number
• Call a contact
• Remove all to delete all call history records
• Access more options by pressing the
symbol.
A31003-M40A0-U101-03-7619, 08/07/2020
12 OpenScape Mobile Pro V10, Android Devices, User Guide

3.1.1 How to Refresh the Call History List
How to refresh the Call History list:
Step by Step
1) In OpenScape Mobile Pro, tap Call History.
2) Swipe down your finger to refresh the list.
3.1.2 How to Delete All Call History Records
How to delete all records from your Call History list:
Step by Step
1) In OpenScape Mobile Pro V10, tap Call History.
2)
Tap the icon on the top right corner of your screen and then tap Remove
all to delete the records of your recent calls.
Using Integrated or UC-only Configurations
Contacts
3.2 Contacts
The second tab on your main navigation bar, is the Contacts tab.
Each contact is displayed with its:
• Avatar image
• Presence status
• Display name
• Short label or phone number (displayed in light grey color)
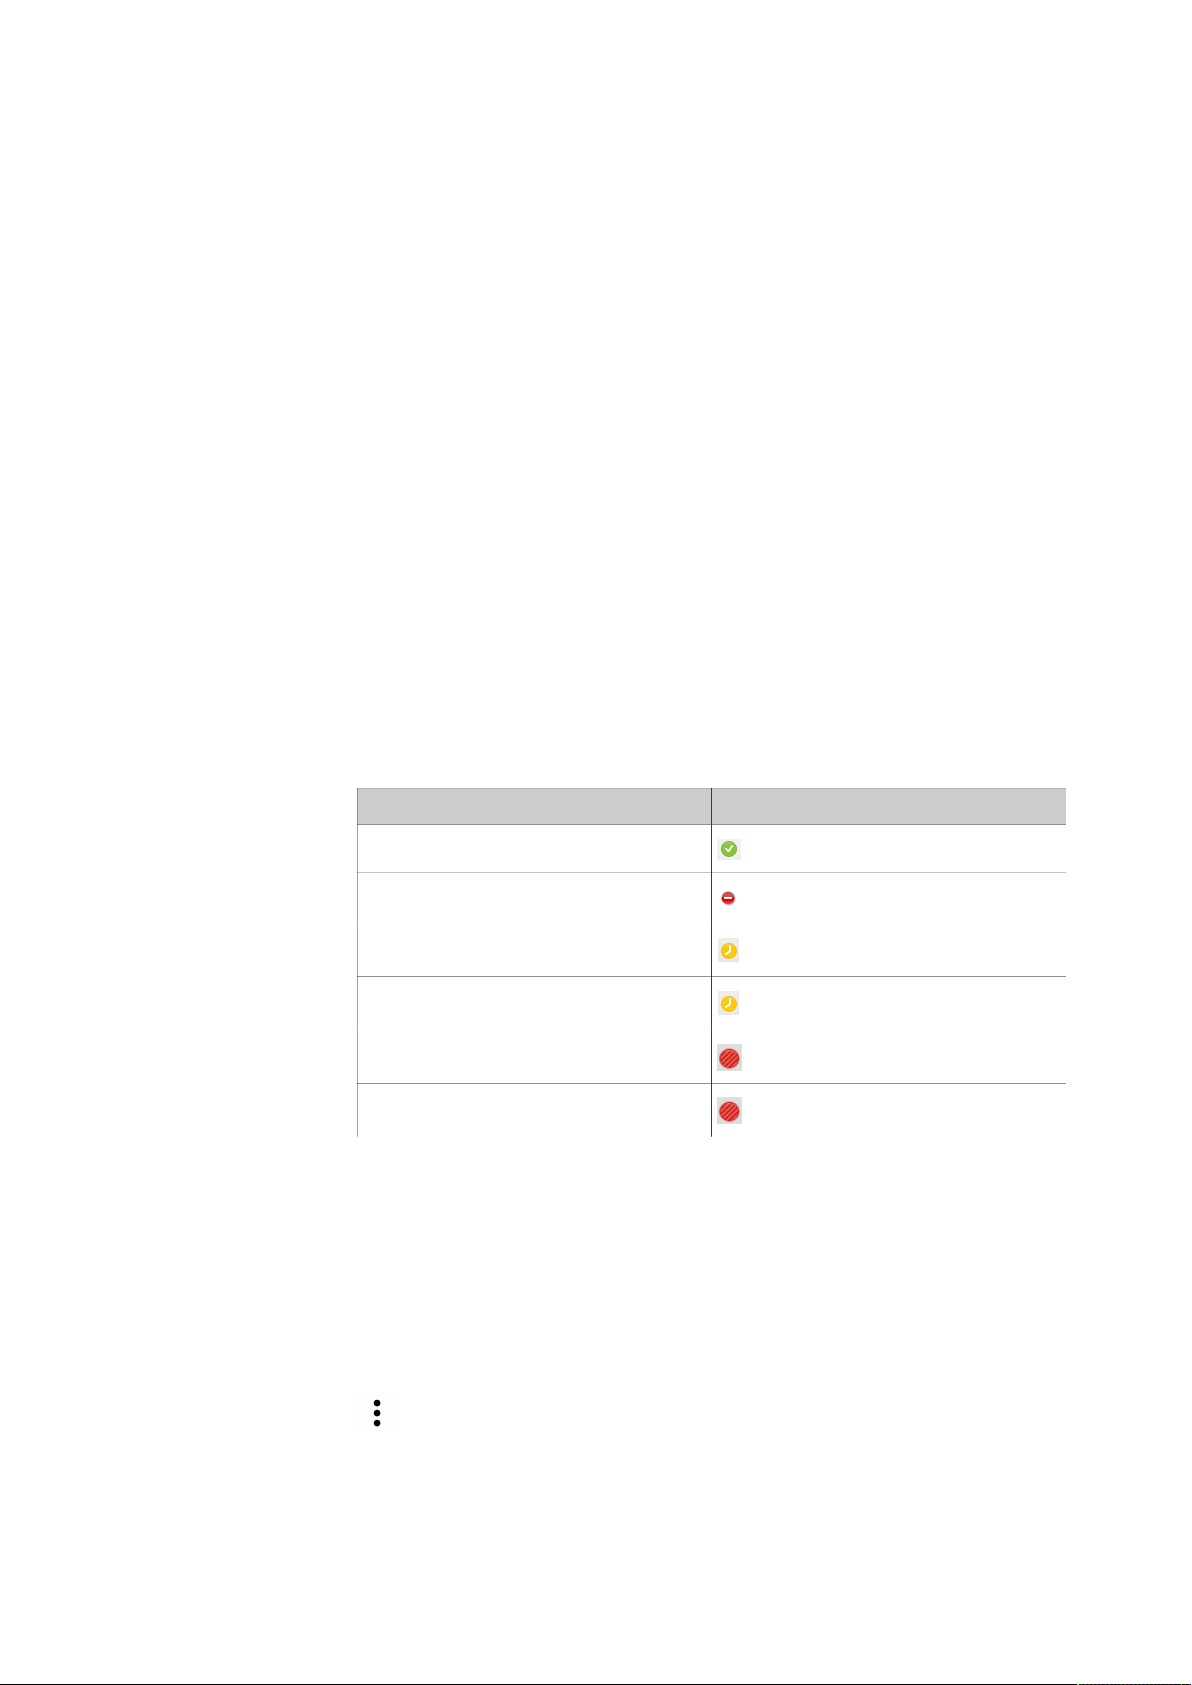
The Presence Status is indicated in the bottom right corner of the avatar icon
of each contact, with a small sign. The Presence states are:
State Symbol
Available
Do not disturb
Be right back
Away
Busy
In a meeting
From here you can access your personal contacts. In the OpenScape Mobile
Pro Integrated Configuration you will see three main categories on your
Contacts tab. More specifically you will see the three following Contact
Groups:
• UC Contacts - This is your contact list of contacts connected to your
OpenScape UC server.
A31003-M40A0-U101-03-7619, 08/07/2020
OpenScape Mobile Pro V10, Android Devices, User Guide 13

Using Integrated or UC-only Configurations
• Device Contacts - This is your private contact list of contacts that you have
saved in your device.
• Groups - This is a list of your groups.
NOTICE:
You might be asked to allow permissions to OpenScape Mobile
Pro to access your device’s contacts.
Using the Contacts view you can:
• Open a contact
• Edit a contact
• Delete a contact
• Add a contact manually
• Call a contact
• Create a group
• Add a contacts group
• Edit a group
• Delete a group
3.2.1 How to Add a Contact
How to add contacts:
Step by Step
1) In OpenScape Mobile Pro, navigate to Contacts.
2) Tap the + button on the lower right corner of your screen.
3) A new screen Contact Details pops up. Enter all contact’s details and
information.
4) Tap Save on the upper right corner of your Contact Details screen and your
new contact will be saved in your contacts list.
3.2.2 How to Edit a Contact
How to edit a contact:
Step by Step
NOTICE:
You cannot view or configure UC Teams via OpenScape Mobile
Pro client.
1) In OpenScape Mobile Pro, tap Contacts.
2) Open the Contact Details screen by tapping on any contact from your
contact’s list.
3)
Tap the button on the upper right corner of the Contact Details screen.
4) Tap Edit and the Contact Details screen will open again but in editable form.
A31003-M40A0-U101-03-7619, 08/07/2020
14 OpenScape Mobile Pro V10, Android Devices, User Guide

5) Perform the desired modifications.
6) Tap Save to close the dialog and automatically change the contact data in
your OpenScape contact list.
3.2.3 How to Delete a Contact
How to delete a contact:
Step by Step
1) In OpenScape Mobile Pro, navigate to Contacts.
2) Open the Contact Details screen by tapping on any contact from your
contacts’ list.
3)
Tap the button on the upper right corner of your Contact Details screen.
4) Tap Remove from the list of these options.
5) A pop up dialog will appear with two options Cancel or Delete. Tap Delete.
The dialog closes and the contact is removed from your contact list.
Using Integrated or UC-only Configurations
Conference
3.2.4 Chat
3.3 Conference
The Chat tab next to Contacts tab, lists all the chat sessions you have had
with your contacts and allows you to switch between conversations. While on
the Chat view, a limited number of conversations is displayed. To load more
conversations, simply scroll down.
The Conference tab enables you to create and start an ad-hoc conference,
start scheduled conferences you have already created, and/or display the
conference data.
NOTICE:
You cannot configure any new scheduled conferences via the
OpenScape Mobile Pro Client.
The context menu of a scheduled conference features the following options:
• Call to start the conference.
• Chat with group to exchange messages with all the conference participants.
• Mail notification to send an email with the conference details.
• Mail new PIN to send an email with the new PIN of the conference.
• Remove a conference.
You can change the call in status of a scheduled-conference participant via
his/her context menu. The call in status lets you control whether a conference
member needs to dial in himself/herself or is called automatically at the start of
the conference.
A31003-M40A0-U101-03-7619, 08/07/2020
OpenScape Mobile Pro V10, Android Devices, User Guide 15

Using Integrated or UC-only Configurations
3.3.1 How to Start a Conference
How to start an available conference:
Step by Step
1) In OpenScape Mobile Pro tap Conference in the main navigation bar:
2) Select a conference and then tap Call to initiate the scheduled conference.
3.3.2 How to Display Information about a Conference
How to display more information about a conference like creator, alternate
bridge and PIN:
Step by Step
1) In OpenScape Mobile Pro tap Conference in the main navigation bar:
2) Select a conference and then tap on it to display a new screen with
information about this conference.
3) Tap on the option This conference is moderated in the top of the screen, to
make this this conference moderated or not.
NOTICE:
This option is only available if you have the right permissions
for this conference. If you don’t have permissions then this
option will be greyed out.
4) Select the option Call in from the drop-down menu, if you want dial into the
conference.or Call out if you wish to be called by the system.
NOTICE:
You cannot change the conference PIN and the dial-in number.
Both are defaulted by the OpenScape UC Application during the
conference configuration
3.3.3 How to Chat with a Group
How to chat with a group of a conference:
Step by Step
1) In OpenScape Mobile Pro tap Conference in the main navigation bar.
2)
Select a conference, tap on the icon and tap on Chat with Group.
3) On the new Chat screen tap on the text box at the bottom to bring up the
keypad and type your message.
A31003-M40A0-U101-03-7619, 08/07/2020
16 OpenScape Mobile Pro V10, Android Devices, User Guide

4)
Tap the icon on the right upper corner.
• Tap Call to initiate a call with the other participants
• Tap Add participant(s) if you want to add more participants to the
conversation.
• Tap Close Chat if you want to return to the original Conferences tab.
3.3.4 How to Mail Confernece Participants
How to mail a notification or a new PIN to conference participants:
Step by Step
1) In OpenScape Mobile Pro tap Conference in the main navigation bar.
2)
Select a conference, tap on the icon and tap on of the following options:
• Tap Mail notification to send a notification to the other participants’
default mails.
• Tap Mail win new PIN to send to the other participants’ default mails a
new PIN for the conference.
Using Integrated or UC-only Configurations
User
3.3.5 How to Remove a Conference
How to remove a conference from your conferences list:
Step by Step
1) In OpenScape Mobile Pro tap Conference in the main navigation bar.
2)
Select a conference, tap on the icon and tap on Remove conference.
3.4 User
The fifth tab on your main navigation bar, is the User tab.
In the User tab you can access and edit your personal user information. In this
tab you can see the following:
• Sign in - From here you can sign in or sign out from the application. Tap on
the switch icon to sign in or out.
• Account- This is your account’s details list and from here you can
administer your Subscriber Number, Server Address and Password, etc.
• Presence - This is your profile’s details list and from here you can choose
your presence status (Available, Busy, Do not disturb, etc) and edit your
timezone and location settings.
• Devices - From here you can select your preferred device to make or
receive calls. You can choose one of the following options:
– Auto-Pilot
– Work Phone
– OpenScape Mobile
• Rules - From here you can associate rules to your profile to specify different
ways to deal with with incoming calls.
A31003-M40A0-U101-03-7619, 08/07/2020
OpenScape Mobile Pro V10, Android Devices, User Guide 17

Using Integrated or UC-only Configurations
• Voicemail - From here you can administer your voice mails.
3.4.1 How to Choose your Presence Status
How to choose your presence status:
Step by Step
1) Navigate to the User tab and tap Presence.
2) In the Choose your Presence section choose any of the following.
• Available
• Be right back
• Busy
• In a meeting
• Do not disturb
• Unavailable
Tap on any of these options to select it. Your status will be updated
automatically according to your choice.
NOTICE:
If you are on a call your Presence Status will change
automatically to Busy.
3.4.2 How to Edit your Timezone and Location
How to edit your timezone and location details:
Step by Step
1) Navigate to the User tab and tap Presence.
2) In the Additional Information section tap on Timezone to edit your
timezone information.
NOTICE:
Your timezone may be automatically set and updated when
connecting to the internet and its value might be in grey color.
Tap on any of these options to select it. Your status will be updated
automatically according to your choice.
3) In the Additional Information section tap next to Location to enter
manually your location. You can also add a note by tapping next to Note.
3.4.3 How to Choose your Preferred Device
How to choose your preferred device to for inbound or outbound calls:
Step by Step
1) Navigate to the User tab and tap Devices.
A31003-M40A0-U101-03-7619, 08/07/2020
18 OpenScape Mobile Pro V10, Android Devices, User Guide

2) In the Select device section that appears tap on any of your available
devices to make it your preferred device for making or receiving calls. You
can choose on of the following:
• Auto-Pilot
• Work phone
• OpenScape Mobile
Tap on any of these options to select it. .
3) Once you select a device you are prompted to the Edit Device window with
details about your device. Tap on the Preferred Device box, in the bottom, to
select it.
4) Tap OK to save your changes.
3.4.3.1 How to Add a New Device
How to add a new device to your preferred devices:
Step by Step
1) Navigate to the User tab and tap Devices.
2)
In the Select device section that appears tap the icon and tap New
Device:
3) Enter manually the name, address in the corresponding fields and select one
of the following:
Using Integrated or UC-only Configurations
• RNA - If you select this option then you need to also enter an RNA value,
that is the time period (seconds) that the call will ring when not being
answered.
NOTICE:
RNA is the acronym for Ring, No Answer and refers to
the time duration when an agents is not at the place
to receive or make calls and the calls are not being
answered.
• Standard redirection timeout - In this option your incoming call will be
directed after ringing for a prefixed duration of time.
• No redirection timeout - In this option there will not be a redirection of
your incoming call no matter the duratuion time it remains unanswered.
4) Tap OK to save your changes.
NOTICE: You may need to refresh your devices tab to see the
new device. You can do this by tapping the icon and then
tap Refresh:
3.4.4 How to Administer your Voicemail
How to administer your voicemail:
Step by Step
A31003-M40A0-U101-03-7619, 08/07/2020
OpenScape Mobile Pro V10, Android Devices, User Guide 19

Using Integrated or UC-only Configurations
Settings tab
1) Navigate to the User tab and tap Voicemail.
2) A new window may appear asking you to complete the action using either
your Work phone or an alternate (e.g Skype). Tap on one of the options to
proceed.
3.5 Settings tab
The last tab on the far right corner of your main navigation bar, is the Settings
tab. In this tab you can access useful information about your account and also
edit your settings to make better use of the OpenScape Mobile Pro application,
to better suit your needs. More specifically, in the Settings tab, you can see the
following:
• Application Settings
– Features
– Advanced
• Mobile Data Network
– Use Wi-Fi Only
– Allow VoIP Calls
• Notices and Disclaimers
3.6 Making a Call
– About
– Privacy Policy
– End User License Agreement
– Third-Party Components
– Emergency Calls Disclaimer
The Settings tab has a vast amount of options and settings that you can
access and modify. For this reason, there is a separate chapter just for this tab
in this guide. So for more details about the Settings tab, please refer to chapter
Settings.
Making calls directly through your Wi-Fi device is only supported in the
Integrated and Voice-only configurations. The UC-only configuration does not
support VoIP calls through your device. So this section refers mainly to the
Integrated Configuration. The UC-only mode enables you to choose the device
with which you will perform an outgoing call.
CAUTION:
Do not use OpenScape Mobile Pro to make emergency calls: use your
cell phone. It will provide more accurate location information to the
emergency response center. Emergency calls made with OpenScape
Mobile Pro may be routed to the incorrect response center.
NOTICE:
The person you call will see your desk phone number as the
calling number.
A31003-M40A0-U101-03-7619, 08/07/2020
20 OpenScape Mobile Pro V10, Android Devices, User Guide
 Loading...