

AppCam Solo 2
Quick Start Guide
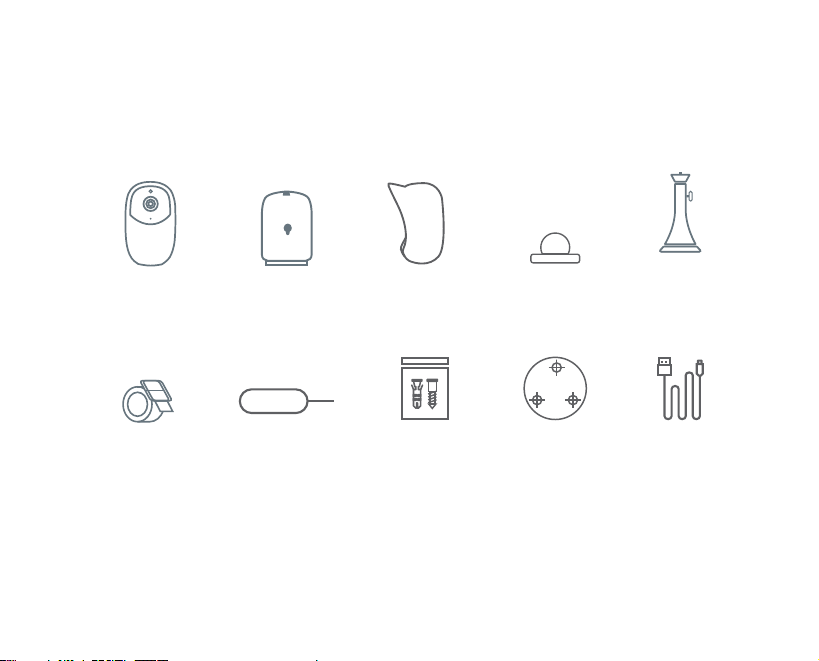
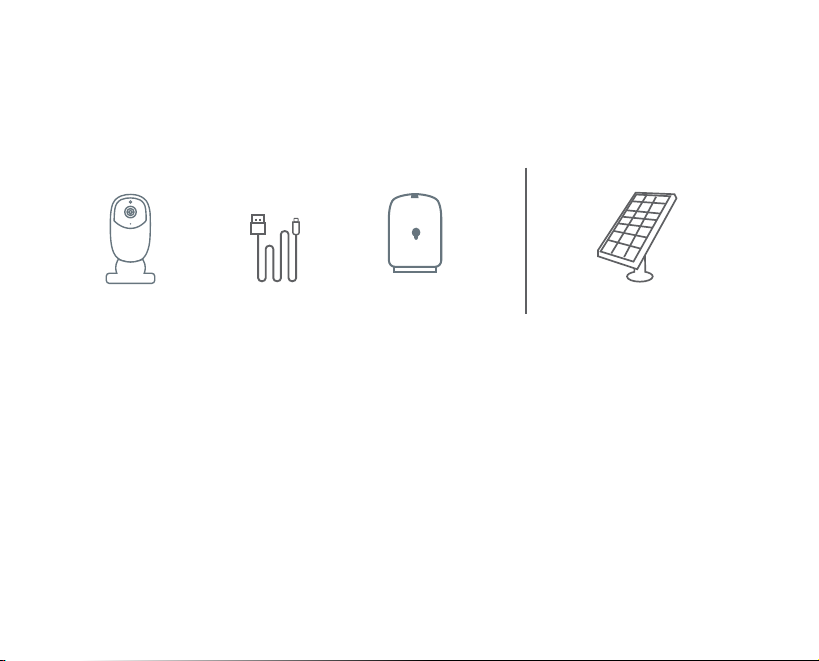
What’s in the Box
AppCam Solo 2
Camera
x1
Mounting
Strap
x1
2
Rechargeable
Battery
x1
Reset
Needle
x1
Weatherproof
Silicone Cover
x1
Screw
Kit
x2
Magnetic Mount
x1
Mounting
Template
x2
Screw Mount
x1
Power
Cable
x1
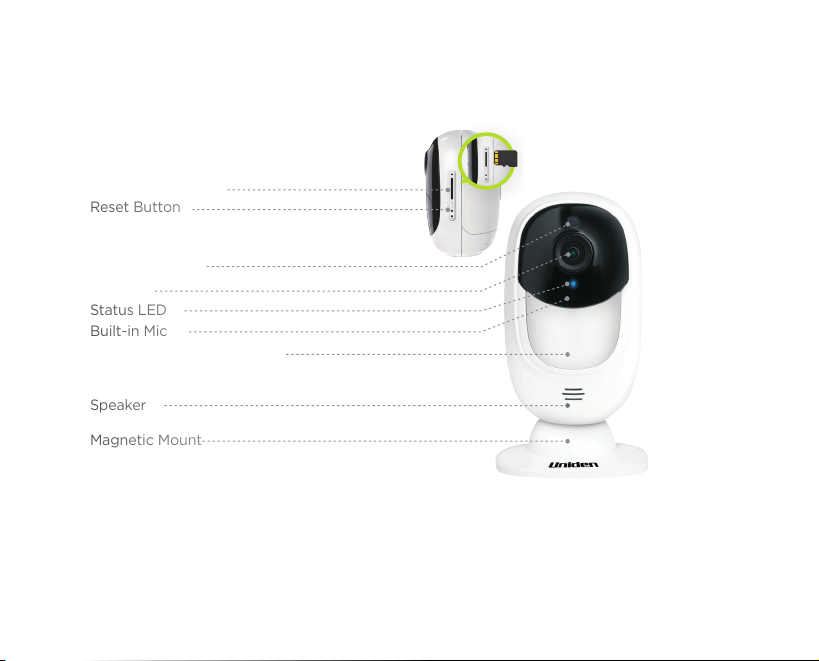
General Introduction
Reset Button
Status LED
Built-in Mic
Speaker
Magnetic Mount
Micro SD Card Slot
Daylight Sensor
Lens
Built-in PIR Motion Sensor
Red LED (Wi-Fi connection failed)
Blinking: Standby status
On: Working status
Blue LED (Wi-Fi connection succeeded)
Blinking: Standby status
On: Working status
3
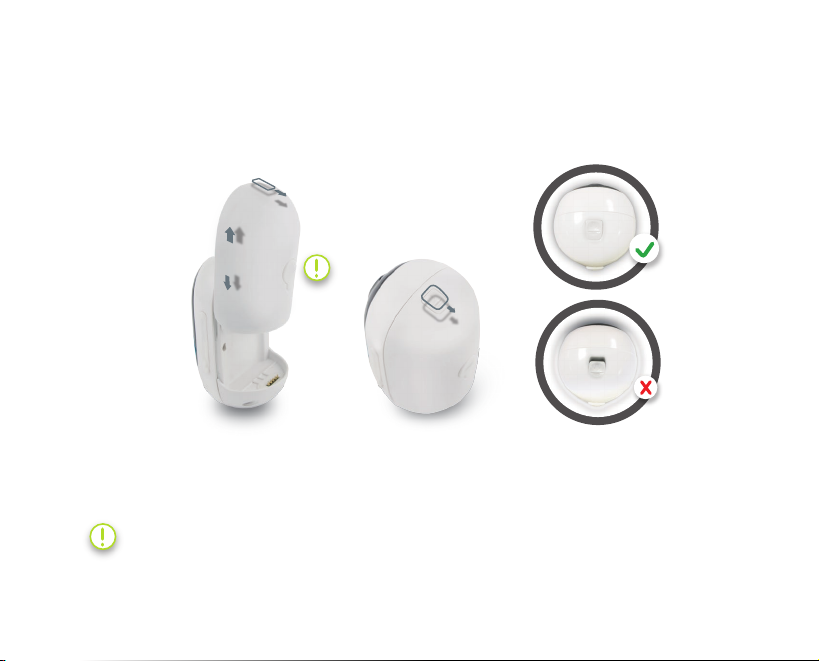
Install the Rechargeable Battery to
the Camera
Please press the button (on the top of the back casing), and slide the back casing downward
to close it. The button also needs to be closed firmly for good weatherproof performance.
For the weatherproof performance, always cover the USB charging port with the
rubber plug.
4
Charge the Battery
AppCam
Solo 2
1. You can charge the battery when it’s installed to the camera.
2. You can charge the battery separately.
3. You can charge the battery with Uniden AppCam Solo 2 Solar Panel. Please note that
the solar panel is NOT included in the package.
There is a status LED under the micro USB port of the battery, indicating the battery charging status.
Green LED: Fully charged
•
Orange LED: Charging
•
Power Cable Rechargeable
Battery
AppCam Solo 2
Solar Panel
(Not included in
the package)
5
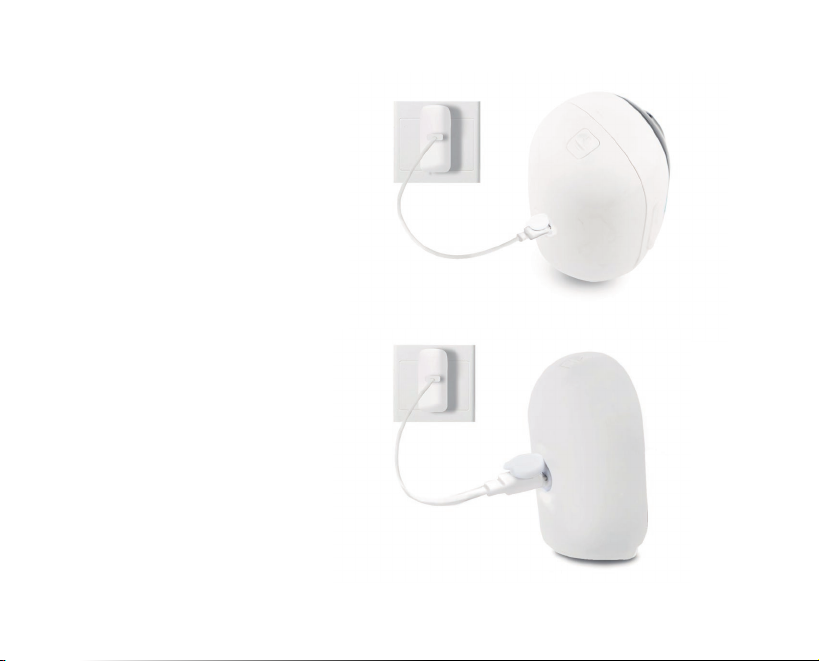
1. Charge the battery when it’s installed
to the camera.
2. Charge the battery separately.
6
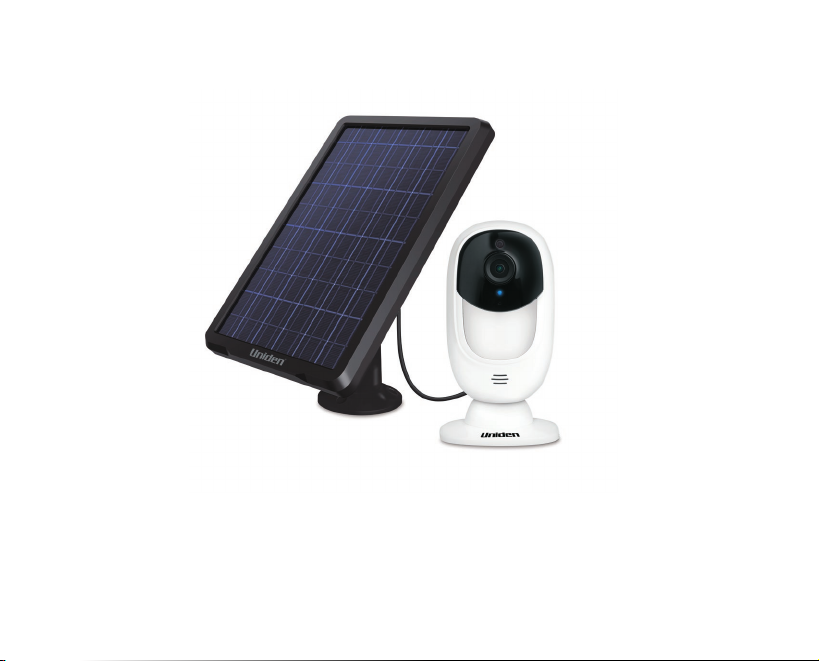
3. You can charge the battery with Uniden AppCam Solo 2 Solar Panel. Please note that
the solar panel is NOT included in the package.
7
Important Safeguards on Rechargeable
!
1. Please charge your rechargeable battery with a standard and high-quality DC 5V
or 9V battery charger.
2. If you want to power the camera via the solar panel, please note that the camera
is ONLY compatible with Uniden Solar Panel. You cannot charge this camera with
other solar panel brands.
3. Please charge the battery in temperatures between 0°C and 45°C.
Please read the battery warnings and safety document provided in this
guide to use your Uniden Solo 2 rechargeable battery safely.
Uniden AppCam Solo 2 is not designed for 24/7 full capacity running or around-theclock live streaming. It’s designed to record motion events and remotely view live
streaming only when you need it.
Please learn some useful ways to maximize the battery life in this post:
https://kb.uniden.com/customer/portal/articles/2949997-appcam-solo-battery-savings
8
Battery Use

1. Please charge the rechargeable battery with a standard and high-quality DC 5V or 9V
battery charger.
2. If you want to power the battery via the solar panel, please note that the battery is ONLY
compatible with Uniden Solo 2 Solar Panel. You cannot charge the battery with other solar
panel brands.
3. Please charge the battery in temperatures between 32°F and 113°F (0°C and 45°C).
4. Always use the battery in temperatures between -4°F and 140°F (-20°C and 60°C).
5. Please make sure the battery compartment is clean.
6. Please keep the USB charging port dry, clean and free of any debris and make sure the battery
contacts are aligned.
7. Always make sure the USB charging port is clean. Please cover the USB charging port with the
rubber plug after the battery has been fully charged.
8. Never charge, use or store the battery near any ignition sources, such as fire or heaters.
9. Always store the battery in a cool, dry and ventilated environment.
10. Never store the battery with any hazardous or combustible objects.
11. Do keep the battery away from children.
12. Do not short-circuit the battery by connecting wires or other metal objects to the positive (+)
and negative (-) terminals. Do NOT transport or store the battery with necklaces, hairpins or
other metal objects.
13. Do NOT disassemble, cut, puncture, short-circuit the battery, or make it dispose of in water, fire,
microwave ovens and pressure vessels.
14. Do NOT use the battery if it gives o an odor, generates heat, becomes discolored or
deformed, or appears abnormal in any ways. If the battery is being used or charged, remove
the battery from the device or the charger immediately, and stop using it.
15. Always follow the local waste and recycle laws when throwing the used battery away.
9

Install AppCam Solo App
There are two ways to get the AppCam
Solo App:
• Search “AppCam Solo” in App Store (for iOS)
download and install the app.
• Search “AppCam Solo” in Google Play
(for Android), download and install the app.
Set up the Camera
Please follow the prompt tone to
configure the camera
Please run App. Click the “Add New
Device” button, and follow the instructions
to set up the camera.
10
1. Please click the “ ’’ button in the
top right corner to add the camera.

2. Scan QR code on the camera.
iOS
3. Click “Connect to Wi-Fi” to continue.
Note: When the setup for this camera
is completed, your family can access
the camera simply by clicking “Access
Cameras” without reconfiguring it.
11

4. Click the button “I have heard the
voice prompt” to enter the next page.
If you did not hear the voice prompt,
please press “I did not hear the voice
prompt” for help.
Distance (8 inches)
5. Enter the Wi-Fi password of the
selected Wi-Fi network and press “I have
entered the correct information” to enter
the next page.
12
1 2 3 4 5

Scan succeeds. Camera is connecting to the router.
6. A QR code will be generated on the phone. Please place the QR code on your phone towards
the AppCam Solo 2 camera lens at a distance of about 20cm to let the camera scan the QR
code. Please make sure that you’ve removed the protection film o the camera’s lens.
5 6 7 8
13

Wi-Fi connection failed! Please check
the Wi-Fi settings and try again.
7. If you hear the above voice prompt,
please press “I heard ‘Wi-Fi connection
failed’ ” for help.
Wi-Fi connection succeeds!
8. If you hear the above voice prompt,
please press “I heard ‘Wi-Fi connection
succeeds’ ” to finish the quick setup.
14

9. Name your camera and create a password (at least 6 characters), tap “Create Password”,
slide the page to read the tips and tap “finish” to start the Live View. Tap V to go to the
“Devices” menu.
Note:
“Name your camera” field refers
to the display name of the
camera rather than the login
username.
“Playback” only displays when
you’ve inserted a micro SD card
into the camera. Make sure that
the SD card is recognized by the
camera.
15

Device Menu
10. Please tap the camera and follow the steps to
sync the time, and then start live view or go to
“Device Settings” for more configurations.
Menu
Add New Device
Enable/Disable PIR Motion Sensor (in
default, the PIR sensor is enabled).
Device Settings
Access the Live View
Battery Status
16

Adjust the Detecting Distance of the PIR Sensor
The default sensitivity of the PIR sensor is at “Mid” and the detecting distance is 6 meters
(20ft). If you want to adjust the sensitivity, please launch your AppCam Solo App, and then
click “Device Settings” -> “PIR Settings” and click the “Save” button to save the settings.
Sensitivity
Low Up to 4 meters (13ft) Up to 10 meters (33ft)
Mid Up to 6 meters (20ft) Up to 12 meters (40ft)
High Up to 9 meters (30ft) Up to 15 meters (50ft)
Detecting Distance
(For moving and
living things)
Detecting Distance
(For moving vehicles)
Note:
Higher sensitivity oers longer detecting distance, but it
would lead to more false alarms.
You are advised to set up the sensitivity level to “Low” or
“Mid” when you install the camera outdoors.
17

Important Notes for Reducing False Alarms
!
To reduce false alarms, please note that:
• Do not install the camera facing any objects with bright lights, including
sunshine, bright lamp lights, etc.
• Do not place the camera too close to a place where there are frequently
moving vehicles. Based on our numerous tests, the recommended distance
between the camera and the vehicle is 55 ft.
• Stay away from the outlets, including the air conditioner vents, humidifier
outlets, the heat transfer vents of projectors, etc.
• Do not install the camera where there are strong winds.
• Do not install the camera facing the mirror.
• Keep the camera at least 3 ft away from any wireless devices, including Wi-Fi
routers and phones in order to avoid wireless interference.
18

Cover the Monitoring Area
When installing the camera, it’s not suggested to
make the PIR sensor vertically face the moving
object. Please note that if the moving object
approaches the PIR sensor vertically, the PIR
sensor may not detect the motion events. You are
advised to install the camera angularly (the angle
between the PIR sensor and the detected object is
larger than 10°) for eective motion detection.
FYI:
• The PIR sensor’s detecting distance: 6m
(in default)
• The PIR sensor’s detecting angle: 120° (H)
It’s not suggested to make
the PIR sensor vertically
face the moving object.
The path of the
moving object
Entrance
10°
19

The Ideal Viewing Distance
The ideal viewing distance is 7-33 ft,
which enables you to recognize a human.
20
Ideal Viewing Distance:
7- 33 ft

How to Install the Skin to the AppCam Solo 2.
Please dress the camera with the skin for better weatherproof performance when
you install the camera outdoors.
Step 1
Please dress the AppCam
Solo 2 camera with the skin
provided in the package.
Step 2
The skin has an anti-falling
safety rope. Please fasten
the other end of the rope
to the wall mount when
mounting it to the wall.
Step 3
Stick the camera on the wall
mount and twist the camera
in any directions you want.
21

How to Install (using screw mount)
Wall Mount
Step 1:
Press the button to release the
plate from the security mount.
Step 5:
Screw in the camera, adjust
its direction and tighten the
knob to fix it.
22
Step 2:
Screw in the security mount
plate into the wall.
Step 3:
Latch the security mount on its
plate.(Make sure the top edge
of the backing plate is inserted
into the mount.)
Step 4:
Press the security mount
button until its plate clicks into
the mount.

Tree Mount
How to Remove
Step 1:
Thread the hook & loop strap
through the slots.
Step 4:
Latch the security mount on its
plate. (Make sure the top edge
of the backing plate is inserted
into the mount.)
Step 2:
Thread the hook & loop strap
through the slots.
Step 5:
Press the security mount
button until its plate clicks into
the mount.
Step 3:
Fasten the warp strap to
the tree.
Step 6:
Screw in the AppCam Solo 2,
adjust its direction and tighten
the knob to fix it.
Step 1:
Thread the hook & loop strap
through the slots.
Step 2:
Unscrew the AppCam Solo 2
from the wall mount.
23

WARRANTY
Uniden AppCam Solo 2
Uniden Corporation Limited 1 Year Warranty
Important: Keep yo ur receipt. Proof of origina l
purchase is require d for warranty service
WARRANTOR: Unide n America Co rporation
(“Uniden”) ELEMENTS OF WARRANTY: Uniden
warrants, for one year, to the original retail owner,
this Uniden Produc t to be free from defects in
materials & craftsmanship with only the limitations
or exclus ions set out be low. Uniden only warrants
the Product s conta ined i n the ori ginal facto ry
packaging.
WARRANTY D URATION: Th is warr anty to the
original use r shall terminate & be of n o fur ther
effect 12 mo nths af ter the date of origina l retail
sale. The warranty is invalid if the Produc t is (A)
damag ed or not maintaine d as reasonable or
neces sary, (B) modif ied, altere d, or used as pa rt
of any conversion k its, sub-a ssem blies, or any
configurati ons not sold by Uniden , (C) improper ly
insta lled , (D) serviced or repai red by someone
other th an an authorized Uniden se rvice center for
a defec t or malfunc tion cove red by this warra nty,
(E) use d in any co njunction with equipme nt or
part s or as pa rt of any s ystem n ot manufactured
24
by Uniden, or (F) ins talled or pro gram med by
anyone other than as det ailed by the owner’s
manual for this product.
STATEMENT OF R EMEDY: In the event that the
produ ct does not conform to th is warr anty at any
time whi le this warran ty is in effec t, warrantor
will either, at its o ption , repair or rep lace th e
defec tive unit & return it to you without charge
for par ts, s ervice, or a ny other c ost (except
shipping & handlin g) incurred by warranto r
or its represe ntatives in connection with the
performance of this warra nty. Warrantor, at
its option, may replace the unit with a new or
refurbishe d unit. Warrantor is not responsibl e for
any additiona l costs assoc iated with reinstall ation
of product.

WARRANTY
THE LI MITED WARRA NTY S ET FO RTH
ABOVE IS THE SO LE & ENTIRE WAR RANTY
PERTAINING TO TH E PRODUCT AND TH E
CONTENTS CONTAINED IN THE ORIGINAL
FACTORY PACKAGING & IS IN LI EU OF &
EXCLUDES ALL OTHER WARRANTIE S OF ANY
NATURE WHATSOEV ER, W HET HER E XPRE SS,
IMPL IED OR ARIS ING BY O PER ATION OF L AW,
INCLUDING, B UT NOT LI MITE D TO ANY IM PLI ED
WARRANTIE S OF ME RCHA NTABILITY O R
FITNE SS FOR A PARTICULA R PUR POS E. TH IS
WARRANTY D OES N OT COVER OR PROVIDE
FOR THE REIM BURSEM ENT OR PAYMENT OF
INCIDENTAL OR CONSEQUENTIAL DAMAGES
TO THE PRO DUC T CAUS ED BY IM PROPER
INSTALL ATION OF THE PR ODU CT. THIS
WARRANTY D OES N OT COVER AN Y COSTS
RELATING TO THE REMOVAL, REPLACEMENT,
OR INS TALLATION OF ANY PROD UCT.
Some states do n ot allow this exclusion o r
limita tion of incide ntal or conse quen tial da mage s
so the ab ove limit ation or exclusi on may not
apply to yo u.
LEGAL R EMED IES: This wa rrant y gives yo u
specific legal rights, & yo u may als o have othe r
rights which vary from state to state. T his
warranty is voi d outside the U nited States of
America & Canada.
PROCEDURE FOR OBTAINING PERFORMANCE
OF WARR ANT Y: If, after following the
instructio ns in the owner ’s manu al you are
certain that the Product is defec tive, pack the
Product carefully (preferably in its original
packaging). The Prod uct should i nclude all
part s & acces sories originall y packa ged with the
Product. Includ e evide nce of origina l purchase &
a note des cribi ng the defect t hat has caused you
to return it.
The Product s hould be shipped freight prepa id,
by tracea ble me ans, to warra ntor at:
Uniden America Service
C/O Saddle Cre ek
743 Henri etta Creek Rd ., Su ite 100
Roanoke, Texas 76262
25

20C

uniden.com
 Loading...