

Page 1
Owner’s Manual
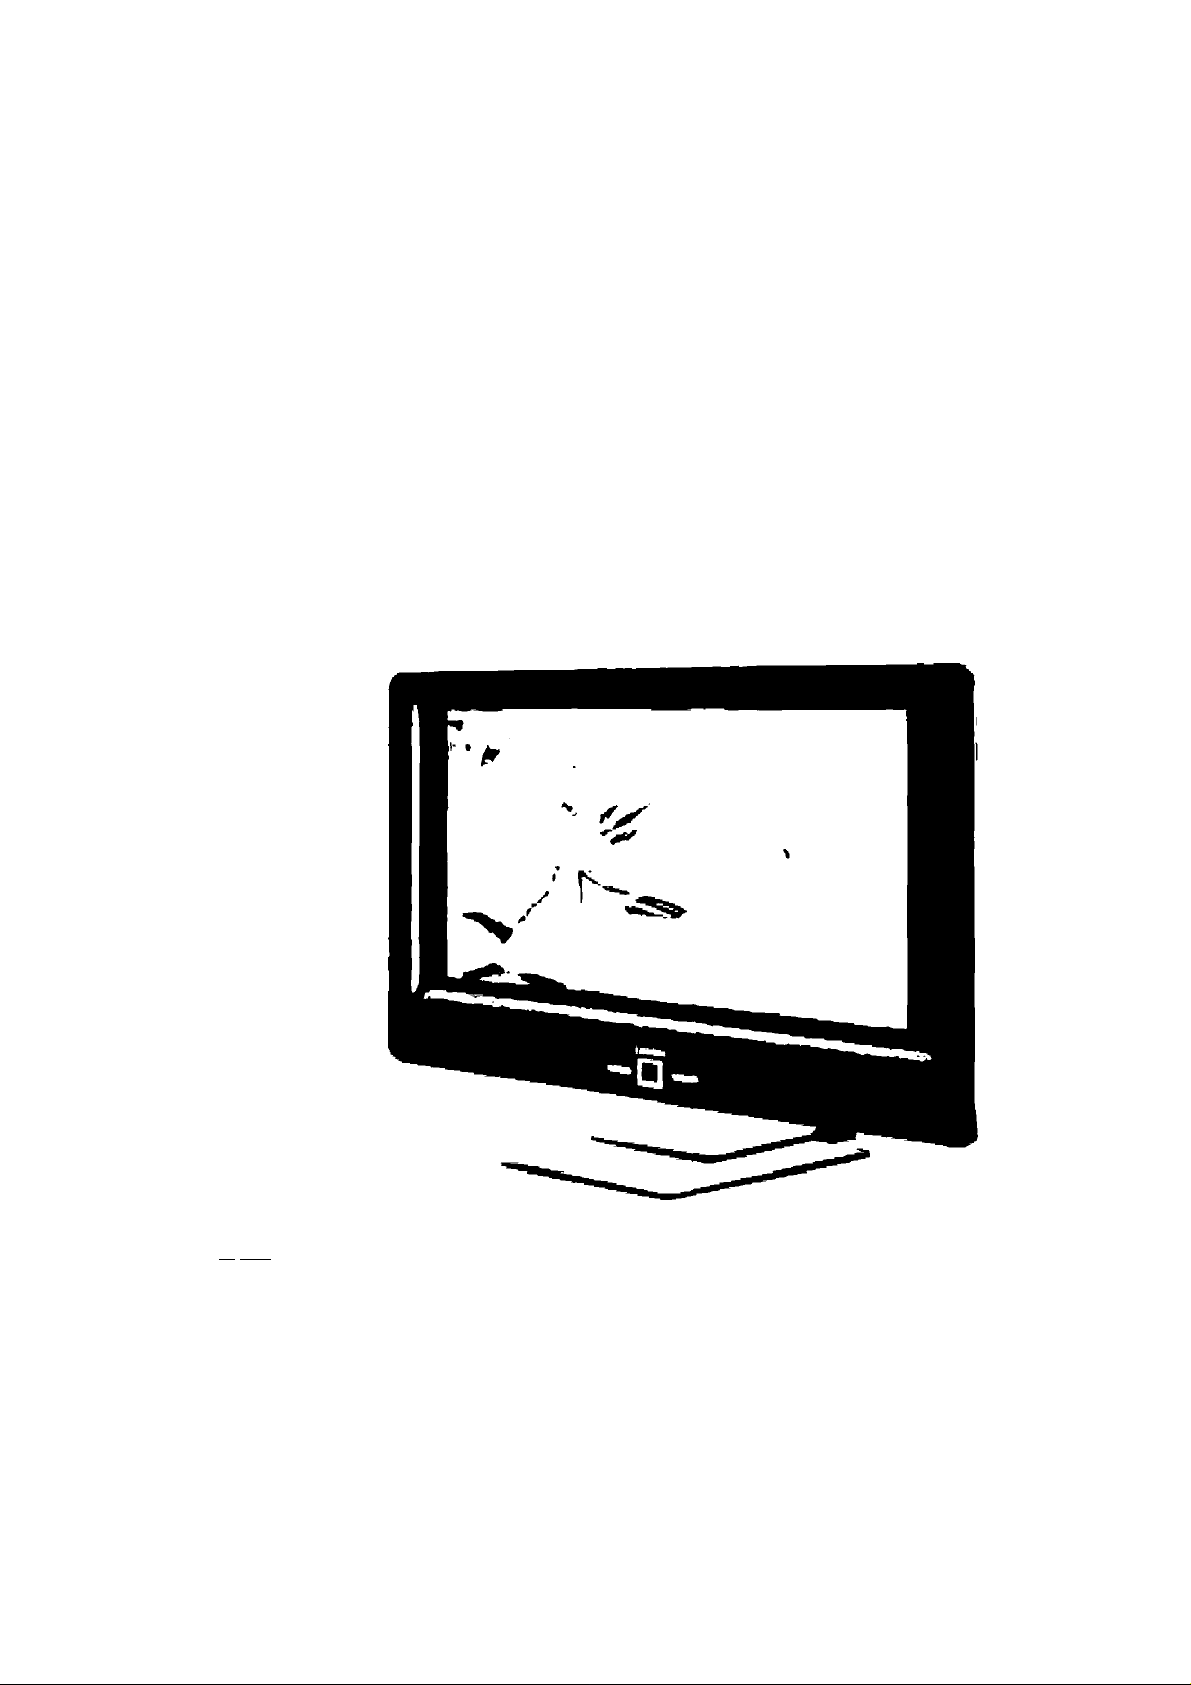
TL27TX1-AB
TL27TX1-AW
Model No.
TL32TX1-AB
TL32TX1-AW
TL42TZ1 -AB
Unlden
O
H
O
D
a
o
cc
TL42TZ1 -AW
riMtmiiiH fill irw DVB
VMM Droodcnaitnq (IBAI tflU)
DJ3
DOLBY
DIGITAL
F^VLnÌI I II lrilorfMaatDthair»dwT>#rt(arf*|)i|i|Ar«dir*(l«frArV(}l
3737 (33LWDfiOQA}, 9735 (37lWDfiaOA)
MvHiladurtd undur licsnca Irom Oulby
■ymbOl lira Ifodemiirha ol
Doloy Ut»ofalori«t
I ^^1-1^** HDMI >OBU arti Hlgh'Dannftltin MuiilmarfiM
hDMI Uùftftililg UC
CL
t
CD
Z
T
I
CO
CD
z
I
CO
* Cptn^iliM imugo uiw4 to »ImuiAtv tV rooepnon
SRSC«>
Thank you tor purchasing this product.
* Before you begin using this product, road tho Snioty
Precautions. Failure to observe these precautions may cause
injury to the user, others or property.
* Tills Owner's Manual describes Important precautions to help
prevent accidents and how to handle this product properly.
Be sure to thoroughly read these precautions before use to
ensure safety,
* Tho Warranty Is located on page 50 of this Owner's Manual.
Please note down the dale of purchase and Keep II in a safe
pinoe.
IfftifiTli] t| ■ irapwniuli p( HRi* UD». tOd
THiBorfOuAUX r l«ùN>plùg)r h nctirpotaMd urfdii
huinu from Ann Uihi, Ma
More Information can be found at cur webpage;
For AUSTRALIA: www.uniden,com.au
For NEW ZEALAND; www.uniden.GO.nz
LU
O
z
LU
CC
LU
U.
LU
CC
Page 2

■Contents
o
F
u
3
Q
O
Chapter 1 INTRODUCTION
Safety Precautiona............................................
Notes on Use.....................................................8
Recommendations........................................8
Accessories......................................................12
Controls and Connections {remote control)
Controls and Connections (LCD TV)
Preparing and Using the Remote Control.. 15
How to insert the batteries
How to use the remote control....................15
Connecting the Antenna
VHF/UHF antenna
Connecting the Power Cord.............................17
Initial Sellings...................................................18
Connecting Other Equipment
Arranging the cables
About connector covers
Watching TV............
Saving Still Images (FREEZE).........................25
Displaying Channel Numbers (DISPLAY) ..26
Displaying Digital Information (INDEX)
Displaying Digital Information (INFO)
Displaying Subtitles (SUBTITLE).....................29
Selecting Dual Language Audio (AUDIO)..30
Setting Panorama or Zoom Display Mode
(WIDE MODE) ................................................31
Using the Sleep Timer (SLEEP)
Using Optional Equipment (HDMI)
Using Optional Equipment (TVA/IDEO)
Using Teletext (TEXT)
Enjoying TV with Headphones.........................37
Adjusting TV Settings (menu screen)
Menu Flow Chart.............................................41
Video Setup......................................................43
Mode...........................................................43
Contrast
Brightness...................................................43
Colour
Tint..............................................................43
Colour Temp(Colour temperature)
Sharpness...................................................43
Reset
Dynamic Contrast (4Z inch model only)
......................................................
.........................................................
..........................................................
................................
......................................
..........................
...................................
..............................
........................................
.....................................
...............
..........................
............
..............
......................
..................
..........
..............
.............
.......
4
14
15
16
16
20
22
22
24
27
28
32
33
34
35
40
43
43
43
43
.43
Audio setup
Bass.........................................................„„44
Treble
Balance
Stereo/Mono...............................................44
Main+Sub.................................................. 44
SRS TruSurround XT
HDMI1 Audio
HDMI2 Audio..............................................44
Reset..........................................................44
Screen setup
Current Mode
Auto Detection............................................45
Default ................................................... 45
Vertical Centre
Overscan.............................................. 45
Reset..........................................................45
Channel setup
Auto Program
Channel List
Signal Level................................................47
Other Settings
Video Label
Setting the Country Selection
Time Zone
Subtitle
Power Saving.............................................49
Parental Control
Version
All Reset (restoring factory settings)
Main Specifications
Troubleshooting...............................................53
Caring for your TV.
Caring for you LCD display panel
About the fluorescent tube
INDEX
Memo
Customer Support
Warranty..........................................................59
.....................................................
......................................................
......................................................
....
...........................
...........................................
...................................................
.............................................
...........................................
.................................................
.............................................
.............................................
.................................................
............................................
....................
..................................................
.......................................................
.........................................
.....................................................
...........
.........................................
..........................................
...................
.........................
.............................................................
............................................................
...........................................
44
.44
44
44
44
45
45
45
46
46
47
48
48
49
49
49
49
49
52
55
55
55
56
57
58
49
Page 3

Chapter 1
5
3D
O
o
c
o
INTRODUCTION
o
z
Page 4

■Safety Precautions
Be sure to thoroughly road tho following Items before you start using this product to ensure safe and correct
use.
The following symbols Indicate warnings In this Owner's Manual and on this product, Be sure to properly under
stand the meanings of these symbols before reading this Owner’s Manual.
z
g
H
Ü
o
o
WARNING
A
Description of Symbols
WARNING
This symbol alorts the user to the risk of death or serious Injury from (ire
or electric shock.
CAUTION
This symbol alerts the user to the risk ot Injury or damage to nearby
objects.
Symbol urging caution Symbol Indicating Caution
A
OSIMfSl C4P|kOA
Do not damage the power cord.
Failure to do so may cause fire or electric
shock.
■ Do not pinch the power cord between this
product and the wall or floor during
installation.
• Do not modify or damage the power cord.
• Do not place heavy objects on or tug the
power cord.
• Do not heat or bring the power cord close to
heating equipment.
• When unplugging the power cord, be sure to
Q® ®
Syrtitnllhdtctfmo Dp ml Da npt handle
CauHon nliwMfnDl« W*f fMfHIft li> NwU
Awarning
If this product becomes damaged or you
find somo abnormality, please unplug the
power cord.
Failure to do so may cause fire or electric
shock.
• If you drop this product or the chassis is
damaged, turn the power off and unplug the
power plug,
• If you notice smoke, strange odors, noise or
any other abnormality, turn the power off and
unplug the power plug.
ibk ol ihock
Symbol instructing an action
o c
pownr cord
Unplug the
power cord
from (he
wall Bockoi
Page 5

I Safety Precautions (continued)
^WARNING
If dust or dirt has accumulated on the wall
plug, unplug the wall plug and wipe the plug
clean with a dry cloth.
• Use of the power plug In this condition may
cause fire or electric shock,
o
Wipe off dirt
and dust
Do not insert or unplug the power plug
with wot hands.
* Doing so may cause electric shock,
If you hear thunder, do not touch the TV,
antenna wire or power plug.
* Doing so may cause electric shock.
Do not touch
Do not insert or allow metal or flammable
objects to fall Inside this product.
* Failure to do so may cause fire or electric
shock. In tho ©vent that water or foreign
objects fall inside this product, immediately
turn it oft and unplug th© power plug.
o
Q
c
o
o
Wet hands
forbidden
Insert the wall plug.
• An incomplete insertion may generate heat,
or cause dirt or dust to accumulate, resulting
in fire or electric shock.
O
Insert fully
Do not connect the power cord to a multi
plug strip.
• Failure to do so may cause fire or electric
shock.
<S)
Caution
0
Caution
Do not remove the rear cover or modify
this product.
' Touching the high-voltage components inside
this product may cause electric shock.
Do not
disassemble
Do not use screws longer than 20mm to
attach an optional wall mounting bracket to
the LCD TV.
■ Failure to do so may cause electric shock or
damage to the LCD TV.
>1 tlt^n L
^ 20mni n
0
Caution
Page 6
I Safety Precautions (continued)
Awarning
z
o
f“
z>
Q
o
Do not install this product on unstable
surfaces.
- Doing so may cause it to fall or tip over,
resulting in injury.
0
Caution
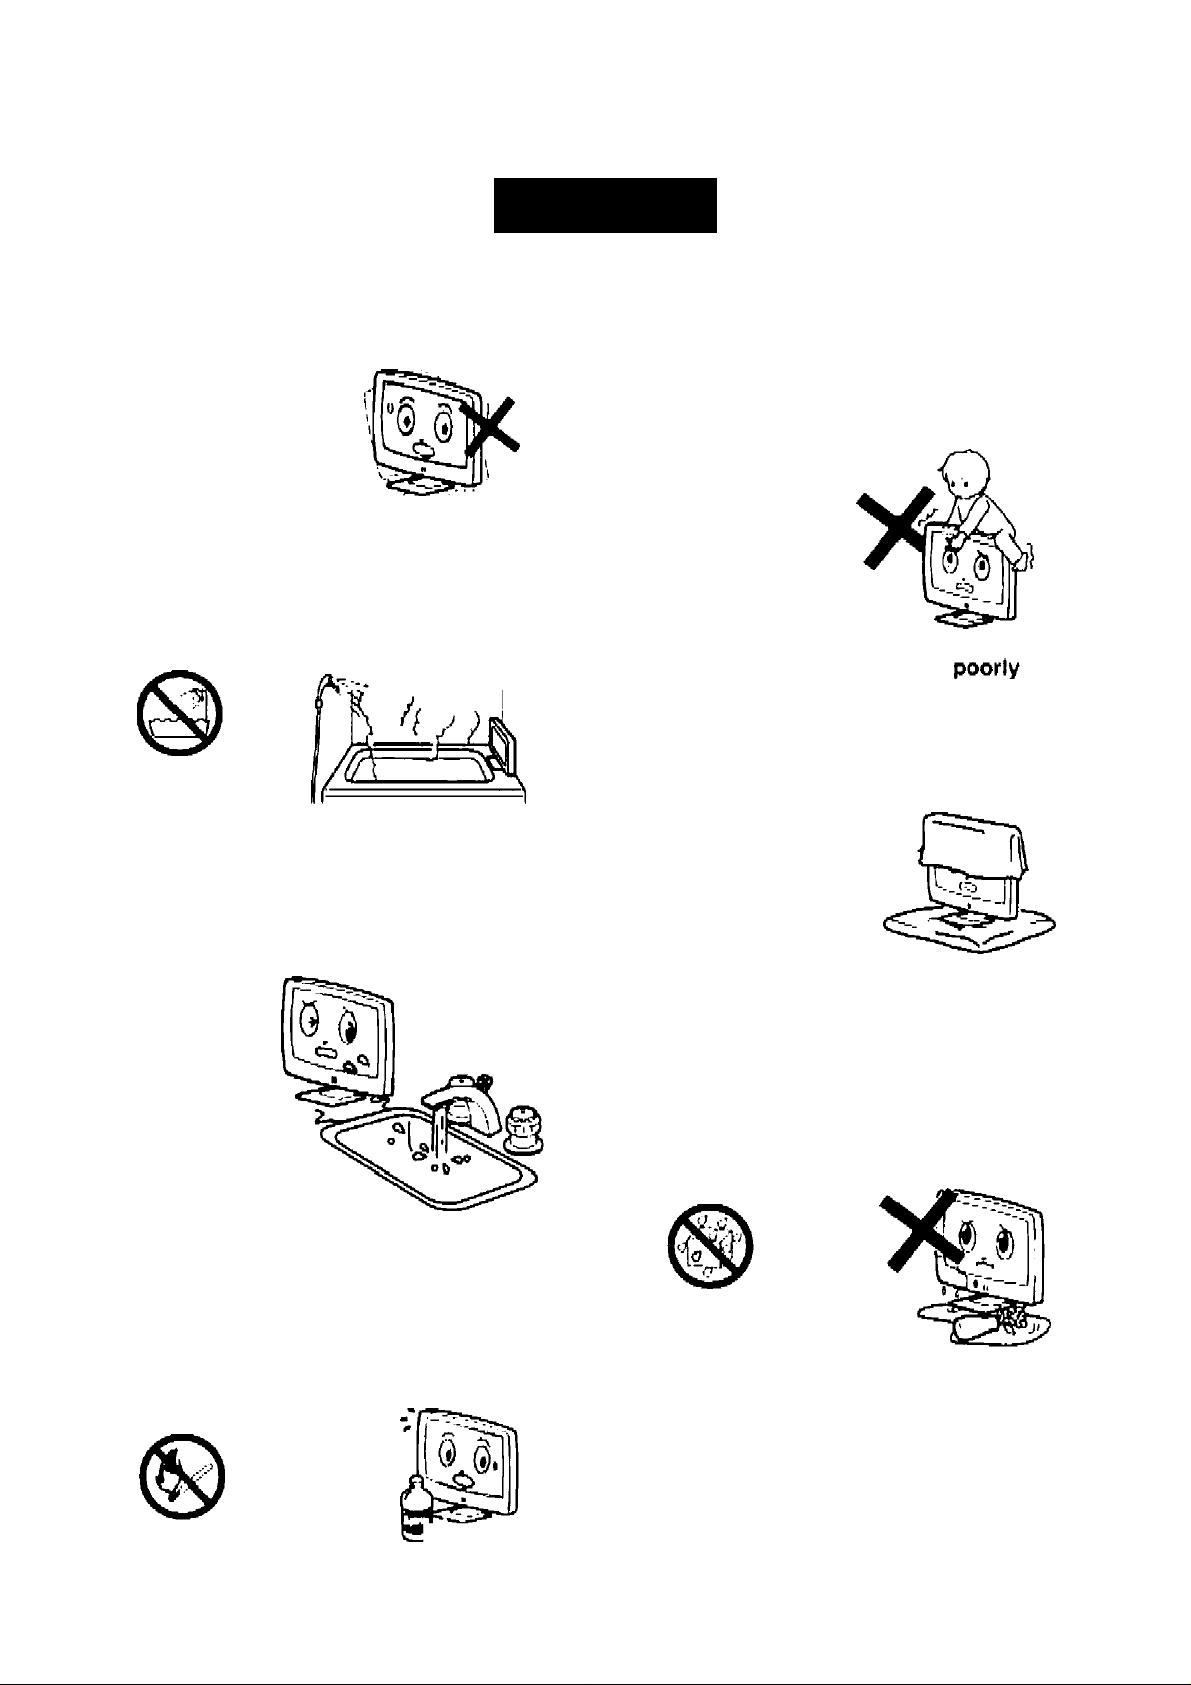
Do not use this product in bathrooms or
shower rooms.
• This product is not designed to waterproof
specifications. Exposure to splashing water
may cause electric shock or malfunction.
Do not use
in shower
rooms
Do not Install this product In locations
subject to water drops, moisture, steam,
oil mist, dust or dirt,
* Doirig so may cause fire or electric shock.
Do not place heavy objects on this
product.
• Doing so may cause it to fall or tip over. Pay
particular attention when this product is used
in homes where children are present,
0
Caution
Do not Install this product In
ventilated locations, in sealed boxés,
on carpets or blankets, or cover It with
cloth.
• Doing so may cause heat to build up inside,
resulting in fire.
0
Caution
0
Caution
Do not place fire such as lighted candles
or lit cigarettes nearby. Do not bring any
thing highly flammable or volatile into
contact with the TV.
■Doing so may cause deformation and fire.
Caution
^ &
Do not place vases or other containers
filled with water nearby.
• Water may spill Inside this product, resulting
In fire or electric shock.
Caution:
Splashing water
Page 7

I Safety Precautions (continued)
Acaution
' Before moving this product, disconnect
all leads.
• Failure to do so might damage the power
cord, resulting in fire or electric shocK.
O
Disconnect leads
Before performing daily maintenance on
this product or when it is not to be used
tor a long time, unplug the power cord.
• Failure to do so may cause fire or electric
shock.
Unplug the
power cord
I Handling the Remote Control
I
Use only the specified batteries, and do
not use old and new batteries together.
• Failure to do so may cause the batteries to
rupture and battery fluid to leak, resulting in
injury or bums,
NEI^ OLD
0
Caution
When Inserting batteries, make sure that
the poles are facing the correct direction.
• Failure to do so might cause the batteries to
rupture and battery fluid to leak, resulting in
injury or burns.
o
o
c
o
d
o
z
Be sure to wipe off any dirt or dust from
the ventilation holes.
■ Failure to do so may cause fire.
O
Wipe off dirt
and dust
Do not subject the LCD screen to Impact.
■ Doing so may cause the LCD panel to split,
resulting In Injury.
0
Caution
•¥
1
O
Insert as
Indicated
If fluid is leaking from alkali batteries, do
not touch them with your bare hands.
• Doing so might cause skin Inflammation, loss
of sight or injury.
Do not touch
+
T=r*
"O 0"
i
-Z.
Page 8
I Notes on Use
Recommendations
This product cannot be used outside the
country of purchase, Australia or New
Zealand,
• This product can be used only in the coun
try of purchase, Australia or New Zealand*.
It cannot be used in any other country as
broadcasting systems and power voltages
differ overseas.
’The Digital Tuner is not compatible with the
New Zealand Digital Freeview Broadcast.
Installation
Power Supply/Voltage
• Use only the specified power supply (230-240
VAC, 50 Hz). Use of other power supplies
may cause a malfunction.
■ Be sure to use the power cord provided.
-2.30
Antennas
• To prevent the influence of radio Interference,
set up the antenna away from busy roads,
overhead railway lines, electricity feeder
lines, and neon signs. This Is also effective
In preventing accidents from electric shock In
the event that the antenna falls over.
• Do not Install this product near equipment
that generates heat.
Do not place objects on top of this product.
Do not place this product on unstable
surfaces or in locations subject to
moisture.
When this product is installed next to a
window, prevent It from being splashed by
rain or snow.
Do not unnecessarily lengthen or bundle the
antenna wire, Doing so may disrupt recep
tion.
Bear In mind lo periodically Inspect and
replace the antenna. If necessary, as it is
exposed to the wind and rain. The antenna
is particularly susceptible to damage in loca
tions subject to smoke and soot or locations
exposed to sea breezes. It video reception
is poor, contact your dealer,
8
Page 9
I Notes on Use (continued)
Recommendations (continued)
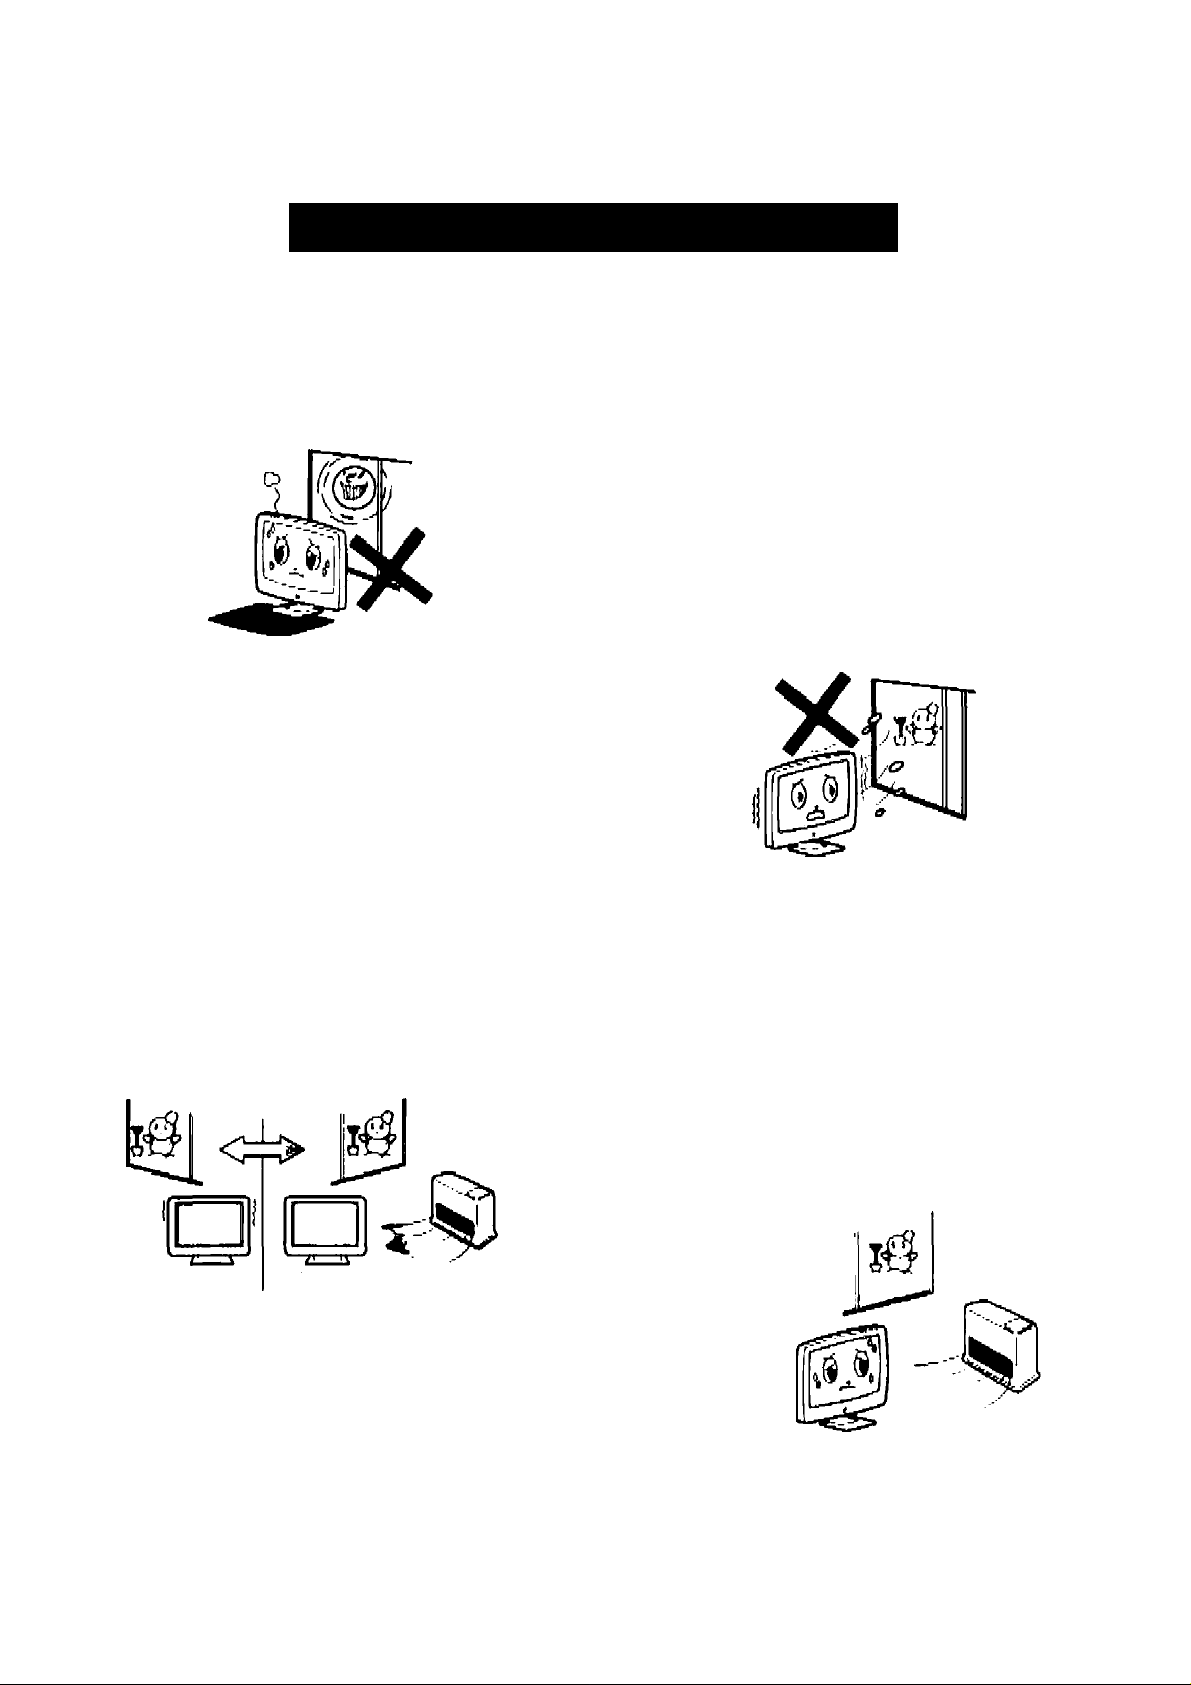
Avoid direct sunlight or steam.
■ Do not Install this product In direct sunlight
or near heating equipment, Doing so may
adversely Influence the chassis or compo
nents.
Leaving this product In locations such as
vehicles with closed windows that become
excessively hot may deform the chassis or
cause this product to malfunction.
Use in low-temperature rooms and
locations
• If this product is installed In a cold room or
location, smears may appear in the picture
or the picture may be delayed on screen.
This Is not a malfunction. These phenomena
improve as room temperature is restored.
• Do not install this product in locations where
the temperature will drop. Doing so may de
form the chassis or cause the LCD screen
to malfunction. Recommended operating
temperature: 0*C to 40*C
O
o
c
o
Avoid using this product in rooms and
locations subject to sudden changes In
temperature.
• Doing so may Impair the definition of the
display.
Condensation
• II this product is suddenly transfered from a
cold to a warm location or If the room tem
perature changes suddenly (e.g. by turning
on the heating on a winter's morning), con
densation (water droplets) may form on its
surface or inside. Continued use In this condi
tion may cause malfunction. If condensation
occurs, wall a while for the condensation to
disappear before plugging the power cord
Into the power outlet.
A
Caution
Page 10
I Notes on Use (continued)
Recommendations (Continued)
O
Î3
=>
o
o
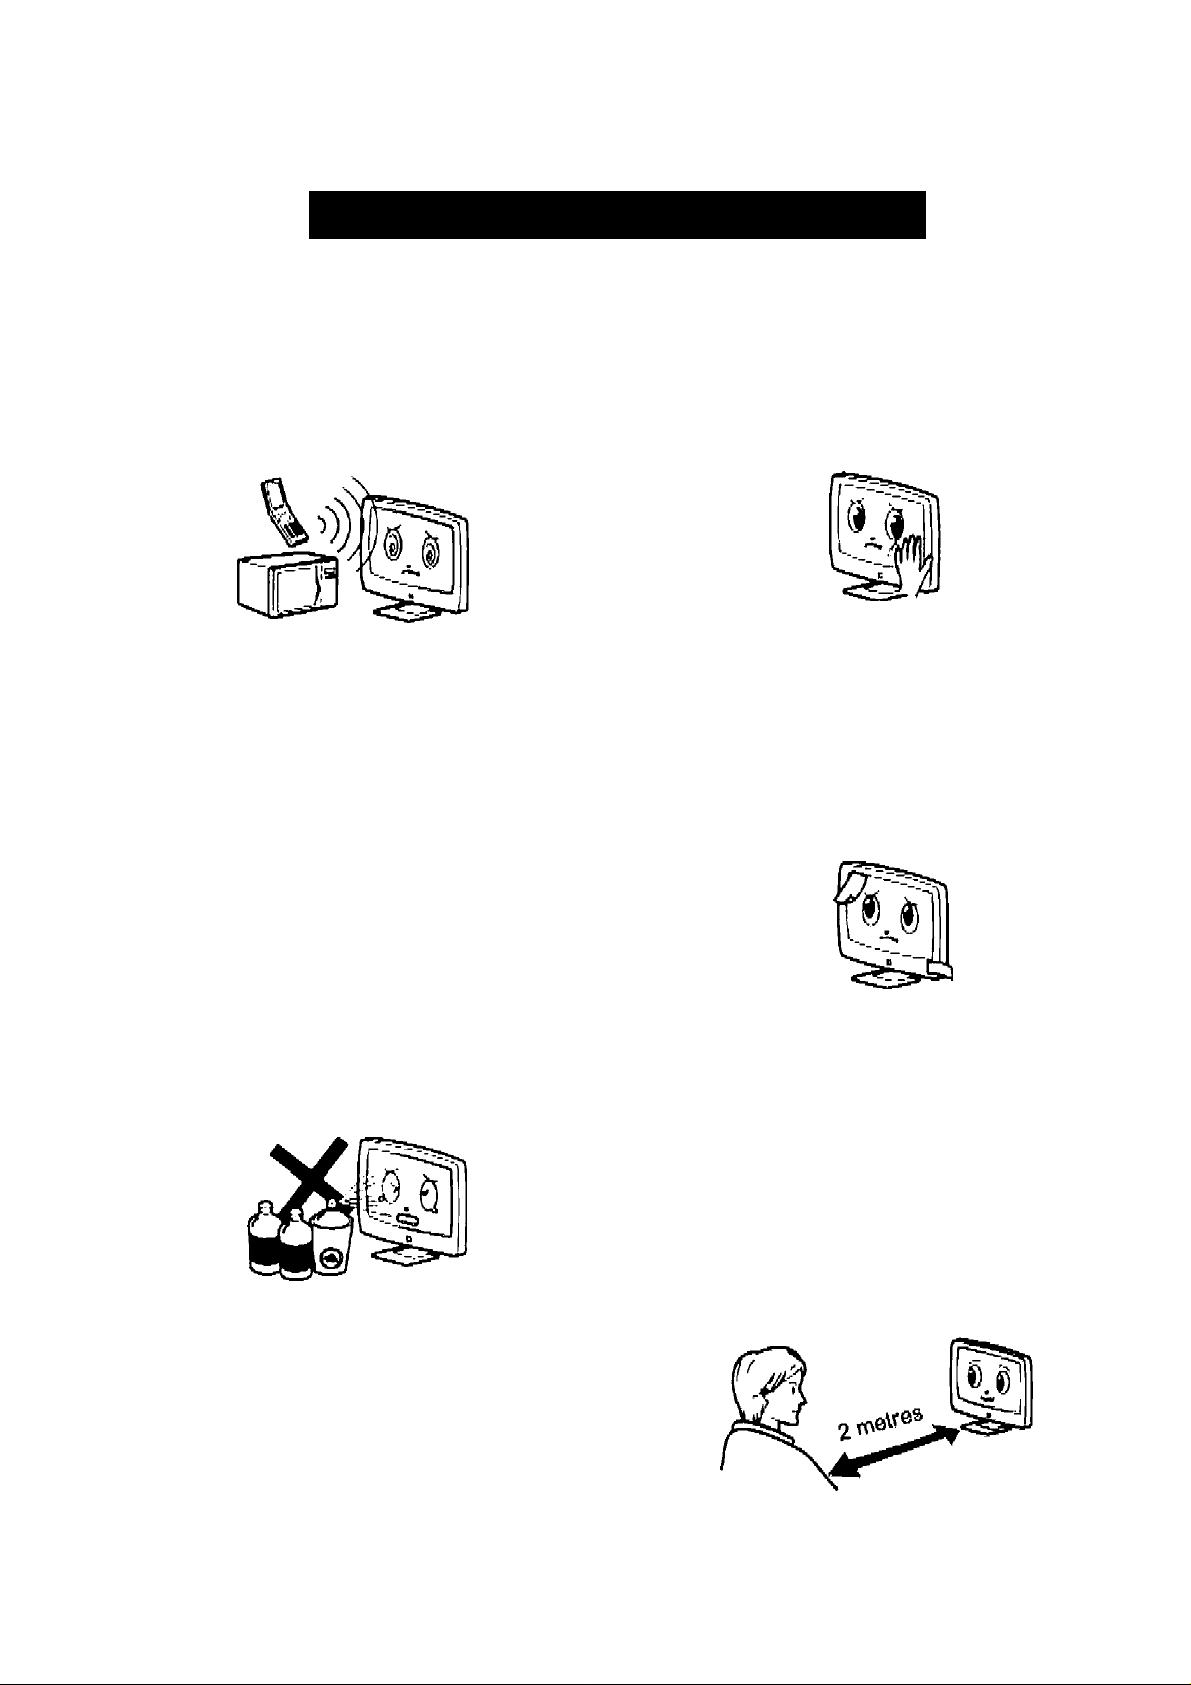
Avoid radio interforence,
• If cell phones and other electronic equipment
are used near this product, electromagnetic
waves may cause mutual Interference be
tween these devices, disrupt picture recep
tion or cause noise.
Daily maintenance of the chassis
• Before you perform daily maintenance on
the chassis, unplug the power cord from the
power outlet.
' Wipe away dirt lightly with a soft, dry cloth
such as flannel.
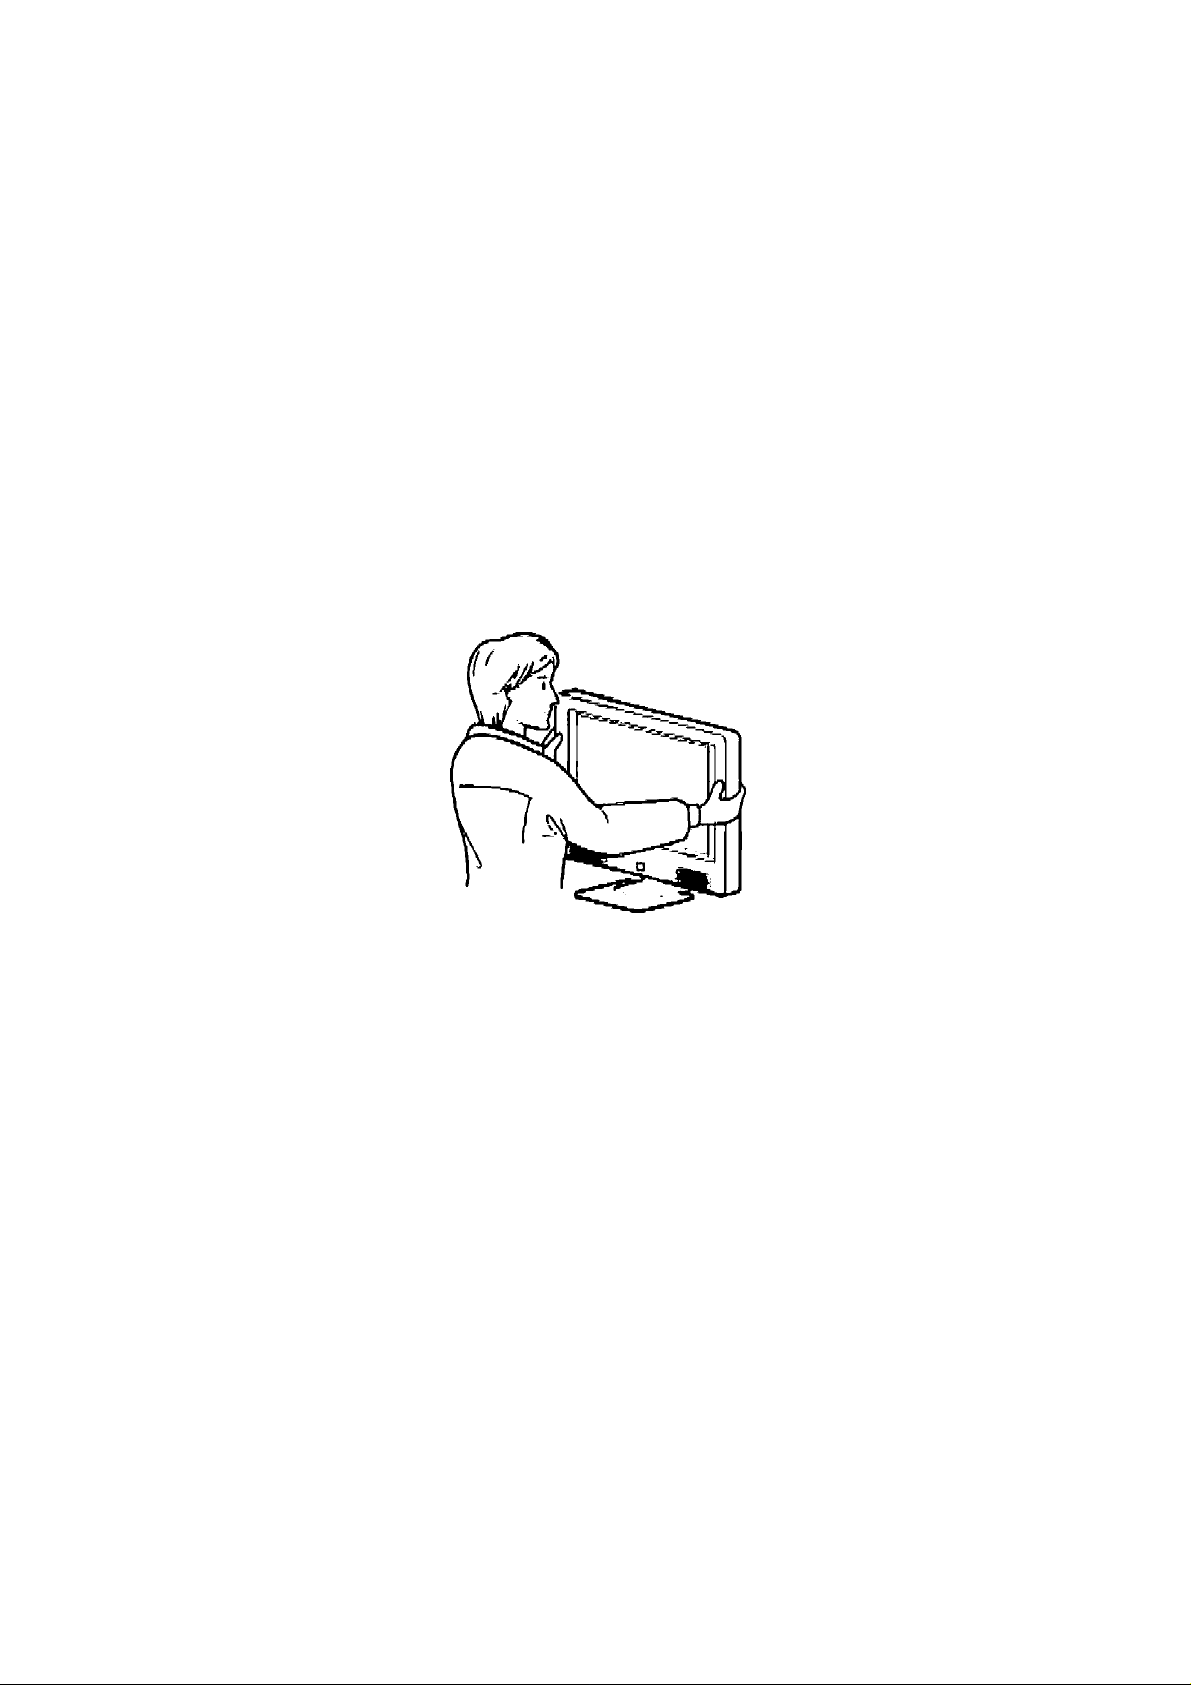
Handling precautions
• Do not press on the LCD panel. Doing so
may cause the LCD panel to split, which is
dangerous. Also, do not drop this product or
subject it to strong impact.
Do not stick stickers or adhesive tape on
this product.
• Doing so may discolour or damage the
chassis.
• To remove stubborn dirt, moisten the cloth
with neutral detergent diluted with water,
firmly wring the cloth and wipe off the dirt.
Then, wipe with a soft, dry cloth.
• Many plastic parts are used on the chas
sis, Avoid using benzene, paint thinner and
other organic solvents to clean the chassis
as these may deform the chassis or cause
paint to peel.
Avoid spraying the chassis with volatile sub
stances such as insect spray. Also, do not
use this product for an extended period of
time with products made of rubber or vinyl
In direct contact with the chassis. Doing so
may deform the chassis as a result of action
of the plasticizer contained in the plastic or
cause paint to peel.
When watching the TV, allow at least two
metres between you and the TV screen.
• If the picture hurts your eyes, move further
away from the TV screen.
• It you sense twitching of your eyes, head
aches or dizziness, break from watching
the TV.
10
Page 11
Chapter 2
SETUP
W
q
c
"D
Page 12
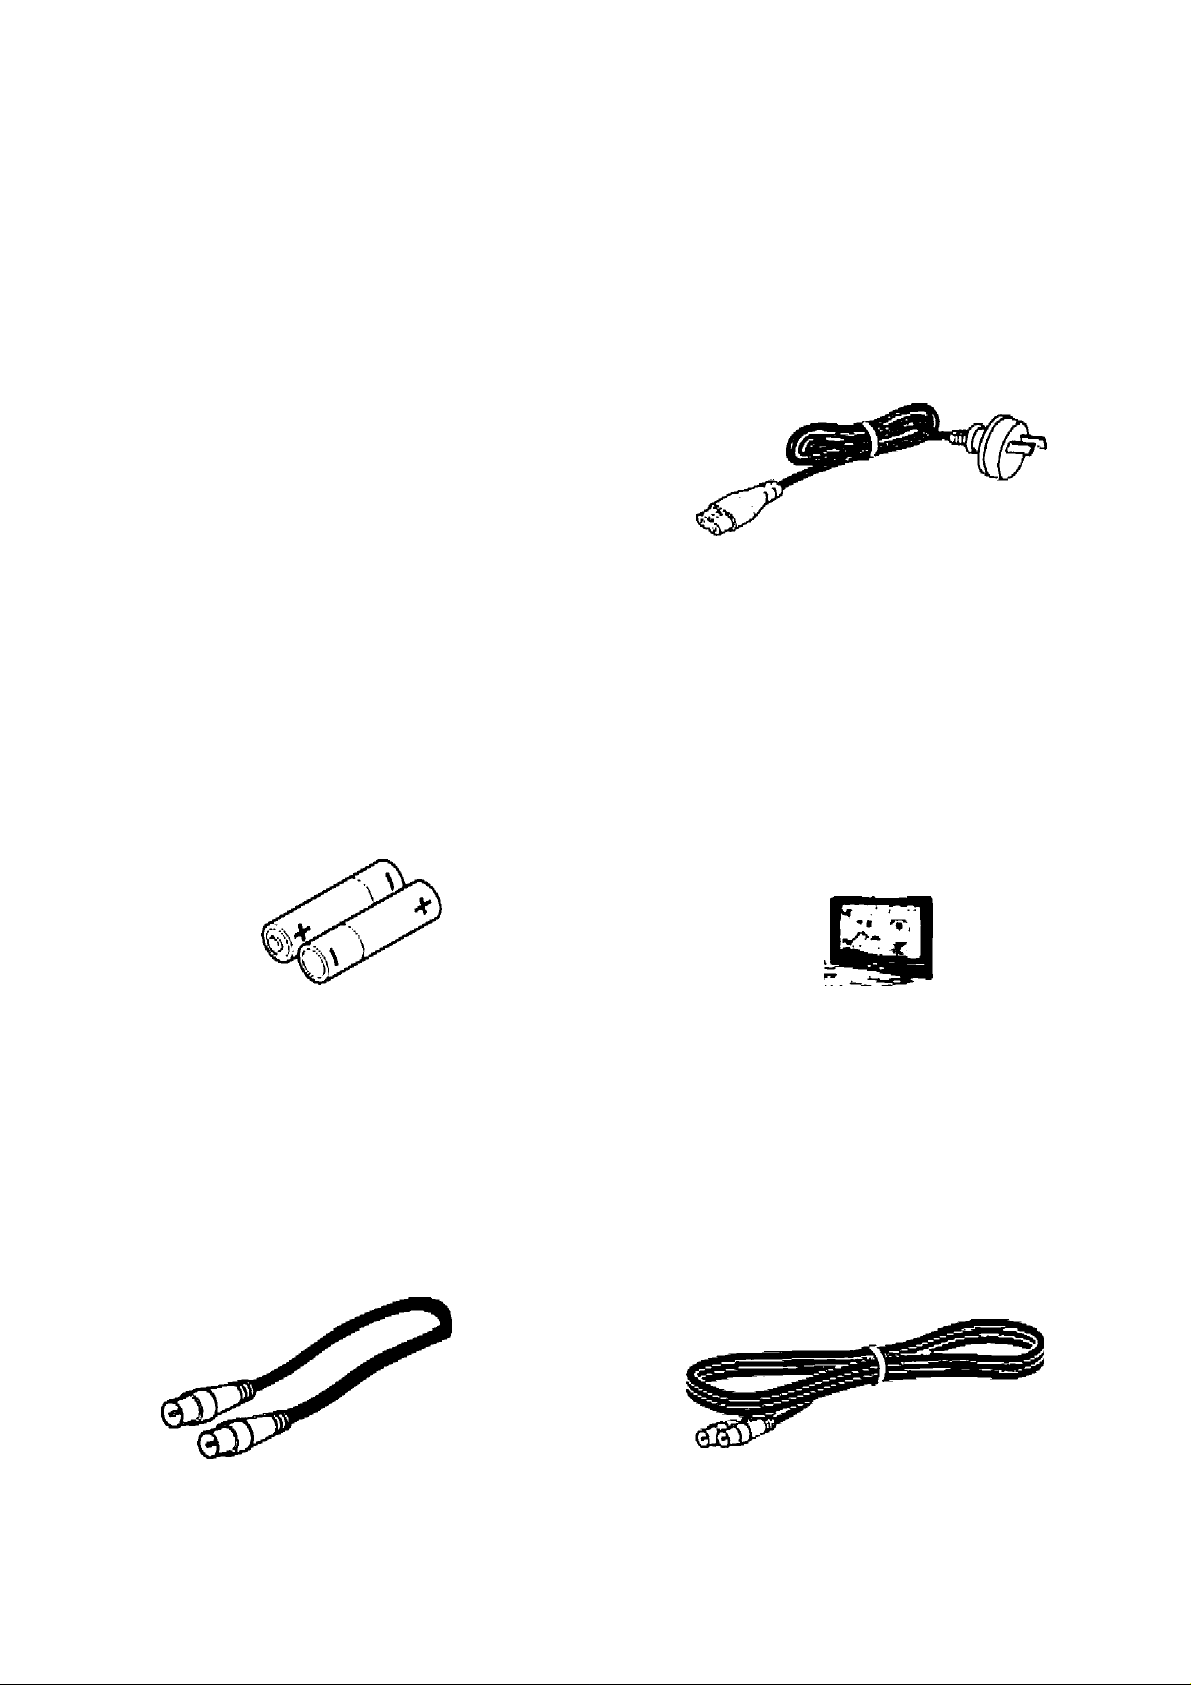
I Accessories
Make sure your LCD TV comes packaged with the following items. If any Items are missing contact your
place of purchase,
Accessories subject to change without notice and may vary from image shown.
Remote control (1 pc) Power cord (1 pc)
0 fcS
O
AAA batteries (2 pcs)
Antenna Loop cable (1 pc) (Pre-fitted)
This Owner’s Manual (1 pc)
HfMiTt
P
Antenna cable (1 pc)
12
Page 13
I Controls and Connections (remote control)
Screen DISPLAY button ^^^page
26. This button selects how channels
• \
SLEEP button @^page 32.
This button activates the off timer
fodturo.
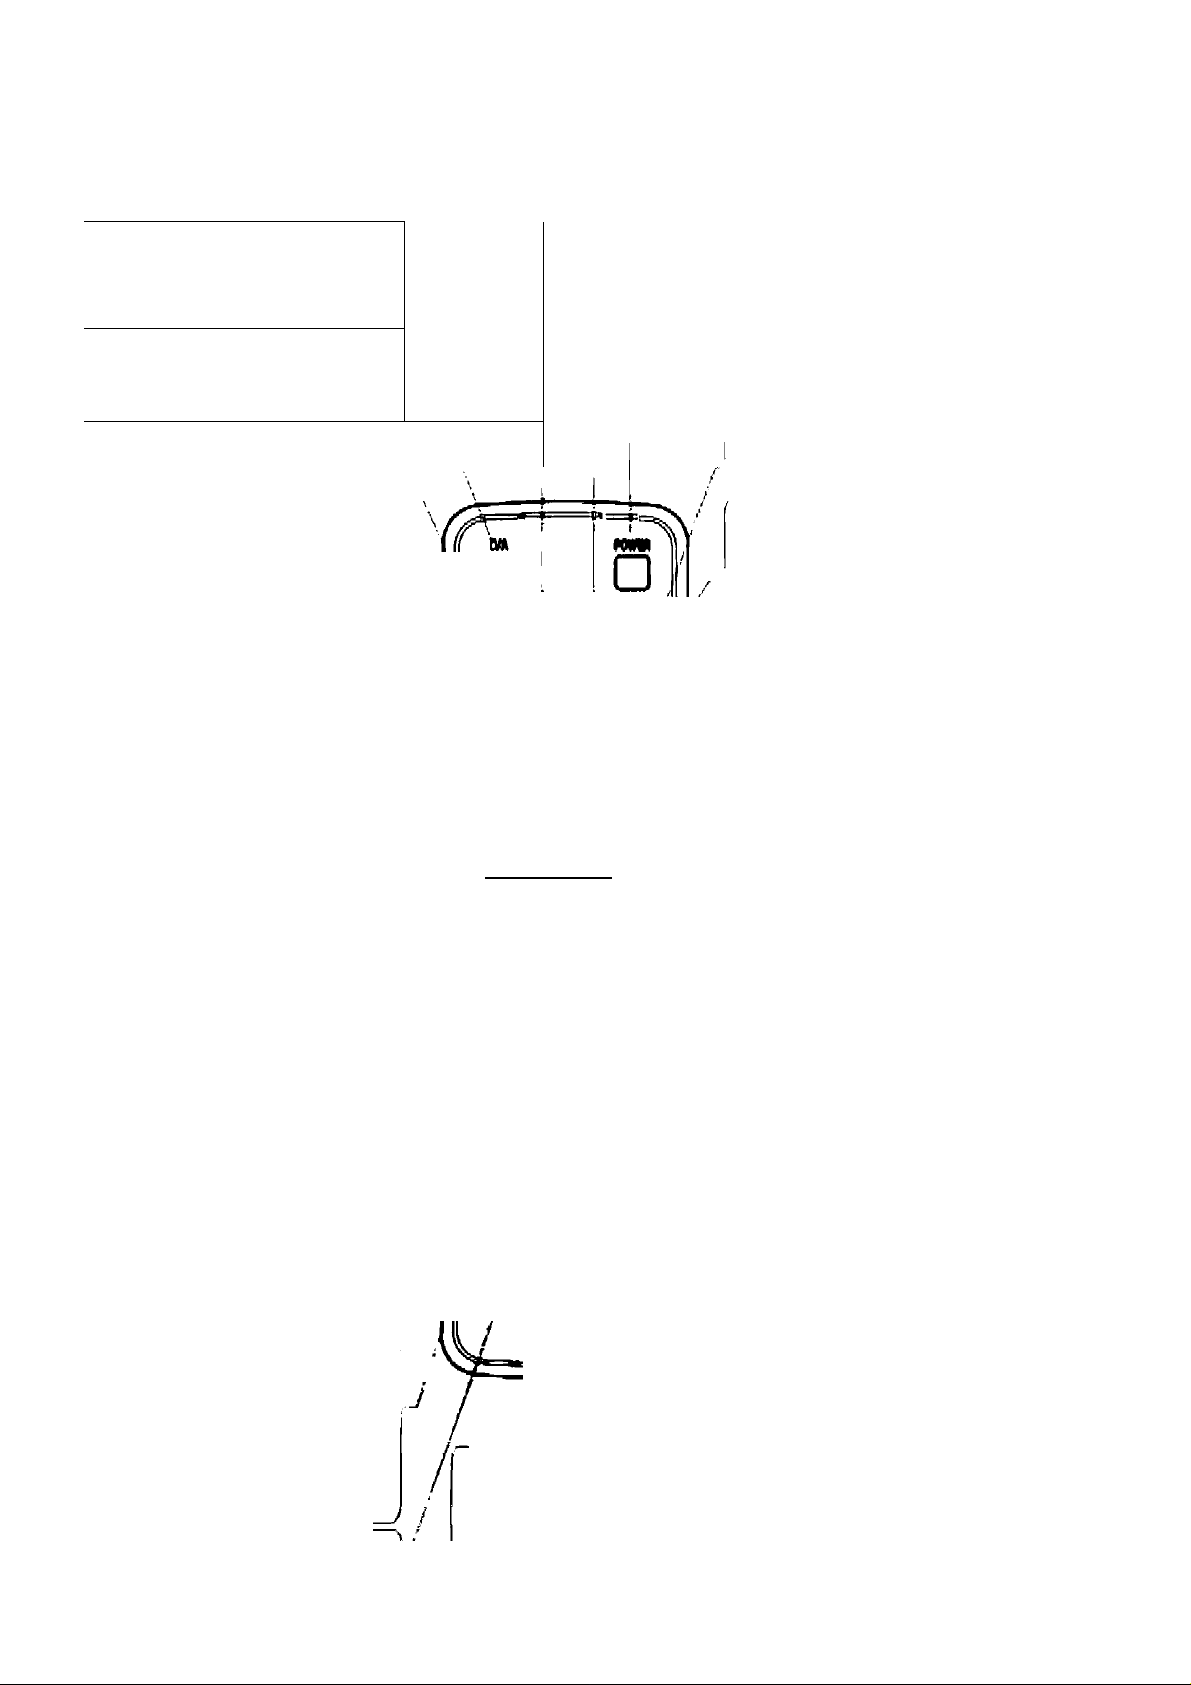
D/A button page 24.
Press to switch betwoon
Dlgltal(DVB) and Analog TV mode.
TEXT button j^^page 35. Í
Press lo activate the Teletext
mode, Press again to view the TV
program with tolotoxt page. You
can return to normal viewing by
pressing this (or a third time.
--
'l
□
and the audio mode are displayed.
POWER button ©'■page 24.
This button turns the power on and
off.
( TVAdDEO button t^^page 34.
This button selects video and audio
inputs.
HDMI button ti^pago 33,
Use this button to select betwoon the
j two HDMI inputs.
INDEX button d^^age 27.35.
Press to select the Index page.
Number buttons @^page 24.
Use these buttons to enter the
desired channel,
BACK button page 24. Use
to return to previous channel.
VOLume (+/-) button page 24.
This button adjusts the volume.
INFO button IJ^page 28.
Press to display tho program info
of DTV (Digital TV only),
Cursor buttons (¡^"'pago 19.
These buttons are used for
selecting menu setting Items.
OK button @^pago 18.
This button confirms tho solectod
on screen option.
WIDE MODE button li^page 31. J
This button switches the TV screenj' ,
between the panorame and
dispiays.
(REVEALbutton @^pago36,
Press once to reveal hidden
Information (solutions to puzzles,
riddles, etc). This button is
applicable only to teletext page
with puzzles, riddios, etc.
HOLD button li^^page 38.
Press once to hold page, and the
second time to roieaso that page.
200
m
□ So®
m ютлшЕ mo nm a
a □ □ сУ
^ 111 li
ИВЕ
3 В E
^ В P
В ™ 0
и». CD и
В в
в н в
ЕПШВ
ДОС
а о о ■
asñs
\
Colour BUTTONS <1^ \
page 36.
Press according to tho
red, green, yellow and
blue field shown at the
bottom of the screen.
AUDIO button page 30.
This button switches the audio mode.
}
SUBTITLE button pago 29,
Press to turn the subtitles on and off.
ENTER button Impago 24.
Usa to confirm key selection,
MUTE button *^^page 24. Press
this button to mute tho sound. Press
again to cancel the mute.
CHannel buttons 24.
Press to change the channel up or
down.
MENU button i^S^page 40.
This button displays the menu sotup
scroon.
FREEZE button !@^page 25.
Whon this button is pressed, the
currently displayed screen is saved
as a still Imago and displayed on
screen.
SUBPAGE button I^^page 36.
Press to enter the subpage mode.
You can use subpage up/subpage
down to displayed subpage. Press
again to exit.
l' SIZE button [¡^pag0 36.
Repeatedly pressing this button
' doubles the character size In the fol
lowing order; Uppor hall of the pageI > Lower half of the pago-> Return to
^ normal size.
_________________
13
СЛ
Ч
c
*0
Page 14
I Controls and Connections (LCD TV)
Q.
Z)
[L
(O
VIDEO 1,2 Input
S VIDEO inpul
Video input
LoM (monaural) audio
input
Right audio Input
VIDEO 3. 4 Input
Componont (Y) Input
Componeni (PB) Input
Component (PR) input
Left audio Input
Right audio Input
Antenna IN (Analog)
VHRUHF anionna
connectoi' jack
HDMI Input
AV Input (HDMI1)
AV Input (H0MI2)
Audio output
Left audio output
Right audio output
Antenna OUT (Analog)
14
Aniqnno IN (Digital)
A Anionna Loop cehio le pfo-fittod between
Antenna OUT (Analog) and Antonnn IN
(Analog) jacke.
Page 15
I Preparing and Using the Remote Controi
How to insert the batteries
Open the battery compartment cover.
Remove the cover by pushing down where
the cover edge is marked and slide the cover
backwards.
Close the battery compartment cover.
Rest the cover along the back with the clip
aligned and push/slide the cover until you
hear it click into place.
Insert the batteries.
Insert two AAA batteries by matching the +
and - terminals on the batteries to the dia
gram inside the battery compartment.
(Make sure that the poles are facing the cor
rect direction.)
CO
n
c
TJ
How to use the remote control
When Operating the remote control, point its top edge at the
remote control IR receiver on the TV. Operate the remote control
within seven meters, 30” on the left and right and 15® above and
below the receiver.
If the TV cannot be operated by remote control operation (but by
the buttons on the TV), a probable cause Is that the batteries in
the remote control have reached the end of their service life,
Replace with new batteries.
Do not leave or attach the remote control in a location subject to direct sunlight.
Heal may deform the remote control and cause it to malfunction.
The remote control becomes more difficult to operate if direct sunlight or bright overhead lighting falls
on the remote control IR receiver on the TV. Either re-orient the lighting or TV, or bring the remote
control closer to the remote control IR receiver.
Do not subject the remote control to strong Impact. Also, do not allow it to get wet or leave It in very
hot locations.
15
Page 16
I Connecting the Antenna
VHF/UHF antenna
An analogue cable for VHF/UHF i$ provided with this TV as an accessory.
Connect the antenna cable (provided) or commercially available antenna cable or cable adaptor accord
ing to the antenna Jack you are using, and connect the other end to the antenna input Jack on the TV.
Wall antonna jdQk
Q,
tii
16
Ì
I
You can confirm the signal level of digital broadcasting
using Menu (page 46),
Page 17
I Connecting the Power Cord
Insert the power cord (provided) into the power jack on the TV, and connect the power plug to the do
mestic power outlet. The standby indicator on the front lights rod.
Ui
q
c
T5
(Be sure to connect in order CP then (D)
When tho TV Is not in use for extended periods of
lime, be sure to unplug the power plug from the power
outlet.
17
Page 18
I Initial Settings
When the TV is turned on for the first time, it starts tuning the channels automatically. This TV automati
cally detects and memorize receivable VHF and UHF broadcasting waves.
I
Do not turn on the TV until you have connected the antenna, Without the connected antenna,
the TV may fail to carry Out initial aettings successfully.
Q.
IL
CO
rOnniEn'
press the 0 button on the TV or
r*1 on the remote control.
^j^tandbyIndicator
rvmig-1
JRarnotBconlrol
IR lanior
The TV turns on and initial setting screen is
displayed. Standby indicator will be turned off
Powar Button
Initial Setup
PlcastfseloctthATimp whAfAyou l<XMA.
NSW/ACT
VIC
QIP
SA
WA
TA5
NT
Move 2o
Eu
Select Q
EndQ
Select the time zone using the 0 0 button where you locate, then press the B
18
button. Next initial setting screen is displayed.
Initial Setup
IV Isabout to stnn chanr>«l scanning.
PImw connect antenna.
Start
Cancel
Move
D'
Select N End0
Page 19

I Initial Settings (continued)
Press the B button.
TV starts auto detect program for
receivable analog and digital broadcast signals.
Э PI 0
Initial Setup
Searching for stations now
Please wait,,.
20% finished
EUBUE)
I
• With poor reception, TV might not be abi© to receive broadcast station successfuliy.
• if no screen is displayed, please see Trouble Shooting ( page 53).
When the automatic setup ends, the Program Edit menu appears with the first assigned channel
on screen. Use the 0 0 buttons to check the channel numbers end the stations they are
tuned to.
To edit the scanned channels (to delete CHs which have poor reception), page 47, Press
CO
Ч
c
“0
the Ы button to exit from program edit.
• The automatic channel setup program starts the first time the TV is turned on.
* The automatic channel setup program can also be run from the channel setup menu (0^ page
46). You can also check how channels have been assigned.
If you turn the TV off before automatic channel setup is completed, the initial setup screen will be dis
played again when the TV is next turned on.
r<!
• When the Initial Setup is completed, the Program Edit screen displays automatically.
• If you proceed to Auto Program without connecting an antenna the TV will not be able to tune in
any channels. Make sure an antenna cable is connected and then choose Auto Program from
setup menu (page 46).
19
Page 20

I Connecting Other Equipment
When no other equipment is to be connected, proceed to Chapter 3 "Watching TV" page
24), You can start enjoying TV progranns right away.
0.
z>
H
LU
«
VIDEO ^ Input
T>iiA input l$ uAAd for cdnnooiing un
Si VIDEO JacK to optional equip
ment having an S VIDEO terminal.
O.g.) Video camera, DVD pinyor.
VCR, etc. wllh an 5 jack
VIDEO It Input
This input Is used fdr connecting
optional equipment by AV cable,
o.g.) VCR, TV game machine,
video camera, etc.
VIDEO 3, 4 Input
This Input is used for connecling op
tional equipment with a component
video jwck.
e.g.) Digital tuner. DVD player, etc.
HDMI1,2lnput
This input Is used for connecting
optional equipmont with an HDMI
lack. e.g.) Digilai tuner, etc. When
connecting from a OVI (Video
only) source, connoci sound 10
Audio of VIDEO 1,2,3 or 4 input.
’ About connection cables
Cennociiqns are also made using the cables specified (or the various
equipment (e.g. video camoru) to bo cdnnoctad, For details on how to
make connections, refer to the User's Manual for the feapecliya ogulpmont,
ro fl VICDO inru )éck ConH|t*fOiil(y ÉvvONliit
m
m
S
"^ü
20
Audio output
This output Is usod for recording
audio from the TV or (or connecling
to an oKiernal amplifier.
Antenna connections not shown for clarity
«Kt
Before connecting optional equipment, be suro to turn this TV and the optional equipment off.
The plugs and jacks for video and audio connections aro colour-coded. Connect cables so that the cable
plugs match ihoir respective colour of the connection Jack.
Connect only video and audio signals to the video and audio Jacks. Do not connect other signals. Doing
so may cause malfunction.
For details on how to use arid connect equipment, refer to the User's Manual of the respective
equipment.
Connection Precautions
• Insert plugs as (ar as they can go. Incomplete connections cause noise.
• When unplugging plugs, do not pull on the cord. Hold cords by their plugs.
■ To prevent mutual intorloronce when two or more pieces of equipment are connected, turn equipment
that Is not in use off.
• If noise appears In the video or audio of the TV and connected equipment, move the equipment
away from the TV,
i
Page 21

■ Connecting Other Equipment (continued)
With th© 6 input connections avaiiable you can connect a DVD player, Video Camera, TV games machine or VCR player.
If S-Vidftojock \% Installed,
S Video cable
A S-Video and Audio
output jacks aro connected
Videos Audio
Cable
Component
Video Coble
Audio Cable
Audio cable
NDMI ™hln p
HDMl cablo
---------------------------
Of»**'
'(--------------1'
a
и
_____
3
L'.tZI.'.')
•eee О
mm
If there la no S vidoo Jack,
4 Video and Audio output
Jacks are connectod
• Componont and Audio
output jocks oro
connected. D-Tormlngl
connection can also bo
used here Instead of
Component connection.
• Audio input ¡{icks
are connected
• HDMl jacks
aro connected
CO
Ч
c
13
vr.
----
cable
I
4-
Exomplo of connections
Reference
9
About Equipment with an HDMl or DVI jack
* Um Iho HDMl (Hk)h Dsfinitiort Mulllmedia InlorlaQo) jack whan ovnllnblo nn this connection Is rsconimonded >0^ best quality picluro
and audio
■ If there is only e DVt jack then DVI to HDMi cablos uro commorcioliy availablo. DVi only aupplios a video signal so connoct audio
cable too. Then go to Iho *'Audio Setup" menu and aelact audio input to chooso Audio l, 2,3 or 4.
About tha Component Video Jack
* Componont vtdoo signniB arc Also celled "colour difforortce algnala.” Componont vidoo la oont through thrno cabloa: one brlghu^ss
(lumlnnncn or blnck-and-whitq component) signal and two colour shade (chromtnanco. or Wuo: D-Y and rod; ft"V) nignal As iho
brighlncma and colour nhndo atgnala nro rocordod separdtely trom each other on a dtolia) lunor or DVD, componont vidoo achieves
groBior colour Bcourocy [o.g. Iona colour amodr) th«n reoMlfir video signals Oial aro obiafned by combIntnQ the brighlnoaa and
colour Bhado aignals.
If OVI Jack Is Installed,
HOMI (OVI to HDMl cable)
plus any Audio Jnck
for connection
21
Page 22

Q.
ZD
[D
to
I Connecting Other Equipment
Arranging the cables
Pass the cable through the notch in the cover.
(The cover can also bo removed.)
About connector covers
Removal
Press down
here.
(continued)
27 and 32 inch models:
Press down on the lip at the top and pull
towards you to remove it.
• Installation
Insert the two protrusions at the
bottom into the holes on the body,
and press in the top until it is locked
In place. Next, press in the center
section to lock the protrusions on the
left and right.
2 2 * Take care not to pinch the cords.
42 Inch model:
Press on the two tabs on the right and pull
towards you to remove it.
42 inch model:
Align the three tabs on the left into the
holes on the body and press them Into the
left side until it is locked in place. Next,
press the right section to lock in the right
side tabs.
Page 23

Chapter 3
WATCHING TV
о
I
О
X
z
Page 24

I Watching TV
Perform regular TV operations using the remote control. The TV is provided with buttons having the
same functions as those on the remote control. These can be used to operate the TV.
Turn the TV on.
Press the [J button on the remote control or
tho 0 button on the TV. The standby indica*
lor at the bottom of the TV goes out and the
TV turns on.
Select tho desired channel.
Switch Analog and digital
broadcasting by pressing Q button.
Select the desired channel using the number
buttons then press Q' o'" channel selection
buttons.
Press [““I button to switch the channel
currently tuned to and the one previously
tuned to.
Press
currently tuned channel.
1Ич
button again to switch back to the
0
z
X
1
ГПЁГИ
3 0 (T
3 0(1
H m H
и ШЁ)
Qs *
□ Ни ■
Э H в
ЕПЮЭ
аМа
о о a CD
шим. жи в ятт
Г-Т П t"J гт
ипют
Adjust tho volume.
Adjust the volume using the volume □0
button.
The volume is displayed in the form ol a
horizontal bar on the bottom of the screen.
Temporarily mute audio.
Press the Q button.
■ To restor^ie volume, press the Q button
again.
• To lower the volume setting while the
sound is muted, press the volume (~3
button.
• To turn on and raise the volume setting,
press the volume [0 button.
Turn the power off.
If you press the Q button on the remote
control or the button on the TV, the TV
enters the standby mode, and the standby
indicator lights.
24
Page 25

I Saving Still Images (FREEZE)
Save the Image currently being shown as a still image and display It on screen.
This feature is useful for saving Information such as telephone numbers, maps and recipes.
0JE|_B
ntrg,
a a a
MMM. NOU) IB NIHWI
Reference
Press the ED button.
The image that was displayed appears at the
bottom right of the screen.
rnrc/n
lUUf
5
To delete a screen freeze, press the Q
button again.
I
X
z
CD
5
Screen freezes are automatically deleted by selecting a channel, by selecting the
Wide screen display mode, or by selecting an external input.
25
Page 26

I Displaying Channel Numbers (DISPLAY)
If you press the DISPLAY button, the number, label and Information of the channel that is currently being
received are displayed.
TBcr iu]V|Mnjv;nnao
a aicDja
■OBC nnmi MDia
CD CD CD CD
0
Z
X
0
1
I Digital Broadcasts
Press the button.
The channel number, program
name etc for the channel currently
being received are displayed at the
top of the screen.
Press the button again to
reveal furtner^plcture Information at
the top left of the screen.
To turn the display off, press the
Pn button again.
I Analog Broadcasts
Press the I \ button.
The number, label and mode* of the channel
that is currently being received are displayed
at the top right of the screen.
0101
* The audio mode Is not displayed when an
external input Is selected, page 34)
To turn the display off, press the button
again.
26
Page 27
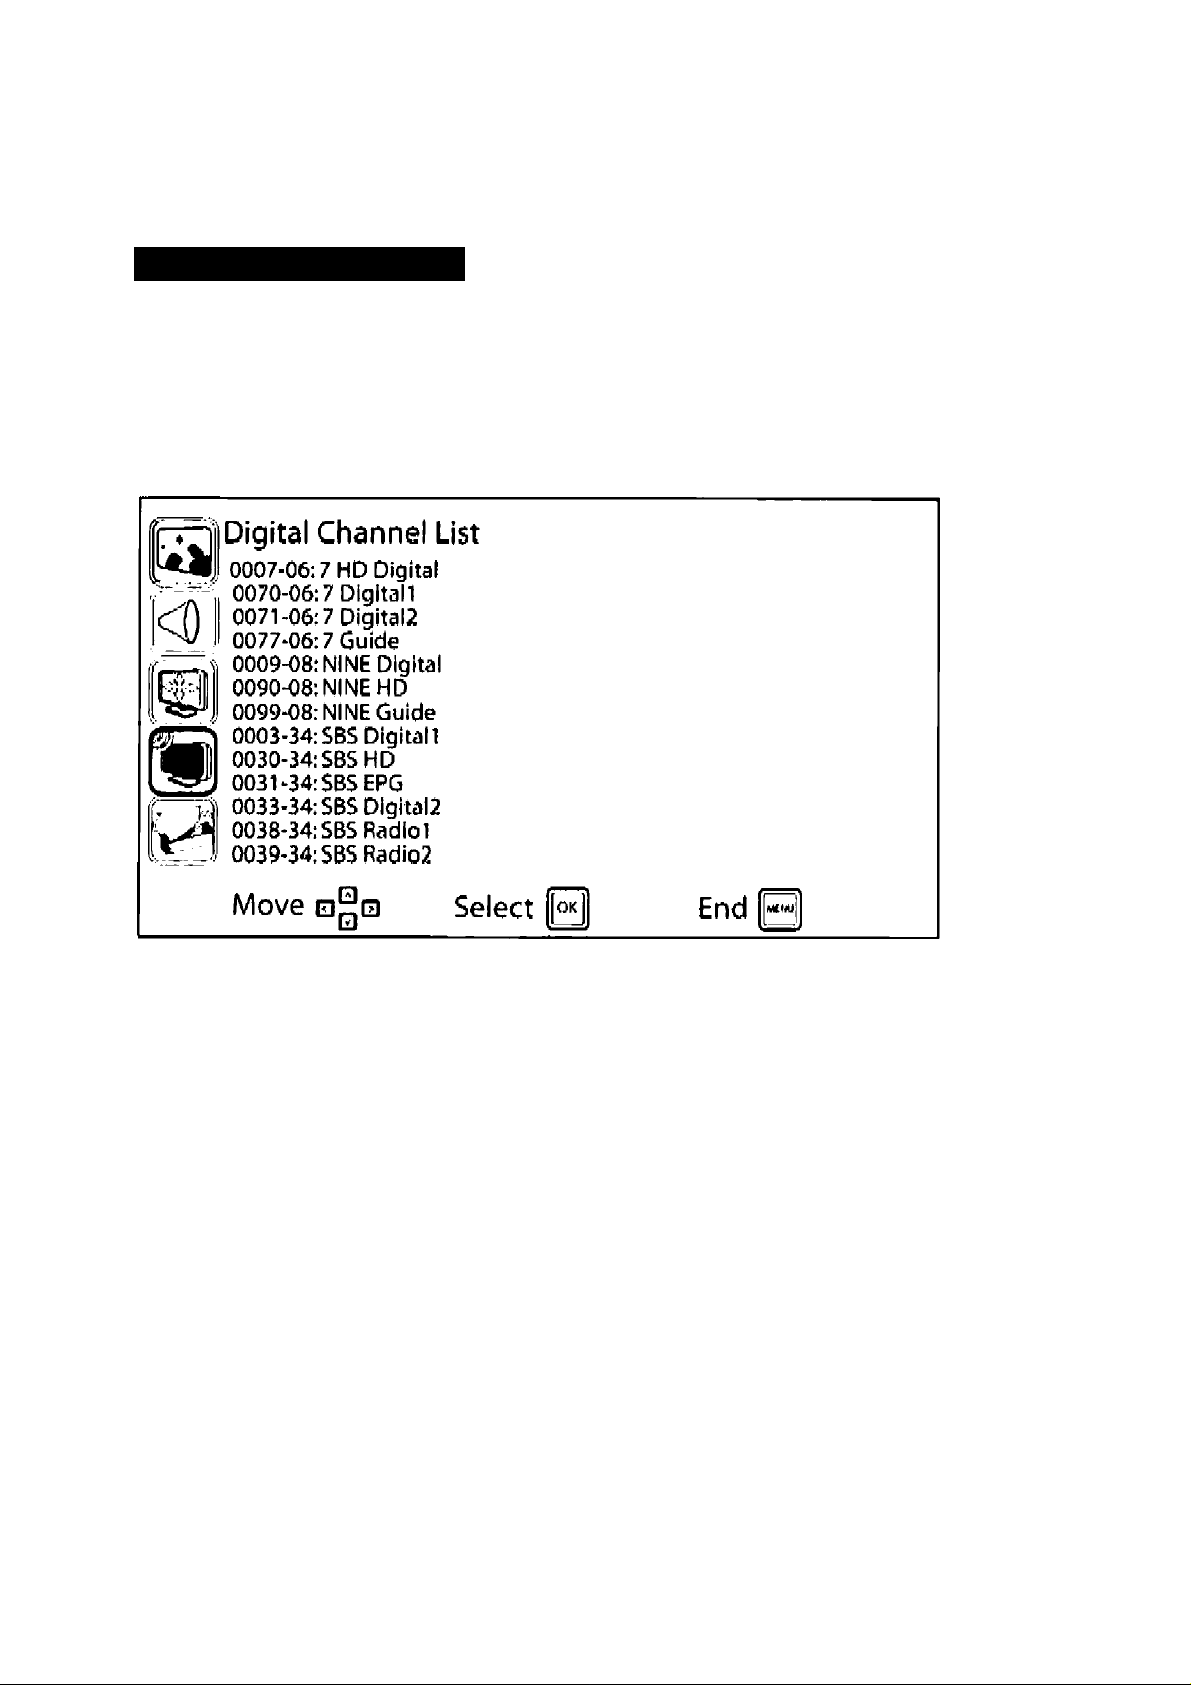
I Displaying Digital Information (INDEX)
INDEX (Digital channel)
Press the Q button, when not using the Teletext mode, to display the Digital channel listing. The
list displays the digital channels which are tuned and available for selection,
Example display:
i
X
z
o
27
Page 28

I Display Digital Information (INFO)
When viewing digital broadcast channels the INFO feature can be used to display
additional information for the current program.
Press the (5 button to display information for
the current digital channel,
I
i
28
Page 29

I Displaying Subtitles (SUBTITLE)
You can aclivato subtitles for currently displayed broad
casts which include subtitle information.
TEXT a» DOniVTWVBO
a,a,a a
MDEX;§Uiimf; AUDIO HOII
Oi aja a
Reference
When the broadcast contains no
subtitle stream the following appears
on the screen.
wmu
Press the a button during the broadcast to activate
the feature.
•urnnc
If there are multiple subtitle streams then press a
again to view the next stream,
I
T
2
O
:
Notice
You can automatically set subtitles to be ON or OFF. (page 49)
29
Page 30

I Selecting Dual Language Audio (AUDIO)
You can saldct batwoen main and sub audio In the case of dual language broadcasts such a$ English
and another language broadcast.
Press the button.
The channel number and audio (main, sub or
malO'fsub) Is displayed at the top right of the
screen.
Each press of the I I button switches
the display between "main", “sub" and
"maln+sub".
* You can also make this setting In the menu
screen.(page 44-)
Reference
§
AUOIQ
Main
17
0
1
I
When ihe broadcast contains no
dual language stream, the following
appears on the screen,
s'
If the broadcast is not a dual language broadcast, pressing the || button will not produce
any effect.
When an external input is selected page 33,34), audio cannot be selected.
When you select Maln+sub. main audio Is output from the left speaker and sub audio Is
output from the right speaker.
Display of "Main", "Sub" and "Main + Sub" depends on the broadcast signal.
'S
¡71
Sub
1-/1
Maln+Sub
Return to
Main
30
Page 31

I Setting Panorama or Zoom Display (WIDE MODE)
The display screen can be switched to the Fult, Normal* Panorama, and Zoom screen modes.
Press the “Qj* button.
This sets the screen to the Normal screen
mode,
Each press of this button switches the input
as follows:
mifvuuEi RTODB
oti a o
DEVEM. H0U» ns UfiMAE
I H_ J L I L J
Reference
9
When you select another channel, Iha screen mode will revert back to the default
setting. The default screen type can be set with “Screen Setup” (page 45) in
the menu screen.
In the Panorama screen mode, 4:3 aspect ratio images are expanded to naturally
fill the entire screen.
In the Normal screen mode, a black band containing no Imago appears on the left
and right of the picture,
Panorama display cannot be selected when the video format is 720p/l080i/
lOSOp.
The same settings can also be made with "Screen Setup" (3^ page 45) In the
menu screen.
WIOEKtODt.
S
Full screen
Zoom screen
iNormal screen
Panorama screen
I
I
z
Q
31
Page 32

I Using the SLEEP Timer (SLEEP)
The TV is turned oM when the time preset to the off timer is reached, This feature Is useful for when you
watch TV In bed. You can sot tho off timer within the range 30 to 120 minutes in 30-minute units.
Press tho button.
The screen changes to the off timer setup
screen.
Each press of the button changes the
time as follows: "30min." *“> ''60min," -->
■*90mln." --> “Off --> "30min."
and so forth.
The lime preset to the timer is displayed at
Si.EEP
I—I
30 min.
the bottom left of the screen.
When the preset time Is reached ...
C3
z
X
I
"5
‘»-✓ n
60 min.
■fyn
90 min.
120 min.
•l7—I
Oft.
Roturn to 30
minulos
One minute before the preset time Is
reached, the message "Sleep Timer: TV will
turn off soon*' is displayed and the TV enters
the standby mode.
‘iyi
I
The sleep timer Is canceled when the TV is
turned off.
If you press the button with the sleep
timer already set, the time you set is added
to the remaining time. (For example, when
the remaining time is 1 to 30 minutes, 31 to
60 minutes. 61 to 90 minutes and 91 to 120
minutes, the timer setting Is started from
"60 Min.". “90 Min. ,’T20 Min"" and "Off",
respectively.)
32
Page 33

I Using Optional Equipment (HDMi)
If you have an external device such as DVD player or Digital Tuner connected by HDMI you can
select as follows.
r
DM
□ □
TEXT 81» DOnJOrnrimD
□ a □ a
MDEX tUnnif AUDIO fim'\
CD a aiai
NUVt
'B
Press the I I button.
Each press on this button switches
between “HDMir and "HDMI2”.
HDMI1
Press the I—I button to change from
HDMI input.
I
X
z
o
33
Page 34

I Using Optional Equipment (TV/VIDEO)
Select the input when a VCR or DVD player, for example, connected to the external input jack on the
rear of the TV Is used.
Press the Q’ button.
Each press of this button switches the input.
The channel number or selected video/audio input ig displayed at the top right of the
screen.
0
z
X
1
Reference
VIDEO 3
VIDEO 4
h/1
4
Carry out the required operation.
Switching of screens or volume adjustment
Is performed by the remote control for this
TV. Perform other operations according to
the instructions in the user's guides for any
optional device connected to the TV,
Rotum to Antonna input (the last
TV channel)
34
The name displayed on screen can be changed
to match the equipment connected to the TV;
For details, see “Video Label" (page 48),
Page 35

I Using TELETEXT (TEXT)
TtXT
If lh6 current channel Includes Teletext Information you can enjoy this feature by presaing o
to activate the Teletext mode.
The functions below are available when In Teletext mode.
TBCr
Tol6t0Xt Mode on/oft
Display Index page
tumru
a
Subtitle Indication
mill
purm
3 (H (7
3 0 [I
§ a H
Next or Previous page
number 1,2. 3. 4, 5,
Enter the page number
directly
I
X
z
o
35
Page 36

I Using TELETEXT (TEXT) (continued)
REVEAL
@ PI B
ETjBZE]
HOU)
a
SQE
Show hidden text or information
Hold the current page display
Expand page to 2 times height
0
z
1
ICVEM. NOU KZE
CLDXHD,
suepUE
a
RED o
GREEN V
YELLOW CD Di
BLUE
O
___
) Display GREEN designated
Sub page Indication
Display RED designated page
page
Display YELLOW designated
page
Display BLUE designated page
36
Page 37

I Enjoying TV with Headphones
To use commercially available headphones, connect the headphones' plug to the headphone jack at the
bottorm of the TV.
%
Insert the headphones' plug as far as if can go. (An incomplete connection may
cause audio to be output from the speakers.)
The head phone jack is designed for 3.5mm stereo mini-plugs, if the head phone has
other than a stereo mini-plug, then an adaptor plug can be used.
In addition, if the head phone has a straight type plug, then there may be a possibility of
there not being enough clearance to secure the connection. In this case, a 3.5mm L typo
stereo mini-plugs with jack can be used as an adaptor.
I
T
z
o
5
L
3.5mm L'type Stereo plug
3.5mm Stereo jack
37
Page 38

00
WATCHING TV
L
J
Page 39

Chapter 4
TV SETTINGS
3
Z
О
СЛ
Page 40

I Adjusting TV Settings (menu screen)
If you have turned the TV on for the first time, be sure to carry out initial settings (page 18).
■ To display the menu screen, press the button. Pressing the button again returns the
display to the original screen.
• In the menu screen, you can make various adjustments and settings related to video, audio and
channels. 1^ page 41).
• To return the items to their initial settings (factory settings), perform a reset.
5^ page 49).
The currently selected item Is displayed
Menu screen
in green.
CO
O
"Video setup" menu
"Audio setup" menu
"Screen setup" menu
"Channel setup" menu
"Other setup" menu
'HffVideo
3
‘i*.
Button options
Mode:
Contrast:
Brightness:
Colour;
Tint:
Colour Temp.
Sharpness;
Reset
Move □So
UJ
Select
ÛK
51
32
36
Game
0
Neutral
End [“‘»'I
R
40
Press the Q button to display the menu.
Press the □ □ buttons to select the
menu icon containing the items you want to
set up.
The currently selected icon is displayed in
green. While a menu icon is displayed, the
Items that can be set in that menu are dis*
played in the sub-menu on the right. I( you
press the 0 button, the display changes to
the next level of the menu hierarchy and the
selected item is highlighted In green,
Move the green highlight of the selected
Item using the
desired item.
Select the setting value of the Item using the
00
buttons to select the
□ 0 buttons (or the 0 0 buttons).
Press the 0 button to complete tho setting.
For details of each setting item, see Menu
List on the following page. All of the set
ting items in this list can be set by the same
method,
Page 41

I Menu Flow Chart
Top Level
2nd Level
Video setup (page 36)
Mode
Contrast
Brightness
Colour
Tint ^
Sharpness
Colour Temp,
ОуПйгпк Cúfitratl <47 Inch т<мМ i<tJy}
Reset
— • Audio setup menu
Bass
3rd Level
Vivid
Standard
Movie
Game
64 levels
64 levels
• 64 levels
-------
1 64 levels
—
15leveli(-7to+7)
•Neutrar/Warm'/Coor'
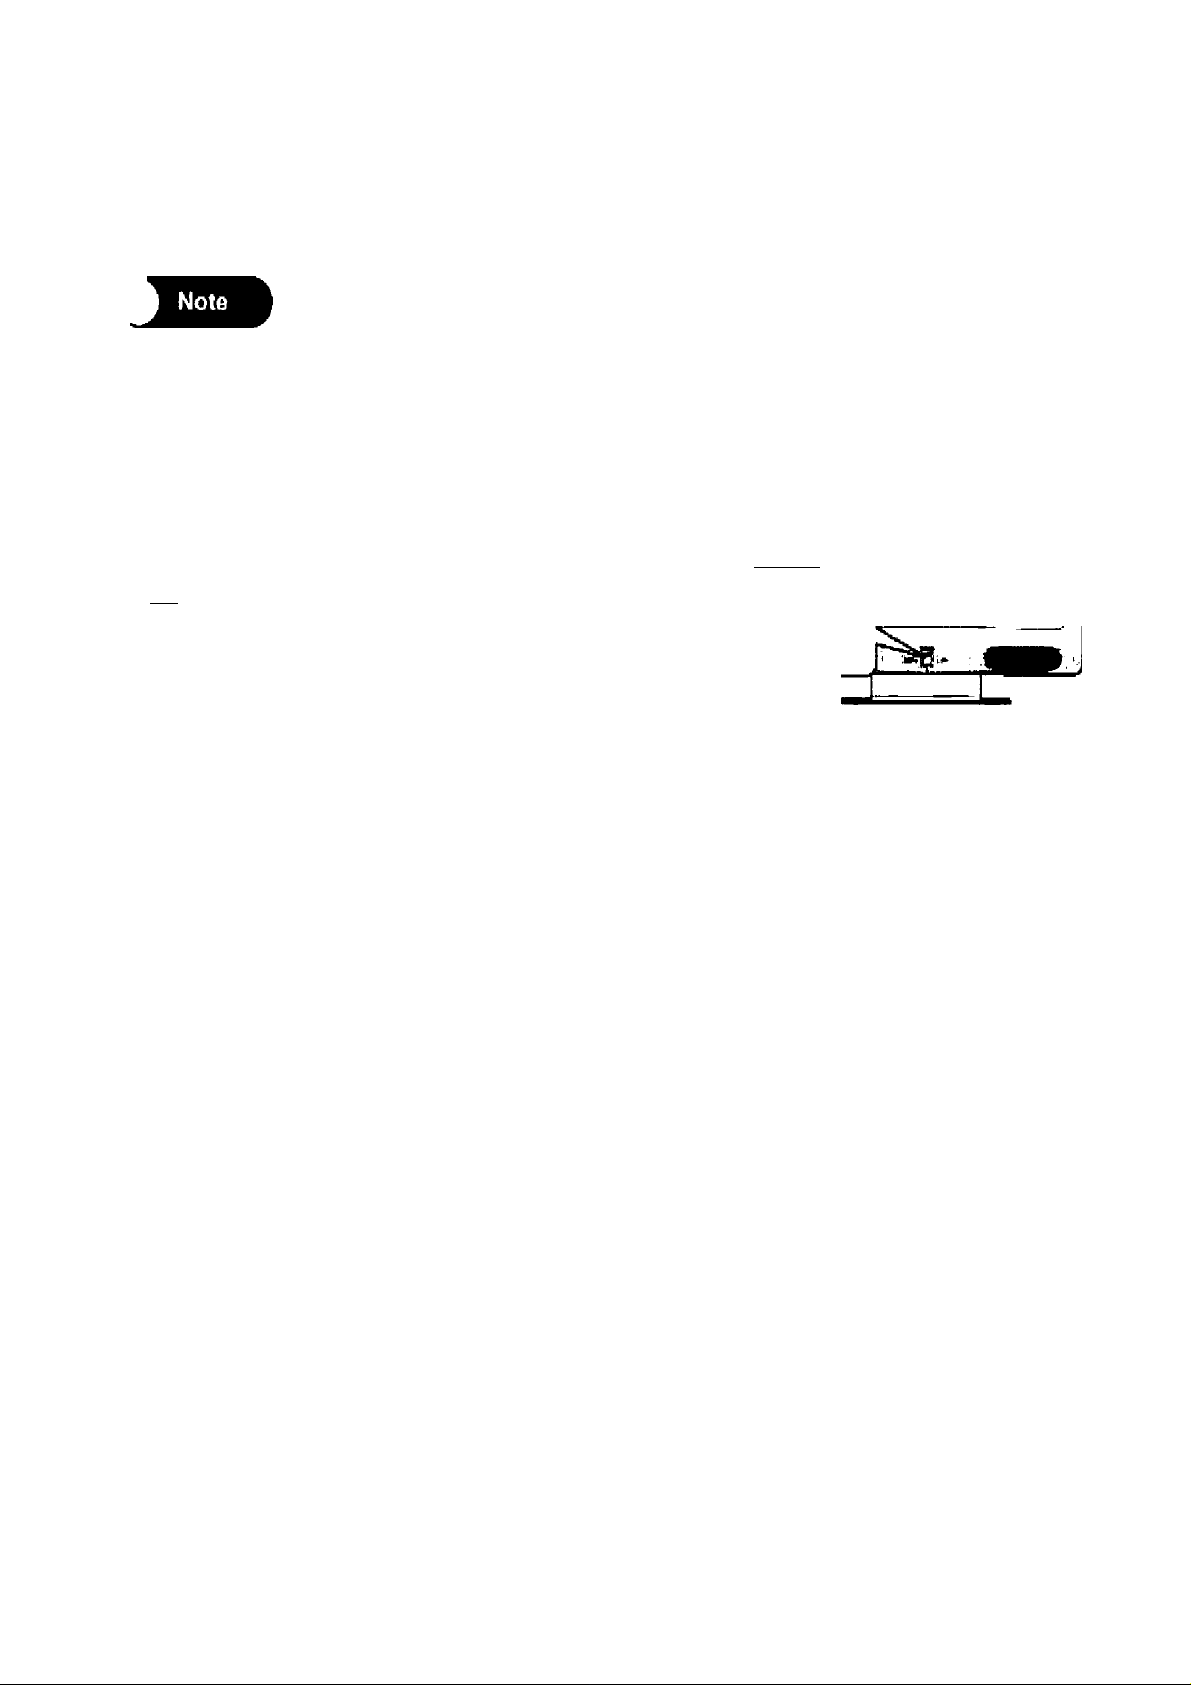
•■On"/OfT
— 33 levels (-1610 1-16)
Screen (page4S)
Treble
Balance
Storeo/Mono
Main/Sub
SRSTruSurround XT
HDMIl Audio
HDMI2 Audio
Reset
Screen setup menu
33 levels (-16 to+16)
33 levels (-16 to+16)
’’Auto”/Mono^
‘Main". "Sub", "Main+Sub*^
"Off"/low"/’Mlddle^‘'HlglV‘
"HDMII". -AUCHO IN 1". - AUDIO IN2".
“AUDIO IN3", "AUDIO IN4*
•HDMI2-’, "AUDIO IN 1", "AUDIO IN2",
■AUDIO IN V. “AUDIO IN4"
5
in
3
z
Q
<n
41
Page 42

I Menu Flow Chart (continued)
Top Level
Channel (page A6)
2nd Level 3rd Level
Channel setup menu
Channel List
Auto Program ■■ Analog Auto Program
Other setup menu
Video Label
Country
Analog Channel List
Digital Channel List
Digital Auto Program
Signal Level
Analog
Digital
Vldeol
VIdeoZ
Vldeo3
Vldeo4
HDMil
HDMI2
Reset
Australia
New Zealand
CO
O
z
È
CO
Time Zone
Subtitle
Power Saving
Parental Control
Version
All Reset
NSWMa^VlC. OLD, SA, WA,TAS. NT
On
Off
On
Off
Parental rating -G, PG,M.
MA,AV,R.No Block
Change Password
42
Page 43

I Video Setup
Select the video setup icon in the Menu screen using the Q buttons and press the Q button.
The sub-menu is displayed on the right side of the screen.
Sub-menu
Select the desired setup Item using the [~v] button In the sub-menu, then press Q button.
Each of the settings can be changed by the [T] buttons (or the Q Q buttons).
Mode
Various contrast, brightness, Colour. Tint, and
Sharpness settings ere stored to each of the video
modes.
Mode ^
Vivid
Standard
Movie
Qame
Contrast
Adjusts the difference between light and dark sec
tions of the screen,
Brightness
Adjusts the brightness of the screen.
Picture ideal (or playing games.
Bright, lively picture
Standard picture
Picturo idofll for watching moviss
Adjusts the colour depth of the screen.
Adjusts the Tint of the screen.
Colour Temp. (Colour temperature)
Switching between Cool, Neutral and
Warm changes the tone to a reddish, warm
colour.
Sharpnc&s
Adjusts contours on screen.
Dynamic Contrast M^inohmodniooivi
Allows (or adjusting the differences
between light and dark sections of the
screen over a period of time,
3
г
Q
CO
Reset
Returns all settings in Video Setup to the
factory setting,
43
Page 44

I Audio Setup
SolGct the audio setup icon in the Menu screen using the 0 0 buttons and press the 0 button.
The sub-menu is displayed on the right side of the screen.
Select the desired setup item using the
changed by the □□ buttons (or the Q
Sets how much the bass range i$ enhanced,
Sets how much the troble range is enhanced.
Sets the audio balance between the left and right
speakers.
CO
o
?
È
CO
loroo/Mono
Sets the broadcast audio type.
“Auto” setting is recommended.
Maln+Sub'
* This setting can also be changed by pressing the
Q button. (page 30)
button in the sub-menu. Each ol the settings can be
buttons for items marked by *).
HDMI1 Audio
When the input source is HMDI then select
HDMI1. If the input source is from DVI fo HDMI
then soloct AUDIO INI to 4
len the input source Is HMDI then select
HDMI2. If the input source Is from DVI to HDMI
then select AUDIO INI to 4,
Reset
Returns all settings In Audio Setup to the factory
setting.
When the SRS TruSurround XT function 1$ used,
you can enjoy enhanced audio similar to the sound
that you might experience In a movie theater.
* SRS TruSurround XT® is a virtual surround tech
nology developed by SRS Labs, Inc. for playing
back 5,1 channel realistic multi-channel surround
sound on two speakers.
44
Page 45

I Screen Setup
Select the screen setup icon in the Menu screen using the 00 buttons and press the B button.
The sub-menu is displayed on the right side of the screen,
Screen setup menu screen
Sub-menu
Screen
Current Mode;
Auto Detection:
Default Mode; Panorama
"Screen setup” menu
Select the desired setup item using the □ \~v] button in the sub-menu.
Each of the settings can bo changed by the □0 buttons.
Current Modo
This option switches the screen between Full. Normal, Panorama and Zoom.
' This setting can also be changed by pressing the □ button. (!^ page 31)
Vertical Centre:
Overscan
Reset
Move 0^0 Select
Full
On
0
End Q
Auto Dotoclion
Sets the Wide mode during reception ol regular TV broadcasts or for video Input pictures that contain
no aspect ratio information.
Notice
• About the Auto-detection Switching Function
The auto detection switching function Is activated when WSS or ID-1 type aspect
ratio Information Is detected in the video signal.
15m
Sarn^^wstBuidar^ii^^
menu screen. (5^ page 43)
Letter Box
16:9 The screen display mode is Full,
OetoutI
Sets the default screen between Full, Normal, Panorama, Zoom and Oft.
Vertical Centre
Use this option to adjust the top and bottom picture
position for Zoom and Panorama modes.
Reset
Reset screen setup to factory settings.
The screen display mode Is Zoom.
Overacsn
Overscan can be set On/Off for the follow
ing; Analog, Digital, Videol, Video2, Vldea3.
Video4, HDMI1, HDMI2. Overscan reset
option is also available.
45
(J>
3
Z
О
CO
Page 46

I Channel setup
Select the Channel setup icon in the Menu screen using the buttons and press the button.
The sub-menu is displayed on the right side of the screen.
______
Channel setup menu screen
I Channel
I Channel List:
I Auto Program:
I Signal Level:
“Channel setup" menu
Move o®o Select Q End Q
Sub-menu
Auto Program - Analog
If you select "Auto Program" In the sub-menu, the option to start Auto Program displays, and you can
select whether to execute (Start) or cancel execution of the automatic channel setup program (Cancel).
The initial setting for this item is Cancel.
If you select Start using the IZI □ buttons and press the button, the channels being received start
to be automatically scanned.
' For details on Auto Program settings, see "Initial Settings" ( page 18).
When Auto Program for Analog TV is selected the digital channels will be scanned and automatically
tuned. When tuning is complete you can view and edit the tuned channels from the Channel List • Analog.
CO
Auto Proqram • Diqitai
i
When Auto Program for Digital TV is selected the digital channels will be scanned and automatically
CO
tuned. When tuning Is complete you can view and edit the tuned channels from the Channel List - Digital.
?
The Digital Tuner Is not compatible with the New Zealand Digital Freeview Broadcast
46
Page 47

I ChannGl SOtup (continued)
Channel List - Analog
After tuning (Auto Program) the channel list Is populated and can then viewed or edited.
Example:
After tuning (Auto Program) the channel list is populated and can then be viewed or edited.
Example;
Digitcil Channnel List
0007-06:7 HD DigiWi
0070- 06:7 0191(^11
0071- 06:7Digildl2
10 i
The strength of the radio wave which the antenna is receiving tor a CH which is currently selected can
be verified on screen with this option,
0077-06:7 Guido
0009-08: NINE Digital
0Q90 08;NINEHD
0099-08; NINE Guide
0003-34:SBSDIgiion
0030- 34: SBS HD
0031- 34‘,5BSEPG
S
0033-34:50$ Digital)
0038- 34: SBS RddiOl
0039- 34: $85 Radio)
Move
Select IQ
End
C/3
3
z
Q
(/)
47
Page 48

I other Settings
Select the Set up icon in the Menu screen using the 0 0 buttons and press the 0 button,
The sub-menu is displayed on the right side of the screen.
Video Label
If you select “AV Preset" in the sub-menu, you can
change the name of optional video and audio input
Jacks.
When the button or the button is pressed,
the name of equipment currently connected can be
displayed instead of the VHF/UHF channel, VID
EO!, VIDE02, VIDEOS, VIDE04, HDMH _or
Select the input jack to rename using the
buttons, and change the name using the
buttons.
You can select names from those in the following table.
DM12.
LllP VIdM Labei:
Coumry:
Time Zone;
SutalUlei
Power Saving:
1©
Parental Control:
Version;
8
All Reset
Move Select 0 End0
New Zealand
VIC
Oft
Off
OSA5-OODH
CO
CO
2
E
CO
DISPLAY
**“*
DVD
DVD1
DVD2 DVD player/recorder 2
VCR
VCR1
VCRS
DVR Hard disk recorder, etc
DVR1
DVRS Hard disk recorder 2, etc
CABLE TV
SATELLITE
SKY TELEVISION
GAME1
GAME2
PC Personal computer
HDMI Vendor
HDMI Product
Edit Label Edit label within 8 characters
Skip External input is disabled. (External input is skipped when Input Is selected.)
Example of assigned equipment
Not set (Standard names "VIDEO 1", “VIDEO 2". "VIDEO 3", "VIDEO 4",
"HDMI1" or "HDMI2" are used.)
DVD player/recorder
DVD player/recorder 1
Video tape recorder
Video tape recorder 1
Video tape recorder 2
Hard disk recorder 1, etc
Cable TV (set-top box, home terminal)
Satellite broadcast
Sky Television
Game Input 1
Game Input 2
Uniden
DT100
48
- If you select Eciit Label then you can customize a 8-digit label. Press Iho 0 0' 0and0
buttons to edit the labels.
* Pressing the Q button returns the display to the previous screen.
■ In some cases the TV doesn’t receive vendor or product information from the equipment connected to
HDMI input 1 or 2. In such a case, the TV displays “HDM11" or "HDMI 2".
Page 49

I other Settings (continued)
Setting the Country selection
The country selection Is used to set the broadcast channels the LCD TV automali'
cally tunes to. Pressing the Q Q buttons switches between '“Australia” and "New Zealand".
*lf you change the country setting to other than the country you are In then broadcast channels
may not tune In properly.
Time Zone
This option select your time zone in the sub-menu.
Subtitle
Select this option to enable Subtitles for Digital channels with this feature.
Power Saving
Select this option to enable Power Save mode.
Parental Control
Select this option to access Parental Rating and Change Password feature.
Version
Select this option to view the version number for the TV firmware.
All Reset (restoring factory settings)
If you select “All Reset", you can display the factory reset screen.
In the factory reset screen, you can select whether to Yes or No execution of the reset,
All Reset takes several seconds to complete.
None of keys are available during All Reset.
Never disconnect power cord during All Reset.
cn
2
O
49
Page 50

Ul
o
TV SETTINGS
J
Page 51

Chapter 5
REFERENCE
m
2
O
X
m
"n
rn
X
m
Page 52

I Main Specifications
Nnmo
Model TL27TX1-AU
Scroon 0120 zriruh ( oecm )
s
0
□rivo $y9tom
Resolution
1
TV System
s'
Tunor
3
s
Sound System
C/)
ChAnnol Coverage
Video System
Componont Input Tormot SD: 4B0t. 460p. 57S), 676p HD: 7Z0p (D0/60HZ), 10601 (50/60H/). lOSOp (50/60Hz)
Audio System
Surround
SpooKore
|5
Audio output
Connoetton Jack«
"Power, heodptiono ouipul, VHF/UHF antonrw input. RF ontonni output, 01git(il nnignna input, video Input
(2), S ViDCO Input (1, aharod with VIDEO t|, componont Input (2), HDMI Input (2), audio OulpuF
TU7TX1-AW
i3eo(H)x78a (V) pixels
Analog : VMF/UHP x 1. Digital : DVB-Tx 1
Analog VHP 0 • 12 / UHF 27 - 69. DigHal VHP 6.12/ UHF 27 - 69
LCD Digital colour TV
TLaiTXl-AO
TL3ÌTX1-AW
nzmeh (Stem)
TFT acilVo matrix
1366 (H)x788 (V) pixels
PAL B/Q
A?/NICAM
PAL/NTSC
Sioroo
$RS TfUSUffOOndXT
6cmx 12cm(x2)
Total 20Wil0W4. lOW)
TU2T21-A(1
TU2T2l-AW
4imch{ lOBom)
1920 (M)x 1080 (V) pixels
UJ
O
Z
m
(T
LU
LL
UJ
QC
Qporntlng tompprAlure 0* * 40“ C
Pow<<r riKiulmmdntA
a *0
AvoraoD Use
|l
During standby
inciiidino table stand
(excluding some
Iff
protrusions)
U
Wolflht
now
0.1 W
7B.0 cm (W)
29.2 cm (0)
C9.1 cm (H)
Approx. leKg
230 < 240VAC. 50Hit
186W
0 1 W
66.3 cm (W)
29.2 cm (D)
0G.5 cm (H)
Approx. 21 Kg
110.6 cm (W)
36.2 cm (0)
62 6 cm (H)
Approx. 37Kg
RICOH bitmap fonts made by Ricoh, Company Ltd. are used.
The LCD panel has been made using extremely high-precision technology and has effective pixels of
99.99% or more. Black dots of 0.01% or less may appear or bright points of light may appear
constantly. This, however, is not a malfunction.
Specifications, external appearance and other details are subject to change without notice In the
interest of product improvement.
230W
OtW
52
The Digital Tuner is not compatible with the New Zealand Digital Freevlew Broadcast.
Page 53

I Troubleshooting
Be Bure to thoroughly read this section l?eiore asking your dealer for repair. For details on customer support, see
page 58. If the problem still persists alter you have checked the following items, contact your Uniden Customer
Suppon Centre by phone or email. (page 58)
* Take care not to call or fax tho wrong number when contacting the Customer Service Center.
* Tho telephone and fax numbers are subject to change.
For details on the latest numbers, check at tho above web site.
Problem
No video or audio output
No video output
"Ro audio output
Probable Cause Page
Is the power plug disconnected from the power outlet? 17
Have you selected an Input jack that is not connected to 33,34
optional equipment?
Have you pressed the power button on the remote 24
control or TV?
Are brightness and contrast properly adjusted?
1$ the volume adjusted to the minimum setting?
Is audio muted?
Is the headphones' plug still connected to the TV?
43
24
24
37
No video or audio output
Only noise is output.
Poor picture quality Is the antenna cable disconnected?
Poor Tint Faint colour
Is the antenna cable disconnected?
Are you receiving transmission on a channel that Is
not broadcasting?
A probable cause is poor reception.
Are Tint and Colour properly adjusted?
16
46
16
43
J3
m
m
m
D
m
z
o
m
53
Page 54

I Troubleshooting (continued)
Problem
Dark screen
The remote control does not
work.
Picture is not sharp.
Picture flickers.
Probable Cause
Is brightness sot low?
Are brightness and contrast properly adjusted?
A probable cause Is that the fluorescent lamp has
reached the end of its service life.
Are the batteries inserted properly?
A probable cause Is that the batteries in the remote
control have reached the end pf their servica life.
Is bright light from a fluorescent lamp falling on the
remote control IR receiver?
A probable cause Is poor reception.
Is the antenna out of position?
Is the outdoor antenna disconnected?
Page
43
43
55
15
15
15
16
lU
z
11
X
u
I.
IJ
r
Double or triple picture images
Specks on screen
Colour stripes or no colour
Is the antenna out of position?
A probable cause Is the influence of waves raflected
from mountains or buildings.
A probable cause is the effect of interference from
automobiles, railways, high-voltage lines,
neon signs, etc.
Is your TV being Influenced by other equipment
(interference)?
Other probable causes are location of transmission
antennas for radio broadcasts or amateur radio
nearby or cell phones.
Locate the TV as far away as possible from other
equipment thought to be emitting interference.
8
10
54
This TV uses a microcomputer, and so normal operation may be prevented by external noise or inter
ference. If this happens, unplug the power plug from the power outlet, and wait several minutes before
re-inserting the power plug into the power outlet and turning the power on.
Page 55

I Caring for Your TV
Caring for your LCD display panel
Before you perform dally maintenance, turn the power off and unplug the power cord from the power
outlet.
To clean the display panel on the TV, wipe lightly with a soft, dry cloth made of cotton or flannel.
Wiping with a hard cloth or rubbing heavily may leave scratches on the surface of the panel.
To remove stubborn dirt, moisten the cloth with neutral detergent diluted with water, firmly wring the
cloth and lightly wipe off the dirt. (Wiping heavily may leave scratches on the surface of the panel.)
Wipe off dust from the panel surface using a commercially available anti-dust (static removal) brush.
To protect the panel, do not use dusty clothes, detergents or chemical fiber cleaning cloths. Doing so
may cause the panel surface to peel oft.
About the fluorescent tube
The service life of the fluorescent lamp used on the TV is limited.
If the screen darkens, flickers or does not light at all, contact your
Uniden Customer Support center by phone, fax or e-mail.
Uniden Customer Support Center
For Australian model: www.uniden.com.au
For New Zealand model: www.uniden.co.nz
33
m
T1
m
X
m
z
o
m
55
Page 56

I Index
Accessories..........................................................12
Antenna cable
Antenna connection
AUDIO..................................................................30
Automatic channel setup program
Balance................................................................41
Battery..................................................................15
Bass setting..........................................................44
Brightness
Channel selection.................................................24
Channel setup......................................................46
Colour...................................................................43
Colour Temp (Colour temperature)
DISPLAY..............................................................26
Dual language broadcast
DVIjack
DVD player
................................................................
......................................................
...........................................
..............
............................................................
......................
.....................................
..........................................................
....19,46
12
16
43
43
30
21
21
SUBPAGE.......................................................... 36
TELETEXT...........................................................35
Tint
.....................................................................
Treble setting
.......................................................
43
B
VHF/UHF antenna
VIDEO 1,2 input...................................................14
Video Settings......................................................43
Volume adjustment
Zoom
..................................................................
...............................................
..............................................
44
16
24
31
LU
O
z
u
cr
UJ
u.
LU
cr
HDMI....................................................................33
HDMIjack..............................................................20
Headphone jack...................................................37
HOLD
...................................................................
INDEX
INFO.................................................................... 28
Initial setting
Menu screen....................................................... 40
Mute
Reset
Remote control.....................................................13
Remote control button operations
REVEAL
SIZE......................................................................36
Sleep timer
Speakers
SRS TruSurround XT
Standby indicator..................................................14
..................................................................
.........................................................
.....................................................................
...............................................
...............................................................
...
.................................................. 32
............................................................ 37
...........................................
43, 44, 45, 49
........................
36
27
18
24
13
36
44
56
Page 57

s
I
о
E
<D
Page 58

I Customer Support
Our customer care specialists are here to help youl Visit our website at;
For Australia; www.unlden,com.au or call our Customer Service Hotline at 1300 366 895, Monday
through Friday, 8.30am to 5.00pm. The Customer Service Line is closed Saturday/Sundays and public
holidays.
For New Zealand; www.unlden.co.nz or call our Customer Service Hotline at 0800 4864 336, Monday
through Friday, 8.30am to 5.00pm. The Customer Service Line is closed Saturday/Sundays and public
holidays.
S8
Page 59

I Warranty
TL27TX1-AB, TL27TX1-AW, TL32TX1-AB, TL32TX1-AW, TL42TZ1-AB,
and TL42TZ1-AW LCD TV
Two Years Limited Warranty
Note: Please keep your sales docket as It provides evidence o1 warranty.
Warrantor: Uniden Australia Ply Limited ABN 58 001 865 498
Uniden New Zealand Limited
Warranty only available In original country of purchase
Elements of Warranty: Uniden warrants to the original retail owner tor the duration of this
warranty, its TL27TX1-AB, TL27TX1-AW. TL32TX1-AB, TL32TX1-AW, TL42TZ1-AB, and
TL42TZ1-AW LCD TV (hereinafter referred to as the Product) to be free from defects in materials
and craftmanship with only the limitations or exclusions set out below,
Warranty Duration:
This warranty to the original retail owner only, shall terminate and be of no further effect TWO (2)
years after the date of original retail sale. This warranty will be deemed invalid if the Product is:
(A) Damaged or not maintainod as reasonable and necessary.
(B) Modified, altered or used as part of any conversion kits, subassemblies, or any configurations
not sold by Uniden,
(C) Improperly installed.
(D) Repaired by someone other than an authorized Uniden Repair Agent for a defect or
malfunction covered by this warranty.
(E) Used In conjunction with any equipment or parts or as part of a system not manufactured by
Uniden, or
(F) Where the Serial Number label of the product has been removed or damaged beyond
recognition.
Warranty only valid In the country of original retail/sale.
Parts covered:
This warranty covers for TWO (2) years, the Product and included accessories.
Statement of remedy:
In the event that the Product does not conform to this warranty at any time while this wao’anty is
In effect, the warrantor at its discretion, will repair the defect or replace the Product and return It
to you without charge for parts or service. This warranty does not provide for reimbursement or
payment of incidental or consequential damages.
This EXPRESS WARRANTY is In addition to and does not In any way affect your rights under the
TRADE PRACTICES ACT 1974 (Clh) (Australia) or the CONSUMER GUARANTEES ACT (New
Zealand).
Procedure for obtaining performance of warranty: In the event that the Product does not
conform to this warranty, the Product should be shipped or delivered, freight prepaid, with
evidence of original purchase, (eg. a copy of the sales docket), to the warrantor at:
UNIDEN AUSTRALIA PTY LTD
Sen/ice Division
345 Princes Highway.
Rockdale, NSW 2216
Fax (02) 9599 3278
UNIDEN NEW ZEALAND LTD
Service Division
150 Harris Road, Easi Tamaki,
Auckland
Fax (09) 274 4253
59
3J
m
m
m
J3
m
m
Page 60

f
A
ih
a
A
\
■J
Th« oontent of thto Owrwr^ Manual It tubject to change without
notice.
Unauthorized duplication or copying of the content of thia
Owner's Manual Is forbidden,
Q 2007 Unlden Australia Ply Ltd. UnIden NZ Ltd
Printed In China.
U6ZZ01537BZ(D)
 Loading...