

Uniden G14xx Series Accessories Manual
Accessory Camera for G14xx Series
Surveillance Systems
What’s in the Box?
1 x Camera
1 x Antenna
1 x Stand
1 x AC Adaptor
Screws and Anchors
1
5
6
7
2
3
4
8
FRONT BACK
9
10
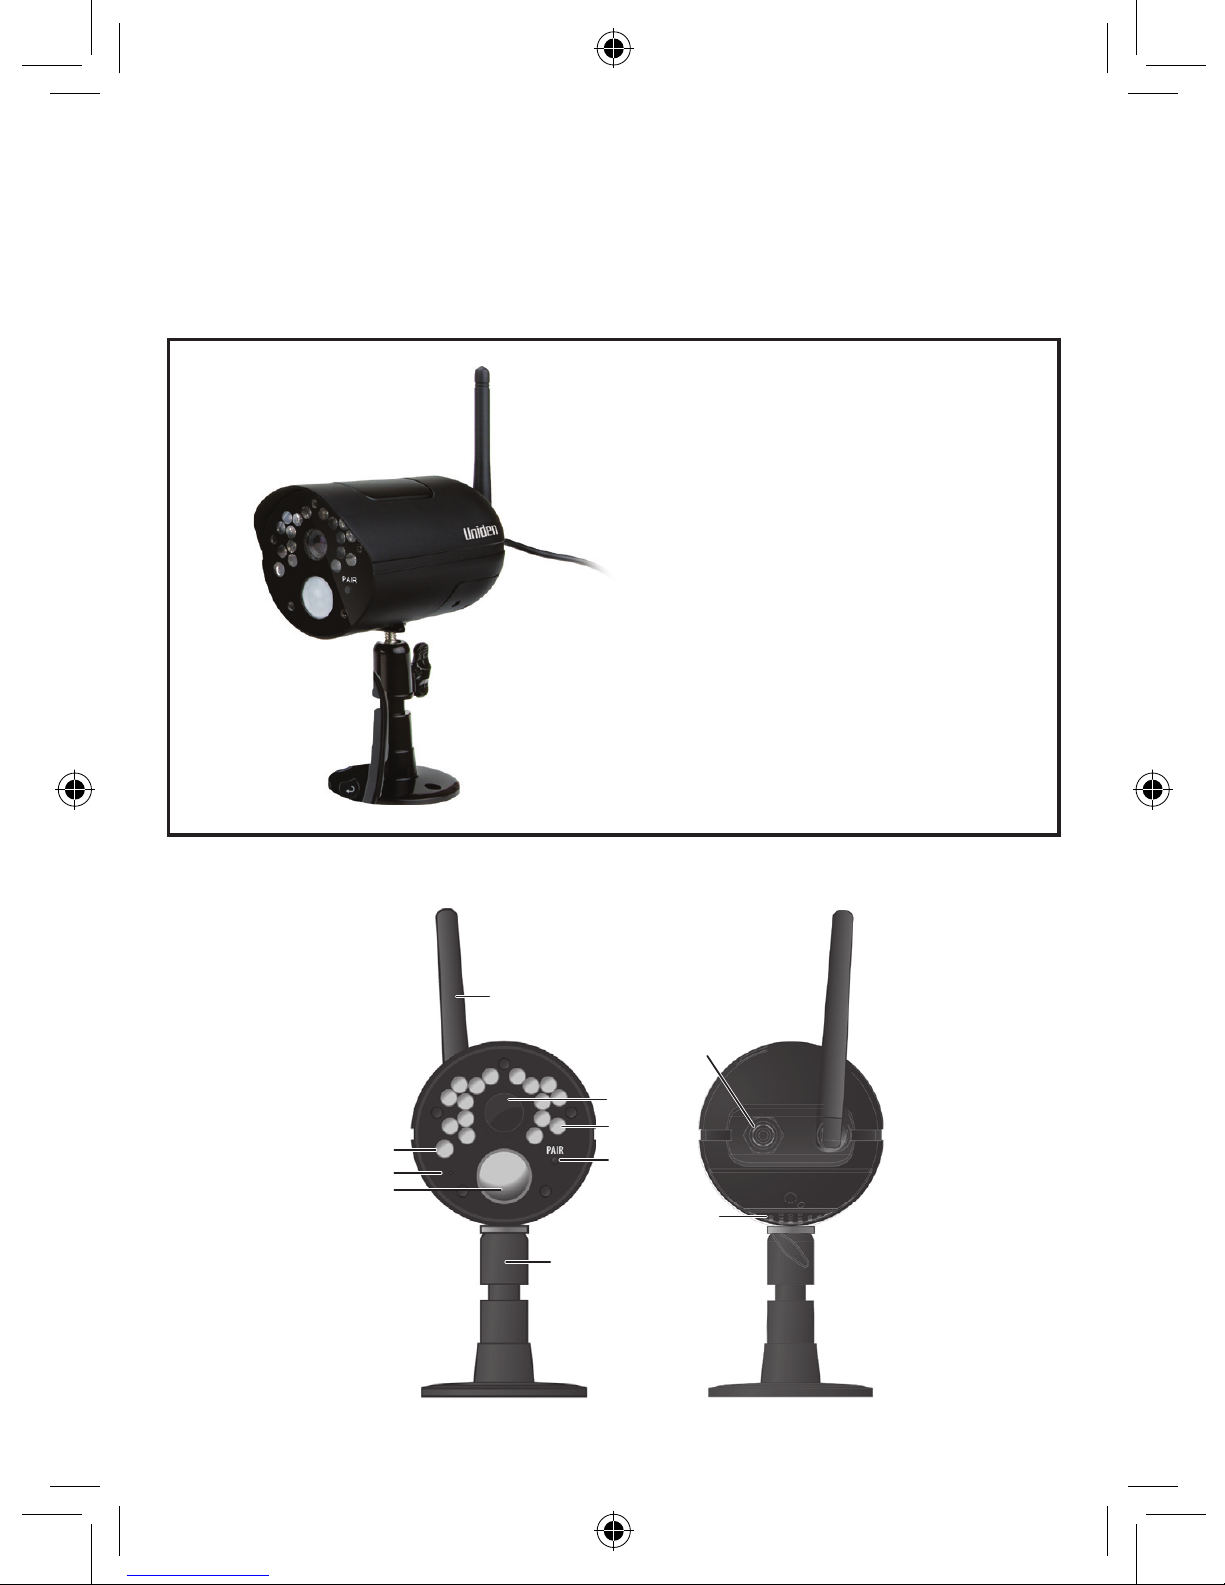
Outdoor Camera
2
No Keys/Indicators Function
1 Camera Antenna Sends signals to the monitor.
2 Light sensor Measures light intensity to activate
IR LEDs for night vision.
3 Microphone Receives sounds from the area
near the camera
4 PIR sensor Detects motion within camera’s
line of sight.
5 Camera Lens Mechanism through which the
camera views surroundings and
records images.
6 Infrared LED Infrared LEDs provide viewing in
no/low light conditions.
7 Pair Press this button to pair the cam-
era to the monitor.
8 Camera stand Connects to the camera to allow
multiple mounting positions.
9 Speaker Transmits sound from the monitor
(intercom).
10 Power Input (9V
DC)
Connect to power adaptor.
3
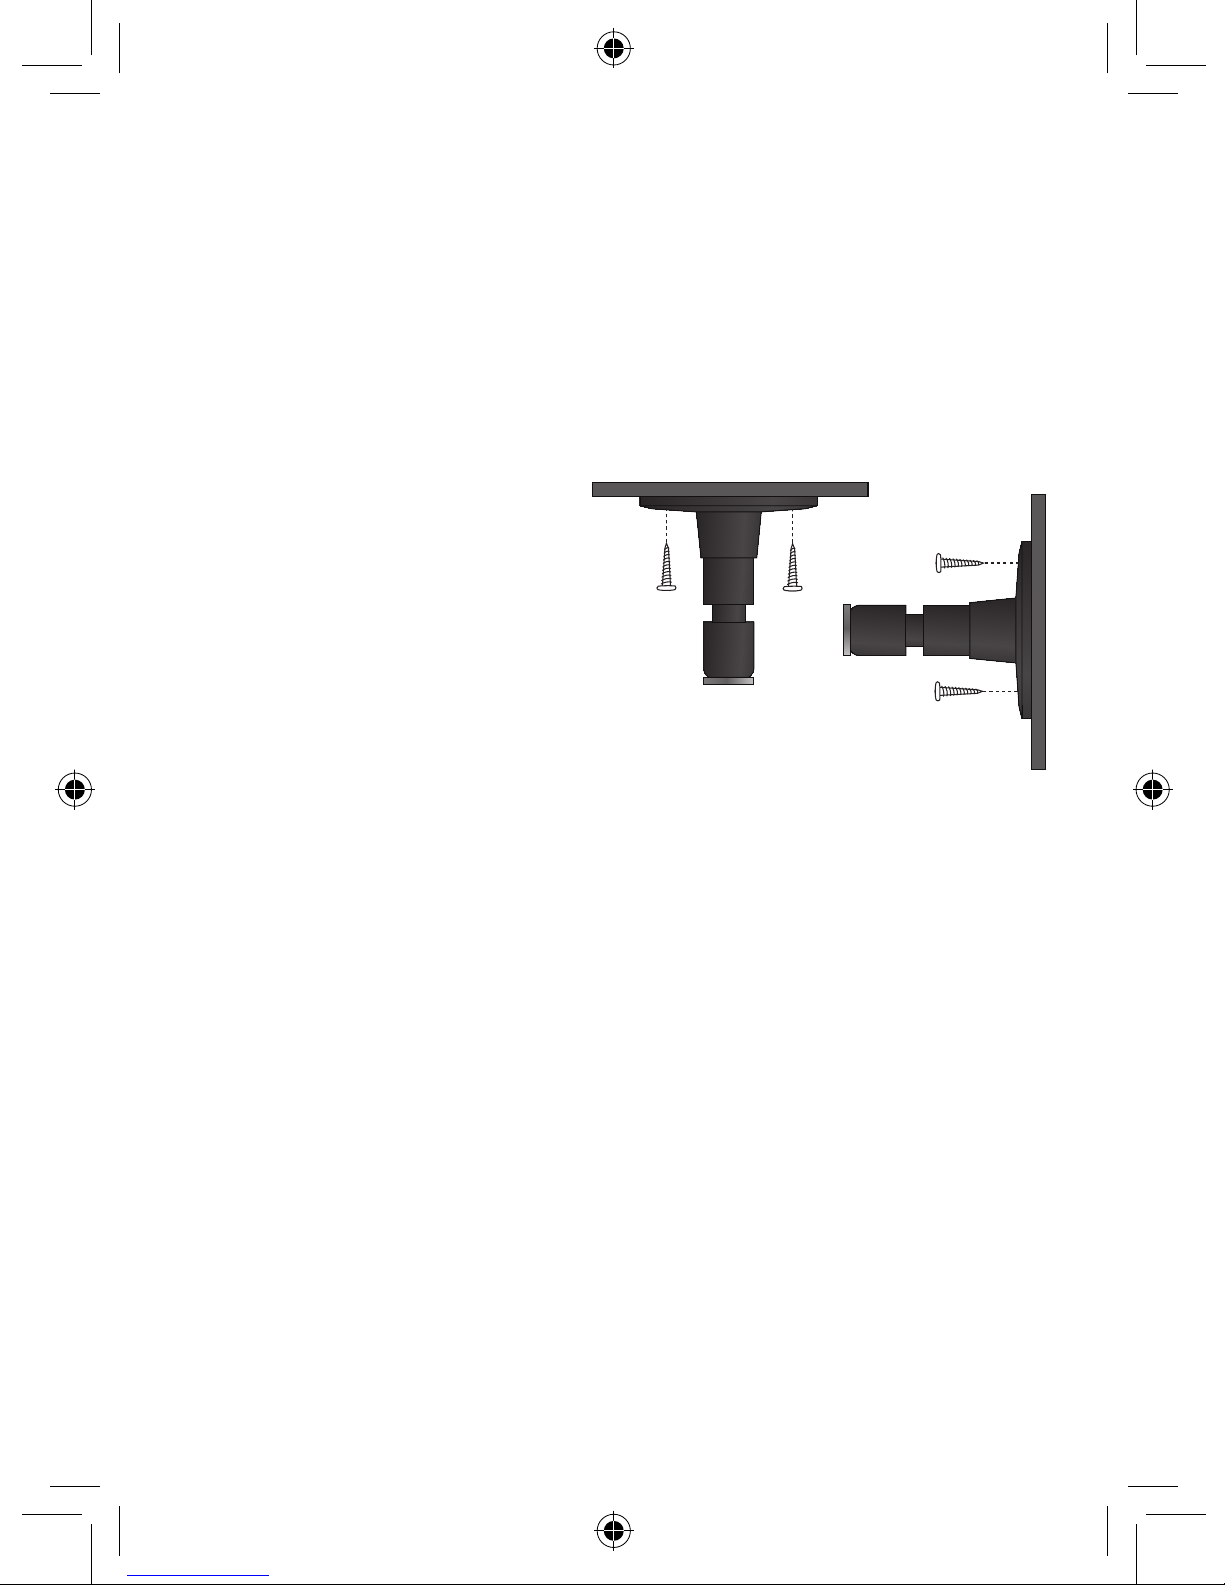
Installing the Camera
You can mount the camera with the stand on the bottom (for a flat
surface such as a tabletop), on the side (for a wall), or on the top (for the
ceiling).
The following tools are required:
• Electric Drill
• 5mm Drill Bit
• No. 2 Phillips Screwdriver
Mount the Camera Base
1. Hold the base of the camera stand where you want to mount
it and mark the location of the screw holes.
2. Drill holes using the 5mm drill bit.
3. Insert anchors.
4. Use the included screws to attach the base to the wall or
ceiling. You can also screw the base into a flat surface such as
a tabletop if needed.
Before attaching the camera, tug gently on the stand to make
sure it is securely in place.
When you are positioning the camera, you might want to bring the
monitor along; it’s much easier to get the camera into the right position
when you have the monitor handy.
4
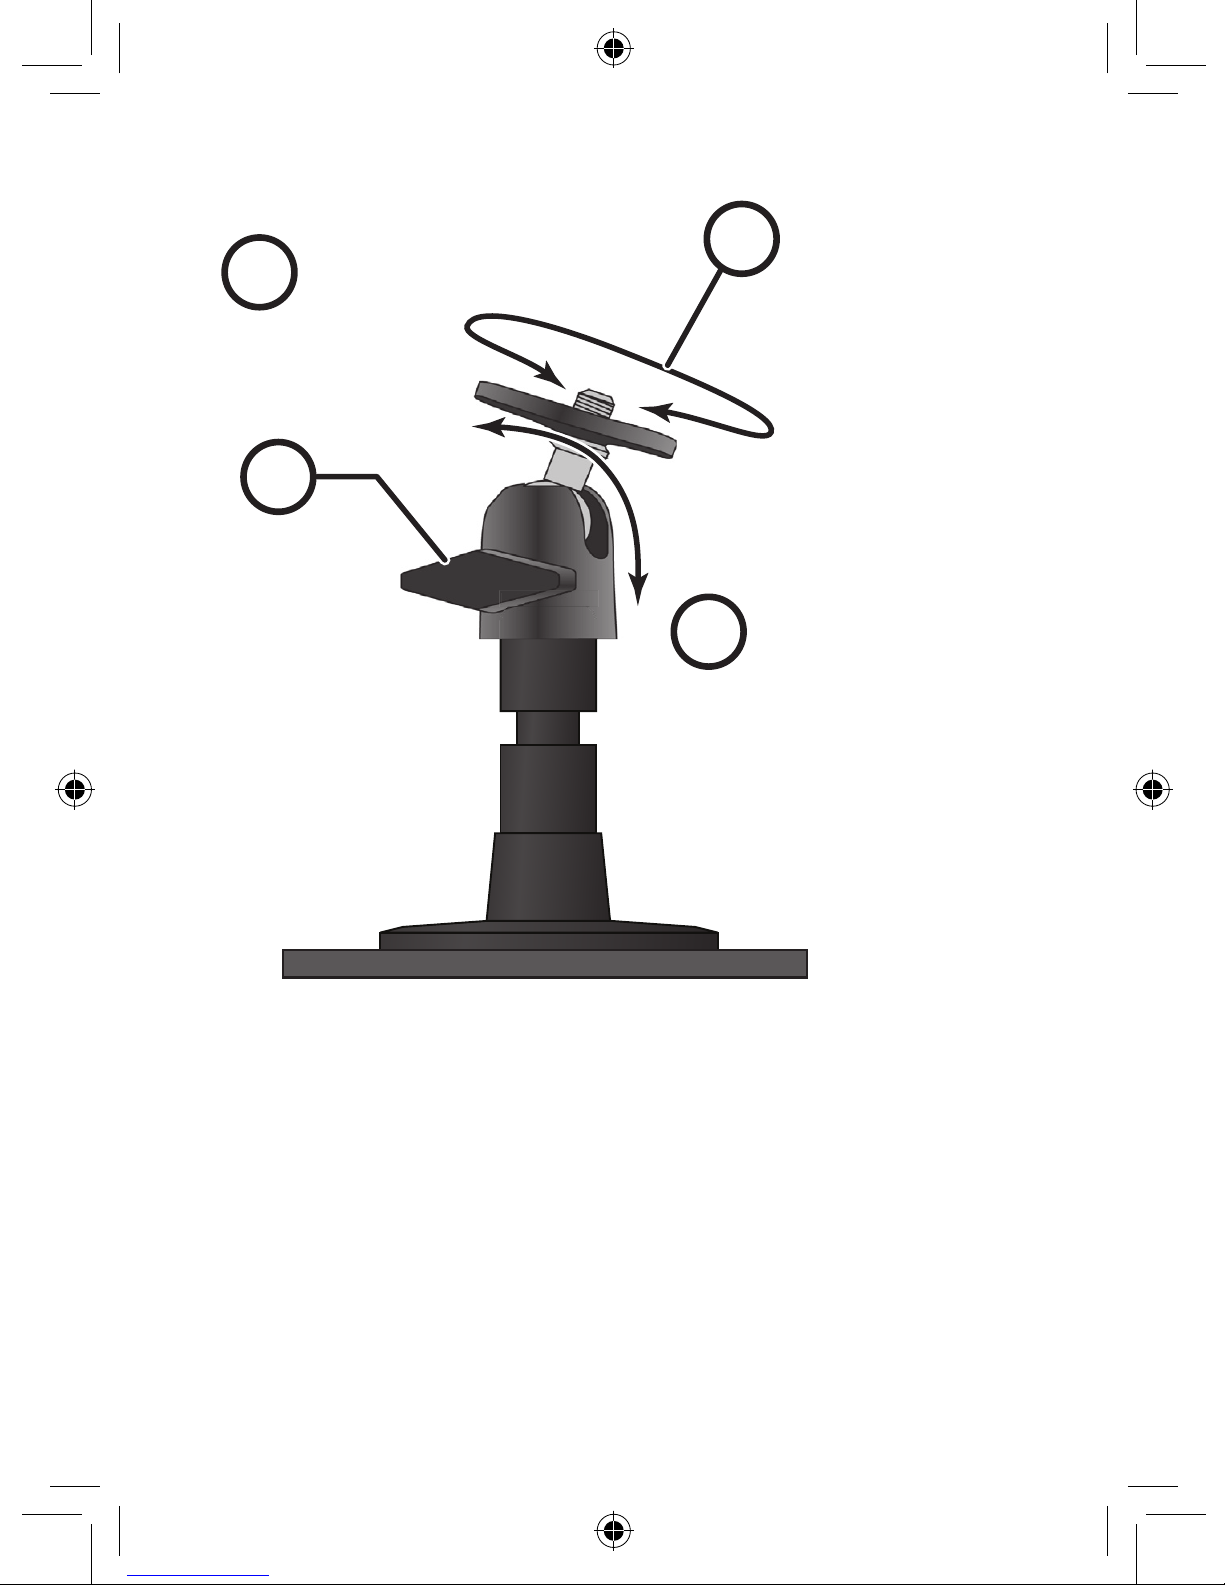
Attach the Camera
1. For each camera, attach the camera bracket to the mounting
screw. You can attach the stand to the top or the bottom of
the camera as needed. Tighten it a few turns, then turn the
camera to face the direction you want.
2. Tighten the camera brace up against the camera to secure it
into place.
3. Unlock the mounting post by turning the wingnut a few turns
to the left.
4. Set the mounting post to the correct angle, then tighten the
wingnut until the post is locked into place.
5. Attach the antenna to the rear of the camera.
1
2
4
3
Loosen the
wingnut to
unlock the
mounting
post.
Attach the camera
to the mounting
screw and turn it
to the desired
direction.
Adjust the post to
the correct angle,
then tighten the
wingnut to lock the
post into place.
Tighten the brace against
the camera to
secure it
in place.
 Loading...