

Page 1
Page 2
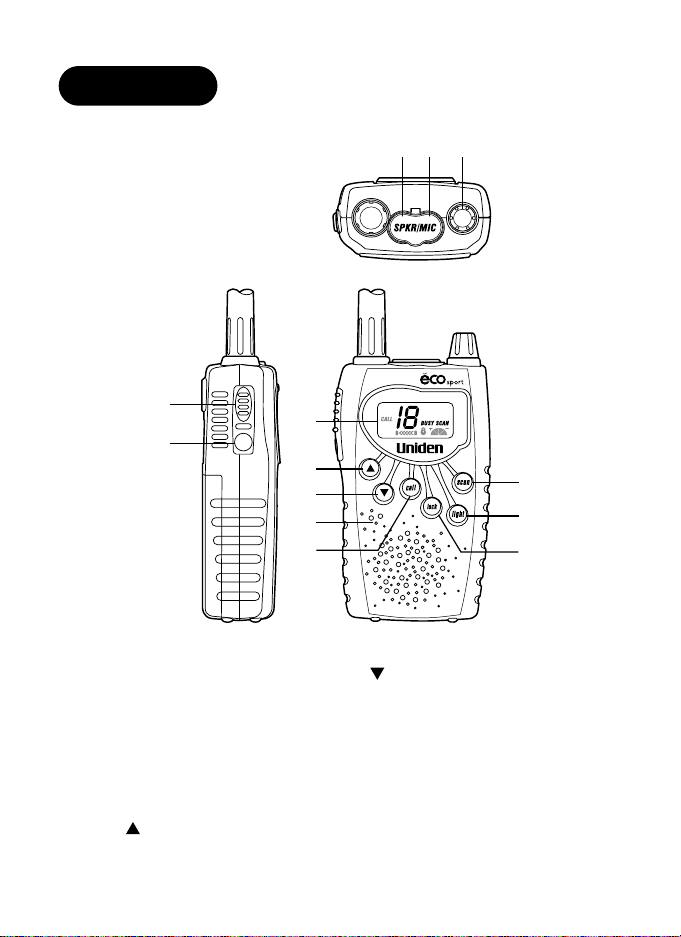
Controls
12 3
4
6
5
7
8
9
10
1 Speaker jack 8 button
2 Microphone jack 9 Microphone
3 on/off volume 10 call button
4 PTT button 11 scan button
5 MON button 12 light button
6 LCD 13 lockbutton
7 button
11
12
13
Page 3

FCC Information
Important: Changes or modifications to this unit not expressly approved by Uniden could void
your authority to operate this unit. Do not open your radio to make any internal adjustments. Your
radio is set up to transmit a regulated signal on an assigned frequency. It is against the law to alter
or adjust the settings inside the radio to exceed those limitations. Any adjustments to your radio
must be made by qualified technicians using the proper test equipment. To be safe and sure:
•Never open your radio’s case.
•Never change or replace anything in your radio except the batteries.
Your radio might cause TV or radio interference even when it is operating properly. To determine
whether your radio is causing the interference, turn it off. If the interference goes away, your radio
is causing it. Try to eliminate the interference by moving your radio away from the receiver. If you
cannot eliminate the interference, the FCC requires that you stop using the radio.
Audio Accessories
experts advise against continuous high volume operation. If you experience a ringing in your ears,
reduce the volume level or discontinue use. Always make sure the radio is turned off before
plugging audio accessories into the accessory jack.
conditions, radios can interfere with blasting operations and may cause an explosion. Turn your
radio OFF to prevent accidental transmission when in a blasting area or in areas posted: “Turn off
two-way radio.” Construction crews often use remote control RF devices to set off explosives.
Care and Safety
solvents because they can harm the body of the unit and leak inside, causing permanent damage.
Use a dry, lint-free cloth to clean the battery contacts.
This device complies with Part 15 of the FCC Rules.
: Do not operate the radio with audio accessories at high volume levels. Hearing
Do not operate the radio in hazardous environments. Explosion or fire may result.
Do not operate the radio near unshielded electrical blasting caps. Under certain
: To clean the radio, use a soft cloth dampened with water. Do not use cleaners or
Operation is subject to the following two conditions: (1) this device may not cause
interference, and (2) this device must accept any interference, including interference
that may cause undesired operation of the device.
Page 4

Contents
Welcome . . . . . . . . . . . . . . . . . . . . . . . . . . . . . . . . . . . . . . . 2
Included in Your Package . . . . . . . . . . . . . . . . . . . . . . . . . . 3
Battery Installation . . . . . . . . . . . . . . . . . . . . . . . . . . . . . . . 4
Low Battery Alert . . . . . . . . . . . . . . . . . . . . . . . . . . . . . . . . 5
Belt Clip . . . . . . . . . . . . . . . . . . . . . . . . . . . . . . . . . . . . . . . 5
Using Your Radio . . . . . . . . . . . . . . . . . . . . . . . . . . . . . . . . 6
•Turning the Radio On . . . . . . . . . . . . . . . . . . . . . . . . . . . 6
•Adjusting the Volume . . . . . . . . . . . . . . . . . . . . . . . . . . . . 6
•Choosing a Channel . . . . . . . . . . . . . . . . . . . . . . . . . . . . .7
•Scan Mode . . . . . . . . . . . . . . . . . . . . . . . . . . . . . . . . . . . .7
•Monitor Mode . . . . . . . . . . . . . . . . . . . . . . . . . . . . . . . . .8
•Talking on Your Radio . . . . . . . . . . . . . . . . . . . . . . . . . . . 8
•Locking In Your Selection . . . . . . . . . . . . . . . . . . . . . . . . . 9
•Call Tone Transmission . . . . . . . . . . . . . . . . . . . . . . . . . .9
•Silent Keypad . . . . . . . . . . . . . . . . . . . . . . . . . . . . . . . . .10
•LCD Backlight . . . . . . . . . . . . . . . . . . . . . . . . . . . . . . . . 10
•External Microphone and Speaker (Optional) . . . . . . . . . . .10
Troubleshooting . . . . . . . . . . . . . . . . . . . . . . . . . . . . . . . . 11
Specifications . . . . . . . . . . . . . . . . . . . . . . . . . . . . . . . . . . 12
Appendix - FCC Part 95 Subpart B . . . . . . . . . . . . . . . . . A-1
1
Page 5

Welcome
Congratulations on your purchase of the Uniden FRS300 family radio. This product is a
lightweight, palm-sized radio you can carry almost anywhere. Use it at shopping malls,
amusement parks, or sporting events to stay in contact with family and friends, or in a
neighborhood watch for vital communications. This compact, state-of-the-art device is
equipped with the following features:
• 14 Preprogrammed Channels
• Up to 2 mile range*
• LCD Display
• Tone Alert for incoming calls
• Channel Scan
• Keypad Lock
• 50 hours of operation
• Low Battery Level Indicator
• LCD Backlit
• Silent Keypad
• External Speaker and Microphone Capable
* Range may vary depending on environmental and/or topographical conditions.
2
Page 6
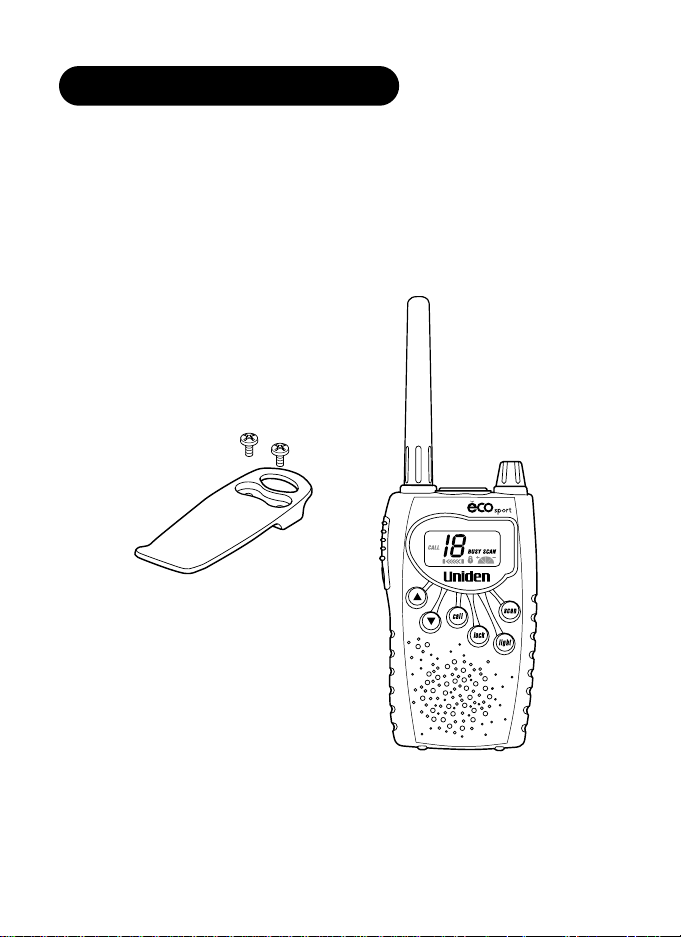
Included in Your Package
Your package contains the FRS300, this reference guide, and the accompanying belt clip
with hardware. You will need to purchase three (3) AA ALKALINE batteries in order to
operate the unit. If any of these items are missing or damaged, contact the Uniden Parts
Department at (800)554-3988 M-F: 7:00 AM-5:00 PM CST.
Belt clip and screws
FRS Unit
3
Page 7

Battery Installation
Your FRS300 radio uses three (3) AA ALKALINE batteries for power.
To install the batteries:
1. Make sure your radio is off.
Do not mix old and new batteries to avoid damage to the unit.
2. Release the battery cover clip,
then remove the battery cover.
3. Insert three (3) AA ALKALINE batteries
according to the polarity symbols on
the inside of the battery compartment.
4. Align the battery cover tabs with the
FRS300 tab holes then replace the cover.
4
Tab holes
Page 8

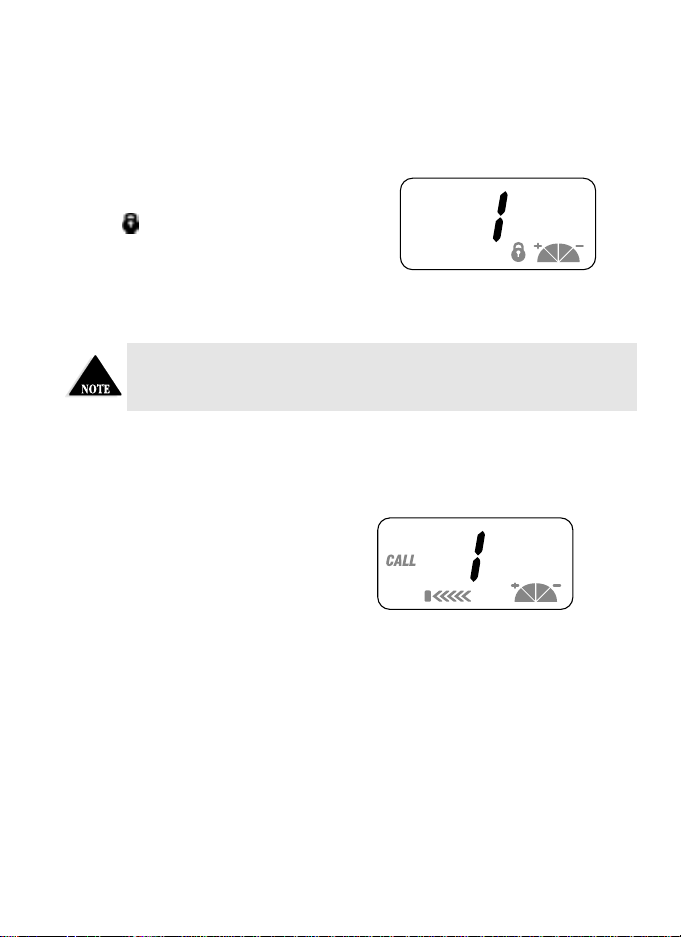
Low Battery Alert
The LCD on your radio shows a battery
meter in the lower right corner. The
icon indicates a fully powered unit. As the
batteries become low, will flash.
After 10 seconds, the channel number
disappears.
When the batteries in the unit are low, the unit will go into a Battery Low/Sleep Mode.
The Scan Mode, Transmit, and Transmit Call Tone Mode are disabled. Replace the
batteries immediately to continue using the radio.
Belt Clip
Because you will most likely use your radio when you are out and about, the unit comes
equipped with a belt clip to fasten the unit to your belt, pocket, or purse.
To remove the belt clip, turn the screws counterclockwise.
To attach the belt clip:
1. Insert the belt clip screws into the slot
on the belt clip.
2. Align the screws with the holes on the back
of the radio and turn them clockwise,
using a Phillips screwdriver to secure the
belt clip. Do not over-tighten.
5
Page 9

Using Your Radio
To get the most out of your new radio, read this reference guide completely before
attempting to operate the unit.
Turning the Radio On
1. Turn the on/off volume control
clockwise to turn the unit on.
When you turn on your FRS300, the LCD backlight remains lit for
5 seconds.
2. Turn the control counterclockwise to turn the unit off.
Adjusting the Volume
1. Press the MON button to hear
background noise. The “BUSY” icon
and icon appear.
2. Turn the on/off volume control
clockwise to increase the volume and
counterclockwise to decrease the volume.
You may need to adjust the volume again when audio is heard from
the speaker.
2
1
6
Page 10

Choosing a Channel
Your radio has 14 preprogrammed channels that you can use to talk to others. You must
select the same channel as your party selected.
To choose a channel for the FRS300:
Press the ▲ or ▼ button repeatedly to
select one of the 14 channels.
(The number on the LCD changes to
indicate that a new channel has
been selected.)
The BUSY icon and icon appear while receiving a transmission.
Scan Mode
Your radio also allows you to scan for activity from other transmitting radios.
To use the Scan feature:
1. Press the scan button to begin
scanning channels. The LCD will
indicate that you are in scan mode.
If a signal is present, the radio will stop
on the active channel. It will remain on
the channel until the transmission ends.
After 2 seconds, it will resume scanning.
7
Page 11

2. To resume scanning prior to the transmission end, press scanagain.
3. Press the scan, call, PTT, ▲, or ▼ button to exit the scan mode, stopping at the
current channel.
If you press scan to exit the scan mode, the radio must be actively
scanning.
Monitor Mode
The Monitor Mode is used to check activity on a specific channel. It will allow you
to receive signals that are considered too weak.
To check the channel activity:
1. Press and hold the MON button until you hear a series of beeps. You will hear
background noise if the channel is clear. Don’t transmit if you hear conversation.
2. To turn the Monitor Mode off, press the MONbutton again.
Talking on Your Radio
To talk to others using the radio;
1. Determine your communicating channel with the other members of your party
(refer to “Choosing a Channel” on page 7).
2. Press and hold the PTT button and
speak into the microphone. The
following LCD screen appears.
3. When you finish speaking, release the PTT button. You cannot hear any signals
while your PTT button is pressed.
4. Repeat steps 2 and 3 to continue communication.
8
Page 12
Locking In Your Selection
To prevent the channel from accidentally being changed, you should lock the buttons of
your FRS radio. This will disable the ▲, ▼, and scan keys.
1. Press and hold the lock button
for two seconds to lock the buttons.
The icon appears on the display
indicating the buttons are locked.
2. Press and hold the lock button again for two seconds to unlock the buttons.
Or turn the radio off and then on again to unlock the buttons.
The call, on/off volume, PTT, MON, lock and light buttons will
not be locked.
Call Tone Transmission
If you want to contact someone in your
party, press the call button. ”CALL” and
the transmit icon appear on the LCD for
2 seconds. Anyone on the same channel
will be alerted with your Call Tone.
9
Page 13

Silent Keypad
A tone sounds when any button is pressed. This is the initial default setting. This function
may be silenced if you wish. To silence the tones, press and hold the MONbutton while
you turn on the radio. If you want to hear the tones again, press and hold the MON
button while you turn on the radio. When the radio is turned off and then on again, the
last selected setting remains.
This function will also silence call tones and error tones.
LCD Backlight
The LCD display can be illuminated to assist your viewing. Press the light button to turn
on the display backlight. The light goes off automatically after 5 seconds.
External Micr ophone and Speaker (Optional)
Available as an optional accessory. Use only an original Uniden speaker/microphone.
Use of any other speaker/microphone may void your warranty.
To purchase your external accessory, contact your local Uniden dealer or call Customer
Service at (800) 297-1023 Monday through Friday, 7:00 a.m. to 7:00 p.m. Central time.
10
Page 14

Troubleshooting
Problem Solution
No power •Reposition or replace batteries.
Message not •Make sure the PTT button is completely pressed as
transmitted you transmit.
•Reposition or replace batteries.
Message not received •Confirm radios have the same channel.
•Make sure PTT is not inadvertently being pressed.
•Reposition or replace batteries.
•Obstructions, operating indoors or in vehicles may
interfere with communication. Change your
location.
•Check to make sure volume is turned up.
Limited talk range •Street/concrete structures, heavy foliage and use in
buildings and in vehicles will decrease the range.
Check for clear line of sight to improve
transmission.
•Wearing the radio close to the body, such as in
pocket or on a belt will decrease range. Change
the location of radio.
Heavy static or • Radios are too close. Radios must be at least 5 feet
interference apart. Increase your distance.
•Radios are too far apart.
Obstacles interfere with transmission. Talk range is
up to 2 miles in clear, unobstructed conditions.
If after trying these simple steps, your unit still does not function properly, call Uniden
Customer Service at (800)297-1023 Monday through Friday, 7 a.m. to 7 p.m.
Central time.
11
Page 15

Specifications
Description
Channels 14
Operating Frequency UHF - 462.550 to 467.725 MHz
Talk range Up to 2 Miles
Power Source 3AA Alkaline Batteries
Transmit Power Out 500m W
Battery Life 50 Hours typ. (5/5/90 duty cycle)
Channel Frequency Chart (MHz)
Channel Frequency Channel Frequency Channel Frequency
1 462.5625 6 462.6875 11 467.6375
2 462.5875 7 462.7125 12 467.6625
3 462.6125 8 467.5625 13 467.6875
4 462.6375 9 467.5875 14 467.7125
5 462.6625 10 467.6125
12
Page 16

Appendix - FRS Radio Rules
FCC Part 95 Subpart B
§95.191 (FRS Rule 1)
Eligibility and responsibility.
(a) Unless you are a representative of a
foreign government, you are authorized by
this rule to operate an FCC certified FRS
unit in accordance with the rules in this
subpart. No license will be issued.
(b) You are responsible for all
communications that you make with the
FRS unit. You must share each channel
with other users. No channel is available
for the private or exclusive use of any user.
§95.192 (FRS Rule 2)
Authorized locations.
(a) Provided that you comply with these
rules, you are authorized to operate an
FRS unit:
(1) Within or over any area of the world
where radio services are regulated by the
FCC (this area includes the fifty United
States and the District of Columbia, the
Commonwealth of Puerto Rico, the
United States Virgin Islands (50 islets and
cays), American Samoa (seven islands),
the Commonwealth of Northern
Marianna Islands, and Guam Island);
(2) Within or over any other area of the
world, except within or over the
territorial limits of areas where radio
services are regulated by an agency of the
United States other than the FCC or any
foreign government (you are subject to
its rules);
(3) Aboard any vessel or aircraft
registered in the United States, with the
permission of the captain, that is within
or over any area of the world where radio
services are regulated by the FCC or upon
or over international waters;
(4) Aboard any unregistered vessel or
aircraft owned or operated by a United
States citizen or company that is within
or over any area of the world where radio
services are regulated by the FCC or upon
or over international waters.
(5) You must operate the FRS unit only
according to any applicable treaty to
which the United States is a party. The
FCC will make public notice of any
such conditions.
(b) [Reserved]
(c) [Reserved]
(d) Anyone intending to operate an FRS
unit on the islands of Puerto Rico,
Desecheo, Mona, Vieques, and Culebra in a
manner that could pose an interference
threat to the Arecibo Observatory shall notify
the Interference Office, Arecibo Observatory,
Post Office Box 995, Arecibo, Puerto Rico
00613, in writing or electronically, of the
location of the unit. Operators may wish to
consult interference guidelines, which will
be provided by Cornell University. Operators
who choose to transmit information
electronically should e-mail to:
prcz@naic.edu.
A-1
Page 17

(1) The notification to the Interference
Office, Arecibo Observatory shall be made
45 days prior to commencing operation
of the unit. The notification shall state
the geographical coordinates of the unit.
(2) After receipt of such notifications,
the Commission will allow the Arecibo
Observatory a period of 20 days for
comments or objections. The operator
will be required to make reasonable
efforts in order to resolve or mitigate any
potential interference problem with the
Arecibo Observatory. If the Commission
determines that an operator has satisfied
its responsibility to make reasonable
efforts to protect the Observatory from
interference, the unit may be allowed
to operate.
§95.193 (FRS Rule 3)
Types of communications.
(a) You may use an FRS unit to conduct
two-way voice communications with
another person. You may use the FRS unit
to transmit one-way communications only
to establish communications with another
person, send an emergency message,
provide traveler assistance, make a voice
page, or to conduct a brief test.
(b) The FRS unit may transmit tones to
make contact or to continue
communications with a particular FRS unit.
If the tone is audible (more than 300
Hertz), it must last no longer than 15
seconds at one time. If the tone is
subaudible (300 Hertz or less), it may be
transmitted continuously only while you are
talking.
(c) You must not use an FRS unit in
connection with any activity which is
against federal, state or local law.
(d) You must, at all times and on all
channels, give priority to emergency
communication messages concerning the
immediate safety of life or the immediate
protection of property.
(e) No FRS unit may be interconnected to
the public switched network.
§95.194 (FRS Rule 4)
FRS units.
(a) You may only use an FCC certified FRS
unit. (You can identify an FCC certified FRS
unit by the label placed on it by the
manufacturer.)
(b) You must not make, or have made, any
internal modification to an FRS unit. Any
internal modification cancels the FCC
certification and voids your authority to
operate the unit in the FRS.
(c) You may not attach any antenna, power
amplifier, or other apparatus to an FRS unit
that has not been FCC certified as part of
that FRS unit. There are no exceptions to
this rule and attaching any such apparatus
to a FRS unit cancels the FCC certification
and voids everyone's authority to operate
the unit in the FRS.
A-2
Page 18

Memo
Page 19

© 2000 Uniden America Corporation
All rights reserved • Printed in China
UTZZ01874ZZ
Covered under one or more of the following U.S. patents:
4,398,304 4,409,688 4,455,679 4,461,036 4,521,915 4,597,104
4,627,100 4,841,302 4,888,815 4,932,074 4,947,456 5,014,348
5,199,109 5,408,692 5,428,826 5,438,688 5,448,256 5,465,402
5,471,660 5,483,684 5,548,832 5,551,071 5,642,424 5,710,992
5,530,296 5,574,995 5,577,076 5,598,430 5,600,223
 Loading...