

Uniden FP203 User Manual
FP203
CONTENTS
Introduction ..............................................................................................1
Features ........................................................................................1
Included in your package .............................................................1
Location and Controls ..............................................................................2
Setup ......................................................................................................2
Connecting Line Cords and AC Adaptors ...................................3
Setting Time and Date .................................................................3
Optional Backup Battery Installation .......................................................3
Telephone Key Function ..........................................................................5
Display Messages .....................................................................................6
Caller ID ...................................................................................................7
Caller ID Operation ..................................................................................7
Speed Dial Numbers ................................................................................8
Storing One-Touch Speed Dial Numbers ....................................8
Storing Two-Touch Speed Dial Numbers ....................................8
Dialing One-Touch Numbers ......................................................8
Dialing Two-Touch Numbers ......................................................8
Troubleshooting .......................................................................................9
Warranty .................................................................................................10
INTRODUCTION
TIP
To get the most from
your phone, please
read the Owner's
Manual thoroughly.
Features
Caller Display
99 Caller ID memory
Call Back Function
NEW CALL light
Speaker Phone
Last number redial
Last 10 numbers call back
FLASH button
REDIAL/PAUSE button
Message waiting function
6 one-touch memories
10 two-touch memories
Clock
Included in your package
1 - Handset with curly cord and phone base
1 - Telephone line cord
1- Owner's manual
1 - AC Adaptor
1 - Speed Dial label
Optional extras
4 - AA size 1.5V batteries
This unit is not
waterproof. Do not
expose this product to
rain, water, moisture
or any other liquid.
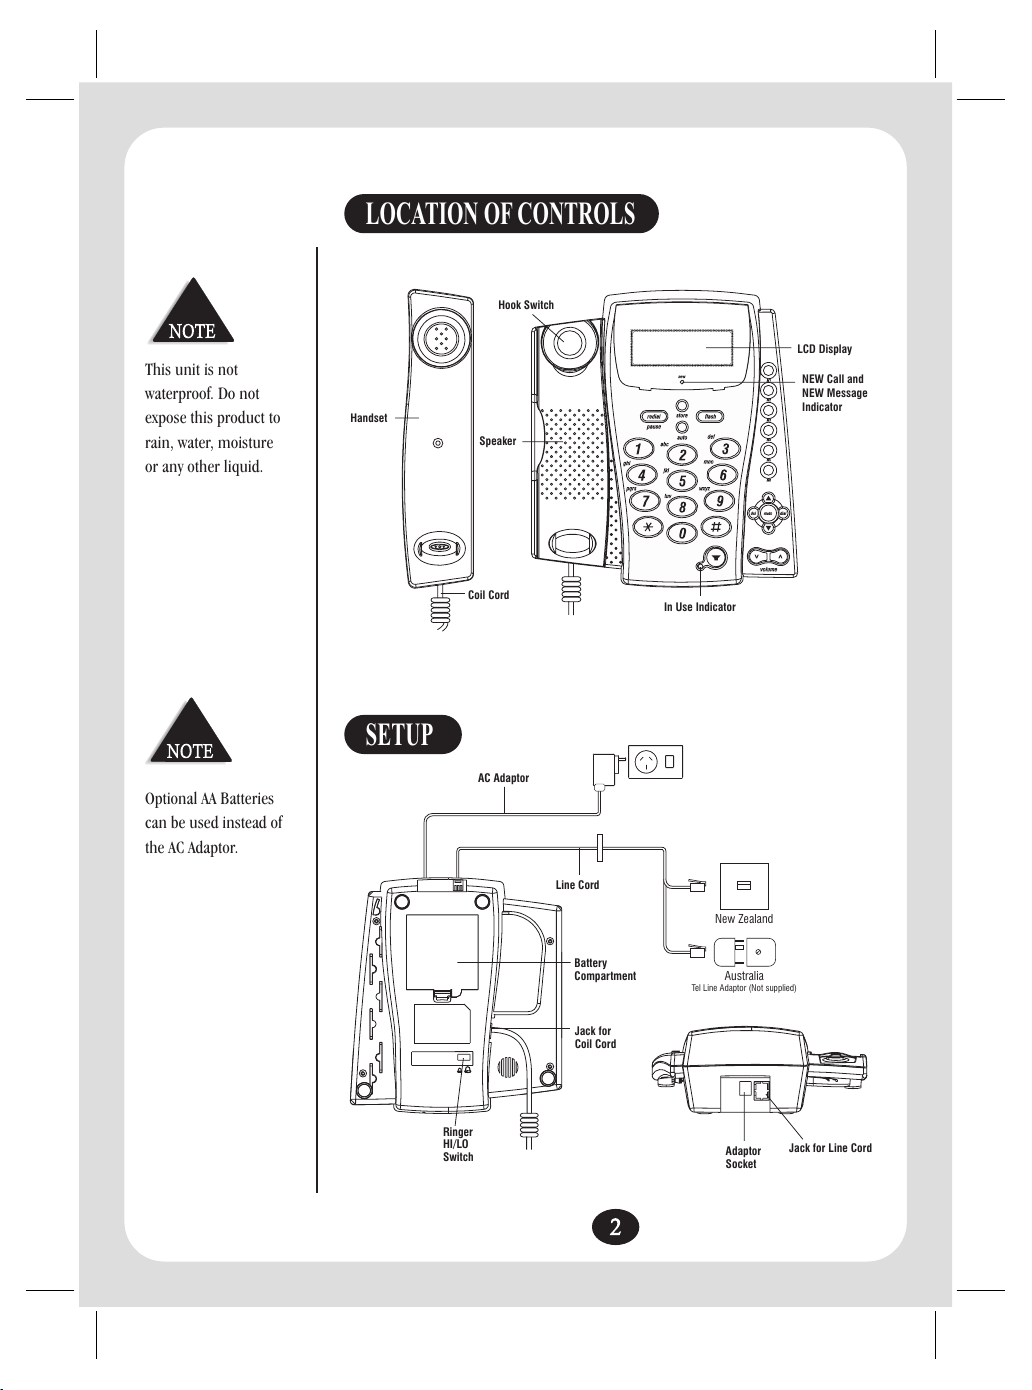
LOCATION OF CONTROLS
Hook Switch
Handset
Speaker
LCD Display
NEW Call and
NEW Message
Indicator
Optional AA Batteries
can be used instead of
the AC Adaptor.
SETUP
Ringer
HI/LO
Switch
Coil Cord
AC Adaptor
Line Cord
Battery
Compartment
Jack for
Coil Cord
In Use Indicator
New Zealand
Australia
Tel Line Adaptor (Not supplied)
Adaptor
Socket
Jack for Line Cord
DEL
If using the AC Adaptor,
Batteries are not
required for normal
operation.
Connecting Line Cords and AC Adaptor
1. Plug one end of the supplied telephone cord into the telephone line socket located
at the rear of the phone.
2. Plug the other end into the telephone line wall jack.
3. Plug the AC Adaptor lead into the power socket at the rear of the phone.
4. Plug AC Adaptor into a standard wall outlet and switch it on.
Setting Time and Date
If you subscribe to a Caller ID Service, your time and date will automatically be set for you
when you receive your first call to this unit.
1. Press and hold , display shows "Set Time".
2. Use and to select the correct number, press to confirm and move
FLASH
DIAL
to the next digit, HH:MM DD/MM.
3. Press to exit.
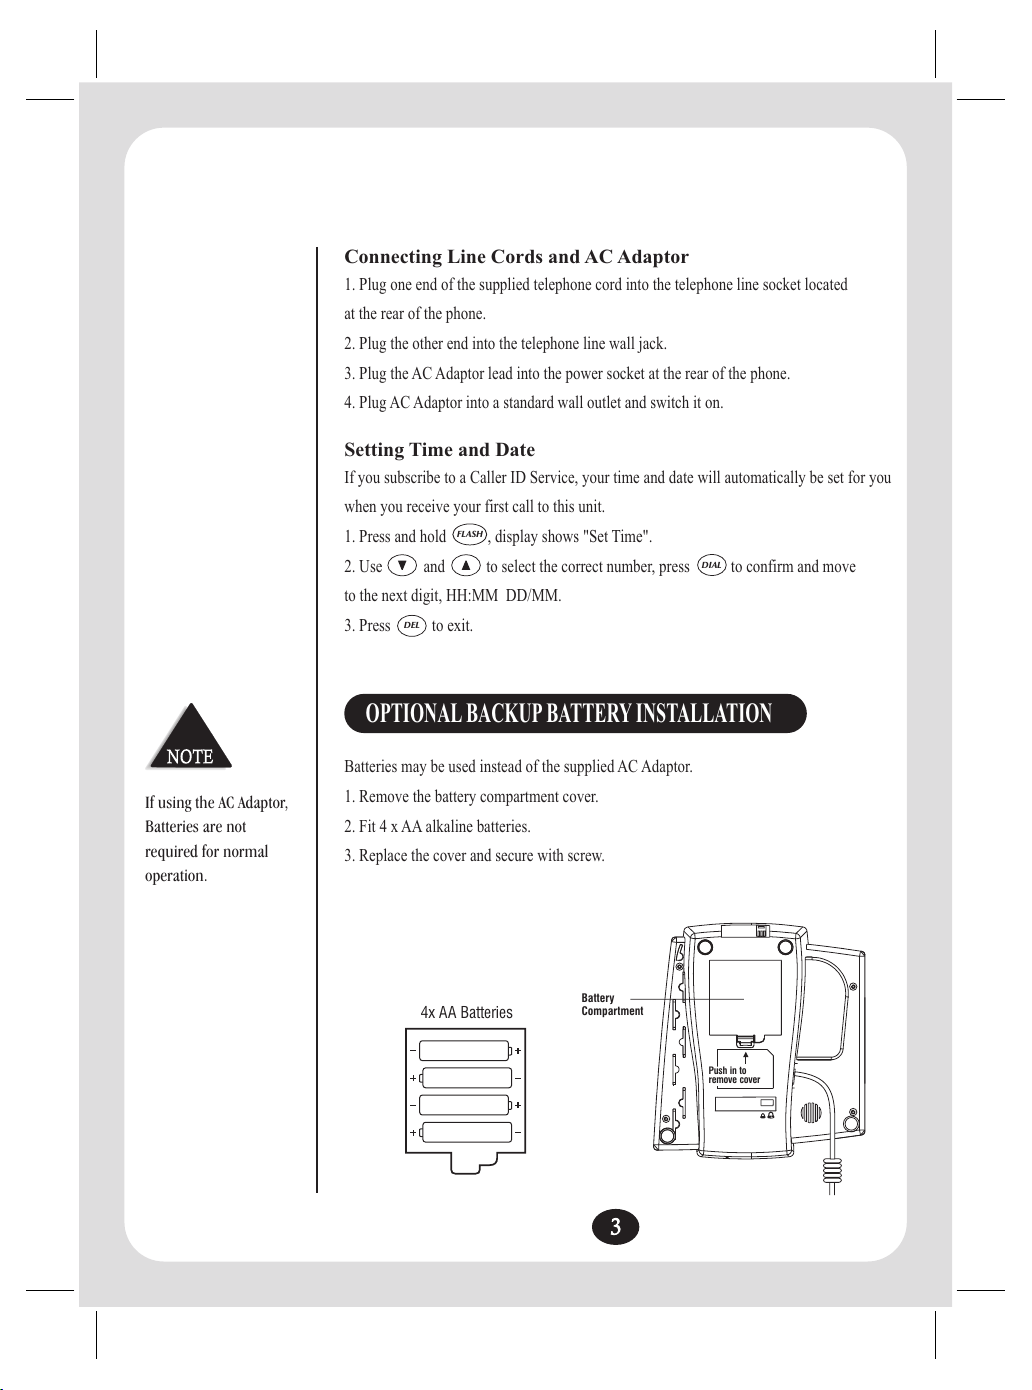
OPTIONAL BACKUP BATTERY INSTALLATION
Batteries may be used instead of the supplied AC Adaptor.
1. Remove the battery compartment cover.
2. Fit 4 x AA alkaline batteries.
3. Replace the cover and secure with screw.
Battery
4x AA Batteries
Compartment
Push in to
Push in to
cover
remove
remove cover
 Loading...