

Page 1

D S 7 0
Digital Spread Spectrum
provides the longest range,
the clearest sound
OWNER’S
and the best privacy.
Page 2

Precautions
Introduction
Installahun and Adjustment
Using Your New Phone
r
.................................................................
Installation Considerations
Important Safety Instmctions
Important Electrical Considerations.......................
Features ..................................................................
Included In Your Package
Desk Installation
Wall Installation ...................................
Installing the Handset Battery Pack
Charging the Battery Pack
Cleaning the Battery Contacts...............
Handset Ringer Volume and Tone . .
Installing the Beltchp
Headset Installation
Automatic Digitai Code Security . .
Making and Receiving Calls
Call Waiting ............................................................................ 14
Page ......................................................................................... 14
Travelling Out-Of-Range .........................................................14
PABX Connection ....................................................................14
Storing a Phone Number in Memory..........................................li
Dialling a Number In Memory.................................................15
Changing a Stored Number from Memory
Pause Function
3 Way Chat Function (Conferencing)
Chain Dialling...........................................................................16
..........................................................................
.....................................
................................. ..................
.....................................
..................................
...................
...........................
..............................
....................................................
.......................................
..................
..................
..................
. 5
................
................
.............................7
...........................
...........................
.....................9
...........................10
..........................
.................
........................
..........................
...............................
6
7
9
10
11
12
12
li?
15
15
16
2
2
3
4
5
Introduction
Installing and
Adjusting
Using Your
New Phone
Troubleshooting
Quick Reference Chari
Specifications
Warrant}^
Controls And Functions , ,,
..............................
...................................
.............
.30
19
17
18
Troubleshooting
Specifications
Page 3
W
o
K
P-.
pd
?
pd
o
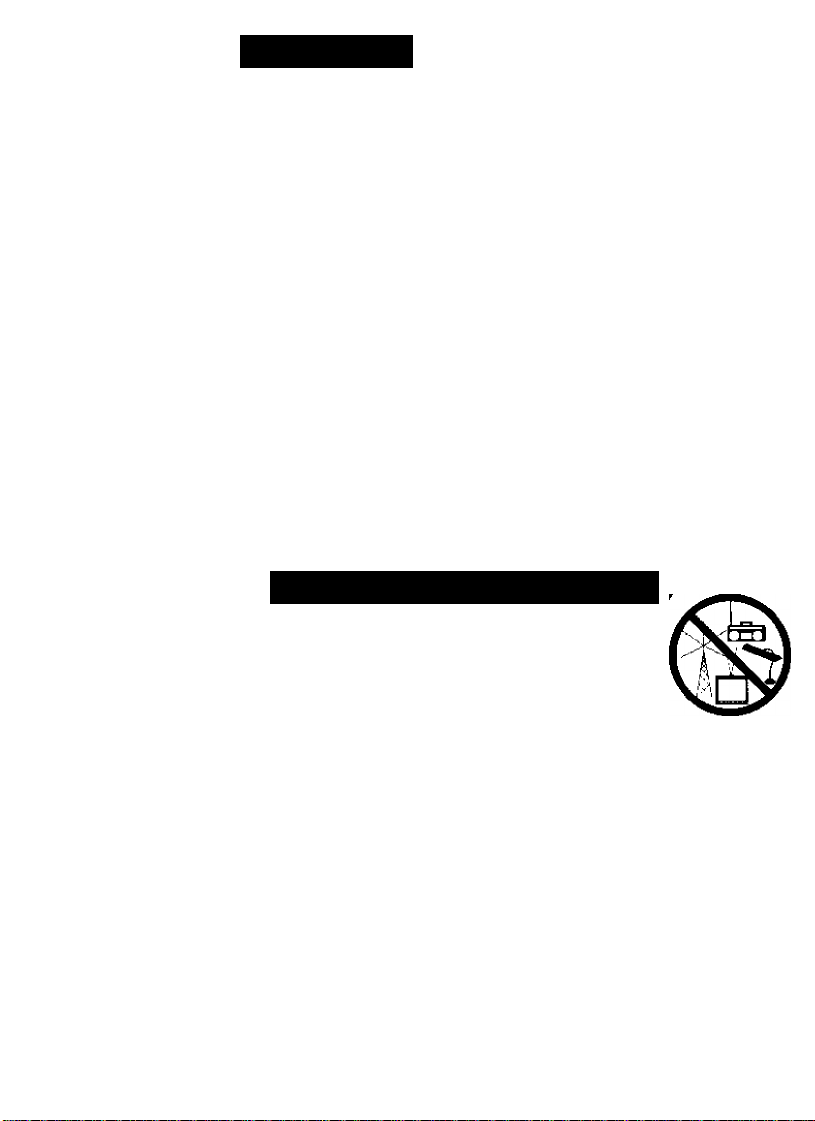
PRECAUTION
Before you read anything else, please observe the following:
Warning!
UNIDEN DOES NOT represent this unit to be waterproof.
To reduce risk of fire, eleancal shock or damage to the unit, DO NOT expose
this unit to rain or moisture.
Rechargeable Nickel-Metal Hydride Battery Warning
• The rechargeable Ni-MH battery contained in this
equipment may explode if disposed of in fire.
• Do not charge the rechargeable Ni-MH battery in any other charger
than the one specified in this Owner’s Manual.
This symbol indicates important operating and servicing
A
instructions.
INSTALLATION CONSIDERATIONS
T Selecting a Location
Before choosing a location for your new phone,
here are some important guidelines you should
consider:
• The location should be close to both a phone jack and a power outlet.
• Keep the base and handset away from sources of electrical noise such
as motors and fluorescent lighting,
• Be sure there is sufficient space to rotate the base antenna folly vertical,
• The base can be placed on a desk, tabletop or mounted on a standard
wall plate.
. You should charge the battery in your handset for 15-20 hours before
connecting the phone line.
. Most phone equipment available now uses modular jacks. Phone cords
are fitted with a plastic connector which plugs into this type of jack. If
you do not have a modular phone jack, contact your local telephone
company for information about their installation.
Page 4

IMPORTANT SAFETY INSTRUCTIONS
When using your tdephone equipment, these basic safety precautions
should always be followed to reduced the risk of fire, electrical shock,
and injury:
1. Do not use this product near water; for example, near a bathtub, shower,
washbowl, kitchen sink or laundry tub, in a wet basement or near a
swimming pool.
2. Do not overload wall outlets and extension cords, as this can result in the
risk of fire or electrical shock.
3. Never spill liquid of any kind on the product.
4. To reduce the nsk of electric shock, do not disassemble this product.
5. Unplug this product from the wall outlet and refer servicing to qualified
service personnel under the following conditions:
A. If the power supply cord is damaged or frayed.
B. If liquid has been spilled into the product.
C. If the product has been exposed to rain or water.
D. If the product does not operate normally when following the operating
instructions (Adjust only those controls that are covered by the operating
instructions).
Improper adjustment of other controls may result in damage,
and will often require extensive repair work by a qualified technician),
E. If the product has been dropped, or the base unit has been damaged.
F. If the product exhibits a distinct change in performance.
6. Do not use the telephone to report a gas leak in the vicinity of the leak.
Page 5

IMPORTANT ELECTRICAL CONSIDERATIONS
Unplug all elearical appliances when you know an electrical storm is
approaching. Lighming can pass through your household wiring and damage
any device connected to it. This phone is no exception.
Please do not attempt to unplug any
A
T elephone Line Problems
If you are having trouble with your telephone service, you must first disconnect
your phone to determine if it is the cause of your problem. If you determine that it
is the cause, you must leave it disconnected until the trouble has been corrected.
A
Radio interference
Radio interference may occasionally cause buzzing and humming in your cordless
handset, or clicking noises in the base. This interference is caused by external sources
such as cellular phone charger, TV, refrigerator, vacuum cleaner, fluorescent lighting
or electrical storm. Your unit is NOT DEFECTIVE. If these noises continue and
are too distracting, please check around your home to see what appliances may be
causing the problem. In addition, we recommend that the base not be plugged into
a circuit that also powers a major appliance because of the potential for interference.
Be certain that the antenna on the Base Unit is fully extended and raised vertically,
appliance during an electrical storm.
Under power failure, this telephone will not operate. Please
ensure that a separate phone, not dependent on local power
is available during emergencies.
More Than One Phone
Each telephone device that you connect draws power from the phone line. We refer
to the power drawn as the device’s Ringer Equivalence Number (REN). The REN is
shown at the bottom part of your telephone. If you are using more than one
phone or other device on the line, add up all the RENs. If the total is more than 3,
your phones may not ring.
Page 6

m
Congratulations on your purchase of the Uniden
DS70
cordless telephone. This
phone is designed for reliability, long life and outstanding performance utilising
the latest in 900 MHz Digital Spread Spectrum Technology.
O
X
P-^
15 channels (Aust), 7 channels (NZ)
900 MHz Digital Spread Spectrum Technology
20 Memory Dials (16 digits maximum per memory)
32 Digit Redial
Pd
g
O
hi
Redial, Flash and Pause Dialling
Tone Dialling
Call Waiting Compatible
Page
14-Day Standby Battery Time
4-Hour Talk Time
Handset Earpiece and Ringer Volume Control
Hearing Aid Compatible
Auto talk
Auto Standby
Any key Answer
Digital Spread Spectrum Technology utilises a digital transmission
and a “wider frequency band" compared to, a “single narrow band" 30/39 Standard
Analogue transmission. The result is a more secure conversation with the clarity of
digital sound, extended range, and minimal interference from other cordless phones.
Random Code “digital security automatically selects one of over 16 million
codes for the handset and base. This feature prevents unauthorised calls as a result
of your phone being activated by other equipment.
Page 7
A
To get the most ftom your
phone, please read this
owner’s manuil thoroughly.
Be sure to complete and mail
the product registration form.
A
If any of these items are
missing or damaged, contact
your place of purchase.
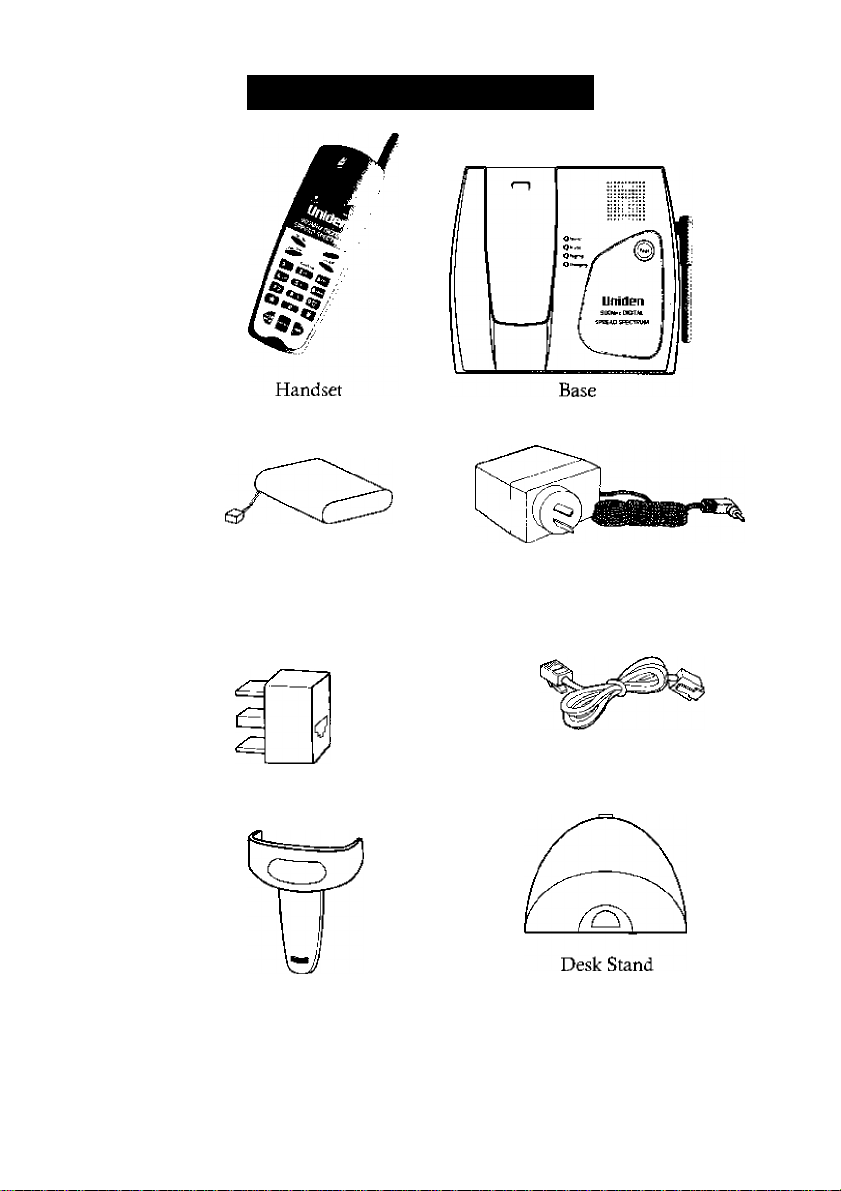
INCLUDED IN YOUR PACKAGE
Rechargeable Battery
AAD 900S
AC Adaptor
Belt Clip
Telephone Cord
Adaptor
(Australia Only)
• This Owner’s Manual
• Registration Card
• and other printed materials
Long Telephone
Cord/Plug
Page 8

DESK INSTALLATION
Your DS70 can be fitted with a Desk Stand or mounted on the wall.
Before connecting your
phone Ime, fully charge the
Nickel- Metal Hydride battery
pack for IÖ-20 hours.
A
Place the power cord so
that it does not create a trip
hajard or where it could
become chafed and create a
fire or electrical hazard.
. Thread both the telephone line cord and the power cord through the semi-circle
hole in the back of the Desk Stand,
. Insert the two tabs, located on the base of the Desk Stand, into the slots on the
bottom of the Base Unit.
. Push down gently until the tab locks into the top of the Base Unit.
• Now connect the telephone line cord and AC power cord into the Base Unit as
shown on page 8.
A
Use only the Uniden AC
adaptor supplied with this
phone. Make sure it is
switched ON at all times.
WALL INSTALLATION
Your DS70 can be wall mounted on a standard telephone wall plate.
. Do not install the desk stand.
. Now connect the telephone line cord and AC power cord into the Base Unit as
shown on page 8.
. Position the Base so the mounting studs on the standard telephone wall plate fit
into the holes on the back of the Base Unit.
• Shde the Base down on the mounting studs until it locks into place.
Page 9

A
Bifore you plug the other
end of the telephone cord
into the modular jack on the
wall, charge the battery (See
CHARGING THE BATTERY
PACK, pagell).
1. Plug the AC adaptor into a standard 240V AC wall outlet and switch ON.
2. Charge the battery {See CHARGING THE BATTERY PACK,
page 9).
3. Plug the other end of the phone cord into the telephone jack on the wall,
4. Raise the antenna to a vertical position,
Page 10

A
Use only Uniden Battery
supplied with your phone.
INSTALLING THE HANDSET BATTERY PACK
1. Press and slide the battery cover off,
2. Align the plastic connector of the
Nickel Metal Hydnde battery with its socket
and plug it in.
3. Place the battery pack inside.
4. Slide the battery cover back
until it snaps into place.
CHARGING THE BATTERY PACK
T
Initial battery charging
Before connecting your phone for the first time, fully
charge the rechargeable battery pack for 15-20 hours
without interruption.
I. Place the handset on the base
2, Make sure that the
LED lights. If the LED doesn’t
light, check the AC adaptor is
plugged m and and switched
ON. Also check the handset has
good contact with the base
charging contacts.
Charging
Page 11

T Low battery indicator
The low battery indicator shows when the
battery pack is very low and needs to he charged.
If the phone is not in use, the
Low batt
LED
flashes every four seconds. If the phone is in use,
the
Low batt
LED flashes every four seconds
and the handset beeps. Complete your
conversation as quickly as possible and return
the handset to the base for charging.
▼ Recharging the battery pack
Replace the handset on the base if it’s convenient. However recharging
the battery is only necessary when the Low batt LED is lit.
15 - 20 hours charging is required for a full charge - however it is safe to
leave the handset on the base for longer periods.
CLEANING THE BATTERY CONTACTS
To maintain a good charge, clean all charging contacts on the handset and base
about once a month. Use a pencil eraser or other contact cleaner. DO NOT use
liquids or solvents; you may damage your phone.
10
HANDSET RINGER VOLUME AND TONE
▼ Adjusting ringer volume
• Ensure the handset is in standby mode.
• Press the
to set the handset ringer volume.
• The volume will remain on the same setting
when you hang up.
▼ Adjusting ringer tone
There are 4 ringer tones to choose from.
• While in the standby mode, press the
• Press a key
Vo i
A or T key on the handset
(1,2,3 or 4)
to select a ringer tone.
Recall
button.
Page 12

A
The handsel cannot be wall
mounted with the beltdip
installed.
INSTALLING THE BELTCLIP
'
To attach the beltdip
Press the beltdip against the rear of the
handset until it elides into place.
▼ To remove the beltdip
• Gently pull one side of the beltdip
to release.
D
11
Page 13

A
Use only the Uniden
HS910/hS90() headset
HEADSET INSTALLATION
Your phone may be used with an optional
headset, the Uniden HS910/HS900.
To use this feature, simply plug the headset
into the headset jack. Your phone is
ready for hands-free conversations.
headset
Jack
A
Keep the headset wire away
from handset and
base antennas.
A
If you are using an optional headset, you must still use the
handset keypad for phone operations.
When using a headset on DS70, an АСА approved headset
is required.
AUTOMATIC DIGITAL CODE SECURITY
To prevent other panics ftom making unauthorised calls on your phone line, a
digital code was added to the DS70. Your phone’s handset and base share this
code. This code is randomly set each time you place the handset in the base. If
the phone experiences a power failure, you must reset the digital security' code by
placing the handset on the base.
T To reset the digital security code
1. Restore power to the base.
2. Place the handset on the base.
Talk/End
{on the base) LEDs momentarily blink.
The digital security code is reset.
(on the handset) and
In use
12
Page 14

MAKING AND RECEIVING CALLS
A
Refer to the CONTROLS &
FUNCTIONS at the
bach of this Owner's Manual.
W
o
p-l
w
pti
▼ Basic phone operation
When Handset On Base
To answer
a call
To make
a call
T0 hang up
To redial
Pickup handset.
1, Pickup the handset.
1. Press Talk/End
3. Listen for the dial tone.
4. Dial the number.
Press Talk/End on the handset, or remtn the handset to the base
(AutoStandby).
1. Pick up the handset.
2. Ptess Talk/End.
3. Listen fot the dial tone.
4. Press Redial Pause,
When Handset Off Base
Press
any key
1 Press Talk/End.
2. Listen for the dial tone.
3. Dial the numbet.
2. Press Talk/End
3. Listen for the dial
tone.
4. Press Redial
Q EB (3
Pause.
%
a>':
Big.
BIH!|
D«aa '
Note:
If any key is pressed before pressing Redial Pause, the last
number dialled will not redial.
13
Page 15

A
AUSTRALIA
The Call Walt+2 call waiting
procedure to^es betvfeen the
incoming and onginal call
(and visa versa).
The Call Wait + 1 procedure
will drop the current call
connection and pick up the
incoming call on hold.
A
NEW ZEALAND
You need to subscibe to
Telecom's Qll Waiting
Service before you can use this
feature.
CALL WAITING
▼ For Australian Version
Using the Call Wait feature
If the Call Waiting tone sounds, press
waiting call (Aust. only).
-OR
To return to the original caller press
T For New Zealand Version
Using the Call Wait feature
If the Call Waiting tone sounds during a call, press
toggle between the incoming call and the original call,
To locate the handset press
for about 15 seconds.
Page
Call Wait
Call Wait
on the Base Unit, The handset beeps
then 2 to accept the
then 1 (Aust.only).
Call Wait
to
14
TRAVELLING OUT OF RANGE
As you begin to move too far from the base, you will first hear a clicking
sound. As you travel further, the noise increases. If you travel
out of range, your cal! terminates.
PABX CONNECTION
The DS70 telephone may work with a 2-wire Analogue PABX network.
However, with the DS70 hook-flash timing fixed at lOOms (NZ 600ms),
some PABX equipment that uses a different hook flash timing may have its
special feature (i.e. placing a call on hold or transferring a call) inaccessible.
Page 16

STORING A PHONE NUMBER IN MEMORY
The pause button counts as
one digit. Pressing
Rediat/Pause more
than once increases the
length of pause between
numbers.
1. Make sure the handset is in standby mode
2. Press the
Memory
button on the handset.(the
(In Use
In
light is OFF).
Uselightwill
begin flashing
3. Enter the phone number, up to 16 digits
4. Press
Memory
again
5. Enter the two digit memory location nmber (01
20) on the keypad {the
In Use
light will stop flashing
and you will hear two confirmation beeps.
6. Repeat these steps to store additional phone numbers.
PAUSE FUNCTION
In some cases, such as PABX or long distance service, a pause may be needed in the
diahing sequence. Pressing the
Redial/Pause
button on the handset inserts a
2 second delay between dialled numbers. Pause(s) can be inserted into the programmed
dialling sequence in memory locations.
DIALLING A NUMBER IN MEMORY
1. Press
2. Press
3. Enter the two digit memory location number (01-20). The number
Taik/End
Memory
automatically dials. .
CHANGING A STORED NUMBER FROM MEMORY
Follow the steps in the section Storing a Phone Number in Memory. The new
phone number will automatically replace the previous one.
15
Page 17

A
Check with your PABX
supplier if you are not sure
whether your PABX network
uses Analogue or Digital
iuterface.
3 WAY CHAT FUNCTION (CONFERENCING)
While on a call you can make another call to a third person and hold a 3 way
conversation. "
▼ To establish a 3 way chat (conference) while on a call:
1
. Press the
Recall
button to put the current caller on hold.
2. Wait for dial tone,
3. Dial the third person’s phone number.
4. When the third person answers the call, press the
3-Way Chat
button
to connect both callers to yourself
▼ To establish a 3 way chat (conference) while on a call with
a second incoming call:
1, Press the
Call Wait
button to put the current caller on hold. Thiswill
also connect the second caller.
2. While talking to the second caller, you can establish a 3 Way Chat by
pressing the
▼ To split up the 3 Way Chat:
1
. Press the
2. To switch between callers, press the
3 Way Chat
Call Wait
button,
button to put the current caller on hold.
Call Wait
button.
3. To hang up on one caller and return to the caller on hold, press
Recall 1.
CHAIN DIALLING
On certain occasions after dialling a number, you may be requested by the
party or service you are calling to enter a special access code, such as when
performing a banking transaction. To store this number, refer to “Storing
Memory Dial Numbers” on page 15, .
16
For example, if your bank’s telephone number is stored in handset memory
location 3, and your account number is stored in handset memory location 4:
1
. Press
Talk/End
2. Press
Memory
3. At the appropriate time, press
on the handset.
on the handset and 3 on the handset keypad.
Memory
and number 4 on the
handset keypad.
4. Your handset dials the number and you may proceed with your
transaction.
Page 18

w
o
tc;
pu,
w
QUICK REFERENCE CHART
If your phone is not petforming to your expectations, please try these simple steps
first before calling Uniden customer service -
PROBLEM SUGGESTION
D
O
No dial tone
Does not ring
No power on the
handset
Does not charge Make sure the chargir^ contacts on both the handset
Range is limited
Check that ±e phone line cord connectors at both ends
are pushed in until they dick.
If you have had a power failure or have unplugged the
base unit, replace the handset on the base unit for two
to five seconds to reset the system.
You may have exceeded the limit of the number of
phones that can be conneaed to the same line, at the
one time
Themaxirnum is3.
Check the battery pack connection inside the battery
compartment of the handset.
The handset rechatgable Ni-MH battery pack may need
to be chatged.
and the base unit are in contact during charging.
The charging contaas may need to be cleaned with an
alcohol-moistened cloth.
The battery pack may need to be dischaiged first before
a full charge can be accomplished.
Make sure the base antenna is vertical.
Move the base unit so that it is centrally located in your
residence or office and make sure that the base unit is
not located near appliances.
Calls received,
flutter or fade
Cannot store or
recall phone
numbers from
memory
The handset rechatgable battery pack may need charging.
You may be out of normal operating rai^e. Move closer
to the base unit.
When storing phone numers, make sure that the handset
is in the standby position.
When recalling stored numbers, check first for a dial
tone.
17
Page 19

ш
;zi
Australian Specification: The DS70 complies with TSOOl, TS002, TS004,
о
AS/NZS 3260 and FCC Part 15(as per АСА Radio Communications
д
рц
Class Licensing Requirements).
New Zealand Specification; The DS70 complies with PTC200, RFS 29.
ы
Frequency control; PLL
pci
Modulation: Direct Sequence Spread Spectrum; DBPSK
;:з
Operating temperature: 0” to +50" C
g
Frequency: 917.4 to 925,8 MHz (15 channels: Australia)
Frequency: 923.4 to 927.0 MHz (7 channels: New Zealand)
Power requirements; 9V 300raA (from AC adaptor)
Size; 152mm (W) x 183mm (H) x 53.5mm (D)
Weight: Approx. 307g
Frequency: 917,4 to 925,8 MHz (15 channels: Australia)
Frequency: 923.4 to 927,0 MHz (7 channels: New Zealand)
Power requiieraents: Rechargeable NiMH battery pack
Size (without antenna): 50mm (W) x 154mm (H) x 27.5mm (D)
Weight: Approx. 136g (including battery)
Battery: Capacity 550 inAH, 3.6V
Talk mode 4 hours
Standby mode 14days
Specifications, features, and availability of optional accessories ate all subject
to change without prior notice.
IS
Page 20

One Year Limited Warranty
Important: Evidence of original purchase is required for warranty service.
Wanantor: Uniden Australia Pty Limited ACN 001 865 498
Uniden New Zealand Limited
ELEMENT OF WARRANTY: Uniden warrants to the original retail owner for
the duration of this warranty, its DS70 (herein after referred to as the Product), to be
free from defeos in materials and craftsmanship with only the limitations or exclusions
set out below,
WARRANTY DURATION: This warranty to the onginal retail owner only,
shall terminate and be of no further effect 12 months after the date of original retail
sale. This warranty will be deemed invalid if the product is; (A) Damaged or not
maintained as reasonable and necessary, (B) Modified, altered or used as part of any
conversion kits, subassemblies, or any configurations not sold by Uniden, (C) Improperly
installed, (D) Repaired by someone other than an authorised Uniden Repair Agent for
a defect or malfunaion covered by this warranty, (E) Used in conjunction with any
equipment or parts or as part of a system not manufactured by Uniden. (F) Only available
in the original country of sale.
PARTS COVERED: This warrant)' covers for one (1) year, the Base/Charging Unit
and Handset only All accessories (AC Adaptor, Wall mount bracket etc)are covered for
90 days only.
STATEMENT OF REMEDY: In the event that the product does not conform
to this warranty at any time while this warranty is in effect, the warrantor at its discretion,
will repair the defect or replace the product and return it to you without charge for parts
or sendee, THIS WARRANTY DOES NOT COVER OR PROVIDE FOR THE
REIMBURSEMENT OR PAYMENT OF INCIDENTAL OR CONSEQUENTIAL
DAMAGES, THIS GUARANTEE IS IN ADDITION TO AND DOES NOT IN ANY
WAY AFFECT YOUR RIGHTS UNDER THE CONSUMER GUARANTEE ACT.
WARRANTY CARD: If a warranty' card has been included with this product
then please fill it in and return to us within 14 days of purchase. Your name and the
Serial number of the product will then be registered in our database and this will help
us process your claim with greater speed and efficiency should you require warranty
PROCEDURE FOR OBTAINING PERFORMANCE OR
WARRANTY: In the event that the produa does not conform to this warranty, the
Product should be shipped or delivered, freight pre-paid, with evidence of original
purchase [eg. a copy of the sales docket), to ±e warrantor at:
UNIDEN AUSTRALIA PTY LIMITED
SERVICE DIVISION
345 Princes Highway,
Rockdale NSW 2216
Ph (02) 9599 3577 Fx (02) 9599 3278
Toll Free 1300 366 895
UNIDEN NEW ZEALAND LIMITED
SERVICE DIVISION
150 Harris Road,
East Tamaki, Auckland
Ph (09) 273 8383 Fx (09) 274 4253
ToUFree 0800 4 UNIDEN
(864 336)
Customers in other States should ship or deliver the Product freight pre-paid to their nearest
Uniden Authorised Repair Centre (Contact Uniden for the nearest Warranty Agent to you)
19
Page 21

CONTROLS & FUNCTIONS
1.
Headset Jack
2.
Battery Compartment
3.
In Use LED
4. Talk/Endbutton
5. Call Waiting button
6. 3 Way Chat (conference) button
7.
Re dial/Pause button 19.
8.
Handset Aerial 20.
9.
Low battery/Out of range indicator 21.
10.
Volume Control buttons
11, Numeric Keypad
12. Recall Button
13. Memory button
14.
Charging Contacts
15. Handset retainer
16. Power Indicator LED
17.
In Use LED
18. Paging LED
Charging LED
Page button
Base Unit Aerial
22.
DC In 9V
23.
Tel Line
20
Page 22

21
Page 23

^>H
I
------------
or)
1
2001 Uniden Australia Pty Limited
Uniden New Zealand Limited
 Loading...