

Uniden DECT Elite 9005 Owner's Manual
DECT Elite 9005
Accessory handset for
DECT Elite 9035 Series
Welcome
Congratulations on your purchase of the Uniden DECT Elite
9005 accessory handset and charging cradle. You can place
this fully featured cordless handset anywhere your home has AC
power.
Note: Illustrations in this manual are used for explanation
purposes. Some illustrations may differ from the actual unit.
Important!
The DECT Elite 9005 accessory handset will not operate until it
is registered to a Uniden main base. This manual describes how
to set up your new handset; for more detailed instructions on
operating your new handset, please refer to the manual supplied
with your base.
Terminology Used in this Manual
Accessory
Handset
Base
Charging
cradle
Standby
Station Any registered handset or the base.
Talk
A handset that works with an expandable phone base.
Accessory handsets must be registered to a base.
The main part of the phone that connects to your phone
line, and lets you make and receive calls.
A cradle that charges an accessory handset. It connects to
power but not to a phone line.
The handset is not in use. No line has been activated.
(It doesn’t matter whether the handset is in the cradle.)
No dial tone is present.
A dial tone has been enabled, so you can dial and carry on
a conversation with an outside party.
1

Compatible Bases
This handset is compatible with Uniden’s 1.8 GHz DECT Elite
9035 Series.
Installing the Accessory Handset
Checking the Package Contents
Make sure your package contains the following items. If any
items are missing or damaged, contact your place of purchase
immediately.
• Cordless Handset • Belt Clip
• Printed Material
• Charging cradle with AC Adapter (model # AAD-600S: Input
240V AC, 50 Hz; Output 9V DC, 210 mA)
• Rechargeable NiMH Battery Pack (model # BT-694)
2
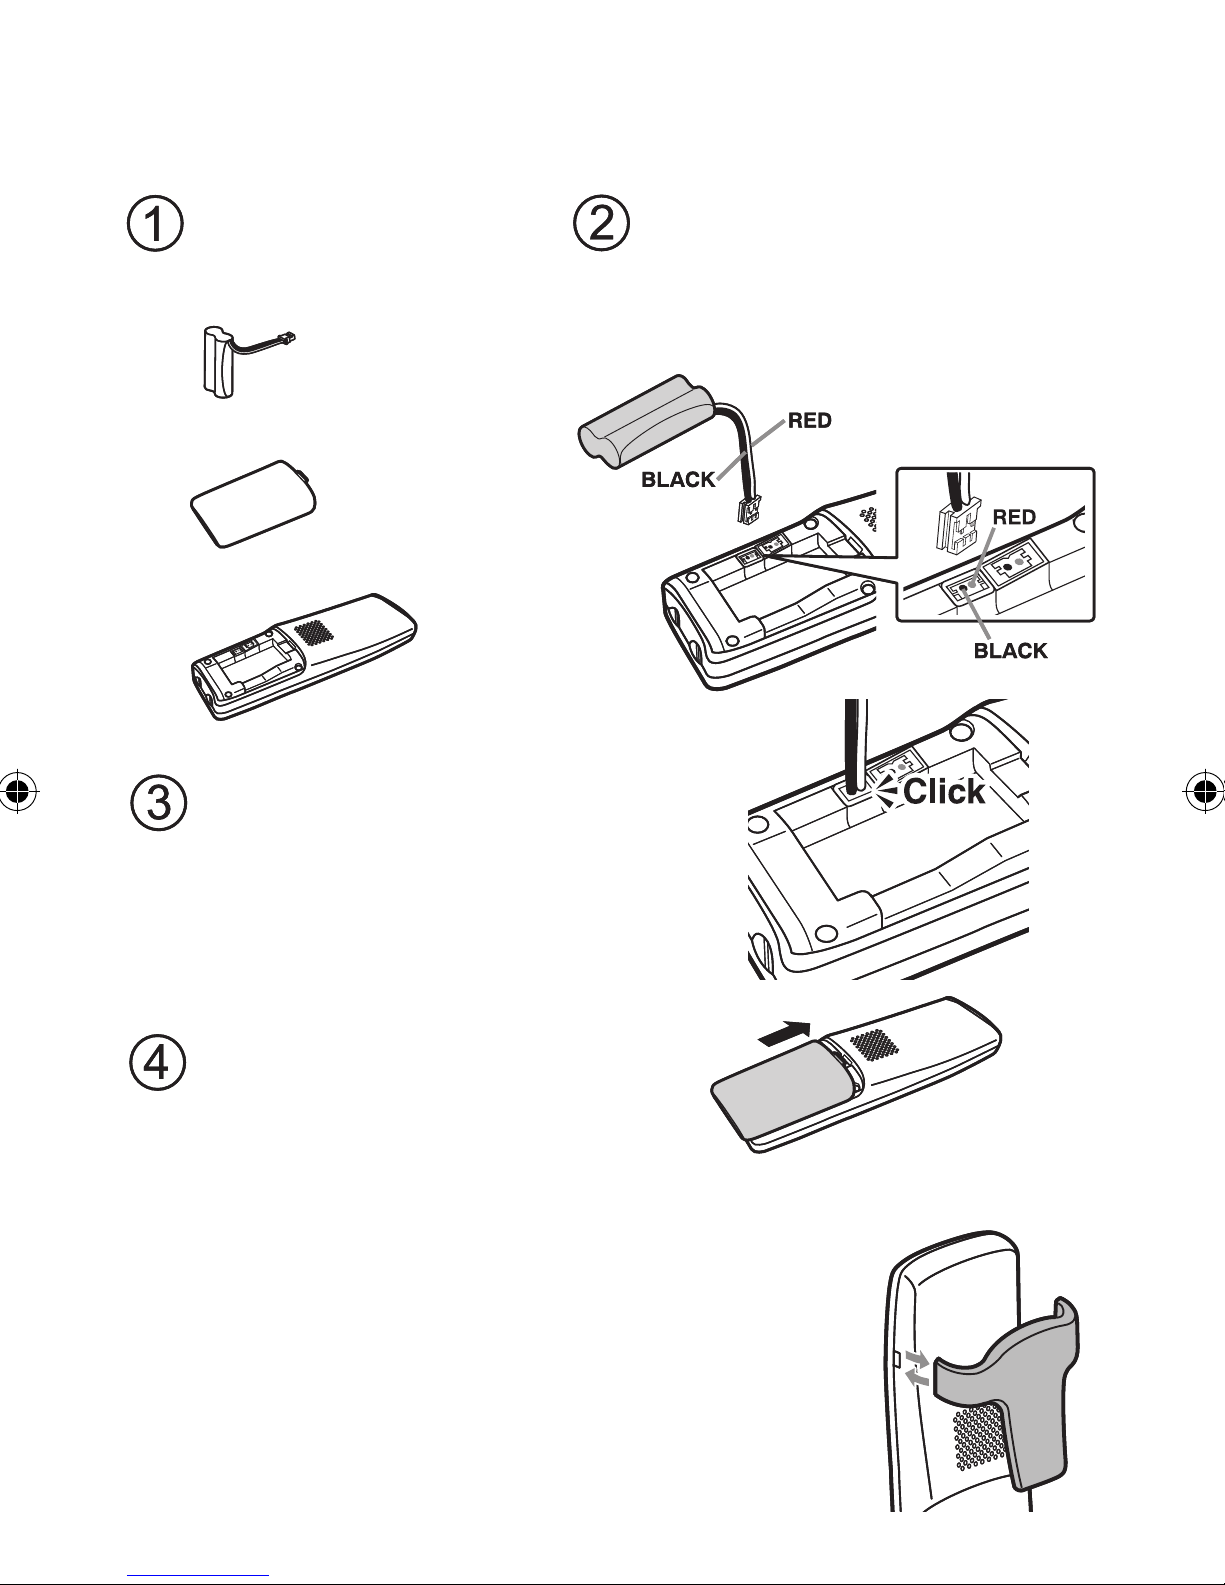
Installing the Battery
Use only the Uniden BT-694 rechargeable battery pack supplied
with your cordless telephone.
Locate the battery
Locate the battery
pack, battery cover
pack, battery cover
and the handset.
and the handset.
Battery
Battery
pack
pack
Battery
Battery
cover
cover
Handset
Handset
Push the battery pack connector
Push the battery pack connector
Line up the red and black
Line up the red and black
wires on the battery pack
wires on the battery pack
connector with the sticker in
connector with the sticker in
the handset’s battery
the handset’s battery
compartment.
compartment.
in firmly. (You should hear it click
in firmly. (You should hear it click
into place.) Gently tug on the
into place.) Gently tug on the
battery wires to make sure the
battery wires to make sure the
connection is secure.
connection is secure.
Place the cover over the
Place the cover over the
battery compartment and
battery compartment and
slide it up into place.
slide it up into place.
Installing the Belt Clip
Insert the tabs on the sides of the belt clip into
the holes on either side of the handset. Press
the belt clip down until it clicks into place. (Tug
on the clip to make sure it’s secure.)
To remove the belt clip, gently pull the tabs out
of the holes, then slide the belt clip off of the
handset.
3
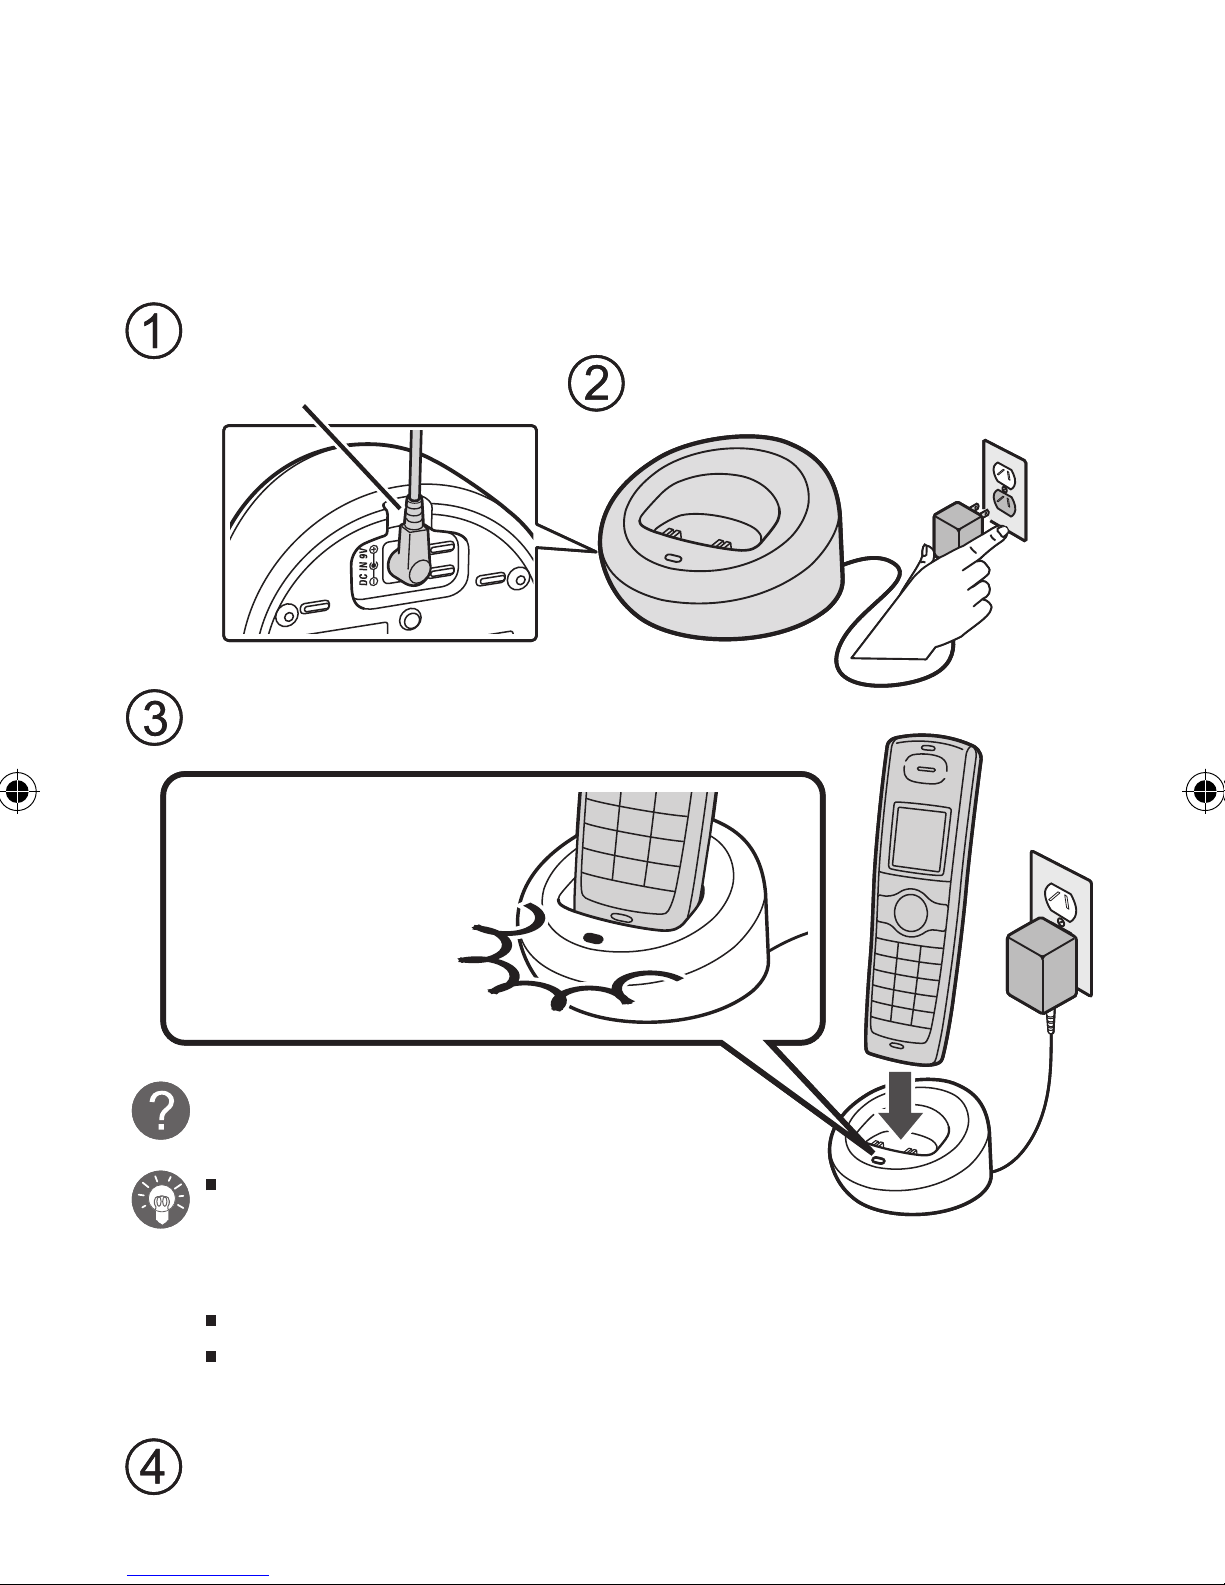
Charging the Accessory Handset
The handset is powered by a rechargeable battery pack that
automatically recharges when the handset is placed in the
charging cradle.
Use only the Uniden AAD-600S AC adapter with the charging
cradle.
Place the cord
Place the cord
through the molded
through the molded
wiring channel.
wiring channel.
Connect the AC adapter to a
Connect the AC adapter to a
standard 240V AC wall outlet.
standard 240V AC wall outlet.
Place the handset in the charging
Place the handset in the charging
cradle with the display facing forward.
cradle with the display facing forward.
Make sure that the
Make sure that the
charge LED
charge LED
illuminates when
illuminates when
the handset is
the handset is
seated.
seated.
What if the charge LED
What if the charge LED
doesn’t light up?
doesn’t light up?
Reseat the handset; make sure the
Reseat the handset; make sure the
contacts on the bottom of the handset
contacts on the bottom of the handset
are lined up with the contacts in the
are lined up with the contacts in the
cradle.
cradle.
Check the AC adapter connection.
Check the AC adapter connection.
Make sure you are not using an outlet
Make sure you are not using an outlet
that’s controlled by a wall switch.
that’s controlled by a wall switch.
Charge your handset at least 15 to 20 hours
Charge your handset at least 15 to 20 hours
before using your new handset for the first time.
before using your new handset for the first time.
4
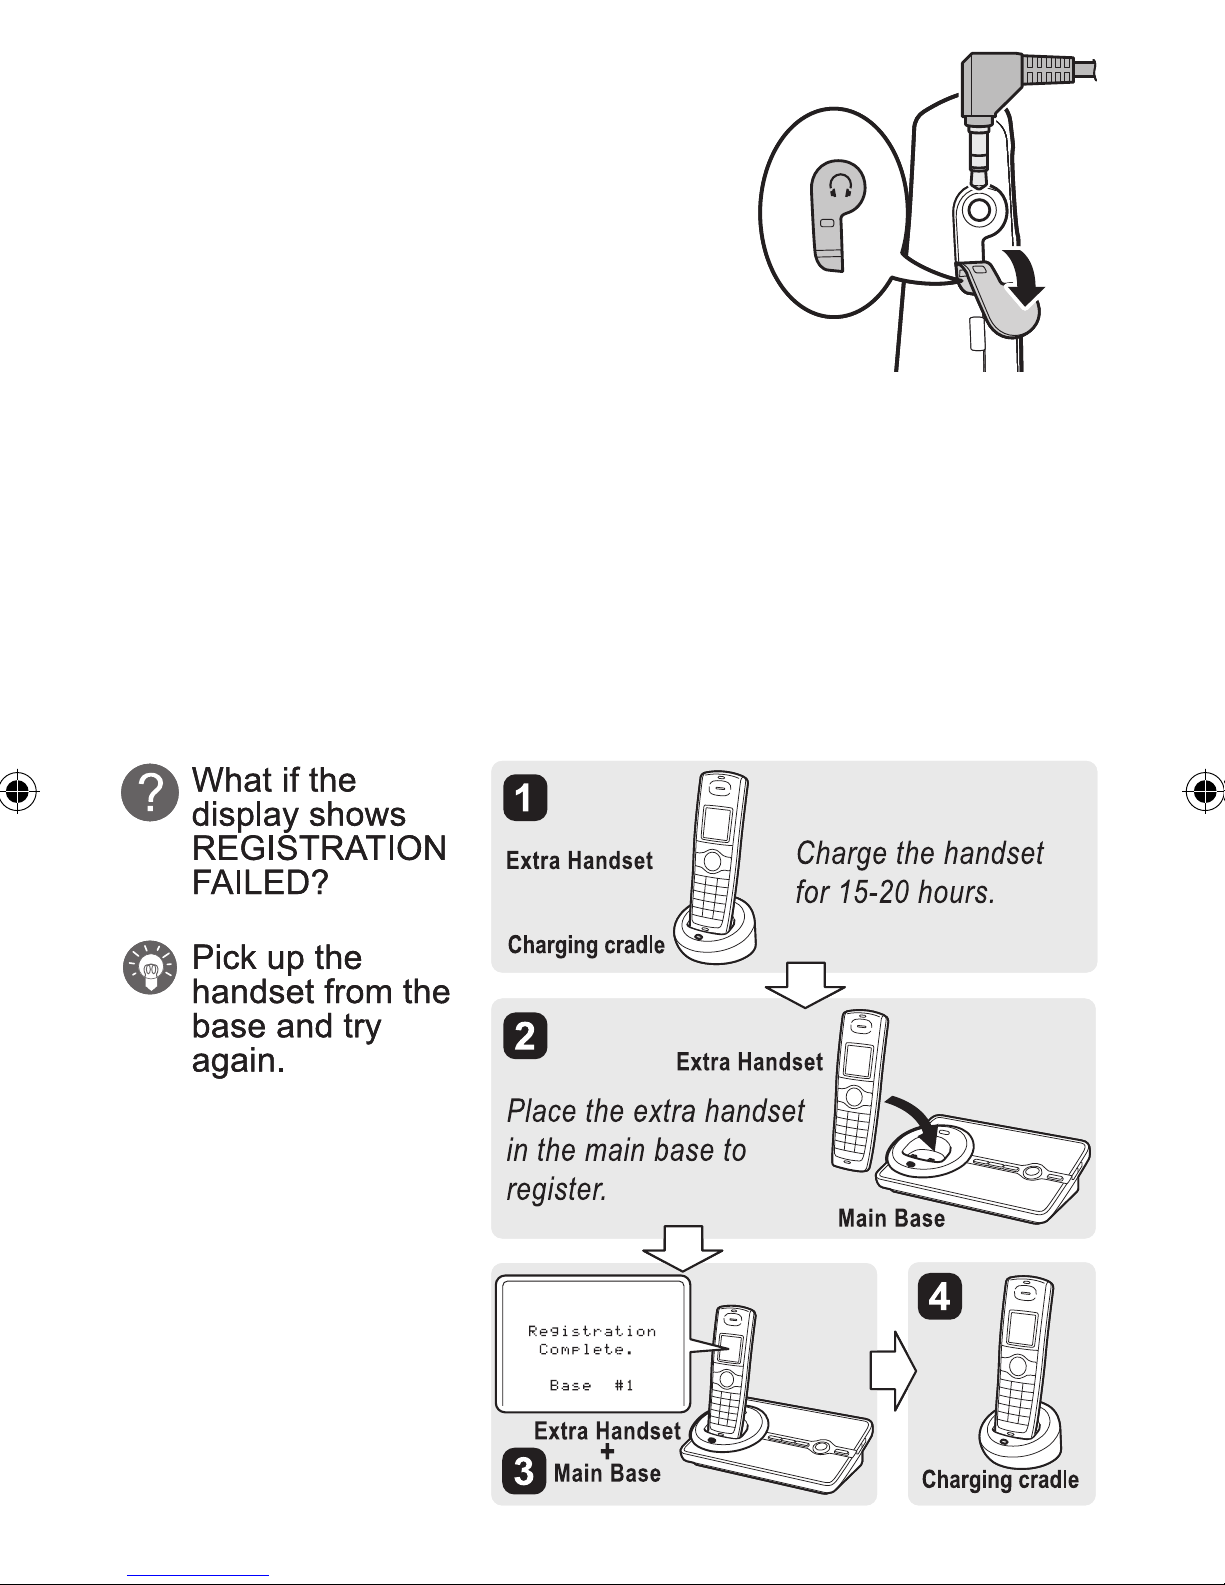
Installing the Optional Headset
Your phone may be used with an
optional headset. To use a headset,
insert the headset plug into the headset
jack. Headsets may be purchased by
contacting Uniden. See warranty on
inside back cover for contact information.
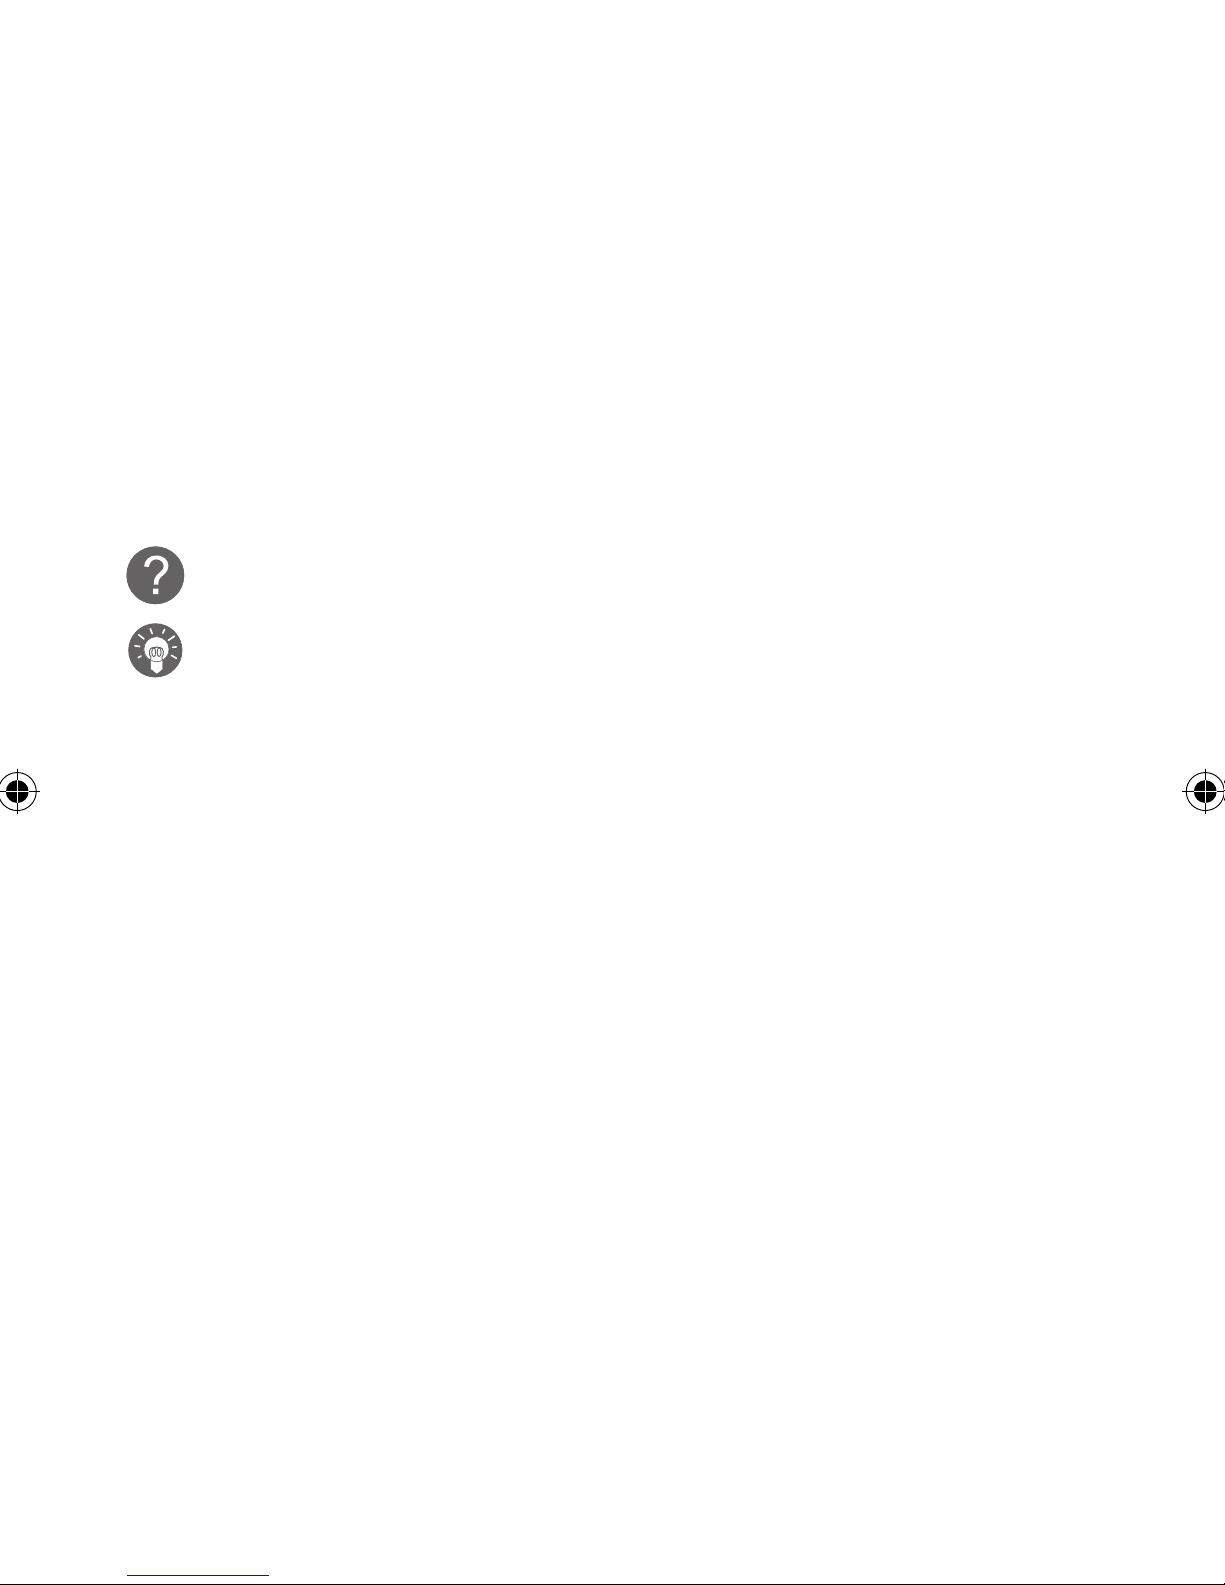
Registering the Handset
You must register the handset to the base before you can use it.
Only one handset can be registered at a time. (If an accessory
handset has ever been registered to a base, you must reset the
handset before you can register it to a new base.)
To register to a DECT Elite 9035 base:
Place the accessory handset in the base. While the handset is
registering, HANDSET REGISTERING appears in the LCD.
When REGISTRATION COMPLETE is displayed, the handset
has been registered to the base.
5
To register to an additional DECT Elite 9035 Series base:
Disconnect the base AC adapter.
1)
Then press and hold [fi nd hs] or [fi nd] while you reconnect
2)
the adapter.
Keep pressing [fi nd hs] or [fi nd] until the charge LED starts
to blink.
On the handset, press [Select/menu]. Select the REGISTER
3)
BASE menu. HANDSET REGISTERING will appear in the
display. (After step 2, you have thirty seconds to complete
this step 3 before the system returns to standby.)
Wait approximately thirty seconds. “REGISTRATION
4)
COMPLETE” will be displayed to indicate the handset has
fi nished registering.
What if the display shows REGISTRATION FAILED?
What if the display shows REGISTRATION FAILED?
Repeat the process starting with step 1.
Repeat the process starting with step 1.
6
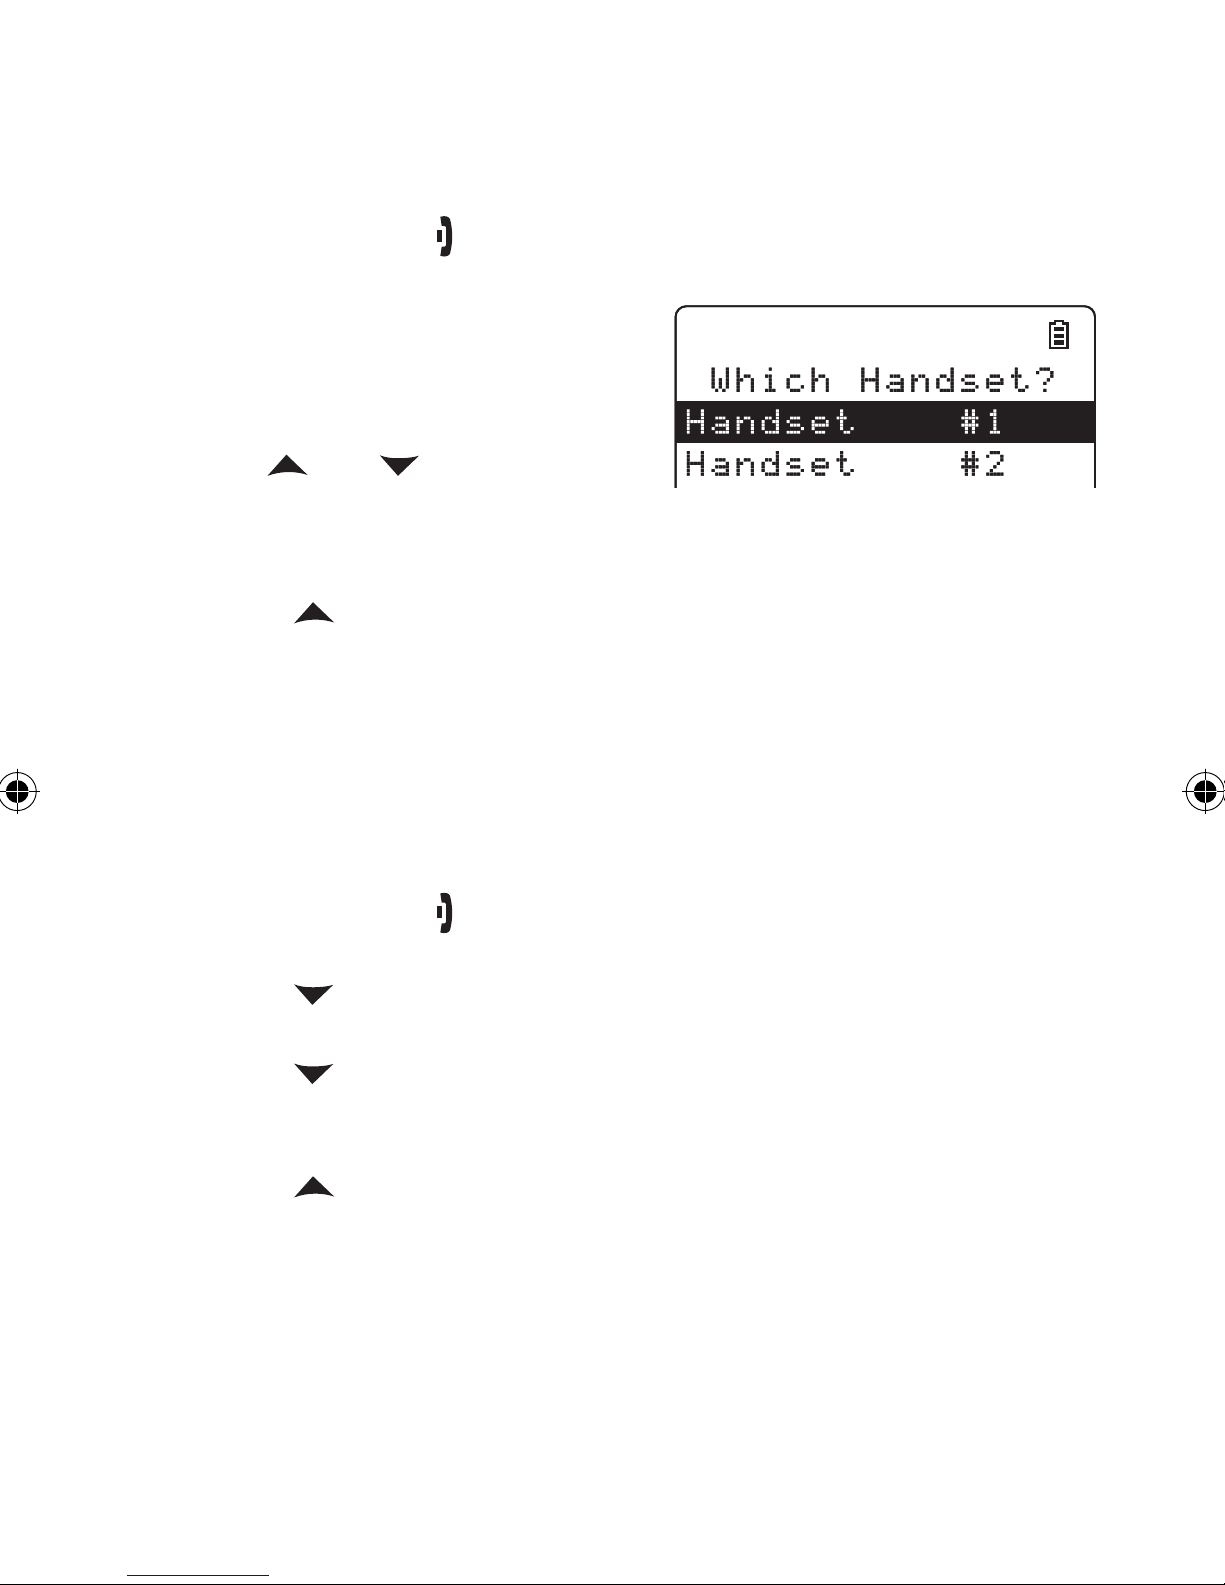
Resetting the Handset
If you want to register the handset to a different base or replace
a handset with another one, you must fi rst clear the registration
information from the base and the handset.
Press and hold [
1)
] and [#] for at least fi ve seconds, until the
SYSTEM RESET menu appears.
Select the DEREGISTER HS
2)
submenu by pressing [Select/
menu]. WHICH HANDSET?
appears in the display.
3)
Use [
] or [ ] to select the
handset ID to be de-registered
from the list, and then press [Select/menu]. DEREGISTER
HS appears.
Press [ ] to move the cursor to YES, and then press
4)
[Select/menu]. You will hear a confi rmation tone.
Resetting the Handset Without the Base
If the original base this handset was registered to is not
available for some reason (for example, it is lost or somehow
incapacitated), you can still reset the handset and use it with
another base.
1)
Press and hold [ ] and [#] for at least fi ve seconds, until the
SYSTEM RESET menu appears.
2)
Press [
] to move the cursor to BASE UNAVAILABLE and
then press [Select/menu].
Press [ ] to move the cursor to the base which you want
3)
to de-register from, and then press [Select/menu]. BASE
UNAVAILABLE appears.
Press [ ] to move the cursor to YES, and then press
4)
[Select/menu]. You hear a confi rmation tone, and the
handset deletes its own link to the base without trying to
contact the base.
Now you are ready to register the handset to the new base.
7
 Loading...