

Page 1

Congratulations! You have purchased one of the most sophisticated and versatile cordless
telephone systems available. To enjoy the best performance from the UNIT’s many features,
please read this Owner’s Guide carefully and save it for future reference.
INTRODUCTION TO YOUR
MULTI-HANDSET SYSTEM TELEPHONE
The unit is different from conventional cordless telephones. The base unit, when connected to
AC power and a telephone line, can support the operation of up to eight handsets. You can now
place a fully featured cordless handset anywhere in you home or office that you have AC power
to connect the handset chargers.
Since the system and the adjunct handsets (available separately) are system telephones, you
can enjoy advanced telephone features like handset to handset intercom and call transfer.
The system Directory holds up to 80 names and phone numbers, and can be accessed from any
of the handsets. All of your commonly dialed numbers can be quickly retrieved for easy, onetouch dialing.
2.4 GHz FHSS (Frequency Hopping Spread Spectrum) technology offers extended range, clarity
and digital security. A belt clip and headset jack (2.5 mm) provide handsfree convenience when
used with an optional headset.
PAGE
1
PACKING LIST
Please take a moment to locate and identify the components shipped with your Telephone
System. Enclosed within the packaging:
■ Base Unit
■ Cordless Handset
■ AC Adapter
■ Belt Clip
■ Telephone Line Cord
■ Battery Pack
■ Owner’s Guide and Quick Reference Guide
Page 2
PAGE
PAGE
2
INITIAL SETUP
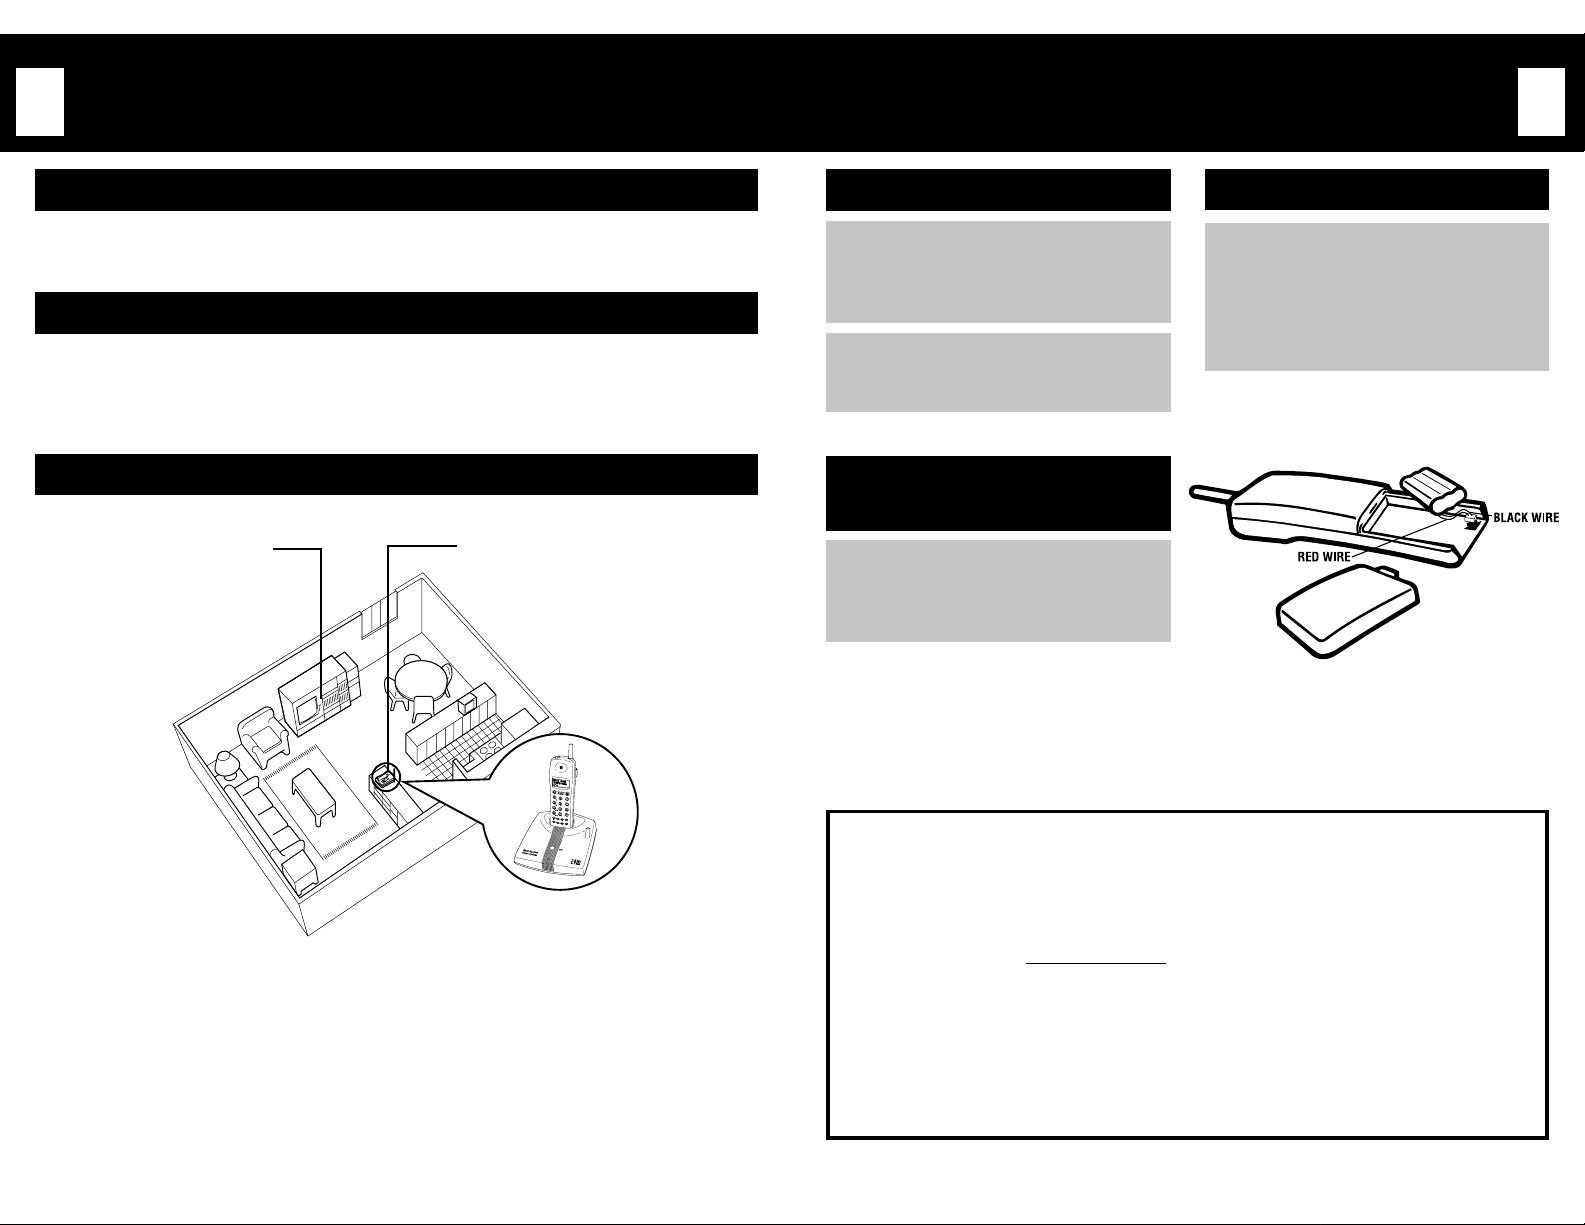
SELECTING A LOCATION FOR THE BASE UNIT
The base unit needs AC power and connection to a telephone jack. This location should be as
central as possible in your home or office.
SELECTING A LOCATION FOR ADDITIONAL HANDSETS
Anywhere you have power will do! Avoid high humidity or high heat areas, and keep the
handsets out of extended exposure to direct sunlight. Handsets can be swapped in their
chargers at any time and can be placed anywhere within the extended transmission range of the
base.
OPERATING DISTANCE/NOISE INTERFERENCE
For optimal performance, your phone's base unit should be installed as follows:
Away from electrical appliances
such as a microwave oven, TV,
personal computer, or another
cordless phone.
In a HIGH and CENTRAL location with
no obstructions nearby.
INSTALL THE BASE UNIT
Plug the line cord into the “TEL LINE”
jack on the back of the base unit and
1
the other end into your telephone wall
jack.
Connect the AC adapter to the back of
the base unit and plug into an electric
2
outlet.
INSTALL
THE HANDSET BATTERY
Slide open the battery compartment
cover and connect the NiMH battery
1
pack as shown in the illustration at
the right.
CHARGING THE BATTERY
Place the handset in the charging
cradle. Additional handsets will
1
include their own individual
charging cradles. The battery will
fully charge after approximately
10-12 hours.
3
NOTE:
While using the handset:
■ If you are near a microwave oven which is being used, noise may be heard at the receiver.
Move away from the microwave oven and closer to the base unit.
■ If more than one cordless phone is being used and your handset is near another cordless
phone's base unit, noise may be heard. Move away from the other cordless phone's base unit
and closer to your base unit.
WARNING
To prevent fire or shock hazard, do not expose the set to rain or moisture.
To avoid electrical shock, do not open the cabinet. Refer servicing to qualified personnel only.
CAUTION
1. Use batteries only intended for recharging. Use only the following battery pack:
Nickel Metal Hydride,
2. Do not dispose of the battery(ies) in a fire. The cell may explode. Check with local codes
for special disposal instructions.
3. Do not open or mutilate the battery(ies). Released electrolyte is corrosive and may cause
damage to the eyes or skin. It may be toxic if swallowed.
4. Exercise care when handling the battery(ies) in order not to short the battery(ies) with
conducting materials such as rings, bracelets, and keys. The battery or conductor may
overheat and cause burns.
3.6 volts, 700 mAh.
Page 3
PAGE
SYSTEM REGISTRA TION
4
(SECURITY CODE)
BASIC PROGRAMMING
PAGE
5
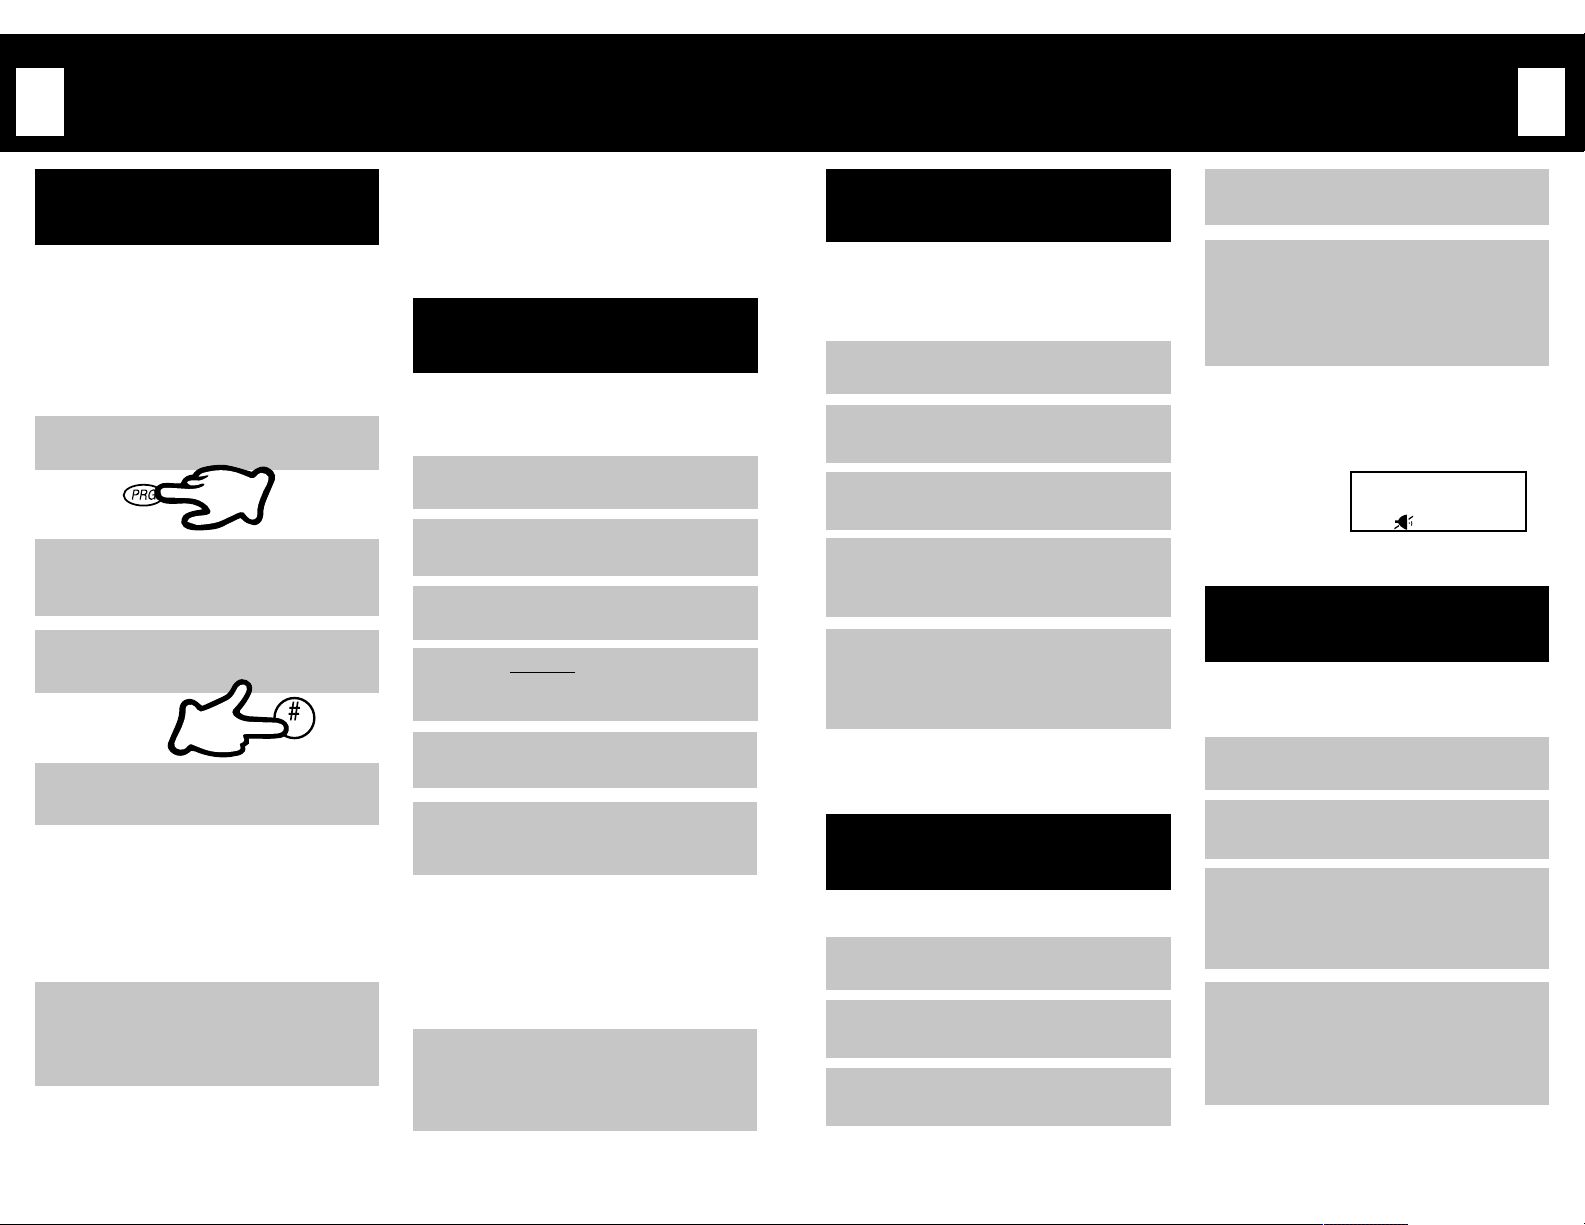
PROGRAMMING THE
SYSTEM SECURITY CODE
All handsets must be programmed with the
SAME security code (Sec. Code) in order to
operate as a system. The first handset that is
programmed must be registered to the base
(see instructions below). Additional handsets
need only be programmed with the same
security code to begin operation.
Press
PRG
(Program).
1
▲ or ▼ (located on the side of
Press
the handset) until “Sec Code”
2
displays.
Enter
“#”
to begin programming the
security code.
3
Using the keypad, enter any 6 digit
code.
4
NOTE:
■ Once you choose a security code for the first
handset, you must use the SAME code for each
additional handset. Don’t worry about forgetting
the code- it can be displayed on the handset to
remind you of the code when you add additional
handsets.
Press
OFF
or
PRG
to end the
programming session OR press
5
▼ to advance to another
programming step.
▲ or
NOTE:
■ Make sure you don’t confuse the System Security
Code with the Handset ID number. Each handset
must have the SAME System Security Code, but
they must have DIFFERENT Handset ID numbers.
REGISTERING THE
HANDSET TO THE BASE
If you are programming the FIRST handset in
the system, you must register the new system
security code to the base unit.
Position the handset close (within 6-8
inches) to the base.
1
Press
PRG
.
2
Press ▲ or ▼ until “REGISTER HS
to Base” displays.
3
Press and hold
for at least 3 seconds. The light will
4
begin to flash.
Release
5
Press
“#”
holding
6
is heard.
NOTE:
■ You don’t need to hold both buttons (PAGE and
“#”) at the same time. After you press and release
the PAGE button, then press the “#” button until
you hear the confirmation beep. If you don’t hear
the beep after about 15 seconds, try repeating the
steps again.
Press
OFF
programming session OR press
7
▼ to advance to another
programming step.
PAGE
on the base unit
PAGE
.
on the handset. Keep
“#”
until a confirmation beep
or
PRG
to end the
▲ or
PROGRAMMING THE
HANDSET ID
Each handset must have a DIFFERENT
handset ID number. If any two handsets have
the same ID number, the entire system will
not function properly.
Press
PRG
.
1
▲ or ▼ until “Handset ID”
Press
displays.
2
“#”
Press
Handset ID.
3
Enter a selected 2-digit station ID
number (choose any number from
4
11-70).
Press
programming session OR press
5
▼ to advance to another
programming step.
to begin programming the
OFF
or
PRG
to end the
▲ or
TURNING THE RINGER
ON/OFF (L1 Ring)
You can turn the ringer on or off on each
handset.
Press
PRG
.
1
▲ or ▼ until “L1 Ring”
Press
displays.
2
The current setting will be displayed
on the second line of the display.
3
“#”
Press
“Off”.
4
When the desired setting is displayed,
press
5
programming session OR press
▼ to advance to another
programming step.
NOTE:
■ When the ringer is set to “Off”, an icon will display
to alert you that the handset will not ring during
incoming calls.
to toggle between “On” and
OFF
or
PRG
to end the
Ring: Mid
ID: 11
▲ or
RINGER TYPE
PROGRAMMING
The unit allows you to select one of four ring
tones for each handset. The ringer type
default is set to type 1.
PRG
Press
.
1
▲ or ▼ until “Ring Type”
Press
displays.
2
“#”
Press
of the four ring tones. Each time you
3
make a selection, you will hear the
corresponding ringer sound.
When the desired ringer type is
displayed, press
4
the programming session OR press
▲ or ▼ to advance to another
programming step.
to toggle between any one
OFF
or
PRG
to end
Page 4

PAGE
PAGE
6
BASIC PROGRAMMING (cont.)
PROGRAMMING
Press ▲ or ▼ until “Tone/Pulse”
displays.
2
THE FLASH TIME
Press
“#”
In the unlikely event that you need to change
the unit’s flash duration, the unit allows you
to choose from four pre-programmed
settings. The default setting of 600 ms will
usually not need to be changed. If the phone
is being used for a Centrex service or in a
country outside of North America, it is
possible that you might need to change the
setting. Contact your service provider for the
specific requirements.
PRG
1
Press
.
and pulse modes.
3
When the desired setting is displayed,
press
4
programming session OR press
▼ to advance to another
programming step.
NOTE:
■ Tone/Pulse Mode is a universal setting. When the
mode is changed on any handset, the setting is
changed for the entire system.
to toggle between the tone
OFF
or
PRG
PROGRAMMING THE HOLD
▲ or ▼ until “Flash Time”
Press
displays.
2
“#”
Press
time choices of 600/100/275/375 ms.
3
When the desired flash time is
displayed, press
4
the programming session OR press
▲ or ▼ to advance to another
programming step.
NOTE:
■ Flash Time is a universal setting. When the mode
is changed on any handset, the setting is changed
for the entire system.
to toggle among the flash
OFF
or
PRG
to end
TONE/PULSE MODE
PROGRAMMING
You may program your phone to be a TONE or
PULSE dialing phone. Most telephone
services dial in the TONE mode.
Press
PRG
1
.
The unit can be programmed to remind you if
a call has been left on hold for extended
periods of time. You can choose how often
you wish to be alerted or if you wish to turnoff this feature.
1
2
3
4
NOTE:
■ Hold Reminder is a universal setting. When the
setting is changed on any handset, the setting is
changed for the entire system.
REMINDER
Press
PRG
.
Press
▲ or ▼ until “Hold Remind”
displays.
Press
“#”
to toggle among the
settings (15, 30, 45 or 60 seconds or
OFF).
When the desired setting is displayed,
OFF
or
press
programming session OR press
▼ to advance to another
programming step.
PRG
to end the
to end the
▲ or
▲ or
PROGRAMMING
AREA CODE
It is only necessary to enter your area code if
you choose the “Smart Dial” method for
dialing from Caller ID records (see “Dialing
Mode” section). The Smart dialing method
will compare the area code of the Caller ID
number to your local area code to determine
whether to dial 7 digits or 11 digits.
NOTE:
■ Area Code programming will ONLY display when
“Smart Dial” is selected as the Dialing Method. If
any other method is selected, the Area Code
programming option will be hidden. Once the Area
Code has been set, it will remain in the system’s
memory, even if the option is hidden.
To enter your area code:
Press
PRG
.
1
Press ▲ or ▼ until “Area Code”
displays.
2
Press
“#”
3
Using the keypad, enter your 3 digit
Area Code.
4
Press
programming session OR press
5
▼ to advance to another
programming step.
NOTE:
■ Area Code is a universal setting. When the setting
is changed on any handset, the setting is changed
for the entire system.
to enter your Area Code.
OFF
or
PRG
to end the
▲ or
7
DIALING MODE
When dialing from Caller ID records, the
unit can use one of the following four dialing
methods:
A) 7/10/11 Digit Dialing – For each call,
the unit will prompt you to choose
7-digit, 10-digit, or 11-digit dialing, based
on the local telephone company’s
requirements. This system is useful in
areas that sometimes require the user to
dial 10 or 11 digits for local dialing. When
dialing from a Caller ID record, the LCD
will display your choice of 7, 10, or 11
digits. Press “1” to initiate dialing using 7
digits, Press “2” for 10 digits, or Press “3”
for 11 digits.
B) All 11 Digit Dialing (Always 11)– For
each call, the unit will dial 11 digits (a “1”
and the area code, followed by the 7 digit
number).
C) Smart Dialing – For each call, the
unit will look at the Caller ID phone
number to see if the area code of the
number matches your local area code
(Note- this feature requires you to enter
your area code – see “Programming Area
Code”). If the area code does match, the
unit will dial only 7 digits. If it does not
match, the unit will dial 11 digits.
D) Exact Dialing – The unit will always dial
the exact digits that are displayed in the
Caller ID record.
Page 5

PAGE
PAGE
8
BASIC PROGRAMMING (cont.)
PROGRAMMING
DIALING MODE
Press
PRG
.
1
Press ▲ or ▼ until “Dialing Mode”
displays.
2
“#”
Press
settings.
3
When the desired setting is displayed,
press
4
programming session OR press
▼ to advance to another
programming step.
NOTE:
■ Dialing Mode is a universal setting. When the
mode is changed on any handset or the base, the
setting is changed for the entire system.
to toggle among the
OFF
or
PRG
to end the
▲ or
The unit can be programmed to detect
whether the line is properly connected, and to
display when the line is being used. For most
users, this feature should be programmed to
“On”. If you are connecting the unit to a PBX
system or if you live in an area prone to line
voltage irregularities, you may want to turn
this feature “Off”.
When LIU is set to “On”, line-in-use status
will be displayed as follows:
On handset – L1 icon will display when the
line is in use.
On base unit – Base LED will flash when the
line is in use.
To program Line In Use Detection:
PROGRAMMING
LINE IN USE DETECTION
(LIU DETECT)
PRG
Press
.
1
Press
▲ or ▼ until “LIU Detect”
displays.
2
Press
“#”
to toggle between “On” and
“Off”.
3
When the desired setting is displayed,
press
OFF
or
4
programming session OR press
▼ to advance to another
programming step.
NOTE:
■ LIU Detect is a universal setting. When the mode
is changed on any handset, the setting is changed
for the entire system.
PRG
to end the
▲ or
PRIVACY
The Privacy setting is only necessary if the
handset is used with a 2-Line multiple
handset system. This setting is not necessary
when using the system. Regardless of
whether Privacy is programmed to “On” or
“Off”, the unit’s operation will not be affected.
PROGRAMMING
THE RINGER LEVEL
Select between three volume levels for the
handset’s ringer.
Press
PRG
1
Press
displays.
2
Press
settings Low/Mid/Hi.
3
When the desired setting is displayed,
press
4
programming session OR press
▼ to advance to another
programming step.
.
▲ or ▼ until “Ring Level”
“#”
to toggle among the
OFF
or
PRG
to end the
▲ or
9
RESETTING
THE HANDSET
At any time, you may reset a handset to return
to the factory default settings. Please note
that this action will completely restore the
handset to its factory programmed settings.
Resetting the handset will NOT reset the
universal settings or the stored information
(such as Caller ID records) contained in the
base unit.
PRG
Press
.
1
▲ or ▼ until “Reset ?”
Press
displays.
2
PRG
Press
reset. You will hear a beep to confirm
3
that the reset process has been
initiated. The LCD will display:
After 15 seconds, the handset will
return to standby mode.
4
NOTE:
■ Make sure to set the Handset I.D. and Security
Code after resetting the handset. Each handset
has the same default Handset I.D. of station 11. If
more than one handset has the same Handset
I.D., the system will not function properly.
again to complete the
PRG OK!
Resetting
Page 6

PAGE
PAGE
10
BASIC OPERA TION
STANDBY (IDLE) MODE
The unit is in standby mode whenever it is
idle and waiting for a call. In standby mode,
the handset LCD will display the current
ringer volume setting and the handset’s
station ID:
Ring:Low
ID:12
VOLUME CONTROL
There are 5 receiver volume levels.
Press ▲ or ▼ on the side of the
handset to change the volume level
1
of the handset during a conversation.
When you reach the maximum or the
minimum volume settings, you will
2
hear a beep.
The volume control automatically
stays at the last setting after each
3
phone call.
PLACING A CALL
Pick up the handset and press either
TALK
1
2
button (● or ❍) .
Wait for a dial tone and then dial the
phone number. The number will
appear in the display as you dial.
L1 00:04
13105553345
Ten digits can be shown at one time
on the display. If more than ten digits
3
are entered, the “←” will appear to
indicate that additional digits are
contained in the number.
CALL TIMER
During a phone call, a timer, located at the top
right corner of the LCD, will display the
elapsed time of the call.
L1 02:47
13105553345
TO END A CALL
To hang up, press
handset to its charger.
1
OFF
or return the
RECEIVING A CALL
When the phone rings, pick up the
cordless handset and press either
1
TALK
button (● or ❍) to answer the
call.
LAST NUMBER REDIAL
(RDL)
The unit remembers the last number you
dialed. The redial memory will hold up to 32
digits. Every time you dial a new telephone
number, the redial memory is updated with
the new number.
TALK
Press one of the
(● or ❍) and wait for a dial tone.
1
buttons
Press
RDL
2
The last number dialed will be
displayed in the LCD and will be
3
automatically dialed.
.
DISPLAY REDIALING
Display redialing allows you to view the first
10 digits of the last number dialed. This is
useful if you aren’t sure what number was
last dialed.
Without pressing one of the TALK
RDL
buttons, press
1
display the last number dialed.
Press one of the
(● or ❍) and the number will be
2
automatically dialed.
NOTE:
■ If you do not press one of the
within 15 seconds, the unit will return to standby
mode.
. The LCD will
TALK
buttons
TALK
buttons
PLACING A CALL ON HOLD
During a phone conversation, press
1
HLD/XFR
will display:
on the handset. The LCD
TRNF To
Hold
11
If you wish to transfer the call to
another handset, dial the desired
2
handset ID number.
If you do not transfer the call, it will
remain on Hold.
3
AUDIBLE HOLD REMINDER
Audible Hold Reminder is designed to prevent
calls from accidentally being placed on hold
for a long duration of time. Audible Hold
Reminder automatically alerts the station that
placed the call on hold, that the call has been
unattended for longer than the hold reminder
time. The default hold reminder time is 30
seconds. To change the hold reminder time,
see page 6.
HOLD RECALL RING
If the call on hold is not picked up for 3
minutes, all handset units will start to ring
(Recall Ring) to remind all of the stations that
a call is on hold.
TAKING A CALL OFF HOLD
Press one of the
❍) OR pick up another phone on the
1
line (including any of the extension
handsets).
The call will be released from Hold.
TALK
buttons (● or
2
NOTE:
■ If a call has been on hold for more than 5
minutes, the unit will automatically disconnect the
call.
Page 7

PAGE
PAGE
12
BASIC OPERATION (CONT.)
MULTIPLE HANDSET
SIMULTANEOUS
CONVERSATIONS
The unit is a multiple handset system, but the
transceiver design can only allow one
handset at a time to talk with an outside
caller. A handset can transfer a call to another
handset (see Transferring a Call, on page 12).
When a handset is talking to an outside caller,
another handset
conversation. The other handset
however, intercom a different handset and
have an internal conversation.
cannot join in the
can,
TRANSFERRING A CALL
During a phone conversation, press
HLD/XFR
1
Dial the desired handset ID number.
on the handset.
2
The other handset will ring to indicate
the incoming transferred call.
3
NOTE:
■ If you do not enter a station number within 10
seconds, the display will return to standby with the
call on hold.
ANSWERING A
TRANSFERRED CALL
Pick-up the handset and press one of
TALK
the
1
The call will be transferred to the new
handset, and will be released from the
2
other handset.
buttons (● or ❍).
TRANSFERRED
CALL ALERT
If a transferred call is not answered within 3
minutes, all handsets will start to ring to
remind all of the stations of the unanswered
call. An icon will flash in the LCD to indicate
the transferred line. Any handset may answer
the transferred call at this time.
MUTE FUNCTION
The mute feature turns off the microphone so
the other party cannot hear you. You,
however, are still able to hear the other party.
The mute feature automatically cancels when
you let go of the Mute key.
To initiate the mute feature during a
conversation,
Press and HOLD
the handset. The LCD will display:
1
To resume your conversation, release
MUTE
2
.
MUTE
, on the side of
Mute 00:14
TONE/PULSE MIXED
DIALING
This feature is useful if your telephone
service is PULSE and you need to use TONE
dialing to access a special service. This
feature is only needed if you have
programmed the TONE/PULSE setting to
PULSE mode.
Dial the telephone number and wait
for the line to connect.
1
❋❋
❋
Press
temporarily change from PULSE
2
dialing to TONE dialing.
Dial the tone numbers (such as
automated menu choices).
3
Hang up and the unit automatically
returns to the PULSE mode.
4
TONE
❋❋
on the handset to
13
DO NOT DISTURB (DND)
FEATURE
This feature can be used to temporarily
prevent interruptions during meetings or
telephone conversations. When you activate
the DND feature on a handset, the handset
will not ring for incoming calls, transferred
calls, or intercom calls.
From standby mode, press
DND
then press
1
To cancel the DND mode, press
and press
2
(the
Ring: DND
ID:20
DND
again.
OUT OF RANGE WARNING
The unit has an operating range which can
vary, depending on conditions such as
climate, altitude, and the type of obstacles
between the handset and the base. If you
move out of the base unit’s operating range,
the LCD will display “Out of Range” and
you will hear a double beep warning tone.
Move closer to the base unit to deactivate the
warning. If you remain out of range for too
long, the unit will place the call on hold. Go
back into range and pick up the held call.
“4”
FCN
key).
and
FCN
Page 8

PAGE
E
PAGE
14
BASIC OPERATION (CONT.)
HANDSET LOW BATTERY
INDICATOR
When the battery pack needs recharging, the
low battery icon will be displayed. You may
also notice a reduction in the quality of your
cordless handset communications. Return
the handset to the charging station as soon
as possible, whenever the low battery icon
is on.
To avoid a low battery condition, it is
recommended that you keep the handset in
its charging station whenever it is not in use.
Ring: Mid
ID: 11
USING A HEADSET
Each handset can be used with any standard
2.5 mm. headset for handsfree operation.
Plug the headset into the headset jack
on the top of the phone (remove the
1
rubber plug if it is covering the hole).
Calls can now be made using the
headset.
2
To return to using the handset
without a headset, simply unplug the
3
headset.
INSTALLING
THE BELT CLIP
Place one side of the belt clip into the
groove on the side of the handset.
1
Snap the other side of the belt clip
into the groove on the other side of
2
the handset.
MAKING
AN INTERCOM CALL
You can call from one handset to another,
without tying up the outside phone line.
From standby mode, press
INT
.
1
Dial the desired handset number. For
example, if handset 12 calls handset
2
15, the LCD of the calling unit will
display:
AN INTERCOM CALL
The LCD will show which handset is
calling.
1
Pick-up the handset and press a
keypad key. The LCD will display:
2
The calling party’s LCD will display:
When the conversation is over, press
OFF
3
ICM To 15
ID:12 Ring
ANSWERING
ICM By 12
ID:15 Ring
ICM By 12
ID:15 Talk
ICM To 15
ID:12 Talk
to release the call.
ROOM MONITOR
You can automatically turn on the
microphone of a handset to listen for activity.
From standby mode, press
1
Dial the desired handset number. The
handset you are calling will ring.
2
Press
INT
again. The microphone of
the station you are calling will
3
automatically turn on.
Exit by pressing
OFF
INT
.
.
4
PAGE ALL HANDSETS
To page all the handset users or to locate the
handset from the base unit:
Press
PAGE
on the base unit.
1
PAG
Each handset will make a chirping
sound for about 15 seconds.
2
To turn off the page, press
any handset.
3
OFF
on
15
CALL WAITING
Call waiting is a subscription service offered
by your local telephone company. When you
are on the line and another call comes in, a
beep is emitted over the line. You can
continue speaking to the first caller or, by
FLS
pressing
speak to the second caller.
If you subscribe to voice mail service from
your local telephone company AND if your
telephone company uses FSK message
waiting indication (a signaling method that
sends an indication that you have new,
unplayed messages in your voice mail), the
unit will alert you that you have new
messages.
The unit will detect the message waiting
signal and will activate indicators on the base
and the handsets. The base LED will flash
and the handsets will display “MsgWait”.
To retrieve your messages, follow the
voice mail retrieval procedure specified
1
by your local telephone company.
Soon after you review the new
messages, a signal will alert the
2
unit to turn off the voice message
indicators.
To manually turn off the indicators,
press
3
(Flash), you can toggle to
VOICE MESSAGE
INDICATION
L1 Msg Wait
ID:11
FCN
and then press
DEL
(
“1”
).
Page 9

PAGE
PAGE
16
CALLER ID OPERA TION
CALLER ID SUBSCRIPTION
Caller ID is a subscription service available
from your telephone service provider. For the
Caller ID feature to work on the unit, you
must subscribe to the service.
T o receive Caller ID information for a Call
Waiting call, you must subscribe to
combined Call Waiting Caller ID service from
your telephone service provider. Even if you
subscribe to both Caller ID and Call Waiting
services separately, it is possible that you are
not subscribed to the combined service.
MISSING CALLER ID DATA
If a caller chooses to partially or completely
“block” Caller ID information, a message will
appear on the display indicating that the
name and/or phone has been blocked. The
call will display as a Caller ID record, showing
time and date information, and the message
“PRIVATE”. Other messages that might
appear to indicate missing Caller ID data, are
“Out of Area”, “No Number” or “No
Name”. These messages indicate that
complete Caller ID data was not sent.
CALLER ID DISPLAY
If you have subscribed to Caller ID service
from your telephone company, each
handset’s display will show the telephone
number and the name of the incoming call (if
available), as well as the date and time the call
is received. The information will display on
the LCD while the phone is ringing (after
the first ring), and is then stored in the
unit’s Caller ID database.
If the name or number is larger than 12
characters in length, the first 12 characters
will display on the handset’s screen.
To view the remaining characters,
BLUMENFELD J
6189910
Press
1
MUTE
handset).
(on the side of the
←ENNIFER
Press
MUTE
and time of the call, as well as the
2
Caller ID record number and the
Repeat Indicator.
again to view the date
#02 *02
AUG06 14:43
CALL WAITING CALLER ID
If you subscribe to Call Waiting Caller ID
(combined service), you will receive Caller ID
information (if available) from Call Waiting
calls. During a phone call, you will hear a
beep to indicate the presence of a Call
Waiting call. Shortly afterward, the Caller ID
information will appear on the handset LCD.
You can then choose to answer the call, by
FLS
pressing
continue to ring.
, or let the incoming call
REVIEWING CALLER ID
RECORDS
The unit can store 50 of the most recent
Caller ID records. The records are stored in
the base unit and can be accessed by any
handset. Caller ID records are numbered
sequentially, in the order in which they are
received. When the 50 record memory is full,
the oldest record will be deleted automatically
each time a new record is received.
To view the Caller ID records stored in
memory:
CID
Press
database. The LCD will display the
1
number of CID records:
Press ▲ to view the most recent
record.
2
The first display screen will show the
name and the phone number, if
3
available.
JACOBS SHAWN
5552174
Press
4
display screen, which will show the
record number, the time and date of
the call, and the Repeat counter (see
“Repeat Counter” section).
to enter the Caller ID
ALL CID: 23
MUTE
to toggle to the second
#12 *00
JUL18 15:35
17
Press
MUTE
the name and number display OR
5
▲ to continue scrolling to the
press
next most recent record. (Press
view earlier records and press
view later records).
Press
OFF
and the LCD will revert back to the
6
standby display.
REPEAT COUNTER
The unit is programmed to automatically
condense all calls from the same phone
number within the same day as a single Caller
ID record. This feature saves memory and
prevents the Caller ID log from being filled
with duplicate records from frequent callers.
Each time that a repeat caller calls again
within the same calendar date, the unit will
condense the calls into one Caller ID record,
listing only the time of the most recent call.
When viewing a Caller ID record, press
MUTE
the record number, the time and date of the
call, and the Repeat Counter. The Repeat
Counter is located in the upper right side of
the display. The number displayed in the
Repeat Counter indicates how many times the
repeat caller called that day. For example, if a
Caller ID record displays a Repeat count of
“3”, this indicates that the caller called 3
times that day.
to toggle to the screen that contains
NOTE:
■ You will never see a Repeat count of “1”, because
a call is not considered a Repeat until the caller
has called twice. A Repeat count of “0” indicates
that the Caller ID record is not a repeat call
because the caller only called one time.
again to toggle back to
▲ to
▼ to
to exit, or wait 15 seconds
#16 *03
JUL21 08:45
Page 10

PAGE
PAGE
18
CALLER ID OPERATION (CONT.)
DIAL A CALLER ID
RECORD
Press
CID
to enter the Caller ID
database.
1
Press ▲ or ▼ to scroll to the desired
Caller ID record.
2
Press either of the
(
● or ❍).
3
The unit will automatically dial the
number.
4
TALK
DELETING A CALLER ID
RECORD
Locate the desired Caller ID record.
1
FCN
Press
2
“function” mode), and then press
DEL
The display will ask for confirmation
that you wish to delete the record.
3
Press
record.
4
(↑ will display to indicate
(
“1”
).
DELETE ?
PRG
to permanently delete the
buttons
DELETING ALL CALLER ID
RECORDS
Press
CID
. The display will read “All
CID”.
1
Press
FCN
(↑ will display to indicate
“function” mode), and then press
2
DEL
(
“1”
).
The display will ask for confirmation
that you wish to delete all of the
3
records.
DELETE ALL ?
Press
PRG
to permanently delete all
of the records.
4
DIRECTORY OPERA TION
The unit allows you to store up to 80 names
and numbers in an alphabetical phone
Directory.
STORING A DIRECTORY
RECORD
You may create a new Directory record or you
may copy a Caller ID record into the Directory.
CREATING A NEW
DIRECTORY RECORD
Press
DIR
.
1
Press
PRG
2
Press the appropriate keypad button
to toggle through the letters and
3
numbers associated with that key. The
upper case letters will appear first,
followed by the lower case letters, and
the number . (For example- press the
number
“J”, “K”, “L” “j”, “k”, “l”, and the
number “5”).
When the desired letter appears,
either wait 1-2 seconds for the cursor
4
to automatically move to the next
character, OR press
manually move to the next character.
.
“5”
button to toggle among
J
(Name?)
▲ or ▼ to
To add a 2 second pause to a Directory
dialing sequence (for example, to add a
5
delay between dialing a phone number
and dialing a password or menu
choice), press
PAUSE (“7”
display to indicate the placement of
the pause. Add as many 2 second
pauses as neccessary.
Press
programming the phone number.
6
Use the keypad to enter the desired
phone number. Remember to include a
7
“1” for a long distance phone number
and any prefixes necessary to access
an outside line (such as a “9”).
Press
confirmation beep will be heard.
8
). The letter “P” will
PRG
again to begin
PRG
again to complete. A
EDITING TIPS
1. T o move the cursor forward or backward
while editing, press the
2. To insert a character, position the cursor
to the right of the location in which you
wish to add the character and type the
new character.
3. To insert a space between two existing
characters, position the cursor to the right
of the location in which you wish to insert
the space. Type “00”, using the keypad, to
insert the space.
4. To delete a character, position the cursor
on the character , Press
display to indicate “function” mode), and
DEL
then press
(
FCN
and then press
▲ or ▼ keys.
FCN
“1”
).
19
(↑ will
Page 11

PAGE
PAGE
20
DIRECTORY OPERATION (CONT.)
COPYING A CALLER ID
RECORD TO THE
DIRECTORY
Locate the desired Caller ID record.
1
DIR
Press
.
2
A beep will confirm that the record
(both name and number) was copied
3
to the Directory. The screen will
display “Directory OK”.
OFF
Press
to exit to idle mode.
4
DIRECTORY FULL
If the Directory memory is full (80 records),
the unit will alert you when you press
The screen will display “Directory
(Full)”. If you wish to add additional
Directory records, you must first delete
records to create space in the Directory
memory.
LOCATING A DIRECTORY
RECORD (BY SCROLLING)
To scroll through the alphabetical list of
Directory records:
DIR
21
LOCATING A DIRECTORY
RECORD (BY JUMPING)
To jump immediately to the Directory listings
beginning with a selected letter:
From idle mode, press
1
Press the keypad button associated
with the desired letter of the
2
alphabet. Continue pressing the
keypad button until the desired letter
is displayed. For example, to display
the letter “V”, press the “8” key three
times.
“#”
Press the
key to begin the search.
DIR
.
3
V
(#: Search)
.
The display will jump to the first
Directory listing beginning with the
4
chosen letter. If no Directory listing
begins with the chosen letter, the
display will jump to the next record
alphabetically.
EDITING AN EXISTING
DIRECTORY RECORD
Locate the desired Directory record.
1
PRG
Press
.
2
The existing Name will display, with
the cursor flashing on the first
3
character of the Name.
Follow the “Editing Tips” on page 19
to edit the Name.
4
PRG
Press
the Number .
5
Press
edited record.
6
PLACING A CALL FROM
THE DIRECTORY
Locate the desired Directory record.
Press either of the
1
● or ❍).
(
The unit will automatically dial the
number.
2
again to begin editing
PRG
a third time to save the
TALK
buttons
DELETING A DIRECTORY
RECORD
Locate the desired Directory record.
1
FCN
Press
“function” mode), and then press
2
DEL
The display will ask for confirmation
that you wish to delete the record.
3
Press
record.
4
DELETING ALL DIRECTORY
Press
1
“Directory”.
Press
“function” mode), and then press
2
(
“1”
The display will ask for confirmation
that you wish to delete all of the
3
records.
(↑ will display to indicate
(
“1”
).
DELETE ?
PRG
to permanently delete the
RECORDS
DIR
. The display will read
FCN
(↑ will display to indicate
).
DELETE ALL ?
DEL
From idle mode, press
1
Press the
through the Directory listings.
2
▲ or ▼ keys to scroll
DIR
.
4
PRG
Press
of the records.
to permanently delete all
Page 12

PAGE
22
TROUBLESHOOTING
FCC REQUIREMENTS
USER INSTRUCTIONS
PAGE
23
NoSvcNoSvc
“
NoSvc” displays on the LCD
NoSvcNoSvc
■ Make sure that the base unit is plugged in
to the AC outlet.
■ Make sure that the telephone cord is
properly connected to the wall jack.
■ The security code may not be properly
registered to the base unit (See
“Registering the Handset to the Base” page 4).
■ The individual handset may not be
programmed with the correct security
code (See “Programming the System
Security Code” - page 4).
Handsets keep going “off hook” by
themselves (won’t hang up)
■ Make sure that each handset has a
DIFFERENT handset I.D.
One or more handsets don’t communicate
with the base or the other handsets
■ Make sure that each handset has the
SAME security code.
Poor Sound Quality
■ The handset might be too far away from
the base.
■ Make sure the battery is fully charged.
■ Do not use the phone near a microwave
oven that is in use.
■ Another phone might be causing
interference.
“Out of Range” displays on the LCD
■ The handset is too far away from the base
unit. Move closer to the base unit.
No Caller ID data is displayed
■ Confirm with your local telephone
company that you are subscribed to Caller
ID service.
No Call Waiting Caller ID
■ Confirm with your local telephone
company that you are subscribed to Call
Waiting Caller ID. Even if you have
subscribed to Call Waiting and Caller ID
services separately, you may need to
initiate the
service.
PrivatePrivate
“
Private”, “
PrivatePrivate
NameName
Name” Messages
NameName
■ All or part of the Caller ID information is
not being sent. The information is either
unavailable or is being blocked by the
caller.
During a Call Waiting Call, the speaker
mutes temporarily
■ This is normal operation. The speaker
must be muted briefly to allow the phone
to receive Call Waiting Caller ID
information.
A second handset can’t join the
conversation
■ Only one handset at a time can talk with
an outside caller. To allow a different
handset to talk to the caller, transfer the
call to the other handset.
Voice Message Indication does not work
■ Contact your local telephone company to
make sure that your telephone line
receives FSK message signaling.
combined Call Waiting Caller ID
UnavailableUnavailable
Unavailable”, or “
UnavailableUnavailable
NoNo
No
NoNo
1. This equipment complies with Part 68 of the FCC rules. On the bottom of this equipment is a label that
contains, among other information, the FCC registration number and Ringer Equivalence Number (REN)
for this equipment. If requested, provide this information to your telephone company.
2. The REN is useful to determine the quantity of devices you may connect to your telephone line and still
have all of those devices ring when your number is called. In most, but not all areas, the sum of the RENs
of all devices should not exceed five (5.0). To be certain of the number of devices you may connect to your
line, as determined by the REN, you should call your local telephone company to determine the maximum
REN for your calling area.
3. If your telephone causes harm to the telephone network, the telephone company may discontinue your
service temporarily. If possible, they will notify you in advance. But if advance notice is not practical, you
will be notified as soon as possible. You will be advised of your right to file a complaint with the FCC.
4. Your telephone company may make changes in its facilities, equipment, operations, or procedures that
could affect the proper operation of your equipment. If they do, you will be given advance notice so as to
give you an opportunity to maintain uninterrupted service.
5. If there is a problem with this unit, the telephone company may ask you to disconnect this equipment from
the network until the problem has been corrected or you are sure that the equipment is not malfunctioning.
6. Repairs can only be made by the manufacturer or an authorized service agency. Unauthorized repairs void
registration and warranty. Contact seller or manufacturer for details of permissible user -performed routine
repairs, and where and how to have other than routine repairs made.
7. This equipment may not be used on coin service provided by the telephone company. Connection to party
lines is subject to state tariffs. (Contact your state public utility commission or corporation commission for
information.)
Jacks: RJ11 Ringer Equivalence: See bottom/underside of the unit.
NOTE: This equipment has been tested and found to comply with the limits for a Class B digital device,
pursuant to Part 15 of the FCC Rules. These limits are designed to provide reasonable protection against
harmful interference in a residential installation. This equipment generates, uses, and can radiate radio
frequency energy and, if not installed and used in accordance with the instructions, may cause harmful
interference to radio communications. However, there is no guarantee that interference will not occur in a
particular installation. If this equipment does cause harmful interference to radio or television reception,
which can be determined by turning the equipment off and on, the user is encouraged to try to correct the
interference by one or more of the following measures:
● Reorient or relocate the receiving antenna.
● Increase the separation between the equipment and receiver.
● Connect the equipment into an outlet on a circuit different from that to which the receiver is
connected.
● Consult the dealer or an experienced radio/TV technician for help.
Any changes made by the user not approved by the manufacturer can void the user’s authority to operate the
equipment. This product is hearing aid compatible.
FACTORY
SERVICE
CENTERS
Page 13

PAGE
PAGE
IMPORT ANT SAFETY INSTRUCTIONS
24
INSTALLATION INSTRUCTIONS
1. Never install telephone wiring during a lightning storm.
2. Never install telephone jacks in wet locations unless the jack is specifically designed for wet locations.
3. Never touch uninsulated telephone wires or terminals unless the telephone line has been disconnected at the
network interface.
4. Use caution when installing or modifying telephone lines.
SAFETY PRECAUTIONS
When using your telephone equipment, basic safety precautions should always be followed to reduce the risk of
fire, electric shock and injury to persons, including the following:
1. Read and understand all instructions.
2. Follow all warnings and instructions marked on the product.
3. Unplug this product from the wall outlet before cleaning. Do not use liquid cleaners or aerosol cleaners. Use
a damp cloth for cleaning.
4. Do not use this product near water: for example, near a bath tub, wash bowl, kitchen sink or laundry tub, in a
wet basement, or near a swimming pool.
5. Do not place this product on an unstable cart, stand, or table. The product may fall, causing serious product
damage.
6. Slots and openings in the cabinet and the back or bottom are provided for ventilation. To protect it from
overheating, these openings must not be blocked or covered by placing the product on the bed, sofa, rug, or
other similar surface. This product should never be placed near or over a radiator or heat register. This
product should not be placed in an enclosed environment unless proper ventilation is provided.
7. Do not allow anything to rest on the power cord. Do not locate this product where the cord will be abused by
animals or persons walking on it.
8. Do not overload wall outlets and extension cords as this can result in the risk of fire or electric shock.
9. Never push objects of any kind into this product through cabinet slots as they may touch dangerous voltage
points or short out parts that could result in a risk of fire or electric shock. Never spill liquid of any kind on
the product.
10. To reduce the risk of electric shock, do not disassemble this product. Take it to a qualified serviceperson
when service or repair work is required. Opening or removing covers may expose you to dangerous voltages
or other risks. Incorrect re-assembly can cause electric shock when the appliance is subsequently used.
11. Unplug this product from the wall outlet and refer servicing to qualified service personnel under the following
conditions:
A. When the power supply cord or plug is damaged or frayed.
B. If liquid has been spilled into the product.
C. If the product has been exposed to rain or water.
D. If the product does not operate normally by following the operating instructions. Adjust only those
controls that are covered by the operating instructions because improper adjustment of other controls
may result in damage and will often require extensive work by a qualified technician to restore the
product to normal operation.
E. If the product has been dropped or the cabinet has been damaged.
F. If the product exhibits a distinct change in performance.
12. Avoid using a telephone (other than a cordless type) during an electrical storm. There may be a remote risk
of electric shock from lightning.
13. Do not use the telephone to report a gas leak while near the leak.
14. You should use ONLY the power adapter supplied with your telephone.
TABLE OF CONTENTS
Introduction to your
Multi-Handset System
Telephone ........................... 1
Packing List ............................ 1
INITIAL SETUP
Selecting a Location for
the Base Unit....................... 2
Selecting a Location for
Additional Handset(s) ......... 2
Operating Distance/Noise
Interference .........................2
Install the Base Unit ................ 3
Install the Handset Battery ....... 3
Charging the Battery ............... 3
SYSTEM
REGISTRATION
Programming the System
Security Code ..................... 4
Registering the Handset to the
Base.................................... 4
BASIC PROGRAMMING
Programming the Handset ID .. 5
Turning the Ringer On/Off
(L1 Ring) ............................ 5
Ringer Type Programming...... 5
Programming the Flash
Time ................................... 6
Tone/Pulse Mode
Programming ..................... 6
Programming the Hold
Reminder ............................ 6
Programming the Area Code... 7
Dialing Mode .......................... 7
Programming Dialing Mode.... 8
Programming Line In Use
Detection (LIU Detect) ......... 8
Privacy.................................... 9
Programming the Ringer Level 9
Resetting the Handset.............. 9
BASIC OPERATION
Standby (Idle) Mode ............. 10
Volume Control .................... 10
Placing a Call........................ 10
Call Timer ............................. 10
To End a Call......................... 10
Receiving a Call .................... 10
Last Number Redial (RDL) .... 10
Display Redialing .................. 11
Placing a Call on Hold .......... 11
Audible Hold Reminder......... 11
Hold Recall Ring ................... 11
Take a Call Off Hold............... 11
Multiple Handset Simultaneous
Conversations ................... 12
Transferring a Call................. 12
Answering a Transferred Call 12
Transferred Red Call Alert .....12
Mute Function ....................... 12
Tone/Pulse Mixed Dialing...... 13
Do Not Disturb (DND) Feature 13
Out of Range Warning........... 13
Handset Low Battery Indicator14
Using a Headset ................... 14
Installing the Belt Clip........... 14
Making an Intercom Call ....... 14
Answering an Incoming
Intercom Call .................... 14
Room Monitor ...................... 15
Page All Handsets ................. 15
Call Waiting .......................... 15
Voice Mail Indication ............ 15
CALLER ID OPERATION
Caller ID Subscription........... 16
Missing Caller ID Data........... 16
Caller ID Display ................... 16
Call Waiting Caller ID............ 16
Reviewing Caller ID Records . 17
Repeat Counter ..................... 17
Dial a Caller ID Record .......... 18
Delete a Caller ID Record....... 18
Delete All Caller ID Records .. 18
25
DIRECTORY
OPERATION
Storing a Directory Record.... 19
Creating a New Directory
Record ..............................19
Editing Tips .......................... 19
Copying a Caller ID Record to
the Directory ..................... 20
Directory Full ........................ 20
Locating a Directory Record
(by Scrolling) ................... 20
Locating a Directory Record
(by Jumping) .................... 20
Editing an Existing Directory
Record ..............................21
Placing a Call from the
Directory ........................... 21
Deleting a Directory Record... 21
Deleting All Directory Records21
ADDITIONAL
INFORMATION
Troubleshooting.................... 22
Questions? Here’s How
to Reach Us....................... 23
FCC Requirements ................ 23
SAVE THESE INSTRUCTIONS
Page 14

PAGE
PAGE
26
Technical Specifications
FCC Registration No: See bottom/
underside of the base
Frequency Control: Crystal
Operation Mode: 2.4 GHz Digital Spread
Spectrum
Ringer Equivalence: See bottom/
underside of the base
Jack: RJ11
Transmitting and Receiving Frequency
Handset and Base:
2.4 GHz - 2.4835 GHz
Number of Channels: 75
Security Code Combinations: 7,529,536
Power Source
Handset: Replaceable NiMH Batteries
Base Unit: DC 3.6V 700 mAh
Handset Battery Life
Standby: To 48 Hrs
T alk: 3.5 - 4 Hrs
Recharging Time:
10-12 hours (with power off)
The unit is hearing aid compatible.
Design and specifications are subject to
change without notice.
EASY TO USE
27
OWNER'S GUIDE
2.4 GHz Spread Spectrum
Multiple-Handset Cordless Telephone
System with Call Waiting Caller ID
1660 M1S1 1/01
Printed in China
Page 15

PAGE
28
HANDSET FEA TURES
 Loading...