

unication E5 User Manual


INDEX
1. PREFACE
2. PACKAGE INTRODUCTION
2-1. Standard Package
2-2. Optional Items
3. INSTALLATION
3-1. AA Battery Installation
3-2. SIM Card Installation
(GSM Model Only)
3-3. Li Battery Installation
(GSM Model Only)
4. PAGER INTRODUCTION
4-1. Key Introduction
4-2. Display Introduction
4-3. Icon Introduction
5. TURNING ON THE PAGER
1
2
2
2
3
3
5
6
7
7
12
14
20
20
20
21
21
22
22
23
24
25
26
26
32
36
5-1. Manual Switch On
5-2. Battery Power On
6. SELF TEST
6-1. Self Test
7. TODAY
7-1. Entering Today
7-2. Unread Message
7-3. Today Message
7-4. Message Alarm
8. MESSAGE
8-1. Read Message
8-2. Message Acknowledgement
(GSM Model Only)
8-3. Other Features
................................... ..................
.......... ..................
.................. ..................................
........................ ...............................
........................... ........................................
............. ......................
..................
....................
......................
..................
......................
.....................
...................................
................
.......................
.....................
..............
...........
..................
.......................

9. EMERGENCY MESSAGE
(GSM MODEL ONLY)
9-1. To Activate The Emergency
Message
10. FUNCTION STATUS
10-1. Entering Function Status
10-2. Function Enable /Disable
/Setting
11. SETTINGS
11-1. Profile
11-2. Time & Date
11-3. Clock Alarm
11-4. On/ Off Duty
11-5. Alert Settings
11-6. Change Password
43
43
45
45
46
51
51
52
56
60
62
70
73
74
75
76
78
80
81
85
87
87
87
88
88
89
11-7. LCD Contrast
11-8. Volume Adjustment
11-9. Backlight Setting
11-10. Key Lock
11-11. Calendar
11-12. RF Test
11-13.
Self-Program
11-14. Information
12. OTHER INFORMATION
12-1. Caring for Your Pager
12-2. Clean Your Pager
13. WARNING AND IMPORTANT
NOTES
13-1. WARNING
13-2. IMPORTANT NOTES
............................
...................
.....
.............................
................................
...............................
.......................
.......................
......................
.....................
..............
....................
...........
...............
..........................
..........................
...........................
....................
.......................
..............
........
.............
......................................
.......................
........
INDEX

Unication would like to congratulate you for your choice of the E5 as
your communication tool. This user manual will provide you the
necessary information to get the optimum performance from your
pager. The E5 is a very versatile product and has the ability to satisfy
most communication requirements. We sincerely hope you enjoy
our brand-new E5 product.
This document is subject to changes without notice.The latest
electronic version of the user manual can be downloaded from
Unication official website: http: //www.unication.com/
1
1. PREFACE
PREFACE
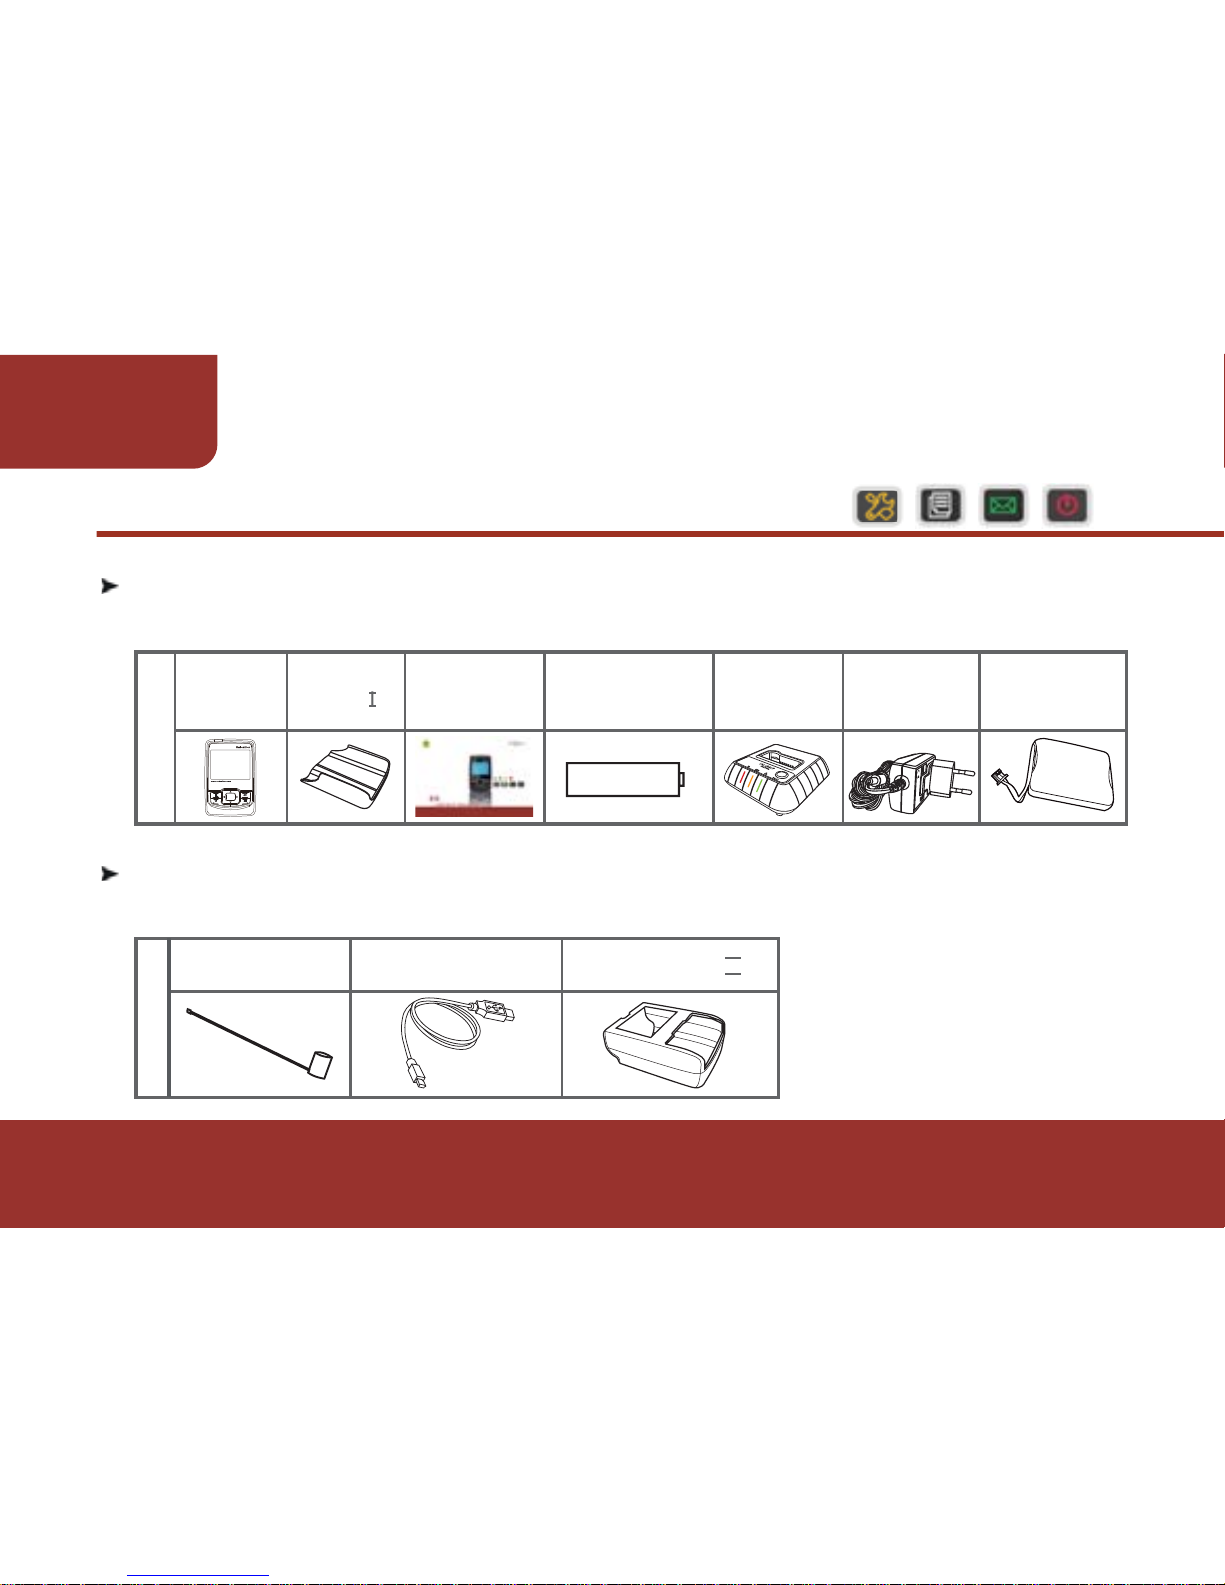
2-1. STANDARD PACKAGE
E5 standard package contains the following items:
2-2. OPTIONAL ITEMS
The following are optional items :
2
2. PACKAGE INTRODUCTION
PACKAGE
INTRODUCTION
Mini USB
External
Antenna
ITEMS
ITEMS
E5 Pager
Holster
Type I
Holster Type II
E5 Pager
User’S
Manual
Ni-HN
Rechargeable
Battery
AA
Charger
AC Power
Adapter
Li battery
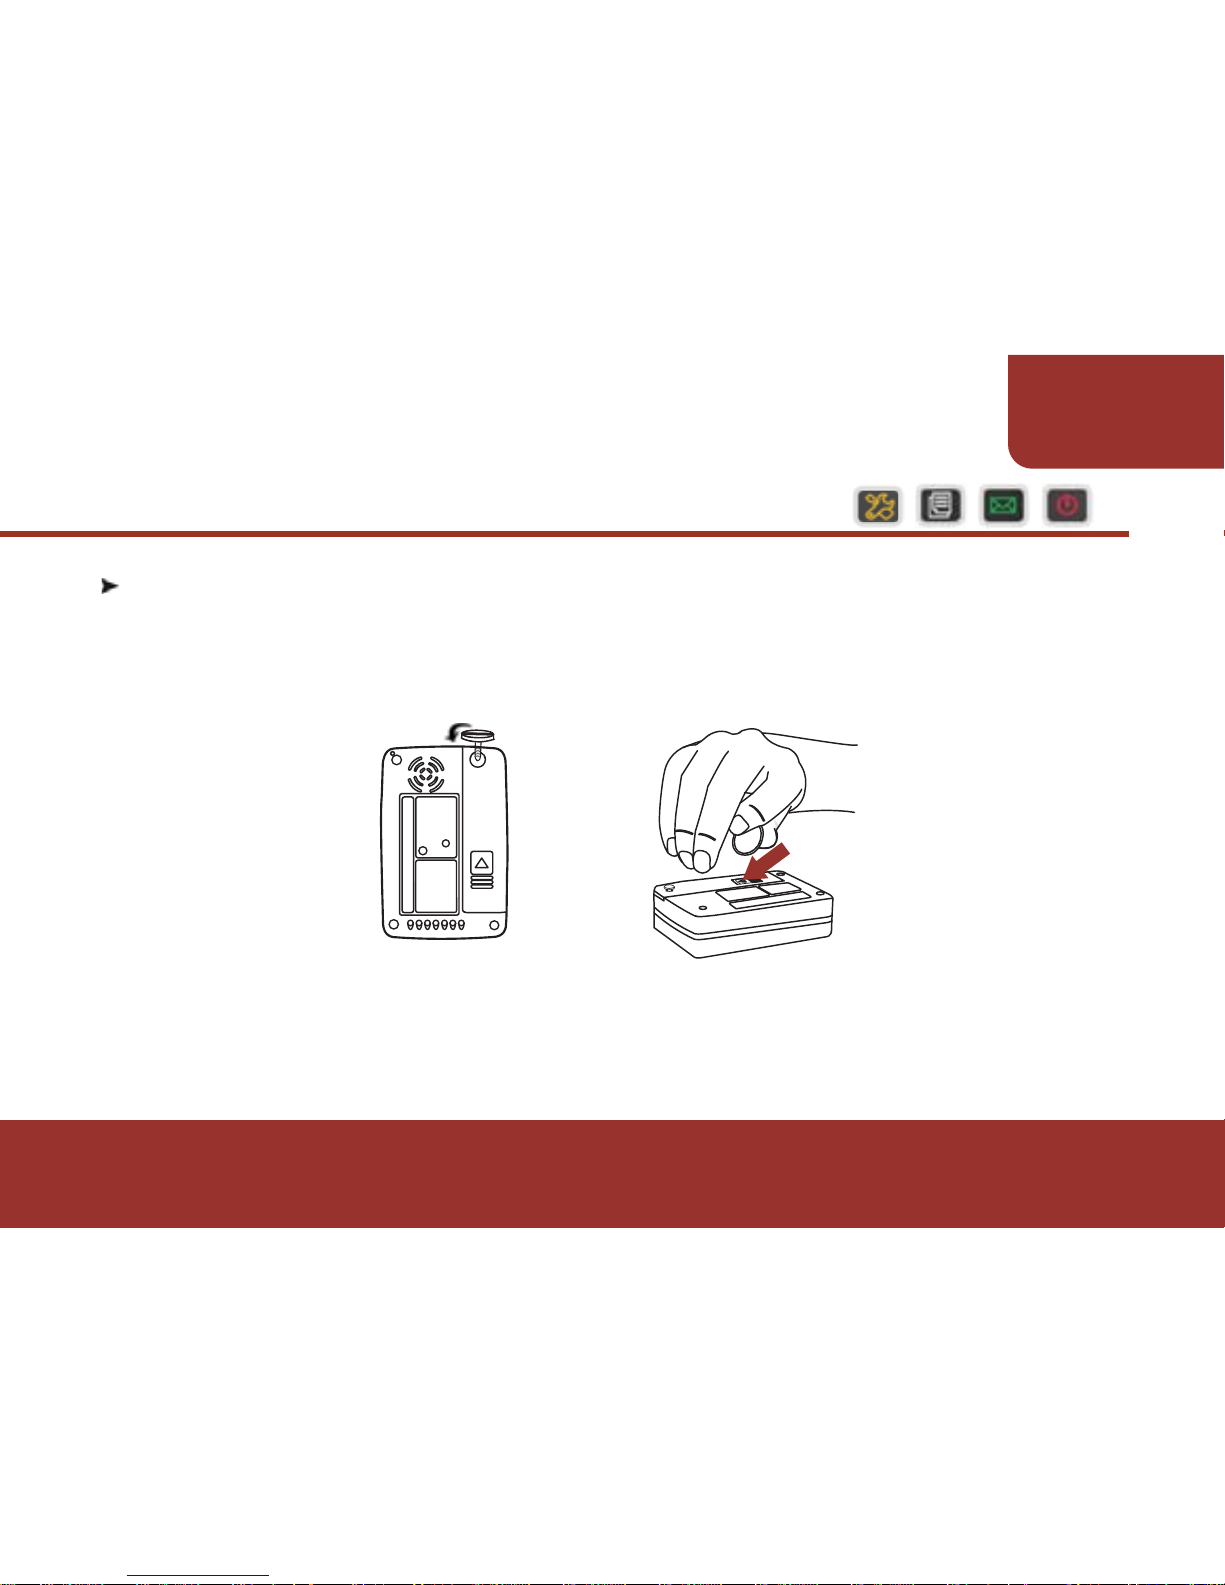
3-1. AA BATTERY INSTALLATION
The E5 is designed to operate with a single AA-size Ni-MH rechargeable
battery or an alkaline battery (LR6 is recommended).
See the diagram below for the battery door location.
To insert or replace the battery, please remove battery door. Insert
one AA battery (Alkaline or rechargeable battery) into the battery
compartment.
ɁCaution: Observe battery polarity.
TURN
1
3
3. INSTALLATION
INSTALLATION
PUSH

Loosen the screw by using a coin.
Using a coin to slide the battery door toward the outer edge.
Lift the battery door away from the housing and remove it.
Insert the battery into the battery compartment, taking note of the
positive (+) and negative (-) markings on the battery and the pager
housing.
※Caution:
For the first use, please keep the full charged battery stay in the pager
for more than 72 hours to fully charge the backup battery for message
retention.
a.
b.
c.
d.
4
INSTALLATION

3-2. SIM CARD INSTALLATION (GSM MODEL)
Before using the E5 GSM model, you have to install a GSM SIM
card, which is provided by your network service agent. Please
follow the below steps to install the SIM card.
a. Loose the 4 screws which are on the pager rear
housing.
b. Remove the pager rear housing.
c. Lift the SIM card holder.
d. Insert the GSM SIM card then place the SIM
card holder back.
e. Slide the SIM card holder forward to lock the
SIM card.
5
PAGER
INTRODUCTION
6
PAGER
INTRODUCTION
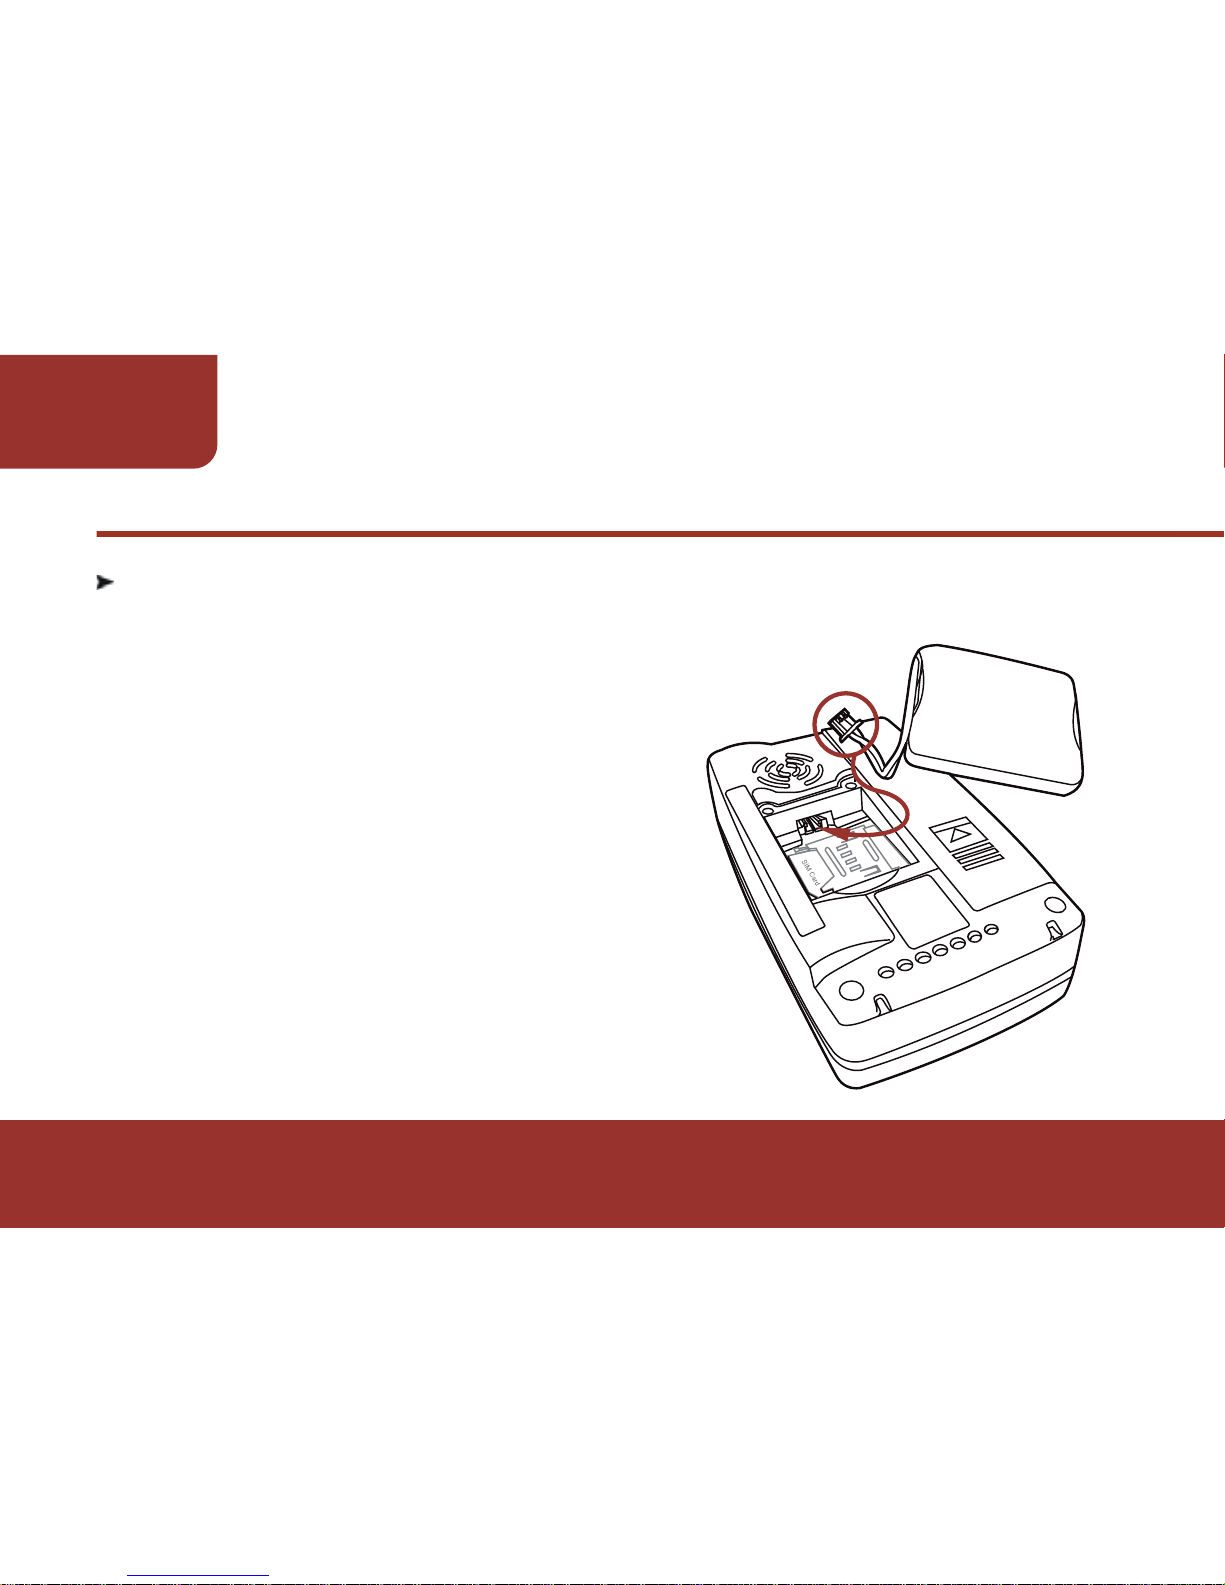
3-3. LI BATTERY INSTALLATION (GSM MODEL)
After install the GSM SIM card, please follow the
below steps to place the Li battery.
a. Plug the battery connector into the battery
connector.
b. Place the Li battery in the battery
component.
c. Place the rear housing back.
d. Screw the screws tightly.
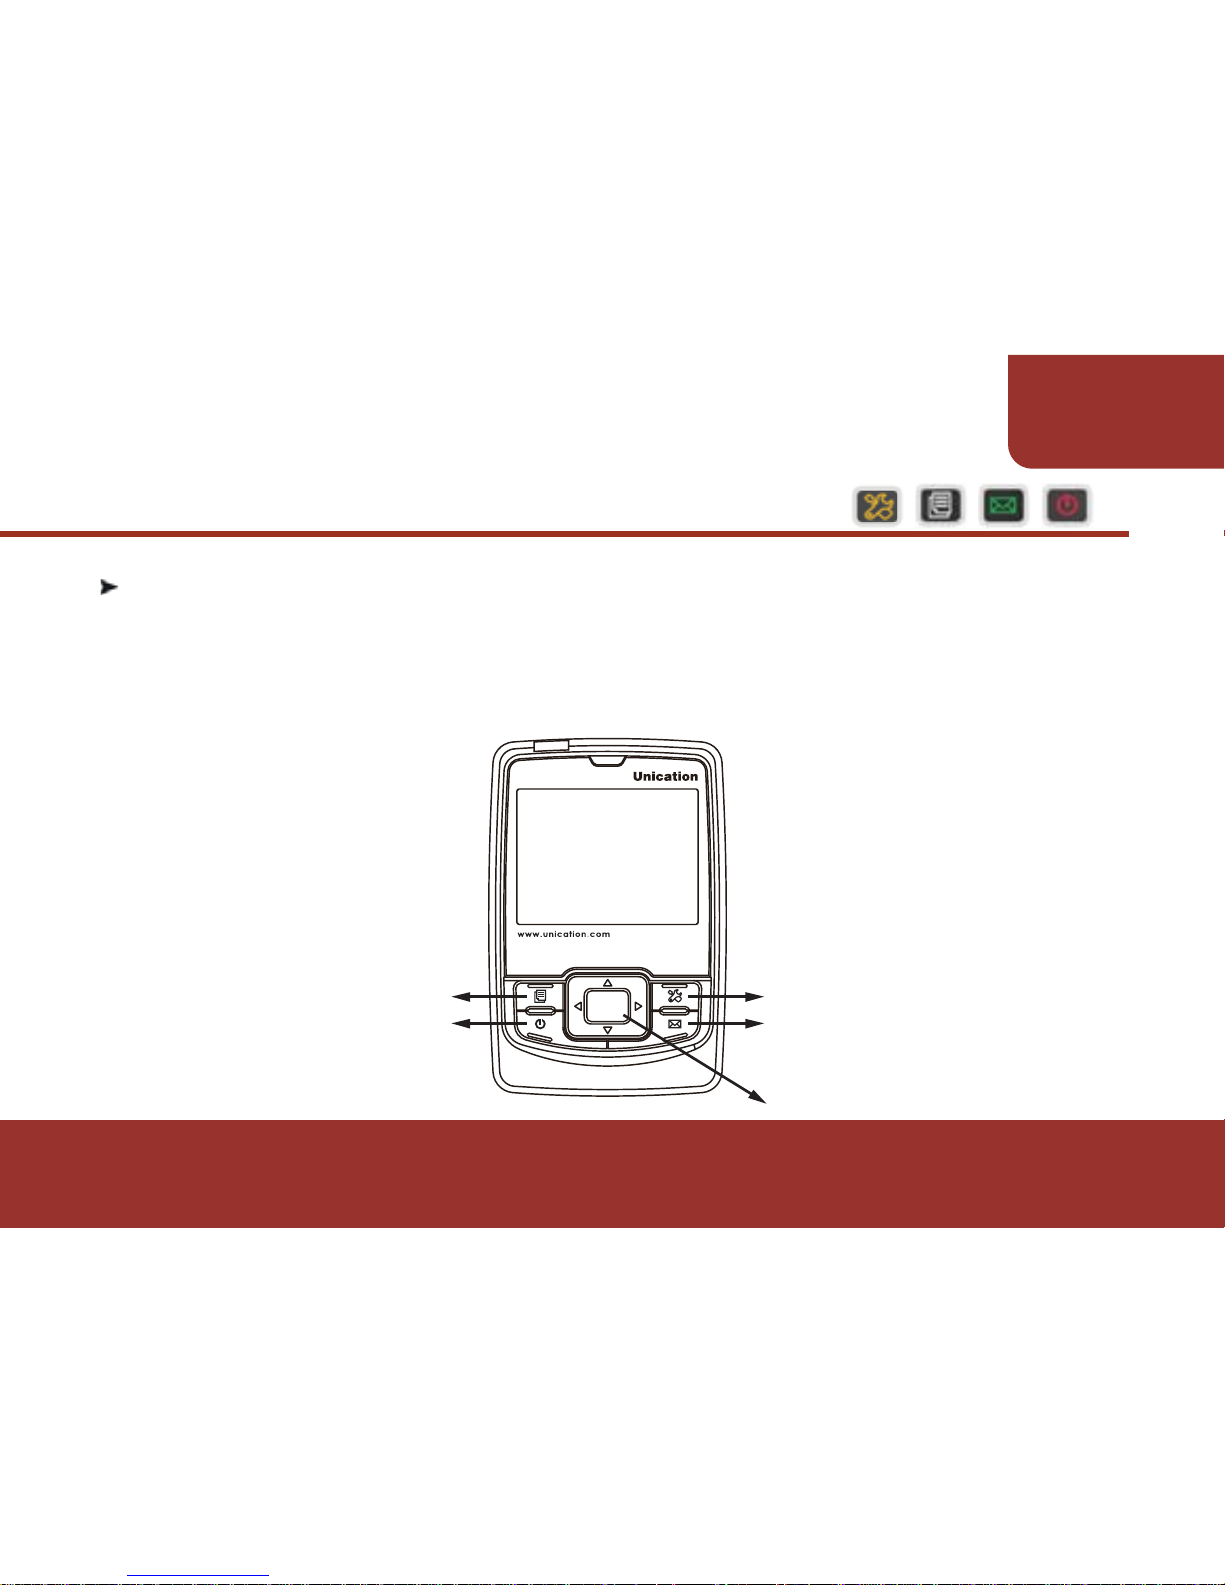
4-1. KEY INTRODUCTION
The E5 is available in 2 models. Please verify your model for the
proper key arrangement.
7
4. PAGER INTRODUCTION
PAGER
INTRODUCTION
FUNCTION STATUS KEY/
SOS BUTTON(GSM MODEL)
POWER KEY
MENU KEY
READ KEY
OK KEY
BASIC & GSM MODEL
<2>MENU KEY
1. Press to display the main meun list.
All the main features that are activated in the PPS will be listed.
2. When “KEY LOCK” is activated and the pager is locked up, press
Menu Key to unlock the pager.
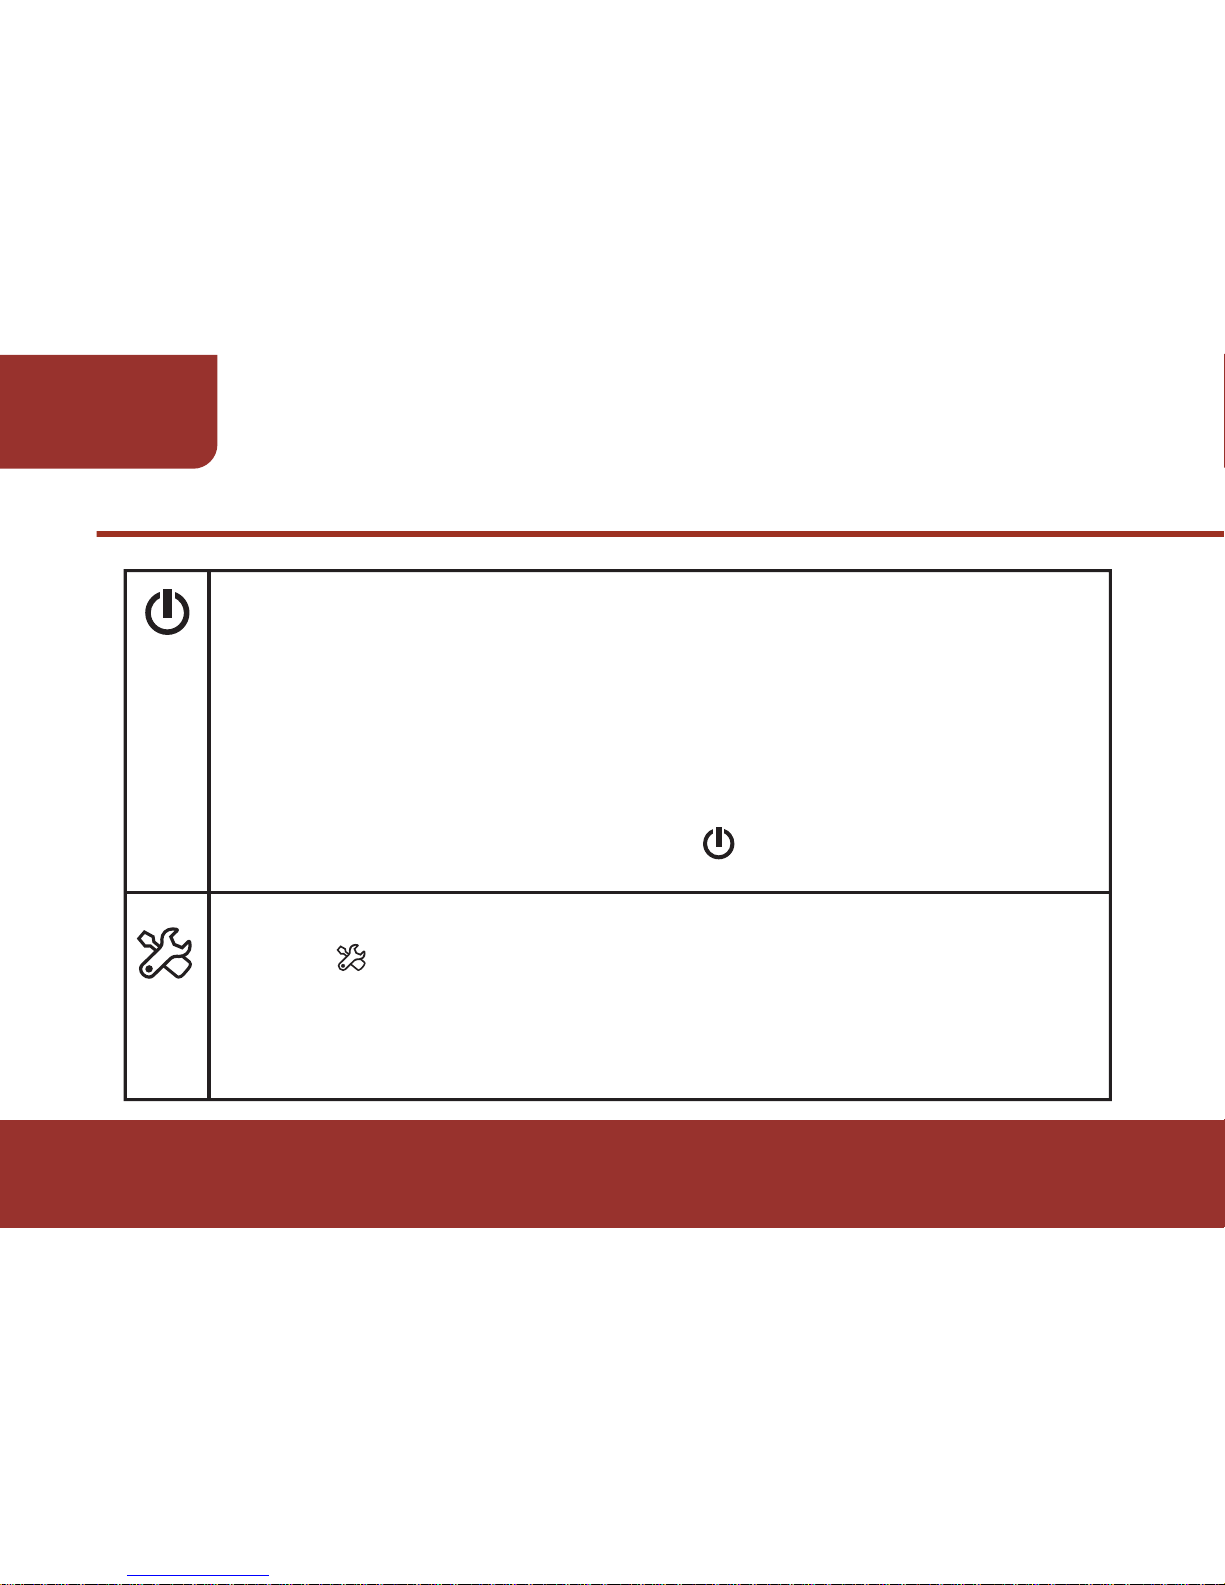
<1>POWER KEY
1. To turn on or turn off the pager.
When the pager is off, press POWER KEY for 2 seconds, the pager
will turn on.
When the pager is on, press POWER KEY for 2 seconds, a pager
off confirmation will pop up on the screen.
2. To return to stand by mode.
When operating any features, press to return to stand by mode.
8
PAGER
INTRODUCTION

9
PAGER
INTRODUCTION
<4-1>FUNCTION STATUS KEY
<3>READ KEY
1. ALERT MODE 2.ON/ OFF DUTY
3. PROFILE 4. ALARM1~ALARM 5
is a shortcut to check the function status of the frequently used
features and to enable or disable the features.
You are allowed to view and change the settings of the following
features in Function Status
is a short cut to read all the received messages.
1. If there are unread messages in the pager, press to read the
messages directly.
2. If there is no unread message, you can also press to enter
MESSAGE BOX.
3. When reading messages, press READ KEY to scroll through the
pages.

10
PAGER
INTRODUCTION
<4-2>SOS Button (A programmable key of GSM model)
can be programmed as a SOS button. When “SOS Button is
enabled, press this key for 3 seconds, the emergency message will
be activated then sent to the designated destination via GSM or
GPRS.
※The Emergency Message can only be activated when the
pager has an active LCD screen i.e. standby or menu screen .
To operate Emergency from ECM condition , the screen must
first be made active with a short press of any key.
<5>OK KEY
1.
2.
3.
For the feature settings, OK KEY is a confirmation key to confirm all the
settings.
When the pager is stand-by, OK KEY is to display the latest message
that received on the day when the pager is operated.
When reading message, OK KEY is to scroll through the pages.
11
PAGER
INTRODUCTION
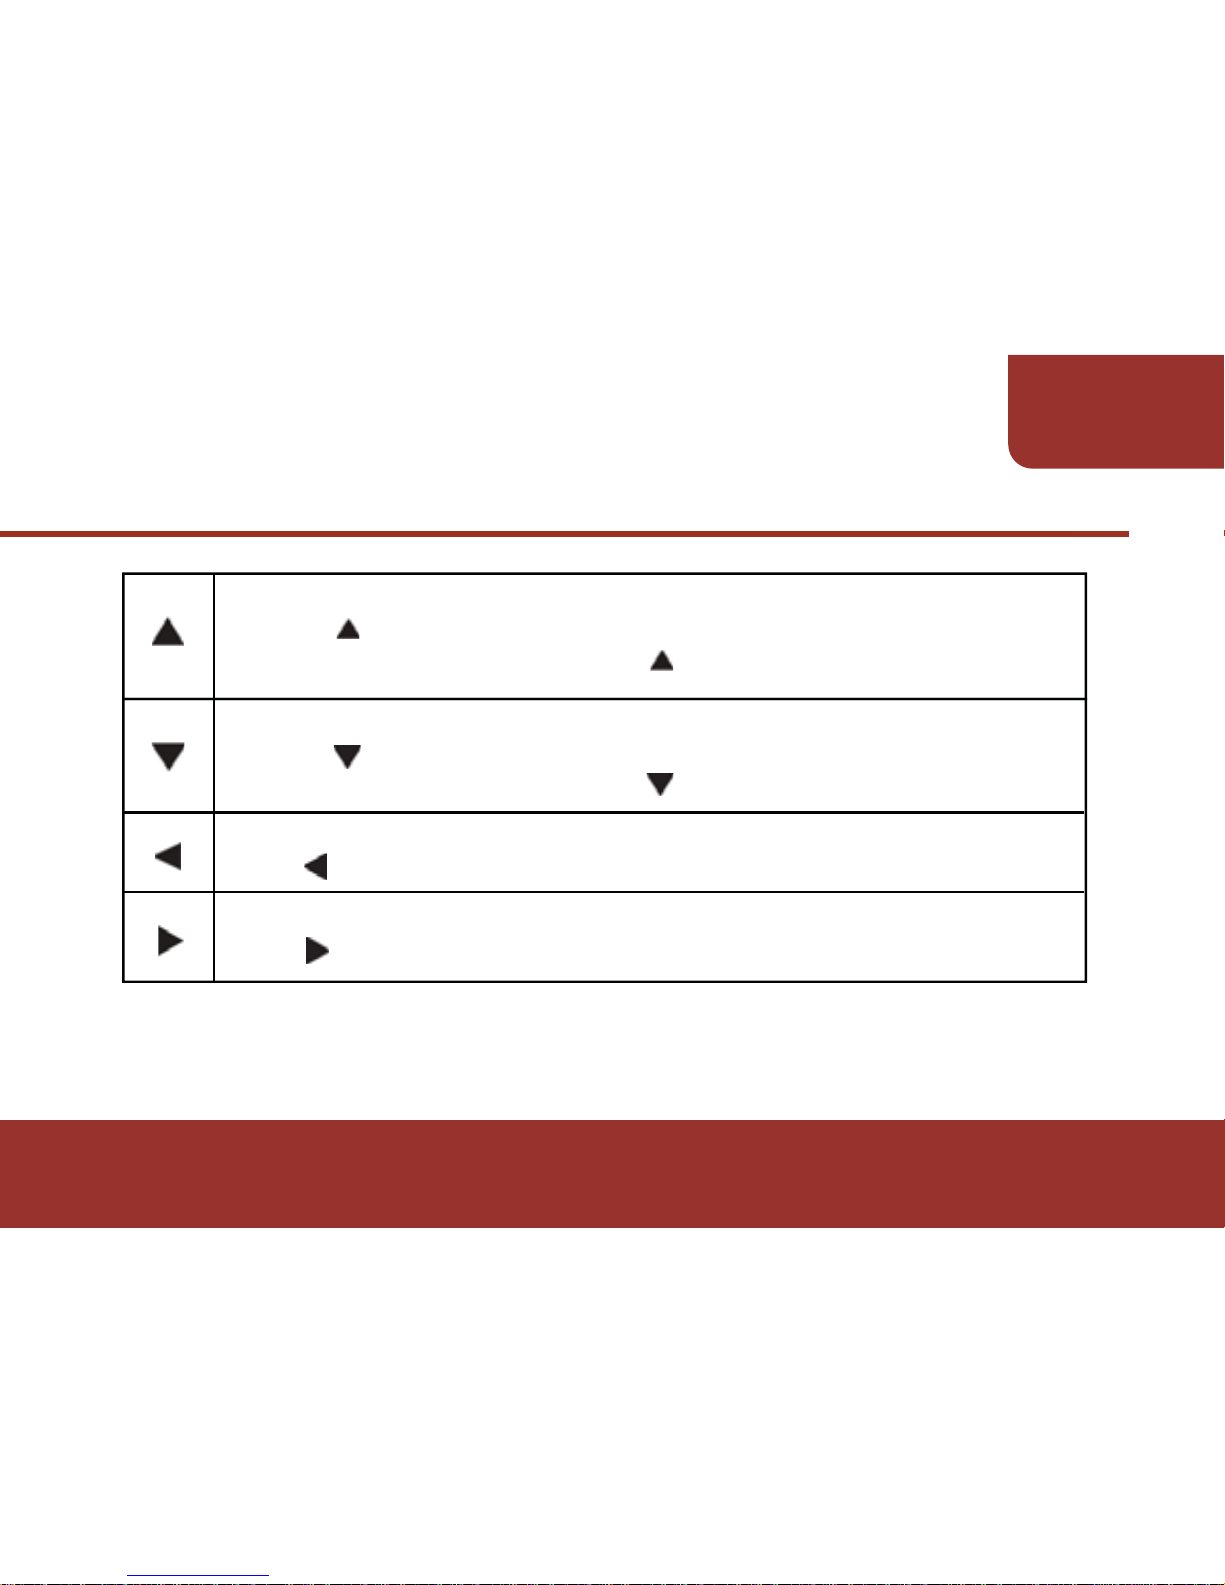
<7>DOWN KEY
1 .
2.
Press to
move the cursor on TOOL BAR
right
.
<8>LEFT KEY
Press to move the cursor on TOOL BAR
left
.
<9>RIGHT KEY
Press to move the cursor down.
When reading messages, press to move to the next message.
<6>UP KEY
1 .
2.
Press to move the cursor up.
When reading messages, press to move to the last message.

4-2. DISPLAY INTRODUCTION
The E5 display is separated into 3 areas:
4-2-1. STATUS BAR
STATUS BAR provides you the basic pager information, and
indicates the following features status:
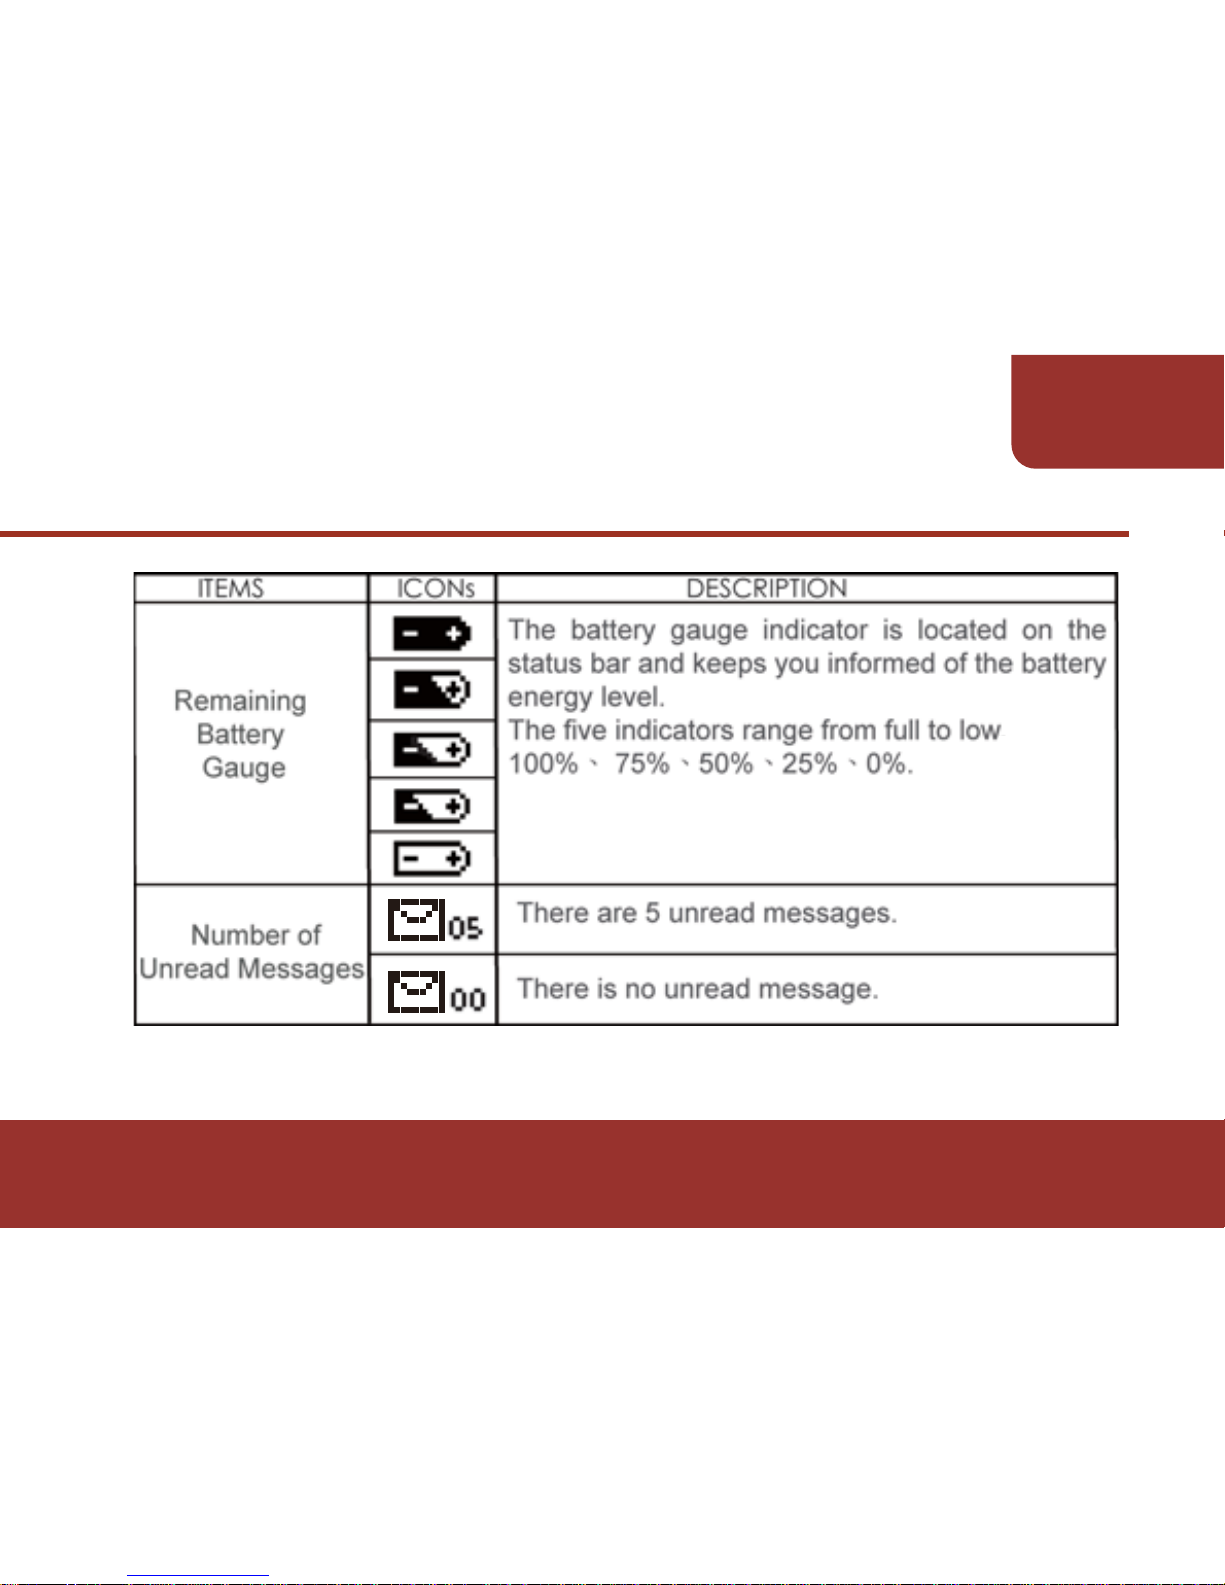
Battery Capacity Indication.
Numbers of Unread Messages
ON/OFF DUTY Status
Alert Mode
Message Alarm Status
GSM Signal Strength (GSM MODEL
ONLY)
RF Signal Strength
a.
b.
c.
d.
e.
f.
g.
STATUS BAR
STATUS BAR
MAIN AREA
TOOL BAR
12
PAGER
INTRODUCTION
READ
NEW MESSAGE
TIME & DATE SETTING
SAVE

13
PAGER
INTRODUCTION
4-2-2. MAIN AREA
In stand by mode, MAIN AREA displays the following information:
a. Profile name.
b. Real Date & Time.
c. Clock Alarm status.
4-2-3. TOOL BAR
The Tool bar displays different features
with different function screens.
You may move the cursor to each feature. A "Feature Description"
will be displayed on the selected feature to help you understand
its functionality.
TOOL BAR
TIME & DATE SETTING
SAVE
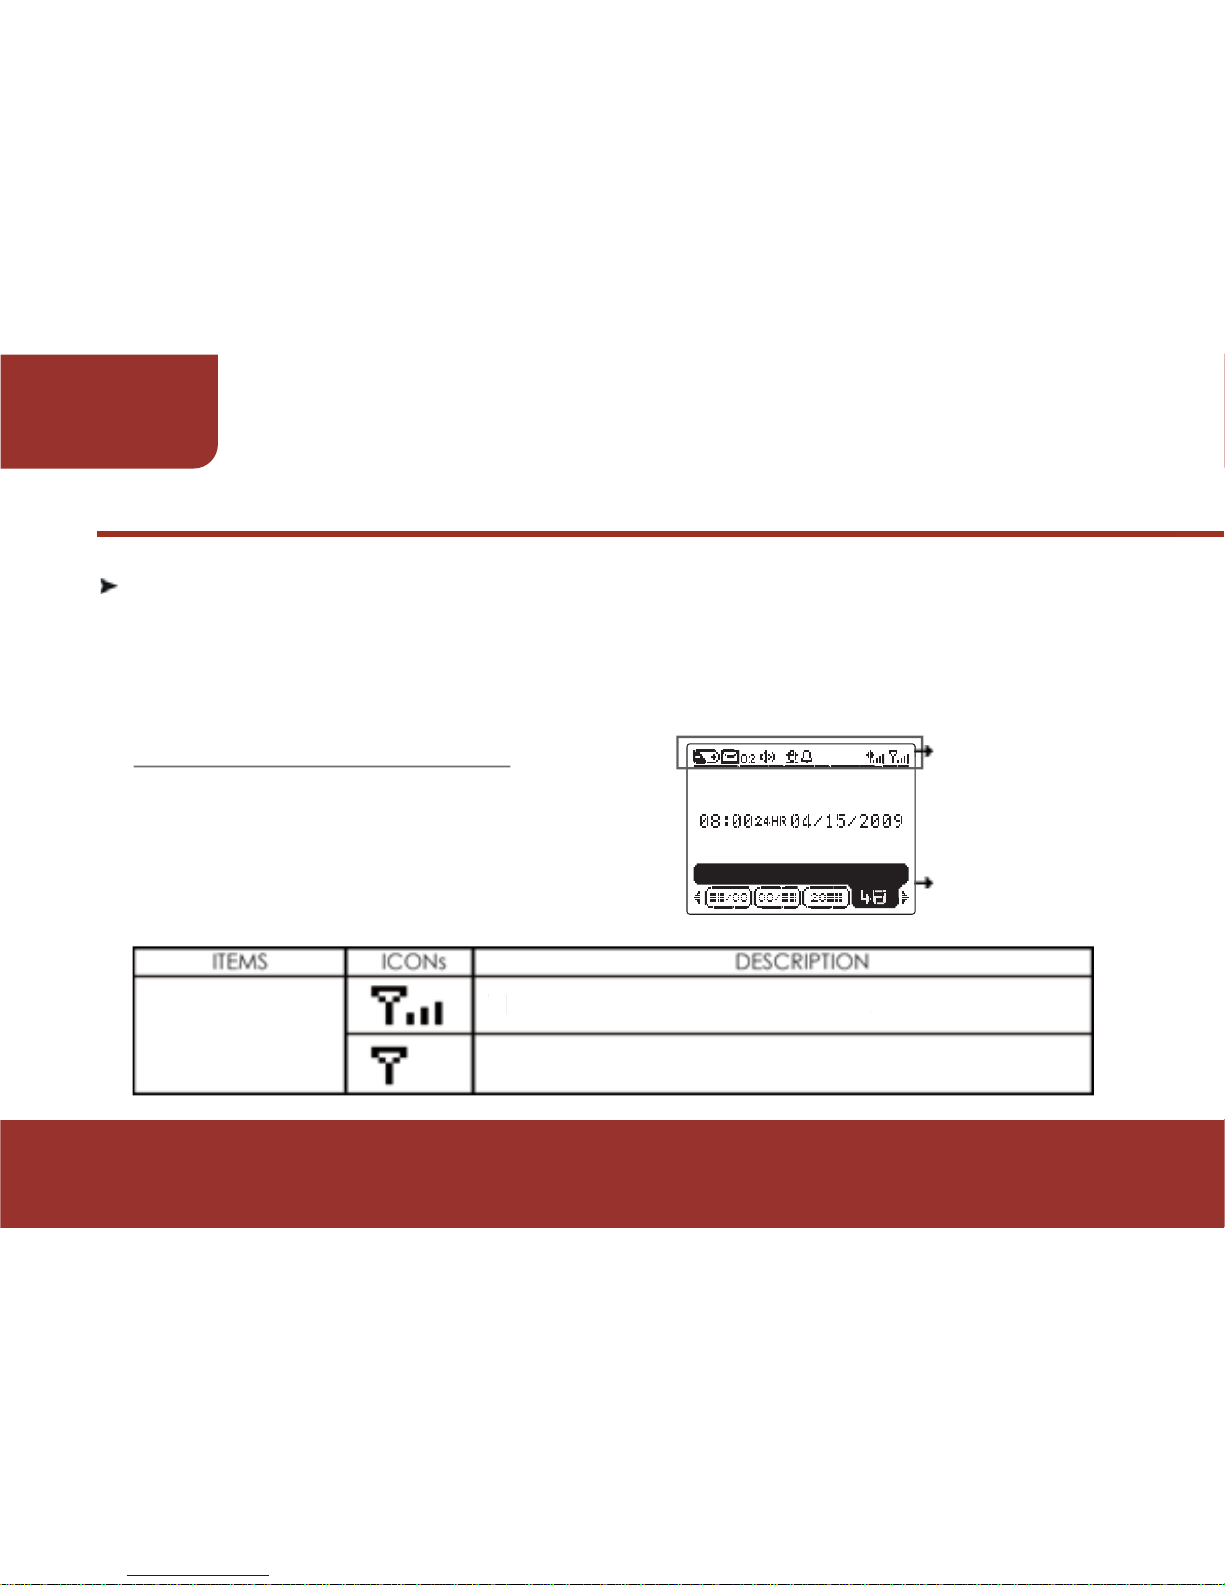
The level of RF signal strength.
4-3. ICON INTRODUCTION
1. Status Icons.
2. Tool Bar Icons.
4-3-1. STATUS BAR ICONS
STATUS BAR
TOOL BAR
T
e level of RF
nal stren
gth
.
There is no RF synchronization signal on the air.
RF Strength
14
PAGER
INTRODUCTION
TIME & DATE SETTING
SAVE
15
PAGER
INTRODUCTION
:
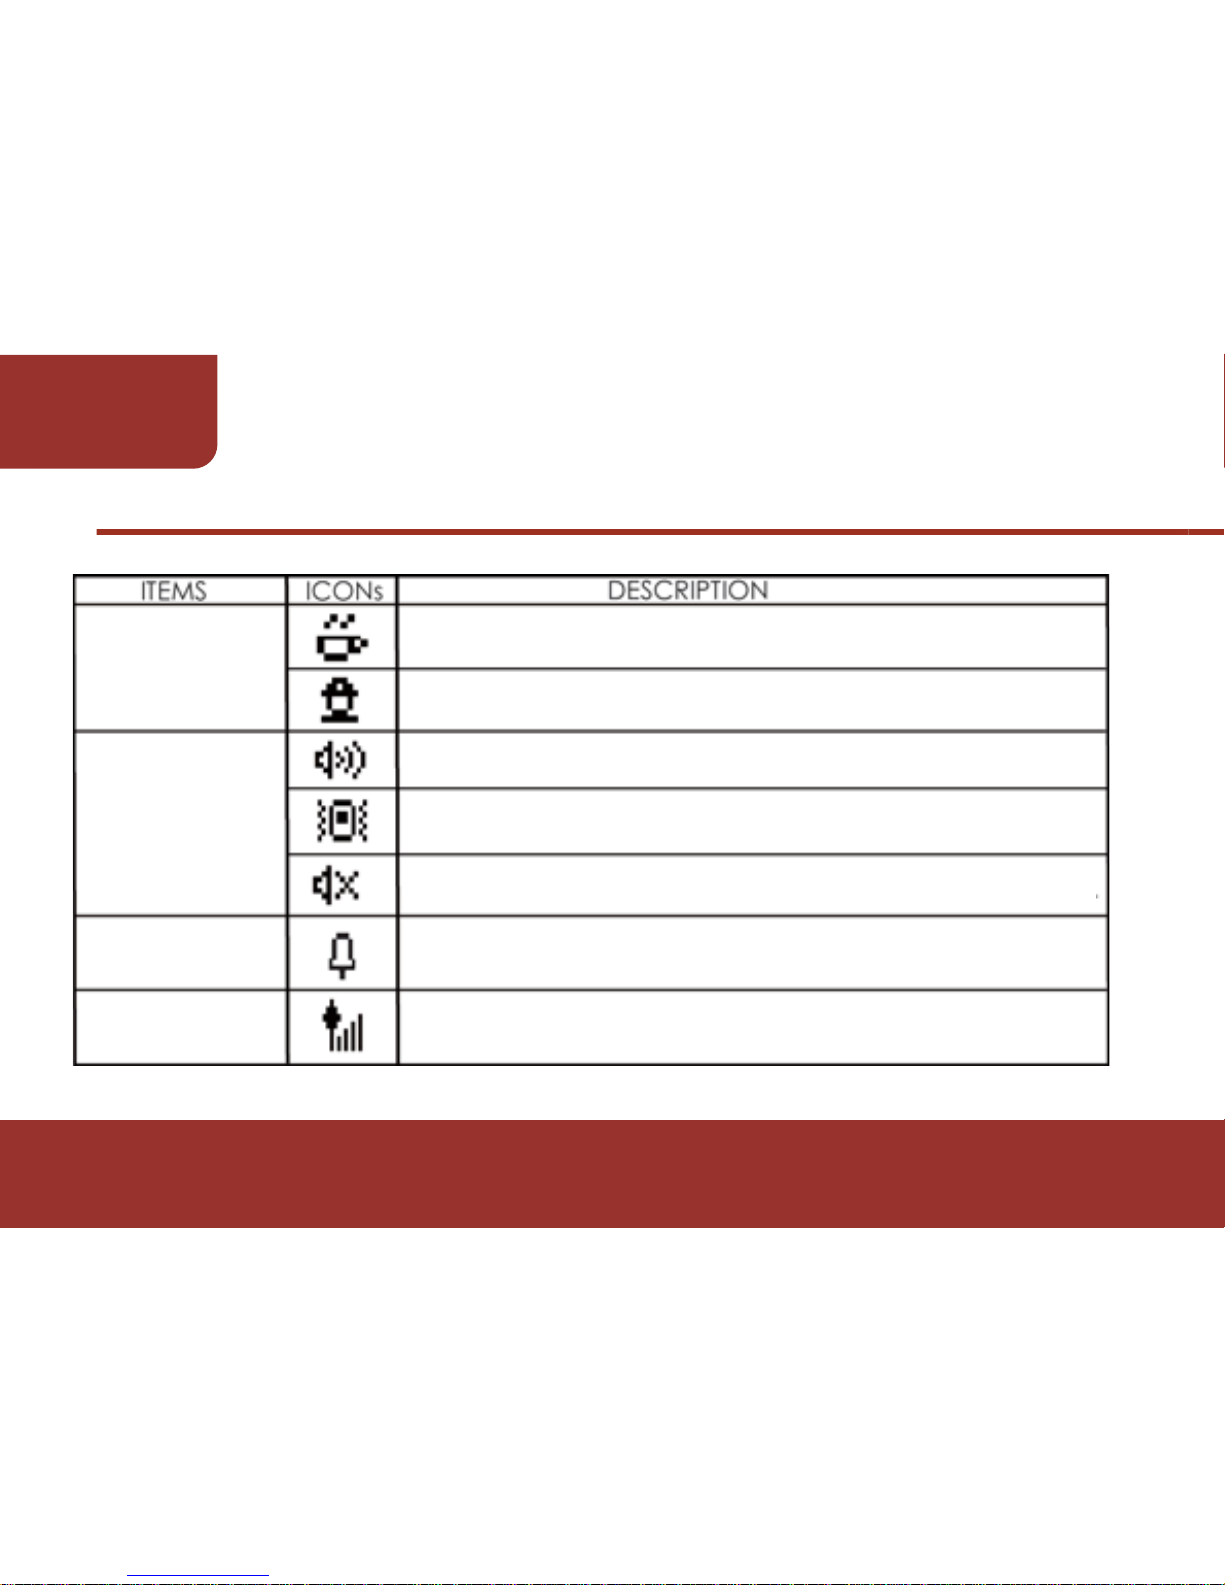
ON/ OFF
DUTY STATUS
Universal
Alert Status
Message Alarm
GSM Strength
Off Duty.
On Duty.
Audible (Alert message alert settings).
Vibration (No alert except for priority call).
Silent (No alert and no vibration, except for priority call).
Message Alarm is activated.
Level of GSM signal Strength. (GSM Model Only)
16
PAGER
INTRODUCTION
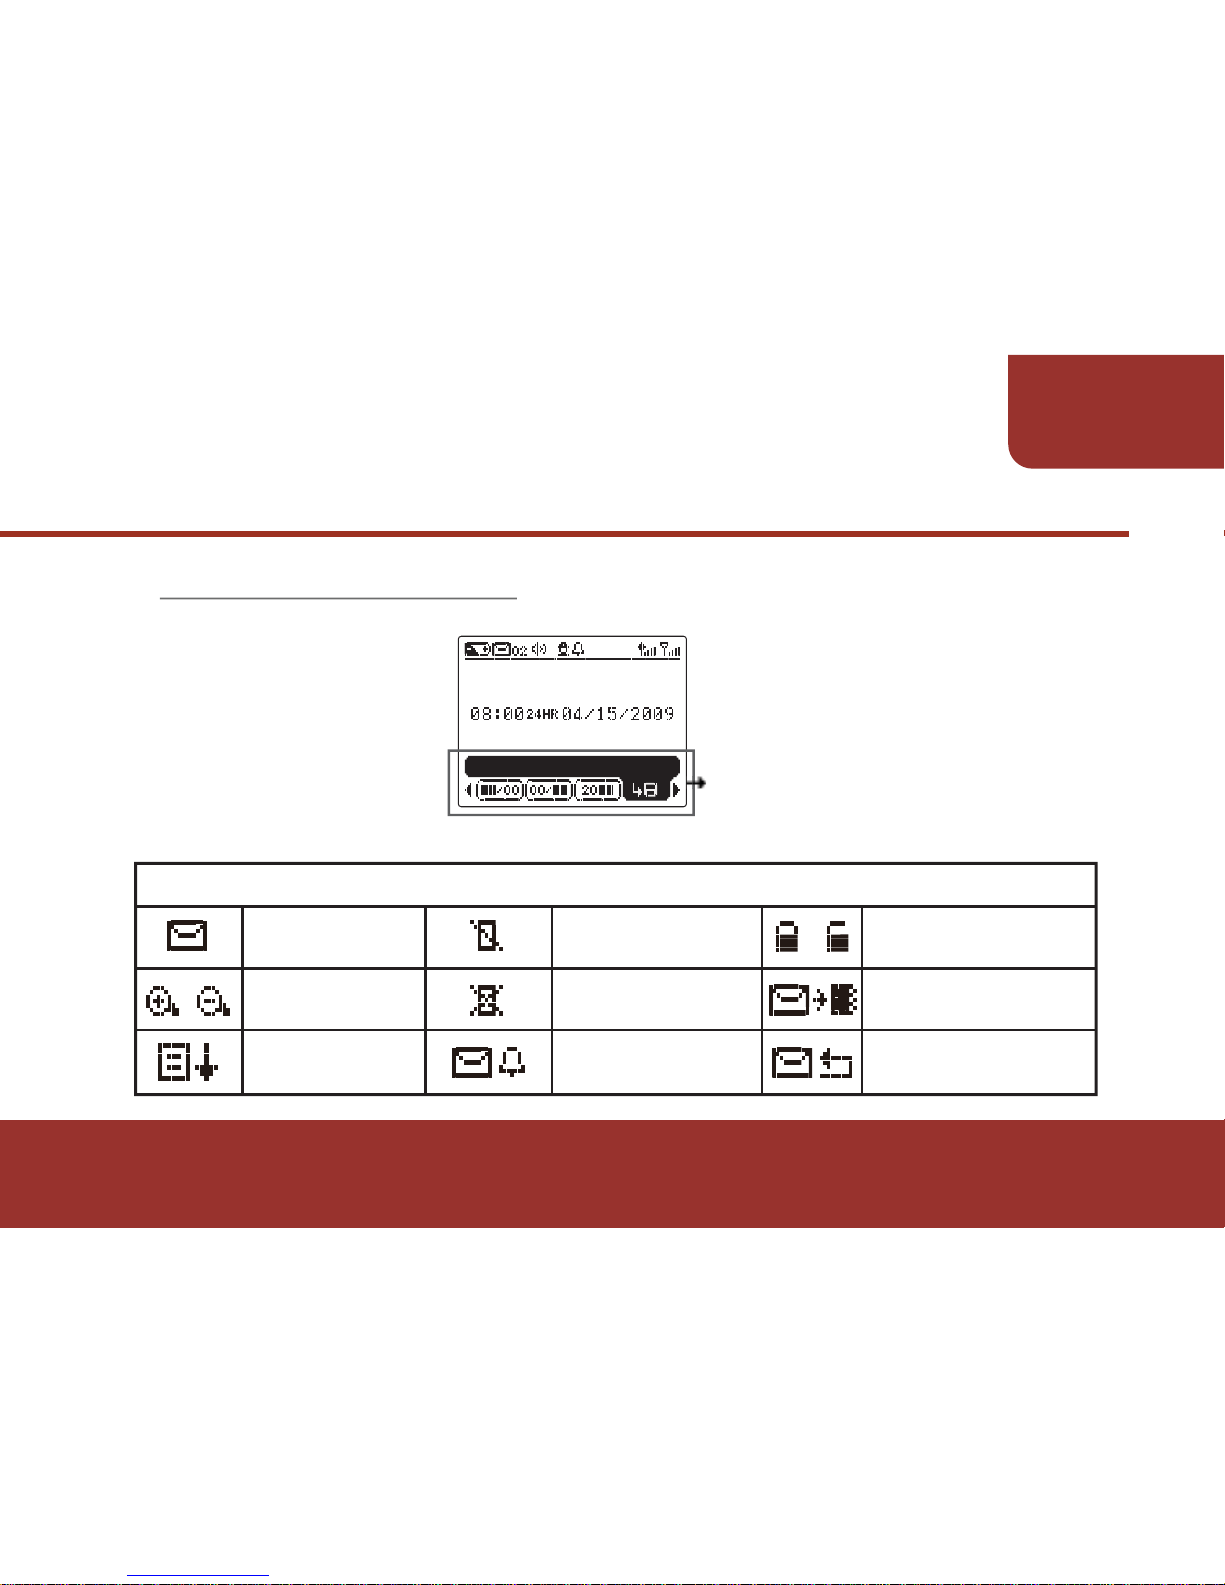
READ
ZOOM IN
ZOOM OUT
PAGE DOWN
DELETE
DELETE ALL
MESSAGE ALARM
LOCK/ UNLOCK
MOVE TO NOTEBOOK
MESSAGE ACK
/
/
ICONs in MESSAGE BOX
4-3-2. TOOL BAR ICONS
17
PAGER
INTRODUCTION
TOOL BAR
TIME & DATE SETTING
SAVE
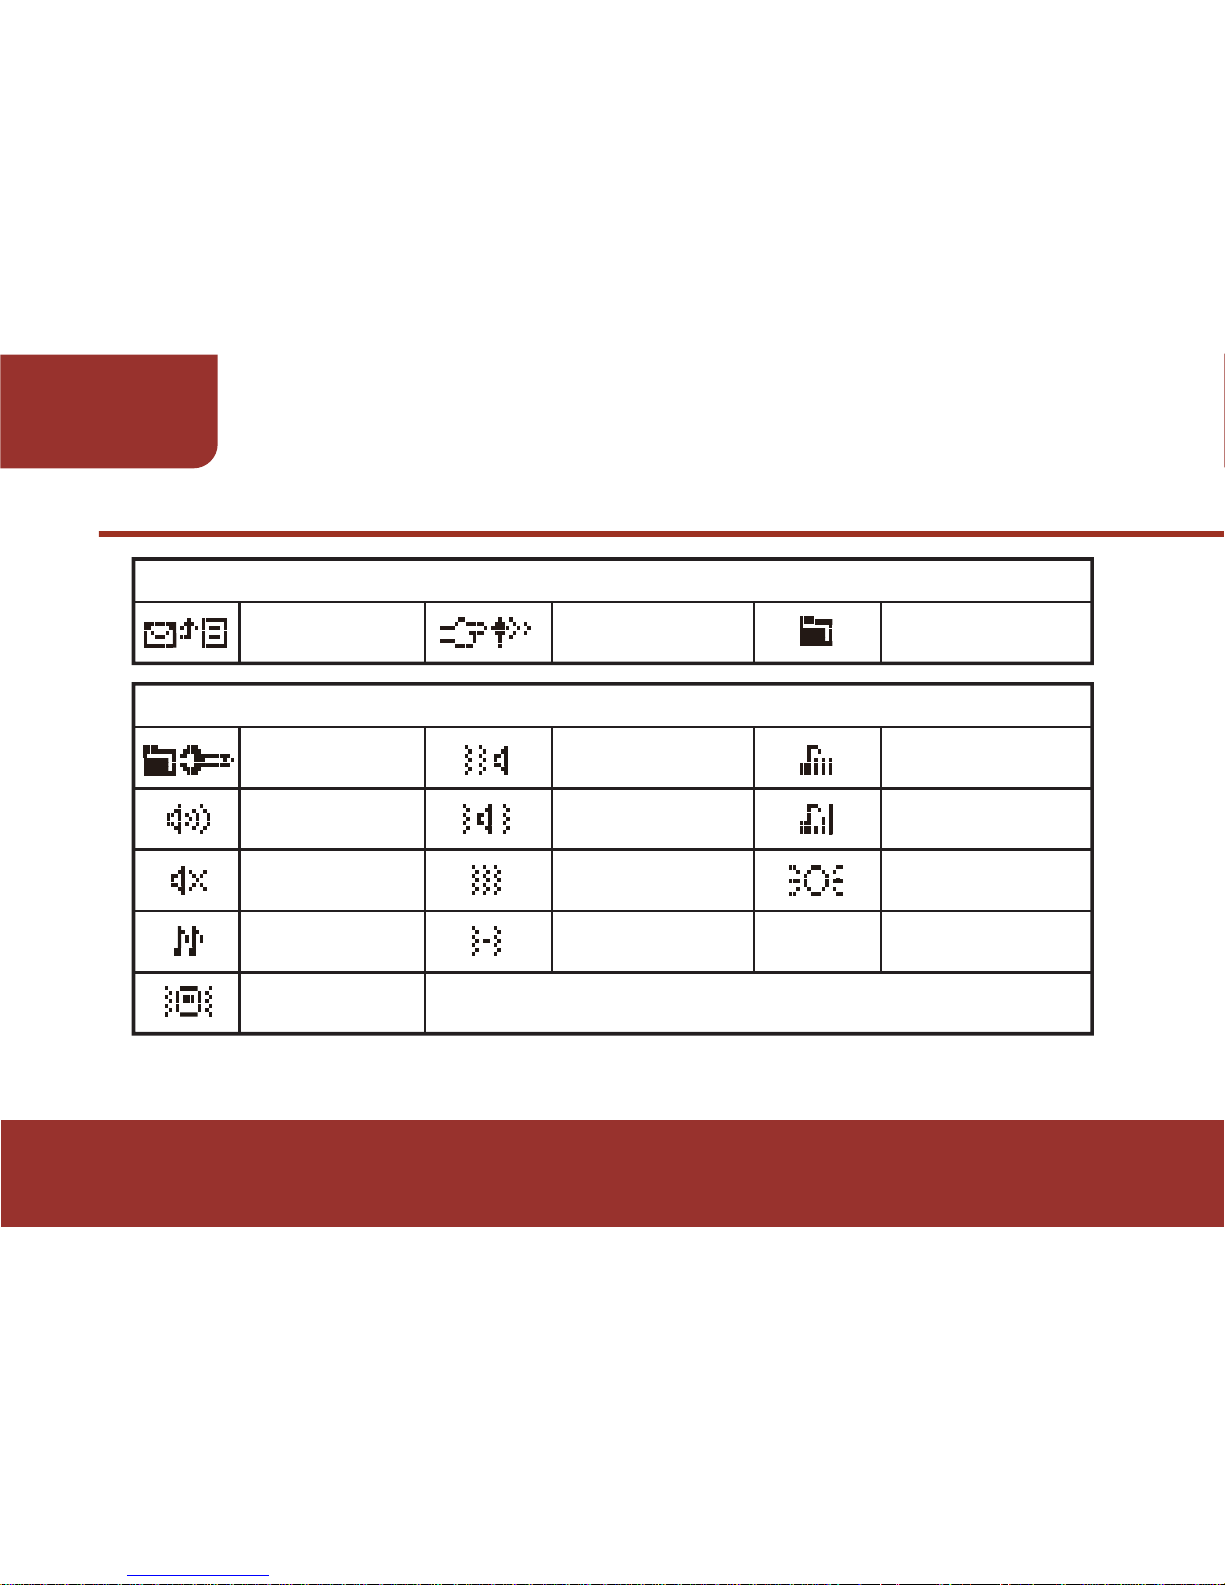
ACK STATUS
ADDRESS
ALERT MODE-VIB
THEN ALERT
ALERT TYPEESCALATING ALERT
ALERT MODE-VIB
AND ALERT
ALERT TYPEGENERAL ALERT
FOLDER LIST
VIBRATION
MODE-REPEAT
BACKLIGHT COLOR
VIBRATION
MODE-INTERVAL
ALERT
MODE-ALERT
ALERT
MODE-SILENT
ALERT
MODE-CHIRP
ALERT MODEVIBRATION
RESPONSE ACK
ICONs in MESSAGE BOX ( GSM Model Only)
ICONs in ALERT SETTING
18
PAGER
INTRODUCTION
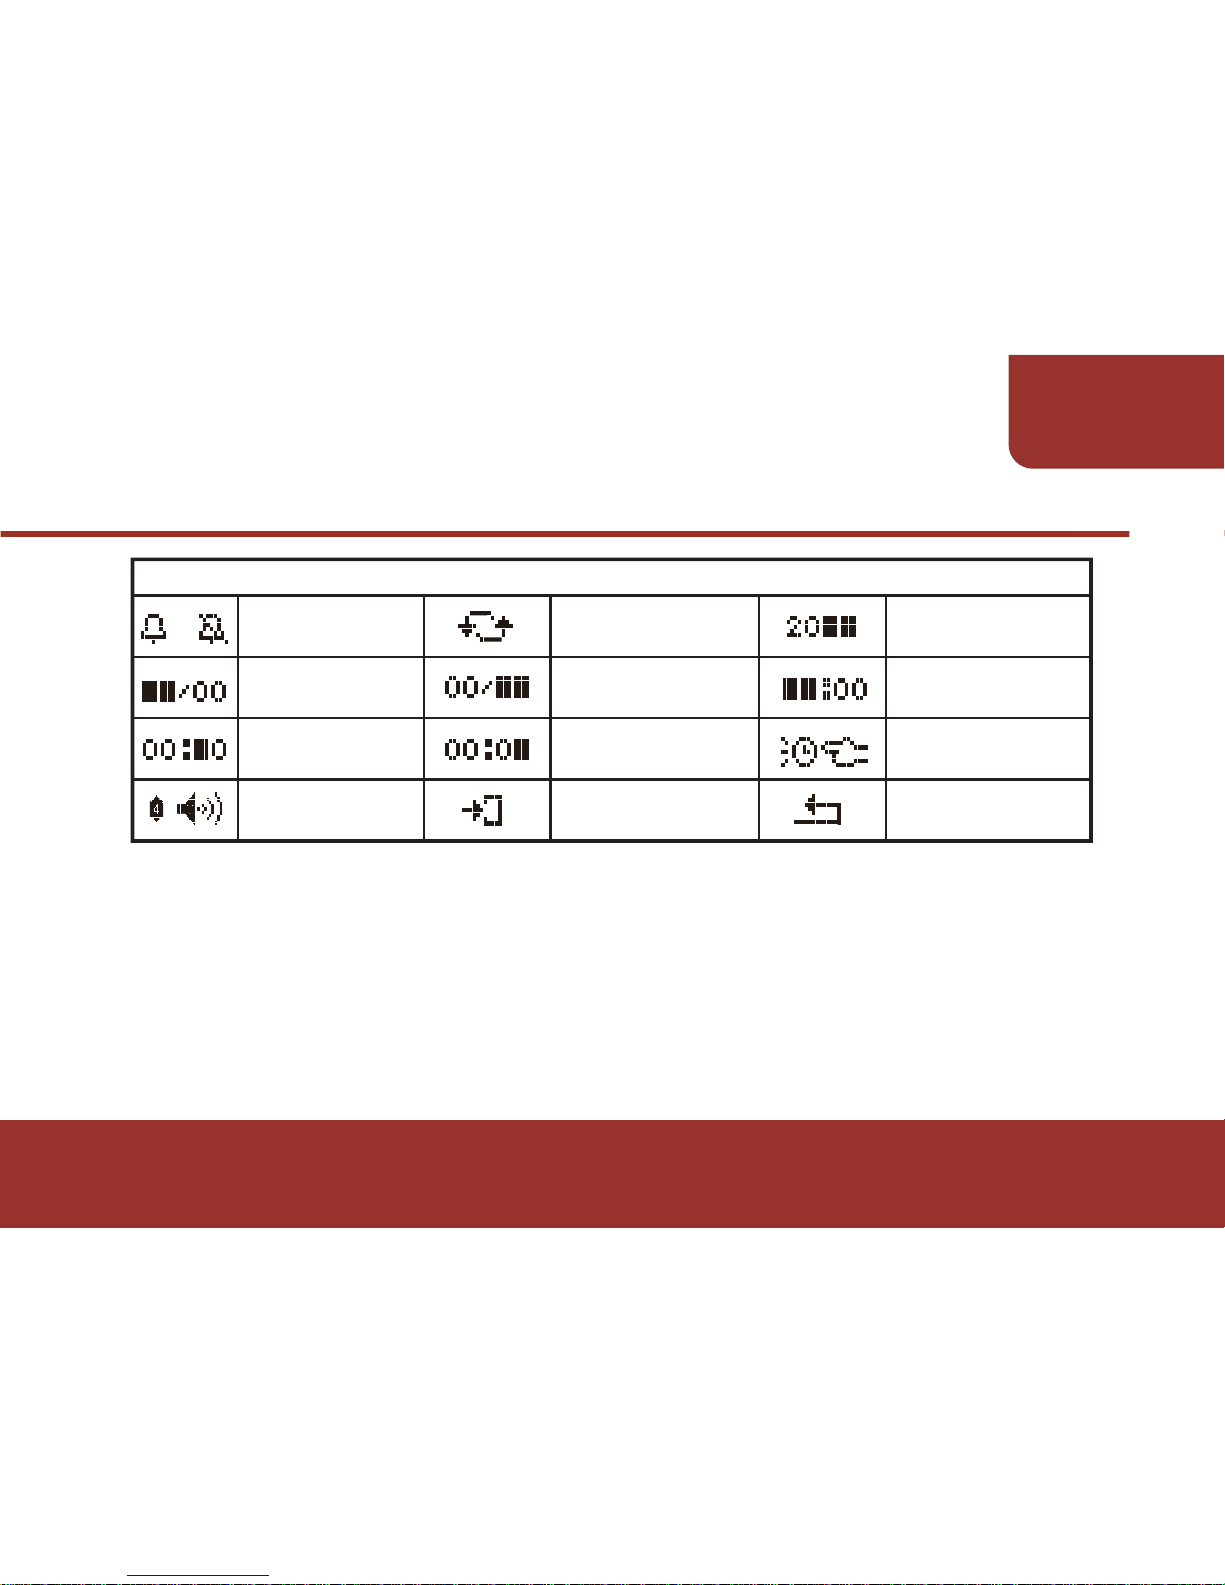
ALARM ON/ OFF
TOGGLE
YEAR SETTING
DATE SETTING
HOUR SETTING
UNIT-MINUTE
SETTING
SOONZER
ACTIVATED TIME
ENTER
BACK
MONTH SETTING
TEN-MINUTE
SETTING
VOLUME
ADJUSTMENT
ICONs in PAGER SETTINGS
/
19
PAGER
INTRODUCTION

20
SELF TEST
There are two ways to turn on your pager :
5-1. MANUAL SWITCH ON
5-2. BATTERY POWER ON
a. The E5 turns on automatically when inserting a battery.
When the E5 is off, press "POWER KEY"
for 2 seconds.
The E5 will turn on and generate a power-on
alert and vibration.
After not operating the pager for seconds , the
E5 will process to Standby mode. The activated profile will be
displayed on the screen.
a.
b.
c.
5. TURNING ON THE PAGER
Unication
a.
b.
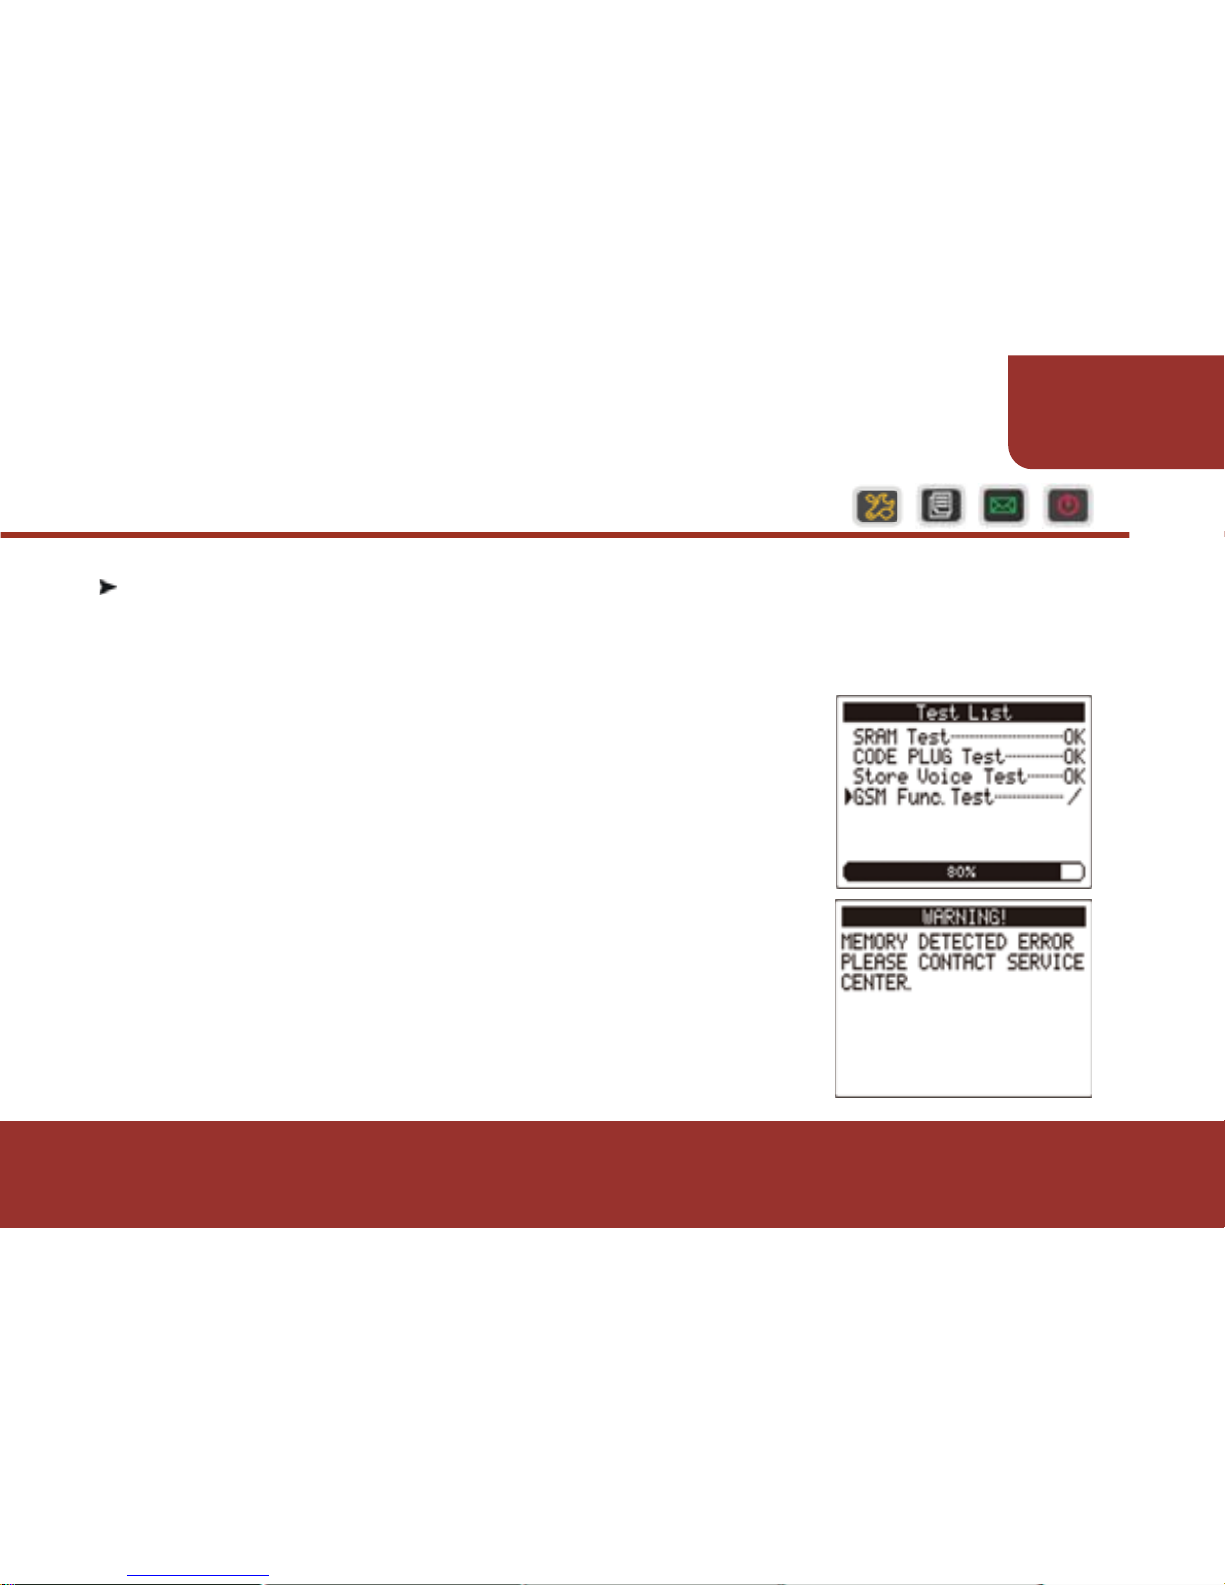
The testing status and result will be displayed
on the screen.
If there is any error found, a warning will be
displayed on the pager screen. Please contact
a Unication representative agent for more
information.
6-1. SELF TEST
When the E5 turns on, it automatically reverts to the “SELF TEST” to
determine if the pager is working normally.
6. SELF TEST
21
TURNING
ON THE PAGER

22
TODAY
7-1. ENTERING TODAY
Press MENU KEY, the main menu will display.
Press and OK KEY to move and enter
today.
7. TODAY
a.
b.
Ɂ
In the TODAY screen, there are 3 sub-folders for you to check:
(1) TODAY UNREAD MESSAGE (2) TODAY MESSAGE
(3) MESSAGE ALARM
TODAY is a folder which stores all the current day’s received
messages.
ENTER

The Message List will be displayed with
its folder name, source name and message
preview.
The tool bar features are the same with
"READ MESSAGE".
Ɂ
Ɂ
23
TODAY
7-2. UNREAD MESSAGE
a. After entering the TODAY screen, the cursor will stay on "UNREAD
MESSAGE". Press OK KEY to enter "UNREAD MESSAGE".
All the unread messages received today will be listed in chronological
order.
ENTER
24
TODAY
7-3. TODAY MESSAGE
The MESSAGE LIST will be displayed with its folder name,
source name and message preview.
The tool bar features are all the same with "READ MESSAGE".
Ɂ
Ɂ
a.
In the "TODAY" screen, press then OK KEY
to select and enter " TODAY MESSAGE".
All the messages that received today will be
saved in this folder.
ENTER

25
TODAY
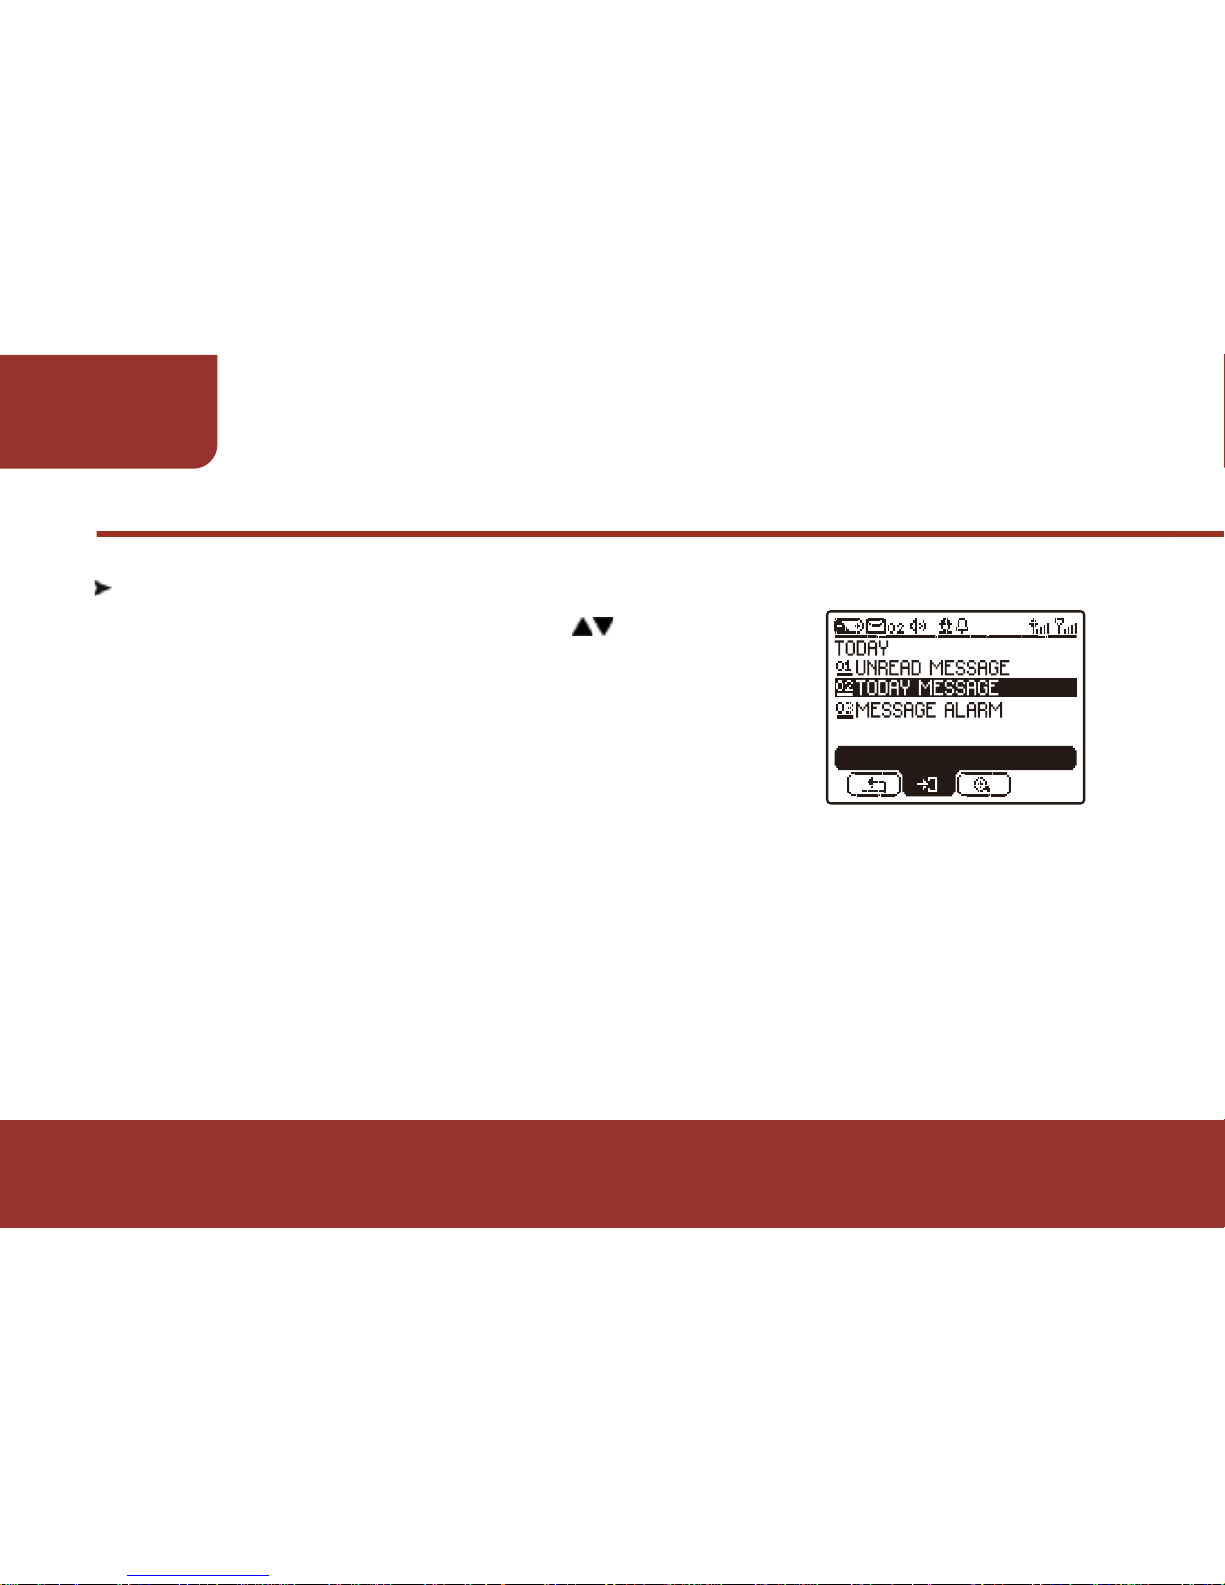
7-4. MESSAGE ALARM
a.
ϡ
b.
In the "TODAY" screen, press then OK KEY
to select and enter " MESSAGE ALARM".
All the message-alarms that will be activated
today are listed in chronological order.!
Press then OK KEY to select and enter the
alarm that you want to look up.
7-4-1. MESSAGE ALARM
If a MESSAGE ALARM is selected, press OK to
display the selected message alarm. The message
content will be displayed on the screen. The TOOL
BAR features are the same with "MESSAGE
ALARM".
The messages alarm that will be activated on the day then the pager
user is operating the pager, will be saved in this folder.
ENTER

26
MESSAGE
8. MESSAGE
8-1. READ MESSAGE
When the E5 receive messages, the pager will generate a message
alert as an indication to remind the pager user that there is a new
message received.
When “Auto Display” is enabled in the PPS, the
received message content will be displayed on the
LCD automatically.
Read the displayed new message via pressing OK
key or read key. If there is no any key pressed within
a default period, the message will be still taken as
unread message. The unread message alert will be
generated to remind the pager users.
If the “Auto Display” is enabled, the pager generates message alert
when it receives a new message. The messages will be stored in the
assigned folder. There are 3 ways to read the received messages:
a.
b.
c.
d.
There are two unread messages.
PROFILE 01
E5 BASIC TYPE
 Loading...