

Page 1
AW850 (SP3890)
Outdoor Lantern And Wireless Speaker
User’s Manual
Please read before using the equipment
Page 2

INTRODUCTION
This 900 MHz wireless speaker syst em uses latest wirele ss technology that ena bles
you to enjoy music and TV sound anywhere inside or outside your home. You can
simply connect the system to any audio source such as Radio, TV, VCR, Hi-Fi and
CD/MP3/VCD/DVD player. Without complicated wiring and installation with your
Audio/Video equipments and rear channel amplifier, the system enables you to
enjoy thrilling, lifelike sound in minutes.
FEATURES
1. 900 MHz RF technology panel-like speaker system
2. Phase Lock Loop (PLL) technology on transmitter
3. RF technology lets you roam freely throughout your house
4. Operating distance up to 50 Meters
5. No line of sight limitation
6. Virtually interference free stereo quality
7. Auto tuning function
8. Work as lamp by Light ON/OFF control
9. Weather resistance
P.1
Page 3
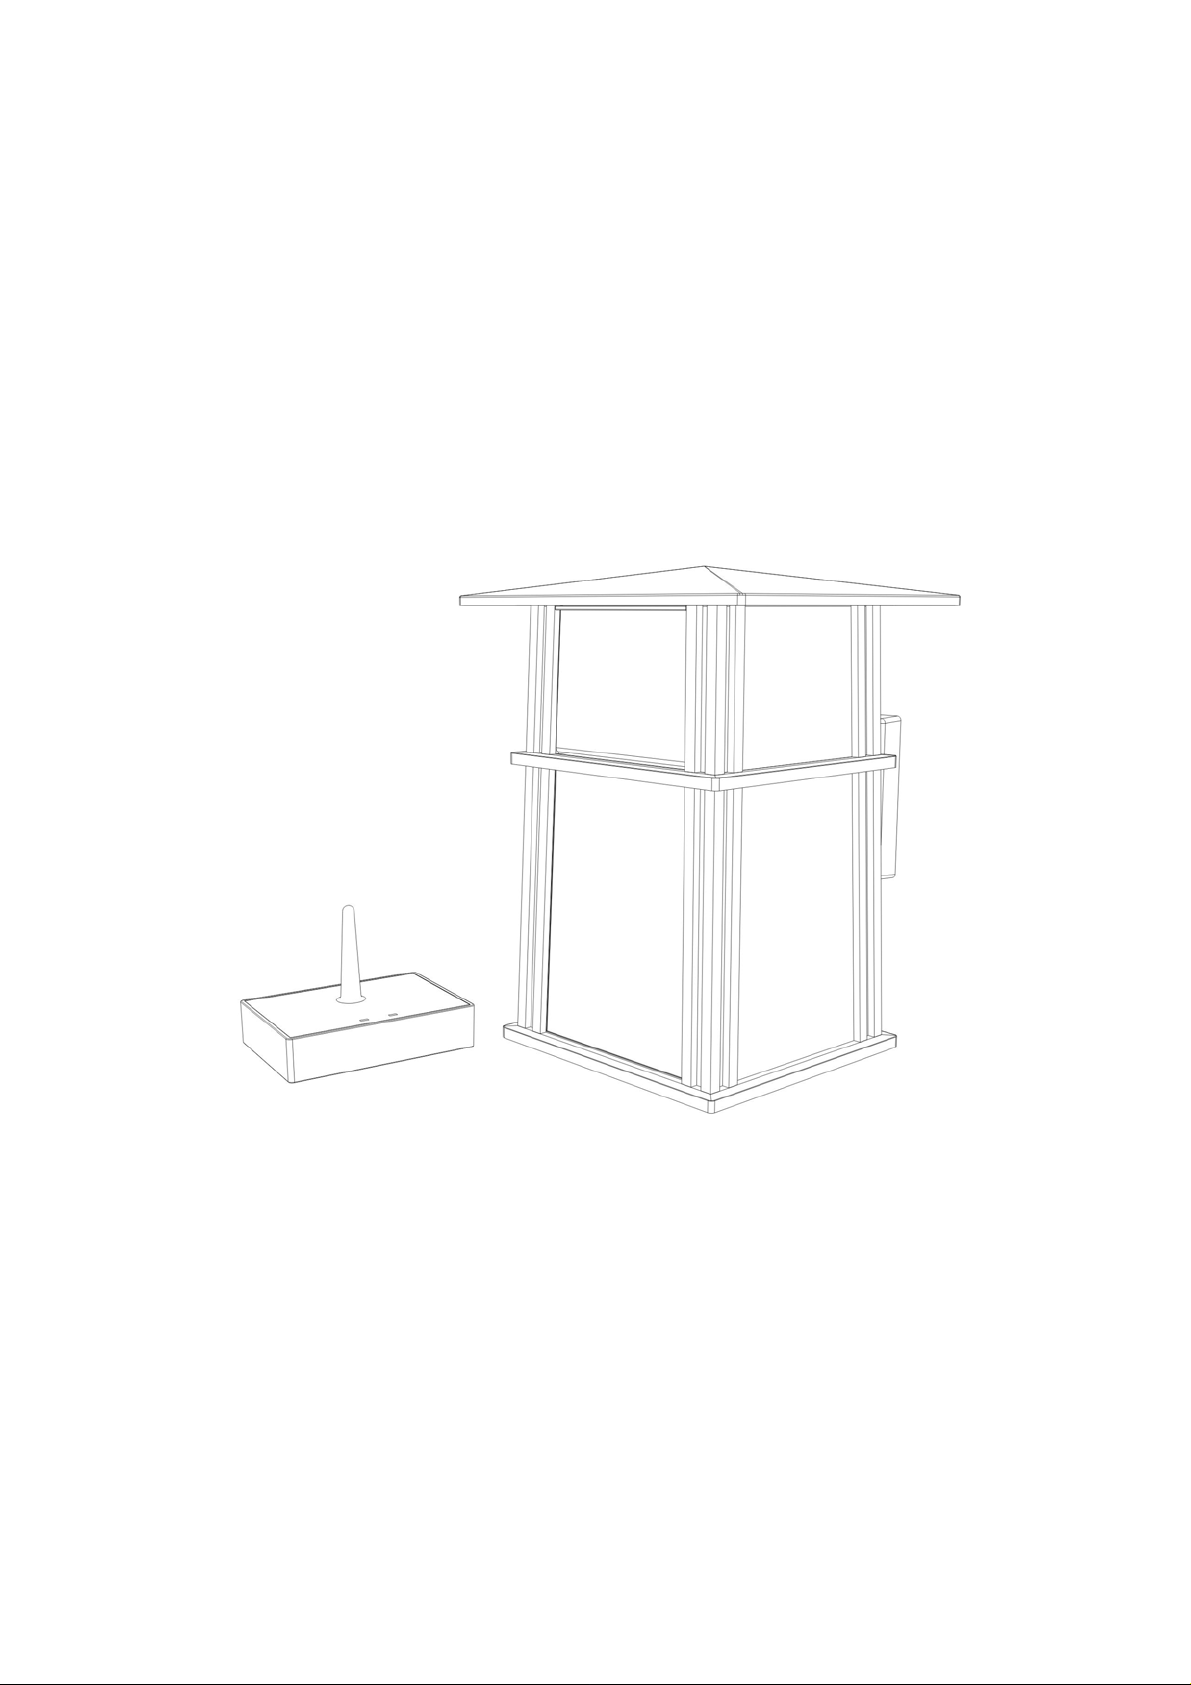
COMPONENT IDENTIFICATION
TRANSMITTER
SPEAKER RECEIVERS
P.2
Page 4
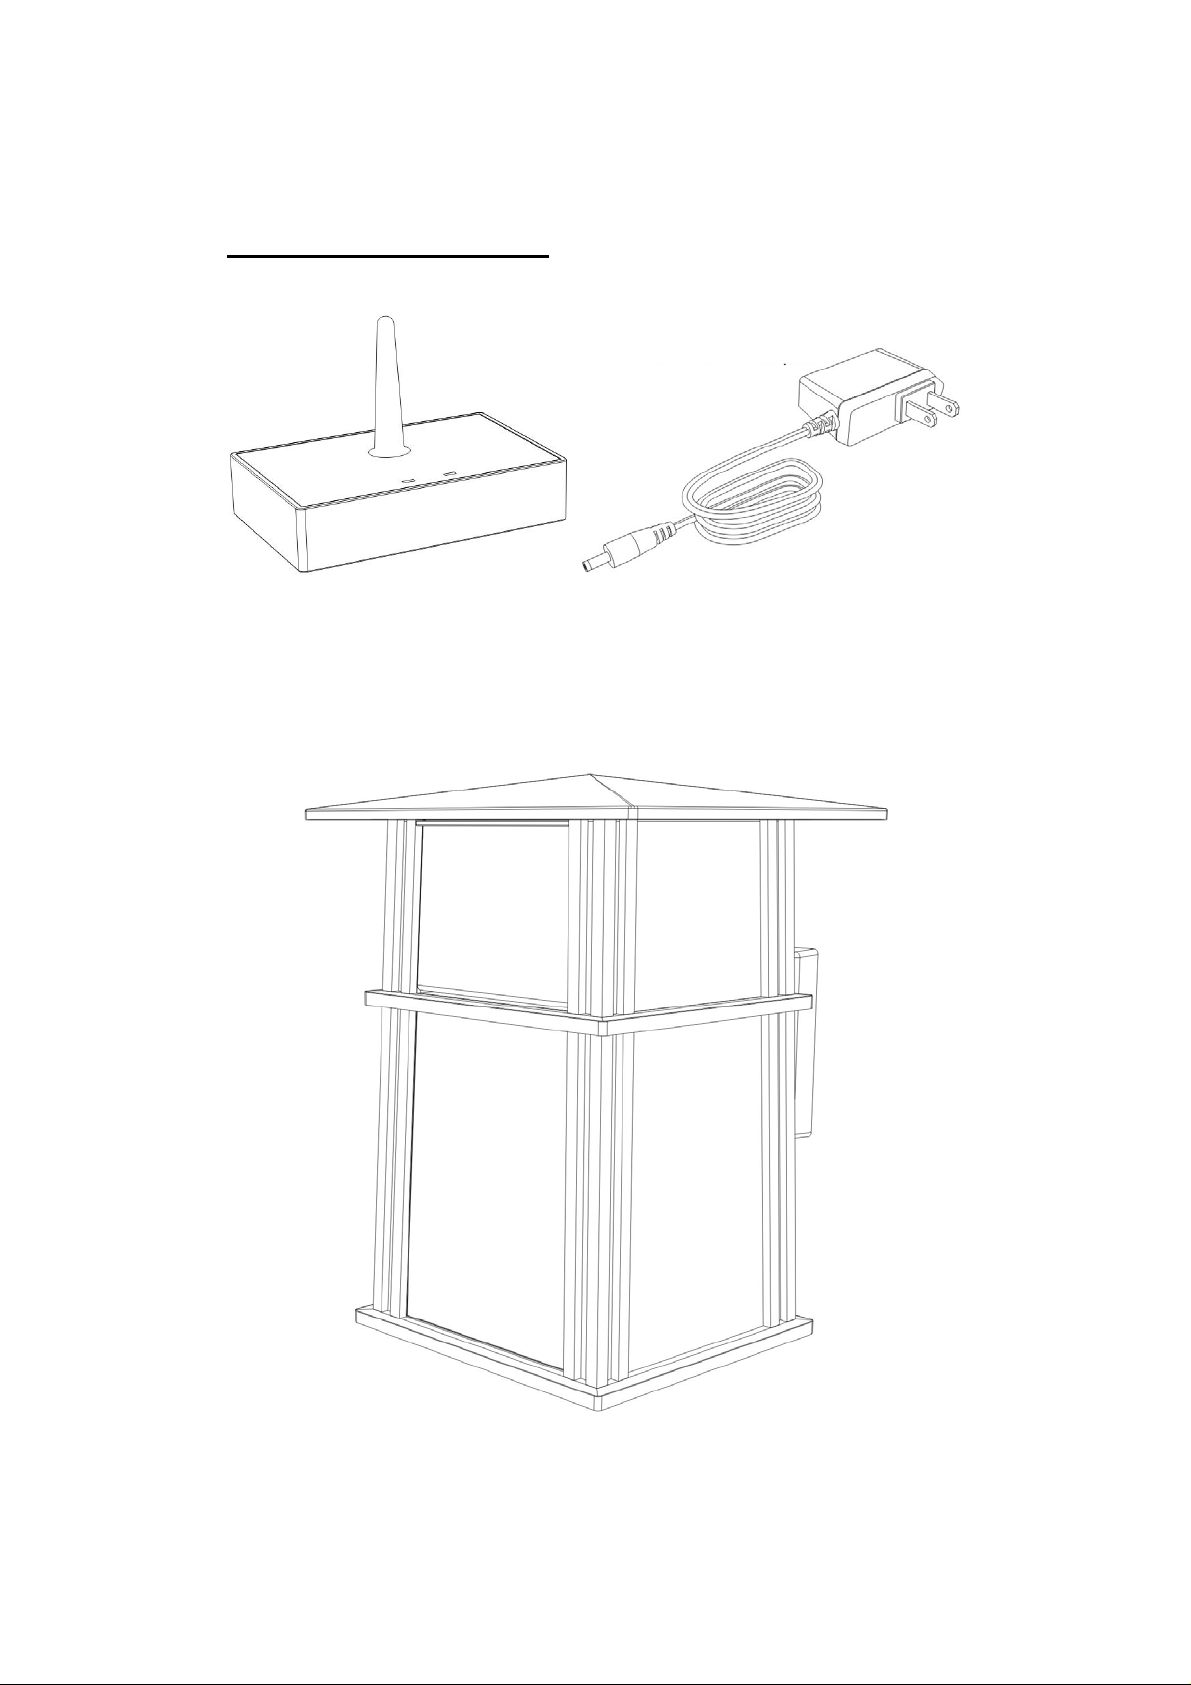
INSTALLATION
TRANSMITTER
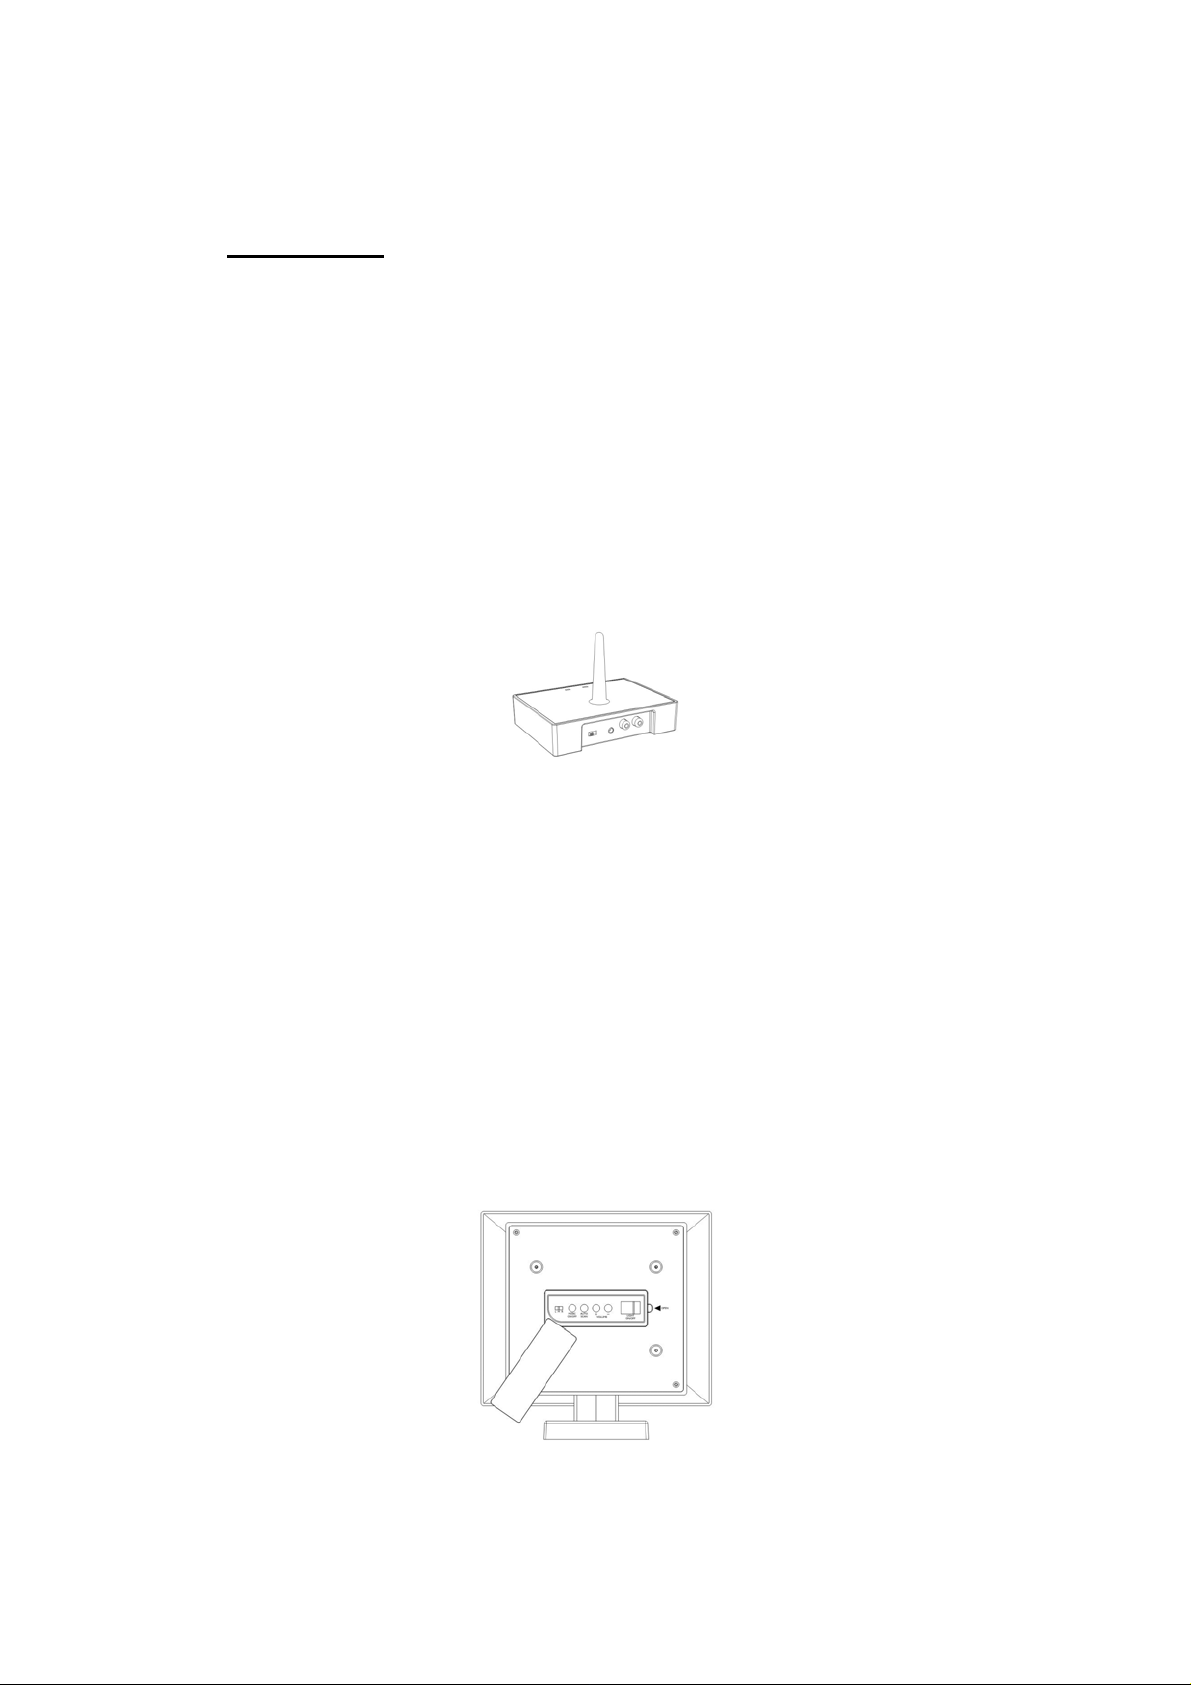
1. Insert the antenna tube into the antenna wire.
2. Connect the supplied AC/DC power adaptor to an electrical wall outlet.
3. Plug the AC/DC power adaptor in the DC jack located on the rear of the
transmitter.
4. When the AC adaptor is plugged in, the blue POWER LED illuminates. If the
blue POWER LED does not illuminate, make sure the adaptor is plugged in.
5. The rear of the transmitter has one RCA input that can be connected to audio
output jack of TV, Monitor, VCR, Radio recorder, CD/MP3/VCD/DVD players or
to headphone/earphone jack with the connector provided.
When the transmitter received an audio signal, the g reen SIGNAL LED and the blue
POWER LED will illuminate together. If the green SIGNAL LED does not illuminate,
ensure the audio source is turned on.
SPEAKER RECEIVERS
1. Once speaker unit has been fastened to the wall, turn ON the power switch
(in-house power button).
2. Remove the rubber cover of the function key that located at the bottom of
speaker. Switch on the lamp by select the Light ON/OFF to ON position.
Please ensure the in-house power switch need to be switch on before the lamp
speaker can be operated. Switch off the light by set the LIGHT button to OFF,
and the light bulb will be off.
P.1
Page 5

3. Press MUSIC button and turn the speakers ON. The POWER LED will light up
in blue. Switch off the speakers by pressing the MUSIC button on the speaker,
and the LED will be off.
OPERATION
1. Turn on the audio source (TV or audio component) to which the transmitter is
connected with. The green LED on the transmitter will light up.
2. Select the channel (1/2/3) of the transmitter for best performance in your
location.
3. Switch on the in-house power switch, and then press the “MUSIC” button on the
speaker to turn on the speaker . Press the “AUTO TUNE” button to get the best
tuning reception in the speakers. When the button is pressed, frequency
tuning starts automatically and it stops when a signal is detected.
4. Volume can be adjusted up by
pressing “+” button or down by
pressing the button “-“ to the
desired listening level.
5. Select the “LIGHT” switch to ON or
OFF the lighting.
NOTE :
a). Keep a distance of the speaker up to 7 meters apart from the transmitter,
and then press “AUTO TUNE” button for the best reception.
b) Whenever you find frequency jam, move your channel switch from one
channel to the other channel (there are three channels for selection) on the
transmitter, and then press the “AUTO TUNE” button again.
6. Should there is any disruption (signal cuts off or carries distortion), press the
speaker’s “AUTO TUNE” button to maximize the best reception.
You can switch to another transmission by selecting another channel (1 , 2 or
6.
7.
3) of the transmitter, then press “AUTO TUNE” button of the speaker for best
reception.
When transmitting / receiving over long distances, the signal from the system
P.2
Page 6

will become weaker.
7. Switching Off
a) For protection of the transmitter and power saving, the transmitter will cut
off automatically if there is no/weak operation input signal from audio
source for 4 minutes.
In other words, if the signal comes back, the transmitter will work again
automatically.
b) Press the “MUSIC” button to turn off the speaker and the LED light goes
off.
P.1
Page 7

TROUBLE SHOOTING
NO SOUND
- Ensure the in-house power switch ON.
- Ensure the AC/DC adaptor is fully inserted into the AC outlet and the
power connection input on the transmitter.
- Ensure the TV or audio component is ON.
- Press the MUSIC button Ensure to turn on the speaker
- The connected audio / video equipment is not playing. Start playing the
equipment.
- The volume of speaker is too low, adjust the volume to an appropriate
level.
NO LIGHT
- Ensure the in-house power switch ON.
- Ensure the LIGHT switch is set to ON.
- Light bulb is malfunction. Replace with a new the light bulb
DISTORTED
- Press the “AUTO TUNE” button on the speakers until matching the
frequency of the transmitter.
- Change the position of the channel selector on the transmitter. You
must then press the “AUTO TUNE” button on the speakers.
- Battery capacity is too low. Replace with the new battery.
- Ensure the volume level of speakers is adjusted properly .
- The speaker is too far away from the transmitter, move it closer.
- The input level of the audio signal is too low. Turn up the volume of the
audio source equipment.
P.2
Page 8

TECHNICAL SPECIFICATIONS
Transmission Mode : UHF
Carrier Frequency : 900 MHz
Operation Voltage : Transmitter, DC 12V 200mA
Speaker, AC 100~240V.
Frequency Response : 40Hz – 12KHz
Distortion : 1%
S/N Ratio : 65dB (typical)
Channel Separation : 50dB (typical)
Operation Distance : Up to 50 meters (open area)
Output Power : 2 x 5Watts (RMS)
WARNING : MODIFICATION OF THIS DEVICE TO RECEIVE CELLULAR
RADIOTELEPHONE SERVICE SIGNALS IS PROHIBITED
UNDER FCC
RULES AND FEDERAL LAW.
Changes or modifications to this unit not expressly approved by the
party responsible for compliance could void the user’s authority to
operate the equipment. Operation is subject to the following two
conditions: (1) this device may not cause interference, and (2) this
device must accept any interference, including interference that
may cause undesired operation of the device.
This device complies with RSS-210 of Industry and Science
Canada. Operation is subject to the following two conditions : (1)
this device may not cause interference, and (2) this device must
accept any interference that may cause undesired operation of the
device.
"This Class B digital apparatus complies with Canadian ICES-003."
This device must be used with the AC/DC adaptor supplied in the
package.
P.3
Page 9

This equipment has been tested and found to comply
with the limits for a Class B digital device, pursuant to
Part 15 of the FCC Rules. These limits are designed to
provide reasonable protection against harmful
interference in a residential installation. This
equipment generates, uses and can radiate radio
frequency energy and, if not installed and used in
accordance with the instructions, may cause harmful
interference to radio communications. However, there
is no guarantee that interference will not occur in a
particular installation. If this equipment does cause
harmful interference to radio or television reception,
which can be determined by turning the equipment off
and on, the user is encouraged to try to correct the
interference by one of the following measures:
Reorient or relocate the receiving antenna.
Increase the separation between the equipment
and receiver.
Connect the equipment into an outlet on a circuit
different from that to which the receiver is
connected.
Consult the dealer or an experienced radio/TV
technician for help.
P.4
Page 10

CAUTION
1) Read these instructions.
2) Keep these instructions.
3) Heed all warnings.
4) Follow all instructions.
5) Do not use this apparatus near water.
6) Clean only with dry cloth.
7) Do not block and ventilation openings. Install in accordance with the
manufacturer’s instructions.
8) Do not install near any heat sources such as radiators, heat registers, stoves,
or other apparatus (including amplifiers) that produce heat.
9) Do not defeat the safety purpose of the polarized or grounding-type plug. A
polarized plug has two blades with one wider than the other. A grounding
type plug has two blades and a third grounding prong. The wide blade or the
third prong are provided for your safety. If the provided plug does not fit into
your outlet, consult an electrician for replacement of the obsolete outlet.
10) Protect the power cord from being walked on or pinched particularly at plug,
convenience receptacles, and the point where they exit from the apparatus.
11) Only use attachment/accessories specified by the manufacturer.
12) Use only with cart, stand, tripod, bracket, or table specified by the
manufacturer, or sold with the apparatus. When a cart is used, use caution
when moving the cart/apparatus combination to avoid injury from tip-over.
13) Unplug this apparatus during lighting storms or when unu sed for long period of
time.
14) Refer all serving to qualified service personnel, Serving is required when the
apparatus has been damaged in any way, such as power-supply cord or plug
is damaged, liquid has been spilled or objects have been fallen into the
apparatus, the apparatus has been exposed to rain or moisture, does not
operate normally, or has been dropped.
P.5
Page 11

WARNING
To Prevent injury, this apparatus must be securely attached to the
floor/wall in accordance with the installation instructions.
5.4.3 DU When apparatus operation and installation instructions contain
instructions for use by service personnel, such instructions shall be separate in
format from other instructions and preceded by the word “CAUTION” and the
following or the equivalent. “These serving instructions are for use by qualified
service personnel only. To reduce the risk of electric shock do not perform any
serving other than that contained in the operating instructions unless you are
qualified to do so.”
P.6
 Loading...