

Page 1
DHP390
2.4GHz Digital Wireless Headphone
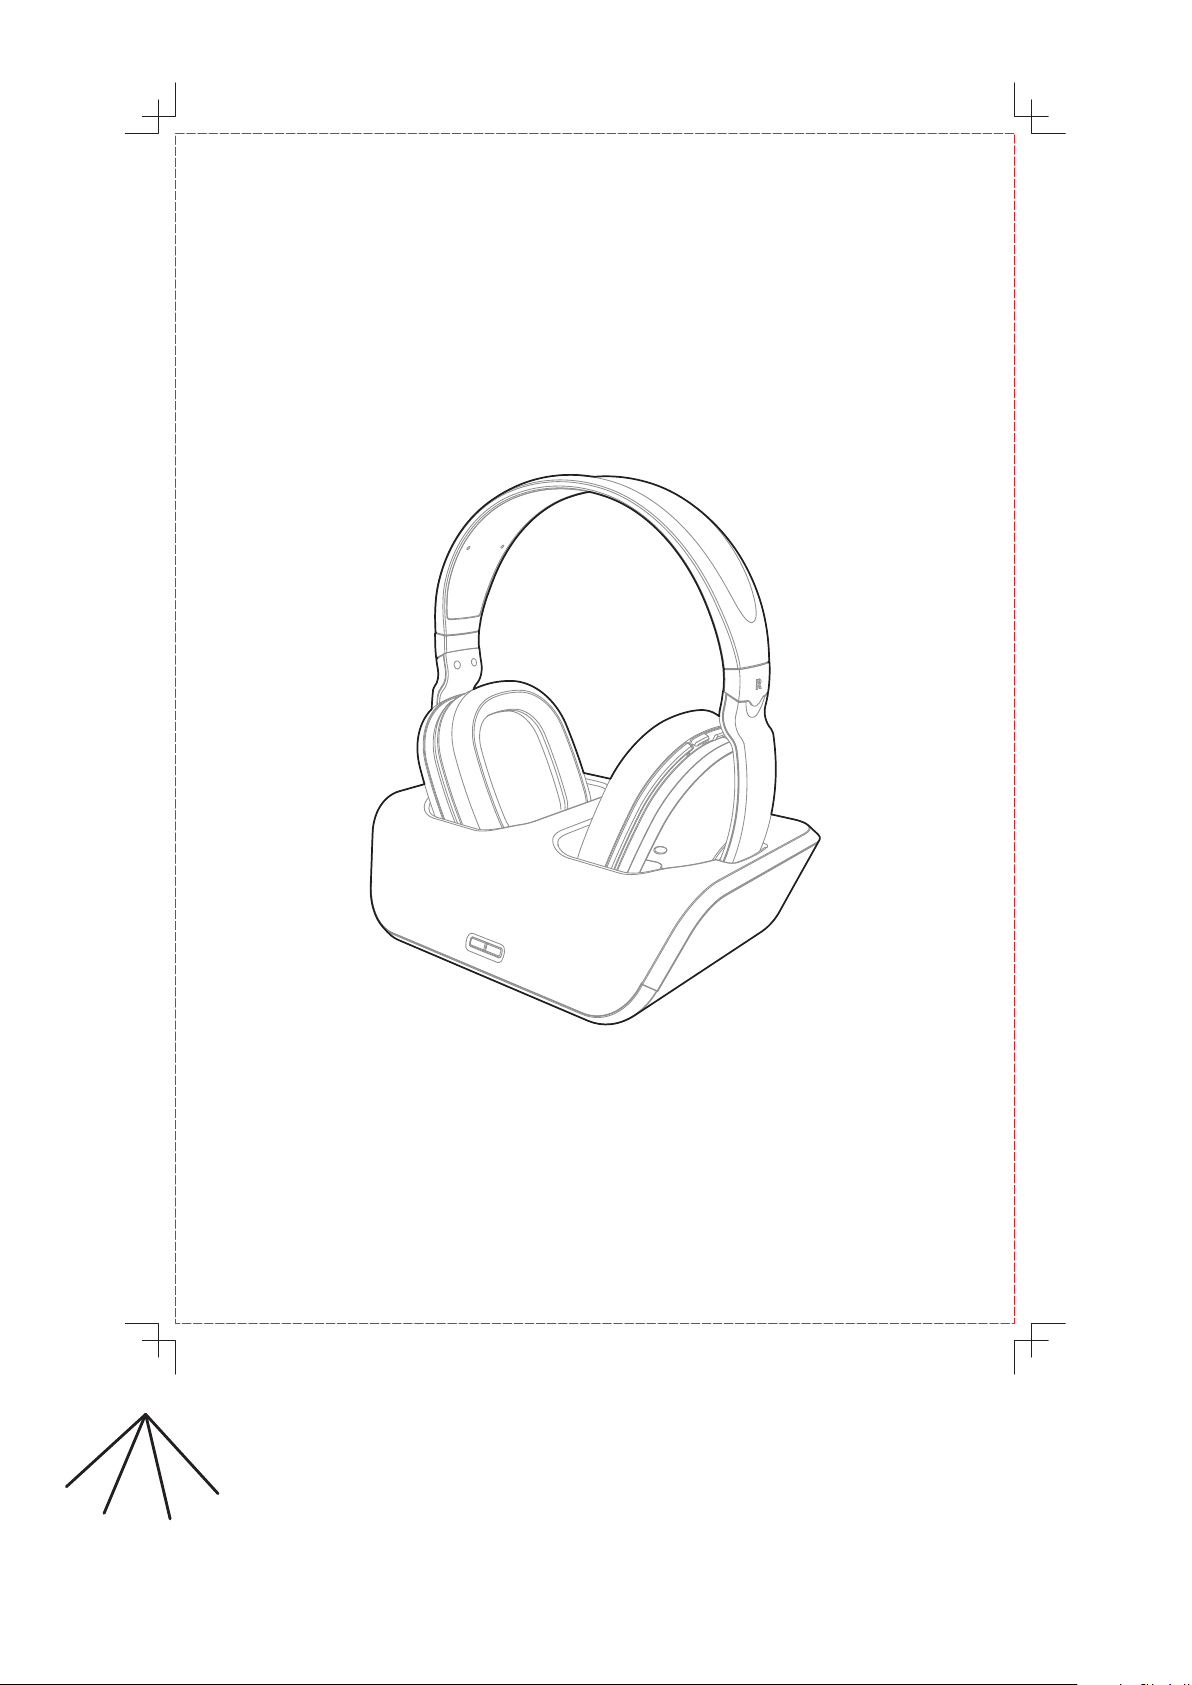
Cover
Page
User's Manual
Please read before using this equipment.
Each Page in Size 148 x 210 mm
1
2
3
4
7
6
5
Page 2

INTRODUCTION
This 2.4GHz Digital Wireless Headphone uses latest digital
wireless technology that enables you to enjoy music and TV
sound anywhere inside your home. Simply connect the
transmitter to a desired audio source: DVD player, CD
player, TV set, VCR or Hi-Fi system. Without complicated
wiring and installation with your Audio/Video equipments
and rear channel amplifier, the system enables you to enjoy
thrilling, lifelike sound in minutes.
FEATURES
2.4GHz Digital UHF Technology.
1.
26-Channel Auto Frequency Searching System.
2.
Smart Volume Memory Built-in.
3.
Electronic Volume Control.
4.
Low Power Indicator Alert.
5.
High Power 3 x NiMh Batteries
6.
Auto Pin Charging Mechanism.
7.
Auto On/Off.
8.
Auto Shut Off.
9.
Muting.
10.
Speed charging mechanism.
11.
Duplex Transmission
12.
1
Each Page in Size 148 x 210 mm
Page 3
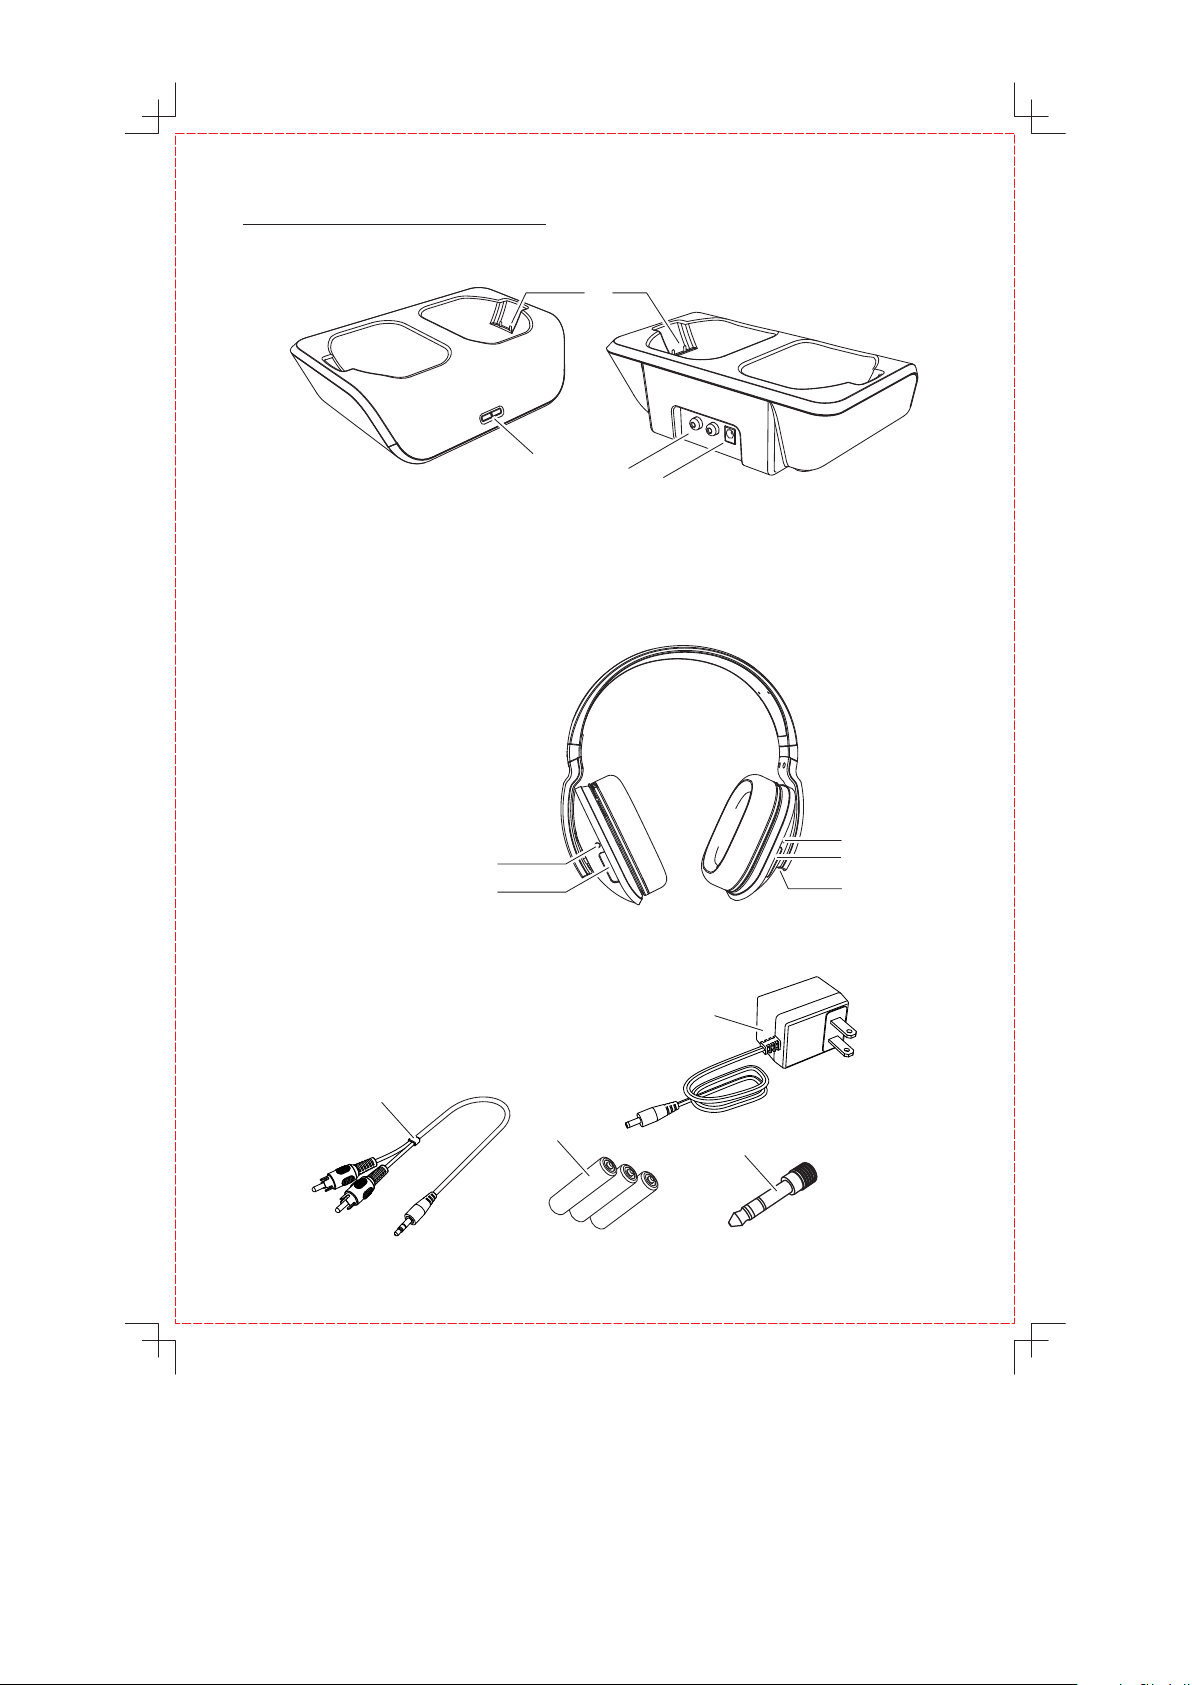
COMPONENT PART LIST
A) Transmitter
2
1
1. Power & C harging in dic ator
2. Charg ing pins
3. Audio I N socket
4. DC IN soc ket
B) Headphone Receiver
5. Volume Up & D own Control
6. Chargi ng LED indicato r
7. Chargi ng contacts
8. ON/OFF C ontrol
9. Power LE D indicator
C) Accessories
10. RC A cable
11. NiMh batt eries for He adp hone(3 pie ces)
12. 3. 5mm to 6.3mm a dap tor plug
13. AC /DC adapto r ( 1x 9V 4 00mA for tran smitter)
LEFT RIGHT
6
5
3
4
9
8
7
13
10
11
12
2
Each Page in Size 148 x 210 mm
Page 4

INSTALLATION
TRANS MITTER
1. Co nnect the su ppl ied AC/DC power ada ptor to an ele ctr ical wall ou tlet.
2. Pl ug the AC/DC po wer a daptor in th e DC jack located o n the rear of th e tra nsmitter.
3. Th e rear o f t he trans mitter h as one audi o cord t hat can be connecte d to aud io output
jack of TV, VCR, Hi-F i, CD/M P3/ VCD/DVD play ers or to hea dphone/e arphone jack w ith
the con nector provid ed.
Plug the adapto r in the AC s ource and connect the audio plug to the audio source. The
trans mitter wil l automati cally swit ch on and t he blue L ED will s tar t flash ing w hen it receives
an audi o signal.
3
2
1
HEADP HONE RECEIVER
1. To insta ll o r re place t he r echargea ble
batte ries, c arefully rem ove the earpad
m o u n t ing f rom t he l e f t a n d right
earph one cabine ts.
2. In sert 2 pcs of A AA size rechargeab le
batte ries (supplie d in the packag e) in to
the right earpho ne's ba ttery compar tme nt
and 1pc of AAA size r ech argeable bat tery
(supp lied in th e p ackage) into the l eft
earph one's ba ttery co mpartmen t. Make
sure the batt eries are placed at the
right p olarity.
3. Sn ap t he e arp ad m ounting back to the
ea rp hone c ab inets af ter in se rted t he
batte ries.
Each Page in Size 148 x 210 mm
LEFT RIGHT
3
Page 5

OPERATION
TRANS MITTER
Tur n on the audi o source (TV or audio compone nt) to whi ch the t ransmitt er is connected
with. The Ch arg ing / Power LE D on th e transmit ter will start fl ashing in bl ue wh en it
recei ves the audio sig nal.
CHARG ING / POWER LED
HEADP HONE RECEIVER
1. Turn on t he head phone by pre ssing t he Power but ton. The POWER LED (Blue ) will li ght
up, the green LED will be f lashing until signal li nk bet wee n t ransmitter and recei ver is
estab lished.
LEFT RIGHT
POWER LED
SIGNAL LED
(Green)
2. Gentl y place the h eadphone on your h ead and adjust for comfort. To obtai n the desired
sound level, you can adj ust th e vol ume control on the hea dphone. After you have
adjus ted the volume in the firs t t ime, the smart bu ilt -in volume mem ory will memorize
your la test volume lev el automat ica lly.
3. If interferenc e or po or sig nal recep tion o ccu rs, th e head pho ne wil l perform the mu ting
funct ion automatic ally, and it will searc h the b est channe l out o f the 26 chann els
avail able. The green LED wi ll be flashi ng wh en it is searc hing for the best c hannel.
(Blue)
4
Each Page in Size 148 x 210 mm
Page 6

(Con' d)
4. Charg ing the batteri es
a) Turn OF F the headph one f irst.
b) Place the hea dphone on the transm itt er's ch arging cradle. Th e charg ing process
begin s aut omatically, and t he ch arging LED will light up in re d whe n the chargi ng
conta cts of tran smitter and headpho ne are made successful ly. When the ch arging
proce ss is completed , the chargi ng LE D will light u p in green.
c) With the smart speedy ch arging fu nction, the headphon e co uld be fully charg ed
withi n 5 hou rs. If t he headpho ne is n ot in u se, plea se pl ace i t bac k to th e
trans mitter's char ging cradl e.
CHARGING LED
(Red / Green)
IMPORTANT
1. Switchi ng Off
a) For pr otection of the transmitter and po wer savin g, the tra nsmitter will s wit ches o ff
autom atically if the re is n o audio source signa l for 3 m inutes. If the au dio source
signa l retu rns , t he transm itter will a uto maticall y swit che s b ack on. Th en, po wer on
the hea dphone aga in.
b) Th e headp hone wi ll switch off autom ati cally i f there is no s ignal f rom the t ransmitt er
for 2 min utes.
2. Make sure t he headpho ne is turned off when ch arging is in p roc ess.
3. Only use the i ncluded rechar geable AAA batt eries. When the he adphone is not in use ,
turn th e headphone OFF.
4. To ensu re a lo ng servic e life, fu lly ch arg e the b atteries before us ing th e headpho ne for
the fi rst ti me. The in iti al cha rge takes 5 hour s to co mplete. E nsure the charg ing socke t
locat ed on the right earphon e c onnects securely with the charge p ron gs on the
trans mitter cradle .
This de vice must be used w ith the AC /DC a daptor sup plied in the pack age.
5
Each Page in Size 148 x 210 mm
Page 7

TROUBLE SHOOTING
No Soun d
- Ensur e th e AC/ DC a daptor is fully inse rted into the AC outlet and the power con nection
input o n the transmitt er.
- Ensur e the headphone i s switch ON.
- Headp hone batte ry ch arge level m ay be t oo low, recha rge the batt eri es fully.
- Ensur e the TV or th e connecte d audio devi ce is s witched ON .
- The vol ume of headphon e may be too low, a djust the volum e to a moderat e lev el.
Disto rtion
- Ensur e the volume leve l of headpho ne is set to an appro ximate lev el.
- The hea dphone is too far f rom the tran smi tter, move it c loser.
- The aud io signal in put l evel is too lo w. Increase the vo lume of the au dio s ource.
TECHNICAL SPECIFICATIONS
Tra nsmissio n Mod e
Carri er Frequency
Opera tion Voltage
Frequ ency Response
Disto rtion
S/N Rat io
Opera tion Distance
:
UHF Ste reo
:
2.4GH z Digital
:
Tra nsmitter, D C 9V 40 0mA
Headp hone, 3 x AAA size Recha rgeable NiMh
batte ries (include d)
30Hz 20 KHz
:
0.5%
:
80dB
:
Up to 150 f eet
:
6
Each Page in Size 148 x 210 mm
Page 8

FEDERAL COMMUNICATIONS COMMISSION (FCC) STATEMENT
This equipment h as been tested and found to comply with the lim its for a
class B digital device, pu rsuant to part 15 of t he FCC Rules. These limits
are des ign e d t o p rovi de reas onab le p rot ecti on a gai nst har m ful
interference in a residential installation.
This equipmen t generates, us es and can radiat e radio frequen cy energy
and, if not i nstalled and used in accordance with the instructions, may
cause harmful interfere nce to radio communi cations. However, there is no
guarantee that interferen ce will not occur i n a p articular install ation. If this
eq ui pm en t do es cause ha rm fu l interf er en ce to r ad io or t el ev is io n
reception, which can be determined by t urning the equip ment off and on,
the user is en couraged to t ry to correct the interference by one or more of
the following m easures:
- Re orient or relocate the recei ving antenna.
- In crease the separation betw een the equipment and receiv er.
- Co nnect the equipment into an outlet on a circuit different from that to
which the receiver is connec ted.
- Co nsult the dealer or an experie nced radio/TV technician f or help.
Changes or modifi cations not expre ssly approved by the party responsible
for compliance could void th e user's authority to operat e the equipment.
This device c omplies with Part 15 of the FCC Rules. O peration is s ubject
to the following two conditi ons:
(1)This devic e may not cause harmful interf erence.
(2)This d evi ce must acc ept an y interf ere nce re cei ved, inc lud ing
interference that may caus e undesired operation.
FCC RF RADIATION EXPOSURE STATEM ENT:
This equi pment com plies wit h FCC R F radiati on exposure limits set forth
for a n uncontrolled environment. T his device and its antenna mus t not be
co-located or operating in conjun ction with any other antenna or
transmitter.
IMPORTAN T NOTE:
To comply with FCC RF exposure compliance requirement, this grant is
applicable to only mobile configurations. The antenna used for this
transmitter must
be installed to provide a separation distance of at lease 20cm from all persons and
must not be co-located or operating in conjunction with any other antenna or transmitter.
Changes or modifications not expressly approved by the party responsible for
compliance could void the user's authority to operate the equipment.
7
Each Page in Size 148 x 210 mm
 Loading...