

unGer nLite Hydro Power Quick Start Manual
Unger Enterprises, LLC
425 Asylum Street • Bridgeport, CT 06610
Tel.: 800 431 2324 • Fax: 800 367 1988
unger@ungerglobal.com
ungerglobal.com
Literature # 18483 Updated 5/15
Quick-Start Guide
ungerglobal.com
At Unger, we aim to stand apart
from the rest thanks to our special
“Yes We Can!” service spirit. We love
what we do and as proof of that, we
promise to deliver a 100% Customer
Satisfaction Guarantee on every
product and service we offer.
ungerglobal.com ungerglobal.com
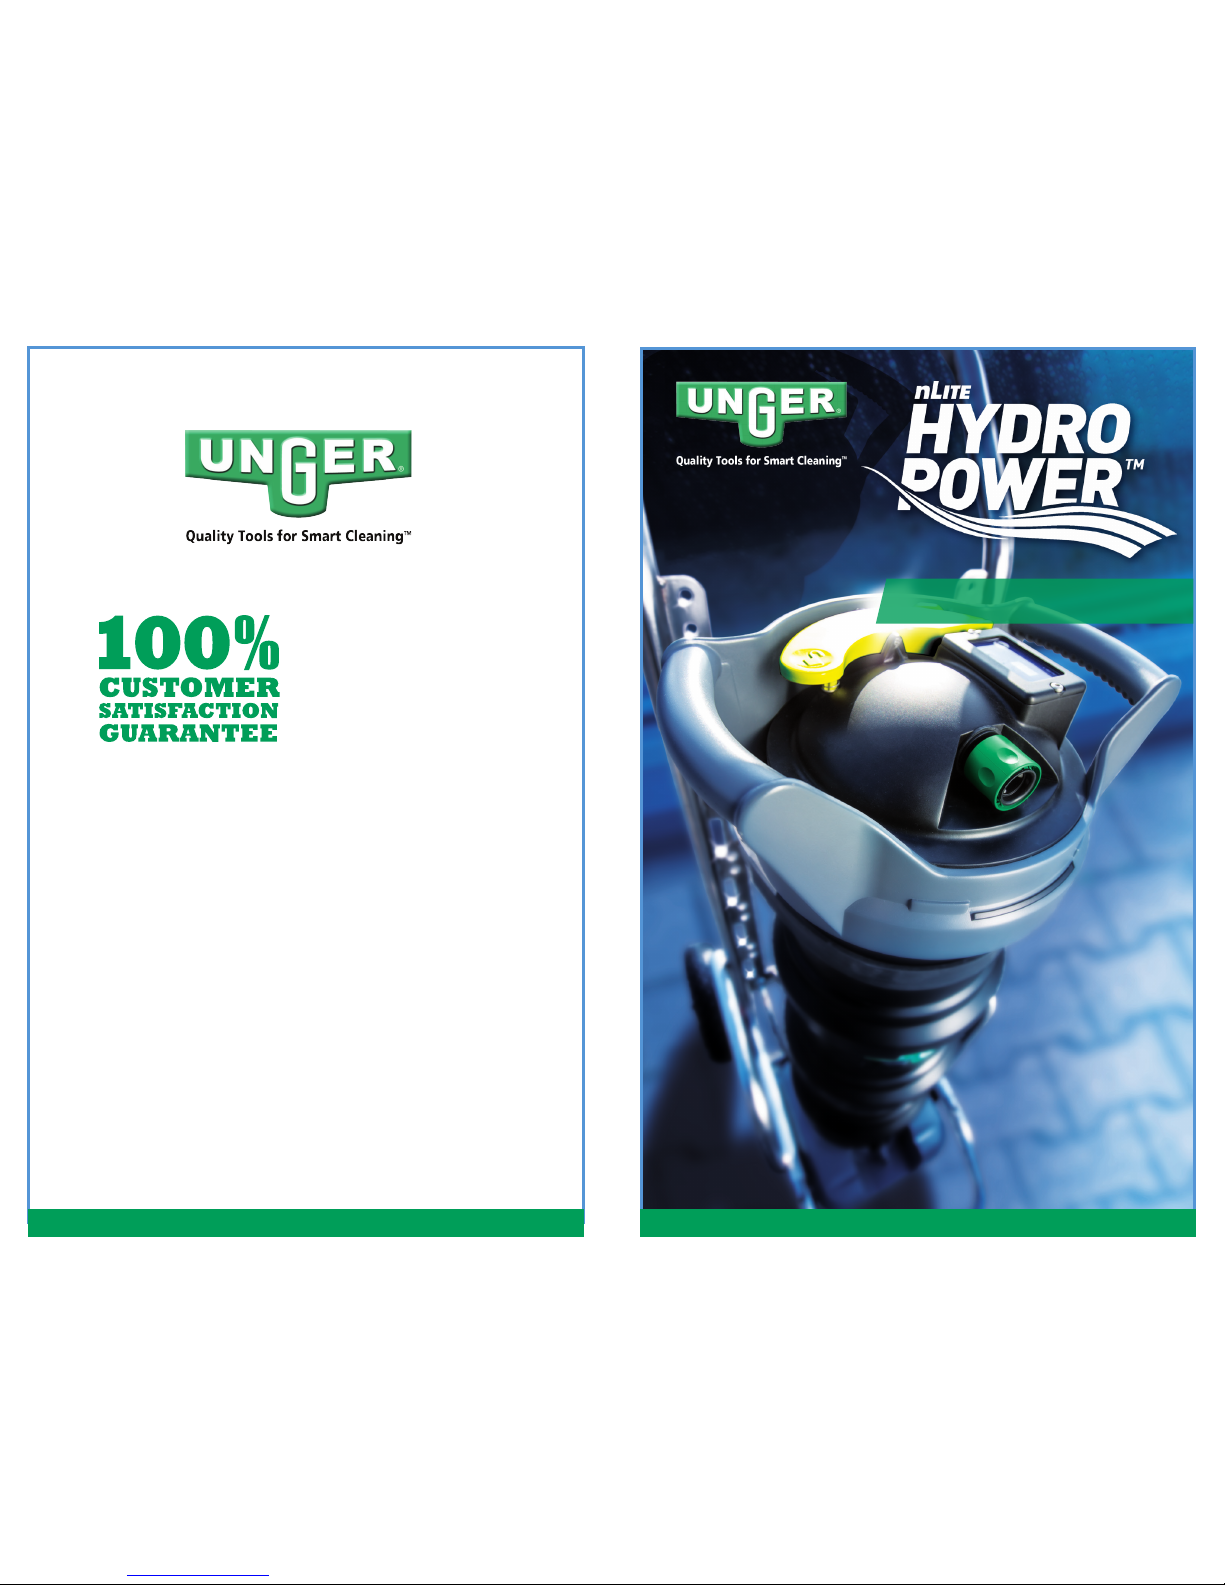
System Overview
The nLite HydroPowerTM –
The Future of DI Systems... Today
System Set Up
LOCATE JOBSITE WATER SUPPLY
Unger recommends testing the on-site water
supply for TDS (total dissolved solids) prior to working.
Higher TDS levels reduce the DI system’s capacity.
• Inspect system – ensure DI resin bag(s) are installed.
• Set up system in upright position.
• Choose a stable on-site location.
CONNECT WATERFED WASH POLE TUBING
• Install Quick Connect adapter to waterfed wash pole hose.
• Ensure all on/off valves are in “OPEN” position when lling system.
CONNECT WATER SUPPLY (GARDEN HOSE)
TO INLET CONNECTION
• Thread On/Off Valve to garden hose prior to connecting water supply.
• Attach On/Off Valve directly onto inlet connection at base of unit.
TURN ON FEED WATER SUPPLY
• When water begins to ow out of the unit, turn on TDS meter and
inspect pure water quality. A reading of ‘0’ is best and indicates the
system is running properly. When the TDS meter reaches 10ppm or
higher the resin should be replaced.
• Adjust ow at waterfed wash pole brush head by:
- On/Off Valve
- Waterfed wash pole control (on/off) valve (if applicable).
1
2
3
4
1
Building/Facility
2
3
4
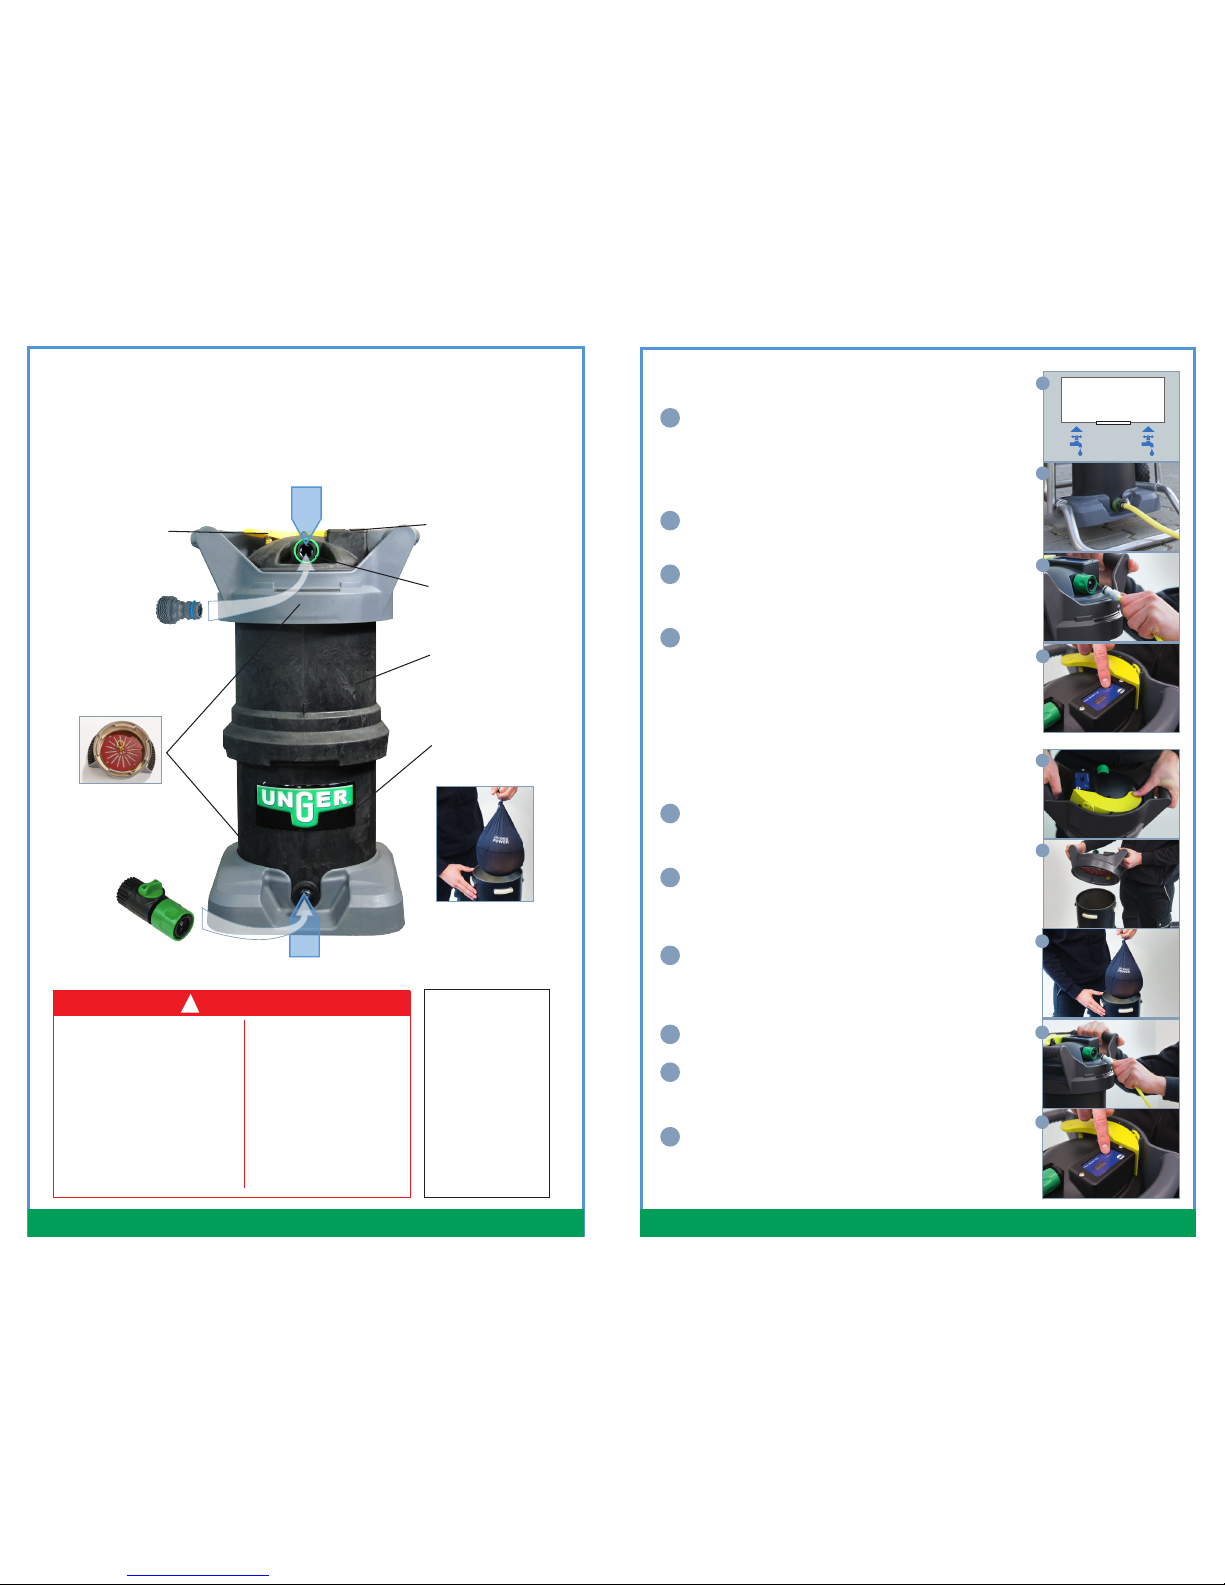
Replacing DI Resin
SHUT OFF FEED WATER SUPPLY
• Depress yellow lever on system head assembly.
• Turn On/Off Valve to “OFF” position.
• Disconnect waterfed wash pole hose.
RELEASE SYSTEM HEAD ASSEMBLY
• While continuing to depress the yellow lever, use a counterclockwise
quarter-turn to release system head assembly; remove and set aside.
• Reach into housing and remove exhausted resin
by hand; discard according to local regulations.
REPLACE RESIN
• Drop in new resin bag(s) by hand – be sure to seat bags with
zip-tie facing up. Pat down bag by hand to ensure seated properly.
• Inspect system head assembly: O-ring and FloWaterTM distribution
lter are in good condition.
RE-INSTALL DI SYSTEM HEAD ASSEMBLY
• Push down rmly, then quarter-turn clockwise.
RECONNECT WATERFED WASH POLE TUBING
• Open any valves in the output. Ensure all valves in the
output are open.
• Turn on water supply valve
TEST SYSTEM TDS
1
2
3
4
5
1
2
3
4
5
Contents under pressure. Can cause severe injury
or death from tank rupture.
When starting system:
• When starting system, water output must be
open when lling.
• Do not exceed pressure of 115 psi (8Bar).
• Check system for cracks.
• Be sure cover is in locked position.
• Keep water output open and hold yellow lever
down to remove trapped air from system.
• For use only with drinking water.
Before servicing system:
• Shut off drinking water supply and open
water output.
• Disconnect water supply and allow tank to drain.
DANGER
!
Spilled resin is a slipping hazard.
Clean up spilled resin immediately.
Resin can cause skin irritation.
Avoid skin contact.
Wash hands thoroughly after use.
Can cause eye irritation.
Avoid eye contact.
Wear safety goggles.
In case of eye contact, immediately ush
eyes thoroughly with clean water.
Consult doctor if symptoms persist.
READ MANUAL BEFORE
USING PRODUCT
STORAGE: Do not store resin
in open or unlabeled containers.
Store in a cool (15°F to 100°F),
dry place.
DISPOSAL: Dispose of in
accordance with applicable
federal, state/provincial, and
local regulations.
All HydroPower models
require the use of mixed
bed ion exchange resin
(commonly referred to as
de-ionizing resin).
This resin will require
replacement and handling.
FastLockTM Lever
Hose
Quick
Connect
FloWaterTM Unit
On/Off Valve
TDS Meter
Output Valve
Housing with
Rugged Outside
Appearance
QuickChange
TM
Resin Bag
(Packed inside unit)
Inlet Connection
Output Valve
6
 Loading...