


4
5
6
7
8
9
10
11
12
13
14
15
16
17
18
19
20
21
22
23
24
25
26
27
28
29
30
31
32
33
34
35
36
37
38
39
40
41
42
43
44
45
46
47
48
49
50
51
52
53
54
55
56
57
P h i l i p s H e a l t h c a r e 9 8 9 7 1 0 0 0 1 2 7 3
DoseAware Dose Manager
Package
INSTRUCTIONS FOR USE
Document version 1.2
English

0-2
4
5
6
7
8
9
10
11
12
13
14
15
16
17
18
19
20
21
22
23
24
25
26
27
28
29
30
31
32
33
34
35
36
37
38
39
40
41
42
43
44
45
46
47
48
49
50
51
52
53
54
55
56
57
Published by Philips Medical Systems Nederland B.V.
Philips Medical Systems Nederland B.V. reserves the right to
make changes to both this document and to the product it
describes. Product specifications are subject to change without
notice. Nothing contained within this document is intended as
any offer, warranty, promise or contractual condition, and must
not be taken as such.
© Koninklijke Philips Electronics N.V. 2009
All Rights are reserved. Reproduction in whole or in part in any
form or by any means, electrical, mechanical or otherwise is
prohibited without the written consent of the copyright holder.
Issue Number 9897 100 01273
Philips Medical Systems Nederland B.V.
Veenpluis 4-6
5684 PC Best
The Netherlands
Unauthorized copying of this publication may not only infringe
copyright but also reduce the ability of Philips Medical Systems
to provide accurate and up-to-date information to users.
Non-Philips product names may be trademarks of their
respective owners.
Published in The Netherlands.
P h i l i p s H e a l t h c a r e 9 8 9 7 1 0 0 0 1 2 7 3 0 9 0 0 a 4 4 7 8 0 0 4 5 a 3 b
DoseAware Dose Manager Package Document version 1.2

4
5
6
7
8
9
10
11
12
13
14
15
16
17
18
19
20
21
22
23
24
25
26
27
28
29
30
31
32
33
34
35
36
37
38
39
40
41
42
43
44
45
46
47
48
49
50
51
52
53
54
55
56
57
P h i l i p s H e a l t h c a r e 9 8 9 7 1 0 0 0 1 2 7 3
DoseAware Dose Manager Package Document version 1.2
Contents
Introduction..............................................................................................1 1-1
1.1 About the DoseAware System.................................................... 1-1
1.2 About these Instructions for Use................................................ 1-2
1.3 Intended use of the DoseAware System...................................... 1-3
1.4 Compatibility............................................................................ 1-4
1.5 Compliance............................................................................... 1-5
1.6 Training.................................................................................... 1-5
1.7 System requirements.................................................................. 1-5
1.8 Other user manuals.................................................................... 1-5
Safety.........................................................................................................2 2-1
2.1 Important safety directions........................................................ 2-1
2.2 Electrical safety.......................................................................... 2-2
2.3 Mechanical safety....................................................................... 2-3
2.4 Explosion safety......................................................................... 2-3
2.5 Fire safety.................................................................................. 2-3
2.6 Electrostatic discharge (ESD)..................................................... 2-4
2.7 Electromagnetic Compatibility (EMC)...................................... 2-5
2.7.1 Mobile phones and similar RF equipment ................ 2-6
2.8 Modality specific safety.............................................................. 2-7
2.9 Network safety, security, and privacy......................................... 2-8
2.10 Toxic or hazardous substances and elements.............................. 2-9
2.11 Equipment label overview.......................................................... 2-10
Contents
0-3

4
5
6
7
8
9
10
11
12
13
14
15
16
17
18
19
20
21
22
23
24
25
26
27
28
29
30
31
32
33
34
35
36
37
38
39
40
41
42
43
44
45
46
47
48
49
50
51
52
53
54
55
56
57
Contents
0-4
Contents
Get to know Dose Manager .................................................................3 3-1
3.1 Introduction to Dose Manager.................................................. 3-1
3.2 Application menu overview........................................................ 3-3
3.3 Home toolbar overview.............................................................. 3-4
3.3.1 PDMs.......................................................................... 3-4
3.3.2 Reports........................................................................ 3-10
3.3.3 Base Stations................................................................ 3-10
3.4 Dose Navigation toolbar overview ........................... 3-11
3.5 Reports Preview toolbar overview ............................ 3-13
3.6 All PDMs window overview ..................................................... 3-15
3.7 Details tab overview................................................................... 3-16
3.7.1 PDM details................................................................. 3-17
3.7.2 Group details............................................................... 3-17
3.7.3 Report details............................................................... 3-18
3.8 Dose graph tab overview............................................................ 3-19
3.8.1 Graph legend............................................................... 3-20
3.8.2 Selections in a dose graph............................................. 3-21
3.8.3 Events in a dose graph.................................................. 3-22
3.9 Dose table tab overview............................................................. 3-22
Use Dose Manager...................................................................................4 4-1
4.1 Get started with Dose Manager................................................. 4-1
4.1.1 Change PDM information and settings....................... 4-1
4.1.2 Collect data from PDM............................................... 4-4
4.1.3 Collect data from Base Station..................................... 4-5
4.1.4 Collect data from USB................................................. 4-6
4.1.5 Show and manage groups of PDMs............................. 4-7
4.1.6 Work with dose sessions............................................... 4-7
4.1.7 Reset dose history......................................................... 4-8
4.1.8 Save data...................................................................... 4-8
DoseAware Dose Manager Package Document version 1.2
P h i l i p s H e a l t h c a r e 9 8 9 7 1 0 0 0 1 2 7 3 0 9 0 0 a 4 4 7 8 0 0 4 5 a 3 b

4
5
6
7
8
9
10
11
12
13
14
15
16
17
18
19
20
21
22
23
24
25
26
27
28
29
30
31
32
33
34
35
36
37
38
39
40
41
42
43
44
45
46
47
48
49
50
51
52
53
54
55
56
57
P h i l i p s H e a l t h c a r e 9 8 9 7 1 0 0 0 1 2 7 3
DoseAware Dose Manager Package Document version 1.2
Contents
4.2 Work with the main window..................................................... 4-9
4.2.1 Customize the columns................................................ 4-9
4.2.2 Sort information in the columns.................................. 4-10
4.3 Analyze dose history from one PDM......................................... 4-11
4.3.1 View dose history as a graph ............................. 4-11
4.3.2 Navigate in a graph...................................................... 4-12
4.3.3 Make a selection in a graph.......................................... 4-13
4.3.4 View dose history as a table.......................................... 4-14
4.3.5 Print data from a dose graph or dose table ........ 4-15
4.3.6 Export data from a dose table ............ 4-16
4.4 Analyze dose data from several PDMs........................................ 4-18
4.4.1 View dose history as a graph......................................... 4-18
4.4.2 View dose history as a table.......................................... 4-21
4.4.3 Print data from a dose graph or dose table
.................................................................................... 4-22
4.4.4 Export data from a dose table ...................................... 4-22
4.5 Reports...................................................................................... 4-22
4.5.1 Create reports.............................................................. 4-23
4.5.2 Export or e-mail a report.............................................. 4-24
4.6 Dose Manager options............................................................... 4-26
4.6.1 Set password................................................................ 4-26
4.6.2 Change password......................................................... 4-26
4.6.3 Change language.......................................................... 4-26
4.7 Dose manager license................................................................. 4-27
Product disposal.......................................................................................5 5-1
5.1 Introduction.............................................................................. 5-1
5.2 Passing the system on to another user........................................ 5-1
5.3 Final disposal of the system........................................................ 5-2
5.4 Fitting, removing, and disposing of batteries.............................. 5-3
Contents
0-5

4
5
6
7
8
9
10
11
12
13
14
15
16
17
18
19
20
21
22
23
24
25
26
27
28
29
30
31
32
33
34
35
36
37
38
39
40
41
42
43
44
45
46
47
48
49
50
51
52
53
54
55
56
57
Contents
0-6
Contents
Technical data..........................................................................................6 6-1
6.1 PDM and Base Station/Dose Manager memories...................... 6-1
6.2 Time management..................................................................... 6-1
6.3 Security and privacy requirements.............................................. 6-2
P h i l i p s H e a l t h c a r e 9 8 9 7 1 0 0 0 1 2 7 3 0 9 0 0 a 4 4 7 8 0 0 4 5 a 3 b
DoseAware Dose Manager Package Document version 1.2

4
5
6
7
8
9
10
11
12
13
14
15
16
17
18
19
20
21
22
23
24
25
26
27
28
29
30
31
32
33
34
35
36
37
38
39
40
41
42
43
44
45
46
47
48
49
50
51
52
53
54
55
56
57
P h i l i p s H e a l t h c a r e 9 8 9 7 1 0 0 0 1 2 7 3
DoseAware Dose Manager Package Document version 1.2
1
1.1
Introduction
About the DoseAware System
Figure 1.1 DoseAware System overview with Dose Manager Package components highlighted
Legend
1 Base Station 2 PDM rack
3 Ethernet 4 Radio
5 Dose Manager 6 Dose View
7 PDM 8 USB
9 Cradle
Introduction
1-1

4
5
6
7
8
9
10
11
12
13
14
15
16
17
18
19
20
21
22
23
24
25
26
27
28
29
30
31
32
33
34
35
36
37
38
39
40
41
42
43
44
45
46
47
48
49
50
51
52
53
54
55
56
57
1.2 About these Instructions for Use
1-2
1.2
Introduction
About these Instructions for Use
W A R N I N G
C A U T I O N
N O T E
The Dose Manager Package consists of:
Dose Manager licensed software (CD)
•
• User Manual (CD)
• Cradle, USB cable
These Instructions for Use are intended to assist users in the safe and
effective operation of the product described.
Before attempting to operate the product, you must read these Instructions
for Use, noting and strictly observing all WARNINGS and CAUTION
notices.
Pay special attention to all the information given and procedures described
in the Safety section.
A WARNING alerts you to a potential serious outcome, adverse event or safety
hazard. Failure to observe a warning may result in death or serious injury to the
operator or patient.
A CAUTION alerts you to where special care is necessary for the safe and effective
use of the product. Failure to observe a caution may result in minor or moderate
personal injury or damage to the product or other property, and possibly in a remote
risk of more serious injury, and/or cause environmental pollution.
NOTES highlight unusual points as an aid to the operator.
These Instructions for Use describe the most extensive configuration of the
product, with the maximum number of options and accessories. Not every
function described may be available on your product.
These Instructions for Use describes the Base Station Package. In order to
get an immediate hands-on experience of the Base Station
Package, we recommended that you interact with the Base Station,
DoseView, and Cradle in parallel to reading these Instructions for Use.
DoseAware Dose Manager Package Document version 1.2
P h i l i p s H e a l t h c a r e 9 8 9 7 1 0 0 0 1 2 7 3 0 9 0 0 a 4 4 7 8 0 0 4 5 a 3 b

4
5
6
7
8
9
10
11
12
13
14
15
16
17
18
19
20
21
22
23
24
25
26
27
28
29
30
31
32
33
34
35
36
37
38
39
40
41
42
43
44
45
46
47
48
49
50
51
52
53
54
55
56
57
P h i l i p s H e a l t h c a r e 9 8 9 7 1 0 0 0 1 2 7 3
DoseAware Dose Manager Package Document version 1.2
1.3
Intended use of the DoseAware System
N O T E S
Intended use of the DoseAware System 1.3
These Instructions for Use describe the Dose Manager software and its
functions. In order to get an immediate hands-on experience of Dose
Manager, we recommended that you interact with Dose Manager in parallel
to reading these Instructions for Use.
This Philips product is intended to be installed, used and operated only in
accordance with the safety procedures and operating instructions given in
these Instructions for Use for the purpose for which it was designed. The
purpose for which the product is intended is given below. However, nothing
stated in these Instructions for Use reduces users’ responsibilities for sound
clinical judgment and best clinical procedure.
The DoseAware System is an electronic X-ray dose monitoring system. The
intended use is to improve the awareness of people, who work with or are in
the presence of X-Ray imaging equipment, about their occupational dose
(also known as staff dose). The awareness focuses on:
A graphical visualization of the real-time staff dose rate while working
•
with X-Ray equipment in examination rooms during medical procedures;
• Instant access to historical staff dose for reporting and analysis purposes.
The benefits of the DoseAware System are to:
• Make people aware of their received staff dose during clinical work with
X-ray imaging equipment;
• Instantly visualize the result of reducing measures of occupational
dose by, for example, changing a person’s position in the examination room.
The DoseAware System may not be used as a legal staff dose recording
solution. The DoseAware System is not intended for patient use.
• Do not expose the PDMs in direct X-ray beam. They are designed to be exposed to
scattered radiation only.
• The Dose Manager, DoseView, Cradle and PDM Rack are not intended to be used
inside examination rooms.
• The DoseAware product is not a replacement for a TLD (ThermoLuminescent
Dosimeter) or similar product.
Introduction
1-3

4
5
6
7
8
9
10
11
12
13
14
15
16
17
18
19
20
21
22
23
24
25
26
27
28
29
30
31
32
33
34
35
36
37
38
39
40
41
42
43
44
45
46
47
48
49
50
51
52
53
54
55
56
57
1.4 Compatibility
1-4
1.4
Introduction
Compatibility
W A R N I N G
Installation, use and operation of this product is subject to the law in the
jurisdiction(s) in which the product is being used. Operators must only
install, use and operate the DoseAware System in such ways as do not
conflict with applicable laws, or regulations, which have the force of law.
Uses of the Allura CV20 for purposes other than those intended and Uses of
the DoseAware System for purposes other than those intended and expressly
stated by the manufacturer, as well as incorrect use or operation, may relieve
the manufacturer (or his agent) from all or some responsibility for resultant
non-compliance, damage or injury.
The product described in this manual should not be used in combination
with other products or components unless such other products or
components are expressly recognized as compatible by Philips Healthcare.
(A list of such products and components is available from the manufacturer.)
Changes and/or additions to the product should only be carried out by
Philips Medical Systems or by third parties expressly authorized by Philips
Medical Systems to do so. Such changes and/or additions must comply with
all applicable laws and regulations that have the force of law within the
jurisdiction(s) concerned, and with best engineering practice.
Changes and/or additions to the product that are carried out by persons without the
appropriate training and/or using unapproved spare parts may lead to the Philips
Medical Systems warranty being voided. As with all complex technical products,
maintenance by persons not appropriately qualified and/or using unapproved spare
parts carries serious risks of damage to the product and of personal injury.
DoseAware Dose Manager Package Document version 1.2
P h i l i p s H e a l t h c a r e 9 8 9 7 1 0 0 0 1 2 7 3 0 9 0 0 a 4 4 7 8 0 0 4 5 a 3 b

4
5
6
7
8
9
10
11
12
13
14
15
16
17
18
19
20
21
22
23
24
25
26
27
28
29
30
31
32
33
34
35
36
37
38
39
40
41
42
43
44
45
46
47
48
49
50
51
52
53
54
55
56
57
P h i l i p s H e a l t h c a r e 9 8 9 7 1 0 0 0 1 2 7 3
DoseAware Dose Manager Package Document version 1.2
1.5
1.6
1.7
1.8
Compliance
Training
System requirements
Other user manuals
Compliance 1.5
The Philips DoseAware System complies with relevant international and
national standards and laws. Information on compliance will be supplied on
request by your local Philips Medical Systems representative, or by the
manufacturer.
Users of this product must have received adequate training on its safe and
effective use before attempting to operate the product described in these
Instructions for Use. Training requirements for this type of device will vary
from country to country. Users must make sure they receive adequate
training in accordance with local laws or regulations.
If you require further information about training in the use of this product,
please contact your local Philips Medical Systems representative.
Alternatively, contact the manufacturer.
•
Operating systems: Windows Vista or Windows XP.
• .NET 3.5.
• At least one USB port available.
• At least 2 GB of system memory available.
• At least 40 GB hard drive with at least 15 GB of memory available.
• Recommended screen resolution at least 1280 x 1024.
• The Base Station and DoseView are described in a
separate user manual, which can be found on the CD delivered in the box
together with the Base Station package.
• The PDMs are briefly described in the PDM Quick Guide, a leaflet that
is delivered in the box together with the PDM.
Introduction
1-5

4
5
6
7
8
9
10
11
12
13
14
15
16
17
18
19
20
21
22
23
24
25
26
27
28
29
30
31
32
33
34
35
36
37
38
39
40
41
42
43
44
45
46
47
48
49
50
51
52
53
54
55
56
57
1.8 Other user manuals
1-6
Introduction
P h i l i p s H e a l t h c a r e 9 8 9 7 1 0 0 0 1 2 7 3 0 9 0 0 a 4 4 7 8 0 0 4 5 a 3 b
DoseAware Dose Manager Package Document version 1.2
4
5
6
7
8
9
10
11
12
13
14
15
16
17
18
19
20
21
22
23
24
25
26
27
28
29
30
31
32
33
34
35
36
37
38
39
40
41
42
43
44
45
46
47
48
49
50
51
52
53
54
55
56
57
P h i l i p s H e a l t h c a r e 9 8 9 7 1 0 0 0 1 2 7 3
DoseAware Dose Manager Package Document version 1.2
2
2.1
Safety
Important safety directions
W A R N I N G
W A R N I N G
If the DoseAware system is not functioning correct or damage is visible,
inform a Philips service engineer, which will take appropriate actions in
order not to harm personnel or patients.
Handle the hardware and software with care. Make sure that the hardware
and software is used and stored in a secured environment to prevent
unauthorized access.
Maintenance & faults
Do not use the product for any application until you are sure that the user routine-
checks have been satisfactorily completed, and that the periodic maintenance of the
product is up to date. If any part of the product is known (or suspected) to be
defective or wrongly adjusted, DO NOT USE the product until a repair has been
made. Operation of the product with defective or wrongly adjusted components could
expose the user or the patient to radiation or other safety hazards. This could lead to
fatal or other serious personal injury, or to clinical misdiagnosis/clinical mistreatment.
Safety awareness
Do not use the product for any application until you have read, understood and know
all the safety information, safety procedures and emergency procedures contained in
this Safety section. Operation of the product without a proper awareness of how to
use it safely could lead to fatal or other serious personal injury. It could also lead to
clinical misdiagnosis/clinical mistreatment.
Safety
2-1
4
5
6
7
8
9
10
11
12
13
14
15
16
17
18
19
20
21
22
23
24
25
26
27
28
29
30
31
32
33
34
35
36
37
38
39
40
41
42
43
44
45
46
47
48
49
50
51
52
53
54
55
56
57
2.2 Electrical safety
W A R N I N G S
W A R N I N G
W A R N I N G
2.2
Electrical safety
W A R N I N G
2-2
Safety
Adequate training
• Do not use the product for any application until you have received adequate and
proper training in its safe and effective operation. If you are unsure of your ability
to operate this product safely and effectively, DO NOT USE IT. Operation of this
product without proper and adequate training could lead to fatal or other serious
personal injury. It could also lead to clinical misdiagnosis/clinical mistreatment.
• Do not operate the product with patients unless you have an adequate
understanding of its capabilities and functions. Using this product without such an
understanding may compromise its effectiveness and/or reduce the safety of the
patient, you and others.
Safety devices
Never attempt to remove, modify, override or frustrate any safety device on the
product. Interfering with safety devices could lead to fatal or other serious personal
injury.
Intended use and compatibility
Do not use the product for any purpose other than those for which it is intended. Do
not use the product with products other than that which Philips Medical Systems
recognizes as compatible. Operation of the product for unintended purposes, or with
incompatible products, could lead to fatal or other serious injury. It could also lead to
clinical misdiagnosis/clinical mistreatment.
P h i l i p s H e a l t h c a r e 9 8 9 7 1 0 0 0 1 2 7 3 0 9 0 0 a 4 4 7 8 0 0 4 5 a 3 b
Do not remove covers or cables from this product. Dangerous electrical voltages are
present within this product. Removing covers or cables could lead to serious or fatal
personal injury.
DoseAware Dose Manager Package Document version 1.2
4
5
6
7
8
9
10
11
12
13
14
15
16
17
18
19
20
21
22
23
24
25
26
27
28
29
30
31
32
33
34
35
36
37
38
39
40
41
42
43
44
45
46
47
48
49
50
51
52
53
54
55
56
57
P h i l i p s H e a l t h c a r e 9 8 9 7 1 0 0 0 1 2 7 3
DoseAware Dose Manager Package Document version 1.2
2.3
2.4
W A R N I N G S
2.5
Mechanical safety
W A R N I N G
Explosion safety
Fire safety
Mechanical safety 2.3
Covers or cables should only be removed by qualified and authorized service
personnel. Use this product in rooms or areas that comply with all
applicable laws (or regulations having the force of law) concerning electrical
safety for this type of product.
Electrically isolate this product from the mains electrical supply before
cleaning, disinfecting or sterilizing it.
Do not remove covers from this product. Removing covers could lead to serious or
fatal personal injury.
Covers should only be removed by qualified and authorized service
personnel. In this context, qualified means those legally permitted to work
on this type of medical electrical product in the jurisdiction(s) in which the
product is being used, and authorized means those authorized by the user of
the product.
• Do not use this product in the presence of explosive gases or vapors, such as
certain anesthetic gases.
• Do not use flammable or potentially explosive disinfecting sprays.
• Use of this product in an environment for which it was not designed can lead to
fire or explosion.
Use of electrical product in an environment for which it was not
designed can lead to fire or explosion.
Safety
2-3
4
5
6
7
8
9
10
11
12
13
14
15
16
17
18
19
20
21
22
23
24
25
26
27
28
29
30
31
32
33
34
35
36
37
38
39
40
41
42
43
44
45
46
47
48
49
50
51
52
53
54
55
56
57
2.6 Electrostatic discharge (ESD)
2-4
2.6
W A R N I N G
Electrostatic discharge (ESD)
C A U T I O N S
Safety
Fire regulations for the type of medical area being used should be fully
applied, observed and enforced. Fire extinguishers should be available for
both electrical and non-electrical fires.
Only use extinguishers on electrical or chemical fires, which are specifically labeled
for those purposes. Using water or other liquids on an electrical fire can lead to fatal
or other serious personal injury.
If it is safe to do so, attempt to isolate the product from electrical and other
supplies before attempting to fight a fire. This will reduce the risk of electric
shocks.
• Always wait at least ten seconds after the product is switched OFF before switching
the product back to ON.
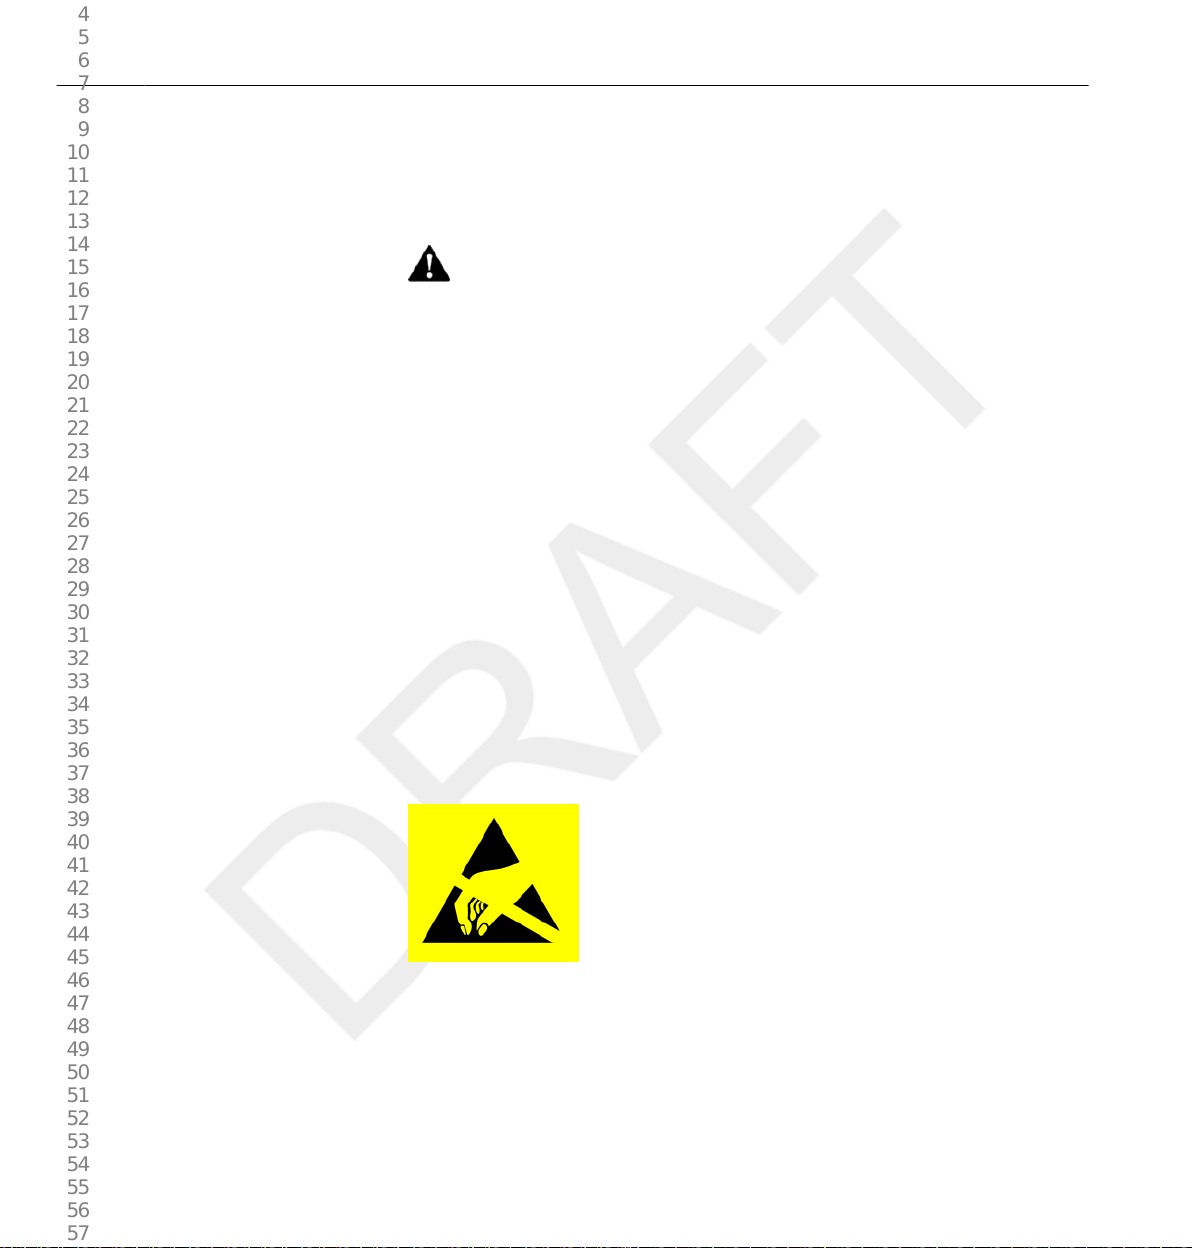
• Always use proper static procedures, protection, and product prior to opening and
during handling of this product. This product contains components that are
electrostatic sensitive. Failure to use ESD procedures may cause damage to these
components. Such damage to components is not covered by Philips warranties.
Connections to sensitive parts are identified by the ESD warning symbol as
shown.
P h i l i p s H e a l t h c a r e 9 8 9 7 1 0 0 0 1 2 7 3 0 9 0 0 a 4 4 7 8 0 0 4 5 a 3 b
ESD can amount to a significant voltage, which may cause damage to PCBs
or other system components.
DoseAware Dose Manager Package Document version 1.2

4
5
6
7
8
9
10
11
12
13
14
15
16
17
18
19
20
21
22
23
24
25
26
27
28
29
30
31
32
33
34
35
36
37
38
39
40
41
42
43
44
45
46
47
48
49
50
51
52
53
54
55
56
57
P h i l i p s H e a l t h c a r e 9 8 9 7 1 0 0 0 1 2 7 3
DoseAware Dose Manager Package Document version 1.2
2.7
Electromagnetic Compatibility (EMC)
Electromagnetic Compatibility (EMC) 2.7
ESD damage is cumulative and may not be apparent at first, as indicated by
a hard failure, but can cause degraded performance. Therefore, always use
proper ESD handling procedures. ESD can result from low humidity
conditions, use of electrical equipment on carpeting, linens, and clothing.
This Philips product complies with relevant international and national laws
and standards on EMC (electromagnetic compatibility) for this type of
product when used as intended. Such laws and standards define both the
permissible electromagnetic emission levels from equipment and its required
immunity to electromagnetic interference from external sources.
Other electronic products exceeding the limits defined in such EMC
standards could, under unusual circumstances, affect the operation of the
product.
Medical electrical products need special precautions regarding EMC, and
•
need to be installed and put into service according to EMC information
provided in the accompanying documents.
• The use of accessories and cables other than those specified may result in
increased emission or decreased immunity levels.
• The product should not be used adjacent to or stacked with other
products and that if adjacent or stacked use is necessary, it should be
observed to verify normal operation.
This equipment is intended for use in a hospital environment. Operation in
other than hospital environments may compromise electromagnetic
compatibility.
The Base Station and PDM comply with part 15 of the FCC Rules.
Operation is subject to the following conditions :(1) This device may not
cause harmful interference, and (2) this device must accept any interference
received, including interference that may cause undesired operation.
Changes or modifications to the equipment not expressly approved by the
party responsible for compliance could void the user’s authority to operate
the equipment.
Safety
2-5

4
5
6
7
8
9
10
11
12
13
14
15
16
17
18
19
20
21
22
23
24
25
26
27
28
29
30
31
32
33
34
35
36
37
38
39
40
41
42
43
44
45
46
47
48
49
50
51
52
53
54
55
56
57
2.7 Electromagnetic Compatibility (EMC)
This device complies with Industry Canada license-exempt RSS standard(s).
Operation is subject to the following two conditions: (1) This device may
not cause interference, and (2) this device must accept any interference,
including interference that may cause undesired operation of the device.
Le présent appareil est conforme aux CNR d'Industrie Canada applicables aux
appareils radio exempts de licence. L'exploitation est autorisée aux deux
conditions suivantes : (1) l'appareil ne doit pas produire de brouillage, et (2)
l'utilisateur de l'appareil doit accepter tout brouillage radioélectrique subi, même
si le brouillage est susceptible d'en compromettre le fonctionnement.
This class A digital apparatus complies with Canadian ICES-003.
Cet appareil numérique de la classe A est conforme à la norme NMB-003 du
Canada.
The Base Station and PDM have been tested and found to comply with the
limits for a Class A digital device, pursuant to part 15 of the FCC Rules.
These limits are designed to provide reasonable protection against harmful
interference when the equipment is operated in a commercial environment.
This equipment generates, uses, and can radiate radio frequency energy and,
if not installed and used in accordance with the instruction manual, may
cause harmful interference to radio communications. Operation of this
equipment in a residential area is likely to cause harmful interference in
which case the user will be required to correct the interference at his own
expense.
The DoseAware system is intended for use in the electromagnetic
environment in which radiated RF disturbances are controlled.
Portable and mobile RF communications can affect medical electrical equipment. Use
caution when using such communication devices within the specified range of medical
electrical devices.
2-6
2.7.1
Mobile phones and similar RF equipment
C A U T I O N
Safety
P h i l i p s H e a l t h c a r e 9 8 9 7 1 0 0 0 1 2 7 3 0 9 0 0 a 4 4 7 8 0 0 4 5 a 3 b
DoseAware Dose Manager Package Document version 1.2

4
5
6
7
8
9
10
11
12
13
14
15
16
17
18
19
20
21
22
23
24
25
26
27
28
29
30
31
32
33
34
35
36
37
38
39
40
41
42
43
44
45
46
47
48
49
50
51
52
53
54
55
56
57
P h i l i p s H e a l t h c a r e 9 8 9 7 1 0 0 0 1 2 7 3
DoseAware Dose Manager Package Document version 1.2
2.8
W A R N I N G
N O T E
Modality specific safety
Modality specific safety 2.8
The customer or the user of the DoseAware system can help prevent
electromagnetic interference by maintaining a minimum distance between
portable and mobile RF communications equipment (transmitters) and the
DoseAware system as recommended below, according to the maximum
output power of the communications equipment:
A minimum distance of 20 cm between a PDM and a mobile phone or
•
regular electronic device (e.g. a computer).
• A minimum distance of 50 cm between a PDM and a medical device or
intended radiator (e.g. a wireless router).
These guidelines may not apply in all situations. Electromagnetic propagation is
affected by absorption and reflection from structures, objects and people.
During communication between the Base Station and PDMs, personal data is
transmitted in open air.
Be careful when using a PDM while being near a patient and make sure that
the PDM does not fall or comes in contact with other equipment (such as a
catheter) to endanger the procedure.
Do not move a PDM to an unknown environment (for example another
hospital). If you are visiting unknown environments, there is a risk that
personal data is registered there. For correct registration of staff dose data,
only use the PDM within designated environment.
Philips Medical Systems declares that all CE marked DoseAware products
incorporating Radio and Telecoms Terminal Equipment functionality are in
compliance with the essential requirements and other relevant provisions of
Directive 1999/5/EC.
Safety
2-7

4
5
6
7
8
9
10
11
12
13
14
15
16
17
18
19
20
21
22
23
24
25
26
27
28
29
30
31
32
33
34
35
36
37
38
39
40
41
42
43
44
45
46
47
48
49
50
51
52
53
54
55
56
57
2.9 Network safety, security, and privacy
2-8
2.9
Safety
Network safety, security, and privacy
Customer Role in the Product Security Partnership
We recognize that the security of Philips Medical Systems products is an
important part of your facility's security-in depth strategy. However, these
benefits can only be realized if you implement a comprehensive, multilayered strategy (including policies, processes, and technologies) to protect
information and systems from external and internal threats.
Following industry-standard practice, your strategy should address physical
security, operational security, procedural security, risk management, security
policies, and contingency planning. The practical implementation of
technical security elements varies by site and may employ a number of
technologies, including firewalls, virus-scanning software, authentication
technologies, etc.
As with any computer-based system, protection must be provided such that
firewalls and/or other security devices are in place between the medical
system and any externally accessible systems.
The USA Veterans Administration has developed a widely used Medical
Device Isolation Architecture for this purpose. Such perimeter and network
defenses are essential elements in a comprehensive medical device security
strategy.
For our product security policy statement and additional information, see
the Philips Medical Systems product security website at:
P h i l i p s H e a l t h c a r e 9 8 9 7 1 0 0 0 1 2 7 3 0 9 0 0 a 4 4 7 8 0 0 4 5 a 3 b
DoseAware Dose Manager Package Document version 1.2
4
5
6
7
8
9
10
11
12
13
14
15
16
17
18
19
20
21
22
23
24
25
26
27
28
29
30
31
32
33
34
35
36
37
38
39
40
41
42
43
44
45
46
47
48
49
50
51
52
53
54
55
56
57
Toxic or hazardous substances and elements 2.10
http://www.healthcare.philips.com/main/support/productsecurity
2.10
Toxic or hazardous substances and elements
Toxic or hazardous substances and elements
DoseAware
component
Lead (Pb) Mercury (Hg) Cadmium (Cd) Hexavalent
The following table details the toxic or hazardous substances and elements
which are present in the DoseAware systems.
Chromium (Cr6+)
Polybrominated
Biphenyls (PBB)
Base Station O O O O O O
PDM O O O O O O
O: Indicates that this toxic or hazardous substance contained in all of the homogeneous materials for this part is
below the limit requirement in SJ/T11363–2006.
Perchlorate materials
In this product, perchlorate material is present in lithium coin cells and/or
batteries. Special handling may apply for these materials, for more
information, go to:
P h i l i p s H e a l t h c a r e 9 8 9 7 1 0 0 0 1 2 7 3
www.dtsc.ca.gov/hazardouswaste/perchlorate
REACH Declaration
REACH requires Philips Healthcare (PH) to provide chemical content
information for Substances of Very High Concern (SVHC) if they are
present above 0.1% of the product weight. Components within electric and
electronic equipment may contain phthalates above the threshold (e.g. bis(2ethyl(hexyl)phthalate), CAS nr.: 117-81-7). The SVHC list is updated on a
regular basis. Therefore, refer to the following Philips REACH website for
the most up-to-date list of products containing SVHC above the threshold:
http://www.philips.com/about/sustainability/reach.page
China RoHS Hazardous Substances Declaration
For information, please see the Philips Medical Systems product
sustainability website at:
DoseAware Dose Manager Package Document version 1.2
Polybrominated
Diphenyl Ethers
(PBDE)
Safety
2-9
4
5
6
7
8
9
10
11
12
13
14
15
16
17
18
19
20
21
22
23
24
25
26
27
28
29
30
31
32
33
34
35
36
37
38
39
40
41
42
43
44
45
46
47
48
49
50
51
52
53
54
55
56
57
2.11 Equipment label overview
2-10
2.11
Safety
Equipment label overview
N O T E
http://www.healthcare.philips.com/main/about/Sustainability
This section describes the DoseAware product labels and their locations.
Some of the information (such as frequency, type, date of manufacture, and other
markings) on the labels for your DoseAware product may vary from the examples
shown below.
Base Station product label
The following Base Station product label is located on the rear side of the
Base Station.
Figure 2.1 Base Station label
P h i l i p s H e a l t h c a r e 9 8 9 7 1 0 0 0 1 2 7 3 0 9 0 0 a 4 4 7 8 0 0 4 5 a 3 b
DoseAware Dose Manager Package Document version 1.2
4
5
6
7
8
9
10
11
12
13
14
15
16
17
18
19
20
21
22
23
24
25
26
27
28
29
30
31
32
33
34
35
36
37
38
39
40
41
42
43
44
45
46
47
48
49
50
51
52
53
54
55
56
57
P h i l i p s H e a l t h c a r e 9 8 9 7 1 0 0 0 1 2 7 3
DoseAware Dose Manager Package Document version 1.2
Equipment label overview 2.11
Base station product label for products sold in the EU
The following Base Station product label is located on the rear side of the
Base Station for products sold in European Union (EU) countries.
Figure 2.2 Base Station label for products sold in the EU
Cradle product label
The Cradle product label is located on the bottom of the Cradle.
Figure 2.3 Cradle label
Safety
2-11
4
5
6
7
8
9
10
11
12
13
14
15
16
17
18
19
20
21
22
23
24
25
26
27
28
29
30
31
32
33
34
35
36
37
38
39
40
41
42
43
44
45
46
47
48
49
50
51
52
53
54
55
56
57
2.11 Equipment label overview
2-12
Safety
PDM product label
The following PDM product label is located on the rear side of the PDM.
Figure 2.4 PDM label
PDM product label for products sold in the EU
The following PDM product label is located on the rear side of the PDM
for products sold in European Union (EU) countries.
Figure 2.5 PDM label for products sold in the EU
P h i l i p s H e a l t h c a r e 9 8 9 7 1 0 0 0 1 2 7 3 0 9 0 0 a 4 4 7 8 0 0 4 5 a 3 b
DoseAware Dose Manager Package Document version 1.2

4
5
6
7
8
9
10
11
12
13
14
15
16
17
18
19
20
21
22
23
24
25
26
27
28
29
30
31
32
33
34
35
36
37
38
39
40
41
42
43
44
45
46
47
48
49
50
51
52
53
54
55
56
57
P h i l i p s H e a l t h c a r e 9 8 9 7 1 0 0 0 1 2 7 3
DoseAware Dose Manager Package Document version 1.2
3
3.1
Get to know Dose Manager
W A R N I N G
Introduction to Dose Manager
This chapter describes the available features in Dose Manager. Instructions
and commonly used workflows are found in section “Use Dose Manager”
on page 4-1 .
Do not start up the product unless you and all other users present have read, fully
understood and know all the safety information and emergency procedures given in
the Safety section of these Instructions for Use. Operation of the product without
having read, understood and knowing all the safety information and procedures in the
Safety section could lead to fatal or other serious personal injury, clinical
misdiagnosis, or clinical mistreatment.
Dose Manager is a powerful, easy-to-use tool for analyzing, reporting and
storing dose information as well as administrating multiple PDMs.
Dose Manager makes it possible for you to:
Store and manage dose history for multiple PDMs.
•
• Collect dose history from Base Stations in your local network.
• Analyze dose data.
• View dose history as a graph or table.
• Export dose data for further analysis with other software tools, such as Excel.
• Create and print reports of dose history.
Get to know Dose Manager
3-1

4
5
6
7
8
9
10
11
12
13
14
15
16
17
18
19
20
21
22
23
24
25
26
27
28
29
30
31
32
33
34
35
36
37
38
39
40
41
42
43
44
45
46
47
48
49
50
51
52
53
54
55
56
57
3.1 Introduction to Dose Manager
3-2
Get to know Dose Manager
Figure 3.1 Dose Manager overview
The following items are available when you start Dose Manager:
Table 3.1 Dose Manager overview
Item Description
1 Application menu Manage databases and
printing and access the Options dialogs (see sectio
n “Application menu overview” on page 3-3).
2 Home Show and manage PDMs, groups and reports (see
section “Home toolbar overview” on page 3-4).
3 Dose navigation Navigate in the dose history (see section “Dose
Navigation toolbar overview ” on page
3-11).
4 Report preview Preview and export reports (see section “Reports
Preview toolbar overview ” on page
3-13)
DoseAware Dose Manager Package Document version 1.2
P h i l i p s H e a l t h c a r e 9 8 9 7 1 0 0 0 1 2 7 3 0 9 0 0 a 4 4 7 8 0 0 4 5 a 3 b

4
5
6
7
8
9
10
11
12
13
14
15
16
17
18
19
20
21
22
23
24
25
26
27
28
29
30
31
32
33
34
35
36
37
38
39
40
41
42
43
44
45
46
47
48
49
50
51
52
53
54
55
56
57
3.2
Application menu overview
P h i l i p s H e a l t h c a r e 9 8 9 7 1 0 0 0 1 2 7 3
DoseAware Dose Manager Package Document version 1.2
Application menu overview 3.2
Item Description
5 All PDMs Show available items (see section “All
PDMs window overview ” on page 3-15).
6 Details tab Display information of selected items (see section
“Details tab overview” on page 3-16).
7 Dose graph tab Show dose data as a graph (see section “Dose
graph tab overview” on page 3-19).
8 Dose table tab Show dose data as a table (see section “Dose
table tab overview” on page 3-22).
Figure 3.2 Application menu
The application menu is where you work with Dose Manager databases and
printing. This is also where you find general Dose Manager settings. The
following functions are available in the application menu:
Table 3.2 Application menu functions
Function Description
New Create a new database.
Open Open an existing database.
Save as Save your current database with a new name.
Print Print dose graphs, dose tables and reports.
Get to know Dose Manager
3-3

4
5
6
7
8
9
10
11
12
13
14
15
16
17
18
19
20
21
22
23
24
25
26
27
28
29
30
31
32
33
34
35
36
37
38
39
40
41
42
43
44
45
46
47
48
49
50
51
52
53
54
55
56
57
3.3 Home toolbar overview
3.3
Home toolbar overview
3.3.1
PDMs
3-4
Get to know Dose Manager
Function Description
Print preview Preview and customize dose graphs and
dose tables. In this menu you can also find tools to
export and e-mail the current view.
Options Set or change an optional Dose Manager
password, change the user interface language.
Figure 3.3 Home toolbar
The home toolbar provides you with tools to manage separate PDMs,
groups of PDMs and dose data reports. It is also where you find tools to
synchronize dose data from PDMs and Base Stations.
In the PDMs group you can find the following tools:
Table 3.3 PDM functions
Function Description
Show Show available PDMs in a list.
PDM options Show and manage options for a PDM that is placed
in a Cradle. You can only access and change PDM
options when the PDM is in a Cradle.
When this information is changed in Dose
Manager, it will be synchronized to Base Stations
and DoseView. The PDM options dialog is
separated in three tabs, see below.
Groups Show and manage groups of PDMs. Use groups to
arrange PDMs in different departments, clinical
roles or for studies, for example.
Delete Delete the selected PDM(s) or group(s).
DoseAware Dose Manager Package Document version 1.2
P h i l i p s H e a l t h c a r e 9 8 9 7 1 0 0 0 1 2 7 3 0 9 0 0 a 4 4 7 8 0 0 4 5 a 3 b

4
5
6
7
8
9
10
11
12
13
14
15
16
17
18
19
20
21
22
23
24
25
26
27
28
29
30
31
32
33
34
35
36
37
38
39
40
41
42
43
44
45
46
47
48
49
50
51
52
53
54
55
56
57
P h i l i p s H e a l t h c a r e 9 8 9 7 1 0 0 0 1 2 7 3
DoseAware Dose Manager Package Document version 1.2
Home toolbar overview 3.3
Information tab
The Information tab contains information about the person using the PDM.
Figure 3.4 Information tab
Table 3.4 Information tab functions
Function Description
Full name Full name of the person using the PDM. This text
field is limited to maximum 40 characters due to
space limitations in the Base Station.
If PDMs are shared with others, it may be
convenient to name the PDMs “Doctor1”,
“Doctor2”, and so on, for the clinical
role “Doctor”. Using different colors on the PDM
can also help to separate each clinical role.
Displayed name The name that is displayed when the PDM appears
in a Base Station. This name is also used to identify
a PDM in DoseView and Dose Manager. This text
field is limited to maximum 16 characters due to
space limitations in the Base Station.
PDM position Reflects where on the person the PDM is
positioned and can be set to one
of Head, Torso, Hand, Belly, Leg or Other.
Get to know Dose Manager
3-5

4
5
6
7
8
9
10
11
12
13
14
15
16
17
18
19
20
21
22
23
24
25
26
27
28
29
30
31
32
33
34
35
36
37
38
39
40
41
42
43
44
45
46
47
48
49
50
51
52
53
54
55
56
57
3.3 Home toolbar overview
N O T E
3-6
Get to know Dose Manager
Function Description
Clinical role Reflects the role of the person using the PDM and
can be set to one of Doctor, Nurse, Technician
or Other.
Displayed symbol Reflects the clinical role and is displayed when the
PDM appears in a Base Station.
Annual dose limit This value is used to show the annual dose value in
relation to the annual dose limit in percent. If you
do not want to show this relation, set this value to
0.
The annual dose limit for the PDM is dependent of the shielding factor of the lead
apron, as well as other radiation protection used. The more protection the higher the
limit can be for the same effective dose to the user. The annual dose limit may or may
not be chosen to reflect the legal dose limit where it is used. It could reflect the legal
limit or for example a lower target for the clinical user case. These and other
considerations need to be counted for when choosing the annual dose limit.
Settings tab
The Settings tab contains the PDM’s settings.
P h i l i p s H e a l t h c a r e 9 8 9 7 1 0 0 0 1 2 7 3 0 9 0 0 a 4 4 7 8 0 0 4 5 a 3 b
DoseAware Dose Manager Package Document version 1.2

4
5
6
7
8
9
10
11
12
13
14
15
16
17
18
19
20
21
22
23
24
25
26
27
28
29
30
31
32
33
34
35
36
37
38
39
40
41
42
43
44
45
46
47
48
49
50
51
52
53
54
55
56
57
P h i l i p s H e a l t h c a r e 9 8 9 7 1 0 0 0 1 2 7 3
DoseAware Dose Manager Package Document version 1.2
Home toolbar overview 3.3
Figure 3.5 Settings tab
Table 3.5 Settings tab functions
Function Description
PDM time See the PDM’s time and synchronize the PDM’s
time with your computer.
Base Station mode Enable or disable the PDM from appearing on Base
Station screens.
Power mode • On – Communication with Base Stations will
take place and registration of dose data will occur
• Off – Power saving mode. No communication
with Base Stations will take place and no
registration of dose data will occur.
Get to know Dose Manager
3-7

4
5
6
7
8
9
10
11
12
13
14
15
16
17
18
19
20
21
22
23
24
25
26
27
28
29
30
31
32
33
34
35
36
37
38
39
40
41
42
43
44
45
46
47
48
49
50
51
52
53
54
55
56
57
3.3 Home toolbar overview
3-8
Get to know Dose Manager
Function Description
Dose history The accumulated dose history, the dose
rate history and Dose Sessions 1 and 2 will
be reset to 0. The following happens when the
dose history is reset:
• In DoseView and Base Stations it will appear as
if the PDM has started measuring from 0 again.
The deleted dose history cannot be retrieved.
• In Dose Manager, the dose history that was
available before reset will be archived and
possible to retrieve by clicking + next to the
PDM in the All PDMs window. Dose Manager
will start a new session for the PDM and it will
appear as if the dose history will start measuring
from 0 in the new session.
Technical information Battery status indicates the PDM's battery status:
• Green and yellow indicates normal use.
• Red indicates that the PDM need to be replaced
in 4-6 months at normal use.
• A crossed battery indicates that there is no
battery left. The PDM does not measure
radiation and will not communicate with Base
Stations.
Firmware version refers to the firmware that is
currently installed in the PDM.
Dose tab
The Dose tab shows and manages dose information.
P h i l i p s H e a l t h c a r e 9 8 9 7 1 0 0 0 1 2 7 3 0 9 0 0 a 4 4 7 8 0 0 4 5 a 3 b
DoseAware Dose Manager Package Document version 1.2

4
5
6
7
8
9
10
11
12
13
14
15
16
17
18
19
20
21
22
23
24
25
26
27
28
29
30
31
32
33
34
35
36
37
38
39
40
41
42
43
44
45
46
47
48
49
50
51
52
53
54
55
56
57
P h i l i p s H e a l t h c a r e 9 8 9 7 1 0 0 0 1 2 7 3
DoseAware Dose Manager Package Document version 1.2
Home toolbar overview 3.3
Figure 3.6 Dose tab
Table 3.6 Dose tab functions
Function Description
Accumulated personal dose The PDM's accumulated annual dose measured
this calendar year or since last reset, measured in Sv.
Percentage of annual dose The PDM's accumulated annual dose measured this
year or since last manual reset, measured in Sv.
Dose Session 1 Trip meter for dose values. The accumulated dose
for a session since last Dose Session reset,
measured in Sv. Use the Reset button to reset this
Dose Session to zero.
Dose Session 2 Trip meter for dose values. The accumulated dose
for a session since last Dose Session reset,
measured in Sv. Use the Reset button to reset this
Dose Session to zero.
Total personal dose The total dose exposure for a PDM since last dose
history reset
Get to know Dose Manager
3-9

4
5
6
7
8
9
10
11
12
13
14
15
16
17
18
19
20
21
22
23
24
25
26
27
28
29
30
31
32
33
34
35
36
37
38
39
40
41
42
43
44
45
46
47
48
49
50
51
52
53
54
55
56
57
3.3 Home toolbar overview
3.3.2
Reports
3.3.3
Base Stations
3-10
Get to know Dose Manager
In the reports group you can find the following tools:
Table 3.7 Reports group functions
Function Description
Show Show all available reports.
New Enter the report wizard to create a new report.
There are 4 standard report templates available to
base reports upon:
• Yearly dose report
• Monthly dose report
• Weekly dose report
• PDM report
Delete Delete the selected report(s).
For information about how to work with reports, see section “Reports” on
page 4-22. For information about the reports preview, see section “Reports
Preview toolbar overview ” on page 3-13.
The Base Stations group provides the following tools:
Table 3.8 Base Stations group functions
Function Description
Synchronize Synchronize data from Base Stations that are added
to Dose Manager.
Manage Find Base Stations in your local network and add
them to Dose Manager. Manage Base Stations that
are added to Dose Manager.
Synchronize USB Synchronize Base Station data from USB.
P h i l i p s H e a l t h c a r e 9 8 9 7 1 0 0 0 1 2 7 3 0 9 0 0 a 4 4 7 8 0 0 4 5 a 3 b
DoseAware Dose Manager Package Document version 1.2

4
5
6
7
8
9
10
11
12
13
14
15
16
17
18
19
20
21
22
23
24
25
26
27
28
29
30
31
32
33
34
35
36
37
38
39
40
41
42
43
44
45
46
47
48
49
50
51
52
53
54
55
56
57
3.4
Dose Navigation toolbar overview
P h i l i p s H e a l t h c a r e 9 8 9 7 1 0 0 0 1 2 7 3
DoseAware Dose Manager Package Document version 1.2
Dose Navigation toolbar overview 3.4
Figure 3.7 Dose Navigation toolbar
The Dose Navigation toolbar is where you find tools to navigate in dose
graphs and dose tables. The following items are available in the Dose
Navigation toolbar:
Navigation group
The Navigation group contains access tools for dose history navigation.
Table 3.9 Navigation group functions
Function Description
Undo zoom Move one step back in a sequence of zoom actions,
showing the last selected time range.
Redo zoom Move one step forward in a sequence of zoom
actions, showing the time range that was selected
before the last undo zoom action.
Show all Show all available data for the selected PDM(s).
The time range will start the first date any PDM
begun to measure dose and stop the last date any
PDM was synchronized.
Left Shift the time range one step backward. If you have
selected year/month/week/day, the time range
will move one year/month/week/day backward.
If you have selected another time range, the time
range will move approximately 10% backward.
Right Shift the time range one step forward. If you have
selected year/month/week/day, the time range will
move one year/month/week/day forward. If you
have selected another time range, the time range
will move approximately 10% forward.
Day View dose history for the current day.
Week View dose history for the current week.
Month View dose history for the current month.
Get to know Dose Manager
3-11

4
5
6
7
8
9
10
11
12
13
14
15
16
17
18
19
20
21
22
23
24
25
26
27
28
29
30
31
32
33
34
35
36
37
38
39
40
41
42
43
44
45
46
47
48
49
50
51
52
53
54
55
56
57
3.4 Dose Navigation toolbar overview
Function Description
Year View dose history for the current year.
Start time The viewed time range start day.
End time The viewed time range end day.
Graph Details group
The Graph Details group allows you to select which information is visible in
the graph.
Table 3.10 Graph details group functions
Function Description
Accumulated dose Show/hide the accumulated dose in the graph.
Dose rate Show/hide the dose rate in the dose graph.
Show details Checked: The graphs will display dose rate samples
Events Show/hide events, such as synchronization
Graph options Enter the graph options dialog, where you can
3-12
Get to know Dose Manager
for every second, where such data is available.
Unchecked: the graphs will display mean dose rate
values per hour.
occasions, in the dose graph.
access the graph visibility settings and select to show/
hide:
• Base Station to PDM synchronization occasions.
• Cradle to Dose Manager synchronization
occasions.
• Session reset occasions.
• Event labels.
• Accumulated dose.
• Dose rate.
• Details.
P h i l i p s H e a l t h c a r e 9 8 9 7 1 0 0 0 1 2 7 3 0 9 0 0 a 4 4 7 8 0 0 4 5 a 3 b
DoseAware Dose Manager Package Document version 1.2

4
5
6
7
8
9
10
11
12
13
14
15
16
17
18
19
20
21
22
23
24
25
26
27
28
29
30
31
32
33
34
35
36
37
38
39
40
41
42
43
44
45
46
47
48
49
50
51
52
53
54
55
56
57
3.5
Reports Preview toolbar overview
P h i l i p s H e a l t h c a r e 9 8 9 7 1 0 0 0 1 2 7 3
DoseAware Dose Manager Package Document version 1.2
Reports Preview toolbar overview 3.5
Export group
The Export group allows you to export the dose table.
Table 3.11 Export group functions
Function Description
Export to clipboard Copy all data from the dose table to clipboard.
Export Export all visible data from the dose table to one of
the following formats:
• Microsoft Excel
• CSV (Comma-Separated Values, which is a
common standard for text spread sheet files
that can be used in most spread sheet and
database applications such as Excel, Access and
Open office.)
To make all data visible in the dose table, click
Expand All, see section
“Export data from a dose table ”
on page 4-16.
Export raw data Export all visible data to a tab separated text file in
a simple format that is suited for processing and
advanced excel analysis. To make all data visible in
the dose table, click Expand All.
Selection group
The Selection groups allows you to manage selections in a dose graph.
Table 3.12 Selection group function
Function Description
Clear Clear the current selection in the dose graph.
Figure 3.8 Reports preview toolbar
The reports preview toolbar provides the following tools:
Get to know Dose Manager
3-13

4
5
6
7
8
9
10
11
12
13
14
15
16
17
18
19
20
21
22
23
24
25
26
27
28
29
30
31
32
33
34
35
36
37
38
39
40
41
42
43
44
45
46
47
48
49
50
51
52
53
54
55
56
57
3.5 Reports Preview toolbar overview
Page Setup group
Access tools to change the layout of the report.
Table 3.13 Page setup group functions
Function Description
Scale Resize the report to either a percentage of the
Page setup Change the page layout of the report.
Navigation group
Access tools to navigate in the report.
Table 3.14 Navigation group functions
Function Description
Find Search in the report.
First page Go to the first page.
Previous page Go to the previous page.
Next page Go to the next page.
Last page Go to the last page.
Zoom group
Access tools to customize the display of the report.
Table 3.15 Zoom group functions
Function Description
Select Select and drag guides in the report to increase or
Hand tool Move the report within the reports window.
Magnifier Increase/decrease the view magnification in the
Many pages View one or multiple pages.
Zoom out Decrease the view magnification in the reports
Zoom Increase/decrease the view magnification in the
Zoom in Decrease the view magnification in the reports
3-14
Get to know Dose Manager
normal size or to fit a certain page width.
decrease the margins.
reports window one step.
P h i l i p s H e a l t h c a r e 9 8 9 7 1 0 0 0 1 2 7 3 0 9 0 0 a 4 4 7 8 0 0 4 5 a 3 b
window.
reports window to predefined values.
window.
DoseAware Dose Manager Package Document version 1.2

4
5
6
7
8
9
10
11
12
13
14
15
16
17
18
19
20
21
22
23
24
25
26
27
28
29
30
31
32
33
34
35
36
37
38
39
40
41
42
43
44
45
46
47
48
49
50
51
52
53
54
55
56
57
P h i l i p s H e a l t h c a r e 9 8 9 7 1 0 0 0 1 2 7 3
DoseAware Dose Manager Package Document version 1.2
3.6
All PDMs window overview
All PDMs window overview 3.6
Document group
Access tools to export or e-mail the report.
Table 3.16 Document group functions
Function Description
Export Export a report in one of the following file formats:
• PDF
• HTML
• MHT
• RTF
• CSV
• XLS
• TXT
• Image (BMP, GIF, JPG, PNG, TIFF, EMF, WMF)
E-mail as E-mail a report to one of the file formats listed above.
Preview group
Manage the report preview.
Table 3.17 Preview group function
Function Description
Close Close the reports preview and return to the home
screen.
The information that appears in this window is context sensitive, which
means that it will change depending on what you are currently working
on. It is possible to customize which columns to be visible, see section
“Customize the columns” on page 4-9.
Figure 3.9 All PDMs window
Get to know Dose Manager
3-15

4
5
6
7
8
9
10
11
12
13
14
15
16
17
18
19
20
21
22
23
24
25
26
27
28
29
30
31
32
33
34
35
36
37
38
39
40
41
42
43
44
45
46
47
48
49
50
51
52
53
54
55
56
57
3.7 Details tab overview
3.7
Details tab overview
3-16
Get to know Dose Manager
When show PDMs is selected, the following information is visible in the All
PDMs window:
Table 3.18 All PDMs window overview
Item Description
PDM ID A unique PDM serial number.
Displayed name The name that is displayed in the Base Station
Online View.
Full name Full name of the person using the PDM.
Clinical role One of Doctor, Nurse, Technician or Other.
PDM position One of Head, Torso, Hand, Belly, Leg or Other.
Accumulated personal dose The PDM’s total dose measured this calendar year
or since last reset, measured in Sv.
Percentage of annual dose The PDM's accumulated annual dose measured this
year or since last manual reset, measured in Sv.
Dose Session 1 and 2 Trip meter for dose values. The accumulated dose
for a session since last Dose Session reset,
measured in Sv.
Total personal dose The total dose exposure for a PDM since last dose
history reset.
Battery status The PDM's battery status:
• Green: normal use.
• Yellow: normal use.
• Red: the PDM need to be replaced in 4-6
months at normal use.
• Crossed battery: there is no battery left. The
PDM does not measure radiation and will not
communicate with Base Stations.
The information that appears in the details tab is context sensitive, which
means that it will change depending on what you are currently working on.
DoseAware Dose Manager Package Document version 1.2
P h i l i p s H e a l t h c a r e 9 8 9 7 1 0 0 0 1 2 7 3 0 9 0 0 a 4 4 7 8 0 0 4 5 a 3 b

4
5
6
7
8
9
10
11
12
13
14
15
16
17
18
19
20
21
22
23
24
25
26
27
28
29
30
31
32
33
34
35
36
37
38
39
40
41
42
43
44
45
46
47
48
49
50
51
52
53
54
55
56
57
3.7.1
PDM details
3.7.2
Group details
P h i l i p s H e a l t h c a r e 9 8 9 7 1 0 0 0 1 2 7 3
DoseAware Dose Manager Package Document version 1.2
Details tab overview 3.7
Figure 3.10 PDM details
When a PDM is selected in the All PDMs window, you can access the
following information in the details tab:
Table 3.19 PDM details items
Item Description
PDM information For descriptions, see section “All
PDMs window overview ” on page 3-15.
Dose information For descriptions, see section “All
PDMs window overview ” on page 3-15.
Member of groups Shows the groups the PDM belongs to, if any.
Notes View and write optional notes about the PDM.
Figure 3.11 Group details
Get to know Dose Manager
3-17

4
5
6
7
8
9
10
11
12
13
14
15
16
17
18
19
20
21
22
23
24
25
26
27
28
29
30
31
32
33
34
35
36
37
38
39
40
41
42
43
44
45
46
47
48
49
50
51
52
53
54
55
56
57
3.7 Details tab overview
3.7.3
Report details
3-18
Get to know Dose Manager
When a group is selected in the Groups window, you can access the
following information in the details tab:
Table 3.20 Group details items
Item Description
Name View and change the group’s name
Description View and change an optional description for the
group.
Group members Shows the group’s members.
Notes View and write optional notes about the group.
Figure 3.12 Report details
When a report is selected in the reports window, you can access the
following information in the details tab:
Table 3.21 Report details items
Item Description
Period The report’s time period.
Name View and change the report’s name.
Header text View and change an introduction to the report.
Grouping enabled Check this box to enable group name in the report.
Group description Check this box to enable group description in the
report.
DoseAware Dose Manager Package Document version 1.2
P h i l i p s H e a l t h c a r e 9 8 9 7 1 0 0 0 1 2 7 3 0 9 0 0 a 4 4 7 8 0 0 4 5 a 3 b

4
5
6
7
8
9
10
11
12
13
14
15
16
17
18
19
20
21
22
23
24
25
26
27
28
29
30
31
32
33
34
35
36
37
38
39
40
41
42
43
44
45
46
47
48
49
50
51
52
53
54
55
56
57
3.8
Dose graph tab overview
P h i l i p s H e a l t h c a r e 9 8 9 7 1 0 0 0 1 2 7 3
DoseAware Dose Manager Package Document version 1.2
Dose graph tab overview 3.8
Item Description
Show graph Check this box to enable an optional pie chart in
the report.
Report members Show the PDM(s) and group(s) that are members
of the group.
Notes View and write optional notes about the report.
Figure 3.13 Dose graph overview
In the dose graph tab, data from one or several PDMs will be presented as a
graph. It is possible to navigate in the graph and to customize the view
according to your needs, see section “View dose history as a graph ”
on page 4-11 and section “View dose history as a graph” on page 4-18 for
instructions.
Get to know Dose Manager
3-19

4
5
6
7
8
9
10
11
12
13
14
15
16
17
18
19
20
21
22
23
24
25
26
27
28
29
30
31
32
33
34
35
36
37
38
39
40
41
42
43
44
45
46
47
48
49
50
51
52
53
54
55
56
57
3.8 Dose graph tab overview
3.8.1
Graph legend
3-20
Get to know Dose Manager
In the graph legend you can see information about the graphs for different
PDMs.
Figure 3.14 Graph legend
P h i l i p s H e a l t h c a r e 9 8 9 7 1 0 0 0 1 2 7 3 0 9 0 0 a 4 4 7 8 0 0 4 5 a 3 b
DoseAware Dose Manager Package Document version 1.2

4
5
6
7
8
9
10
11
12
13
14
15
16
17
18
19
20
21
22
23
24
25
26
27
28
29
30
31
32
33
34
35
36
37
38
39
40
41
42
43
44
45
46
47
48
49
50
51
52
53
54
55
56
57
3.8.2
Selections in a dose graph
P h i l i p s H e a l t h c a r e 9 8 9 7 1 0 0 0 1 2 7 3
DoseAware Dose Manager Package Document version 1.2
Dose graph tab overview 3.8
Figure 3.15 A selection in a dose graph
Make selections in a dose graph to analyze a certain time span further, see
section “Make a selection in a graph” on page 4-13. When you have made a
selection, the following information is available in the graph legend:
Table 3.22 Dose graph selections
Item Description
Selection summary An overall description about the selection.
Start The selection’s start date and time.
End The selection’s end date and time.
Span The selection’s duration in number of days and
hours.
Name Sort the list of PDMs in a selection either
ascending or descending.
Dose The total dose in the selected time span.
Peak dose rate The maximum dose rate in the selected time span.
Mean dose rate The mean dose rate in the selected time span.
Get to know Dose Manager
3-21

4
5
6
7
8
9
10
11
12
13
14
15
16
17
18
19
20
21
22
23
24
25
26
27
28
29
30
31
32
33
34
35
36
37
38
39
40
41
42
43
44
45
46
47
48
49
50
51
52
53
54
55
56
57
3.9 Dose table tab overview
3.8.3
Events in a dose graph
3.9
Dose table tab overview
3-22
Get to know Dose Manager
The dose graph can show information about the following events:
Table 3.23 Dose graph events
Event Description
Base Station to PDM synchronization
occasions
Cradle to PDM synchronization
occasions
Session reset occasions Shows when Dose Session 1 or 2 has been reset.
Figure 3.16 Dose table overview
Shows when a PDM has been synchronized via a
Base Station.
Shows when a PDM has been synchronized via a
Cradle.
DoseAware Dose Manager Package Document version 1.2
P h i l i p s H e a l t h c a r e 9 8 9 7 1 0 0 0 1 2 7 3 0 9 0 0 a 4 4 7 8 0 0 4 5 a 3 b

4
5
6
7
8
9
10
11
12
13
14
15
16
17
18
19
20
21
22
23
24
25
26
27
28
29
30
31
32
33
34
35
36
37
38
39
40
41
42
43
44
45
46
47
48
49
50
51
52
53
54
55
56
57
P h i l i p s H e a l t h c a r e 9 8 9 7 1 0 0 0 1 2 7 3
DoseAware Dose Manager Package Document version 1.2
Dose table tab overview 3.9
In the dose table tab, data from one or several PDMs will be presented as
a table. It is possible to navigate in the table and to customize the view
according to your needs, see section “View dose history as a graph ”
on page 4-11 and section “View dose history as a graph” on page 4-18 for
instructions.
Get to know Dose Manager
3-23

4
5
6
7
8
9
10
11
12
13
14
15
16
17
18
19
20
21
22
23
24
25
26
27
28
29
30
31
32
33
34
35
36
37
38
39
40
41
42
43
44
45
46
47
48
49
50
51
52
53
54
55
56
57
3.9 Dose table tab overview
3-24
Get to know Dose Manager
P h i l i p s H e a l t h c a r e 9 8 9 7 1 0 0 0 1 2 7 3 0 9 0 0 a 4 4 7 8 0 0 4 5 a 3 b
DoseAware Dose Manager Package Document version 1.2

4
5
6
7
8
9
10
11
12
13
14
15
16
17
18
19
20
21
22
23
24
25
26
27
28
29
30
31
32
33
34
35
36
37
38
39
40
41
42
43
44
45
46
47
48
49
50
51
52
53
54
55
56
57
P h i l i p s H e a l t h c a r e 9 8 9 7 1 0 0 0 1 2 7 3
DoseAware Dose Manager Package Document version 1.2
4
4.1
4.1.1
Use Dose Manager
Get started with Dose Manager
Change PDM information and settings
N O T E
This chapter contains instructions and commonly used workflows in Dose
Manager. Detailed descriptions of all the available features are found in
section “Get to know Dose Manager ” on page 3-1.
When you change the PDM’s information and settings in Dose
Manager the PDM will synchronize these changes to Base Stations and
DoseView.
It is only possible to access and change the PDM options when the PDM is placed in
a Cradle.
Follow the instructions below to change PDM information and settings:
1 Make sure that a Cradle is connected to your computer’s USB port.
2 Insert a PDM in the Cradle.
The computer will detect the PDM automatically and the PDM
information will appear in Dose Manager.
3 Access the PDM options dialog by clicking the PDM options button in the
PDM Group in the Home tab.
The PDM options dialog is separated in three tabs. For descriptions about
the information that is available in these tabs, see section “PDMs” on page
3-4.
Use Dose Manager
4-1

4
5
6
7
8
9
10
11
12
13
14
15
16
17
18
19
20
21
22
23
24
25
26
27
28
29
30
31
32
33
34
35
36
37
38
39
40
41
42
43
44
45
46
47
48
49
50
51
52
53
54
55
56
57
4.1 Get started with Dose Manager
4-2
Use Dose Manager
Information tab — Change information about the person using the
PDM. Store or discard changes with Save or Cancel.
Figure 4.1 PDM settings Information tab
Settings tab — Change the PDM’s settings and access information about
the PDM. The actions synchronize time and reset dose history are applied
immediately. Store or discard all other changes with Save or Cancel.
P h i l i p s H e a l t h c a r e 9 8 9 7 1 0 0 0 1 2 7 3 0 9 0 0 a 4 4 7 8 0 0 4 5 a 3 b
DoseAware Dose Manager Package Document version 1.2

4
5
6
7
8
9
10
11
12
13
14
15
16
17
18
19
20
21
22
23
24
25
26
27
28
29
30
31
32
33
34
35
36
37
38
39
40
41
42
43
44
45
46
47
48
49
50
51
52
53
54
55
56
57
P h i l i p s H e a l t h c a r e 9 8 9 7 1 0 0 0 1 2 7 3
DoseAware Dose Manager Package Document version 1.2
Figure 4.2 PDM settings tab
Get started with Dose Manager 4.1
Use Dose Manager
4-3

4
5
6
7
8
9
10
11
12
13
14
15
16
17
18
19
20
21
22
23
24
25
26
27
28
29
30
31
32
33
34
35
36
37
38
39
40
41
42
43
44
45
46
47
48
49
50
51
52
53
54
55
56
57
4.1 Get started with Dose Manager
4 Wait for a few seconds before you remove the PDM from the Cradle after
4.1.2
Collect data from PDM
1 Make sure that a Cradle is connected to your computer’s USB port.
2 Insert a PDM in the Cradle.
4-4
Use Dose Manager
Dose tab — View the current accumulated dose
for the PDM and reset Dose Session 1 and 2. The action
reset Dose Session is applied immediately and also exits the dialog.
Figure 4.3 PDM settings Dose tab
you have saved the changes.
Follow the instructions below to collect data from a PDM:
P h i l i p s H e a l t h c a r e 9 8 9 7 1 0 0 0 1 2 7 3 0 9 0 0 a 4 4 7 8 0 0 4 5 a 3 b
The computer will detect the PDM automatically and the PDM
information will appear in Dose Manager.
DoseAware Dose Manager Package Document version 1.2

4
5
6
7
8
9
10
11
12
13
14
15
16
17
18
19
20
21
22
23
24
25
26
27
28
29
30
31
32
33
34
35
36
37
38
39
40
41
42
43
44
45
46
47
48
49
50
51
52
53
54
55
56
57
4.1.3
Collect data from Base Station
P h i l i p s H e a l t h c a r e 9 8 9 7 1 0 0 0 1 2 7 3
DoseAware Dose Manager Package Document version 1.2
Get started with Dose Manager 4.1
Follow the instructions below to collect data from one or several Base
Stations in your local network:
Figure 4.4 Collect data from Base Station
1 Click the button Manage in the Home toolbar.
2 Select Find Base Stations and wait while Dose Manager is searching for
Base Stations in your network.
3 Select a Base Station and click Select.
4 Check the box Include in synchronization and click OK.
5 Click the button Synchronize.
The PDM information will appear in Dose Manager.
Use Dose Manager
4-5

4
5
6
7
8
9
10
11
12
13
14
15
16
17
18
19
20
21
22
23
24
25
26
27
28
29
30
31
32
33
34
35
36
37
38
39
40
41
42
43
44
45
46
47
48
49
50
51
52
53
54
55
56
57
4.1 Get started with Dose Manager
4-6
4.1.4
Use Dose Manager
Collect data from USB
1 Click the button Synchronize USB in the Home toolbar.
2 Select the folder from which to synchronize Base Station data.
3 Click OK.
Finding Base Stations on a local network might not be possible due to the
network configuration. If you cannot find a Base Station that is installed on
your local network it can also be added to the list of Base Stations for Dose
Manger using its network IP address. The IP address used by the Base
Station can be found in its network setup menu.
Troubleshooting
If communication with a Base Stations that has been manually added to the
list by using its network address does not work, it might be a result of
network configuration. Make sure that the Base Station and Dose manager
PC is connected to the same network and use the same subnet mask. If the
problems cannot be resolved, contact the local network administrator.
Follow the instructions below to collect data from USB:
P h i l i p s H e a l t h c a r e 9 8 9 7 1 0 0 0 1 2 7 3 0 9 0 0 a 4 4 7 8 0 0 4 5 a 3 b
DoseAware Dose Manager Package Document version 1.2

4
5
6
7
8
9
10
11
12
13
14
15
16
17
18
19
20
21
22
23
24
25
26
27
28
29
30
31
32
33
34
35
36
37
38
39
40
41
42
43
44
45
46
47
48
49
50
51
52
53
54
55
56
57
P h i l i p s H e a l t h c a r e 9 8 9 7 1 0 0 0 1 2 7 3
4.1.5
4.1.6
DoseAware Dose Manager Package Document version 1.2
Show and manage groups of PDMs
W A R N I N G
Work with dose sessions
Get started with Dose Manager 4.1
Figure 4.5 Create a group of PDMs
Follow the steps below to create a new group:
1 Click the button Groups in the Home toolbar to view the groups’ tree.
2 Right-click Groups in the groups’ tree to create a new sub group.
3 Go back to the All PDMs window by clicking on Show in the PDMs
group; then drag PDM(s) from the All PDMs window to group(s) they are
going to belong to.
Right-click on a group to delete or rename the group or access group properties.
Deleting a PDM from the All PDMs window will result in removing the PDM and all
related dose history from the Dose Manager database.
Use Dose Session 1 and 2 to measure dose for specific time spans, for
example a specific procedure or a working day.
Use Dose Manager
4-7

4
5
6
7
8
9
10
11
12
13
14
15
16
17
18
19
20
21
22
23
24
25
26
27
28
29
30
31
32
33
34
35
36
37
38
39
40
41
42
43
44
45
46
47
48
49
50
51
52
53
54
55
56
57
4.1 Get started with Dose Manager
N O T E
Reset dose history
1 Make sure that a Cradle is connected to your computer’s USB port.
2 Insert a PDM in the Cradle.
3 Access the PDM settings dialog by clicking the PDM options button.
4 Select the Settings/dose tab.
5 Click Reset dose history. This action is applied immediately and also exits
Save data
4-8
4.1.7
4.1.8
Use Dose Manager
The end user can easily reset these Dose Sessions in the Base Station without
the use of a computer. When Dose Sessions are reset either on a Base
Station that is synchronized to Dose Manager, or directly in Dose Manager,
a Dose Session event will be added to the dose history. This event will be
visible on the PDM’s accumulated dose series when viewed.
Dose Session resets that are done in DoseView will not be displayed as an event in
Dose Manager.
The accumulated dose history, the dose rate history and Dose Sessions 1
and 2 will be reset to 0. The dose history that was available before reset will
be archived and possible to retrieve by clicking + next to the PDM in the All
PDMs window. Dose Manager will start a new session for the PDM and it
will appear as if the dose history will start measuring from 0 in the new session.
Follow the steps below to reset the dose history:
The computer will detect the PDM automatically and the PDM
information will appear in Dose Manager.
the dialog.
P h i l i p s H e a l t h c a r e 9 8 9 7 1 0 0 0 1 2 7 3 0 9 0 0 a 4 4 7 8 0 0 4 5 a 3 b
Dose Manager automatically saves application and dose
data to the database that you are currently working on.
DoseAware Dose Manager Package Document version 1.2

4
5
6
7
8
9
10
11
12
13
14
15
16
17
18
19
20
21
22
23
24
25
26
27
28
29
30
31
32
33
34
35
36
37
38
39
40
41
42
43
44
45
46
47
48
49
50
51
52
53
54
55
56
57
P h i l i p s H e a l t h c a r e 9 8 9 7 1 0 0 0 1 2 7 3
DoseAware Dose Manager Package Document version 1.2
4.2
4.2.1
N O T E S
Work with the main window
Customize the columns
Work with the main window 4.2
Use Save as to save the database you are currently working on with a
new name.
• The database can only be saved on a local drive. A network drive is not supported.
• Dose Manager does not handle backup and restore. Therefore you have to make
sure that you are saving the database in a location that is backed up.
Figure 4.6 Customize columns
Use Dose Manager
4-9

4
5
6
7
8
9
10
11
12
13
14
15
16
17
18
19
20
21
22
23
24
25
26
27
28
29
30
31
32
33
34
35
36
37
38
39
40
41
42
43
44
45
46
47
48
49
50
51
52
53
54
55
56
57
4.2 Work with the main window
4.2.2
Sort information in the columns
4-10
Use Dose Manager
Follow the instructions below to add or remove columns in the main window:
1 Right-click in the column header row in the main window and select
Show field chooser.
2 Drag and drop column headers between the field chooser and the column
header row in the main window.
The order of the selected column headers can be easily changed. Just drag
and drop a column header to move it to the left or to the right.
• Click on the different column headers to sort the list ascending or descending.
P h i l i p s H e a l t h c a r e 9 8 9 7 1 0 0 0 1 2 7 3 0 9 0 0 a 4 4 7 8 0 0 4 5 a 3 b
DoseAware Dose Manager Package Document version 1.2

4
5
6
7
8
9
10
11
12
13
14
15
16
17
18
19
20
21
22
23
24
25
26
27
28
29
30
31
32
33
34
35
36
37
38
39
40
41
42
43
44
45
46
47
48
49
50
51
52
53
54
55
56
57
P h i l i p s H e a l t h c a r e 9 8 9 7 1 0 0 0 1 2 7 3
DoseAware Dose Manager Package Document version 1.2
4.3
4.3.1
Analyze dose history from one PDM
View dose history as a graph
Analyze dose history from one PDM 4.3
Figure 4.7 View dose history as a graph
Follow the instructions below to view dose history as a graph:
1 Select the PDM you would like to analyze in the All PDMs window.
2 Click the tab Dose Graph to see the dose data presented as a graph.
3 Click Show all.
All available data for the selected PDM will appear. The time range will
start the first date the PDM begun to measure dose and stop the last
date the PDM was synchronized.
Use Dose Manager
4-11

4
5
6
7
8
9
10
11
12
13
14
15
16
17
18
19
20
21
22
23
24
25
26
27
28
29
30
31
32
33
34
35
36
37
38
39
40
41
42
43
44
45
46
47
48
49
50
51
52
53
54
55
56
57
4.3 Analyze dose history from one PDM
4 Use the Navigation and Graph details toolbars in the Dose
Navigation toolbar to customize the graph and navigate in it.
5 Click the button Legend to the left of the graph to see the graph legend.
To make the graph legend permanently visible, click the pin in the upper
right corner. Click the pin again to hide the graph legend.
To change the graph colors, select a PDM and right-click on it. Select either
dose graph color or dose rate graph color and choose your preferred color
and click OK.
4.3.2
Navigate in a graph
Figure 4.8 Zoom in a graph
Perform the following actions to navigate in a graph:
1 Use the mouse to left click and drag in the graph to increase the view
magnification.
2 Use the tools in the dose navigation toolbar to navigate further in the graph.
4-12
Use Dose Manager
P h i l i p s H e a l t h c a r e 9 8 9 7 1 0 0 0 1 2 7 3 0 9 0 0 a 4 4 7 8 0 0 4 5 a 3 b
DoseAware Dose Manager Package Document version 1.2

4
5
6
7
8
9
10
11
12
13
14
15
16
17
18
19
20
21
22
23
24
25
26
27
28
29
30
31
32
33
34
35
36
37
38
39
40
41
42
43
44
45
46
47
48
49
50
51
52
53
54
55
56
57
4.3.3
Make a selection in a graph
P h i l i p s H e a l t h c a r e 9 8 9 7 1 0 0 0 1 2 7 3
DoseAware Dose Manager Package Document version 1.2
Analyze dose history from one PDM 4.3
Figure 4.9 Make a selection in a graph
If you want to analyze a certain part of a graph further, follow
the instructions below to make a selection, which will give you more
information:
1 Use the mouse to Shift-click and drag to select in the graph.
This makes a selection in a time span in the graph. The selection is
indicated with vertical red dotted lines.
2 View detailed information from the selection in the graph legend.
3 Clear the selection by clicking Clear in the dose navigation toolbar.
Use Dose Manager
4-13

4
5
6
7
8
9
10
11
12
13
14
15
16
17
18
19
20
21
22
23
24
25
26
27
28
29
30
31
32
33
34
35
36
37
38
39
40
41
42
43
44
45
46
47
48
49
50
51
52
53
54
55
56
57
4.3 Analyze dose history from one PDM
4.3.4
View dose history as a table
Figure 4.10 View dose history as a table
Follow the instructions below to view dose history as a table:
1 Select the PDM you would like to analyze in the All PDMs window.
2 Click the tab Dose Table to see the dose data presented in a table.
3 Click Show all.
All available data for the selected PDM will appear. The time range will
start the first date the PDM begun to measure dose and stop the last
date the PDM was synchronized.
4-14
Use Dose Manager
P h i l i p s H e a l t h c a r e 9 8 9 7 1 0 0 0 1 2 7 3 0 9 0 0 a 4 4 7 8 0 0 4 5 a 3 b
DoseAware Dose Manager Package Document version 1.2

4
5
6
7
8
9
10
11
12
13
14
15
16
17
18
19
20
21
22
23
24
25
26
27
28
29
30
31
32
33
34
35
36
37
38
39
40
41
42
43
44
45
46
47
48
49
50
51
52
53
54
55
56
57
N O T E
4.3.5
Print data from a dose graph or dose table
P h i l i p s H e a l t h c a r e 9 8 9 7 1 0 0 0 1 2 7 3
DoseAware Dose Manager Package Document version 1.2
Analyze dose history from one PDM 4.3
4 Click Expand all to see detailed information.
5 Use the Navigation and Graph details toolbars in the Dose
Navigation toolbar to customize the table and navigate in it.
The data presented in the table depends on which time span that is used.
Figure 4.11 Print dose history
Use Dose Manager
4-15

4
5
6
7
8
9
10
11
12
13
14
15
16
17
18
19
20
21
22
23
24
25
26
27
28
29
30
31
32
33
34
35
36
37
38
39
40
41
42
43
44
45
46
47
48
49
50
51
52
53
54
55
56
57
4.3 Analyze dose history from one PDM
The currently viewed dose graph or dose table can be printed. The same
data that is displayed will be printed. Follow the instructions below to print:
1 Enter the application menu and either select Print or continue with steps 2-3.
2 Select Print Preview to preview and customize the print area.
In this menu you can also find tools to export and e-mail the current view.
3 Select Print.
4.3.6
Export data from a dose table
Figure 4.12 Export data from dose table
4-16
Use Dose Manager
P h i l i p s H e a l t h c a r e 9 8 9 7 1 0 0 0 1 2 7 3 0 9 0 0 a 4 4 7 8 0 0 4 5 a 3 b
DoseAware Dose Manager Package Document version 1.2

4
5
6
7
8
9
10
11
12
13
14
15
16
17
18
19
20
21
22
23
24
25
26
27
28
29
30
31
32
33
34
35
36
37
38
39
40
41
42
43
44
45
46
47
48
49
50
51
52
53
54
55
56
57
N O T E
P h i l i p s H e a l t h c a r e 9 8 9 7 1 0 0 0 1 2 7 3
DoseAware Dose Manager Package Document version 1.2
Analyze dose history from one PDM 4.3
Follow the instructions below to export data from a dose table for further
analysis:
1 Make sure that you are in the Dose Table view.
2 Select the PDM(s) from which you want to export data.
Note that all PDMs in a selection may not have been exposed to radiation
during the same time.
3 Click the Export button and select your preferred file format.
4 Save the document on your computer.
Only the data that is currently visible in the dose table will be exported. Click the
button Expand all to make all data visible.
Copy specific cells in a table
1 Make sure that you are in the Dose Table view.
2 Select the PDM(s) from which you want to export data.
Note that all PDMs in a selection may not have been exposed to radiation
during the same time.
3 Select the cells that you want to copy by clicking on the first and last row
that are going to be included.
4 Copy the cells with the command ctrl + c.
5 Paste the copied cells in the target document with the command ctrl + v.
Export data to a tab-separated text file
1 Make sure that you are in the Dose Table view.
2 Select the PDM(s) from which you want to export data.
Note that all PDMs in a selection may not have been exposed to radiation
during the same time.
Use Dose Manager
4-17

4
5
6
7
8
9
10
11
12
13
14
15
16
17
18
19
20
21
22
23
24
25
26
27
28
29
30
31
32
33
34
35
36
37
38
39
40
41
42
43
44
45
46
47
48
49
50
51
52
53
54
55
56
57
4.4 Analyze dose data from several PDMs
4-18
4.4
4.4.1
Use Dose Manager
N O T E
Analyze dose data from several PDMs
View dose history as a graph
3 Click the Export raw data button.
4 Save the document on your computer.
Only the data that is currently visible in the dose table will be exported. Click the
button Expand all to make all data visible.
Figure 4.13 Analyze dose history from several PDMs
P h i l i p s H e a l t h c a r e 9 8 9 7 1 0 0 0 1 2 7 3 0 9 0 0 a 4 4 7 8 0 0 4 5 a 3 b
DoseAware Dose Manager Package Document version 1.2

4
5
6
7
8
9
10
11
12
13
14
15
16
17
18
19
20
21
22
23
24
25
26
27
28
29
30
31
32
33
34
35
36
37
38
39
40
41
42
43
44
45
46
47
48
49
50
51
52
53
54
55
56
57
P h i l i p s H e a l t h c a r e 9 8 9 7 1 0 0 0 1 2 7 3
DoseAware Dose Manager Package Document version 1.2
Analyze dose data from several PDMs 4.4
Follow the instructions below to view dose history from several PDMs as a
graph:
1 Select either:
Several PDMs in the All PDMs window by holding down Ctrl while
•
clicking on the PDMs.
Or
• A group of PDMs.
2 Click the tab Dose Graph to see the dose data presented as a graph.
3 Click Show all.
All available data for the selected PDMs will appear. The time range will
start the first date any PDM received dose and stop the last date any PDM
received dose.
Use Dose Manager
4-19

4
5
6
7
8
9
10
11
12
13
14
15
16
17
18
19
20
21
22
23
24
25
26
27
28
29
30
31
32
33
34
35
36
37
38
39
40
41
42
43
44
45
46
47
48
49
50
51
52
53
54
55
56
57
4.4 Analyze dose data from several PDMs
4 Click the button Legend to the left of the graph to see the graph legend.
To make the graph legend permanently visible, click the pin in the upper
right corner. Click the pin again to hide the graph legend.
To change the graph colors, select a PDM and right-click on it. Select either
dose graph color or dose rate graph color and choose your preferred color
and click OK.
Figure 4.14 Make a selection in a graph
If you want to analyze a certain part of a graph further, follow the steps
below to make a selection:
5 Make sure that the graphs you are interested in looking at are selected.
4-20
Use Dose Manager
P h i l i p s H e a l t h c a r e 9 8 9 7 1 0 0 0 1 2 7 3 0 9 0 0 a 4 4 7 8 0 0 4 5 a 3 b
DoseAware Dose Manager Package Document version 1.2

4
5
6
7
8
9
10
11
12
13
14
15
16
17
18
19
20
21
22
23
24
25
26
27
28
29
30
31
32
33
34
35
36
37
38
39
40
41
42
43
44
45
46
47
48
49
50
51
52
53
54
55
56
57
4.4.2
View dose history as a table
P h i l i p s H e a l t h c a r e 9 8 9 7 1 0 0 0 1 2 7 3
DoseAware Dose Manager Package Document version 1.2
Analyze dose data from several PDMs 4.4
6 Click Shift in combination with using the mouse to left click and drag in
the graph.
This makes a selection in a time span in the graph. The selection is
indicated with vertical red dotted lines.
7 View information about this selection in the graph legend.
8 Click Clear, either in the graph legend or in the Dose
Navigation toolbar, to clear your selection.
Figure 4.15 View dose history as a table
Use Dose Manager
4-21

4
5
6
7
8
9
10
11
12
13
14
15
16
17
18
19
20
21
22
23
24
25
26
27
28
29
30
31
32
33
34
35
36
37
38
39
40
41
42
43
44
45
46
47
48
49
50
51
52
53
54
55
56
57
4.5 Reports
4.4.3
4.4.4
4.5
4-22
Use Dose Manager
Follow the instructions below to view dose history as a table:
1 Select either:
Several PDMs in the All PDMs window by holding down Ctrl while
•
clicking on the PDMs.
Or
• A group of PDMs.
2 Click the tab Dose Table to see the dose data presented in a table.
3 Click Show all.
All available data for the selected PDM will appear. The time range will
start the first date the PDM begun to measure dose and stop the last
date the PDM was synchronized.
4 Use the Navigation and Graph details toolbars in the Dose
Navigation toolbar to customize the table and navigate in it.
N O T E
The data presented in the table depends on which time span is used.
Print data from a dose graph or dose table
See section “Print data from a dose graph or dose table ” on page
4-15
Export data from a dose table
See section “Export data from a dose table ” on page 4-16
Reports
You can easily create reports for further analysis of both separate PDMs and
groups of PDMs.
DoseAware Dose Manager Package Document version 1.2
P h i l i p s H e a l t h c a r e 9 8 9 7 1 0 0 0 1 2 7 3 0 9 0 0 a 4 4 7 8 0 0 4 5 a 3 b

4
5
6
7
8
9
10
11
12
13
14
15
16
17
18
19
20
21
22
23
24
25
26
27
28
29
30
31
32
33
34
35
36
37
38
39
40
41
42
43
44
45
46
47
48
49
50
51
52
53
54
55
56
57
4.5.1
Create reports
P h i l i p s H e a l t h c a r e 9 8 9 7 1 0 0 0 1 2 7 3
DoseAware Dose Manager Package Document version 1.2
Reports 4.5
Figure 4.16 Create a report
Follow the instructions below to create a report for dose data:
1 Click the Show button in the reports group.
2 Click New.
Dose Manager will open a Report Wizard.
3 Select one of the standard templates and press Next.
4 Select which PDM(s) and/or group(s) of PDMs to include in the report by
using the arrows and press Next.
Use Dose Manager
4-23

4
5
6
7
8
9
10
11
12
13
14
15
16
17
18
19
20
21
22
23
24
25
26
27
28
29
30
31
32
33
34
35
36
37
38
39
40
41
42
43
44
45
46
47
48
49
50
51
52
53
54
55
56
57
4.5 Reports
4.5.2
4-24
Use Dose Manager
5 Select the time range for the report.
If the end time for the report is in the future, for example if you make a
report for the current year before it is ended, the report will be dynamically
updated each month.
6 Click Create.
7 Access the report preview mode by double-clicking it in the
Main toolbar. Exit the report preview by clicking Close.
Export or e-mail a report
N O T E
To be able to e-mail a report you need to have an external e-mail client installed on
your computer.
Figure 4.17 Select a report to export or e-mail
P h i l i p s H e a l t h c a r e 9 8 9 7 1 0 0 0 1 2 7 3 0 9 0 0 a 4 4 7 8 0 0 4 5 a 3 b
DoseAware Dose Manager Package Document version 1.2

4
5
6
7
8
9
10
11
12
13
14
15
16
17
18
19
20
21
22
23
24
25
26
27
28
29
30
31
32
33
34
35
36
37
38
39
40
41
42
43
44
45
46
47
48
49
50
51
52
53
54
55
56
57
P h i l i p s H e a l t h c a r e 9 8 9 7 1 0 0 0 1 2 7 3
DoseAware Dose Manager Package Document version 1.2
Reports 4.5
Follow the instructions below to export or e-mail a report:
1 Click the Show button in the reports group.
2 Double-click on the report you would like to export to enter the report
preview mode.
Figure 4.18 Export or e-mail a report
3 Select either Export or E-mail as in the Document toolbar and select the
preferred file format.
4 Enter export options.
5 Click Close to exit the report preview mode.
Use Dose Manager
4-25

4
5
6
7
8
9
10
11
12
13
14
15
16
17
18
19
20
21
22
23
24
25
26
27
28
29
30
31
32
33
34
35
36
37
38
39
40
41
42
43
44
45
46
47
48
49
50
51
52
53
54
55
56
57
4.6 Dose Manager options
4-26
4.6
4.6.1
4.6.2
4.6.3
Use Dose Manager
Dose Manager options
Set password
N O T E
Change password
Change language
To protect the information stored in Dose Manager, it is possible to set an
optional password that will be required when Dose Manager is launched.
Follow the instructions below to set a password:
1 Click the Application menu.
2 Select Options.
3 Enter a password in the field New Password.
Contact you local administrator for password guidelines.
4 Repeat the password in the field Verify Password.
5 Click OK.
Follow the instructions below to change the current password:
1 Click the Application menu.
2 Select Options.
3 Enter your current password in the field Current Password.
4 Enter a new password in the field New Password.
5 Repeat the new password in the field Verify Password.
6 Click OK.
P h i l i p s H e a l t h c a r e 9 8 9 7 1 0 0 0 1 2 7 3 0 9 0 0 a 4 4 7 8 0 0 4 5 a 3 b
Follow the instructions below to change the user interface language:
1 Click the Application menu.
2 Select Options.
DoseAware Dose Manager Package Document version 1.2

4
5
6
7
8
9
10
11
12
13
14
15
16
17
18
19
20
21
22
23
24
25
26
27
28
29
30
31
32
33
34
35
36
37
38
39
40
41
42
43
44
45
46
47
48
49
50
51
52
53
54
55
56
57
P h i l i p s H e a l t h c a r e 9 8 9 7 1 0 0 0 1 2 7 3
DoseAware Dose Manager Package Document version 1.2
4.7
Dose manager license
Dose manager license 4.7
3 Select your preferred language in the drop-down menu.
4 Click OK.
5 Re-start Dose Manager to apply the change.
Dose Manager shall be used only on the designated hardware and at the site
of the licensee as specified in the Customer Software License Agreement. A
separate Dose Manager is required per each designated hardware on which
the Dose Manager is to be used.
Use Dose Manager
4-27

4
5
6
7
8
9
10
11
12
13
14
15
16
17
18
19
20
21
22
23
24
25
26
27
28
29
30
31
32
33
34
35
36
37
38
39
40
41
42
43
44
45
46
47
48
49
50
51
52
53
54
55
56
57
4.7 Dose manager license
4-28
Use Dose Manager
P h i l i p s H e a l t h c a r e 9 8 9 7 1 0 0 0 1 2 7 3 0 9 0 0 a 4 4 7 8 0 0 4 5 a 3 b
DoseAware Dose Manager Package Document version 1.2

4
5
6
7
8
9
10
11
12
13
14
15
16
17
18
19
20
21
22
23
24
25
26
27
28
29
30
31
32
33
34
35
36
37
38
39
40
41
42
43
44
45
46
47
48
49
50
51
52
53
54
55
56
57
P h i l i p s H e a l t h c a r e 9 8 9 7 1 0 0 0 1 2 7 3
DoseAware Dose Manager Package Document version 1.2
5
5.1
5.2
Product disposal
Introduction
Passing the system on to another user
Philips Medical Systems is concerned to help protect the natural
environment, and to help ensure continued safe and effective use of this
product, through proper support, maintenance and training.
Therefore Philips products are designed and manufactured to comply with
relevant guidelines for environmental protection. As long as the product is
properly operated and maintained, it presents no environmental risks.
However, the product may contain material, which could be harmful to the
environment if disposed of incorrectly. Use of such material is essential to
performing the functions of the product, and to meeting statutory and other
requirements.
This section of these Instructions for Use is directed mainly at the user/
owner of the product.
If this product passes to another user, it must be in its complete state,
including all product support documentation.
Make the new user aware of the support services that Philips Medical
Systems provides for installing, commissioning and maintaining the product.
Before passing on the product or taking it out of service, all data must be
(backed up elsewhere if necessary, and) unrecoverable be deleted on the
product.
It must be remembered by all existing users that passing on electrical
products to new users may create serious technical, medical and legal (e.g.
on privacy) risks. Such risks can arise even if the product is given away.
Product disposal
5-1

4
5
6
7
8
9
10
11
12
13
14
15
16
17
18
19
20
21
22
23
24
25
26
27
28
29
30
31
32
33
34
35
36
37
38
39
40
41
42
43
44
45
46
47
48
49
50
51
52
53
54
55
56
57
5.3 Final disposal of the system
5-2
5.3
Product disposal
Final disposal of the system
Existing users are strongly advised to seek advice from their local Philips
Medical Systems representative before committing themselves to passing on
any product. Alternatively, contact the manufacturer.
Once the product has been passed on to a new user, a previous user may still
receive important safety-related information, such as bulletins and field
change orders. In many jurisdictions, there is a clear duty on the previous
user to communicate such safety-related information to new users. Previous
users who are not able or prepared to do this should inform Philips Medical
Systems about the new user, so that Philips Medical Systems can provide the
new user with safety-related information.
Final disposal is when the user disposes of the product in such a way that it
can no longer be used for its intended purpose(s).
In the European Union, this label (according to the WEEE directive)
indicates that the product should not be disposed of together with
household waste:
This product should be disposed of at an appropriate facility to enable
recovery and recycling.
Philips supports users in:
•
Recovering reusable parts.
• Recycling of useful materials by competent disposal companies.
• Safe and effective disposal of product.
DoseAware Dose Manager Package Document version 1.2
P h i l i p s H e a l t h c a r e 9 8 9 7 1 0 0 0 1 2 7 3 0 9 0 0 a 4 4 7 8 0 0 4 5 a 3 b

4
5
6
7
8
9
10
11
12
13
14
15
16
17
18
19
20
21
22
23
24
25
26
27
28
29
30
31
32
33
34
35
36
37
38
39
40
41
42
43
44
45
46
47
48
49
50
51
52
53
54
55
56
57
P h i l i p s H e a l t h c a r e 9 8 9 7 1 0 0 0 1 2 7 3
DoseAware Dose Manager Package Document version 1.2
5.4
Fitting, removing, and disposing of batteries
N O T E
Fitting, removing, and disposing of batteries 5.4
For advice and information, contact your Philips Service Organization first,
or otherwise the manufacturer.
Batteries harm the environment; dispose of the old batteries in an environmentally
sound way.
For information about disposal of the product, batteries, and hazardous
materials, see the Philips Medical Systems product sustainability website at:
http://www.healthcare.philips.com/main/about/Sustainability/Recycling/
Product disposal
5-3

4
5
6
7
8
9
10
11
12
13
14
15
16
17
18
19
20
21
22
23
24
25
26
27
28
29
30
31
32
33
34
35
36
37
38
39
40
41
42
43
44
45
46
47
48
49
50
51
52
53
54
55
56
57
5.4 Fitting, removing, and disposing of batteries
5-4
Product disposal
P h i l i p s H e a l t h c a r e 9 8 9 7 1 0 0 0 1 2 7 3 0 9 0 0 a 4 4 7 8 0 0 4 5 a 3 b
DoseAware Dose Manager Package Document version 1.2

4
5
6
7
8
9
10
11
12
13
14
15
16
17
18
19
20
21
22
23
24
25
26
27
28
29
30
31
32
33
34
35
36
37
38
39
40
41
42
43
44
45
46
47
48
49
50
51
52
53
54
55
56
57
P h i l i p s H e a l t h c a r e 9 8 9 7 1 0 0 0 1 2 7 3
DoseAware Dose Manager Package Document version 1.2
6
6.1
6.2
Technical data
PDM and Base Station/Dose Manager memories
Time management
Dose rate samples that have been overwritten in the PDM’s dose rate
memory may still be available in the Base Station and
Dose Manager memories.
If there are no dose rate samples neither in the Base Station or
Dose Manager memories, nor in the PDM dose rate memory, the Base
Station and Dose Manager will instead display mean dose rate values based
on accumulated dose values.
Lack of dose rate samples in the Base Station and/or
Dose Manager memories occurs when the:
• PDM is not within range of the Base Station when it is exposed to radiation.
Dose rate samples in the PDM dose rate memory are overwritten.
•
The PDM logs dose history in local time with no daylight saving time
adjustments. Daylight saving time adjustment is done in the Base Station,
DoseView or Dose Manager when the dose history is presented.
The following happens when the daylight saving time is changed:
• When going to summertime, one extra hour with no dose data will be
added to the dose log.
• When going to wintertime, two hours of dose data will be merged into
one hour. This hour contains no dose rate details. When changing
from summertime to wintertime, dose date details in the two merged
hours will not be displayed.
Technical data
6-1

4
5
6
7
8
9
10
11
12
13
14
15
16
17
18
19
20
21
22
23
24
25
26
27
28
29
30
31
32
33
34
35
36
37
38
39
40
41
42
43
44
45
46
47
48
49
50
51
52
53
54
55
56
57
6.3 Security and privacy requirements
6.3
Security and privacy requirements
Network ports
The following ports and protocols are open on the Base Station for
communication with the Dose Manager:
Encryption
DoseAware data is encrypted during transmission, at rest on the Base
Station and is stored in an encrypted Dose Manager database.
6-2
Technical data
TCP/UDP Port
number
TCP 8070 gSOAP httpd 2.7 Used for regular (bidirectional)
UDP 8060 Proprietary discovery
Protocol Additional note
communication between Base Station
and Dose Manager
Protocol (bidirectional) used for Base
protocol
DoseAware Dose Manager Package Document version 1.2
Station discovery
P h i l i p s H e a l t h c a r e 9 8 9 7 1 0 0 0 1 2 7 3 0 9 0 0 a 4 4 7 8 0 0 4 5 a 3 b
 Loading...