

Uncle Milton Shark Encounter User Manual
SCENE SET-UP
5+
2184
INSTRUCTION MANUAL
1
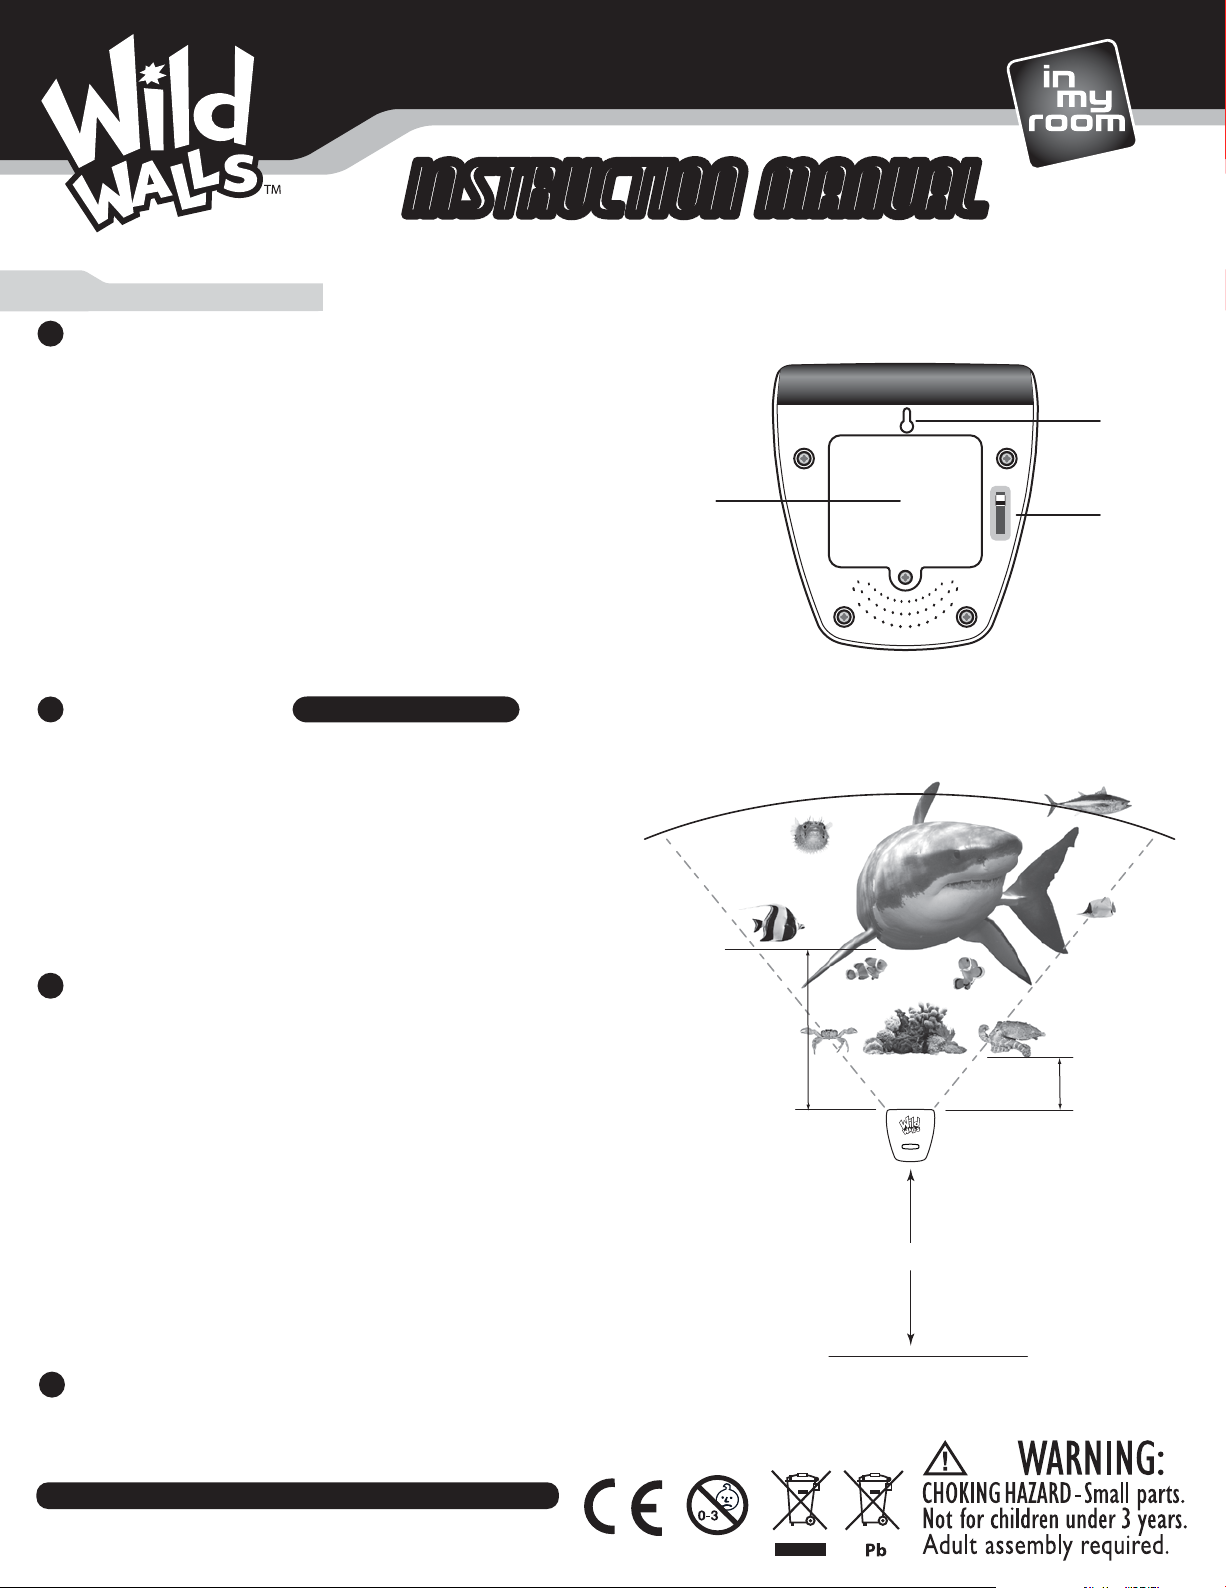
Install the Wallscape FX ActivatorTM on your Wall
Before installing your Activator, move the function switch on the back
of the Activator from “Try Me” to “Play”. This will enable full special
eects functionality.
The Activator should only be mounted on a vertical surface.
For optimal results, place a nail or screw into the wall approximately
4 feet from the oor. Then, position the Activator onto the wall by
placing the hang hole on the back of activator directly over the nail
until securely in place.
Note: For rooms with ceilings higher than 8 feet, you may want to
position the activator higher than 4 feet to ensure that the light
suciently illuminates the wall and the ceiling.
2
Wall Decal Preparation
DO NOT SKIP THIS STEP
After removing the decals from the package, roll out the sheet and lay
at for 24 – 48 hours until the sheet no longer wants to curl back up.
For best results apply the decals onto smooth, clean surfaces. The decals
may not stick to heavily textured surfaces. Do not apply to fresh paint or
wallpaper. Let the new paint/wallpaper dry for at least 3 weeks. Before
applying the decals to wallpaper or other delicate surfaces, test one in an
inconspicuous area. Keep the decals away from cribs and out of reach of
young children to prevent choking hazard.
Battery
Cover
36” inches
15” inches
Wallscape FX ActivatorTM Wallscape FX ActivatorTM
Hang
Hole
TRY ME
Function
Switch
PLAY
Scene Set-UpScene Set-Up
Create your Scene by placing the Wall Decals
3
To apply each decal, carefully peel it o from the sheet. Then, place and
smooth the decal onto your wall in the desired location. To remove or
reposition each decal, just carefully peel it o from the wall. Kids can follow
the suggested scene layout or customize and create their own scene. For
optimal function with the light eects, please note the following suggestions
on wall decal placement:
• Begin with the lowest decal positioned 6” inches above the top of the
Activator.
• Then, place the bottom of the largest featured animal decal approximately
15” above the top of the Activator.
• Place all other decals around the featured animal decal but ideally no more
than 36 inches above the top of the Activator. This will help to
ensure that all decals are illuminated by the light cast.
On textured walls, periodically check the decals to make sure they are remaining at
4
against the surface. Gently smooth any parts of the decal, that appear to be lifting o the
surface. Repeat as needed until the decals remain at against the surface.
KEEP THESE INSTRUCTIONS FOR FUTURE REFERENCE — DO NOT DISCARD
Questions? Visit unclemilton.com
PRODUCT STYLES
MAY VARY
6” inches
Top of Wallscape
FX Activator
4 Feet
Floor
FOR BEST ILLUMINATION, USE IN A DARKENED ROOM.
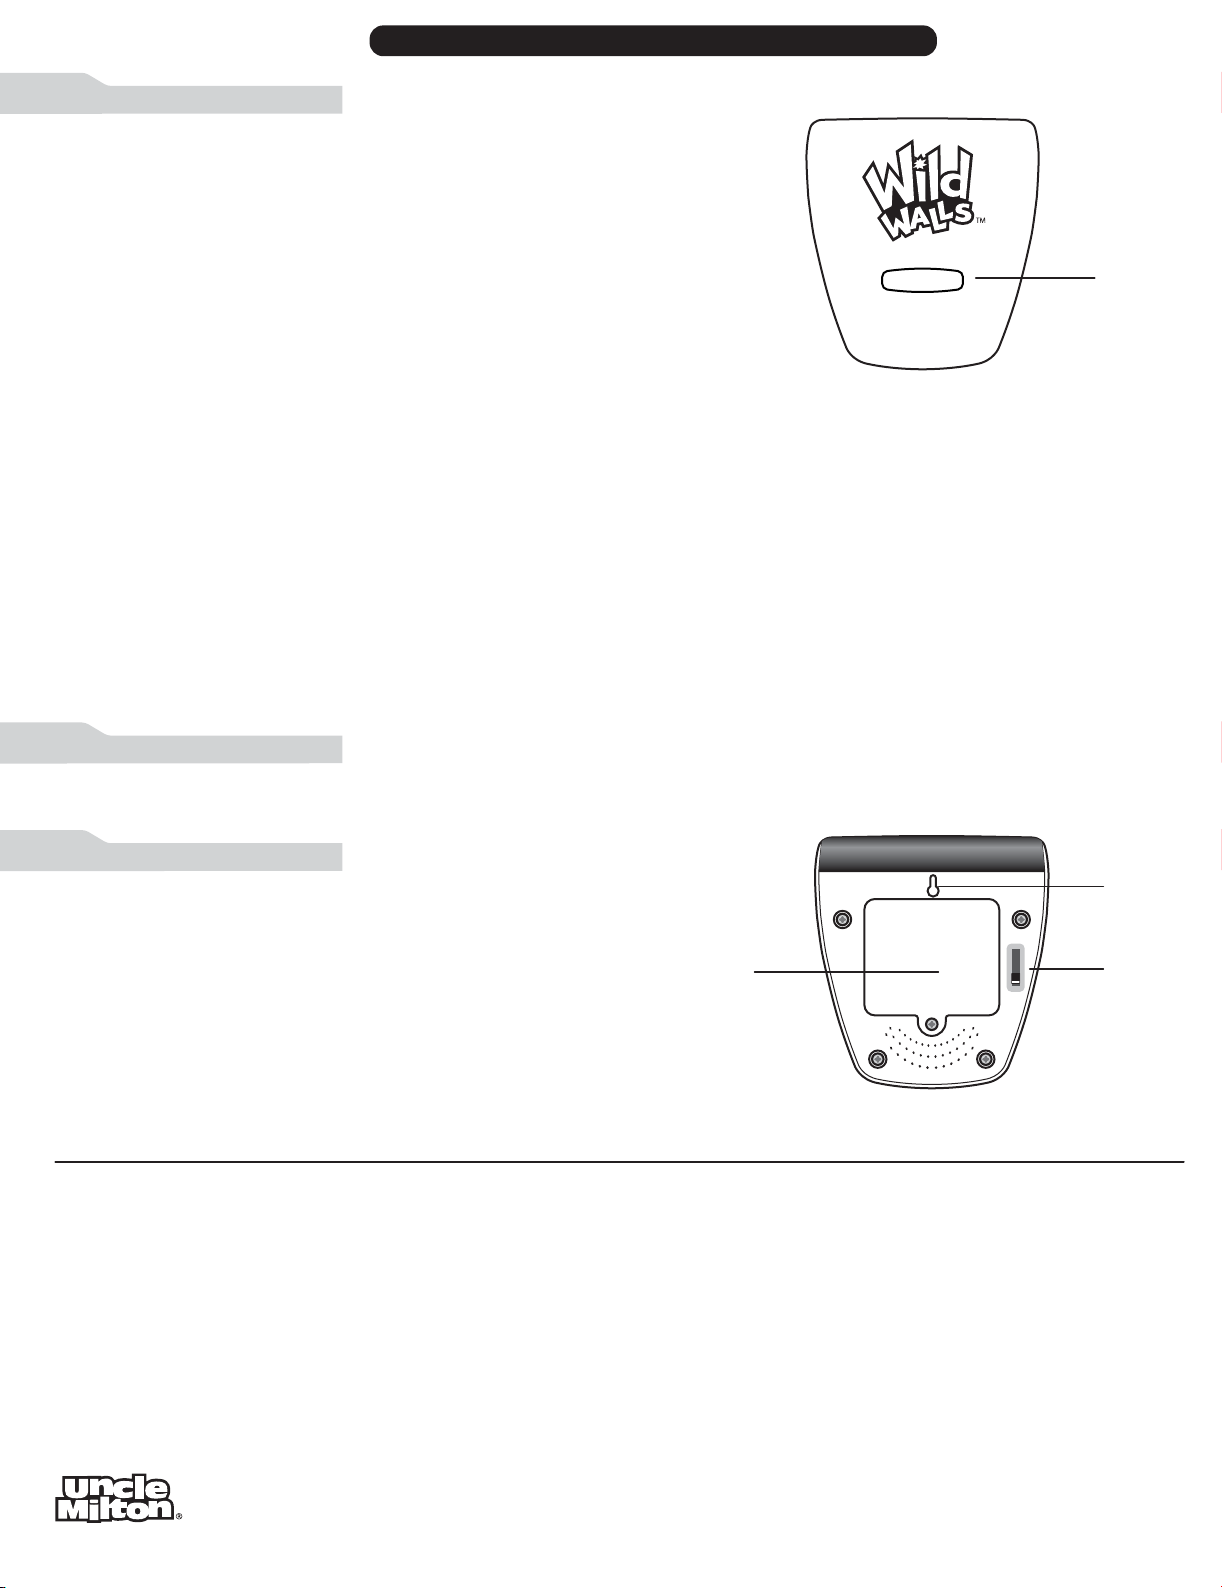
SCENE ACTIVATION
Now you can activate your scene using dierent programming modes on the
Wallscape FX Activator as follows:
TRY ME (10 second demo)
This is the factory default program and is used for in store demonstration. It is not
intended for home use and has limited functionality. For full functionality, move the
function switch on the back of the Wallscape FX Activator from “Try Me” to “Play”.
MODE 1 – FULL FUNCTIONALITY LIGHT & SOUND SHOW
Press the program button once to activate. This will enable full light and sound
special eects including the following:
• Scene environment and animal sound eects
• Light gently fading in and out, illuminating your wall and ceiling
• Synchronized lights and sounds that bring the scene to life.
In this mode, auto shut-o of the sound will occur approximately after 5 minutes and auto
shut-o of the light will occur approximately after 10 minutes.
MODE 2 – LIGHT SHOW & SCENE ENVIRONMENT SOUNDS ONLY
Press the program button twice to activate. This will enable full light functionality but only the
scene environment sound eects. Auto shut-o timing is the same as Mode 1.
Program
Button
MODE 3 – LIGHT SHOW ONLY
Press the program button three times to activate. This will enable full light functionality but will
not include any sound eects. Auto shut-o will occur approximately after 20 minutes.
MANUAL SHUT-OFF
To manually turn o the Wallscape FX Activator, press and hold down the program button for
approximately two seconds until the light and sound turns o.
BATTERY REPLACEMENT
Tool required - Small Phillips head screwdriver
Requires 3 AA/LR6 alkaline batteries.
1. Using a Phillips head screwdriver, remove the battery cover.
Battery
Cover
2. Insert 3 AA/LR6 alkaline batteries as indicated in the battery
compartment and replace cover.
3. IMPORTANT! Switch the Wallscape FX Activator to the PLAY
position before hanging on the wall.
NOTE: This equipment has been tested and found to comply with the limits for a Class B digital device, pursuant
to Part 15 of the FCC Rules. These limits are designed to provide reasonable protection against harmful
interference in a residential installation. This equipment generates, uses and can radiate radio frequency
energy and, if not installed and used in accordance with the instructions, may cause harmful interference to
radio communications. However, there is no guarantee that interference will not occur in a particular
installation. If this equipment does cause harmful interference to radio or television reception, which can be
determined by turning the equipment o and on, the user is encouraged to try to correct the interference by
one or more of the following measures:
- Reorient or relocate the receiving antenna.
- Increase the separation between the equipment and receiver.
- Connect the equipment into an outlet on a circuit dierent from that to which the receiver is connected.
- Consult the dealer or an experienced radio/TV technician for help.
MANUFACTURED BY UNCLE MILTON INDUSTRIES, INC.
P.O. Box 6281
THOUSAND OAKS, CA 91359 USA
©2013 UMI. All rights reserved. ® and
trademarks of Uncle Milton Industries, Inc.
MADE IN CHINA
TM
designate
This device complies with Part 15 of the FCC Rules.
Operation is subject to the following two conditions:
(1) This device may not cause harmful interference, and
(2) This device must accept any interference received,
including interference that may cause undesired operation.
Caution: changes or modications not expressly approved by the party responsible for
compliance could void the user’s authority to operate the equipment.
BATTERY SAFETY INFORMATION
• Non-rechargeable batteries are not to be recharged.
• Rechargeable batteries are to be removed from the toy before being charged.
• Rechargeable batteries are only to be charged under adult supervision.
• Dierent types of batteries or new and used batteries are not to be mixed.
• Batteries are to be inserted with the correct polarity.
• Exhausted batteries are to be removed from the toy.
• The supply terminals are not to be short-circuited.
• Do not mix old and new batteries.
• Do not mix alkaline, standard (carbon-zinc) or rechargeable (nickel-cadmium) batteries.
• Do not dispose of batteries in re. Battery may explode or leak.
TRY ME
Hang
Hole
Function
PLAY
Switch
WildWalls-0250-0513
 Loading...