

Uncle Milton Ever Wonder Star Planetarium User Manual
Batteries not included.
Batteries not included.
8+
AAA/LR03
AAA/LR03
x3
x3
TM
Night
Light
PLANETARIUM
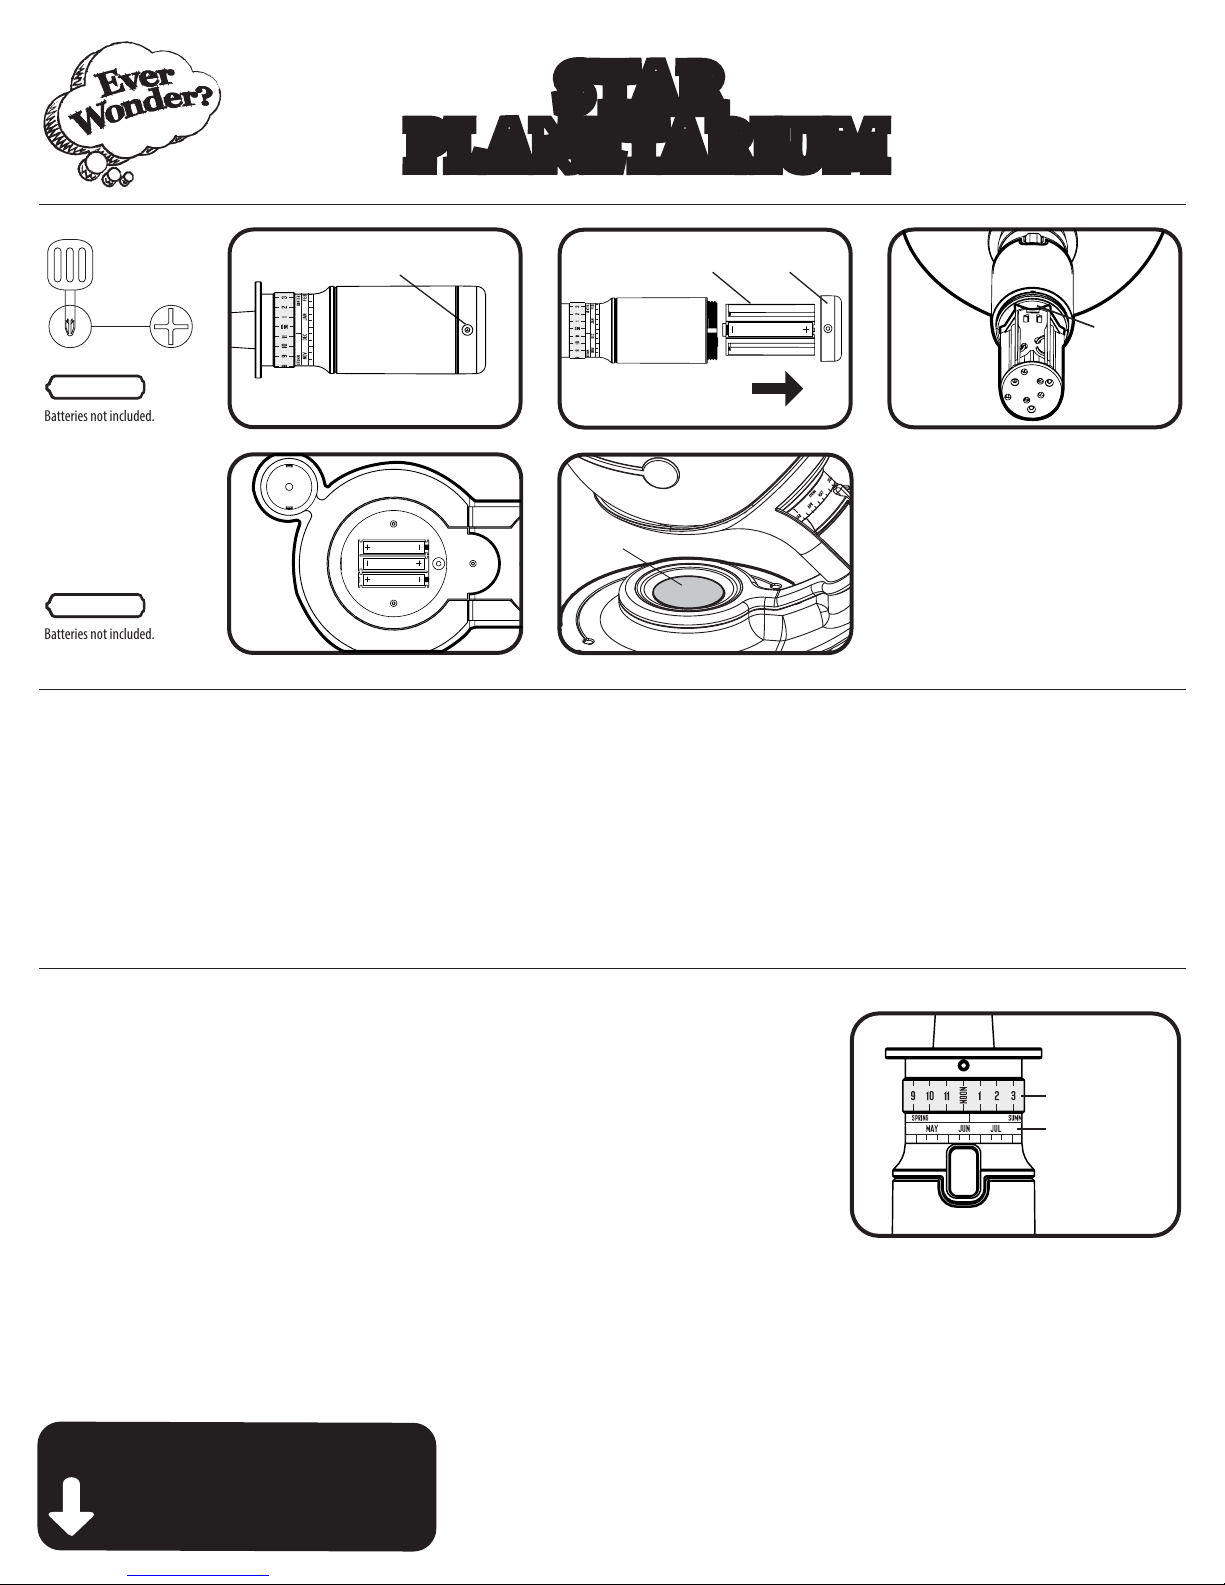
Battery Cap
Screw
STAR
Battery
Module
Night
light
On/O
®
Battery
Cap
Align
Battery
Module
with
groove
Operating Your Planetarium
1. Place planetarium on a table in the center of the room. A room
with smooth, light-colored walls and ceiling works best. A room
that is roughly square and no larger than 12 x 12 feet provides
the best projection quality. Star Theater works best when it is
located two to six feet from the projection surface.
2. Date selector is located on the light wand. To set your
planetarium for the beginning of the audio tour, rotate light
wand until “AUTUMN” lines up with pointer on the base. (The
month and date settings and the time ring will be used after
the audio tour to set your planetarium for a specic date and
time of day.)
3. In a darkened room, turn on projection lamp. (Do not look
directly at the Star Sphere while its light is on, or you will lose
your darkness adaptation.)
Setting the Date and Time
You can set your planetarium to project the night sky for any date and hour. Here is how:
1. Setting the date: With projection lamp o, turn light wand until the month you want lines
up with the pointer on date selector. Below the month, there are markings indicating the
1st, 10th and 20th of the month. Turn light wand to the left until the date you want lines up
with the pointer. For example, if you want to project the night sky the way it is on July 4th,
rst select July, then turn further to the left, to just past the mark for the rst day of the
month.
2. Setting the time: Once you have selected the month and date, rotate the time ring—
without turning the light wand—so that the time at which the sun sets lines up with the
pointer. (The time at sunset can be found in the local newspaper or on the Internet.) Now turn the light wand to the exact ti me you
want. (Note: The months and dates will change on the date selector as you select the time; once you’ve selected the date and set the
time ring for sunset, the time selection function takes over.) You can set your planetarium to project the stars for any time of the night.
You can even see what stars are up during the day, when they are not visible.
Time Ring
Date
Selector
Download an exciting audio tour of the night sky and our
Stellarium Astronomy Software at UncleMilton.com!
Web Code: STAT1143
Web Code: SPSAS1143
5107-0250-0417-V01
*Care and Maintenance
Remove batteries when not in use for extended periods. Keep Star Sphere clean with a soft cloth and
quality anti-static cleaner/polish. Never use abrasive cleaners.
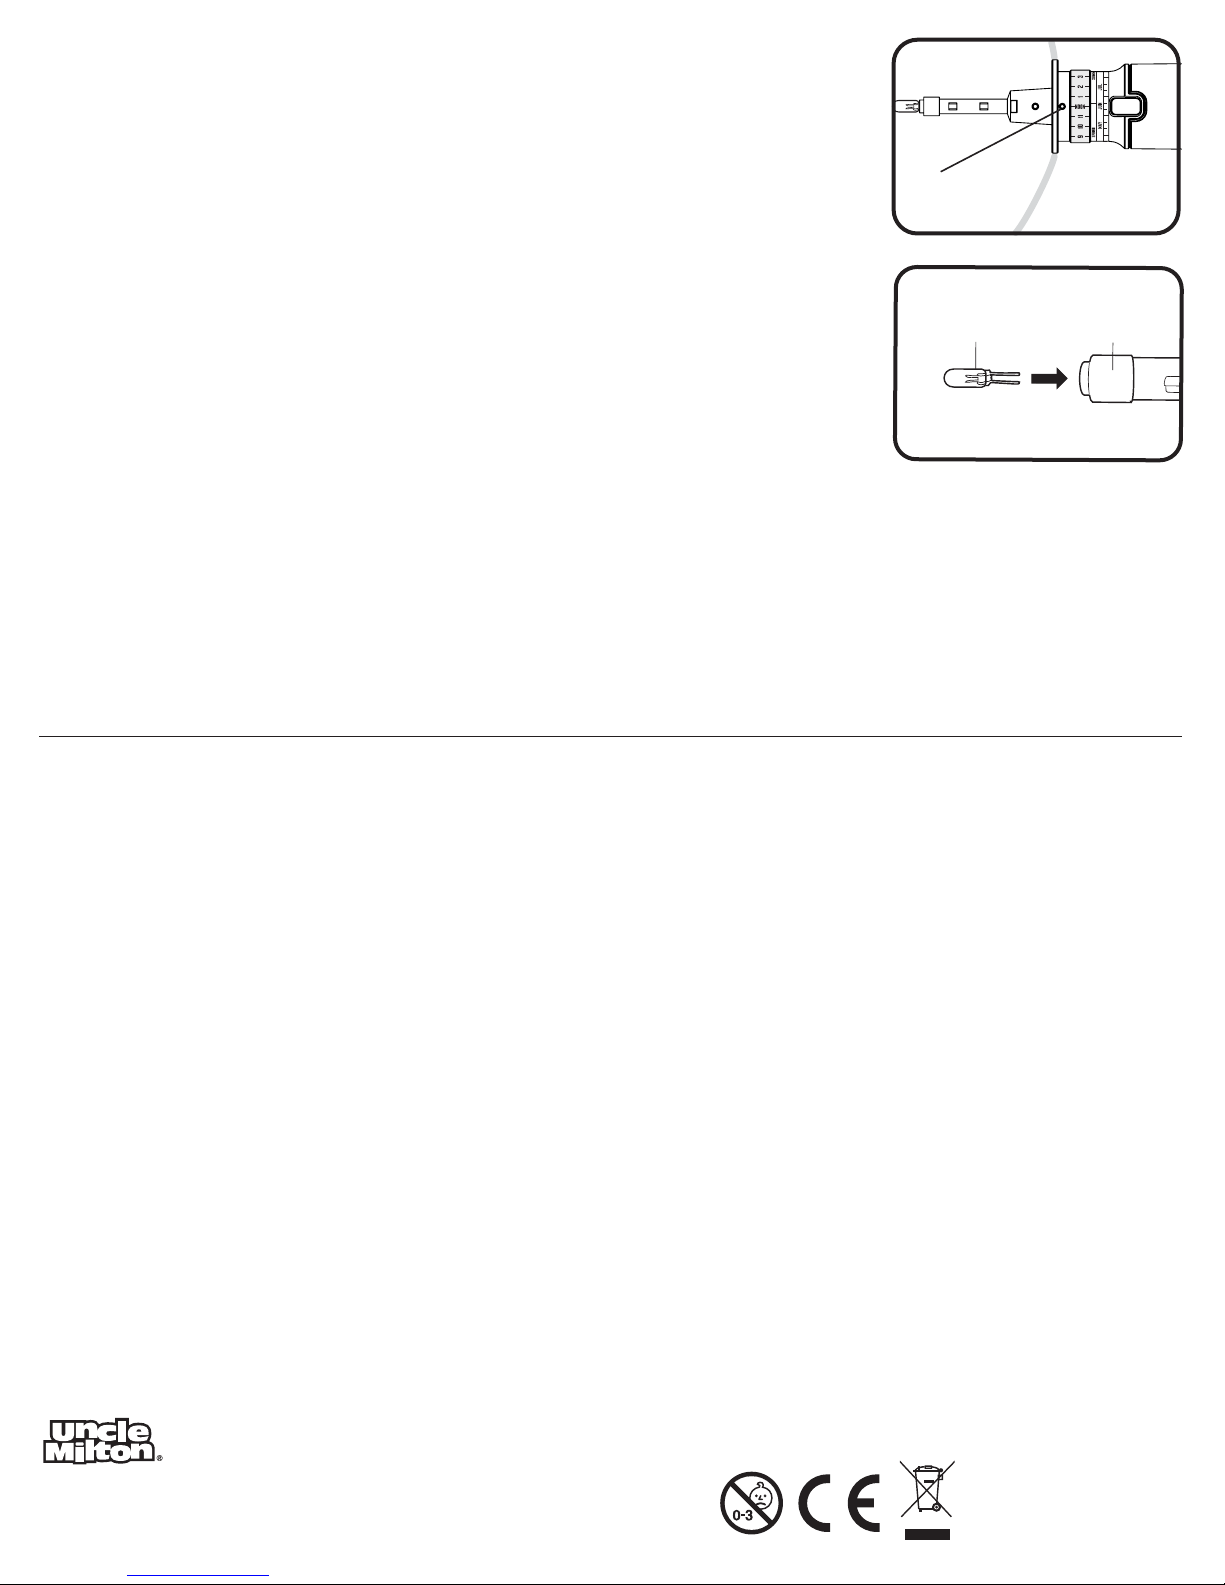
Bulb replacement: Replacement bulbs are available at most electronics retailers. Halogen bulb,
Voltage: 3.6 V, Current: 500 – 600 mA. Part No. LR00001.
1.
Switch o the light wand and wait 10 minutes before changing the light bulb.
Sphere and light wand from base. IMPORTANT–Do not remove the Star Sphere when the light is
switched on.
2. Push a paper clip into the small hole directly above the on/o button. At the same time, rotate
light wand counterclockwise to Star Sphere. Remove it from Star Sphere.
3. Carefully pull old projection lamp out of tip of light wand.
4. The Following step must be performed by an adult.
Insert replacement bulb into tip of light wand. (Important: Be careful not to bend prongs of
the bulb.) Switch light wand on to make sure bulb lights up, then switch it o.
5. Reinsert light wand into Star Sphere. Rotate light wand clockwise until it clicks into place.
This is important for accurate date and time adjustments.
Remove Star
Push a paper clip into this
hole to release Star Sphere
Projection
Lamp
Wand
6. Place Star Sphere and light wand back into base.
* To be performed by an adult, as the above steps may cause harm to young children.
KEEP THESE INSTRUCTIONS FOR FUTURE REFERENCE — DO NOT DISCARD
Questions? Visit unclemilton.com
BATTERY SAFETY INFORMATION
• Only adults should install and replace batteries.
• Non-rechargeable batteries are not to be recharged.
• Rechargeable batteries are to be removed from the toy before being charged.
• Rechargeable batteries are only to be charged under adult supervision.
• Dierent types of batteries or new and used batteries are not to be mixed.
• Batteries are to be inserted with the correct polarity.
• Exhausted batteries are to be removed from the toy.
• The supply terminals are not to be short-circuited.
• Do not mix old and new batteries.
• Do not mix alkaline, standard (carbon-zinc) or rechargeable
(nickel-cadmium) batteries.
• Do not dispose of batteries in re. Battery may explode or leak.
• Batteries should be recycled or disposed of as per state and local guidelines.
© 2017 TBDUM. All rights reserved.
* and TM* designate U.S. trademarks of
®
Uncle Milton
P.O. Box 6281 Thousand Oaks, CA 91359 USA.
Printed in China. Product and colors may vary.
This product and its batteries must be
disposed of separately at your local
waste recycling center. Do not dispose
them in your household waste bin.
 Loading...