

Page 1
STEP 1
E3000 Quick Installation Guide
Connect the e3000
e3000 Quick In
Before you install the Bullet Router, please ask your DSL/Cable
Modem Service Provider the
following questions:
• Do I have a PPPoE (where you must provide a user name and
password to get connected), Dynamic IP, PPtP or a Fixed
IP Account?
• For PPPoE users, what are my user name and password?
• For Fixed IP and PPtP Account Users, what are my IP
Address, Subnet Mask, Default Gateway and Domain Name
Servers?
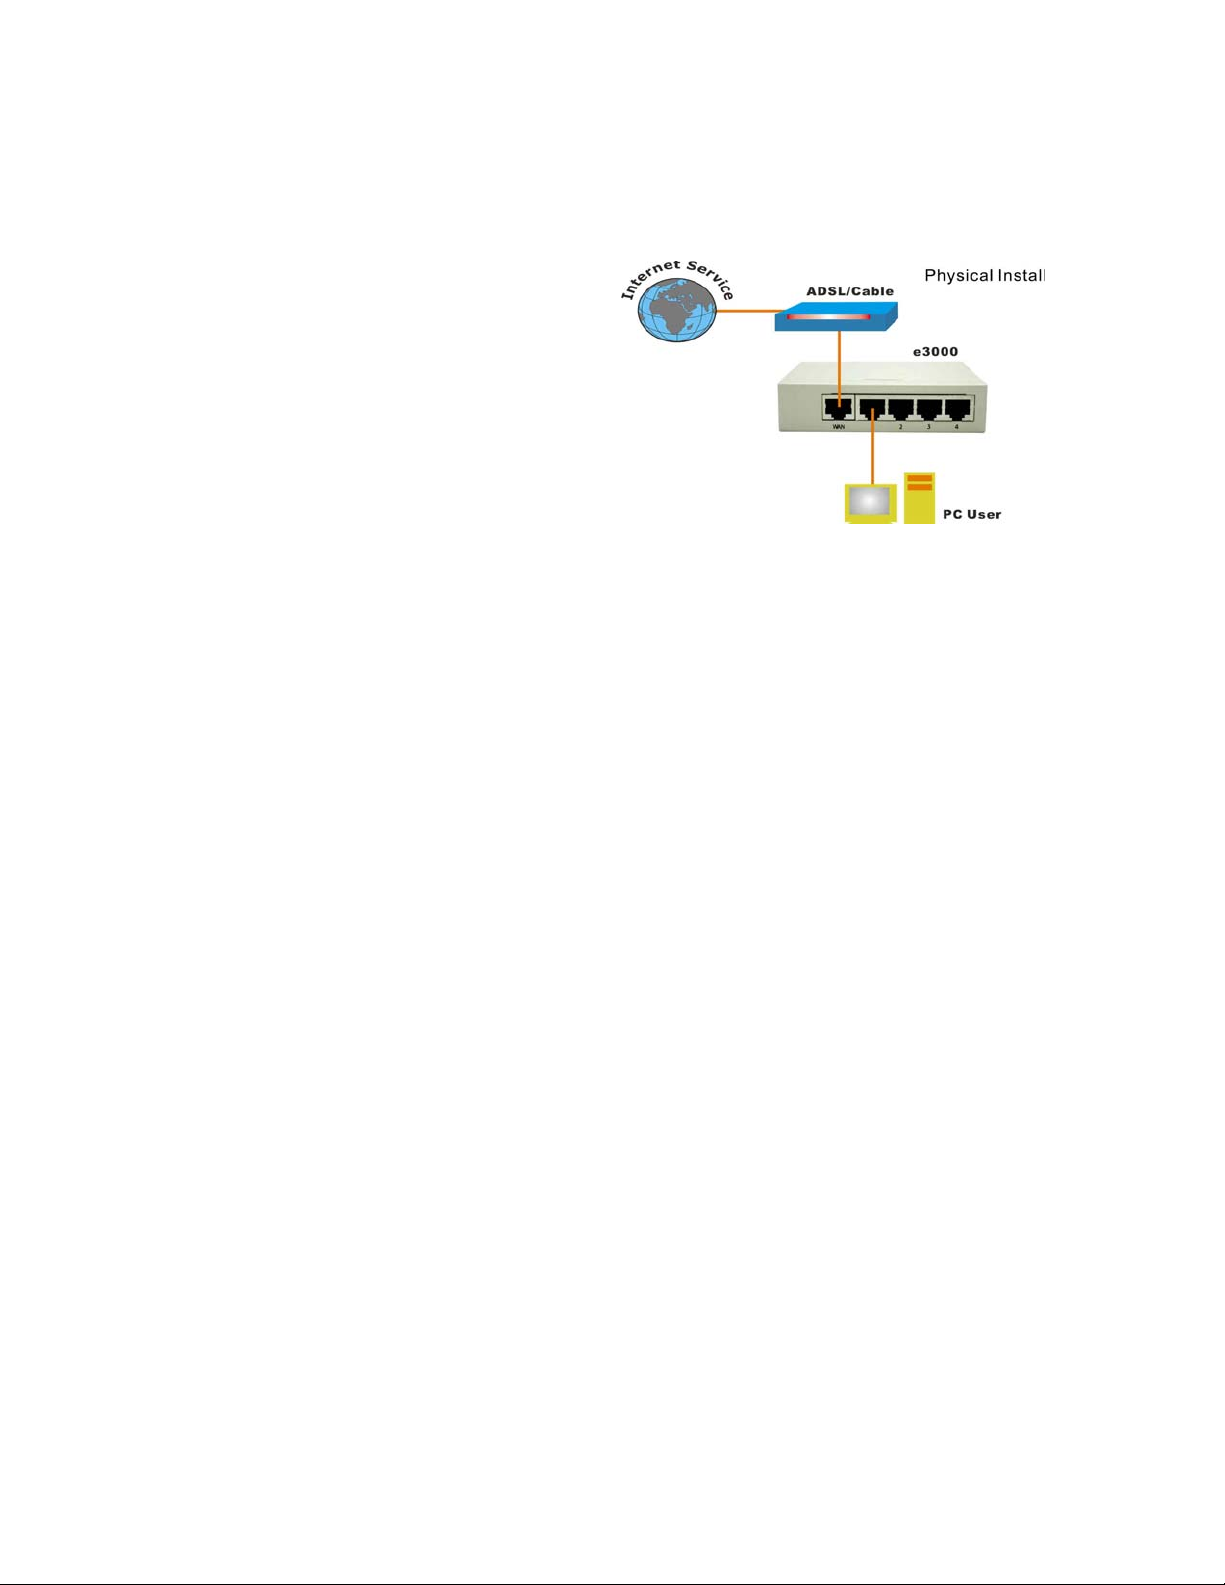
Step 1. Before you start, please turn off the power to the DSL/Cable
Modem, Bullet Router and your PC.
Step 2. Locate the network cable connecting your PC's network card
to the DSL/Cable
Modem.
Step 3. Remove the cable coming from the PC to the DSL/Cable Modem
and insert into
the e3000's connector labeled "1" while remaining connected to the
PC.
Step 4. Using the cable shipped with the Bullet Router, connect the
Bullet Router to the DSL or Cable Modem. Insert one end of the cable
to the Bullet Router's connector labeled "WAN" and other end to the
DSL/Cable Modem, from where you just remove a cable (Step 3.)
Step 5. Make sure the Bullet Router and the DSL/Cable Modem are on,
and then reboot your PC.
Page 2
STEP 2
Configure the e3000
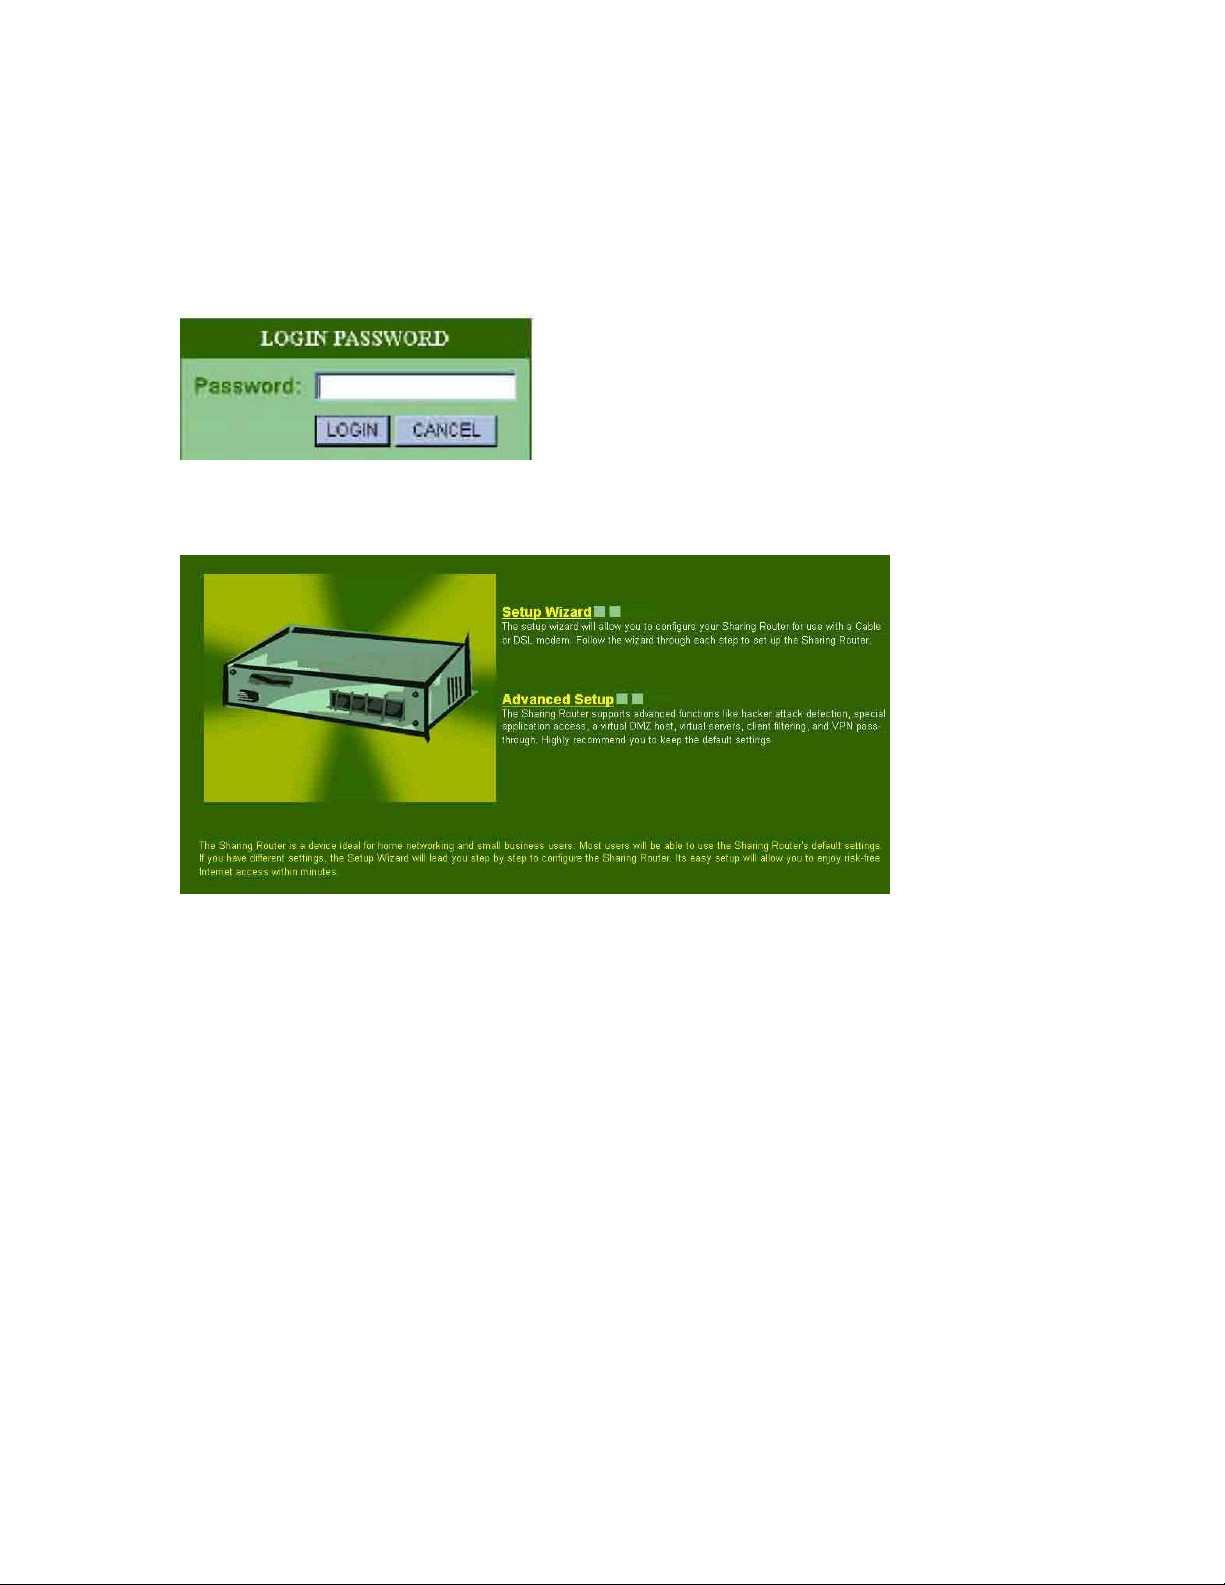
1.Open a browser on your computer and enter http://192.168.1.1 in the
Address.
2.Then login the Sharing Router system with no password (by default, there
is no password).
Basic Setup page is as follows:
Press [Setup Wizard] button to setup
Page 3

A.Setup Time Zone
1.Set the time zone for the Sharing Router. This information is used for log
entries and client filtering.
2.Press[Next]button to continue.
B.Setup WAN Type
Specify the WAN connection type required by your Internet Service
Provider.
Specify a Cable modem (Dynamic IP), Fixed-IP xDSL, PPPoE xDSL, or
PPTP.
Page 4

C.Setup DNS
1.Domain Name Servers are used to map an IP address to the equivalent
domain name. Your ISP should provide the IP address for one or more
domain name servers. Enter those addresses on this screen.
2.Press[Finish]button .
You've successfully configured the e3000.
D.System Status
1. Click on Advanced Setup.
2. Click on System.
3. Click on Status.
You can use the Status screen to see the connection status for the Sharing
Router WAN/LAN interfaces, firmware and hardware version numbers, and
the number of connected clients to your network.
(If your WAN IP, Subnet Mask, and Gateway are 0.0.0.0 then see
instructions to reset your router.)
 Loading...