

Page 1
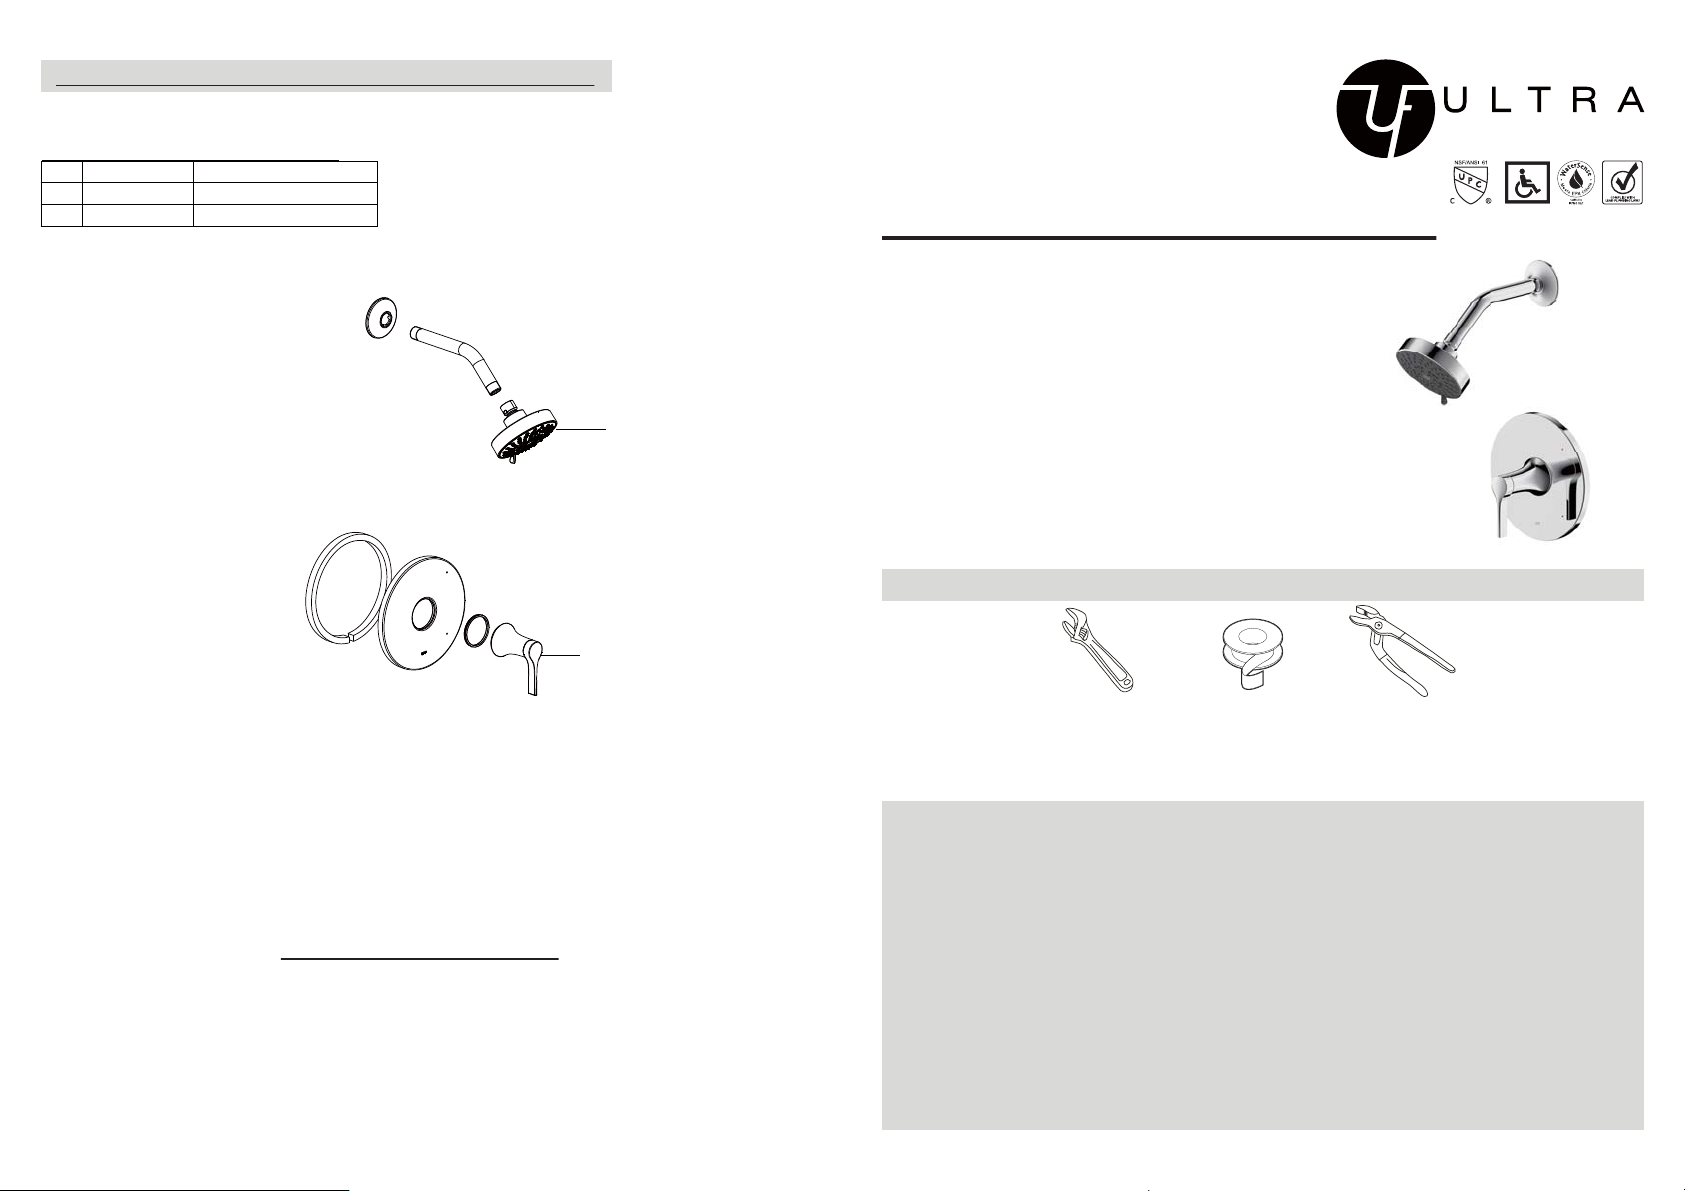
Replacement Parts / Pièces de rechange / Repuestos
No. Description Part No.
1 Shower Head 5F0M017202CP/AP/HA/HBW0
2 Handle Assembly XXXXXXX
UF79700-1
UF79703-1
UF79705-1
UF79707-1
Nita Collection
Single-Handle Shower Only Trim
Installation/Installation/Instalación
CUSTOMER SERVICE
TOLL-FREE 1-888-OK-ULTRA (658-5872)
1
UF79700-1 - Polished Chrome
UF79703-1 - PVD Brushed Nickel
UF79705-1 - Oil Rubbed Bronze
UF79707-1 - Matte Black
Tools You Will Need / Outils dont vous aurez besoin / Herramientas necesarias
2
Adjustable Wrench Pipe Tape Groove join pliers
Clé à molette Ruban pour tuyau Pince multiprise
Llave ajustable Cinta selladora para rosca Pinzas ajustables
If you use soldering for the installation of the faucet, the seats, cartridges and washers will have to be removed
before using flame. Otherwise, warranty will be void on those parts.
Cover your drain to avoid losing parts.
0ɗ~55ɗ.
SAFETY TIPS
Limited Lifetime Warranty
Ultra Faucets warrants to the original purchaser that its products will be free from defects in workmanship and materials. All Ultra
Faucets are provided with a life time limited warranty. This warranty does not cover any other labor or service charges associated with
the removal, repair, or reinstallation of Ultra Faucets products. This express warranty does not apply to products that have been
damaged as a result of misuse, abuse, negligence, accident, faulty installation or maintenance practices and/or used in any manner
contrary to those recommended by the manufacturer.
Need help? Please call our toll-free customer service line at 1-888-658-5872 for additional assistance or service.
Besoin d’aide? Veuillez communiquer avec notre service à la clientèle au numéro gratuit 1-888-658-5872 pour tous renseignements
ou services complémentaires.
¿Requiere asistencia? Llame a nuestro Servicio al Cliente, sin costo, al 1-888-658-5872 para asistencia adicional o servicio.
Revised 12-2018
Si vous posez le robinet par brasage, il est essentiel de retirer les sièges, les cartouches et les rondelles avant
CONSIGNES DE SÉCURITÉ
d’appliquer la flamme, faute de quoi la garantie sur ces pièces sera annulée.
Couvrez le drain pour ne pas perdre des pièces.
0ɗ~55ɗ.
CONSEJOS DE SEGURIDAD
En el caso de utilizar soldadura para instalar el grifo, remueva los asientos, cartuchos y arandelas antes de usar la
llama. De lo contrario, se anulará la garantía para esos componentes.
Tape la boca del desagüe para prevenir la pérdida de piezas pequeñas.
0ɗ~55ɗ.
Revised 12-2018
Page 2
Installation/Installation/Instalación
UF79700-1
UF79703-1
UF79705-1
UF79707-1
1
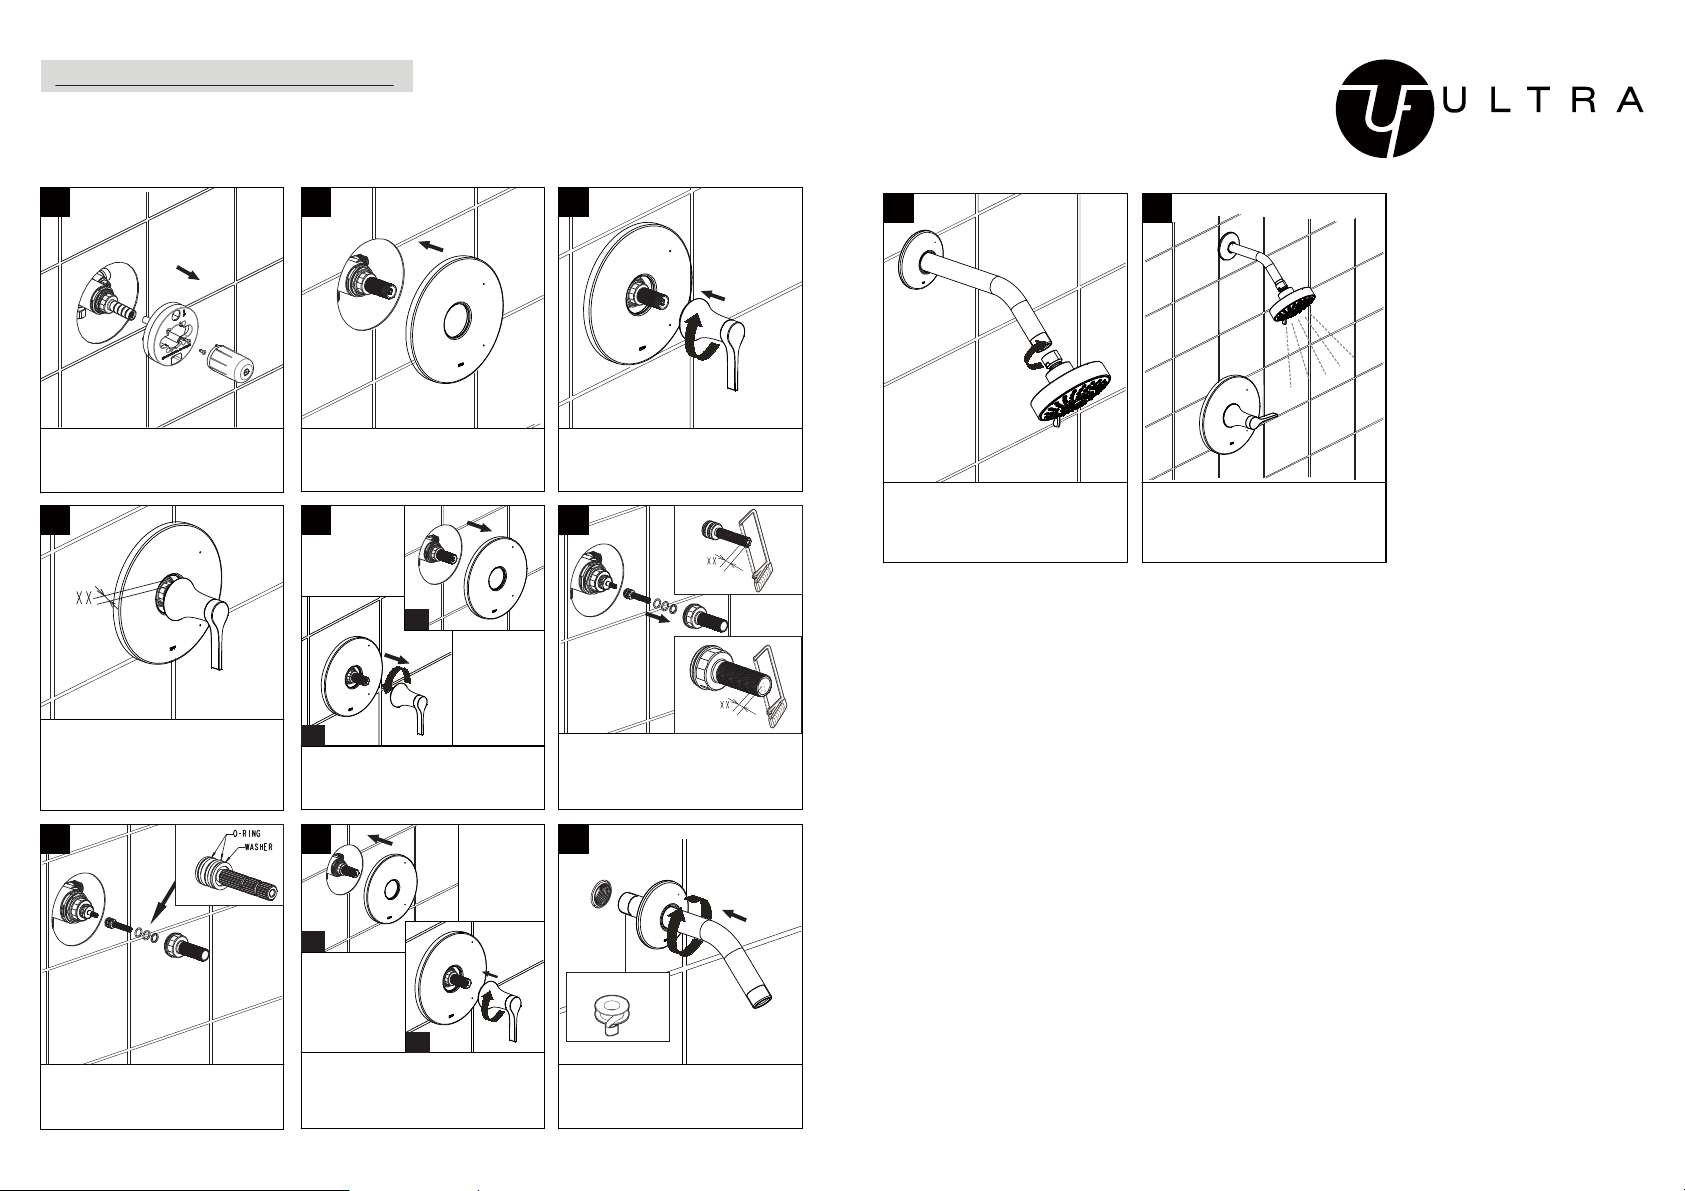
Remove the mud guard.
4
If handle assembly will not secure
escutcheon to the wall, measure and
note the distance ‘XX’(the distance
between the bottom of the handle
assembly and the escutcheon)
2
Carefully slide the escutcheon onto
the valve.
5 6
b
a
Unscrew the handle assembly
anti-clockwise from valve and
remove the escutcheon.
3
Place handle assembly on valve
and rotate clockwise to secure
escutcheon.
Cut stem and nipple the amount
noted in step # 4. (Never cut the
stem and nipple while still on the
valve. This may damage the valve.)
10
Thread the shower head
clockwise onto the shower arm.
11
Turn on the handle and check the
function of the tub spout.
7
`
Re-install the trimmed stem and
nipple on the valve.
8
a
b
Carefully slide the escutcheon onto
the valve and place handle assembly
on valve and rotate clockwise to
secure escutcheon.
9
Thread Teflon Tape
Apply teflon tape to the shower arm
and thread clockwise onto the
nipple. Then slide the flange down.
Revised 12-2018 Revised 12-2018
 Loading...