

Page 1
Ultra Electronics Card Systems Quick Start Guide
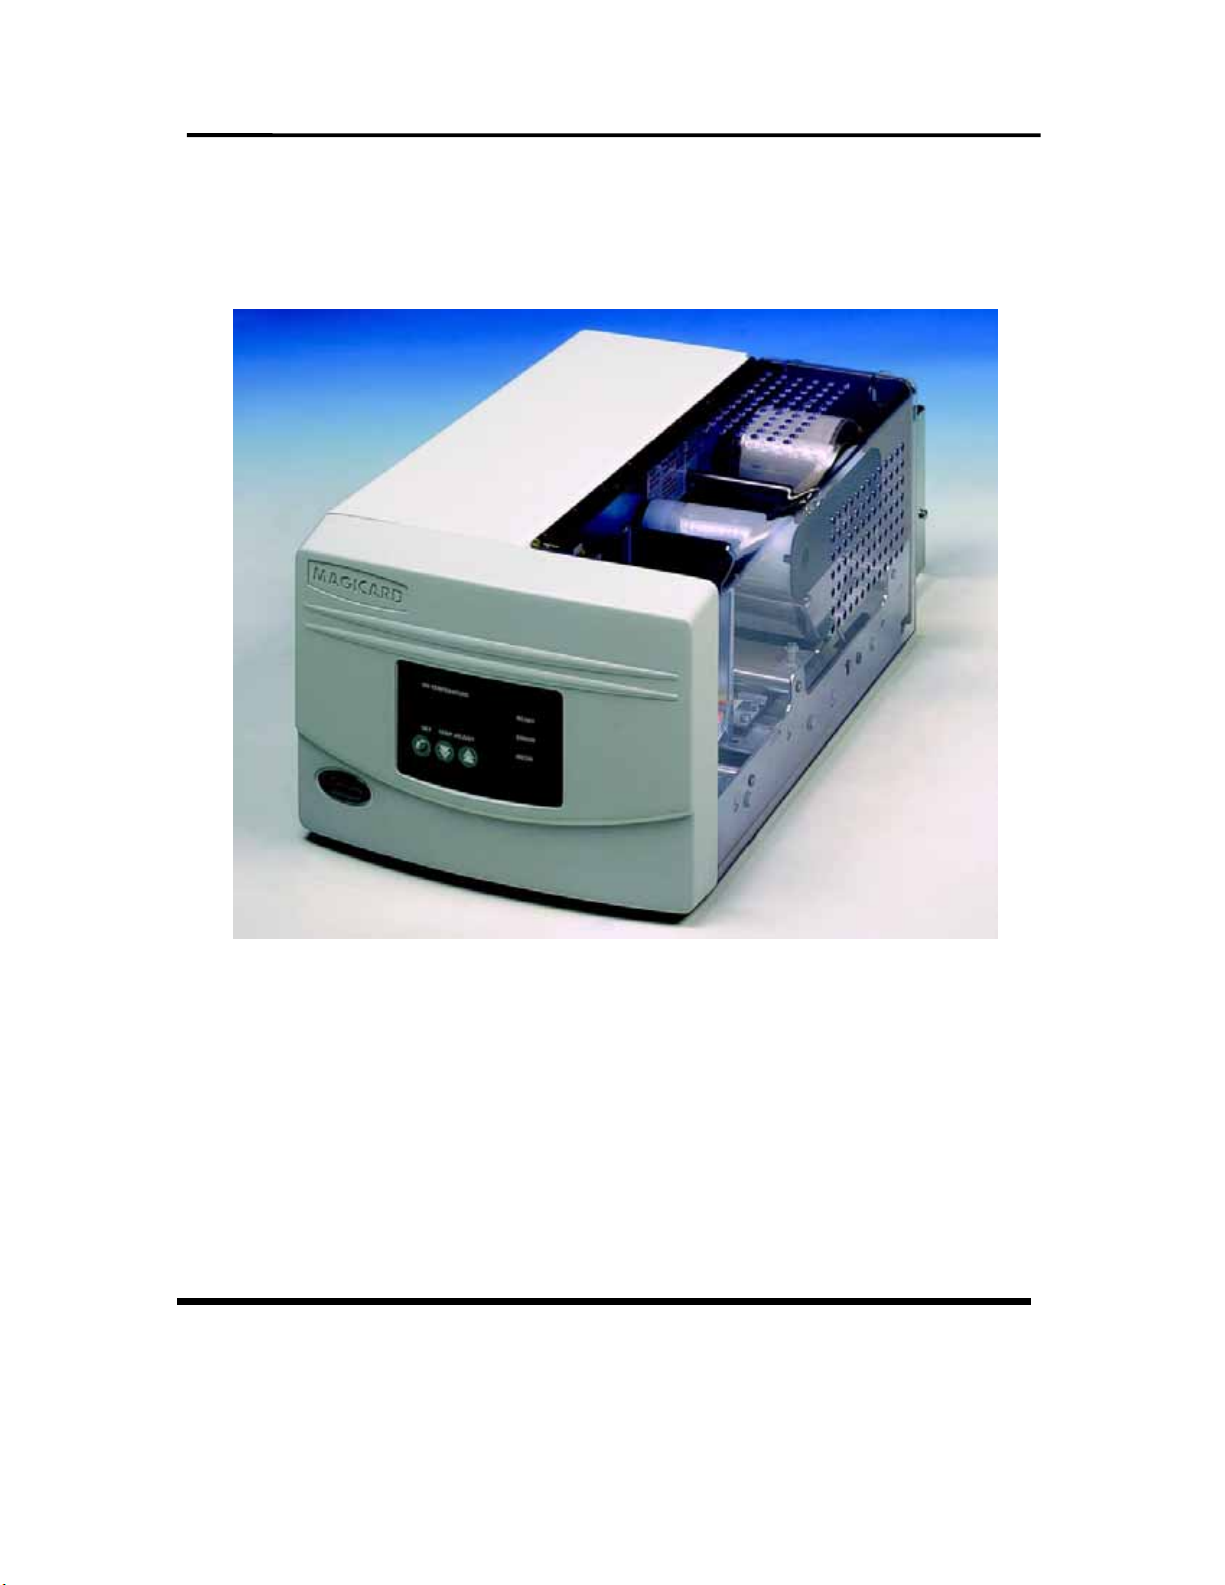
MAGICARD Sicura Laminator
Quick Start Guide
Laminator Setup
Iss. 09 January 03
Stock No. M9004-593
MAGICARD Sicura Laminator Page 1
3504-22-01
DCR 27634 refers
Page 2

Quick Start Guide Ultra Electronics Card Systems
Setting up your Sicura Laminator
takes just two easy steps:
1. Unpack and install the laminator
A Preparing a Location for the Laminator
B Removing the Laminator from the Box
C Check the Package Contents
D Install the Lamination Film
E Connect the Laminator to a Power Supply
F Set the Optimum operating temperature and test the
Laminator Operation
G Interfacing to a Rio/Tango printer
with the Sicura Laminator
H Interfacing to a Turbo series printer
Important Note for Setting Up your Rio/Tango Printer Driver to work
2. Stand-alone Mode
I Operation of the Hopper
J Adjusting the Hopper
K Error Indicators
3. Verify correct operation
L Important Cleaning Procedures
M In Case of Difficulty
Note: The Ultra WEB site at http://www.ultramagicard.com contains comprehensive technical support
information including the latest downloadable software, WINDOWS Drivers, Technical Bulletins etc
Conventions
Throughout this guide, the following conventions are used to identify important
information.
WARNING - Warning messages indicate where personal injury could result from not
following the correct procedures.
CAUTION - Caution messages indicate where damage to equipment could result
from not following the correct procedures.
NOTE - Notes convey important information that is identified within the text.
Page 2 MAGICARD Sicura Laminator
Page 3
Ultra Electronics Card Systems Quick Start Guide
•
Preparing a Location for the
Sicura Laminator and Printer
A
Location Requirements for your laminator/printer:
• A clean, level surface.
• Adequate space for:
- opening the printer cover
– opening the laminator cover
– cable access at the rear and RH side
– allowance for air circulation.
An adequately ventilated room.
•
MAGICARD Sicura Laminator Page 3
An adequate power supply.
Ambient temperature +10 to +30 deg C.
•
• Relative Humidity 20/70% RH.
• Protection from direct sunlight and
chemicals.
• Protection from abrupt temperature
changes.
Page 4
Quick Start Guide Ultra Electronics Card Systems
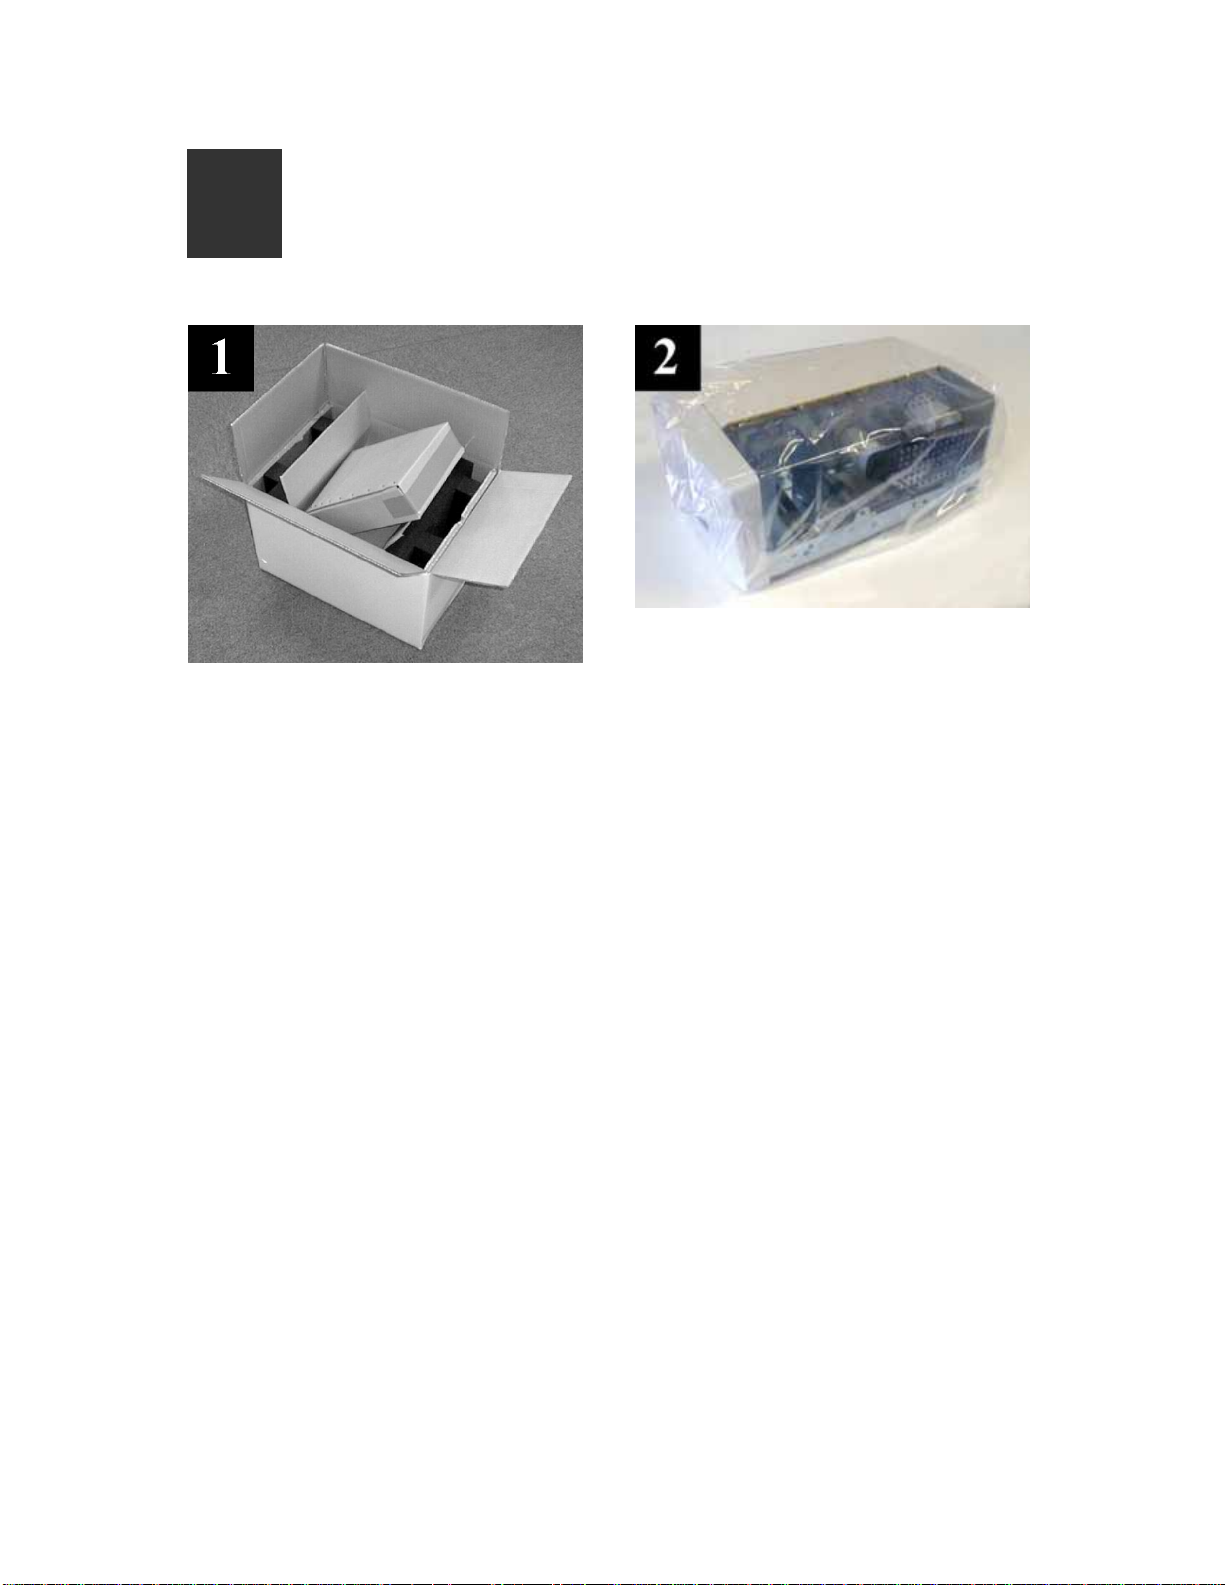
Removing the Laminator
B
Carefully open the box and remove any
accessories.
from the Box
Place on a smooth, level surface and
remove the polyethylene container.
Page 4 MAGICARD Sicura Laminator
Page 5
Ultra Electronics Card Systems Quick Start Guide
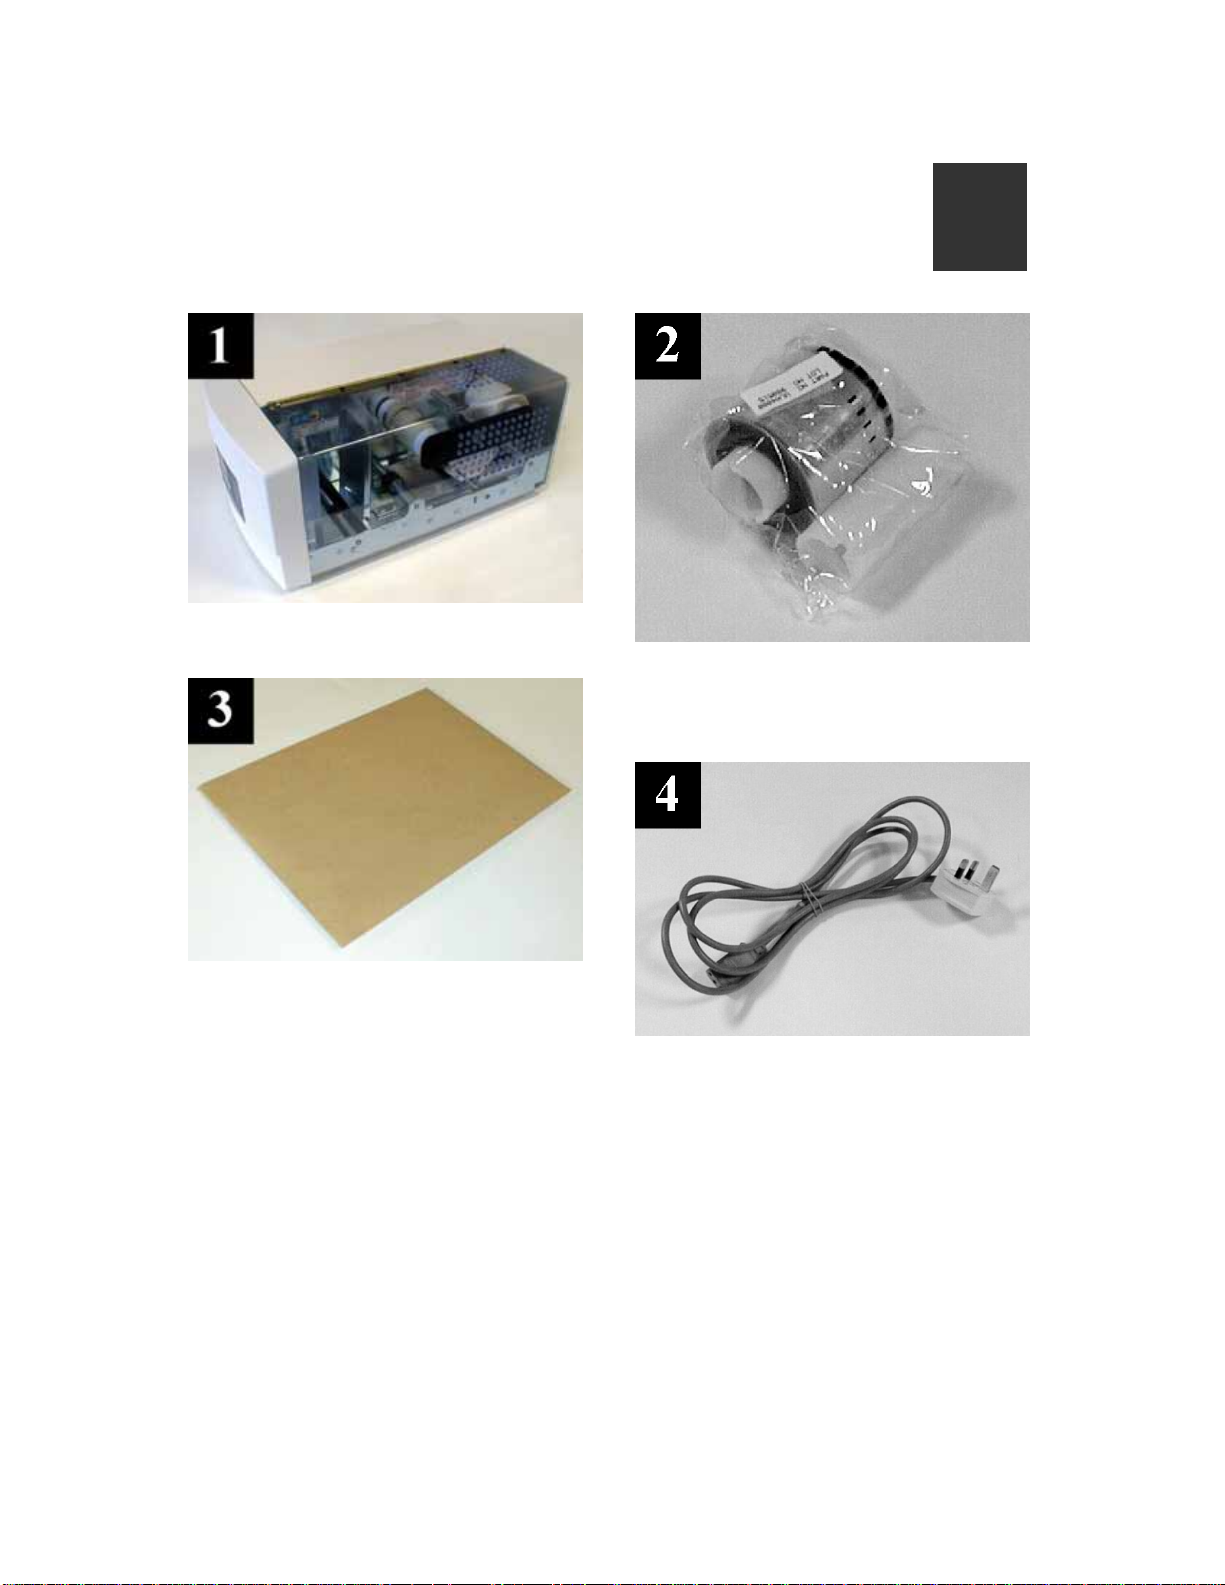
Checking the
The MagiCard Sicura Card Laminator
Envelope containing this Quick-Start
guide
Package Contents
A Roll of Lamination Film and a Take-up
Core (only supplied when ordered with
the Laminator)
A Power Cord with Molded Plug for
your country’s voltage standard
C
MAGICARD Sicura Laminator Page 5
Page 6
Quick Start Guide Ultra Electronics Card Systems
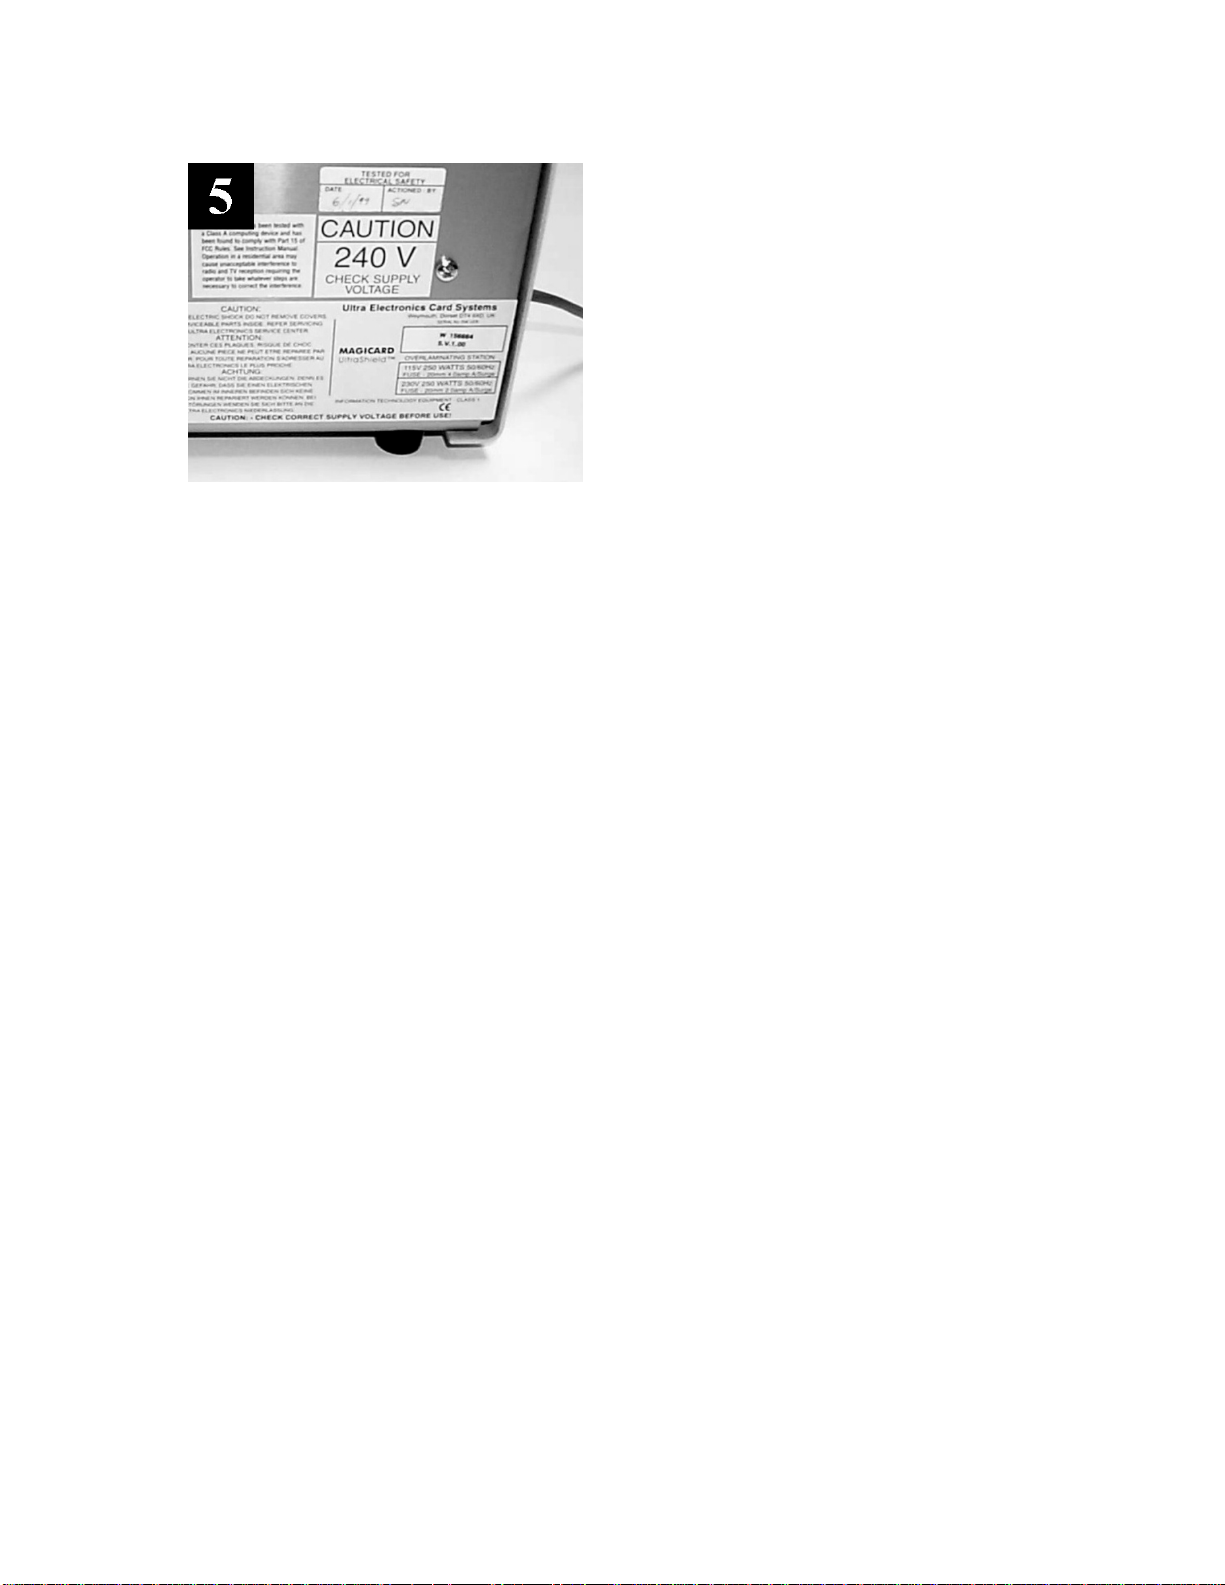
Check that the Mains Supply Voltage is
correct for your country.
(Different models are manufactured for
each supply voltage.)
Page 6 MAGICARD Sicura Laminator
Page 7

Ultra Electronics Card Systems Quick Start Guide
Install the
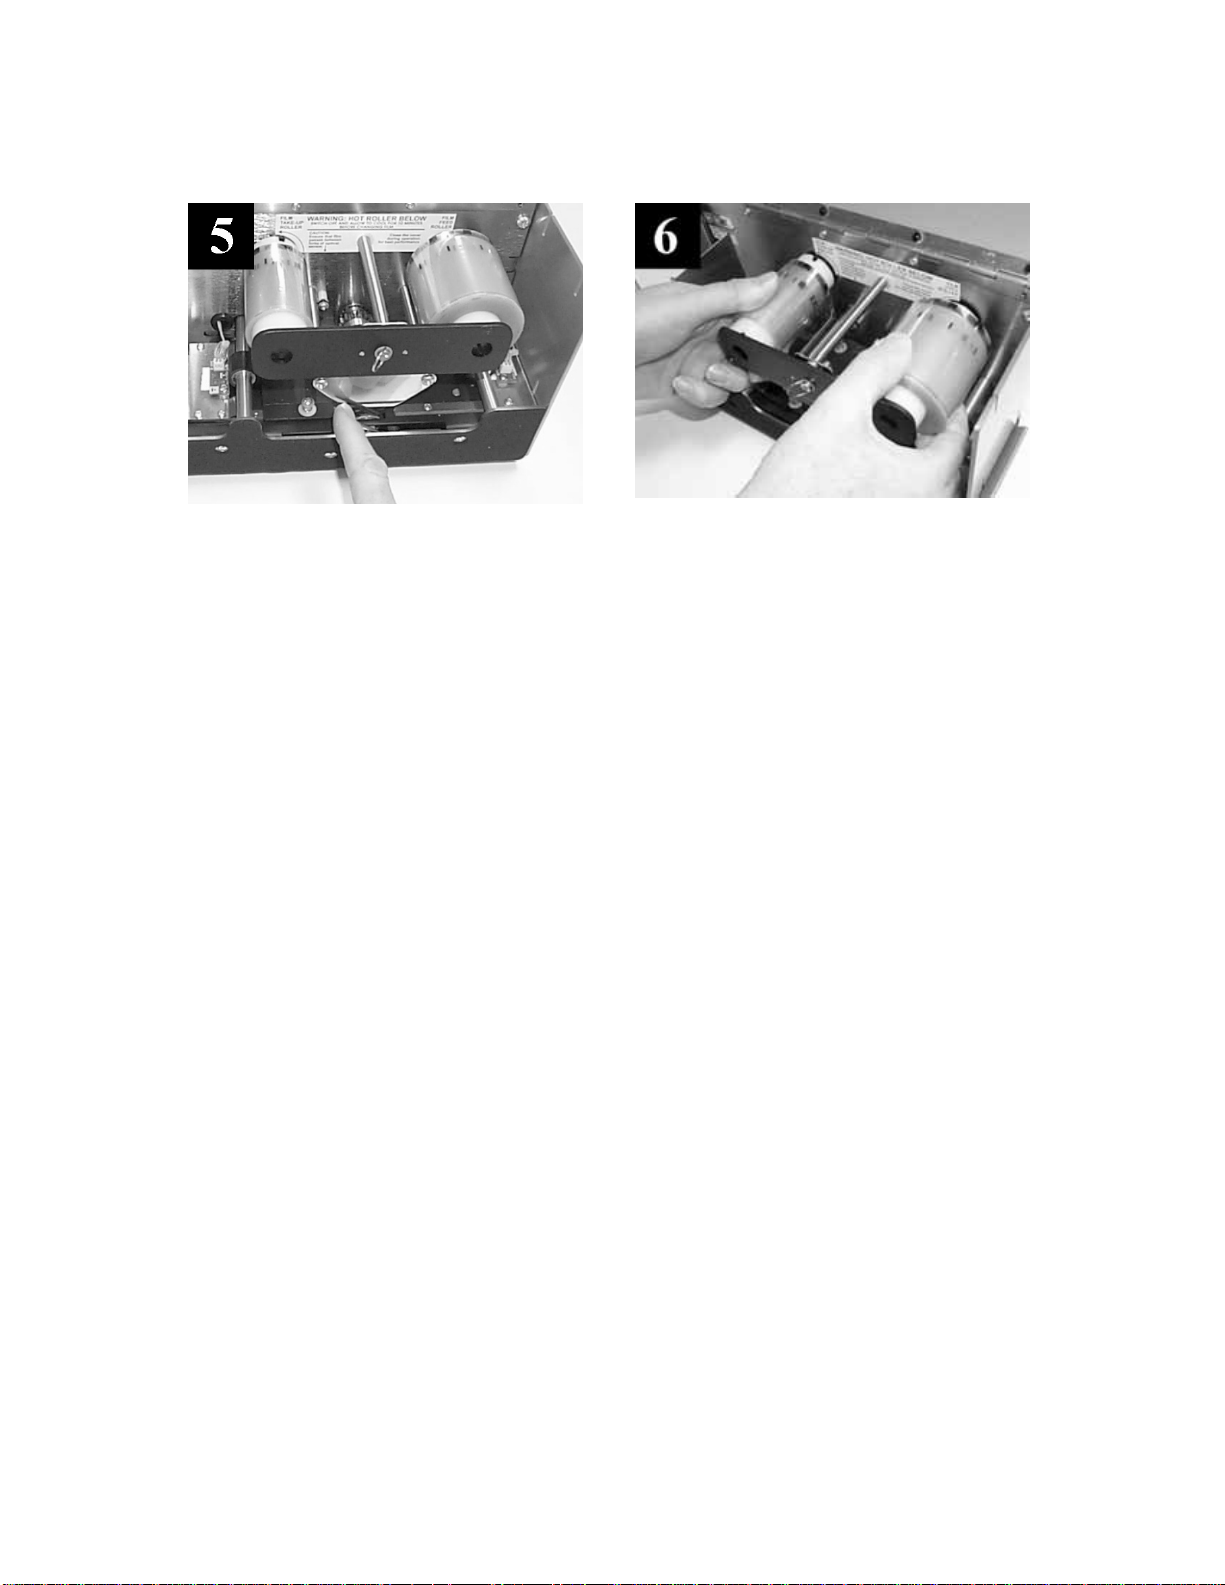
Lift the transparent cover and move the
roller lever to the OPEN position.
Gently install the roll of film between
the rollers. The black alignment marks
on the film should be innermost.
Lamination Film
Turn the fastener ¼ turn counterclockwise and remove the plate.
Ensure that the film passes between the
forks of the optical sensor.
D
MAGICARD Sicura Laminator Page 7
Page 8
Quick Start Guide Ultra Electronics Card Systems
Replace and fasten the film retaining
plate, and close the lever.
Gently turn both rolls, to ensure that
there is no slack film.
Close the transparent cover.
Page 8 MAGICARD Sicura Laminator
Page 9

Ultra Electronics Card Systems Quick Start Guide
Connect the Laminator
to a Power Supply
Check that the Laminator operating
voltage is correct for your supply
voltage.
(Units cannot be changed from one
voltage to another.)
Check that the temperature Controller’s
LED’s flash.
E
Connect to the AC supply and switch
ON.
After a few seconds, the display will
indicate the temperature of the
laminating roller in °C, which will begin
to increase in value.
MAGICARD Sicura Laminator Page 9
Page 10

Quick Start Guide Ultra Electronics Card Systems
The temperature will achieve the set
point level after a delay of 4 minutes,
and the READY indicator will illuminate.
Notes:
1. When switched on, the laminating
roller and take-up roll turn for
30 seconds or until a black
alignment panel is found by the
optical sensor.
2. The Ready LED will flash for
4 minutes until the roller has heated
up, cards cannot be fed in until
then.
3. Opening the roller lever will stop all
card/film movement. Closing the
lever performs a Reset function but
without the 4 minutes delay.
Page 10 MAGICARD Sicura Laminator
Page 11

Ultra Electronics Card Systems Quick Start Guide
Select the Operating Temperature
and Test the Laminator Operation
NOTE: The optimum roller temperature is best determined by trial and error, using
your own cards and laminating film. The following notes are for your guidance only.
• Cards with large, unprinted white areas require a higher temperature for
lamination.
• We recommend that lamination is performed with the cover down.
• PET/PVC composite cards are more resistant to heat deformation than plain PVC
cards.
F
• Holographic film requires a higher temperature for lamination than clear film.
• For laminating PVC cards with clear film, a roller temperature of 180°C should be
adequate.
• For laminating PET/PVC cards with holographic film, a roller temperature of 190°C
is suggested.
There will be slight variations from laminator to laminator, as well as between different
card types. However, if film bonding is poor, increase the roller temperature. If the
cards are too deformed, or the surface is marked, reduce the temperature.
MAGICARD Sicura Laminator Page 11
Page 12

Quick Start Guide Ultra Electronics Card Systems
Insert a card into the slot, side to be
laminated uppermost.
Cards should be clean, dust-free and
not already overcoated.
Adjust the IN/OUT position of the
laminate on the card by screwing the
core in or out, if necessary.
The card will be laminated in 3540 seconds.
The READY indicator should be off
during lamination.
ROTARY SWITCH AND DIP SWITCH
ADJUSTMENTS
The LEFT/RIGHT position of the
laminate on the card can be adjusted
by means of the rotary switch scaled 0
to F.
The second rotary switch (Spare) is not
used (future option).
DIP SWITCH SETTINGS
All switches are to be left in the UP
position except when operating the
Sicura in conjunction with a TURBO
printer, in which case Switch 1 (brown)
should be DOWN.
Page 12 MAGICARD Sicura Laminator
Page 13

Ultra Electronics Card Systems Quick Start Guide
Adjust the roller temperature for good
laminate adhesion as required (up to
200°C max).
The display normally shows the roller
core temperature in °C.
Press the LH Scroll Key once to select
display of setpoint value. The SP
indicator will illuminate.
Adjust the setpoint temperature with
the ↑ and ↓ keys as desired. Press the
Scroll Key once to return to normal
operation. The SP indicator will go out.
Keep the cover down for best results.
White cards need higher temperatures
than printed cards, for best adhesion,
as does Holographic film.
MAGICARD Sicura Laminator Page 13
Page 14

Quick Start Guide Ultra Electronics Card Systems
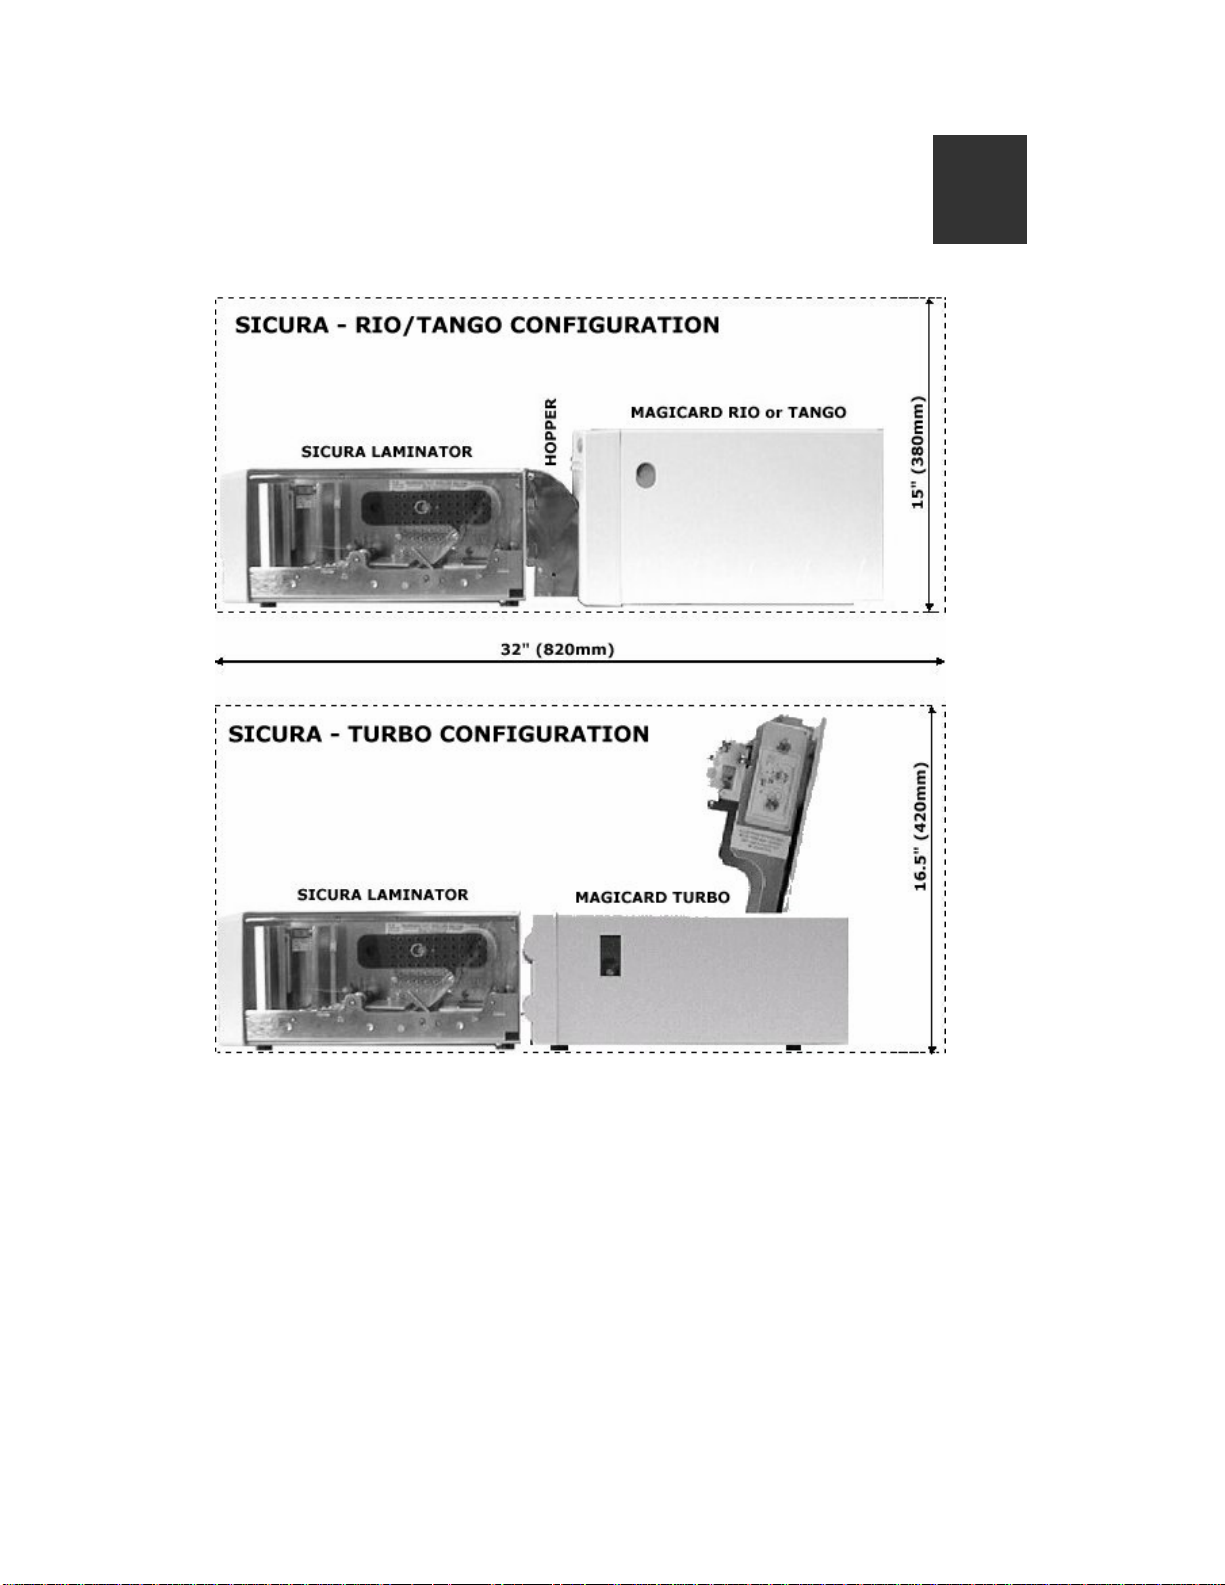
Interfacing to a RIO/TANGO Printer
G
IMPORTANT NOTE FOR SETTING UP YOUR RIO/TANGO PRINTER DRIVER TO WORK
WITH THE SICURA LAMINATOR –
Please select the appropriate option in your printer driver for best results.
It is necessary to make the correct settings to the overcoat page in your printer driver
when using a laminator.
If your printer is installed with a custom Holokote key, or you are using the standard
UltraSecure logo you can select the UltraShield box under the Security Options. This
selection uses selective overcoat application to give a 3D security logo effect.
If you are overlaminating with no additional security option, ensure the overcoat
enabled box is not checked.
Page 14 MAGICARD Sicura Laminator
Page 15

Ultra Electronics Card Systems Quick Start Guide
Clip the card Feed Hopper to the end of
the Sicura card laminator. Make sure
the Card Deflection Plate is fitted.
Connect the interface cable from the
laminator. Check that the DIL Switch
selections are ‘UP’ (see Section F4).
Position the Sicura against the Printer
so that cards frpm the printer drop into
the hopper.
Note:
The Rio/Tango printer can print cards faster than the Sicura can laminate them. There
is a hopper capacity of about 12 cards, but to reduce the speed discrepancy, it is
recommended that the printer is operated in ColorSure mode (refer to the Rio/Tango
Quick-Start Guide).
An interface cable ensures that the printer does not feed cards into the Sicura
laminator until the laminator is ready.
Switch on and allow the laminator to
warm up. Print and laminate a test card
by operating the Test pushbutton at the
rear of the printer.
MAGICARD Sicura Laminator Page 15
Page 16

Quick Start Guide Ultra Electronics Card Systems
r
Interfacing to a TURBO Series
H
Switch off the printer, remove the
UltraSecure dongle, and attach the
cable from the laminator to the printer.
Switch both units ON, and allow to
warm up. Print and laminate a test card
by pressing the Test Card button at the
rear of the printer.
Notes:
1. If the Magicard card printer prints a card before the lam in ator is ready (ie not fully armed up, or
2. All new Turbo printers are configured to detect the presence of a Sicura laminator. If UltraSecure
3. If UltraSecure is turned on however, the printer will copy the standard or key-based security logo
4. When cards are subsequently overlami nated, the result is a clearly visible ‘3D’ logo effect which
5. When view ed under UV light, the logo fluore sc es brightly , produ cin g a security check agai nst
Printe
still laminating the previous card), the card is held within the body of the printer until the
laminator is ready, and further printing is queued.
is de-selected in the Windows driver, the Turbo produces cards with no overcoat.
onto the card, laying down solid overcoat only in the area of the logo itself.
is clearly visible in normal daylight.
counterfeit IDs.
Position the laminator so that the
location tab at the card entry slot is
located in the card exit slot of the
Magicard printer.
Check that the DIP Switch Section 1
(brown) is in the DOWN position (see
Section F4).
Page 16 MAGICARD Sicura Laminator
Page 17

Ultra Electronics Card Systems Quick Start Guide
Clip the Card Feed Hopper to the end of
the Sicura card laminator and remove
the Card Deflection Plate.
Load the hopper with cards to be
laminated (100 cards maximum).
Operating the Hopper/Sicura in
Stand Alone Mode
Connect the interface cable from the
lamintor. Check that the DIL Switch
selections are UP (see Section F4).
Switch on the laminator and the hopper.
The hopper will start to feed cards into
the laminator when it is READY.
I
MAGICARD Sicura Laminator Page 17
Page 18

Quick Start Guide Ultra Electronics Card Systems
J
Adjusting the Hopper
The Card Feed Hopper has been factory set for use with 30 thou cards. Should it
require adjustment, carry out the following procedure:
Remove the hopper from the laminator,
remove the interface cable.
View the cards edge-on at the card exit
aperture and adjust the shutter screw
so that 1½ cards thicknesses are
exposed.
Insert a stack of your normal cards to
be laminated. Cards should be flat for
correct feeding.
Re-fit the Card Feed Hopper and the
cable.
Check for correction operation.
Page 18 MAGICARD Sicura Laminator
Page 19

Ultra Electronics Card Systems Quick Start Guide
Error Indicators
K
The Sicura card laminator has three indicators to tell you what is happening:
READY (Green) - When lit, indicates that it is ready to laminate a card.
When flashing, indicates that it is still warming up.
When off, either busy laminating a card, or the power is off.
MEDIA (Red) - When lit, indicates that the sensor did not detect the black
patches on the film, so either out of film or incorrectly loaded.
ERROR (Red) - Checks the progress of a card through the laminator.
Indicates that card transport has failed and requires
investigation.
Reset by opening and closing the roller lever.
MAGICARD Sicura Laminator Page 19
Page 20

Quick Start Guide Ultra Electronics Card Systems
Important Cleaning Procedures Important Cleaning Procedures
L
Correction operation depends on clean rollers to transport cards, an undamaged
laminating roller, and a dust-free environment.
It is recommended that the laminator be cleaned after every roll of lamination film
(250 cards).
PREPARATION
Set the temperature controller to 20°C, then switch off.
Allow to cool down for 15 minutes.
Remove cards and both film cores.
CLEAN DUST FROM FILM BOSSES
Using a slightly damp cloth, wipe any plastic dust from the two film core bosses, the
retaining plate, and any visible dusty surfaces.
CLEAN THE ROLLERS
Switch the laminator on.
Using a slightly damp cloth, wipe the exposed surfaces of the two pinch rollers and
the laminating roller. Operate the open/close lever to turn the rollers.
Switch off and allow to dry.
RE-LOAD
Re-load the laminator with a fresh roll of film and take-up core. It is not recommended
that take-up cores be re-used.
New cores are supplied with each roll of film.
Switch on and set the temperature controller to the desired laminating temperature.
When warmed up, laminate two or three plain cards to get rid of any residual dust and
to check the film alignment on the card.
Page 20 MAGICARD Sicura Laminator
Page 21

Ultra Electronics Card Systems Quick Start Guide
In Case of Difficulty
M
Check the Installation
• Repeat the installation steps in this guide.
• Check that the laminator mains voltage is correct.
• Check that the laminating film is the right way round and passes through the
optical sensor.
• Check that the unit has warmed up (3 minutes).
• Check that the rollers are clean.
• Check the status of the Error LEDs (section K).
For further assistance
• There are a number of useful Technical Bulletins on the MAGICARD WEB page at
http://www.ultramagicard.com
requested from Customer Service.
:
:
. If you do not have WEB access, copies can be
• Call your local Dealer, giving the Model Number and Serial Number, a description
of the nature of the problem, and the flashing error codes if pressent.
• Call the Ultra Magicard Customer Service Hotline number - +44(0)1305 762115 or
+44(0)11305 762121.
• Email us at: customer_service@ultramagicard.com
.
MAGICARD Sicura Laminator Page 21
Page 22

Quick Start Guide Ultra Electronics Card Systems
Notice
The information contained in this document is subject to change without notice.
Ultra Electronics Limited shall not be liable for errors contained herein or for incidental consequential
damages in connection with the furnishing, performance or use of this material.
This document contains proprietary information belonging to Ultra Electronics Limited and may not
wholly or partially be copied, stores in a data retrieval system, disclosed to third parties or used for any
purpose other than that for which it was supplied, without the express written authority of Ultra
Electronics Limited. All rights are re served.
©Ultra Electronics Limited, 2002
Federal Communications Commission (FCC) Statement
Warning: This equipment generates, uses, and can radiate radio frequency energy and if not installed
and used in accordance with the instructions manual, may cause interference to radio
communications. It has been tested and found to comply with the limits for a Class A computing
device pursuant to Subpart J of Part 15 of FCC Rules, which are designed to provide reasonable
protection against such interference when operating in a commercial environment.
Operation of this equipment in a residential area is likely to cause interference in which case the user
at his own expense will be required to take whatever measures may be required to correct the
interference.
Note: Changes or modifications not expressly approved by the party responsible for compliance could
void the user's authority to operate this equipment.
Canadian Department of Communications Statement
This digital apparatus does not exceed the Class A limits for radio noise emissions from digital
apparatus set out in the Radio Interference Regulations of the Canadian Department of
Communications.
Le présent appareil numérique n'émet pas de bruits radioélectriques dépassant les limites applicable
aux appareils numériques de la class A prescrites dans le Règlement sur le brouillage radioélect rique
édicté par le ministère des Communications du Canada.
WINDOWS is a trademark of Microsoft Corporation.
MAGICARD , Sicura and UltraSecure are trademarks of Ultra Electronics Limited.
PrintMagic is a trademark of Software 2000 Limited.
IBM, AT and PC are trademarks of International Business Machines Inc.
Page 22 MAGICARD Sicura Laminator
Page 23

Ultra Electronics Card Systems Quick Start Guide
Limited Warranty Information
1) Coverage: Ultra Electronics Ltd Warrants that the MAGICARD Sicura card laminator shipped with this Warranty statement
will conform to the manufacturers specifications and be free from defects in materials or workmanship for a period of 12
months from the date of original purchase by the user.
2) Warranty Claims: If the MAGICARD laminator proves defective during this period, please contact the Ultra Service
Center, at the address and telephone/fax number given below. The Ultra Service Center personnel may first ask
you to carry out certain simple checks to confirm the nature of the problem, and if a return is appropriate they will
give you a Return Authorisa tion Number and consi gnment ins tructi ons to the appro priate re pair cente r. Ultra w ill,
at its option, repair or replace the defective parts at no charge to the customer.
3) Warranty Limitations: The Warranty does not apply to MAGICARD laminators that have been:
• Damaged through physical or electrical mishandling.
• Damaged through operation in environments which are outside normal office conditions in terms of corrosive
atmosphere, temperature, humidity, shock or vibration.
• Improperly installed or interfaced to other products which may exhibit software problems or expose the
MAGICARD to improper voltages or control signals.
• Fitted with lamination film rolls from any source other than Ultra Electronics, or have been used to laminate on
anything other than card surfaces which are approved by Ultra and which will generally be made of PVC, be
completely flat, and be free of harmful particles or substances.
• Serviced or interfered with by anyone other than an Ultra Authorised Service provider.
4) Shipping: Insurance and shipping costs incurred in sending the MAGICARD laminator for Warranty service are
the responsibility of the customer. Whenever possible Ultra Service Centers will use the same class of shipping
service selected and paid for by the customer to return the laminator. Return shipping costs from Ultra to the
customer will be at Ultra's expense. After obtaining the Return Authorisation Number as described above, the
laminator should be securely packed in its original packaging with proof of date of purchase and a note
describing the proble m and quoting the Return Authori sation Number. The printer must be sent to the service
center address supplied with the Return Authorisation Number by the main service center. This address may be
different to the address listed below, but will generally be closer to you. Please also mark the Return
Authorisation Number on the outside of the shipping carton. All customs duties and taxes, if applicable, are the
responsibility of the customer.
5) Applicability: The Warranty and remed y provide d above are excl usive and in l ieu of a ll othe r warra nts, eit her expr ess or
implied, including but not limited to, implied warranties of merchantability and fitness for a particular purpose. Any
statements or representations made by any other person or firm are void.
Neither Ultra Electronics Ltd nor its affiliates shall be liable for any loss, inconvenience, or damage, including direct,
special, incidental, or consequential damages, resulting from the use or inability to use the Ultra product, whether resulting
from breach of Warranty or other legal theory even if Ultra has been advised of the possibility of such damage or loss.
This Warranty is governed by the laws of England. Any dispute arising out of or relating to this Warranty shall be submitted
for arbitration of this dispute or disputes pursuant to the rules and regulations of the UK Arbitration Act.
This Warranty gives you specific legal rights, and you may also have other legal rights which vary from country to country
so the above limitations and exclusions may not apply to all customers.
For Warranty enquiries please call or fax our Warranty Service Manager:-
Ultra Electronics Limited
MAGICARD Service Center
Waverley House
Hampshire Road
Granby Estate
Weymouth
Dorset, DT4 9XD, U.K.
Tel: +44 (0)1305 762121 or 762115
Fax: +44 (0)1305 777904
MAGICARD Sicura Laminator Page 23
Page 24

Quick Start Guide Ultra Electronics Card Systems
EC Declaration of Conformity
Manufacturer's Name: Ultra Electronics Limited.
Manufacturer's Address: Waverley House,
Hampshire Road,
Granby Estate,
Weymouth,
Dorset DT4 9XD
England.
declares that the products
Product Name: MAGICARD Sicura™ Card Laminator.
Model Numbers: 3504-0240 (240V Model)
3504-0115c (115V Model)
conform to the following Product Specifications:
Safety: BS7002 : 1992 EN 60950 : 1992
Safety of information technology equipment
including business equipment.
EMC: EN50-081-1 1992 Generic Emission Standard
Part1: Domestic, Commercial and Light Industry.
EN50-082-1 1992 Generic Immunity Standard
Part 1: Domestic, Commercial and Light Industry.
Supplementary Information:
Date: November 2002
Page 24 MAGICARD Sicura Laminator
 Loading...