

Page 1

[title]
Page 2

Europe
Wolfenbütteler Str. 33
38102 Braunschweig, Germany
Tel: +49-531-220-7920
Fax: +49-531-220-7999
http://www.ulead.de
Japan
No. 202, TE Building,
4-5-16, Yohga, Setagaya-ku,
Tokyo 158-0097, Japan
Tel: +81-3-5491-5661
Fax: +81-3-5491-5663
http://www.ulead.co.jp
First English edition for Ulead COOL 3D Version 3.0, March 2000
© 1997-2000 Ulead Systems, Inc.
All rights reserved. No part of this publication may be reproduced or transmitted in any
form or by any means, electronic or mechanical, including photocopying, recording, or
storing in a retrieval system, or translated into any language in any form without the
express written permission of Ulead Systems, Inc.
Software License
The software described in this document is furnished under a License Agreement which is
included with the product. This Agreement specifies the permitted and prohibited uses of
the product.
Licenses and Trademarks
Ulead, Ulead Systems logo, EasyPalette and Ulead COOL 3D are registered trademarks
and/or trademarks of Ulead Systems, Inc. Intel, Pentium and MMX are registered trademarks and/or trademarks of Intel Corporation. Microsoft, Windows, DirectX, DirectX
Media, and/or other Microsoft products referenced herein are either trademarks or registered trademarks of Microsoft Corporation. QuickTime and the QuickTime logo are
trademarks used under license. QuickTime is registered in the U.S. and other countries.
Adobe, the Adobe logo, and Acrobat are trademarks of Adobe Systems Incorporated.
RealText and RealPlayer are either registered trademarks or trademarks of RealNetworks,
Inc. in the United States and/or other countries. The RealPlayer is included under license
from RealNetworks, Inc. © 1995-2000. RealNetworks, Inc. All rights reserved. All other
product names and any registered and unregistered trademarks mentioned are used for
identification purposes only and remain the exclusive property of their respective owners.
Sample Files
Files provided as samples on the program CD-ROM can be used for personal demonstrations, productions, and presentations. No rights are granted for commercial reproduction or
redistribution of any sample files.
Ulead Systems, Inc.
North & South America
970 West 190
th
St., Suite 520
Torrance, CA 90502 U.S.A
Tel: +1-310-523-9393
Fax: +1-310-523-9399
http://www.ulead.com
http://www.webutilities.com
International
10F, No. 45, Tung Hsing Rd.
Taipei, Taiwan 110
Tel: +886-2-2764-8599
Fax: +886-2-2764-9599
http://www.ulead.com
http://www.asiapac.ulead.com
Page 3

[toc]
Contents
Welcome to Ulead COOL 3D 3.0 ........................................................ 5
Whats new ...............................................................................................................................5
Getting help .............................................................................................................................. 6
Installation ................................................................................................................................7
Running Ulead COOL 3D ........................................................................................................ 7
Getting updates and free downloads ..................................................................................... 7
Workspace .................................................................................. 8
Getting started ............................................................................ 11
Using the EasyPalette ........................................................................................................... 11
Using Studio presets ...................................................................................................................... 11
Dimensions and display quality ............................................................................................ 13
Adding and editing text .......................................................................................................... 14
Selecting and grouping objects ............................................................................................ 15
Using the Object Manager ............................................................................................................. 16
Moving, sizing, and rotating an object ................................................................................. 17
Move ................................................................................................................................................ 17
Rotate .............................................................................................................................................. 18
Size .................................................................................................................................................. 19
Editing object style................................................................................................................. 20
Color ................................................................................................................................................ 20
Light ................................................................................................................................................. 20
Texture ............................................................................................................................................. 22
Modifying individual faces of an object ........................................................................................ 23
Basic bevel styles .................................................................................................................. 23
Adding a background ............................................................................................................. 25
Adding and editing 3D graphics and shapes ....................................................................... 25
Making basic 3D objects ................................................................................................................ 27
Animation basics .........................................................................28
Working with key frames and timelines................................................................................ 29
Creating a simple animation ................................................................................................. 31
Animating light and color....................................................................................................... 33
Animating with multiple timelines ......................................................................................... 34
Animating with multiple objects ............................................................................................ 35
Plug-in effects ............................................................................37
Key frames and plug-ins ....................................................................................................... 37
Understanding Global and Key attributes ............................................................................ 37
Bevel Effects .......................................................................................................................... 38
Board ............................................................................................................................................... 38
Custom Bevel ................................................................................................................................. 38
Hollow .............................................................................................................................................. 40
Frame .............................................................................................................................................. 41
Imprint.............................................................................................................................................. 42
Page 4

Ulead COOL 3D 3.0
Object Effects ......................................................................................................................... 43
Bend ................................................................................................................................................ 43
Dance .............................................................................................................................................. 44
Distort .............................................................................................................................................. 45
Explosion ......................................................................................................................................... 46
Motion Path ..................................................................................................................................... 46
Path Animation ............................................................................................................................... 48
Surface Animation .......................................................................................................................... 49
Token Move (G) .............................................................................................................................. 50
Token Rotate (G) ............................................................................................................................ 51
Token Skew (G) .............................................................................................................................. 52
Token Size (G) ................................................................................................................................53
Twist................................................................................................................................................. 54
Transition Effects ................................................................................................................... 55
Blast ................................................................................................................................................. 55
Bump ............................................................................................................................................... 56
Jump ................................................................................................................................................ 57
Global Effects ......................................................................................................................... 58
Fire................................................................................................................................................... 58
Glow................................................................................................................................................. 59
Motion Blur ...................................................................................................................................... 61
Shadow............................................................................................................................................ 61
Path Editor ................................................................................. 62
The basics of vector graphics ............................................................................................... 62
Using the Shape tool ............................................................................................................. 63
Using the Object tool .............................................................................................................64
Using the Path tool ................................................................................................................ 65
Using the Freehand tool ........................................................................................................ 66
Adjusting paths....................................................................................................................... 67
Viewing paths and images .................................................................................................... 68
Tracing and converting raster images.................................................................................. 69
Outputting your project .................................................................. 71
Saving your project ................................................................................................................ 71
Creating image files ............................................................................................................... 71
Creating video files ................................................................................................................ 72
Creating animations for the Web .......................................................................................... 73
GIF animation ................................................................................................................................. 73
RealText 3D .................................................................................................................................... 74
Appendices ................................................................................ 75
Shortcuts................................................................................................................................. 75
Main Program ................................................................................................................................. 75
Path Editor ...................................................................................................................................... 76
Index .......................................................................................................................................77
Page 5
5
Welcome to Ulead COOL 3D 3.0
Unparalleled 3D titling capabilities puts Ulead COOL 3D at the vanguard of its kind.
With this latest version, new tools, plug-ins, and other enhancements let you delve further
into the unlimited depths of your creativity to produce still and animated 3D titles and
other fun projects that you can use to liven up W eb pages, videos, and presentations.
Experiment and take advantage of all the power that Ulead COOL 3D has to offer, and
discover why it remains the industry leader in 3D titling software.
Whats new
Ulead COOL 3D brings you a wide range of new features that give you increased flexibility when creating and outputting your 3D projects. New plug-in effects add extra spice to
your animation, and new tools let you do just what you’ve always wanted to do - create
graphic objects and simple geometric 3D shapes that you can use in your projects.
• Path Editor With this new tool, you can create customized graphic
shapes that you’ve always wanted to use in Ulead COOL 3D
projects, without having to use external vector graphics software.
This feature offers you a multitude of tools for creating and editing
shapes, and tracing images. It even lets you convert simple raster
graphics to vector graphics.
• 3D Geometric Shapes The Geometric T oolbar makes it easy to
insert and edit simple three-dimensional geometric objects into your
projects. Y ou can put spheres, cones, cylinders, cubes, and pyramids
into the picture, all of which you can customize.
• New plug-ins This new version expands your creative potential with
whole new plug-ins. T ransition plug-ins make one string of text move
to another in amusing and unexpected ways, and a new Bevel plug-in
lets you apply special bevel shapes to your objects for eye-catching
results. The Distort effect stretches your title to new perspective,
while the Motion Path plug-in lets your text string move in unusual
ways along specially designed paths.
• Enhanced GIF animation output Y ou now have additional options
when outputting your project as an animated GIF . Among others, you
can create a global palette, remove redundant pixels, and loop the
animation.
• Object Manager This convenient tool lets you easily determine how
the various objects in your project are grouped together, giving you
more control when editing.
Page 6
6
Ulead COOL 3D 3.0
• VIO support More options are available to you when creating
videos. Among other things, you can preview the final video file,
make advanced video settings, and output your project to the
QuickTime file format.
• New file formats supported Ulead COOL 3D lets you take advan-
tage of the latest in 3D technology - with this version, you can output
your project to the RealT ext 3D format for convenient use on the
Web, and you can also import complex 3D images in the DirectX file
format (*.X).
• Key frame control improvement Create animations with even
greater control by taking advantage of modifications in key frame
controls. These let you manipulate the first and last key frames (for
plug-in effects) and show/hide your 3D objects as well.
• Enhanced preview performance W ith the new playback cache, you
can now preview your 3D animations with greater speed.
• Click the Help button, then move the cursor to the object in ques-
tion, and click again to find out more on that feature.
• Go to the Help: Help Topics menu command to get more detailed
information on a certain subject.
• If you are a registered user, you are entitled to Ulead technical
support. This can be accessed through the Help: Ulead Technical
Support menu command, or go to our W eb site by clicking the
Ulead Homepage button on the Standard Toolbar. Other helpful
information is available through the newsgroup at
comp.graphics.apps.ulead.
Getting help
The best way to familiarize yourself with Ulead COOL 3D is to experiment with all of the
options provided. T o help you get started, this manual offers basic tutorials as well as a
glimpse into advanced techniques. If you should get stuck at any time, you can use one of
the following methods for more assistance:
Page 7
7
User Guide
To install Ulead COOL 3D:
1 Place the Ulead COOL 3D CD into the
CD-ROM drive.
2 When the Setup screen appears, follow
the instructions to install Ulead COOL
3D onto your computer.
Note: If the Setup screen doesn’t appear after loading
the CD, then you can manually start it by doubleclicking the My Computer icon on your desktop, then
double-clicking the icon for the CD-ROM drive. When
the CD-ROM window opens, double-click the Setup
icon.
Installation
It’s easy to install Ulead COOL 3D. In the installation process, the Installation Wizard
will guide you through the steps and the options.
Running Ulead COOL 3D
There are two ways that you can run the program:
• Double-click the Ulead COOL 3D icon on your Windows desktop, or
click the icon on the Quick Launch toolbar.
• Select the Ulead COOL 3D icon from the Ulead COOL 3D program
group on the Windows Start menu.
Getting updates and free downloads
Keep apace with the latest in Ulead COOL 3D news, updates, and free downloads - the
program automatically detects and notifies you of any new events in the Ulead COOL 3D
homepage. Y ou can also:
• Click the Free Downloads button located on the Standard Toolbar to
check for updates at your leisure.
• Click the Ulead Homepage button to read about other Ulead news and
products.
Page 8
8
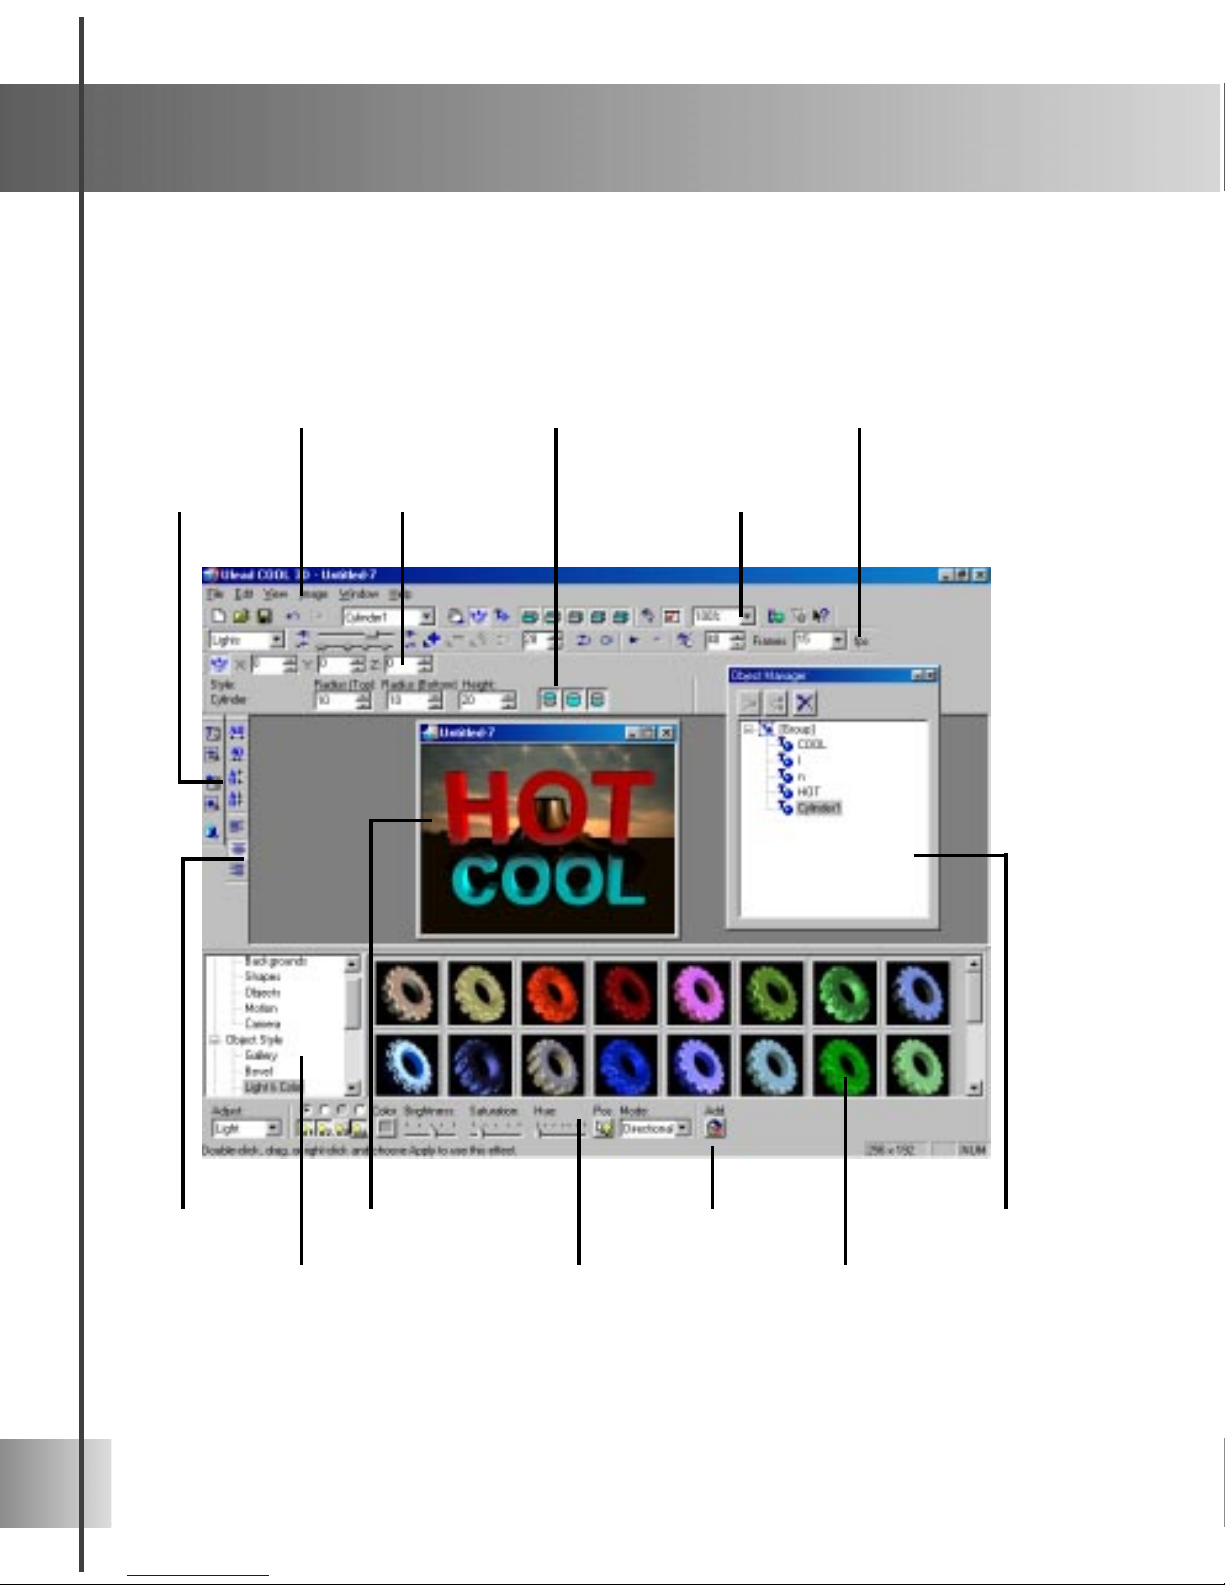
Workspace
The intuitive design of Ulead COOL 3D makes it easy to use the program. In this version,
there are more toolbars and buttons that allow you to really take advantage of all the
program’s increased capabilities and new features. The following section should help you
quickly familiarize yourself with all of the main functions.
Geometric Toolbar
Standard Toolbar
Text Toolbar
Animation Toolbar
Object Manager
Location
Toolbar
Edit Window
EasyPaletteEasyPalette
file directory
Attribute Toolbar
Object
Toolbar
Menu Bar
Status Bar
Page 9
9
User Guide
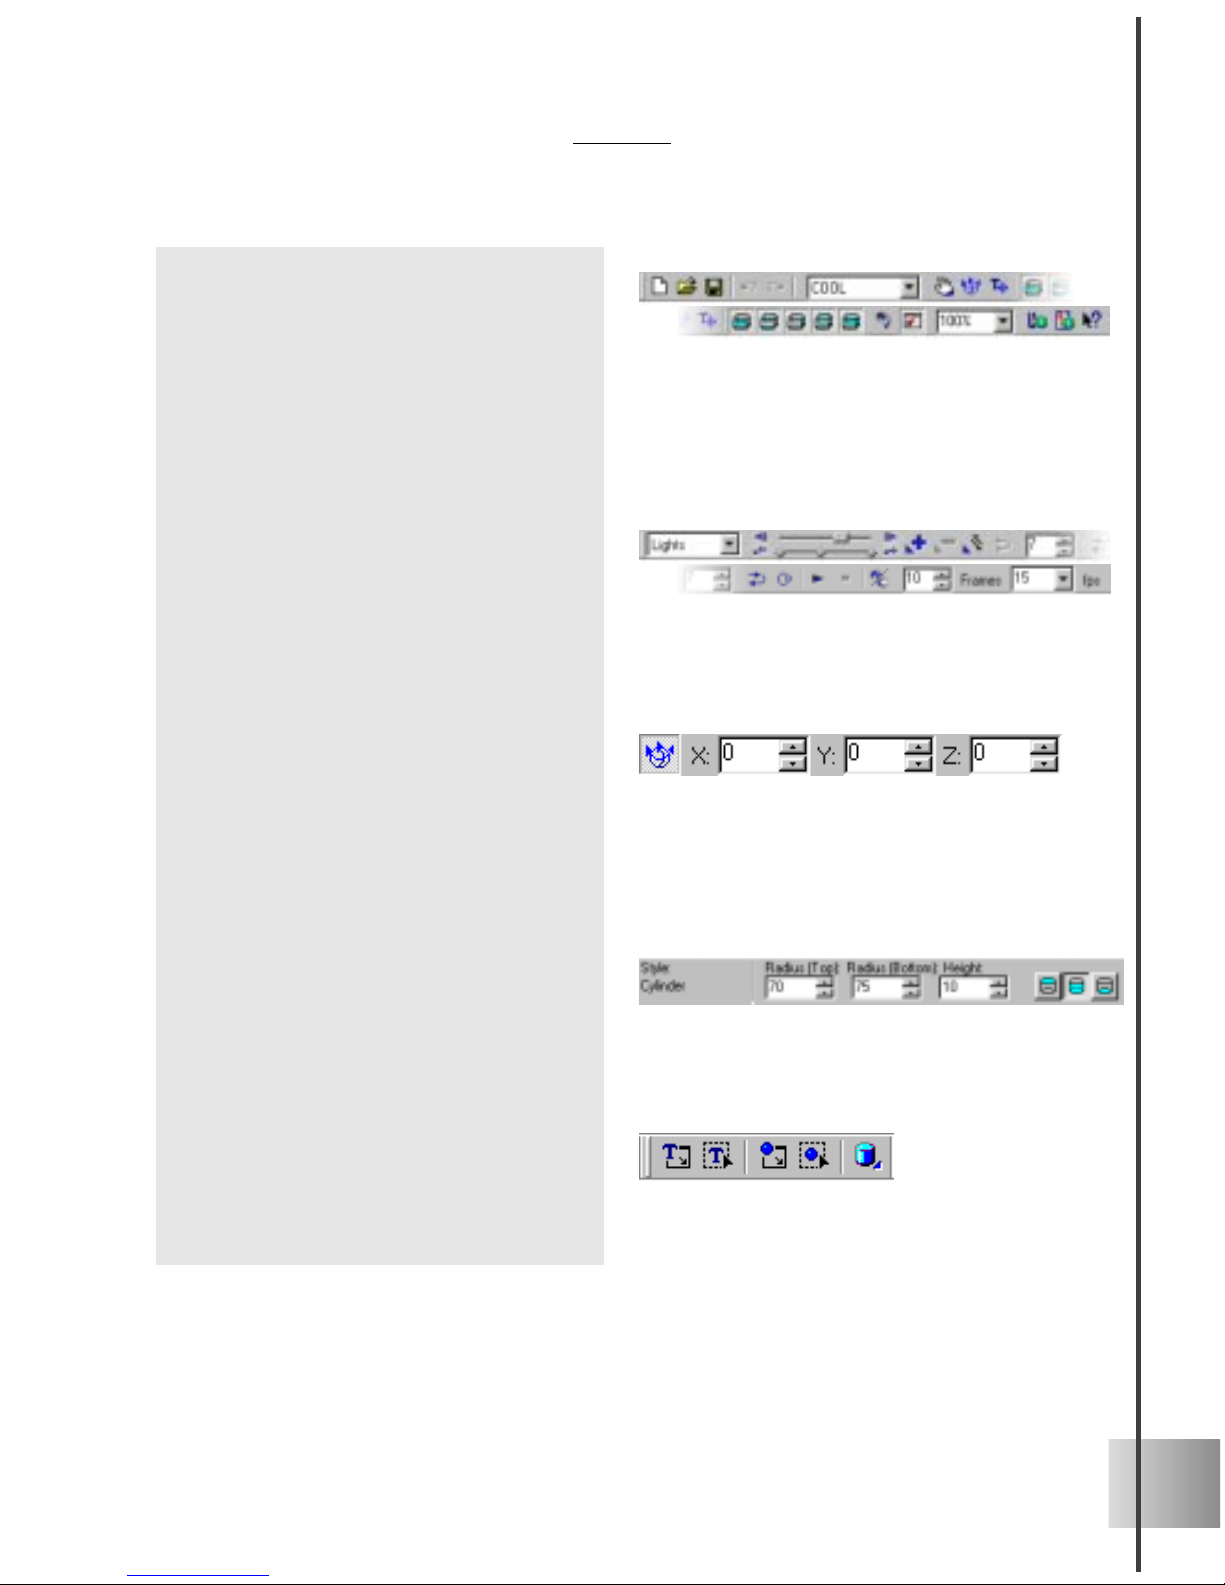
• Standard Toolbar Contains all of
the most commonly used functions
and commands. In addition to the
typical file commands, it also has
object and bevel face selection
buttons, as well as the three basic
movement controls: Rotate, Move,
and Size.
• Animation Toolbar Displays all
the controls you need to manipulate
an animated project, including
extensive key frame and timeline
controls, animation looping modes,
frame numbers, and frame rate. See
page 28.
• Location Toolbar Shows the
position, size, rotation, light, and
texture coordinates of the selected
3D object. Allows you to enter
values yourself, or displays the
changing values of the object as
you drag it in the Edit Window.
• Geometric Toolbar Activated
when you insert a basic 3D geometric shape. Lets you customize its
dimensions and select individual
faces to edit. See page 27.
• Object Toolbar Allows you to
place and edit text, graphics, and
basic 3D shapes in your project.
This is where you really begin your
project.
Page 10
10
Ulead COOL 3D 3.0
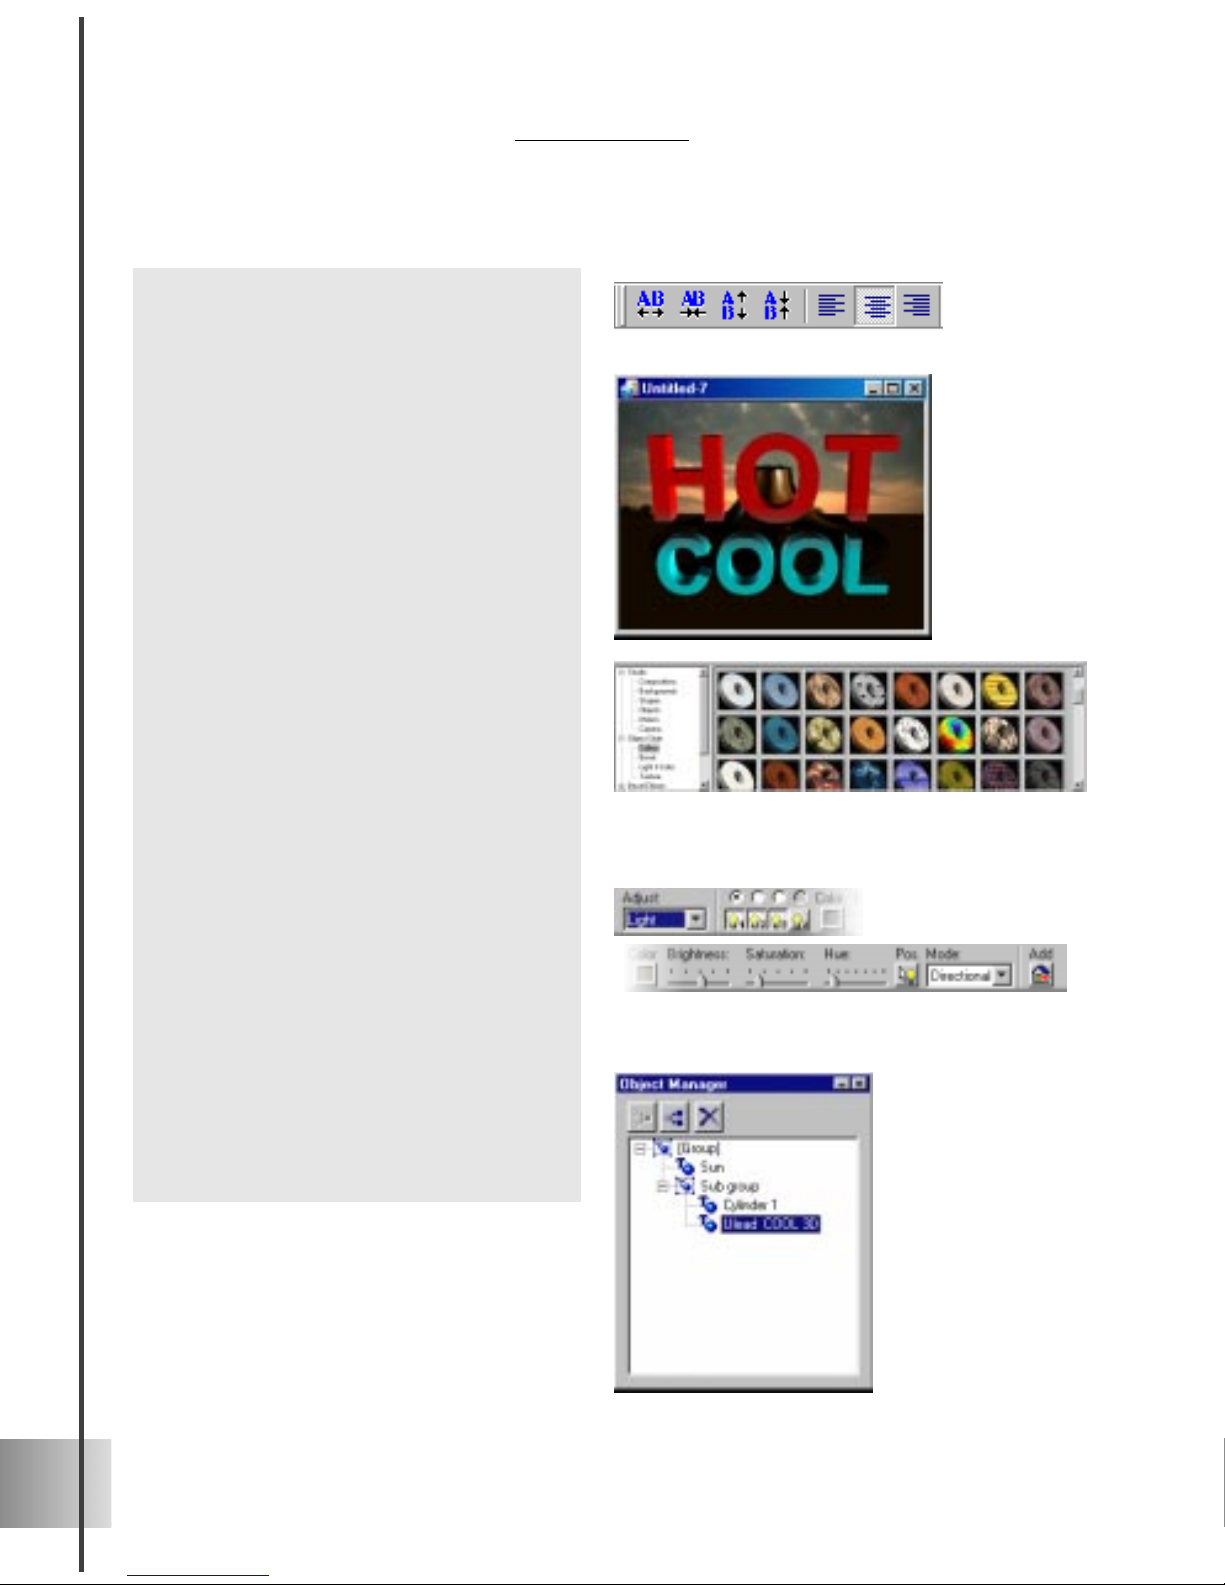
• Text Toolbar Allows you to adjust
the alignment of the text within a
text object, as well as the spacing
between lines and characters.
• Edit Window Lets you preview the
3D project as you work. You can
also drag objects directly within the
the window to customize basic
aspects, such as position, rotation,
and size, among others.
• EasyPalette Contains a file
directory of all the aspects that you
can apply to your 3D object,
including plug-in effects. Click on
any item within each category to
access dozens of preset effects in
the thumbnail pane. These can be
quickly and easily applied to your
project. See page 11.
• Attribute Toolbar Lets you
customize many aspects of your
projects, including plug-in effects.
Once you understand the available
options, you have the potential to
create projects like a pro!
• Object Manager A floating panel
that lets you group, rename, and
delete objects for improved editing
control. See page 16.
Page 11

11
Getting started
Starting a project in Ulead COOL 3D is simple. The following section takes you through
the steps of beginning a first project.
Using Studio presets
Studio is the first category of presets that appears in the EasyPalette file directory . By
using its collection of presets, you can easily complete a project with special animated
effects, shapes, and backgrounds in no time. The following section briefly describes its
preset categories and how to customize them to your needs.
• Drag and drop the preset into the Edit Window.
• Double-click the preset.
• Right-click a preset, and select Apply from the menu that appears.
Using the EasyPalette
The EasyPalette provides you with the fastest way to create astounding titles and graphics
with Ulead COOL 3D. With its vast number of presets, this is where you can add color
and life to your project with just a few clicks.
The EasyPalette file directory lists all of the effects that you can apply to your project.
When you click on a category or a specific plug-in name, the thumbnail presets for that
particular item appear in the thumbnail pane. T o apply a preset, use one of these
methods:
EasyPalette file directory EasyPalette thumbnail pane
Page 12
12
Ulead COOL 3D 3.0
To create a finished title in a few minutes:
1 Drag a Composition preset to the
workspace, or double-click it. The entire
composition appears in the Edit Window.
2 On the Standard Toolbar, select a text
that you want to change from the Object
List.
3 On the Object Toolbar, click the Edit
Text button. The Ulead COOL 3D Text
dialog box appears, displaying the text
object that you selected.
4 Change the text as desired, then click
OK. The new text appears in the
project, replacing the original text.
5 On the Animation Toolbar, click Play to
preview the animated project.
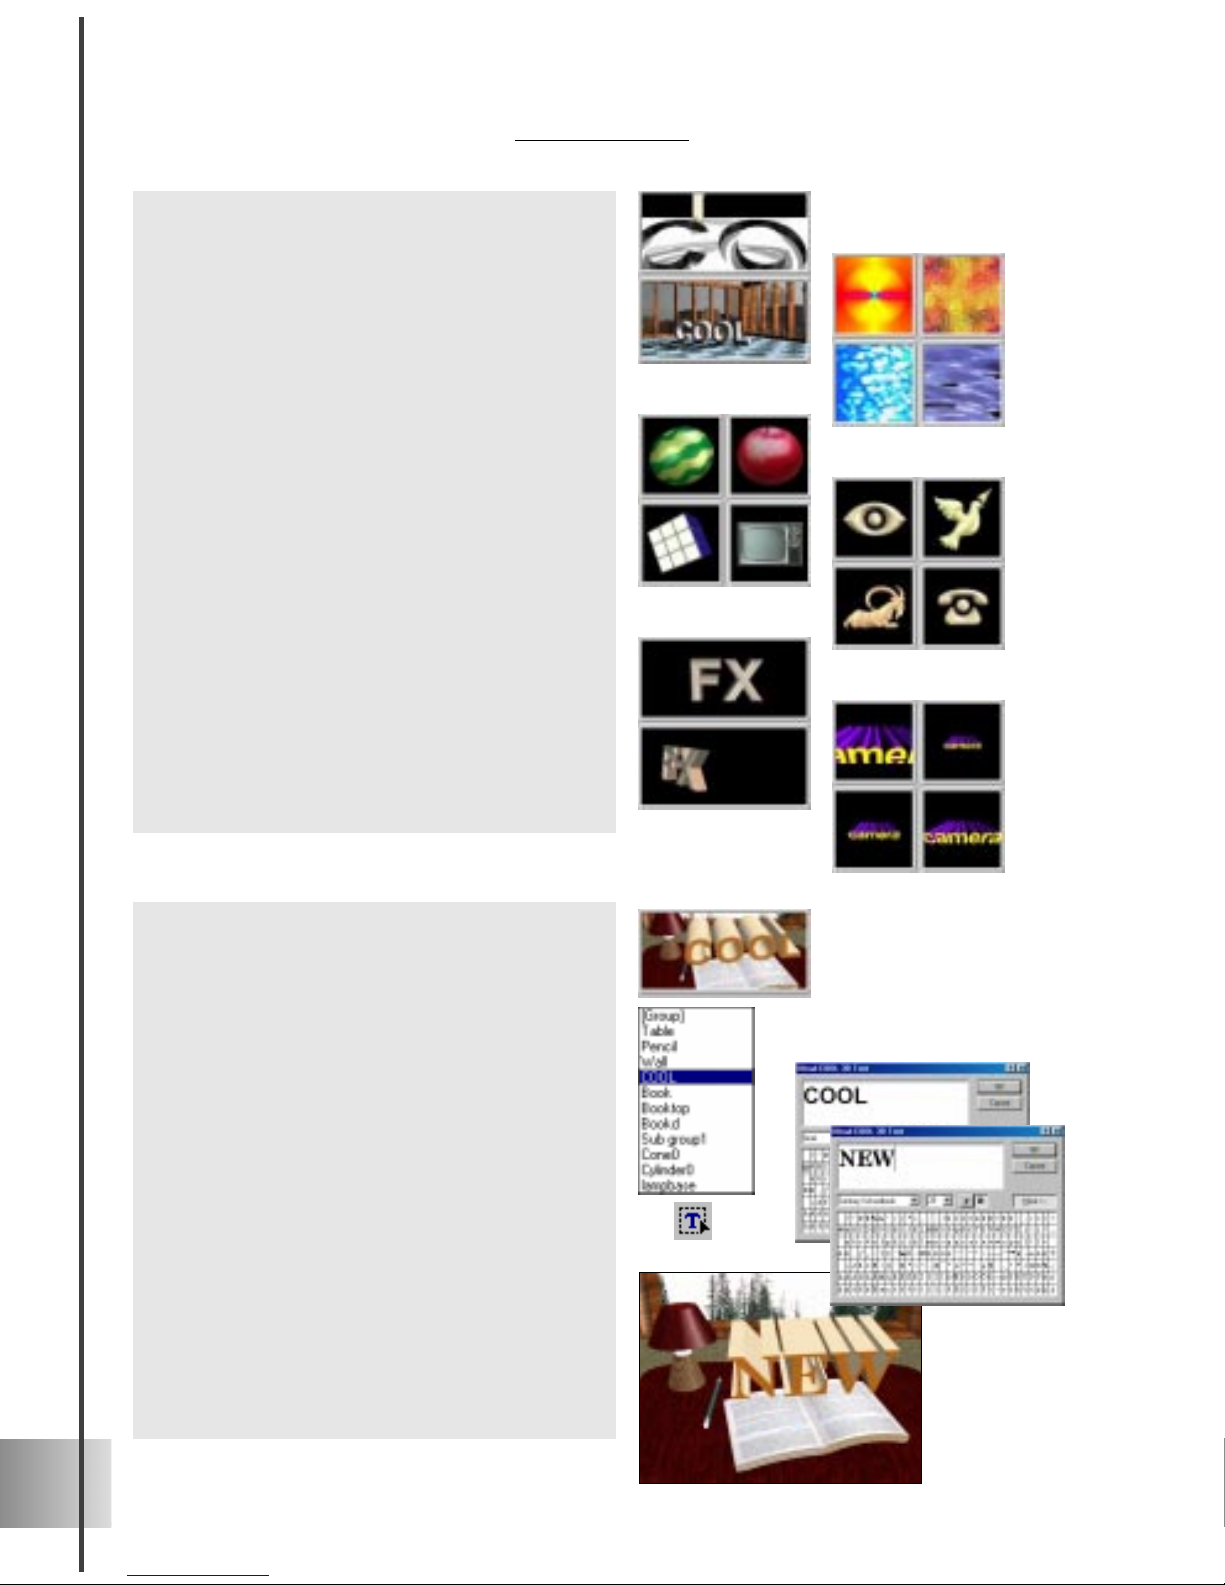
• Compositions Completed animated
projects that you can apply to blank
projects, including special effects. See
the next section for a tutorial.
• Backgrounds A collection of patterned,
photographic, and solid color backgrounds.
• Shapes A group of three-dimensional
objects inspired by objects familiar to us
in daily life.
• Objects A variety of graphic objects that
you can insert into your project. Some
include texture attributes and animation
effects.
• Motion Animation presets designed
using the basic Position, Orientation,
and Size controls.
• Camera Effects that simulate the
motion of a camera and its specific lens
type to zoom in and out of the entire
project.
Page 13
13
User Guide
Dimensions and display quality
When you set up a 3D project, the dimensions and quality of your project depend on how
you plan to use it. You might want to use it as part of a video, include it as a GIF animation on your Web site, or save it as a still 3D image. Regardless of your plans, try using
smaller dimensions and lower display quality while editing. This allows your computer to
render the project at a faster rate when you are experimenting with different effects and
settings. Then, when you have exactly what you want, increase the dimensions of the
project. Some commands accessible on the Image menu are listed below:
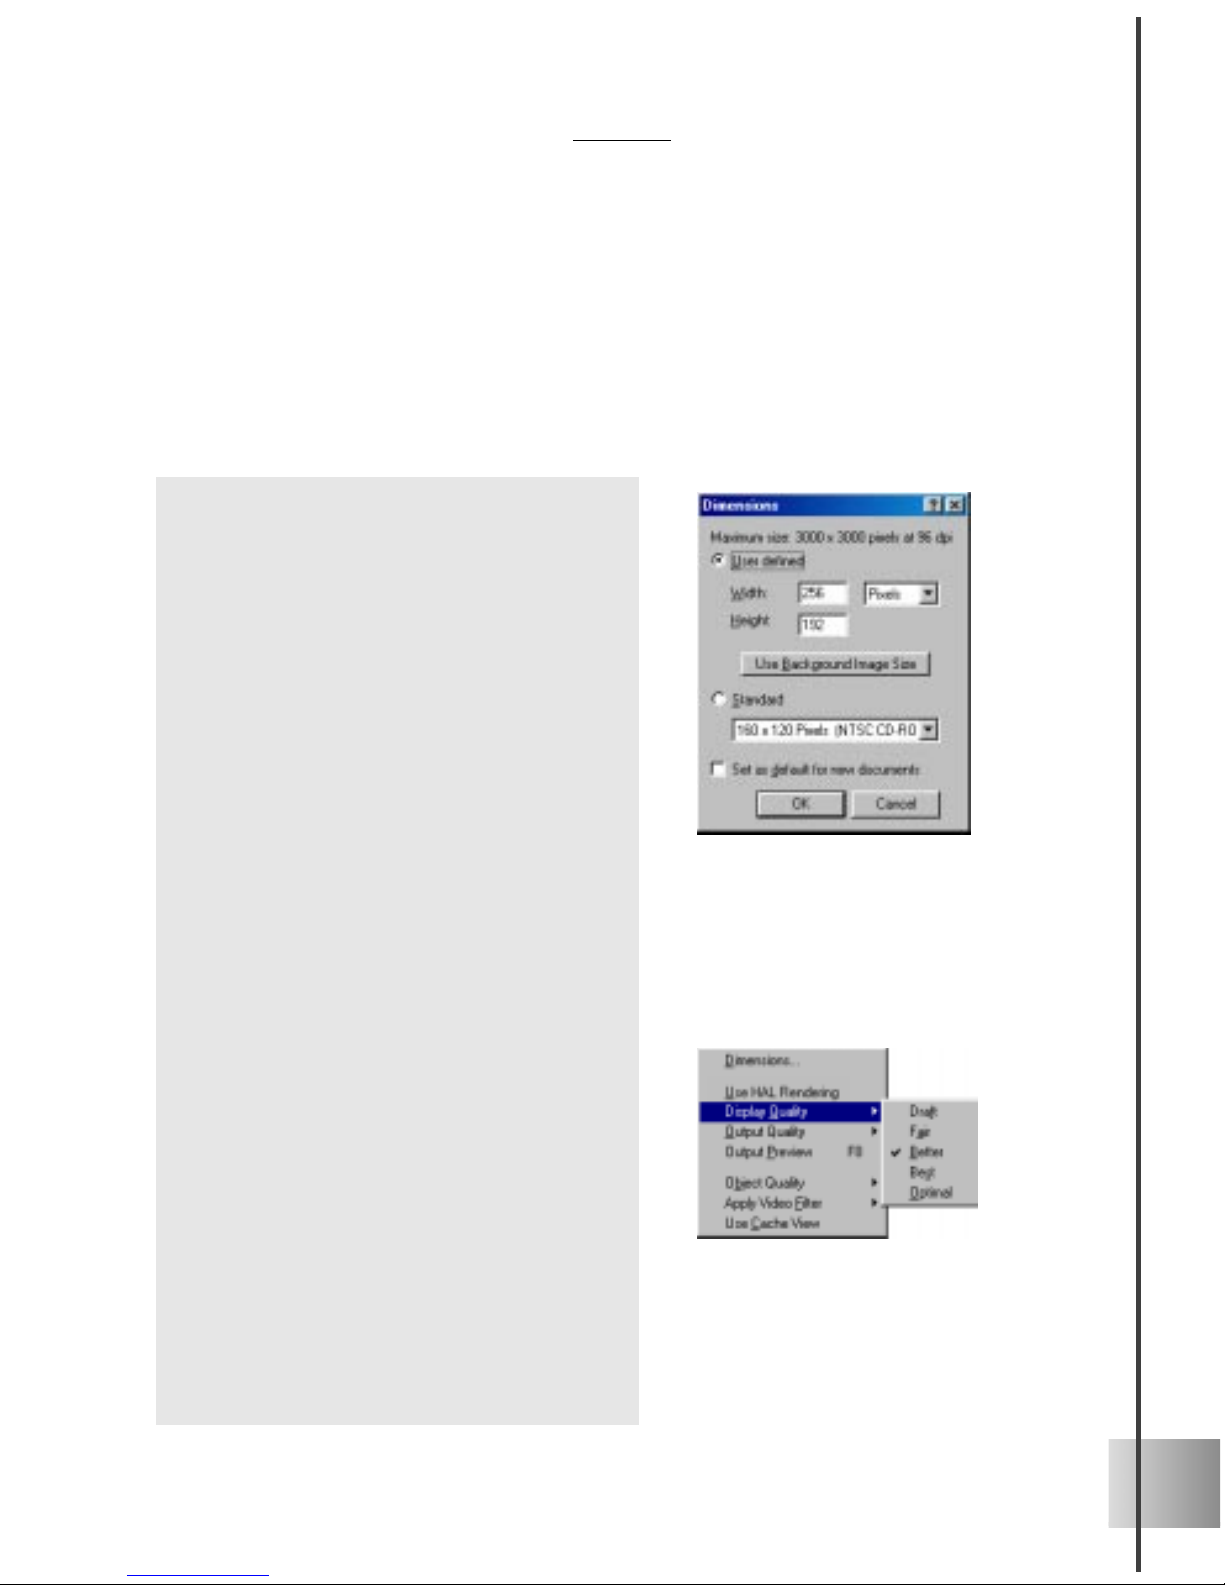
• Dimensions Click this command to
access the Dimensions dialog box. The
User defined option lets you customize
the dimensions. If you have inserted
your own image as the background,
click the Use Background Image Size
button to have the dimensions of the
project match the background. If you
plan to output your project for the video
or the Web, the Standard list has a
range of commonly used dimensions.
• Use HAL Rendering Select this to have
your computer directly access the
DirectX 6.1 Hardware Abstraction Layer
(HAL) to render your project. Selecting
this option enables better performance
with your animations. (Available only if
your display card supports this. Check
your display card’s specifications).
• Display Quality Choose from several
display qualities, ranging from Draft to
Optimal. However, while you are editing
your project, use a lower display quality
to shorten rendering time. This is
particularly recommended for largersized projects or projects that use
multiple plug-in effects.
• Output Quality Similar to Display
Quality, this menu lets you select the
quality of your project when you convert
it to its final format as a still image or
an animation sequence.
Page 14
14
Ulead COOL 3D 3.0
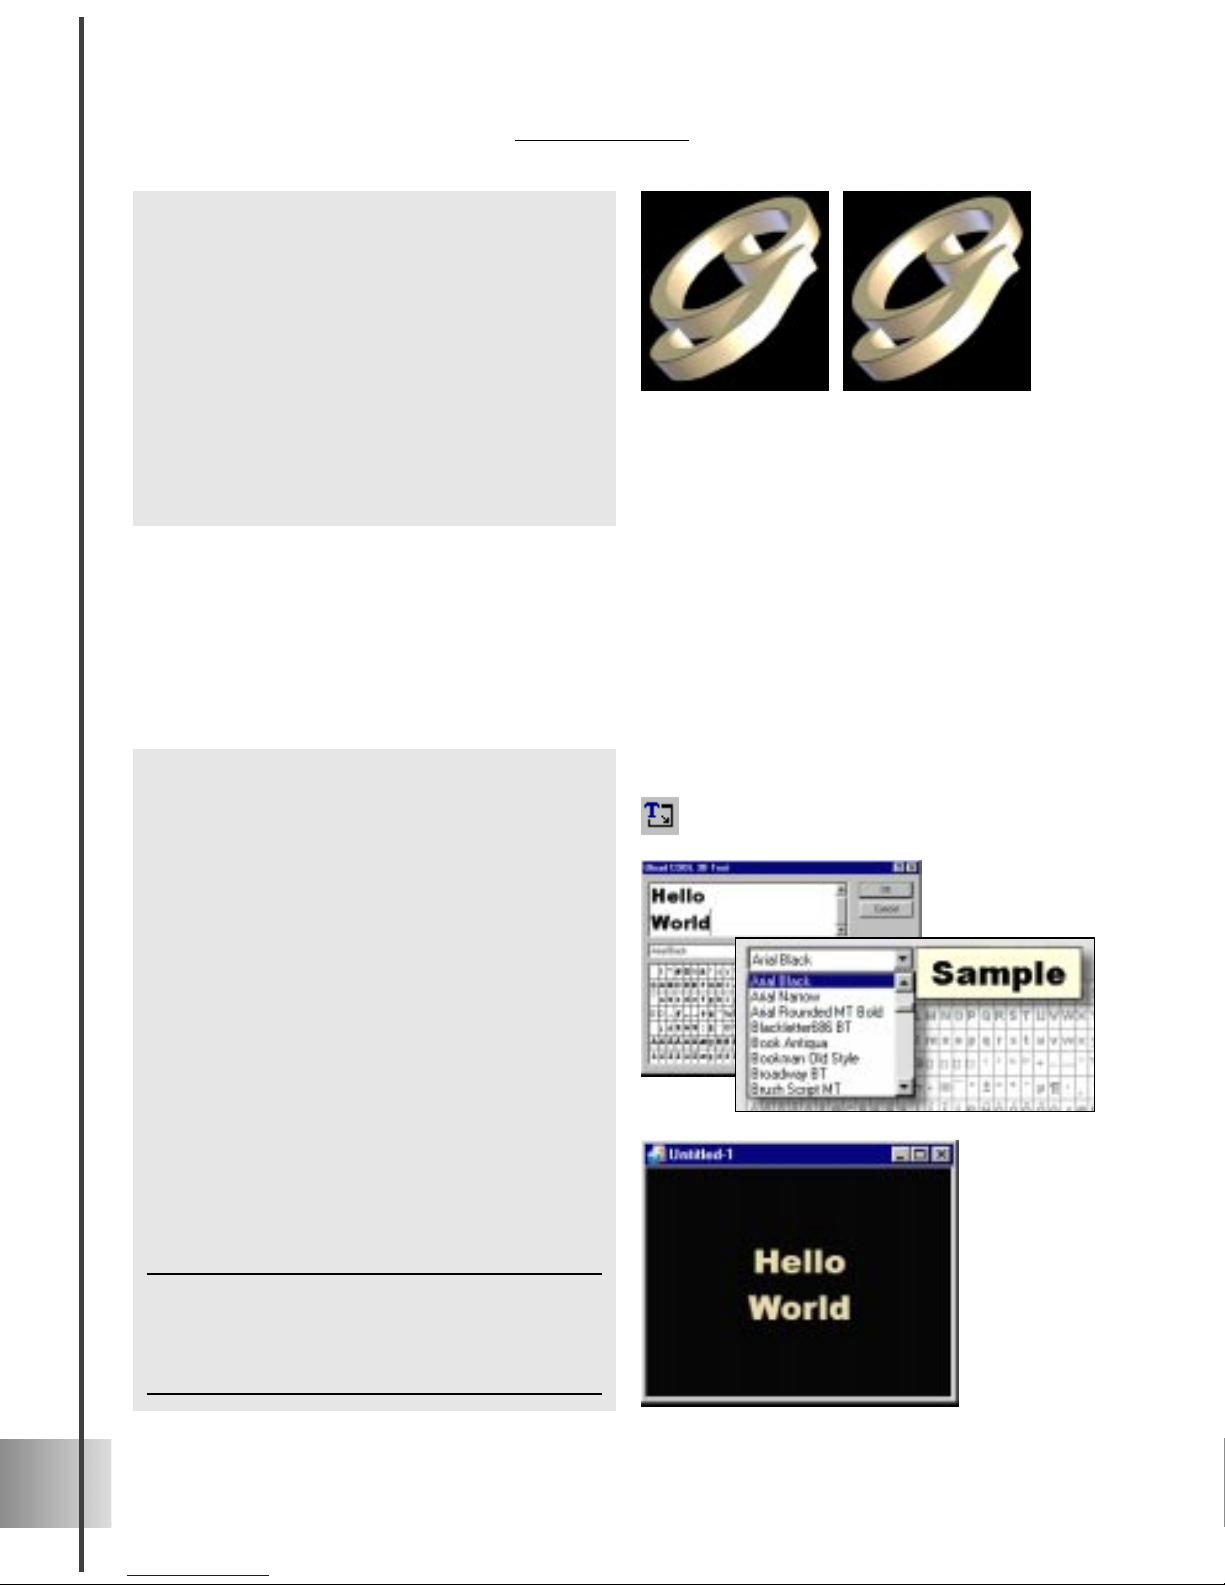
To insert a text object:
1 On the Object Toolbar, click the Insert
Text button. The Ulead COOL 3D Text
dialog box appears.
2 Select a font from the list. When
searching for a font, a ToolTip appears
to give you a preview of the font
currently highlighted. After selecting
your font, set the size and style of your
text, and then enter the actual text in the
text box.
3 Click OK. The text appears in the Edit
Window of the main program.
4 If you want to insert another text object,
click the Insert Text button again. To
edit the existing text, see the following
tutorial.
Note: Create a text string of multiple lines by
creating a line break in a string of text. In the Ulead
COOL 3D T ext dialog box, simply press Enter
where you want a line break to occur.
Adding and editing text
When you create your project, the first step is to insert an object. T o add and edit a text
object, follow the next tutorials. (For information on adding and editing graphic objects,
see page 25.)
• Object Quality Specify how smooth the
3D shapes and forms are. The higher the
precision, the slower the rendering time,
so wait until you’re finalizing your
project before setting this.
• Cache View Select this option and play
your animation once to store the frames
of your animation in a cache. This
allows the animation to be played at
approximately the specified frame rate
the next time you preview the project.
Lower object precision (left) and higher
object precision (right)
Page 15
15
User Guide
Selecting and grouping objects
Ulead COOL 3D allows you to insert more than one object into your project, whether it
be text or graphics. After you have created the individual objects, you can edit and
animate each one individually just by first clicking on it in the Edit Window to select it.
Or you can use the Object List on the Standard T oolbar to select the object that you want
to edit. An even more convenient way to keep track of objects is to use the Object Manager (see the following section).
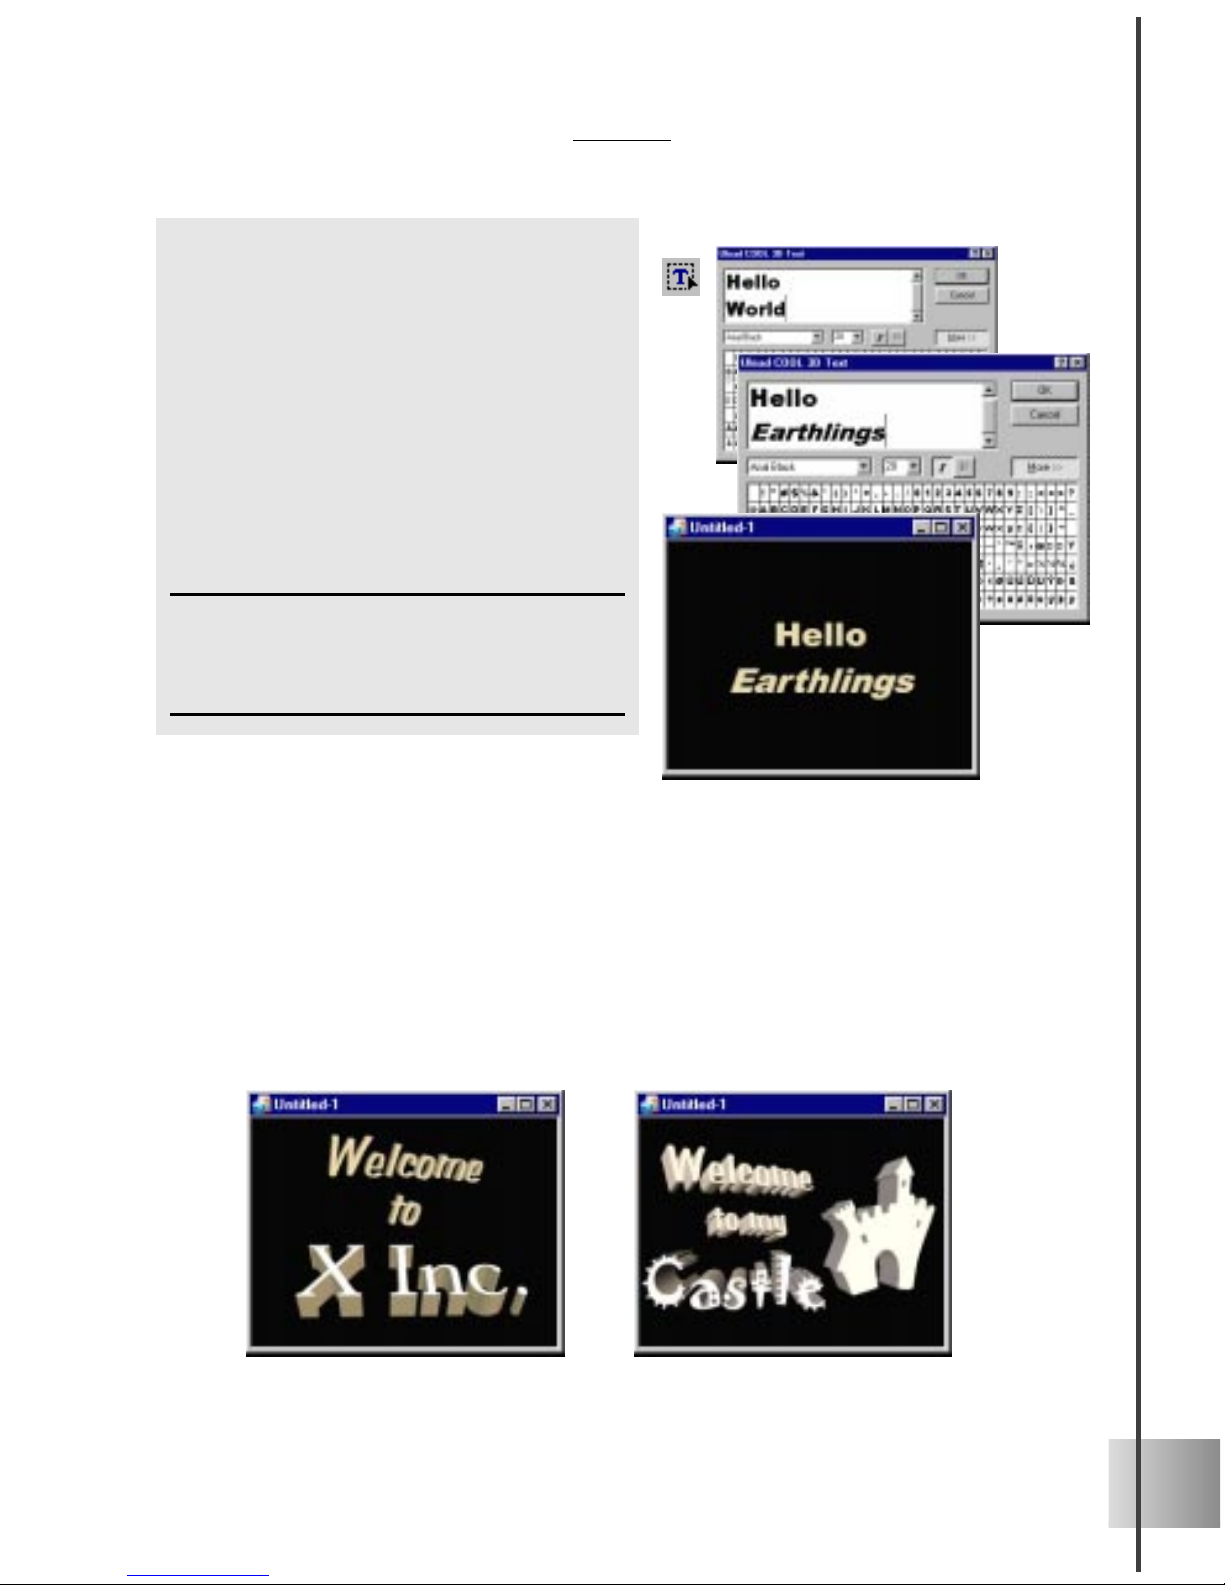
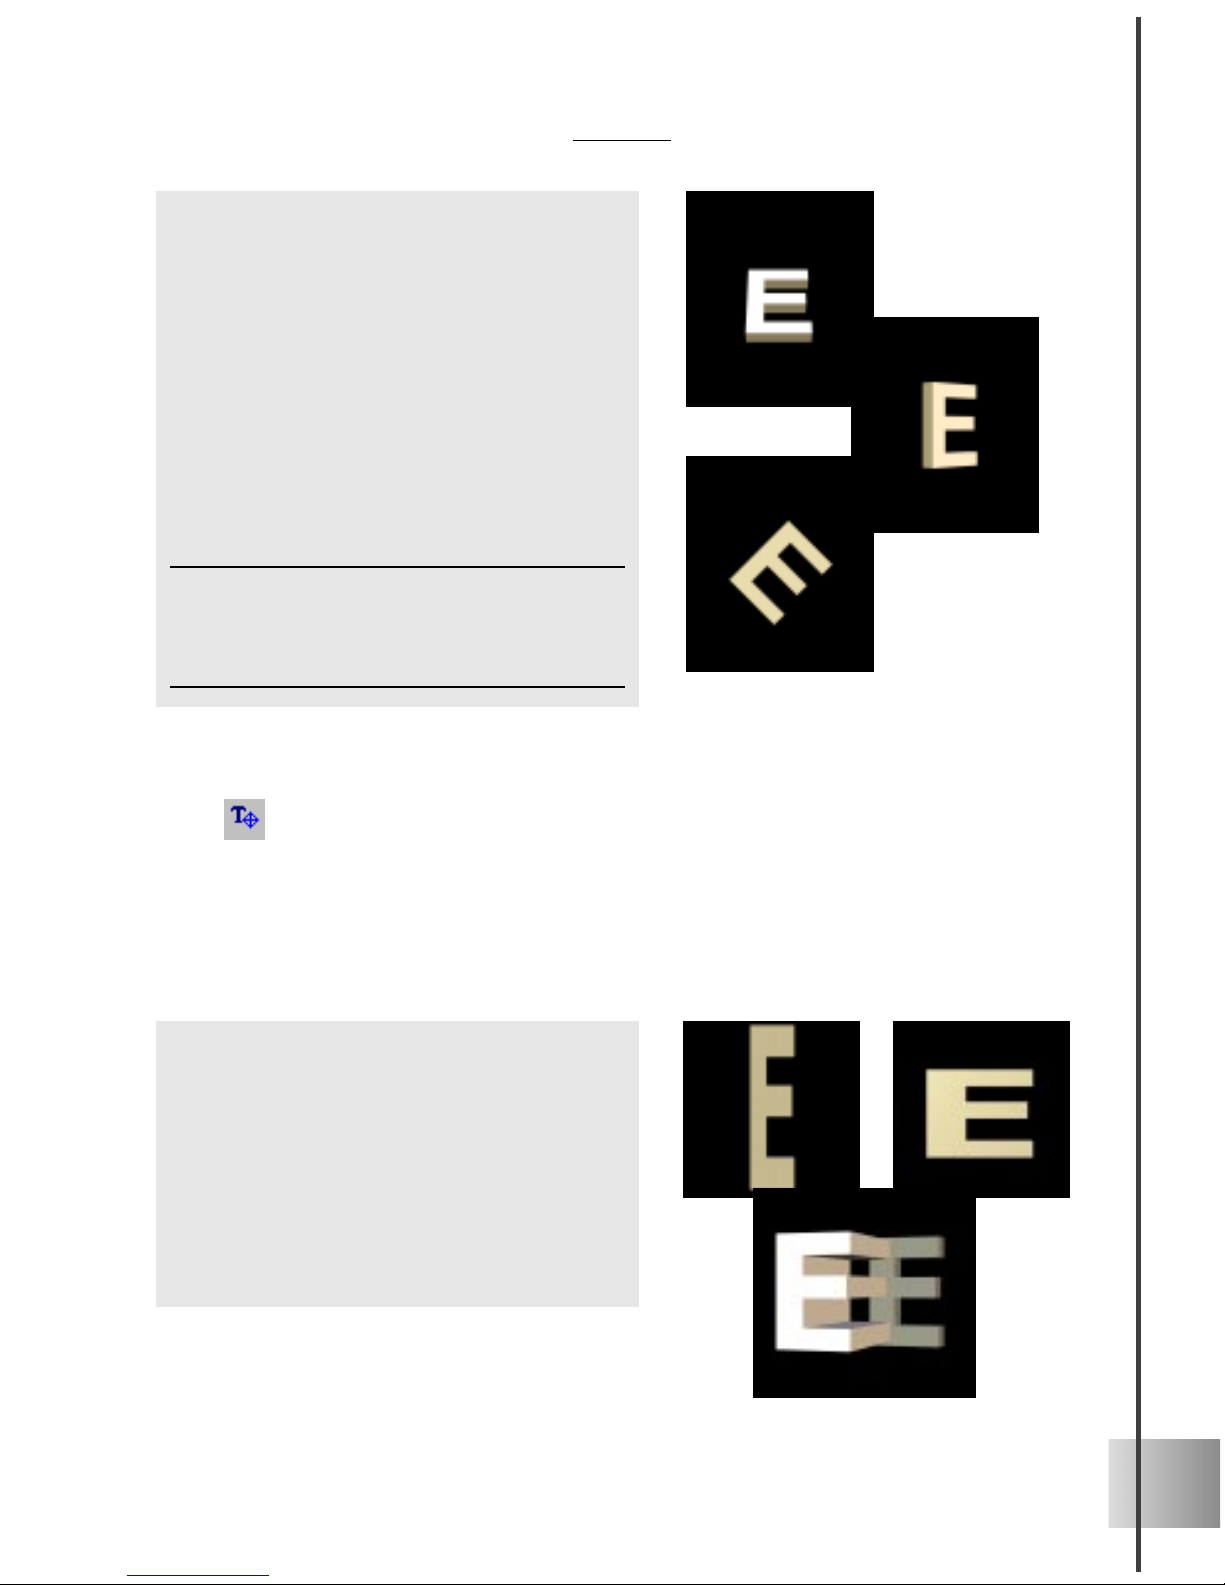
To edit a text object:
1 Click the Edit Text button.The Ulead
COOL 3D Text dialog box appears with
the selected text object.
2 Edit the text in the text box, then click
OK once you’ve made your changes.
The edited text appears in the Edit
Window.
You can also adjust the character
spacing as well as the line spacing and
alignment with functions on the Text
Toolbar.
Note: If you have added more than one text object,
be sure to first select the one you want to edit from
the Object List on the Standard T oolbar , or select it
from the Object Manager (see page 16.)
A text object and a graphic objectMultiple text objects
Page 16
16
Ulead COOL 3D 3.0
Using the Object Manager
The more objects you create, the more of a challenge it can be to keep track of them. The
Object Manager makes it easier for you to organize and edit your objects. Here are some
of the basic functions:
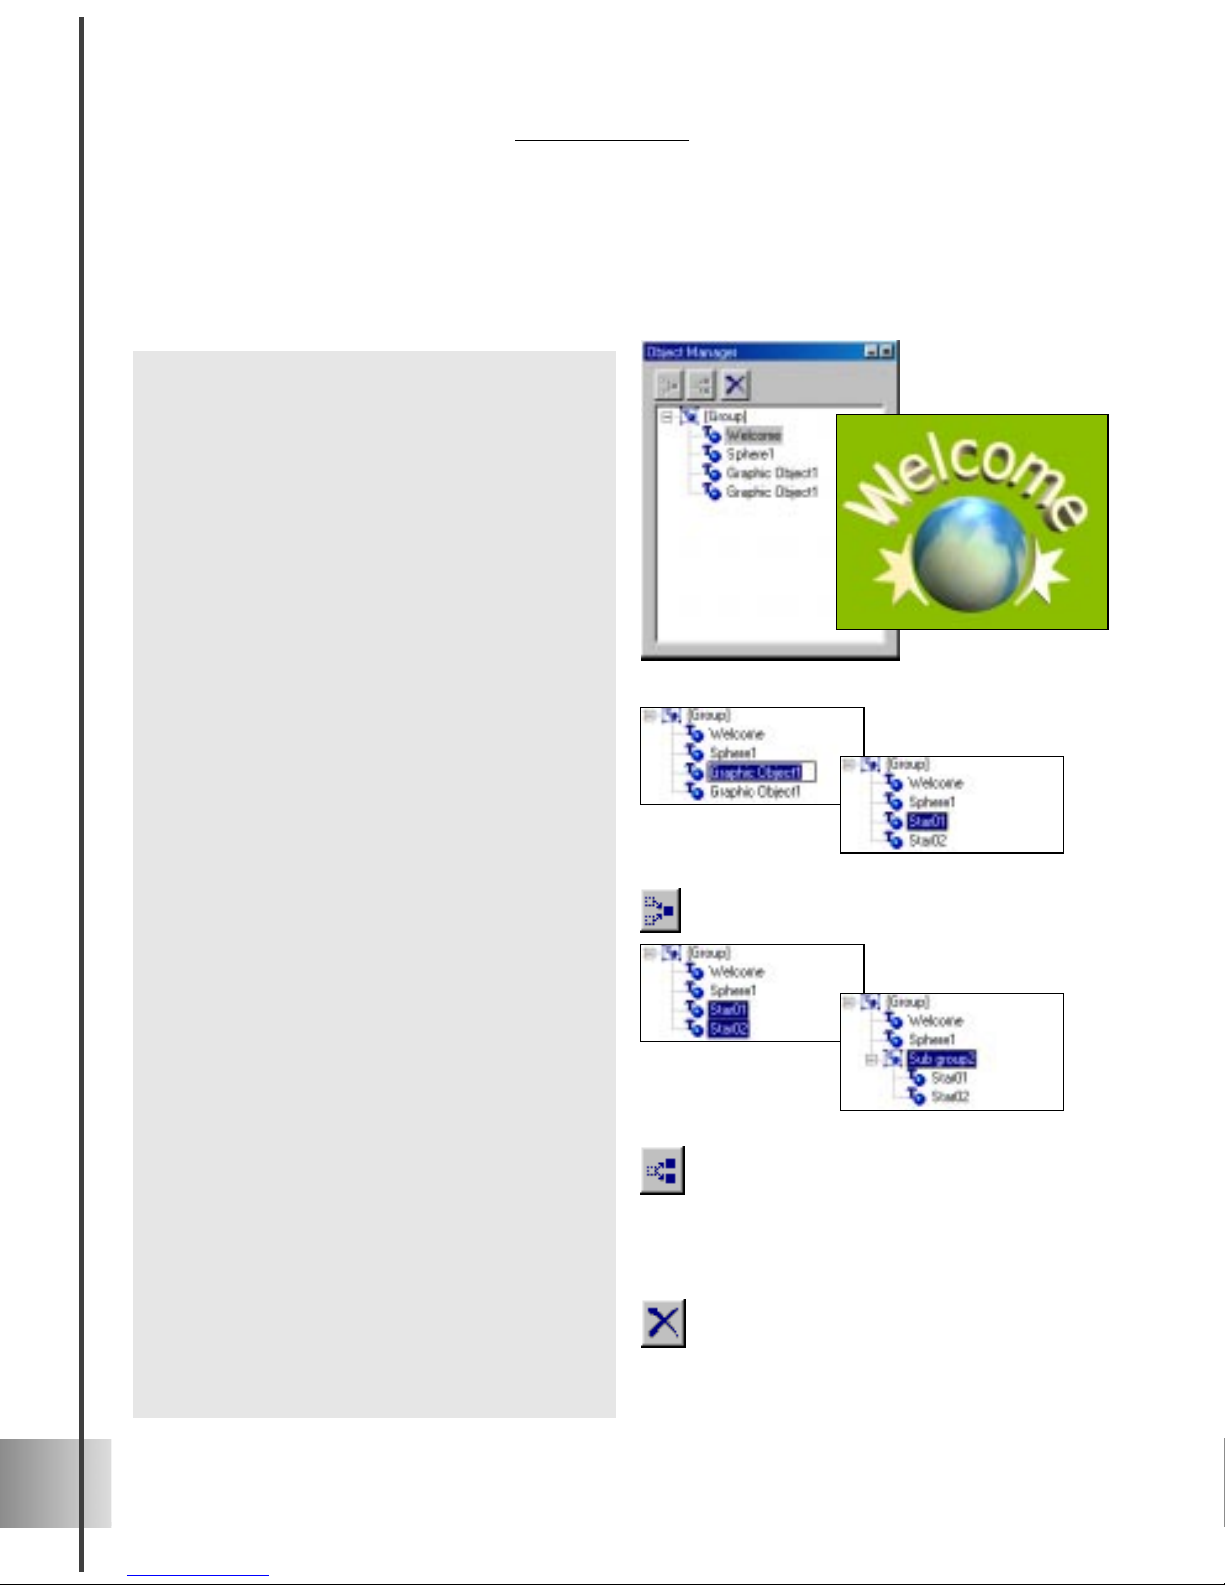
• Select objects Each time you create a
text or graphic object, it appears as an
individual item in the directory. Click on
that item in the Object Manager to select
it. This allows you to edit only that
object.
• Rename objects Do this by selecting the
object in Object Manager, and then
clicking it again to edit the name. This
is convenient when you want to do the
following:
¡ Change the name of an object to be more
specific. Otherwise, it will receive a
generic name by default.
¡ Differentiate between two or more of the
same text or graphic objects in a project.
Otherwise, they will receive the same
name by default.
• Group multiple objects To edit several
objects together as a group, select the
desired items by clicking them with the
mouse while holding either the Shift key
(for a row of items) or the Ctrl key (for
individual items), then click the Group
Objects button. The selected items then
form a Subgroup. To see which objects
are in the Subgroup, click the + symbol.
• Divide a group of objects To have a
group of objects form separate objects
again, select that Subgroup from the list,
and then click the Ungroup Objects
button.
• Delete selected objects or groups
Simply select the desired object or group
of objects, and click the Delete
Object(s) button.
Page 17

17
User Guide
The basic object controls (left) and the Location Toolbar (right)
Two-dimensional space (left) and three-dimensional space (right)
Moving, sizing, and rotating an object
Ulead COOL 3D makes it easy to manipulate and animate 3D objects in three-dimensional space. For basic motions that combine changes in position, rotation and size, use
any of the Motion presets located in the Studio category of the EasyPalette. Eventually,
you will probably want to customize objects using your own settings using the Move
Object, Rotate Object, and Size Object buttons on the Standard Toolbar. You can use
these to make an animation, or simply to enhance your title in a still composition.
T o begin adjusting your object, first click one of these basic positioning controls, then
either drag the object directly in the Edit Window, or get more precise results by entering
coordinate values in the Location Toolbar.
The variables in the Location T oolbar all involve values for X, Y, and Z, which are the
three axes in three-dimensional space. The X and Y axes refer to the position of the object
as it moves horizontally and vertically , while the Z axis refers to the object as it moves
towards you and away from you.
Move
Insert a text or graphic object, then click the Move Object button. Notice that it is
inserted by default where the X, Y, and Z axes intersect. The values of X, Y, and Z at this
intersection are 0, which you can also see on the Location T oolbar. Try some of the
following steps to orient yourself:
Page 18
18
Ulead COOL 3D 3.0
Rotate
Insert an object, then click the Rotate Object button. The default rotation value is 0 for
X, Y, and Z. In this state, the object stands upright facing you. When you rotate an object,
you rotate it around one of the three axes. The values in the Location T oolbar represent
the angles of rotation. For example, a value of 360° equals one complete rotation, while a
value of 180° is half of a complete rotation. A value of 720° is equal to two complete
rotations. This concept becomes important when you start animating objects.
• Drag the object upwards in the Edit
Window, and notice that the value for Y
increases. Drag the object downwards,
and the Y value decreases.
• Drag the object left and right to see how
the X values change on the Location
Toolbar. As the object moves towards
the left, the value for X decreases. When
it moves to the right, the value increases.
• Drag the object along the Z axis by
holding the right mouse button while
dragging. This makes the object come
towards you or move away from you. If
you have not already rotated the object,
then it will simply appear larger as you
move it toward you or smaller as you
push it away. (To rotate the object for a
better view, see the following section.)
• Hold the Shift key down while dragging
the object along any one of the three
axes. Notice that the object will move
only along the axis that you drag it
along.
• For more exact control over the position
of the object, enter values directly in the
Location Toolbar.
Page 19
19
User Guide
Size
Insert a text object, then click the Size Object button. The default size value for X, Y, and
Z is 100. A larger X value increases the width of the object, while a larger Y value
increases the height. Z values affect the thickness of the object. Again, you can enter
values in the Location T oolbar , or you can either drag on the object itself in the Edit
Window.
• Drag to the left and right with the
mouse, and the object rotates accordingly. Notice how values become
negative when you drag to the left and
positive when you drag to the right.
• Drag up and down with the mouse, and
the object rotates backwards away from
you and towards you.
• Hold the right mouse button down, then
drag up and down in the Edit Window.
The object spins counterclockwise and
clockwise.
Note: The axes around which objects rotate are
determined by the center point of the object. For text
objects, this often depends on the font used, and if
the character is lower or upper case.
• Drag upwards in the Edit Window to
decrease height and downwards to
increase it.
• Drag the cursor left to decrease width
and right to increase it.
• Hold the right mouse button down, then
drag towards the left or right to adjust
the thickness of the object. (To see this
effect best, rotate the object slightly.)
Page 20
20
Ulead COOL 3D 3.0
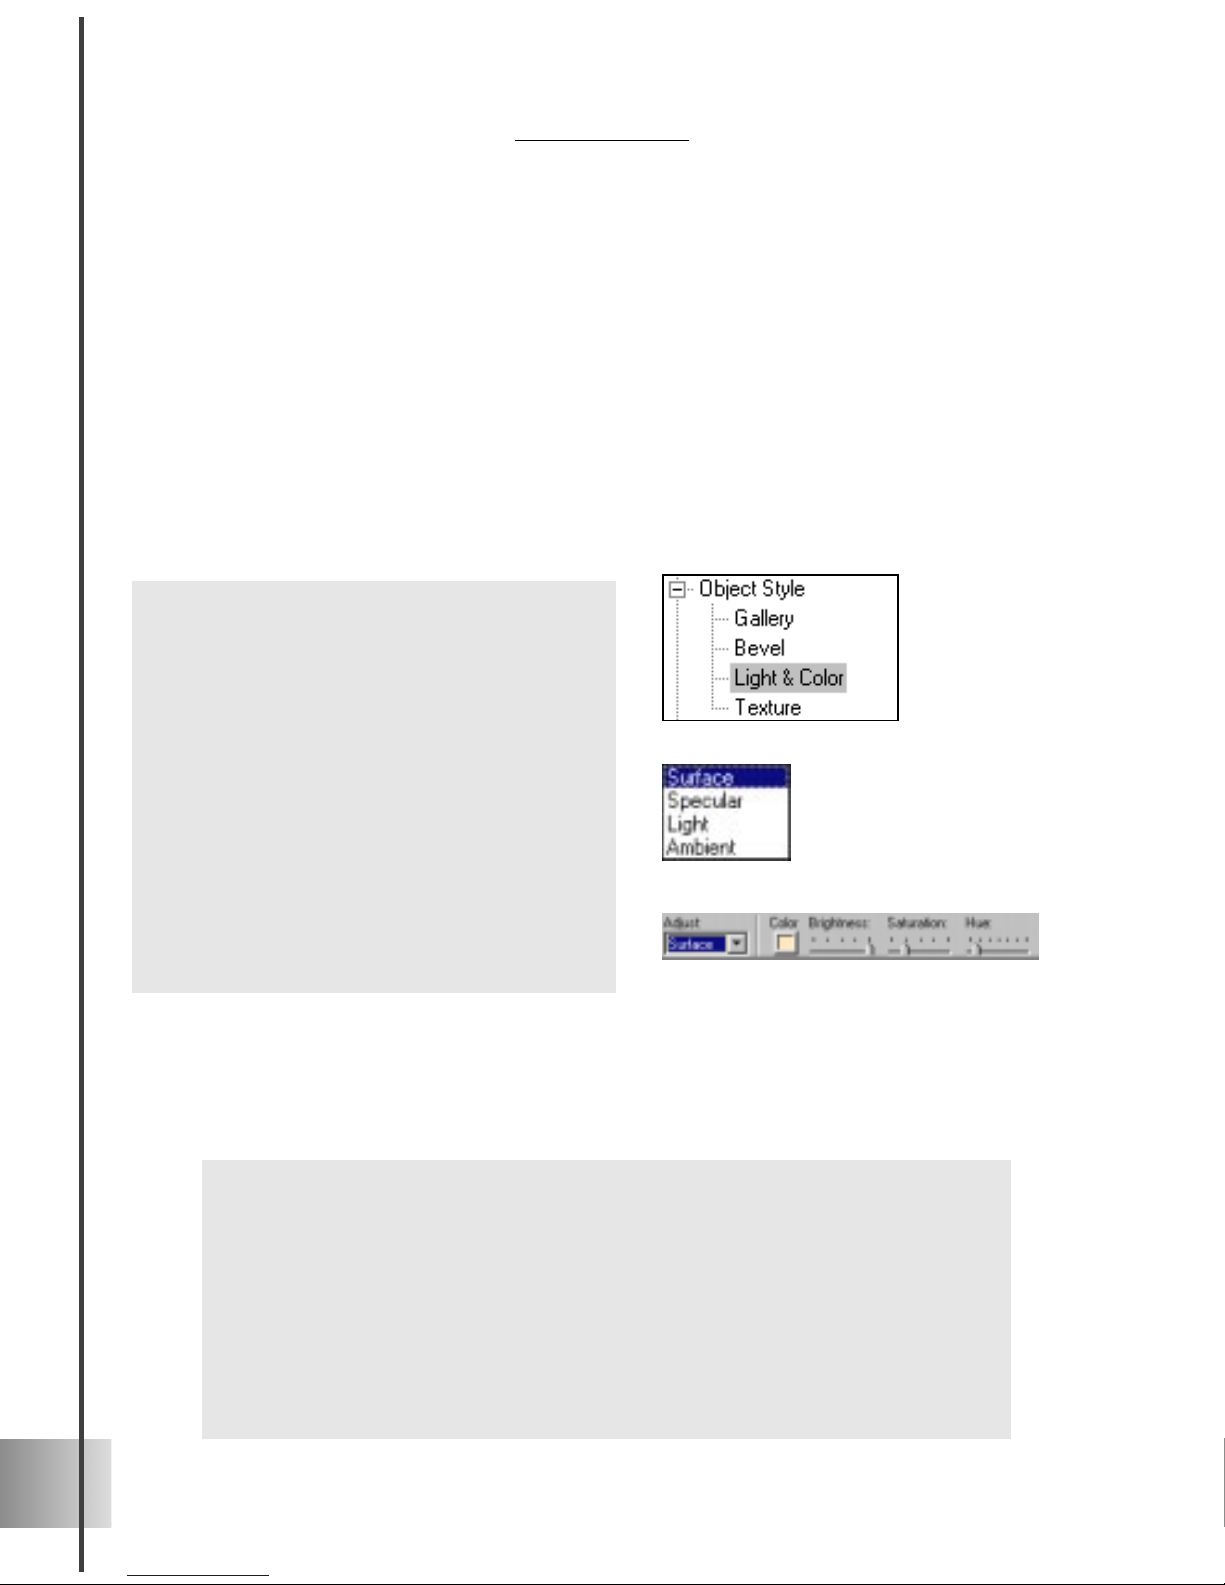
To apply color to an object:
1 In the EasyPalette file directory, select
the Object Style: Light & Color category.
2 On the Attribute Toolbar, select Surface
from the Adjust list, then click on the
Color square to the right of it. A
standard Windows Color dialog box
appears. Select a color.
3 To the right of the Color square, adjust
the Brightness, Saturation, and Hue of
the color until you have the effect that
you want.
Color
It’s easy to apply color to your object. You can use one of the presets that include both
light and color settings, or customize the color yourself.
Editing object style
There are many ways to customize the physical appearance of your object in Ulead COOL
3D. The controls are accessed in the EasyPalette file directory , under the Object Style
category . The easiest way to style an object is to use one of the presets in Object Style:
Gallery, all of which combine many attributes. Or you can control each attribute individually with extensive options on the Attribute T oolbar . This section shows you how to
customize color, light, texture, and bevel attributes.
Light
With Ulead COOL 3D, you can adjust dif ferent types of light that affect the look of your
object. Here is a brief description of the types of light that you can control:
• Specular Commonly known as the highlights that are reflected from an
object when a light source shines on it. By adjusting the specular light of
an object, you basically determine the quality of the object’s surface.
• Light The light source itself. You can have up to four light sources and
set them to be directional or diffuse. (See the following page for a
tutorial.)
• Ambient The general light that surrounds the object. The light source
for ambient light comes from several sources in addition to the light
itself, for example, the light reflected from other objects.
Page 21
21
User Guide
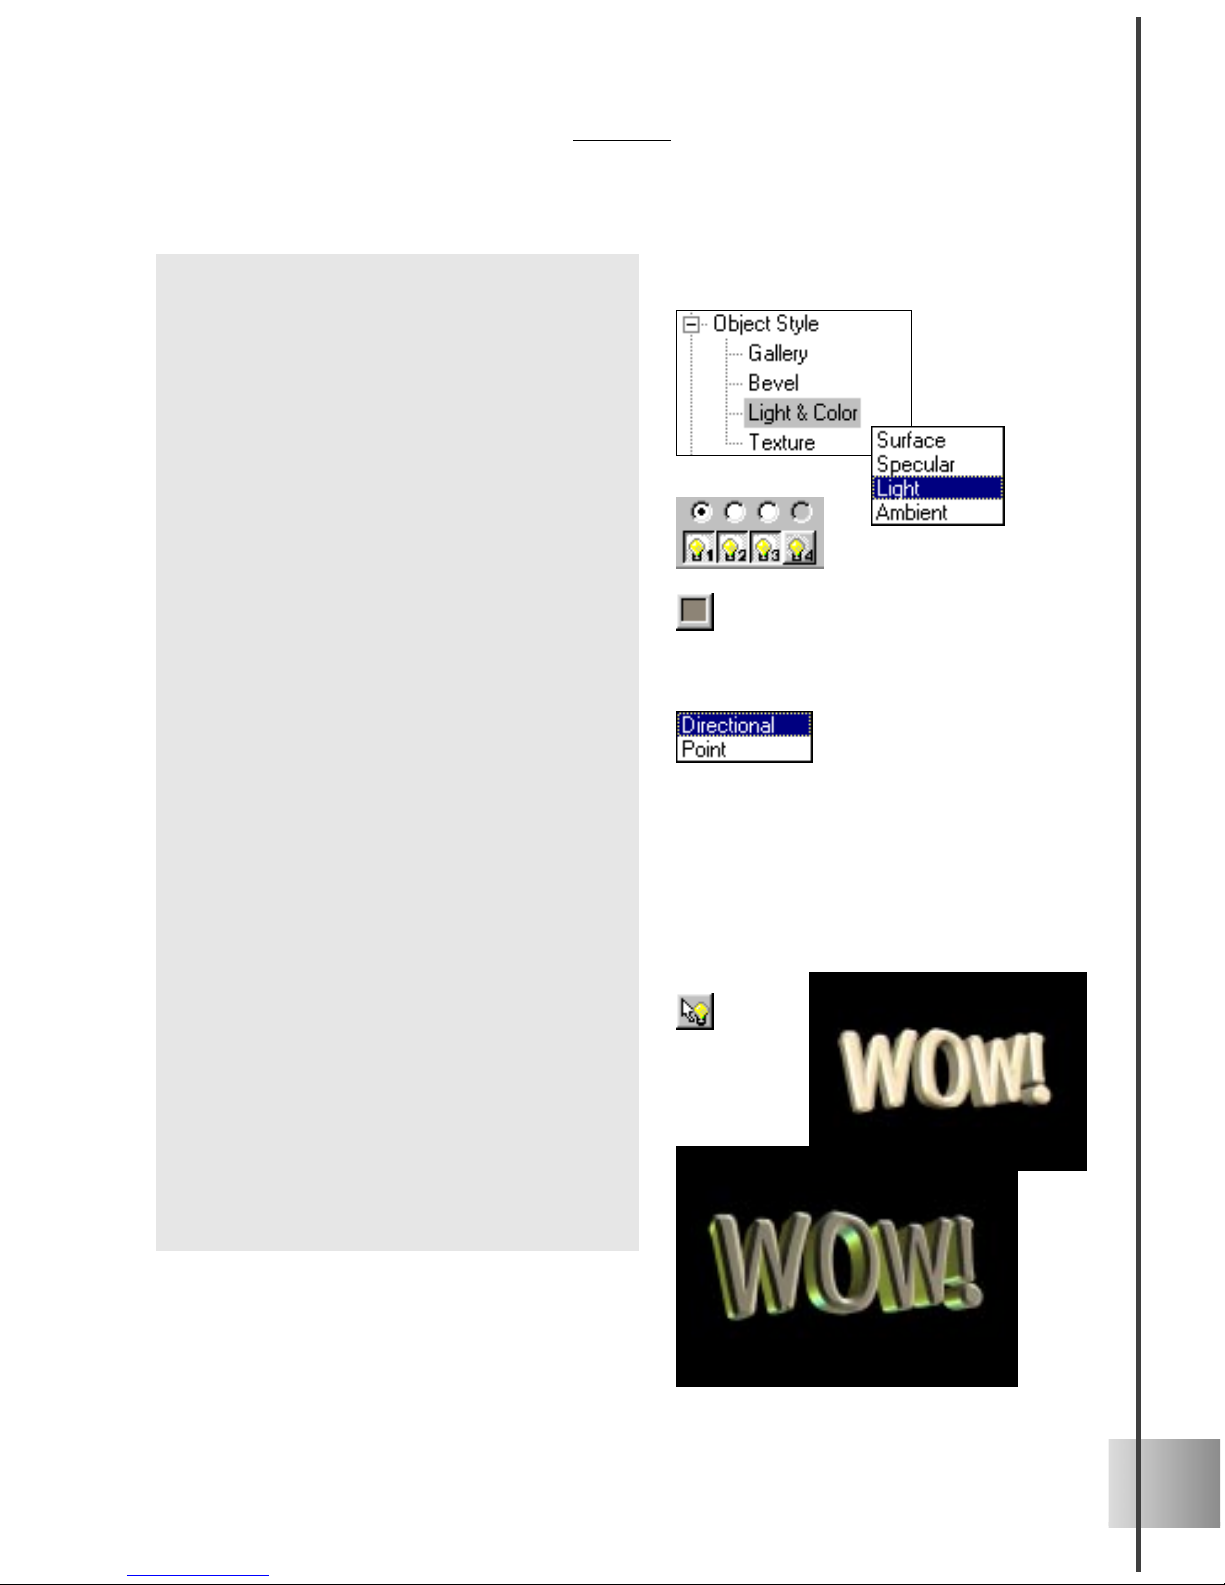
To apply Light to an object:
1 In the EasyPalette file directory, select
the Object Style: Light & Color category.
2 On the Attribute Toolbar, select Light
from the Adjust list. The attributes for
Light appear.
3 Click a Light Source button to activate
it. Then click the radio button above it
to edit its properties.
4 Click the Color square to open the Color
dialog box and change the color of the
currently selected light.
5 Select a Mode for the light:
¡
Directional
Shines a direct beam of light
with a constant strength on the object. The
light source position is based on the angle
of rotation around the X and Y axes.
¡
Point
Shines diffused light with variable
strength on the object. The further the light
is from the text, the weaker the light
appears. The light source position is
based on its position along the X, Y, and Zaxes.
6 Click the Position Light Source button
to adjust the direction from which the
light shines. Then drag your mouse in
the Edit Window until you have reached
the desired effect, or specify values on
the Location Toolbar.
7 Repeat steps 3 through 6 for any
additional light sources that you want to
use.
Page 22
22
Ulead COOL 3D 3.0
Texture
By applying a texture map to your 3D object, you can give it the appearance of being
made from a specific material, such as wood or metal, or you can apply a pattern or
design to it. A texture map is a bitmap image that is wrapped around the surface of a 3D
object. Apply a preset, or use your own bitmap image and apply that to the surface.
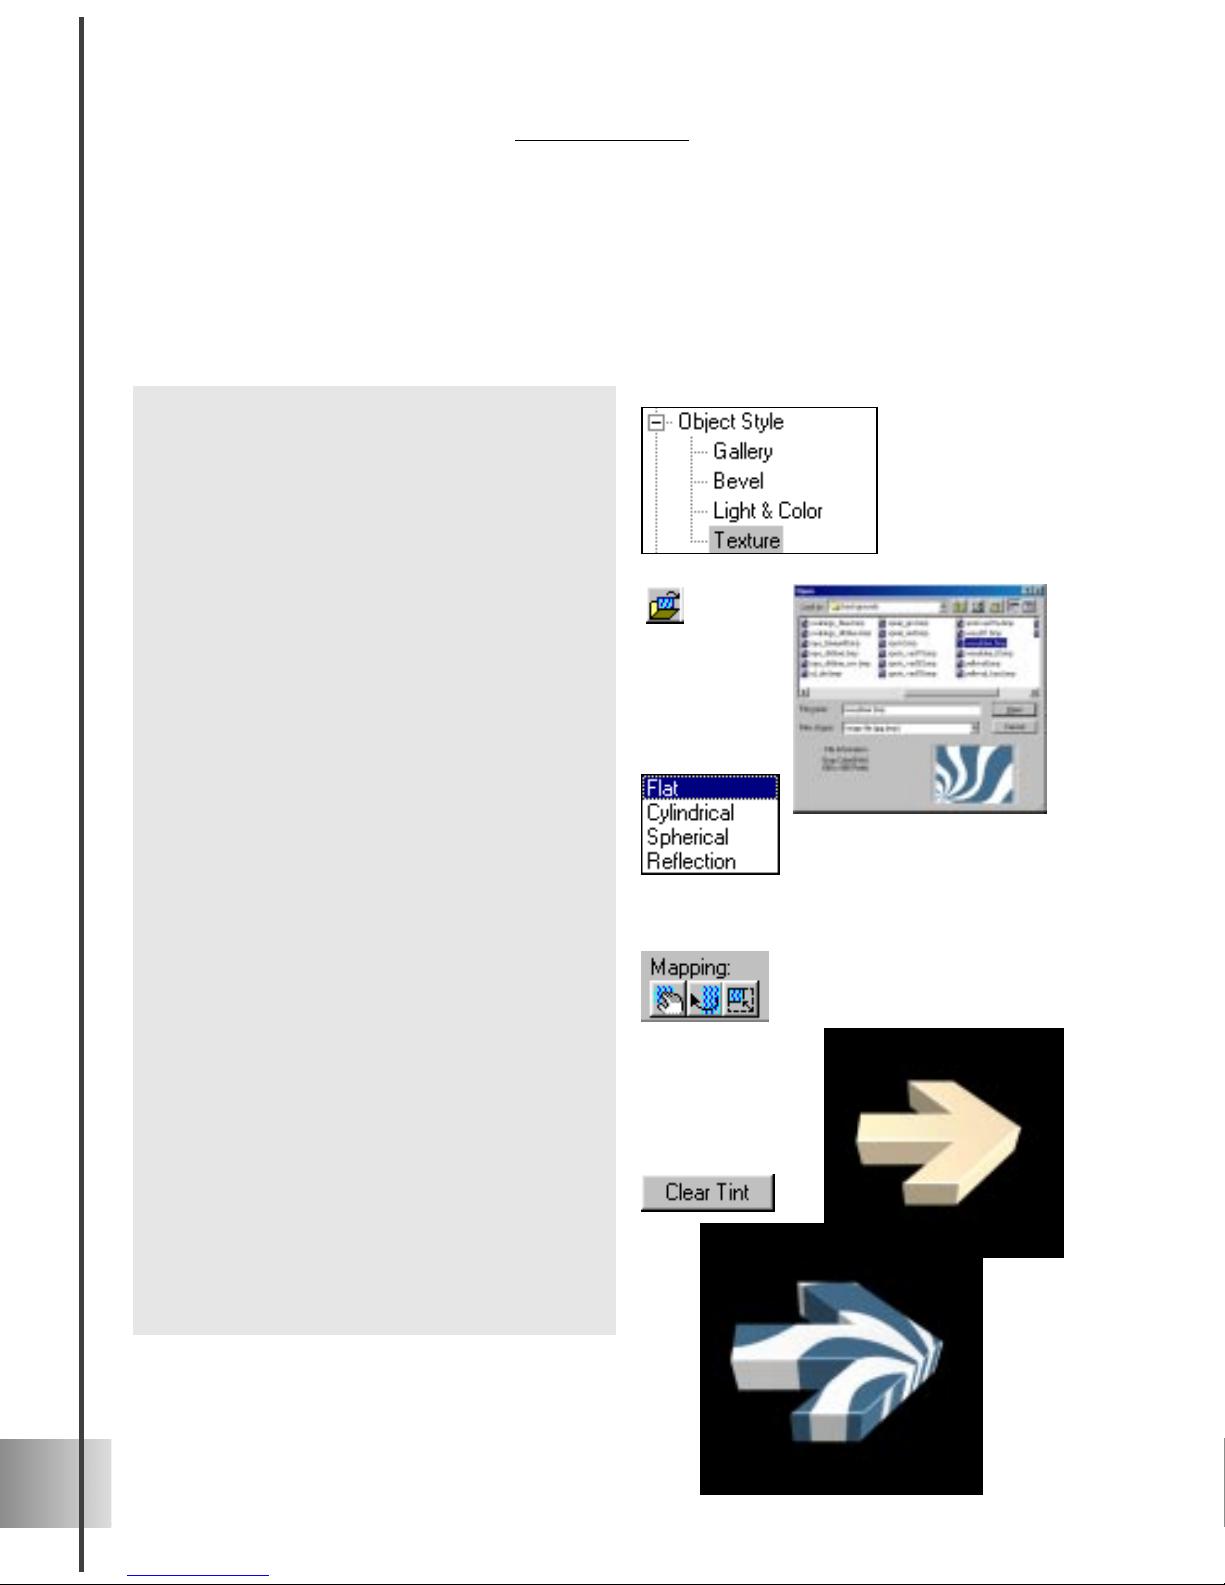
To apply an image texture to an object:
1 In the EasyPalette file directory, select
the Object Style: Texture category. The
Attribute Toolbar changes to display
Texture options.
2 On the Attribute Toolbar, click the Load
Texture Image File button. In the
dialog box that appears, browse for an
image file that you want to use for your
texture (*.BMP or *.JPG), then click
Open. The image is applied to the
object.
3 Select a Wrap Mode for your texture.
This determines how the image is
applied to the object. For instance, if you
have an object with a cylindrical shape,
you might want to choose Cylindrical.
For shiny or metallic textures, using
Reflection often produces best results.
4 Use the Mapping tools to place the
image exactly where you want on the 3D
object. Position, Rotate, and Resize the
image by clicking the desired button,
then drag the mouse in the Edit Window
until the image is the way you want it,
or enter values on the Location Toolbar.
5 Click the Clear Tint option if you want
to remove any color that was already
applied to the 3D object, leaving you
with just the color in the texture map
itself.
Page 23
23
User Guide
Basic bevel styles
A bevel refers to the edge of a 3D object. By adjusting its characteristics on the Attribute
T oolbar , a bevel can be part of what makes objects really interesting. Once you become
familiar with bevel attributes, you can even animate them. This section gives you a
glimpse into the anatomy of a bevel as well as basic bevel styles.
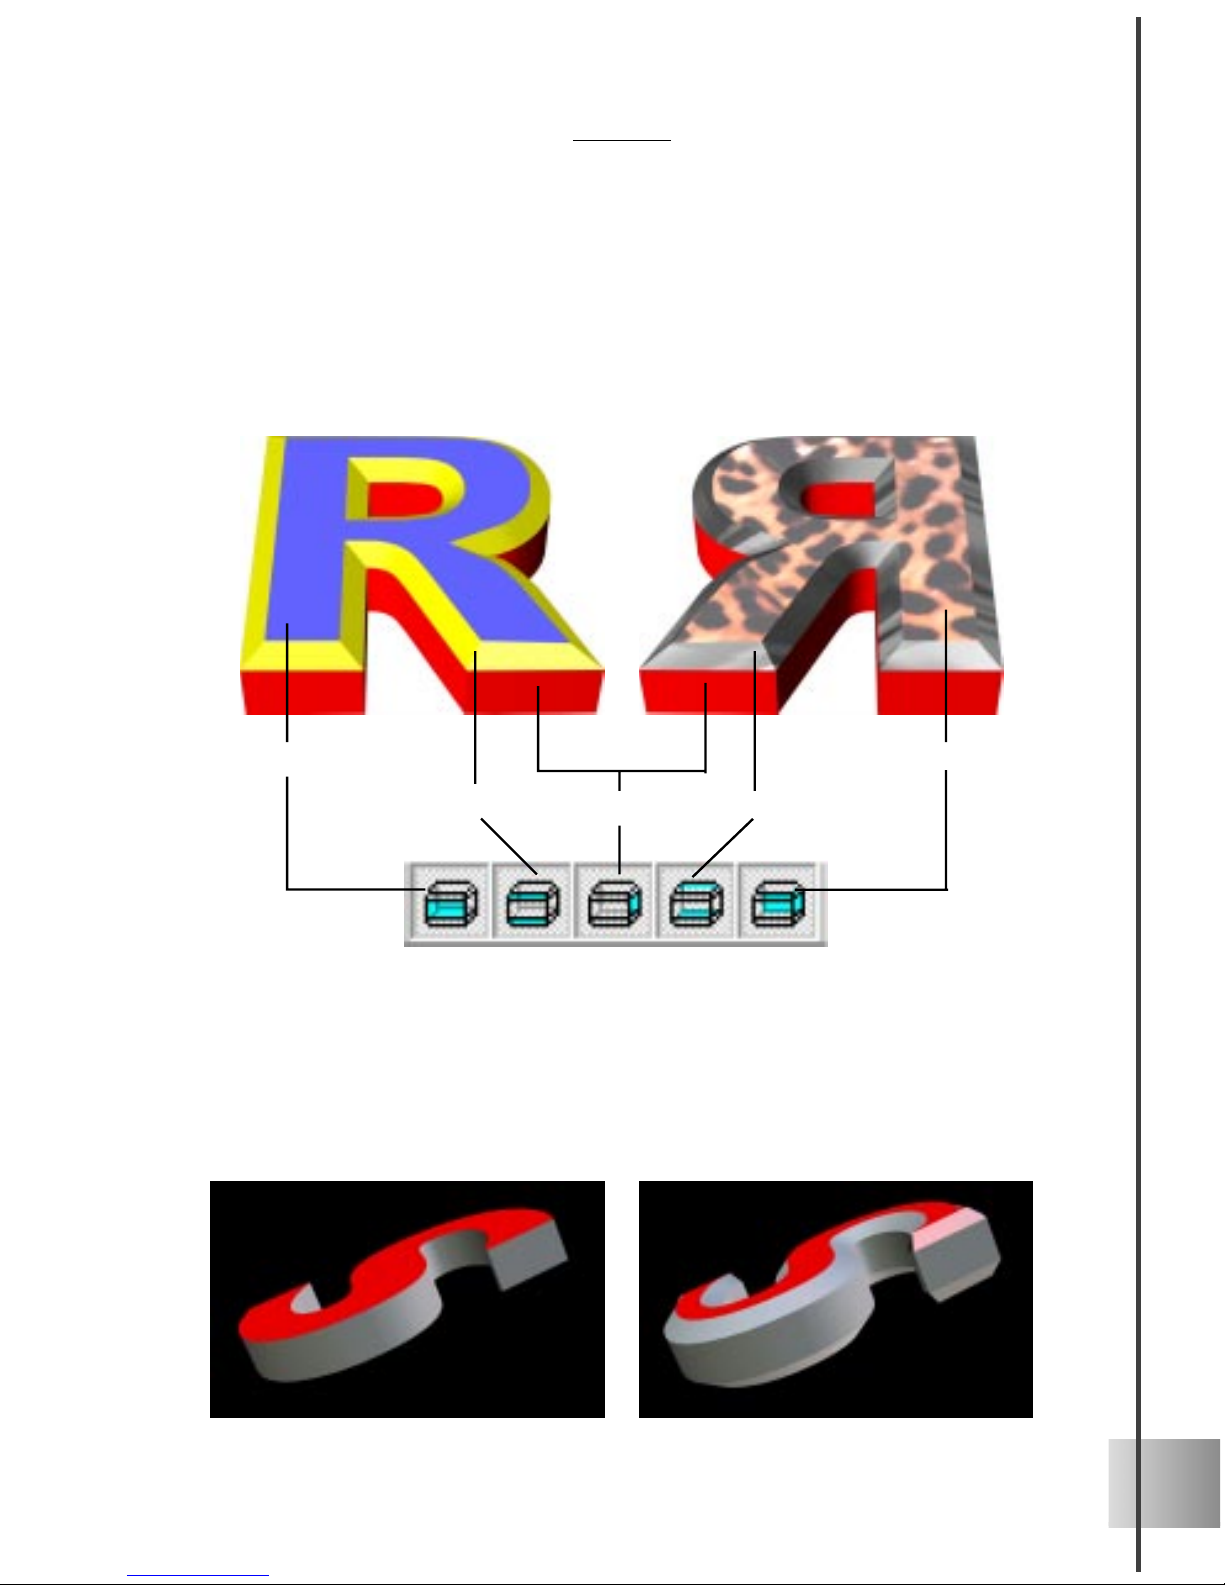
Modifying individual faces of an object
The great thing about applying texture and color in Ulead COOL 3D is that you can apply
them to individual faces of your object. Click a Bevel Face button on the Standard
T oolbar to select the side of the object to edit. Then, drag a color or texture from the
presets to the Edit Window. Try applying different colors and textures to the different
bevel faces of an object. The illustration below shows you this effect when applied to an
object with a Flat bevel style (see the following section for more on bevel styles).
An object with no bevel (left) and the same object with a flat bevel (right)
Front Face
Front Bevel
Side Face
Back Face
Back Bevel
Page 24
24
Ulead COOL 3D 3.0
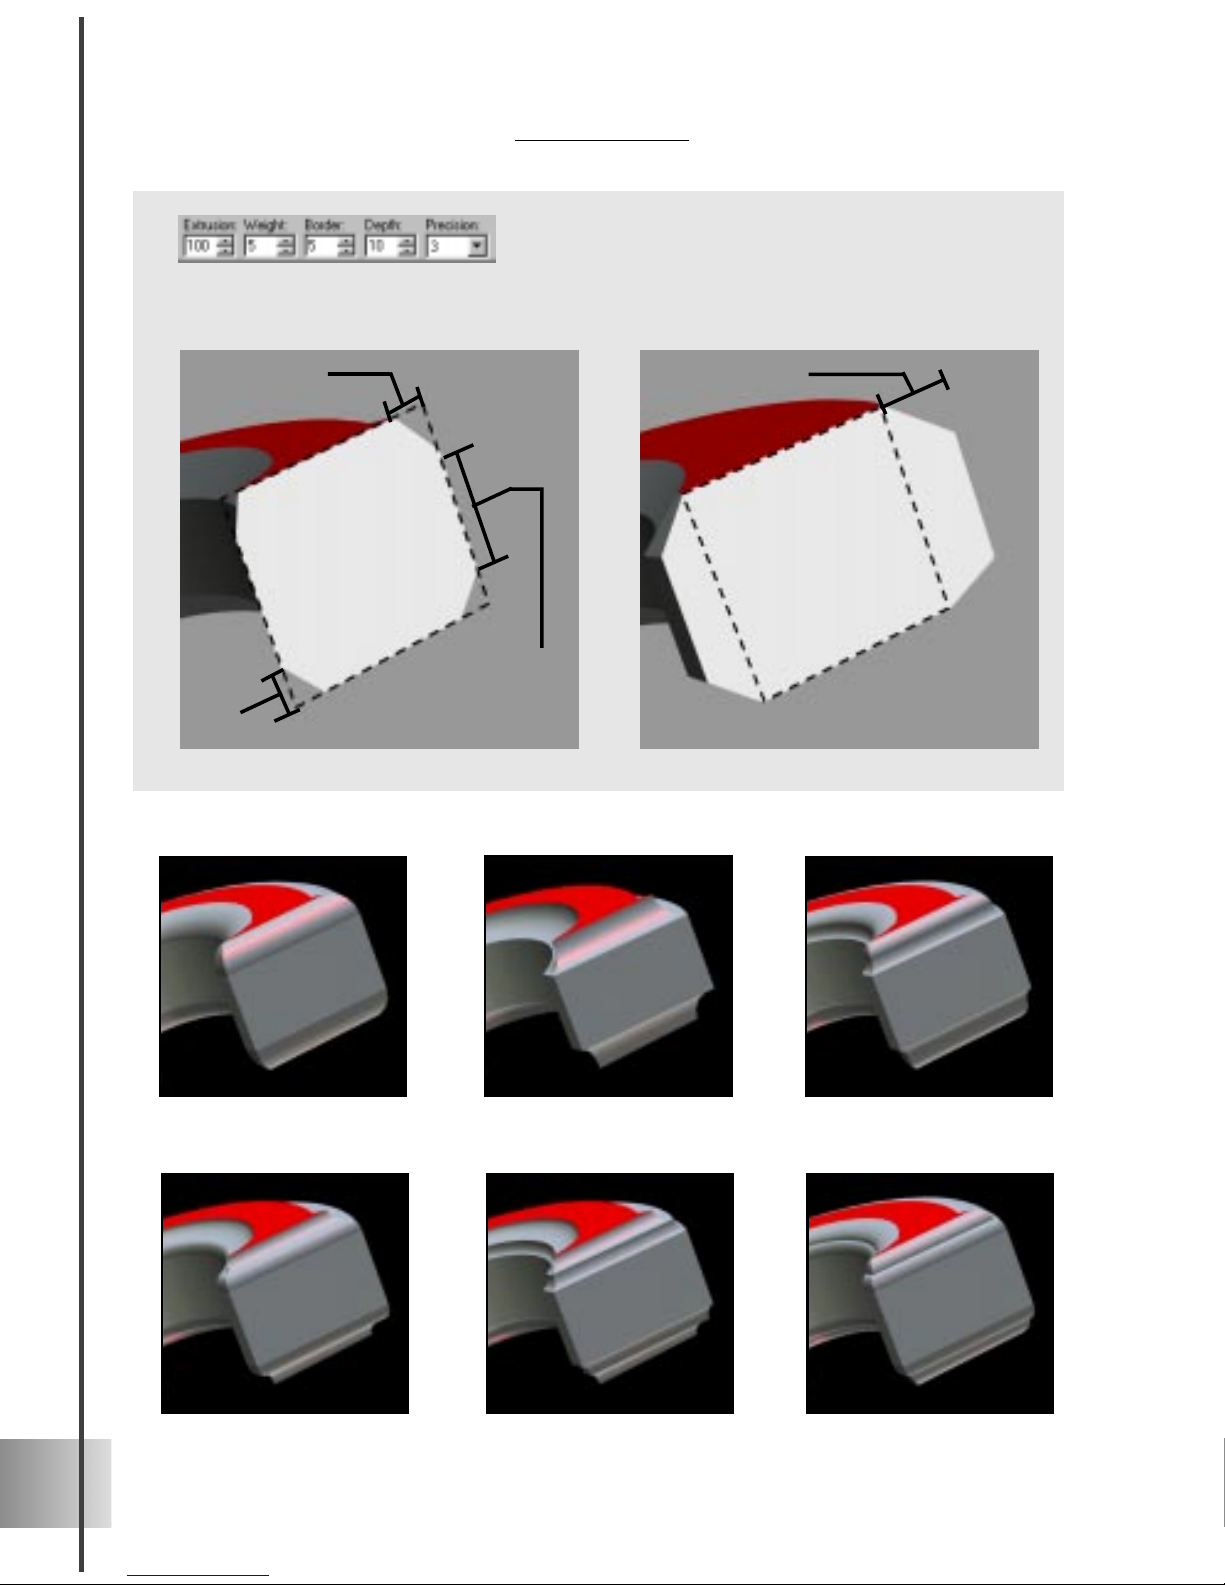
W eight
Depth
Border
Extrusion
Precision Determines the fineness of the bevel. A
higher value creates a more precise bevel. This is
useful if you have a rounded bevel and want
smoother curves.
Round-RoundChiseled-ChiseledChiseled-Round
Round-ChiseledChiseledRound
Page 25

25
User Guide
Adding a background
Once you’ve inserted and styled an object, you’re ready to add a background to your
project. You can use a preset in the EasyPalette, or use your own image. For solid color
backgrounds, simply adjust the controls for Color, Brightness, Saturation, and Hue located
on the Attribute T oolbar for the Studio: Backgr ound category of the EasyPalette file
directory .
To insert an image into the background:
1 On the Attribute Toolbar, click the Load
Background Image File button.
2 Select an image file (*.JPG or *.BMP)
in the dialog box that appears, and click
Open.
3 If you want, you can adjust the dimen-
sions of your project to match the size of
the image that you are using. To do this,
use the Image: Dimensions menu
command, click the Use Background
Image Size button in the dialog box that
pops up, and click OK.
Adding and editing 3D graphics and shapes
Everyone wants to use customized graphics in Ulead COOL 3D to create outstanding 3D
logos and images. With this latest version, importing and editing graphic objects has
become that much easier. There are four ways to do this:
• Insert vector graphics with Path
Editor A vector graphic is different
from the bitmap graphics that are most
widely known (for example, those in
BMP, JPEG, GIF formats). Vector
graphics are composed of paths and
often stored in EMF and WMF formats.
The easiest way to create these graphics
is to use Path Editor, accessed by
clicking the Insert Graphics button on
the Object Toolbar (see page 62 for
details). You can also convert elements
Bitmap of a logo (top), and the same logo
converted to 3D with Path Editor
(bottom).
Page 26

26
Ulead COOL 3D 3.0
of a bitmap image to become vector
graphics, as well as import pre-existing
vector graphics into Path Editor to use
in your project.
• Create simple 3D geometric objects
Insert spheres, cubes, cones, cylinders,
and pyramids by using the Geometry
Toolbar (see the following section). This
is convenient for making still or animated props for other 3D text and
graphic objects in your project.
• Import 3D objects in the DirectX file
format (*.X). These are special files
that contain complex 3D shapes and
textures. Included with the program are
a number of these samples that can be
used in your project. If you are already
using this format in other 3D modeling
software, you can create your own
shapes to use in a Ulead COOL 3D
project. Import these files by using the
File: Import X Model menu command.
In the dialog box that appears, you can
import them as C3D data type (without
color, lighting, or texture attributes) and
then customize its attributes yourself. Or
you can import them as D3D data type
(with its inherent color, lighting, and
texture attributes intact).
• Insert symbol-type fonts (such as
Wingdings). Then, you can either use
them as they are, or adjust the shape by
clicking the Edit Graphic button on the
Object Toolbar and working with Path
Editor (see page 62.). You can also
change the shape of text with the Edit
Graphic button. However, once you edit
it, the text will be converted to graphics,
meaning that you will no longer be able
to change the text content itself.
Examples of symbol-type fonts.
3D geometric objects
Objects in the X file format, as C3D
data type (top), and as D3D data type
(bottom)
Page 27

27
User Guide
Making basic 3D objects
Ulead COOL 3D lets you insert 3D geometric objects into your project with just a click of
the mouse. The fun part is when you use them with text and graphics to create unique 3D
animations and stills. You can use several 3D shapes together to create an alien object, or
just a few as props for an animated title. In this tutorial, learn how to edit a cylinder .
To insert and edit a geometric shape:
1 On the Object Toolbar, click the Insert
Geometric Object button.
If the current icon doesn’t display the
desired shape, click on the bottom right
corner to view a menu with other shapes
on it. Select the shape you want, then
click the button to insert it. The object
appears in the Edit Window.
2 On the Geometric Toolbar, enter values
to adjust the dimensions of the object.
Then, select the desired Face buttons to
edit Color and Texture attributes
individually or as a group.
3 You can now apply plug-ins to it, or use
the basic animation buttons on the
Standard Toolbar to create an animated
sequence.
Note: Bevel attributes and plug-ins cannot be
applied to geometric shapes.
Other things you can do with geometric objects
Page 28

28
Animation basics
After familiarizing yourself with three-dimensional space, you’re ready to start making
fun animations. While there are many factors you have to take into consideration when
creating an animated project, it’s definitely worth taking time to learn some basic ideas.
From there, it will be easy for you to learn to create stunning and complex animation
sequences. The Animation T oolbar is what you will work with the most when you start
animating your objects. Brief descriptions of its functions are listed below .
• Properties Menu Lists all of the basic properties of the 3D object. If you
have applied a plug-in effect to the object, this will be listed as well. The
Timeline Control, just to the right of it, shows the timeline and key
frames that are related to only the property that you have selected from
the list.
• Timeline Control Allows you to choreograph your animation with key
frames. The top line represents the frame-by-frame position, while the
bottom line displays any key frames. Key frames are those frames in
which you specify an attribute or behavior of an object. For plug-in effect
timelines, an additional Control Line (in red) appears between these two
lines (see page 37 for details).
• Add/Delete Key Frame Lets you add or remove a key frame from the
Timeline Control. Each time you add a key frame, you can change the
attributes or behavior of an object. When you remove a key frame, all
attributes associated with that key frame are also removed.
• Reverse Allows you to reverse the sequence of key frames on the
Timeline Control, so that the animation starts with the last frame and
ends with the first.
• Smooth Motion Path Plays the animation smoothly, where the transition
from one frame to the next becomes less noticeable.
• Current Frame Denotes the frame number that is currently displayed.
Smooth Motion
Path
Current Frame
Properties Menu Timeline Control
Add/Delete
Key Frame Reverse
Ping Mode
Loop Mode
Play
Stop
Show/Hide
Number of frames
Frames per second
Page 29
29
ULEAD COOL 3D 3.0
Working with key frames and timelines
When you start to create an animation, you begin with a timeline. The timeline represents
a number of frames in the animation. In Ulead COOL 3D, you use the Timeline Control
to edit the attributes of timelines. Many properties of the 3D object (such as size, position,
color, and any plug-in ef fects) have individual timelines that you can edit independently .
These are listed in the Properties Menu.
Key frames let you choreograph your animation sequence as you work with the timeline.
By adding key frames and editing attributes in those key frames, you can, for instance, set
your object to move from left to right, and then rotate. Any adjustments you make to your
object at a given key frame determines the state of the object at that frame of the animation (for example, the position, size, color, etc.). The following describes some basic
controls of the Timeline Control:
• Ping Mode Plays the animation forwards and backwards infinitely.
• Loop Mode Plays the animation repeatedly in its normal sequence,
skipping the last frame.
• Play/Stop Plays and stops the animation.
• Show/Hide Allows you to display or hide the selected object. Use it to
hide the object for certain parts of the animation or simply for convenience when editing multiple objects.
• Number of frames Sets the total number of frames in the animation
sequence.
• Frames per second (fps) Sets the speed at which the animation plays.
• Properties Menu Use this to select the timeline for a specific object
property that you want to edit. By default, the basic attributes are listed
(i.e. Position, Rotation, Color, etc.). If you apply a plug-in effect to the
object, that will be added to the list. Once you select a property, the
timeline for that property will appear.
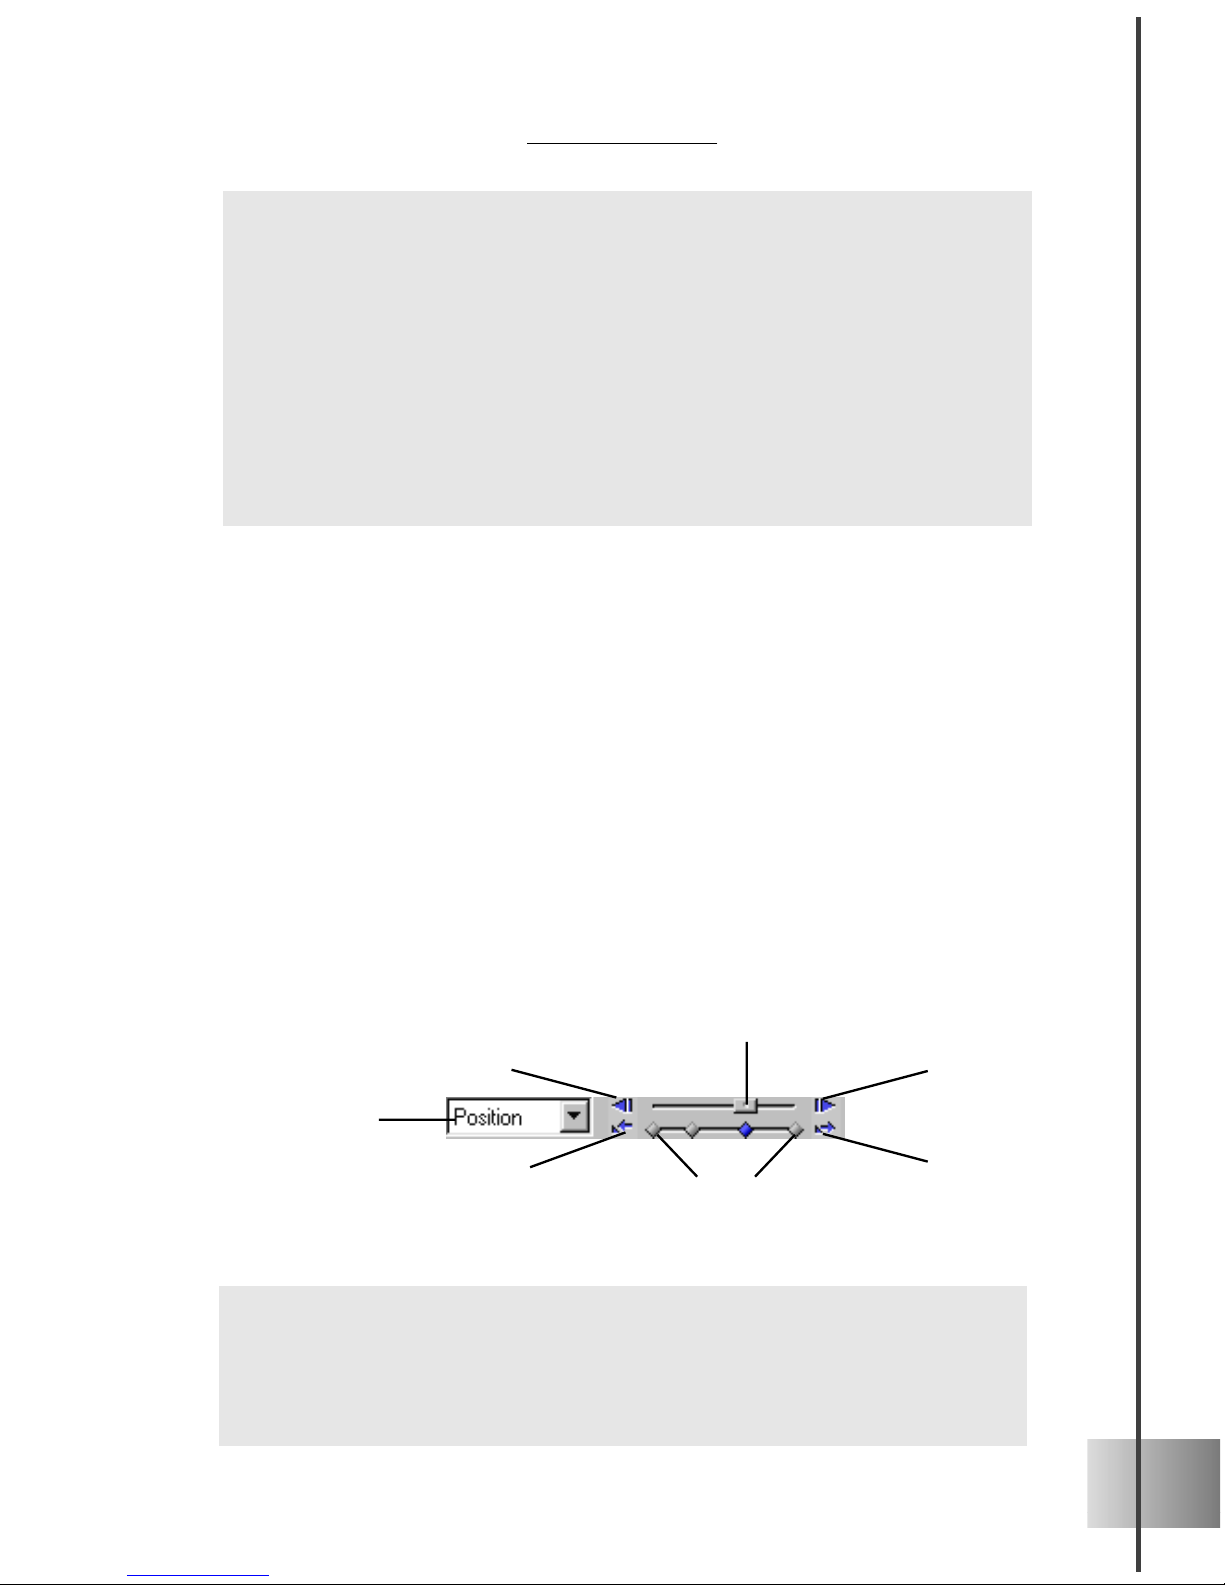
Properties Menu
Slider Move to
Next Frame
Move to
Previous Frame
Jump to
Next Key
Frame
Jump to
Previous Key
Frame
Key frames
Page 30

30
Ulead COOL 3D 3.0
In the next diagram, two key frames have been added to the color timeline. At key frame 1
the object is red, at key frame 5 it is blue, and at key frame 10 the object is green. When
previewing the animation, you see the object’ s color start out at red, gradually transform
to blue and finally to green.
Below is a simplified diagram of the default timeline for an object’ s color. It contains 10
frames and always has a key frame at frame 1 of the animation. At this key frame, the
object is set to be red. When you preview the animation, the object remains red in all
frames.
Because each property has its own timeline, you can control multiple timelines in your
animation, as shown in the following illustration. Not only can you set the timing within
each timeline, but you can also control the timing of events between the many timelines by
coordinating their key frames, as if you were a director telling your various actors what to
do and when to do it. After you familiarize yourself with timelines and key frames, you
can also work with multiple objects that have multiple key frames.
Frame 1 Frame 10 Frame 30Frame 20
Start at far left Move to far right Move to center
Red Red Green
No rotation No rotation Rotate 360º
Position
Orientation
Color
Frame 1 (Frame 10)
Red
Frame 1 Frame 5 Frame 10
Red Blue Green
• Slider Drag this to move to any frame in the animation, or click the
Move to Next/Previous Frame buttons.
• Jump to Next/Previous Key Frame Click these buttons to move from
one key frame to the next, or directly select a key frame by clicking it.
Page 31

31
User Guide
To create a simple animation (I):
1 Insert an object to the Edit Window. On
the Animation Toolbar, the default
frame number should be 10, and the
default fps should be 15. Change the
frame number to 15. Notice that the
current frame is 1, and that the timeline
already contains a key frame.
2 On the Standard Toolbar, click the
Move Object button. In the Edit
Window, drag the object to the left side
of the window. On the Location Toolbar,
the coordinates change to show the
object’s position at the first key frame.
3 Drag the Timeline Control slider to the
last frame of the timeline, or type 15 as
the current frame number. Click the
Add Key Frame button to add a key
frame.
4 Drag the object to the right side of the
Edit Window. The coordinates on the
Location Toolbar change to reflect the
position of the object at frame 15 of the
animation.
5 Click the Play button to view the
animation. The object should move from
the left to right in the Edit Window.
6 Save the project by clicking the Save
button on the Standard Toolbar. This
allows you to save it in the Ulead COOL
3D file format (*.c3d). You can open
this file later from within the program to
edit the project.
Creating a simple animation
The best way to understand key frames is to actually create an animation. The following
section shows you how to create simple animated sequences with a single object and a
single timeline, as well as some more complicated sequences involving multiple objects
and timelines.
Page 32

32
Ulead COOL 3D 3.0
To create a simple animation (II):
1 Open the project that you created on the
previous page (part I).
2 In the Properties Menu, select Position.
On the Timeline Control, move the
slider to frame 7 of the animation.
3 Add a key frame by clicking the Add
Key Frame button to the right of the
Timeline Control.
4 On the Standard Toolbar, click the
Move Object button, and drag the
object in the Edit Window so that it is
at the top and center of the window.
5 Click Play, and notice how the object
now moves in a triangular path.
6 Now you have key frames at frames 1,
7, and 15 of the animation. If you want
to change the position of the object at
any of these key frames, click one of the
key frame controls. Then, drag the
object to another position. Click Play to
view the animation.
7 Increase the number of frames to 30.
Notice how the motion of the object
becomes smoother.
8 On the Standard Toolbar, click the Save
button to save the animation. Your
project will be saved in the Ulead
COOL 3D format (*.c3d).
Page 33

33
User Guide
Animating light and color
The most obvious thing to do when you want to animate an object is to make it move. T o
animate the color and light of an object itself is less obvious, but can result in interesting
effects. In these tutorials, learn how to make light and color change on a stationary object.
Try animating texture as well.
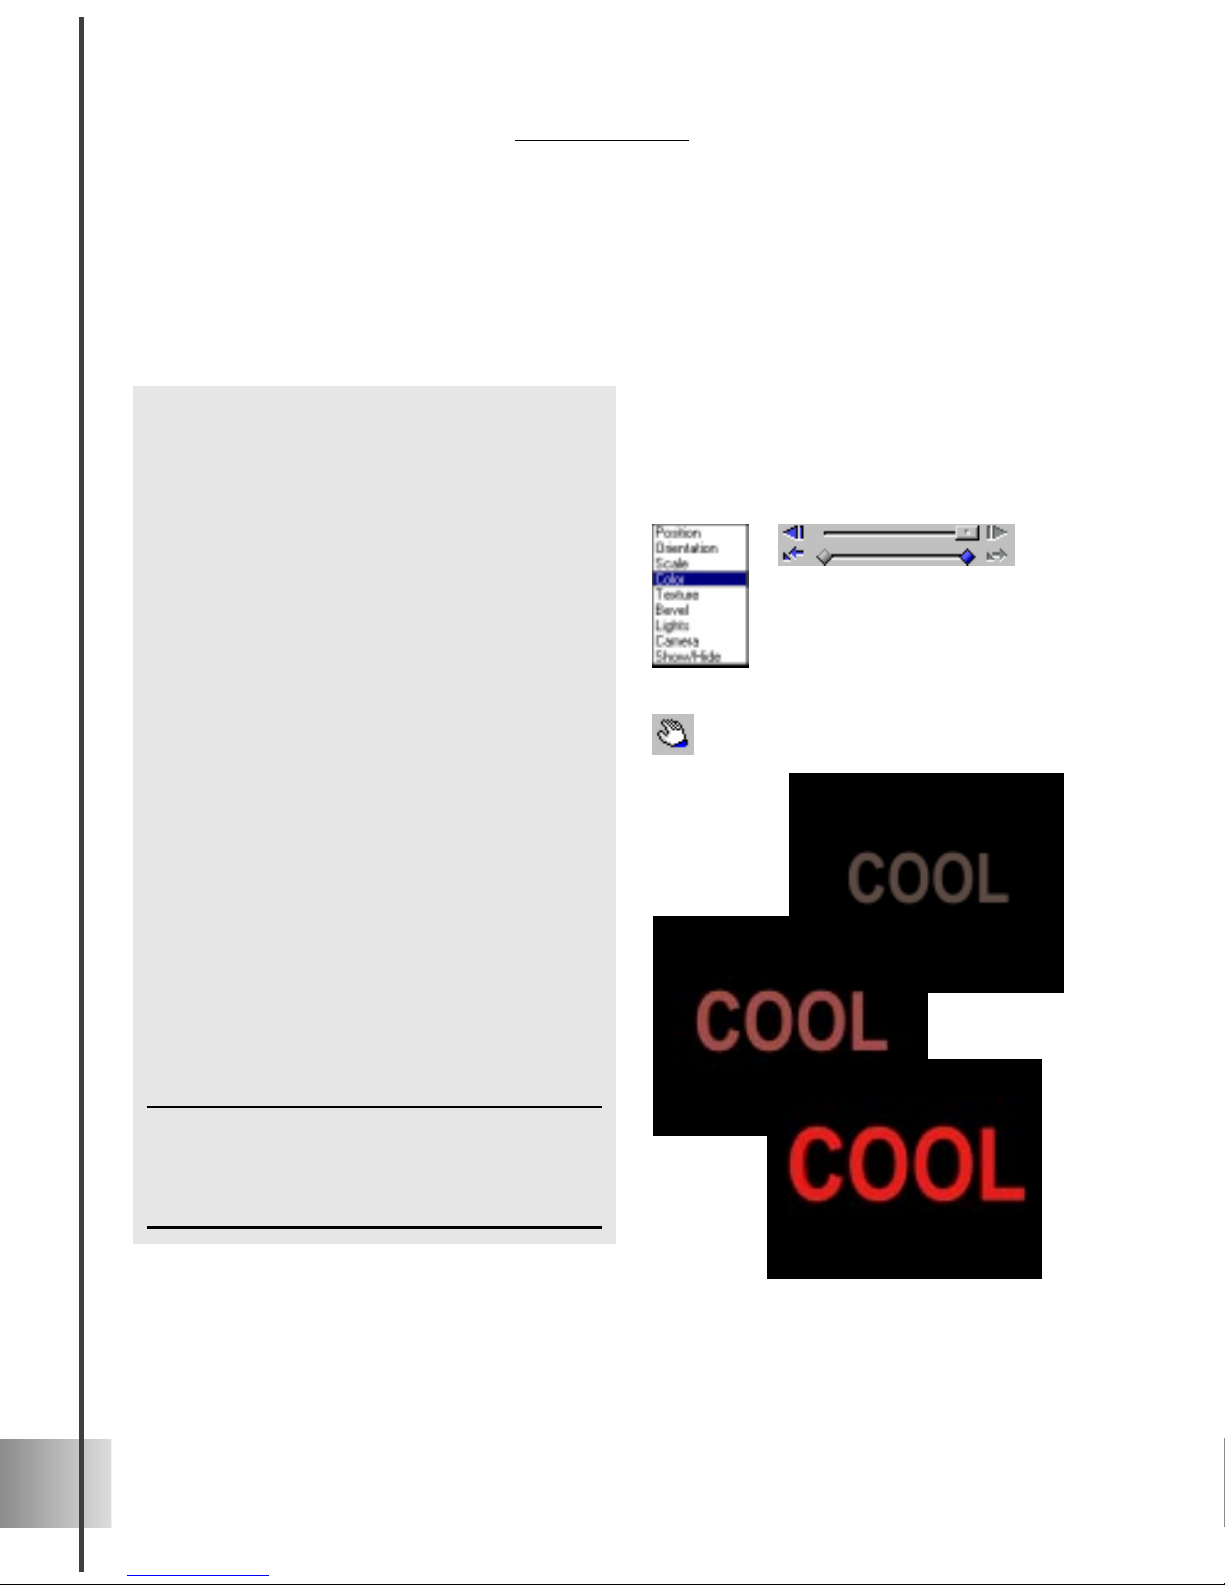
To animate the color of an object:
1 Insert an object, and apply a color at key
frame 1 (to apply a color, see page 20).
2 Add a key frame control at the last
frame of the animation, then apply a
different color to the object. Remember
that you can also apply different colors
to individual bevel faces.
3 Click the Play button to preview the
animation.
To animate light on an object:
1 Insert an object, and at frame 1 of the
animation, define the Light settings (see
pages 20 and 21).
2 Add a key frame at the last frame of the
timeline, then apply a different Light
setting to the object. You can change the
color, brightness, hue, saturation, and
position of the light(s).
Note: The number of lights and the light mode
remain constant between key frames. If you change
these, they will be changed in all key frames. These
are called global attributes (see page 37).
3 Click Play to preview the animation.
Experiment with inserting more key
frames into the animation.
Page 34
34
Ulead COOL 3D 3.0
To animate position and color:
1 Insert an object in a blank project (with
a black background). At frame 1, set the
object color to be black.
2 On the Properties Menu, select Color.
Then, on the Timeline Control, add a
key frame at the last frame of the
animation. Set the color to red.
3 Click Play on the Animation Toolbar to
preview the color animation.
4 Click the Move button on the Standard
Toolbar. The Properties Menu changes
to display Position. The timeline that
appears pertains only to Position.
5 On the Position timeline, select the first
key frame, then on the Location Toolbar,
enter 200 for the Z coordinate.
6 Add a key frame at the end of the
Position timeline, and then enter -200
for the Z coordinate.
7 Preview the animation. The object
should emerge from the background
color and come straight towards you.
Note: If you want to change the color or position for
specific key frames, make sure you select the
relevant property in the Properties Menu first before
you edit the key frames and their attributes.
Animating with multiple timelines
Inevitably , you will want to animate more than one aspect of your object. This means that
you must work with multiple timelines. When you are working with multiple timelines,
keep your eye on the Properties Menu - this will tell you which timeline you are currently
editing. This example shows you how to make a basic animations with two timelines.
Page 35

35
User Guide
Animating with multiple objects
W orking with more than one object can result in a stunning project. The next tutorials
show you how to coordinate two objects. In the first one, make a second object appear
after the first one completes its action. In the second one, learn how to make two objects
chase after one another.
To animate two objects (I):
1 Insert an object, then set the total
number of frames to 30.
2 At frame 1, on the Standard Toolbar,
click the Move Object button, then on
the Location Toolbar, set the Y coordinate to 50.
3 Click the Rotate Object button. The
Properties Menu displays Orientation.
On the Location Toolbar, make sure that
all coordinates are set to 0.
4 Move the Timeline Control slider to
frame 25 of the animation, or enter 25
as the current frame. Click the Add Key
Frame button to add a key frame.
5 Set the X coordinate to -720, then click
Play to preview the animation. The
object should rotate 2 times.
6 Insert a new object. On the Standard
Toolbar, at frame 1, click the Move
button. Enter -100 for the Y coordinate
on the Location Toolbar.
7 At frame 1, click the Show/Hide button
on the Animation Toolbar to make the
text object disappear.
8 At frame 30, add a key frame. Click the
Show/Hide button to make the text
object appear.
9 Click Play. The second object should
appear just after the first object has
completed 2 rotations.
Page 36

36
Ulead COOL 3D 3.0
To animate two objects (II):
1 Insert an object into the project and set
the total number of frames to 30.
2 Select Position from the Properties
Menu. On the Timeline Control, add
key frames at frames 10 and 20.
3 Click key frame 1 of the animation to
select it.
4 On the Standard Toolbar, click the
Move Object button. On the Location
Toolbar, set the X and Z coordinates to
-350 and -200 respectively. The object
disappears off the screen.
5 At frame 10, set the X coordinate to 0.
Do not adjust the Z coordinate. At
frame 20, set the X and Z coordinates
to 100 and 3000. The Y coordinate
should remain at 0.
6 Click Play to preview the animation.
The object should move to the right
and away from you.
7 Insert a second object into the project,
then select Position from the Properties
Menu. Add key frames at frames 10,
20, and 30.
8 Click the Move Object button. On the
Location Toolbar, at frames 1 and 10,
set the X and Z coordinates to -350 and
-200 respectively. At frame 20, set the
X coordinate to 0, and do not adjust the
Z coordinate. At frame 30, set the X
and Z coordinates to 100 and 3000.
9 Click Play to preview the animation.
The second object should chase after
the first one, following the same
motion path.
Page 37

37
Key frames and plug-ins
All plug-in effects (except for Bevel Effects) have a special red Control Line that
appears on the Timeline Control. This is a special feature that lets you move the first and
last frames of the timeline, so that you can determine exactly when the plug-in effect is
applied within the animation sequence. T o adjust the length of the Control Line, click and
drag on either end until you have reached the desired length.
Understanding Global and Key attributes
When you are working with the Attribute T oolbar to make an animated project, it’s a good
idea to take note of the T oolT ips that pop up when you move the cursor over each variable. These contain a brief description of the variable in question, followed by a (G) or
(K). These stand for Global and Key attributes.
A Global attribute is valid for the entire duration of the animation. For instance, if you
set a Global attribute to have the value “x” at frame 1, the value “x” will be applied
throughout the animation. For instance, if you change this value at frame 5, then this new
value will be changed accordingly in all frames of the animation.
A Key attribute can vary with individual key frames. For example, Color is a Key
attribute because at frame 1 you can have an object be red, then at frame 5 you can set the
same object to be green, and at frame 10 you can make the object change to red again.
Plug-in effects
Plug-in effects are what make your still or animated title extra special. In Ulead COOL
3D, you can give objects a unique edge with Bevel plug-ins, switch to different sentiments
with Transition effects, make objects move in special patterns with Object plug-ins, and
give them a unique flair with Global effects. The various categories are located in the
EasyPalette file directory . Click a category or plug-in name to view and apply the presets
that come with it for instant results. If you have a specific effect you want to achieve, try
applying different presets, and see how the attributes change on the Attribute Toolbar .
This gives you a better idea of how the variables affect the object. To view the Attribute
T oolbar, click the Attribute Toolbar button on the Standard T oolbar.
Control Line
Page 38

38
Ulead COOL 3D 3.0
Bevel Effects
You can create interesting still and animated titles with these plug-ins. These allow you to
add a frame, a special hollow or engraved board, or a shape preset to your object. Once
applied, you can further customize them by adjusting the standard bevel attributes.
Board
This effect is perfect for stunning rotating signs and banners. Not only can you put
different objects on the front and back of the board, you can adjust basic bevel attributes
for the text and board independently . This tutorial shows you how you can create an
animated effect with the bevel. (Settings: 30 frames, 15 fps)
To animate the Board effect:
1 Insert a text or graphic object into the
Edit Window. In the EasyPalette file
directory, select Bevel Effects: Board.
The Board presets appear.
2 On the Attribute Toolbar, select Board
from the Bevel Mode list. The Attribute
Toolbar displays the Board options, and
the Edit Window displays the object on
the default rectangular board. To use a
different board shape, drag a Board
preset to the Edit Window.
3 On the Timeline Control, add a key
frame at frame 30.
4 At frame 1, on the Attribute Toolbar,
click the Text button to make basic bevel
settings to the text. Enter 0 for Extru-
sion, Weight, Border, and Depth. The
text object should disappear on the
board.
5 At frame 30, enter 1000 for Extrusion,
5 for Weight, 20 for Border, and 20 for
Depth.
6 Click Play to preview the animation.
The text should appear to grow from the
board.
Page 39

39
User Guide
Custom Bevel
Create unique and wild three-dimensional forms by applying one of the dozens of preset
bevel shapes to any of the objects in your project. When working with this plug-in,
experiment freely with applying various Custom Bevel presets to various objects.
To apply a custom bevel effect:
1 Insert an object into the Edit Window. In
the EasyPalette file directory, select
Bevel Effects: Custom Bevel. The
presets for Custom Bevel appear.
2 On the Attribute Toolbar, select Custom
Bevel from the Bevel Mode list.
3 Apply a Custom Bevel preset to the
object. Each preset represents a single
bevel design that is applied to both the
front and back faces of the object.
4 Scroll down to the next set of attributes.
Choose a different bevel design for the
Front or Back face. The object changes
accordingly.
5 To further customize the custom bevel,
scroll back to the first level of attributes
and adjust values for basic bevel
attributes.
Things you can do with Custom Bevel shapes
Page 40

40
Ulead COOL 3D 3.0
Frame
This bevel effect not only offers you interesting visual options for your project, but gives
you some animation possibilities as well. In this tutorial, work with a Bevel timeline and
an Orientation timeline to create an animated project. (Settings: 30 frames, 15 fps)
To rotate a frame with different text on
each side:
1 Insert an object into the Edit Window.
In the EasyPalette file directory, select
Bevel Effects: Frame.
2 On the Attribute Toolbar, select Frame
from the Bevel Mode list. The Frame
options appear, and a default rectangular frame appears around the object.
3 On the Attribute Toolbar, click the Text
or Frame button under Target to
customize the Text and Frame bevels if
desired.
4 On the Standard Toolbar, select the
Rotate Object button. Orientation
appears on the Properties menu.
5 On the Timeline Control, add a key
frame at frame 30 of the animation. On
the Location Toolbar, enter an X value
of 180. This flips the frame directly to
its other side.
6 Select Bevel from the Properties Menu,
and move to frame 15 of the animation,
and add a key frame.
7 On the Attribute Toolbar, scroll down
to the second level of attributes. Clear
the Use Front option, and click the
Text or Import Graphic button under
Object to put a different text or image
on the other side of the frame. Then
select the Flip Text option.
8 Click the Play button to preview the
animation.
Page 41

41
User Guide
Hollow
This plug-in effect lets your text or graphic penetrate right through the board for an
interesting title. This tutorial shows you how to create a fun yet simple animation using
two of the same text or graphic object. (Settings: 30 frames, 15fps)
To make an object break through a board:
1 Insert an object into the Edit Window. In
the EasyPalette file directory, select
Bevel Effects: Hollow.
2 On the Attribute Toolbar, select Hollow
from the Bevel Mode list. The Edit
Window displays a rectangular board
with a hollow object.
3 Scroll down to the next level of at-
tributes and select None for Board
Bevel.
4 Insert a second object (the same as the
first) to the project. In the EasyPalette
file directory, select Object Style: Bevel,
then select None for Bevel Mode on the
Attribute Toolbar. In the Edit Window,
you should see a seamless and flat
board.
5 On the Object List, select [Group], then
rotate the board and object so that they
lean backwards, allowing you to better
view the results.
6 Select the second object from the Object
list. Select Position from the Properties
Menu. On the Timeline Control, add a
key frame to frame 30 of the animation.
7 Enter a negative value for the Z coordi-
nate on the Location Toolbar. Try
something like -200.
8 Click the Play button. The object should
tear itself away from the board to reveal
the hollow board and the three dimensional letters.
Page 42

42
Ulead COOL 3D 3.0
Imprint
Make a deeper impression by engraving a title or banner on a board with this plug-in
effect. You can also make an animated effect using this plug-in. Learn how to make a
basic title sink into a board in the following tutorial. (Settings: 30 frames, 15 fps)
To apply Imprint to an object:
1 Insert a text or graphic object into the
Edit Window. In the EasyPalette file
directory, select Bevel Effects: Imprint.
The Imprint presets appear.
2 On the Attribute Toolbar, select Imprint
from the Bevel Mode list. The Attribute
Toolbar displays the Imprint options,
and the Edit Window displays the object
on the default rectangular board. To use
a different board shape, drag an Imprint
preset to the Edit Window.
3 On the Timeline Control, add a key
frame at frame 30 of the animation.
4 At frame 1, on the Attribute Toolbar,
enter 500 for Extrusion and 1 for
Imprint.
5 Scroll down to the next set of attributes.
Under Board Bevel, select None. Enter
values for Extra Width and Extra
Height if you want to increase the
dimensions of the board.
6 At frame 30, enter 250 as the Imprint
value.
7 Click Play to preview the animation.
The title should slowly sink into the
board.
Page 43

43
User Guide
Object Effects
The control you have in animating individual objects is one of the things that makes Ulead
COOL 3D remarkable. Some plug-in effects let your objects dance and explode in
customizable patterns, while others let you choreograph the actions between individual
letters with ease. Use the many presets to quickly create stunning effects, or use the
Attribute T oolbar to create custom ef fects. This section shows you basic projects for each
plug-in. For detailed information on all plug-in attributes, please refer to the Help T opics.
Bend
Use this plug-in effect to bend your title in any direction, then animate the bending
movement to attract special attention. In this tutorial, learn how to combine this effect
with basic rotation settings. (Settings: 30 frames, 15fps)
To apply the Bend effect to an object:
1 In the EasyPalette file directory, select
Object Effects: Bend. Click the F/X
button on the Attribute Toolbar. Bend
appears on the Properties Menu.
2 On the Timeline Control, add a key
frame at frame 30.
3 At frame 1 on the Attribute Toolbar, set
the Direction of the bend to Y-Z, and
select the Type as Asymmetric. Set the
Level to 100 to completely bend the
object, and set the Cutting Point to 50
so that the object bends at the center.
4 At frame 30, set the Level to 0. This
allows the object to unbend.
5 On the Standard Toolbar, click the
Rotate Object button. Orientation
appears in the Properties Menu. On the
Timeline Control, add a key frame at
frame 30.
6 At frame 1, on the Location Toolbar, the
rotation coordinates should all be 0. At
frame 30, set the Z coordinate to -720.
This rotates the object twice in a
clockwise direction.
7 Click Play to preview the animation.
Page 44

44
Ulead COOL 3D 3.0
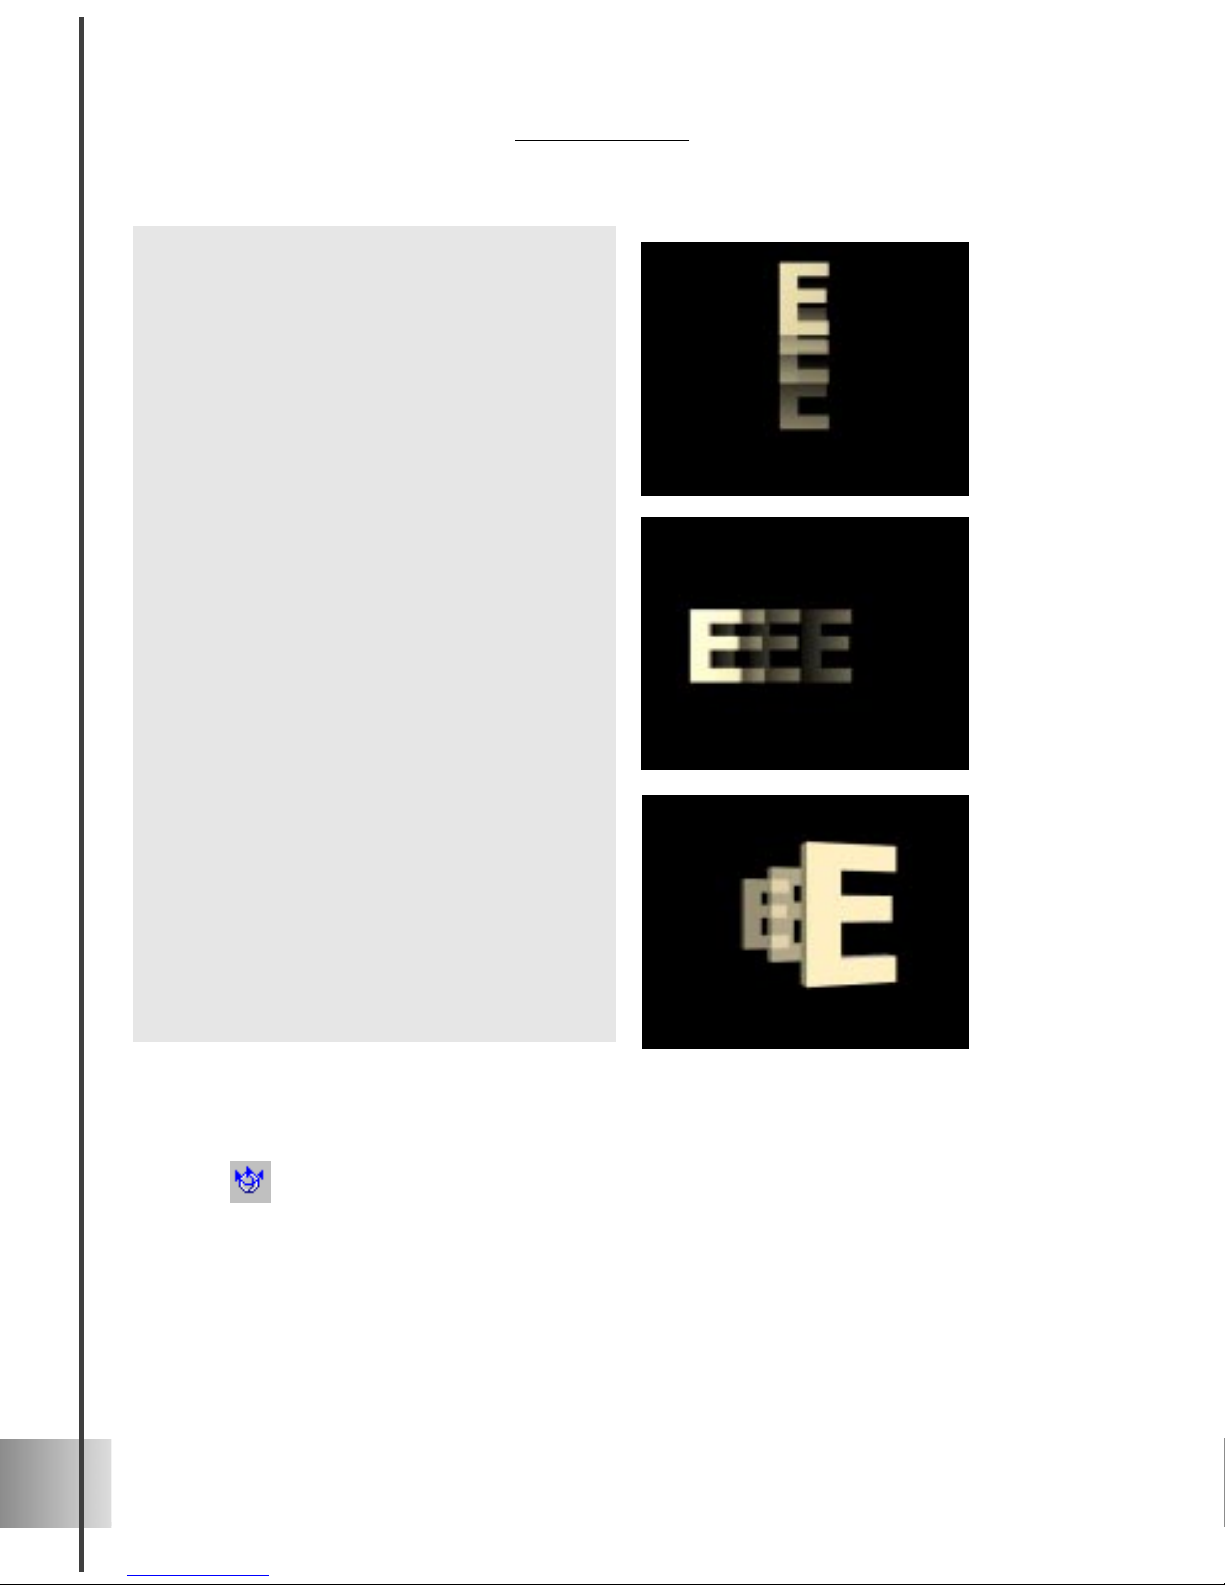
Dance
This effect brings out the buoyancy in your title. Choose from several dance styles Shake, Scatter, Wave, and Bounce. The following tutorial shows you how to make a
bouncing project. (Settings: 30 frames, 15 fps)
To make a title bounce:
1 In the EasyPalette file directory, select
Object Effects: Dance. Click the F/X
button on the Attribute Toolbar. Dance
appears in the Properties Menu.
2 On the Timeline Control, add a frame at
frame 30.
3 At frame 1, select Bounce as the Dance
Mode, and for Sequence, select Ran-
dom.
4 Set Ground to 1. This is the minimum
distance that the letter will fall in order
to bounce. Specify 100 for Rebound,
which makes the letters bounce highest.
5 Specify 10 as the Tempo for fastest
bouncing speed. Set the Variation to 0.
This means that the letters will start out
in their normal stationary position standing up and facing forward.
6 At frame 30 of the animation, set the
Variation to 50. This means that by the
last frame, the letters will be facing in
widely differing directions, as if they
were bouncing out of control.
7 Click Play to preview your project. Try
using different values for Seed. This
generates a slightly different variation of
the Dance effect.
Page 45

45
User Guide
Distort
Put a new perspective on your title by using the Distort plug-in. You can either distort the
perspective of the entire object, or distort the letters individually . When applied in an
animated sequence, this can be useful for emphasizing the noteworthy . Create a basic
Distort animation in this tutorial. (Settings: 30 frames, 15fps)
To distort an object:
1 In the EasyPalette file directory, select
Object Effects: Distort. Click the F/X
button on the Attribute Toolbar. Distort
appears on the Properties Menu.
2 On the Timeline Control, add key
frames to frames 15 and 30.
3 At frame 1 on the Attribute Toolbar,
select Individual for Action Sequence,
and select Y-Z as the Plane along which
the perspective will be distorted. Leave
all other distortion variables at their
default values (100).
4 At frame 15, set the Y1 and Z1 values to
50, and set the Y2 and Z2 values to 300.
Frame 30 should have the same values
as frame 1.
5 Click Play to preview the animation.
Page 46

46
Ulead COOL 3D 3.0
Explosion
The power you have when blasting a title to pieces makes this plug-in a favorite. If you
are not so destructively minded, try reversing an explosion effect, having all the small
pieces come together to form a whole. In this tutorial, learn how to disintegrate your title.
(Settings: 30 frames, 15 fps)
To disintegrate your title:
1 In the Easy Palette file directory, select
Object Effects: Explosion. Click the F/X
button on the Attribute Toolbar. Explo-
sion appears on the Properties Menu.
2 On the Timeline Control, drag the
leftmost end point of the Control Line to
frame 5. This ensures that the explosion
effect will not take place right away.
Add a key frame to frame 30 of the
animation.
3 At the first frame of the plug-in effect
(frame 5), set the Movement Type to
Left, the Collapse Type to Ascending,
and the Action Sequence to Forward.
Set the Level to 0 and the Rotate value
to 30.
4 At frame 30, set the Level to 100 for a
complete explosion. Enter 100 for the
Rotate value.
5 Select Position from the Properties
Menu, and add key frames to frames 25
and 30 on the Timeline Control.
6 At frames 1 and 25 for Position, all
coordinates on the Location Toolbar
should be 0. At frame 30, set the Y
value to -300.
7 Click Play to preview the effect.
Experiment with different values for
Variation. Each number you enter
produces a slightly different variation of
the explosion effect.
Page 47

47
User Guide
Motion Path
Move your title along specially designed paths with this plug-in. Have it zigzag in space,
or let it zip along sweeping curves in roller-coaster fashion. The Attribute T oolbar lets
you further customize how the title moves - you can twist it around the path, make it move
in wave form, mold itself to the path, and have each character move in sequential order . In
this tutorial, learn how to make your object travel along a figure 8. (Settings: 30 frames,
15fps)
To apply Motion Path to an object:
1 In the EasyPalette file directory, select
Object Effects: Motion Path. Click the
F/X button in the Attribute Toolbar.
Motion Path appears on the Properties
Menu.
2 On the Timeline Control, add a key
frame to frame 30 of the animation.
3 At frame 1, on the Attribute Toolbar,
select Figure 8 as the Motion Path.
Select the Show Path option. A model
of the path appears in the Edit Window.
4 Select Horizontal as the Type of path,
then set On Path to Stand. Set the
Wrap Style to Position, and enter 100
as the Level.
5 Scroll down to the second level of
attributes. Increase the size of the path
by entering 500 for Scale. Then, under
Global Rotation, adjust the orientation
of both the path and the object by setting
the X value to 45.
6 At frame 30, set the Level to 0 and the
Scale to 500. Under Global Rotation,
set the X value to 45.
7 On the Attribute Toolbar, clear the Show
Path option to see the object on its own
without the path. On the Animation
Toolbar, click the Loop Mode button,
then click Play to preview the animation. The object should travel continuously along the figure 8.
Page 48

48
Ulead COOL 3D 3.0
Path Animation
This plug-in lets your text move in ways that simulate the natural laws of gravity in the
real world. You can let your object get caught in a tornado, ripple on water, or swing like
a pendulum. In this tutorial, learn how to toss your object in an arc, and then have it
change into another object upon impact. (Settings: 30 frames, 15 fps)
To throw an object in an arc:
1 In the EasyPalette file directory, select
Object Effects: Path Animation. Click
the F/X button on the Attribute Toolbar.
Path Animation appears on the Properties Menu.
2 On the Timeline Control, add a key
frame at frame 30.
3 At frame 1 on the Attribute Toolbar,
select Arc as the Path, and enter 25 as
the value for Speed.
4 Set the Ground to 0 (default), and enter
75 for the Level to start the object at
mid-throw. Enter 40 as the value for the
Angle of the arc.
5 At frame 30, set the Level to 0.
6 Click Play to preview the Arc anima-
tion. The object should be thrown in
from the right of the screen.
7 Insert a new object into the project, and
click the F/X button to deactivate the
effect for that object. At frame 1, click
the Show/Hide button to hide the object,
and at frame 30, click it again to make
the object appear.
8 Click Play to preview the animation.
Page 49

49
User Guide
Surface Animation
With this plug-in, you can let your object move and wrap around the form of dif ferent
three-dimensional shapes. This tutorial shows you how to wrap your object around a small
sphere, have it travel twice around the sphere, and then unwrap at the end. (Settings: 30
frames, 15 fps)
To animate an object around a sphere:
1 In the EasyPalette file directory, select
Object Effects: Surface Animation.
Click the F/X button on the Attribute
Toolbar. Surface Animation appears on
the Properties Menu.
2 On the Timeline Control, add key
frames to frames 25 and 30.
3 At frame 1, select Sphere as the Surface
around which the object is wrapped, set
the Path to V Line to make the object
travel vertically, then set the Wrap
Style to Mesh to mold the object to the
surface of the sphere.
4 Scroll down to the second level of
attributes. Enter 10 for all Size coordinates so that the text is wrapped around
a small sphere. Set the Level to 0.
5 At frame 25, enter 10 for all Size
coordinates, and enter 200 as the Level
so that the object travels twice around
the sphere’s surface.
6 At frame 30, set all Size coordinates to
100 so that the size of the ball increases
drastically. Set the Level to 200 so that
the object does not move from the
previous key frame.
7 Click Play to preview the animation.
Tip: Try using the Surface Animation plug-in with the
Board bevel effect, as in this example. This allows you
to actually see the “object” around which your object
wraps.
Page 50

50
Ulead COOL 3D 3.0
Token Move (G)
It’s easy to choreograph individual letters to move sequentially. This plug-in lets you do
this in any direction and in just a few steps. This tutorial shows you how to have individual letters jut out at you for emphatic expression. (Settings: 30 frames, 15 fps)
To apply the Token Move (G) effect:
1 In the EasyPalette file directory, select
Object Effects: Token Move (G), and
click the F/X button on the Attribute
Toolbar. Token Move (G) appears on the
Properties Menu.
2 On the Timeline Control, add a key
frame to frame 30 of the animation.
3 At frame 1 on the Attribute Toolbar, set
the Level of the animation to 0, Action
Sequence to Forward, Acceleration to
None, and Overlap to 30. Select the To
Origin option to make individual
characters return to their original
positions upon completing the specified
action.
4 Scroll down to the next level of at-
tributes. On this level are the coordi-
nates for position. To make the title
come towards you, enter -500 for Z
Value.
5 At frame 30, set the Level of the
animation to 100.
6 Click Play to preview the animation.
Page 51

51
User Guide
Token Rotate (G)
With this ef fect, you have the ability to make letters and objects spin and twirl, either all
at once or in an elegant sequence. Here, learn how to make a simple wave effect. (Settings: 30 frames, 15 fps)
To apply the Token Rotate (G) effect:
1 Adjust the Orientation of the object so
that the Y coordinate is approximately
45.
2 In the EasyPalette file directory, select
Object Effects: Token Rotate (G), then
click the F/X button on the Attribute
Toolbar. Token Rotate (G) appears on
the Properties Menu.
3 On the Timeline Control, add a key
frame at frame 30.
4 At frame 1 on the Attribute Toolbar, set
the Level of the animation to 0, the
Action Sequence to Forward, and
Acceleration to None.
5 Set the Overlap to 90 so that the
individual letters move almost immediately one after the other. Under Rotation
Center, select Front-LT (the front left
top of each character).
6 Scroll down to the next set of attributes.
These are the axes around which your
title can rotate. Enter -360 for the X
Angle.
7 At frame 30, set the Level of the
animation to 100.
8 Click Play to preview the animation.
Page 52

52
Ulead COOL 3D 3.0
To apply the Token Skew (G) effect:
1 In the EasyPalette file directory, select
Object Effects: Token Skew (G). Click
the F/X button in the Attribute Toolbar.
Token Skew (G) appears on the Proper-
ties Menu.
2 On the Timeline Control, add a key
frame to frame 25.
3 At frame 1 on the Attribute Toolbar, set
the Level to 0, and select Backward as
the Action Sequence. Set the Accelera-
tion to Oscillate.
4 Enter 30 as the Overlap value. Choose
Front-LB as the Skew Center to fix a
point from which letters skew.
5 Scroll down to the next level of at-
tributes. These are the planes along
which objects can be skewed. Under Y-
X Plane, enter 1000, and leave all the
others at 0.
6 At frame 25, set the Level to 100.
7 Next, animate the position of the object.
Select Position from the Properties
Menu, and add key frames at frames 20
and 30.
8 At frames 1 and 20, view the coordi-
nates in the Location Toolbar for
Position. They should all be set to 0. At
frame 30, set the X coordinate to 1500.
9 Click Play to preview the animation.
Token Skew (G)
You can stretch text and objects in any direction with this plug-in effect. In this tutorial,
combine the Skew effect with a simple Position animation to make an object appear as if
it were being sucked away off the screen. (Settings: 30 frames, 15fps)
Page 53

53
User Guide
Token Size (G)
The T oken Size (G) ef fect is especially easy to use because you only have to make most of
the settings once, and then all you have to change in the key frames is the value for Level.
Learn to make your money grow in this tutorial. (Settings: 30 frames, 15 fps)
To apply the Token Size (G) effect:
1 Insert a string of dollar signs, divided up
in 3 rows. Rotate it slightly on the X
axis so that it leans back.
2 In the EasyPalette file directory, select
Object Effects: Token Size (G). On the
Attribute Toolbar, click the F/X button.
Token Size (G) appears on the Properties Menu.
3 On the Timeline Control, add key
frames to frames 15 and 30.
4 At frame 1 of the animation, set the
Level to 0. Select Random for the
Action Sequence.
5 Under Acceleration, select Normal. Set
the Overlap to 50, which makes each
object begin moving after each previous
object has completed half of its motion.
Select Center as the Scaling Center.
6 Scroll down to the next level of at-
tributes. Here’s where you specify how
large and in which direction your objects
grow. For X and Y Values, enter 200.
For Z Value, enter 500.
7 At frame 15, set the Level to 100, and at
frame 30, set the Level to 75.
8 Click Play to preview the animation.
The dollars should grow fully to the
specified size in random order, and then
some of them should shrink again.
Page 54

54
Ulead COOL 3D 3.0
Twist
This effect lets you coil up a title in a number of different directions and styles. Twist the
object beyond recognition along the X or Y axis, or make the title coil out towards you
along the Z axis. In this project, learn how to combine the T wist ef fect with a basic Size
animation for extra impact. (Settings: 30 frames, 15 fps)
To twist an object:
1 Rotate the object slightly on the Y axis.
2 In the EasyPalette file directory, select
Object Effects: Twist. Click the F/X
button on the Attribute Toolbar. Twist
appears on the Properties Menu.
3 On the Timeline Control, add a key
frame at frame 30.
4 At frame 1, on the Attribute Toolbar,
select Left only as the twist Type. This
twists the object starting with its left
side. Select Z as the Axis so that the
depth of the object is twisted, and set the
Skew Angle to 0.
5 At frame 30, set the Skew Angle to
-360.
6 On the Standard Toolbar, click the Size
Object button. Scale should appear on
the Properties Menu. On the Timeline
Control, add a key frame at frame 30.
7 At frame 1, the Size coordinates on the
Location Toolbar should be 100 (de-
fault). At frame 30, set the Z coordinate
to 1000.
8 Click Play to preview the animation.
The title should twist clockwise and coil
towards you.
Page 55

55
User Guide
Transition Effects
This new plug-in category lets you make a striking statement by replacing one text or
graphic object with another in a variety of entertaining ways. Explode your text to form a
completely different text, or have one text squash another . You can also make one text
bump the other one off the screen. All this can be done in a few easy steps with the Blast,
Bump and Jump effects.
Blast
Have fun exploding an object, and then have the pieces come back together to form
something new . The easiest way to apply this ef fect is to apply a Blast preset from the
EasyPalette. For more advanced users, the many variables on the Attribute T oolbar allow
you to control the effect to amazing detail. In the following tutorial, we’ll explode a
graphic and have it turn into text.
To apply a Blast transition:
1 Insert a graphic object into the Edit
Window. Select Transition Effects: Blast
from the EasyPalette file directory, then
on the Attribute Toolbar select Blast
from the Style list.
2 On the Attribute Toolbar at frame 1,
clear the Use Original option. Then,
under Target , click the Text Object
Target button. In the dialog box that
appears, enter the text object that you
want to replace the original object.
3 Set the Shape to Sphere, and the
Collapse Type to All.
4 Scroll down to the next level of at-
tributes. Set the Size of the pieces to 5
and the Action Sequence to All. The
Level should be 100 by default.
5 Scroll down to the next level of at-
tributes. Select Swirl as the Movement
Type.
6 Click Play to preview the animated
sequence.
Page 56

56
Ulead COOL 3D 3.0
To apply a Bump transition:
1 In the EasyPalette file directory, select
Transition Effects: Bump, then on the
Attribute Toolbar, select Bump from the
Style list.
2 On the Attribute Toolbar at frame 1,
clear the Use Original option, then
click the Text or Graphic Object
Target button under Target to insert an
object that you want to replace the
original.
3 Make sure that the Level is 0, and set
the Compression value to 50.
4 If the target object appears on the
screen, set the Initial Position of the
target object to 300, or until it disap-
pears off the screen.
5 Scroll down to the next set of options on
the Attribute Toolbar, and select From
Left as the Direction in which you want
the transition to take place.
6 Move the Timeline Control to the last
frame of the animation. Set the Level to
100.
7 Click Play to preview the transition.
Bump
This transition effect can add expression to those pressing statements that simply must be
made, or simply emphasize the main point by having it push another object away . In this
example, have the main text bump a graphic out of the way .
Page 57

57
User Guide
Jump
Stomp out one text object with another with the Jump effect. You can also give it a
realistic bounce and rebound as one text falls on the other . This example shows you how
to combine this effect with the Show/Hide function so that a second message shows up at
the end of the transition.
To make one object stomp on another:
1 Insert an object, then select Transition
Effects: Jump from the EasyPalette file
directory. On the Attribute Toolbar,
choose Jump from the Style list.
2 On the Attribute Toolbar, clear the Use
Original option, then click the Text or
Graphic Object Target button under
Target. Insert an object to replace the
original. The object above the original
changes in the Edit Window.
3 On the Attribute Toolbar at frame 1, set
the Bounce value to 30. If the target
object is visible, set the Initial Position
to about 300, or so that it disappears off
the screen.
4 Move to the last frame of the animation,
add a key frame, and set the Level to
100.
5 Insert a new object. On the Attribute
Toolbar, select None as the transition
Style. Adjust the object’s position at
frame 1 so that it doesn’t overlap with
the first object.
6 Choose Show/Hide from the Properties
Menu, and add a key frame to frame 30
of the animation.
7 At frame 1, click the Show/Hide button
on the Animation Toolbar, so that the
object disappears. At frame 30, click it
again so that the object reappears.
8 Click Play to preview the animation.
Page 58

58
Ulead COOL 3D 3.0
Global Effects
This category of effects can enhance the quality of your text or graphic object. A wide
variety of options lets you give your 3D objects an eerie aura, set them on fire, or cast a
shadow , among others. These effects are different from Object ef fects in that when you
apply one of them to your project, it is applied to all of the objects in it.
Fire
Make red hot titles that burn and mesmerize, make a cool title that drips with icicles, or
even make the title ooze with neon green goo. All this is possible with the Fire plug-in. In
this tutorial, learn how to animate a basic fire effect. (Settings: 30 frames, 15 fps)
To burn an object:
1 Select Global Effects: Fire in the
EasyPalette file directory, then click the
F/X button on the Attribute Toolbar.
Fire appears on the Properties Menu.
2 On the Timeline Control, add a key
frame to frame 30.
3 At frame 1, set the Strength to 10 and
the Amplitude to 10.
4 Set the Direction to 90 to make the
flames go straight up, and enter 2 for
the Soft Edge value.
5 Enter 10 for Length and 1 for Opacity.
Then customize the colors of the flame
by clicking on the color boxes.
6 At frame 30, set the flame to full blast
by entering 200 for Strength and 100
to Amplitude.
7 Set the Length of the flames to 50, and
increase the Opacity to 75.
8 Click Play to preview the animation.
Page 59

59
User Guide
To make a blinking title:
1 Make a bright-colored title against a
dark background.
2 Select Global Effects: Glow from the
EasyPalette file directory, then click the
F/X button on the Attribute Toolbar.
Glow appears on the Properties Menu.
3 On the Timeline Control, add key
frames to frames 1 and 30. At these key
frames, set the Width of the glow to 2,
the Transparency to 0, and the Soft
Edge to 6. Select a bright Color for the
glow.
4 Add key frames at frames 5, 15, and 20.
These should all have the same attributes as those in frame 1.
5 Add key frames controls to frames 7, 13,
22, and 28. At these key frames, set the
Width of the glow to 0. This makes the
glow disappear.
6 Click Play to preview the animation.
Glow
This plug-in lets you give any type of aura to fit the mood of the project. Make your object
radiate with a luminous glow of the nuclear age, or you can give it a halo of goodness.
One of the things you might want to try with your object is to have it shine like a light.
The following tutorial demonstrates how to make an object blink on and off. (Settings: 30
frames, 15 fps)
Page 60

60
Ulead COOL 3D 3.0
Motion Blur
With this effect, you can make an object look as if it were zipping around at super speeds
bouncing with energy . These and many more whisks of motion are possible with this plugin. If you want to try this with an animated project, it is recommend that you use the least
complicated settings for the animation. The following tutorial takes a look at combining
object position with the Motion Blur effect. (Settings: 30 frames, 15 fps)
To apply Motion Blur to an object:
1 Select Position from the Properties
Menu. On the Timeline Control, add key
frames to frames 12, 18, and 30.
2 At frame 1, set the X coordinate to -600.
The Y and Z values should be 0. At
frames 12 and 18, change the X coordi-
nate to 0. At frame 30, change the X
coordinate to 1000.
3 In the EasyPalette file directory, select
Global Effects: Motion Blur. Click the
F/X button on the Attribute Toolbar.
Motion Blur appears on the Properties
Menu.
4 At frame 1, on the Attribute Toolbar,
select Continuous as the Type, and set
the Path to Straight.
5 Set Density to 5, and Length to 20. Set
the Direction to 180, which makes the
lines horizontal.
6 Scroll down to the next level of options
on the Attribute Toolbar. Set Tail to 30
and the Converge value to 0.
7 Add key frames at frames 10, 12, 18, 20,
and 30. They should all have the same
attributes as in frame 1.
8 For frames 12 and 18, change the Tail
length to 0.
9 Click Play to preview the animation.
Page 61

61
User Guide
Shadow
You can give your object a shadow , then animate it easily after making just a few settings.
In addition to making the gray shadows of real life, you can make colorful shadows, or
have an object cast a negative shadow on a dark background. In the following tutorial,
make an object float away , leaving its shadow behind on the ground. (Settings: 30 frames,
15 fps)
To animate an object and its shadow:
1 Rotate your object so that it appears to
lie somewhat flat on a surface.
2 On the Standard Toolbar, click the
Move Object button. On the Timeline
Control, add a key frame to the last
frame of the animation.
3 At frame 1, the X, Y, and Z coordinates
should remain 0. At frame 30, enter 270
for the Y coordinate, or enter any other
value that makes the object move off the
screen.
4 Select Global Effects: Shadow from the
EasyPalette file directory. Click the F/X
button on the Attribute Toolbar. Shadow
appears on the Properties Menu.
5 On the Timeline Control, add a key
frame to the last frame of the animation.
6 At frame 1, on the Attribute Toolbar,
enter 5 for X Offset and Y Offset.
Enter 3 for Soft Edge.
7 At frame 30, enter 600 for Y Offset.
Enter 40 for Soft Edge.
8 Click Play to preview the animation.
The object should float up and off the
screen, while the shadow remains
behind. If it looks like the shadow is
moving up and down, adjust the Y
Offset value for the last key frame.
Page 62

62
Path Editor
With Path Editor, Ulead COOL 3D now makes it possible to create and edit vector
graphics without having to worry about importing images from other programs. Not only
can you create your own shapes, but you can also take letters that you’ve typed in, and
edit them as vector graphics. And of course you have the ability to import a background,
such as a logo, so that you can trace over the section that you want, then enhance the
original logo with 3D flair .
To access Path Editor, click the Insert Graphics button on the Object Toolbar . This
opens the Path Editor window .
Attribute Toolbar
Tool Panel
Workspace
The basics of vector graphics
In Path Editor, you create shapes that are vector graphics. Vector graphics differ from
raster graphics, or bitmaps, in that they are composed of lines, or paths, that are con-
nected to one another by nodes. Therefore, when you create or edit them, you work only
with the paths and nodes, rather than with the color and texture attributes that you may
want them to have. Simple shapes are composed of a path with few nodes, while more
complex shapes are composed of a path with many nodes.
Path Editor gives you many tools that you can use to draw and edit paths and nodes, and
even to convert raster to vector graphics. The Tool Panel gives you a variety of functions
Page 63

63
User Guide
that you can use to edit and create a shape. Every time you select one of these tools, the
Attribute Toolbar changes to give you the options for that tool. Familiarize yourself with
some of the tools in the following pages.
To create a shape object:
1 Click the Shape tool from the Tool
Panel. The Attribute Toolbar changes to
display the various shapes you can
choose from, as well as how the shape is
created.
2 Select the shape you want to use from
the Attribute Toolbar, then select the
drawing options for creating that shape
by clicking any of these three buttons:
¡ Draw From Center Creates the shape
from the center moving out. If not selected,
the shape is created from the top left
corner down as you draw.
¡ Equal Sides Ensures that the sides of the
shape are all of equal length.
¡ Fixed Size Allows you to specify the exact
width and height of an object in the
neighboring Width and Height boxes.
3 Click on the area of the workspace
where you want the shape to appear, and
drag. As you drag, a shape is created
based on the attributes that you specified.
Using the Shape tool
With the Path Editor, you can create both regular symmetrical shapes, such as squares and
circles, as well as more complex polygons and stars.
A simple shape with few nodes (left) and a
complex shape with many nodes (right)
Page 64

64
Ulead COOL 3D 3.0
• Resize Allows you to drag on the nodes of a
bounding box to enlarge or reduce the size of
an object. Click the Keep Aspect Ratio
button to maintain the proportion of the object
when resizing.
• Rotate Lets you rotate the object by directly
dragging a corner of the object’s bounding
box. As you rotate, the degree of the rotation
is displayed in the Rotation Angle spin box at
the end of the Attribute Toolbar. For finer
adjustments, use this spin box or enter the
degree of rotation directly. To set a different
center of rotation, drag the crosshair to the
desired position. To reposition it at the center
of the object, click the Reset Rotation Center
button.
• Slant, Perspective, Distort Allow you to
adjust and skew your object by dragging on
the control nodes of an object’s bounding box.
Using the Object tool
Once you have created an object, you can move and manipulate it in a variety of ways
with the Object tool. This allows you to select objects and then move, resize, and distort
them anywhere within the workspace.
• To select a single object, click the Object
tool button on the Tool Panel, and then click
anywhere along the path of the object that you
want (a hand icon appears whenever your
cursor moves over a path).
• To select multiple objects, hold down the
Shift key as you click each object. The
bounding box changes each time to encase all
the selected objects. You can also drag in the
workspace to form a selection area that
includes all of the desired object. Once
selected, you can move them as one, or resize
them equally.
The Object tool provides five options on the Attribute T oolbar for resizing, rotating, and
reshaping objects:
Page 65

65
User Guide
Using the Path tool
The Path tool allows you to create shapes based on a series of straight or curved lines.
You can manipulate these lines as you draw or edit them at a later time.
To create a path object:
1 Click the Path tool button on the Tool
Panel. The Attribute Toolbar changes to
display the options for drawing a path.
2 Select the type of path you want to draw
from the Attribute Toolbar. Draw either
in straight or curved line segments by
clicking the appropriate button on the
Attribute Toolbar. (You can switch
between linear or curved segments as
you draw, depending on the type of path
you want to create.)
3 In the Edit Window, begin drawing the
shape you want to create. Each time you
click your mouse, a node is placed in the
Edit Window, and a line segment is
automatically drawn connecting the two
nodes. If you select the Draw Line
option, then only straight line segments
are created every time you click on the
workspace. If you select the Draw
Curve option, curved segments are
created each time you click and drag on
the workspace. When you do this, two
handles appear on either side of the
node, allowing you to stretch, pull or
turn the curve.
4 Click the Close Path button on the
Attribute Toolbar to end your shape.
Path Editor automatically draws a line
connecting the end of the last segment
to the beginning of the shape.
Page 66

66
Ulead COOL 3D 3.0
To create a freehand object:
1 Click the Freehand tool button from the
Tool Panel. The Attribute Toolbar
changes to display the options for
drawing a path.
2 Move to the Edit Window and begin
drawing the shape you want to create or
trace. As you draw, a line appears in the
Edit Window. To draw continuously,
keep your mouse button down as you
drag. If you release the mouse button
you end a segment. You can then create
a new segment by clicking in another
area of the Edit Window. When you
create a new segment, it automatically
connects to the end of the previous
segment.
3 Click the Close Path button on the
Attribute Toolbar to end your shape. A
red line appears following the path you
have drawn. Path Editor uses this line to
determine how many nodes to place on
the resulting path. To have the line more
closely follow what you have drawn,
increase the value in the Accuracy spin
box on the Attribute Toolbar.
4 When you are satisfied with the accu-
racy of your path, switch to the Object
tool, or click outside the area.
Using the Freehand tool
The Freehand tool allows you to create any kind of shape you want by allowing you to
draw it with your mouse or pressure sensitive pen tablet. This can be useful for tracing
over elements in a background image, such as a logo. Once you have finished drawing
your path, Path Editor then places nodes in positions on the path based on the accuracy
that you specify on the Attribute T oolbar.
Page 67

67
User Guide
Adjusting paths
Whenever you create an object, its shape is defined by the path you draw . Once created,
you always edit it using the Adjust tool.
Adjusting a node (left) and a control
handle (right)
To adjust a path:
1 Select the Adjust tool from the Tool
Panel. The Attribute Toolbar displays
the options for adjusting a path. Nodes
also appear on the path of the selected
object.
2 Select the Adjust Path button, and click
any node on the path of the object. The
node changes to black to indicate it is
active, and control handles appear on
either side of the node.
3 Change the shape of the path by drag-
ging the node or one of the control
handles. Dragging the node repositions
it, while dragging a control handle
changes the curvature of the path around
the active node and between its adjacent
nodes. Control the behavior of these
nodes and curvatures with one of five
buttons on the Attribute Toolbar:
¡ Curve Segment Changes the curvature of
a path between the active node and its
adjacent nodes.
¡ Line Segment Changes the shape of the
path to a straight line segment between the
preceding node and active node.
¡ Symmetric Curve Changes the curvature
of the path between the active node and its
adjacent nodes, keeping the control
handles fixed in a linear path and equal in
length. This option is best for making
general changes to a path’s curvature.
Page 68

68
Ulead COOL 3D 3.0
¡ Smooth Curve Changes the curvature of
the path between the active node and its
adjacent nodes, allowing you to change the
length of the control handles independently
from each other (they still remain on a
linear path). Use this option for greater
control over the curvature with respect to
the adjacent nodes.
¡ Cusp Curve Changes the curvature of the
path between the active node and its
adjacent nodes, allowing you to move one
control handle at a time. This is useful
when you want to change the curve on one
side of the path without affecting the other.
• Drag the Zoom Ratio slider on the
Attribute Toolbar until you have the
view you want. Once you have zoomed
in, use the scroll bars on the edges of the
workspace to navigate your image.
• Drag the cursor directly in the
workspace to create a rectangular zoom
selection. This zooms automatically into
the desired area.
• Click the 1x1 button to go back to an
actual view of the path you are editing.
Viewing paths and images
Click the Zoom tool to move in and out of your images as you trace them or to get a better
view of path nodes as you edit them.
Page 69
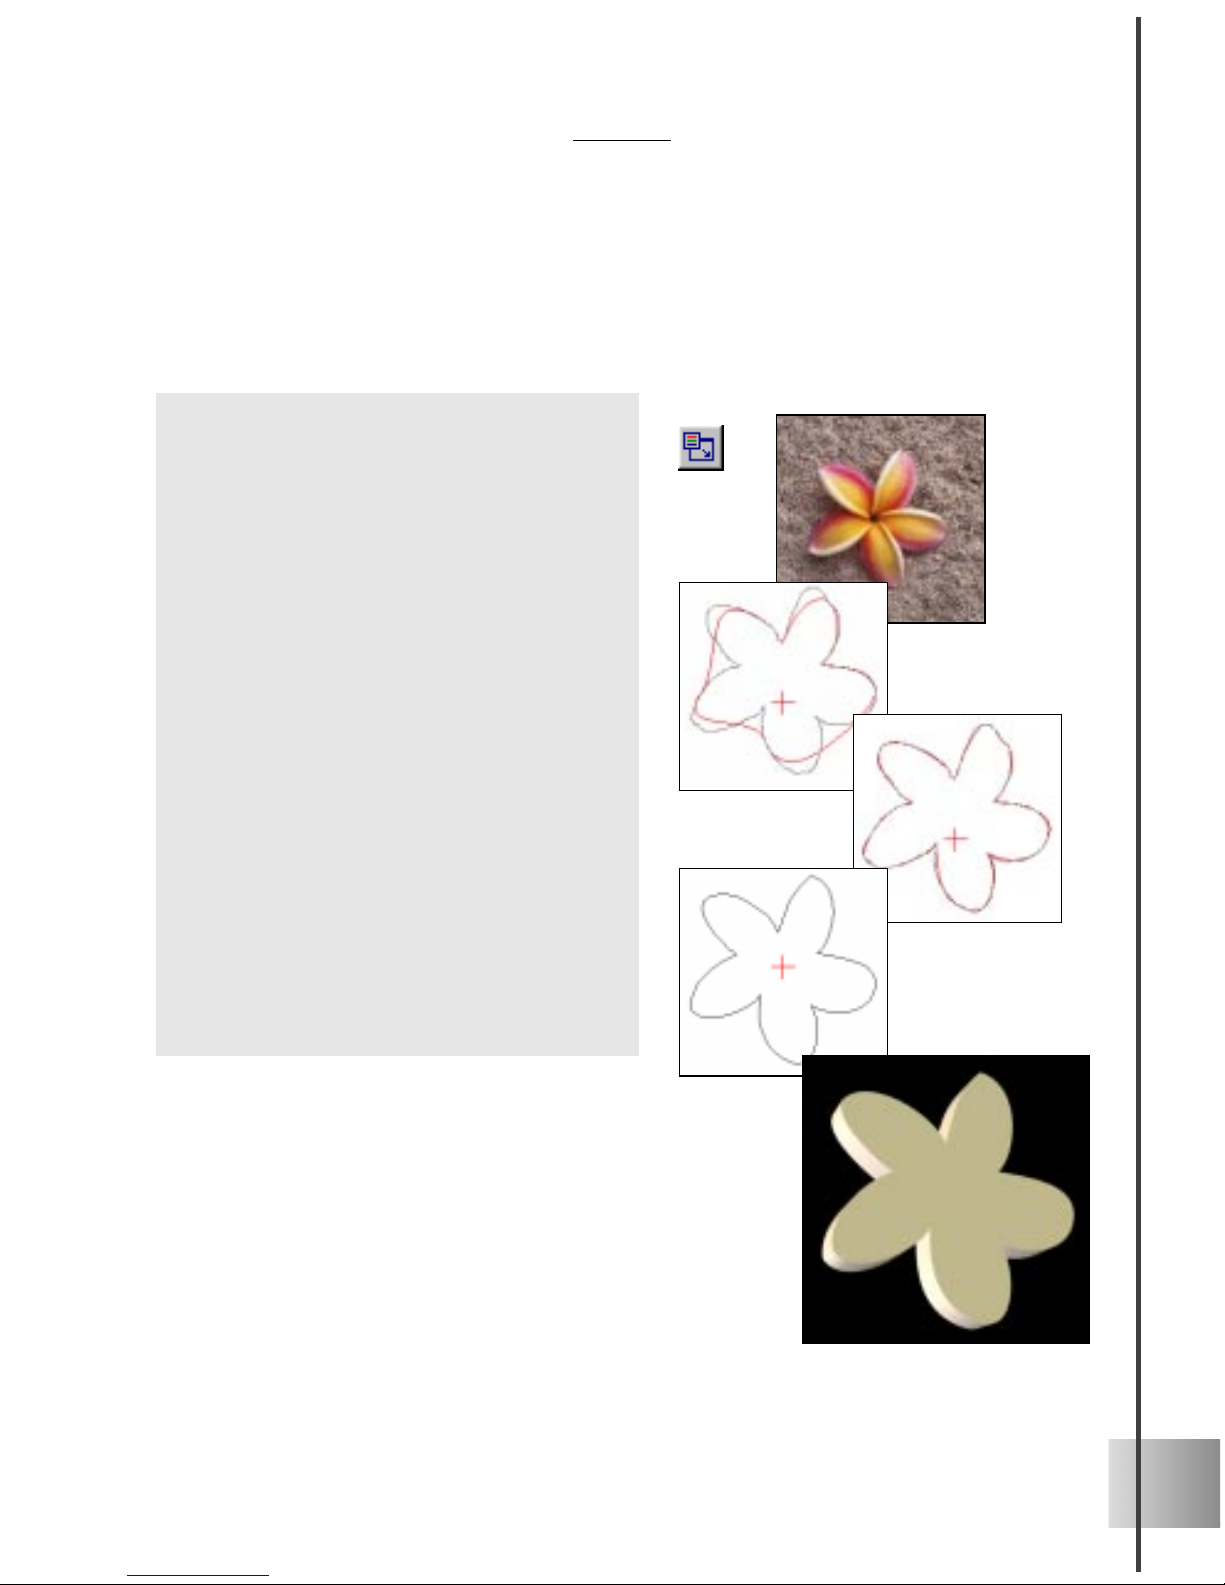
69
User Guide
To trace over a background image:
1 Click the Insert Background Image
button. In the dialog box that appears,
select an image file that you want to
trace (*.BMP or *.JPG). Click Open,
and the image appears in the Edit
Window.
2 Trace the desired part of the image with
the Shape, Path, or Freehand tools.
You can use a combination of these
methods.
3 After you have roughly traced the shape,
clear the Show background option to
get a clearer view of the path. Then, use
the Adjust tool to refine the path. You
can always select the Show background
option to check your adjustments against
the background image.
4 When you have finished making
adjustments and closed all paths, click
OK. The graphic you just traced appears
in the workspace of the main program.
Tracing and converting raster images
Path Editor makes it easy to create a 3D object that is tailored to your specific design
needs. By giving you the ability to trace over a background image or to convert a raster
image to a vector graphic, you have many creative possibilities for incorporating 3D
elements seamlessly into your original graphic or logo.
Page 70

70
Ulead COOL 3D 3.0
To convert raster graphics to vector
graphics:
1 Click the Convert to Vector button. In
the dialog box that appears, select an
image file that you want to convert, then
click Open.
2 In the Convert To Vector dialog box, a
preview of the traced path is displayed
on the window to the right. Adjust the
following variables to get as close as
possible to the tracing that you want:
¡ Tolerance Sets the accuracy of the
tracing. A lower value results in greater
accuracy .
¡ Jump point Determines the smoothness
of the curves used for tracing. A lower
value creates smoother curves.
¡ Threshold Sets a luminance value for
deciding which pixels to include in the
trace. All pixels whose luminance value
falls below this are included.
3 After you have made your settings, click
OK. The raster image appears in the
background with the vector tracing on
top of it.
4 Deselect the Show background option
at the bottom of the Path Editor window.
The raster image disappears, leaving the
vector path clearly visible.
5 Edit the path if required, then click OK.
Tip: For best conversion results, use simple, flat
images with little or no complex shading. When making
Convert to Vector settings, try specifying slightly
higher values for Tolerance and Jump point. This will
expedite the tracing process.
Page 71

71
Outputting your project
Ulead COOL 3D offers you great flexibility in how you output your project. Whether you
want to use your project in a video, on a web page, or simply as a graphic element for a
document, you have a large variety of options to choose from.
Creating image files
You can output your saved project to a variety of image formats: BMP, GIF, JPEG, and
TGA. The following section will give you an idea of what quality you can expect with
each file type, along with some of the options you have for the respective formats.
• BMP saves your image with high quality
and no data loss. However, the trade-of f
is that you end up with a large file size.
Generally , this is the most appropriate
format if you want to make high quality
and high resolution graphics.
• GIF saves the image at small file sizes,
depending on the compression you apply
to it. This is the format most commonly
used for Web pages and is most appropriate for graphics and illustrations that
are relatively small and do not contain a
lot of tonal nuances. When saving an
image in this format, you can choose
how many colors you want the engine to
recognize. A smaller number of colors
generally results in smaller file sizes, but
in some cases might compromise the
quality of the image. You can also set the
background to be transparent, so that
when you place the image on a Web
page, the background of the W eb page
will appear as the backdrop for the
image.
Saving your project
When you have finished editing your work, you can save it in the Ulead COOL 3D format
(*.c3d). This allows you to reopen the project in Ulead COOL 3D for further editing and
revision. If you want to output your project as an image, W eb animation, or video file,
take a look at the following pages for more information.
Page 72

72
Ulead COOL 3D 3.0
Creating video files
One of the great things you can do with Ulead COOL 3D projects is output them as
videos (AVI and MOV formats) to be used in your digital videos. Using a video editor,
such as Ulead’s award-winning MediaStudio Pro, you can add your animated project to
your video clip. T o save your project as a video file, click File: Cr eate Animation Files:
Video File. New extended video output options allow you to tailor exactly how you want
to output your project in the video format of your choice. These are accessed in the Save
As Video dialog box by clicking the Options button. The following gives you a brief
description of the four categories.
• JPEG saves your image in a compressed
format resulting in a small file size, but
the data loss inevitably results in
decreased quality . This is also commonly
used with W eb pages because of the file
size. Photographic images and images
that contain many tonal gradations are
most suitable for this format. When
saving in this format, you have the
options of setting the resulting quality of
the image and the image resolution,
among others.
• TGA saves your image or project with
an alpha channel. What this means is
that you can use it in a video clip, in the
title for example. When you select the
Transparent Background option, an
alpha channel blocks out the entire
image except for the 3D object. You can
then use this as an overlay for your base
video with your video editing program.
• Frame Allows you to select the type of
frames you want for your video (digital
or analog). With the new DirectX Media
6.0 installed, you also have the option to
automatically view the video after it has
been generated.
Page 73

73
User Guide
• General Lets you specify key aspects of
your video, such as frame rate and frame
size.
• Advanced Contains options to optimize
playback of the video file, based on the
intended output device.
• Compression Lets you specify options
particular to the selected video codec.
Creating animations for the Web
Ulead COOL 3D lets you output your animated projects in formats appropriate for
viewing on Web pages: GIF and RealT ext 3D. If used wisely, these can be a good way to
attract the attention of Internet surfers or simply to enliven your W eb pages.
GIF animation
Many animations that you see on the W eb are animated GIFs. This version of Ulead
COOL 3D provides you with extra controls to create a GIF animation that suits your
needs. Here’ s an introduction to some of the new features that you can find, all of which
are accessed by clicking File: Create Video Files - GIF Animation File.
• Colors Specifies the number of colors to
create in the global palette of each
frame, based on the colors in that image.
A smaller number of colors helps to
reduce file size, but sometimes at the
cost of image quality .
• Frame delay The time that each frame is
displayed before moving to the next one.
• Looping Sets the number of times that
the animation plays. If this is not
selected, the animation plays infinitely .
• T ransparent background Removes the
background of the GIF , so that only the
3D objects can be seen. When placed on
a W eb page, the background of that page
shows through instead.
Page 74

74
ULEAD COOL 3D 3.0
Note: Exporting your project to this file format can
result in the loss of the following attributes: texture,
bevel, light, color, background image, and camera.
• Preview after saving Gives you a
preview of the animation in your default
browser after saving.
• Create global palette Builds a global
palette, based on the colors of all of the
images in the animation combined.
Doing this can reduce size, but again,
you should see if this produces the
quality that you want.
• Remove redundant pixels Takes away
pixels that are common to all frames in
the animation. This reduces file size.
• Show status report Displays file size
and other vital stats of the animation
before and after optimization.
• Launch Ulead SmartSaver Lets the
program automatically detect and run
Ulead Smart Saver, a program that helps
you create and optimize animations
saved in JPEG, GIF, and PNG formats.
RealText 3D
You can now output your animations in the RealT ext 3D file format (*.r3t). This new
format stores your animation while maintaining small file sizes, thus making it optimal for
display on a Web page. T o output an animation in this format, use the File: Export To
RealText 3D menu command. Once you’ve saved it, you can preview it in your default
browser .
Page 75

75
Appendices
Shortcuts
Main Program
Function Shortcut keys Description
File: New
Ctrl
+
N
Opens a new document
File: Op e n
Ctrl + O
Opens an existing project file (*.C3D)
File: Save
Ctrl + S
Saves the current file (in *.C3D format)
File: Import Graphics
F5
Imports vector graphics (*.WMF or *.EMF)
File: Print
Ctrl
+
P
Prints the current document
Edit: Undo
Ctrl + Z
OR
Alt
+
Backspace
Undoes the previous action
Edit: Red o
Ctrl + Y
Redoes the previous action that was undone
Edit: Cut
Ctrl
+
X
OR
Shift + Delete
Cuts the sele cte d
o
bject from the current document and
places it in Wi ndows Clipboard
Edit: Paste
Ctrl + V
OR
Shift + Ins
Pastes an object from Windows Clipboard into the
current document
Edit: Delete
Ctrl + Del
Deletes the selected object
Edit: Insert Text
F3
Ope ns the
Ulead
COOL 3D Text dialog box and inserts
text from Wi ndows Clipboard
Edit: Edit Text
F4
Ope ns the
Ulead
COOL 3D Text dialog box containing
the text of the selected ob ject
Image: Output Preview
F8
Renders the current frame at the selected Output
Quality
Move Ob je ct
A
Selects the Move Object tool from the Standard Toolbar
Rotate Object
S
Selects the Rotate Object tool from the Standard
Toolbar
Size Object
D
Selects the Size Object tool from the Standard Toolbar
Select Front Face
Q
Selects/Deselects the fro nt face of the ob ject
Select Front Face
exclusively
Ctrl
+
Q
OR
Shift
+
Q
Selects the front face of the object and deselects all
other faces
Page 76

76
Ulead COOL 3D 3.0
Path Editor
Function Shortcut keys Description
Delete path
Ctrl
+ Del De letes the selected path
Undo
Ctrl + Z
Undoes the previous action
Redo
Ctrl + Y
Redoes the previous action that was undone
Zoom in
Ctrl + "+"
Zooms in on the path or image i n the workspace
Zoom out
Ctrl
+
"-"
Zooms out of the path or image in the workspace
Select Front Bevel Face
W
Selects/Deselects the front bevel face of the object
Select Front Bevel Face
exclusively
Ctrl + W
OR
Shift + W
Selects the front bevel face of the object and deselects
all other faces
Select Side Face
E
Selects/Deselects the side face of the object
Select Side Face
exclusively
Ctrl + E
OR
Shift
+
E
Selects the side face of the object and deselects all
other faces
Select Back Bevel Face
R
Selects/Deselects the back bevel face of the object
Select Back Bevel Face
exclusively
Ctrl + R
OR
Shift
+
R
Selects the back bevel face of the object and deselects
all other faces
Select Back Face
T
Selects/Deselects the back face of the object
Select Back Face
exclusively
Ctrl
+ T
OR
Shift + T
Selects the back faces of the object and deselects a ll
other faces
Stop ani mation
Esc
Stops playin
g
the current animation sequence
Help
F1
Displays Ulead COOL 3D help topics for menu items
Context Sensitive Help
Shift
+
F1
Disp lays brief help top i c upon clickin
g
any one of the
features in the pro
g
ram
Limit object movement to
sin
g
le axis
Shift + Move/Rotate/Size
Object by dragging in
edit window
Fixes the object's position on all axes except the axis
of the initial motion
Page 77

77
User Guide
Index
3D geometric shapes
adding and editing 27
Geometric T oolbar 5, 9
A
Adjust tool 67
animation, creating 29, 31
adding/deleting key frames 28
animating light and color 33
basic tutorial 31, 32
basics 28
Current Frame 28
Frames per second 29
key frames 29
Loop Mode 29
multiple objects 35
multiple objects tutorial 35, 36
multiple timelines 34
multiple timelines tutorial 34
Number of Frames 29
Ping Mode 29
Properties Menu 28, 29
reverse frame sequence 28
Show/Hide 29
Smooth Motion Path 28
Timeline Control 28
timelines 29
animation, previewing 29
Animation T oolbar 9
Attribute T oolbar 10
axes, three-dimensional space 17
B
background
adding 25
Bend plug-in 43
Bevel Effects 38
bevel style, basic 23
border 24
depth 24
extrusion 24
precision 24
weight 24
Blast plug-in 55
Board plug-in 38
Bump plug-in 56
C
cache view 6, 14
color 20
animating 33
applying to individual object faces 23
cone 26
Control Line 37
cube 26
Custom Bevel plug-in 38
cylinder 26
D
Dance plug-in 44
dimensions
menu command 13
setting 13
user-defined 13
using background size 13
Web and video standards 13
display quality 13
menu command 13
object precision 14
output quality 13
Distort plug-in 45
E
EasyPalette 10, 11
features 11
file directory 1 1
thumbnail pane 1 1
Edit Window 10
Explosion plug-in 46
F
file formats
A VI 72
BMP 71
C3D 71
GIF 71
JPEG 72
DirectX file format 26
MOV 72
R3T 74
TGA 72
Fire plug-in 58
Frame plug-in 40
frames per second 29
Page 78

78
Ulead COOL 3D 3.0
G
Geometric T oolbar 9
GIF animation 73, 5
global attributes 37
Global Effects 58
Glow plug-in 59
graphics, adding
3D geometric shapes 26
Microsoft X file format 26
overview 25
Path Editor 25
symbol-type fonts 26
vector graphics 25
H
HAL rendering 13
help 6
technical support 6
Hollow plug-in 41
I
image files, creating 71
image optimization
GIF animation 73
Ulead SmartSaver 74
Imprint plug-in 42
installation 7
J
Jump plug-in 57
K
key attributes 37
key frames 6, 29
adding and deleting 28
definition 29
for plug-ins 37
global attributes 37
key attributes 37
key frames and timelines
working with 29
L
light 20
ambient 20
animating 33
mode 21
positioning 21
specular 20
Location T oolbar 9
M
Motion Blur plug-in 60
Motion Path plug-in 46
N
new features 5
nodes 62
O
Object Effects 43
Object List 12, 15
Object Manager 5, 10, 15, 16
object style
color 20
editing 20
light 20
Object T oolbar 9
objects
basic movement 17
deleting 16
grouping 16
Object Manager 10, 16
renaming 16
rotating 17
selecting 15, 16
ungrouping 16
P
Path Animation plug-in 48
Path Editor 5
Adjust tool 67
adjusting paths 67
Attribute T oolbar 62
changing perspective 64
converting bitmap images to vector graphics 70
distorting objects 64
Freehand tool 66
importing a background image 69
Object tool 64
overview 62
Path tool 65
regular shapes 63
resizing objects 64
rotating objects 64
Shape tool 63
slanting objects 64
T ool Panel 62
Page 79

79
User Guide
tracing a background image 69
vector graphics, overview 62
Zoom tool 68
Path tool 65
paths
overview 62
paths, creating
closed paths 65
curved lines 65
Freehand tool 66
Path T ool 65
straight lines 65
paths, editing
curved path segment 67
cusp curves 68
line segment 67
nodes 67
smooth curves 68
symmetric curves 67
plug-in effects
overview 37
plug-ins, categories
Bevel effects 38
Global Effects 58
Object Effects 43
Transition effects 55
plug-ins, individual
Bend 43
Blast 55
Board 38
Bump 56
Custom Bevel 38
Dance 44
Distort 45
Explosion 46
Fire 58
Frame 40
Glow 59
Hollow 41
Imprint 42
Jump 57
Motion Blur 60
Motion Path 46
Path Animation 48
Shadow 61
Surface Animation 49
T oken Move (G) 50
T oken Rotate (G) 51
T oken Size (G) 53
T oken Skew (G) 52
Twist 54
presets
applying 1 1, 12
backgrounds 12
basic motion 12
camera 12
compositions 12
shapes 12
Studio presets 1 1
symbols 12
previewing animations
cache view 14
Properties Menu 28, 34
pyramid 26
R
RealT ext 3D 74
running Ulead COOL 3D 7
S
saving a project 31
saving projects 71
selecting objects
multiple objects, Path Editor 64
Object Manager 16
Object tool, Path Editor 64
single object, Path Editor 64
Shadow plug-in 61
Show/Hide 29
size
object 19
project 13
sizing objects 17
sphere 26
Standard T oolbar 9
Surface Animation plug-in 49
symbol-type fonts 26
T
text object
adding 14
editing 15
T ext Toolbar 10
T ext T oolbar 10
texture 22
applying 22
applying to individual object faces 23
wrap 22
texture map 22
Page 80

80
Ulead COOL 3D 3.0
W
Web
creating animations for 73
creating images for 71, 72
discussion group 6
RealT ext 3D 74
Ulead Homepage 6, 7
workspace
program map 8
Z
zoom
in Path Editor 68
timeline 29
multiple timelines 30
Properties menu 29, 34
Timeline Control 29
Timeline Control 28
for plug-ins 37
functions 29
timelines
Control Line for plug-ins 37
T oken Move (G) plug-in 50
T oken Rotate (G) 51
T oken Size (G) plug-in 53
T oken Skew (G) plug-in 52
toolbars
Animation T oolbar 9
Attribute T oolbar 10, 37
Geometric T oolbar 9
Location T oolbar 9, 17
Object Toolbar 9
Standard T oolbar 9
T ext Toolbar 10
transforming objects
Object tool, Path Editor 64
Transition Effects 55
transparency , animated GIF 73
transparency, GIF 71
transparency, TGA 72
T wist plug-in 54
U
Ulead homepage 6
Ulead SmartSaver 74
updates 7
free downloads 7
Ulead Homepage 7
V
vector graphics 25
converting bitmap images to 70
nodes 62
overview 62
paths 62
video
creating 72
creating overlays for 72
options 72
 Loading...