

Uhlmann and Zacher EDHMIFBLE User Manual
All contents current at time of publication. 0C97 – V1.0 – 02/13/2019
User Manual – CX2178/CX6178/CX8178
1
2
Assemble the square pin
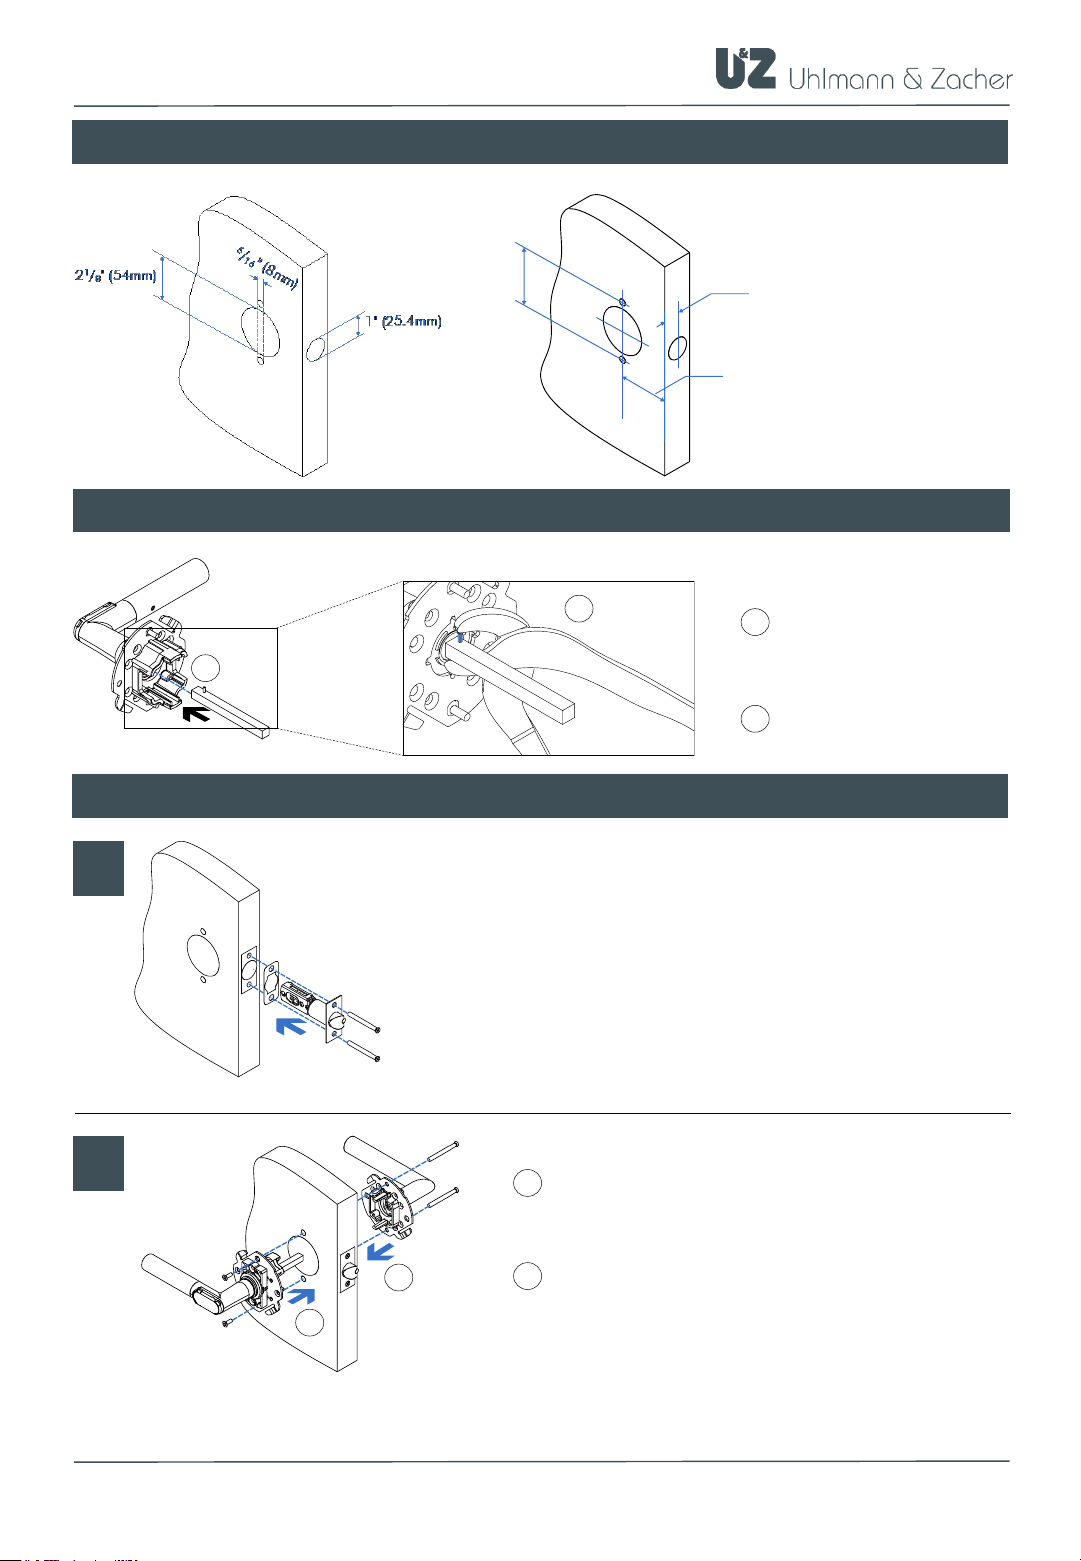
Prepare door
Insert the square onto
the retaining pin and
into the square holder.
Insert the spiral
clamping pin into the
square.
1
2
11
/
16
" (17.5mm) for Door Thickness 1
3
/8"
2
3
/
4
" (70mm)
2
3
/
4
" (70mm)
or
2
3
/
8
" (60mm)
7
/8" (22mm) for Door Thickness 1
3
/4"
Installation
A
B
Slide latch into edge bore of the door. Check that the
faceplate does not project outside door, but it should
also not be installed sunk.
Use washers(s) to adjust penetration depth of the latch.
Insert the square pin of the electronic door handle
into the square nut of the lock. Insert the threaded
bolts provided.
Insert the mechanical door handle from the other
side and screw it along with the electronic door
handle through the door panel.
1
2
1
2
All contents current at time of publication. 0C97 – V1.0 – 02/13/2019
User Manual – CX2178/CX6178/CX8178
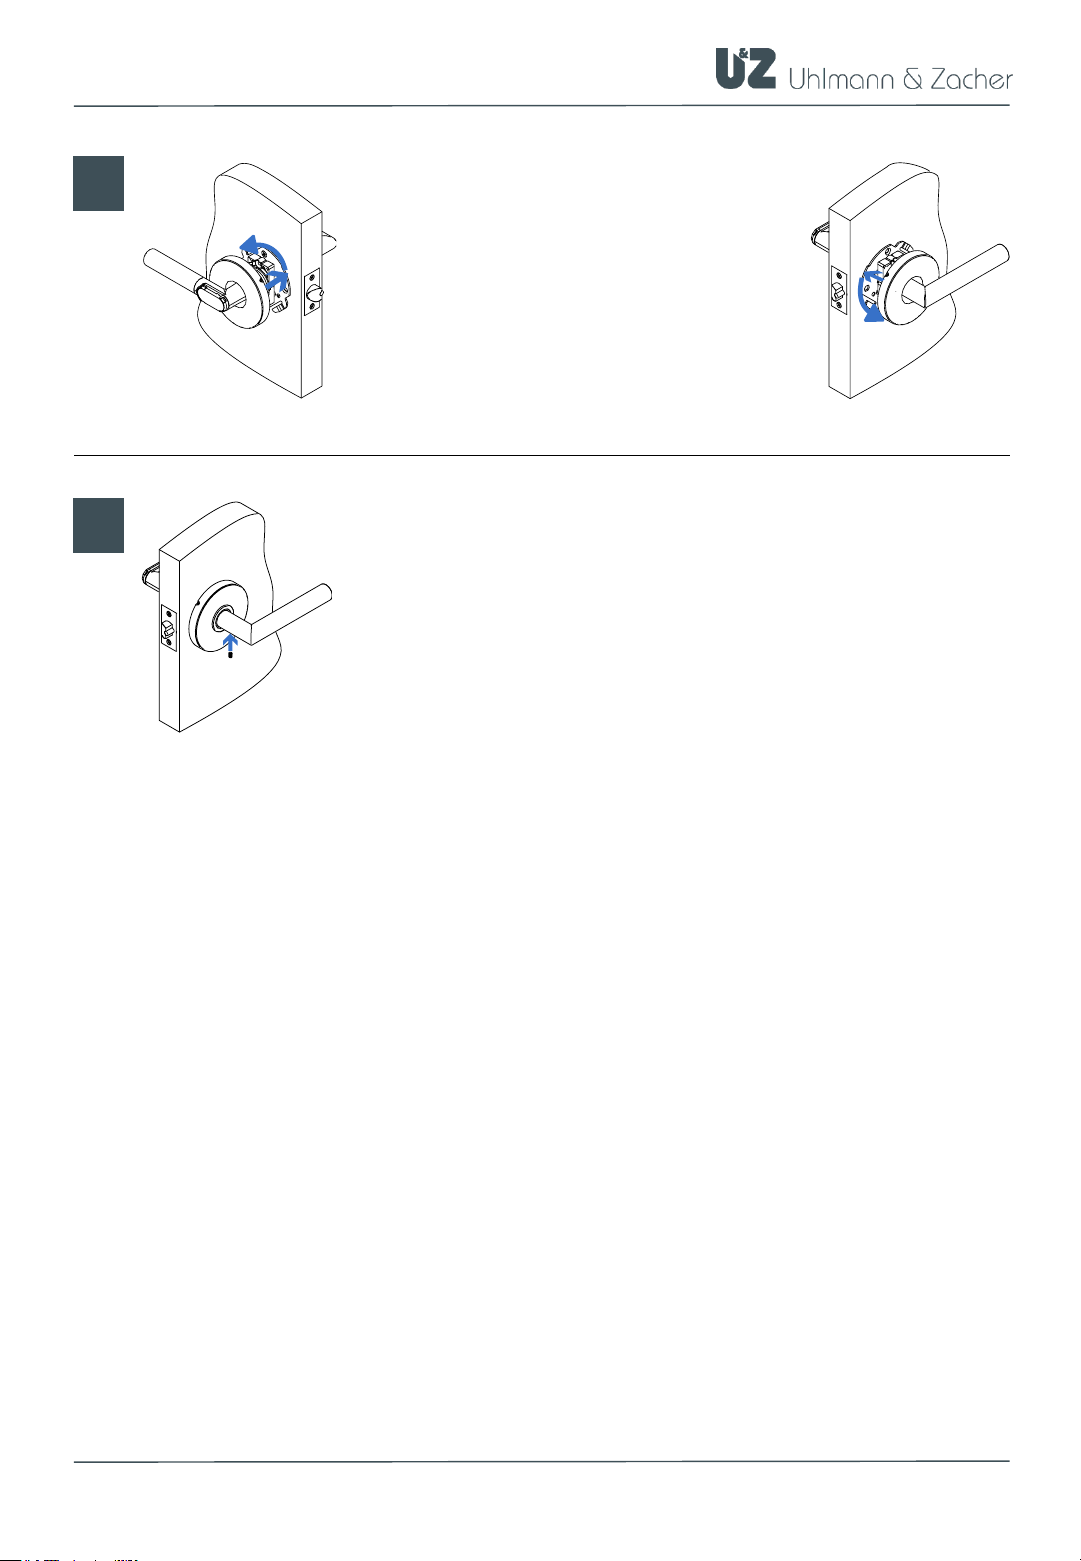
C
D
Attach the covers of both the door handles by
placing it on the holder and turning it.
Insert the locking screw from the bottom of the mechanical
door handle and tighten it.
 Loading...