


UHBIK
User Guide
uhbik 1.3 is safe if used as directed
Heckmann Audio GmbH • BERLIN
TABLE OF CONTENTS
Introduction 5
........................................................................................About Uhbik! 5
....................................................................................Installation! 5
................................................................................File Locations! 5
..........................................................................Online Resources! 5
.....................................................................The u-he team 2015! 5
...............................................................................Common Features! 6
...................................................................................GUI Settings! 6
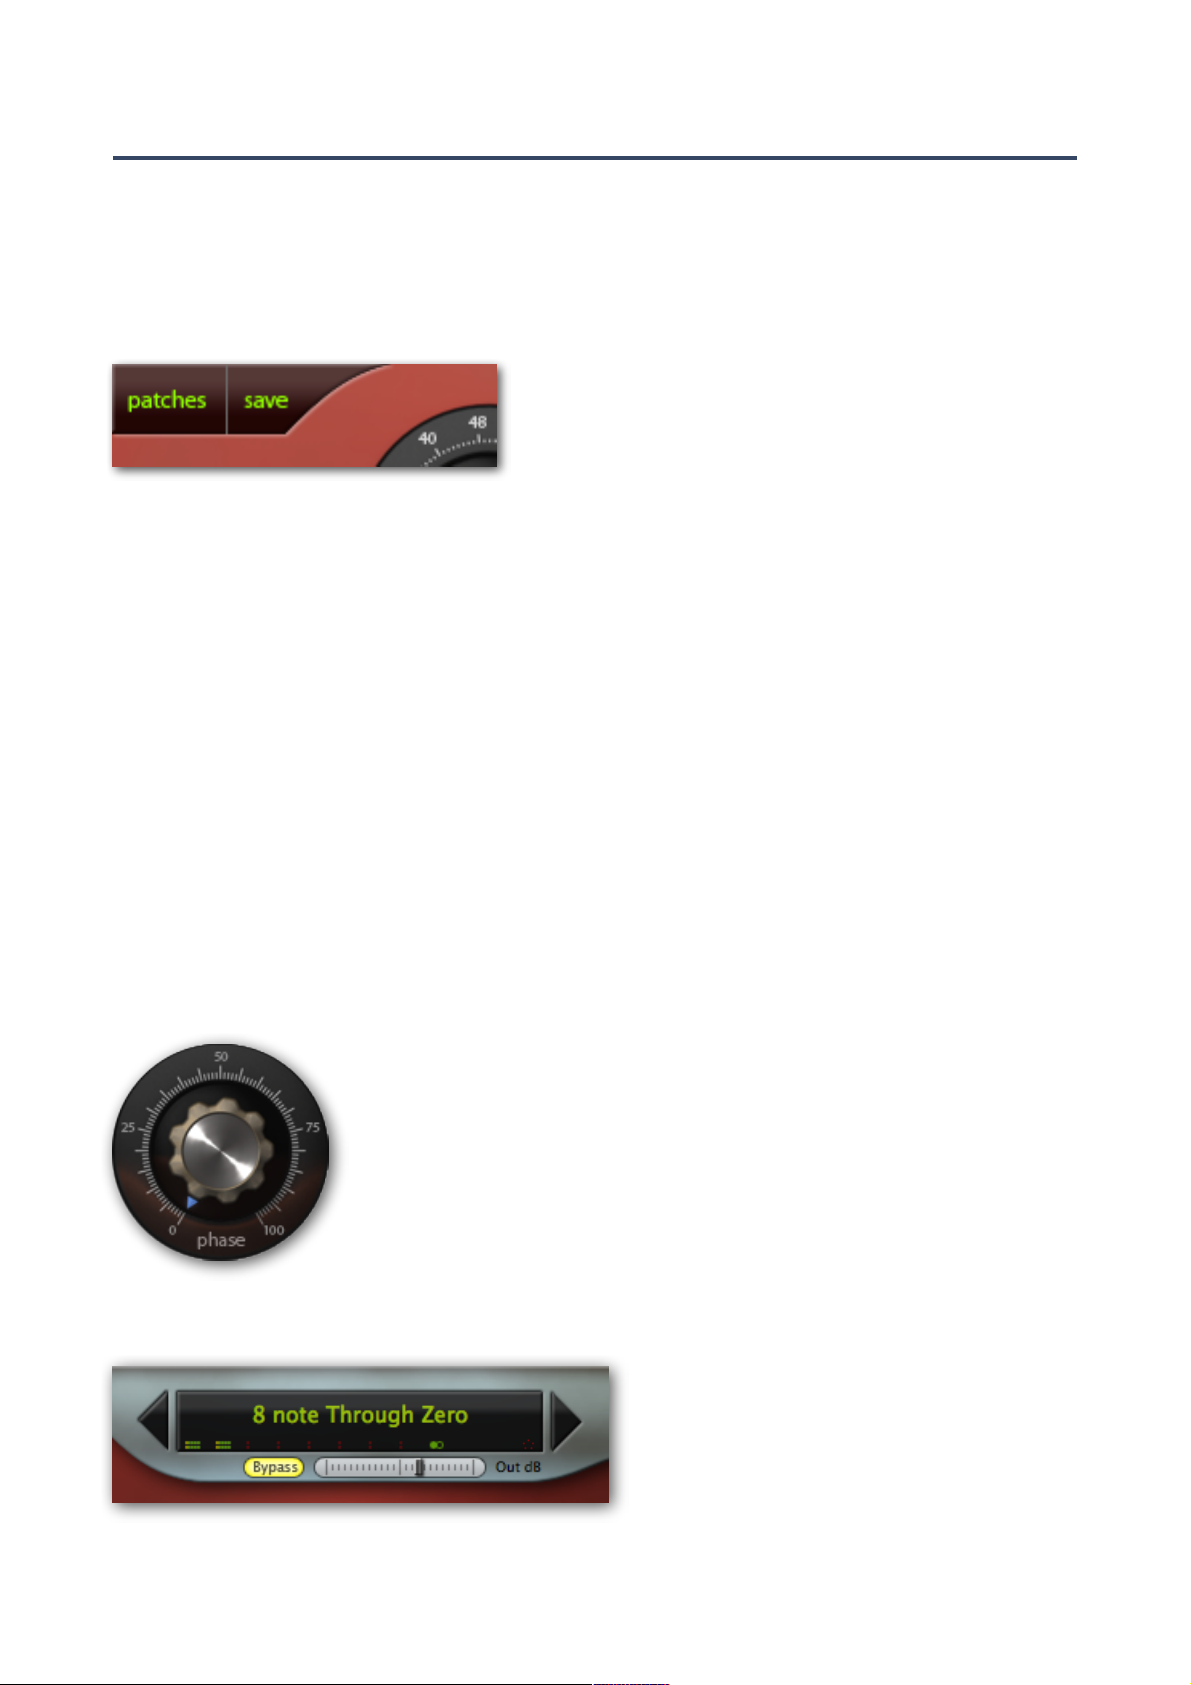
..............................................................................................Load! 6
..............................................................................................Save! 6
...........................................................................................Knobs! 6
............................................................................Bypass and Gain! 6
..........................................................VU Meter and MIDI Indicator! 7
LFO Modulation Effects 8
...........................................................................Time Unit, Times! 8
....................................................................Phase, Channel Offset! 8
..................................................................Wave, Scale, Symmetry! 9
Uhbik-F: Flanger & Chorus 10
............................................................................Flanger History! 10
.................................................................Virtual Tape Machines! 11
..........................................................................Depth and Delay! 11
.........................................................................Mix and Automix! 11
.....................................................................................Feedback! 11
.............................................................................Bass Sanctuary! 11
...........................................................................................Drive! 11
Uhbik-P: Phaser 12
.............................................................................Phaser History! 12
....................................................................................Operation! 12
....................................................................Spectrum and Depth! 13
.....................................................................................Feedback! 13
.............................................................................................Mix! 13
.............................................................................Bass Sanctuary! 13
! 2
TABLE OF CONTENTS
Uhbik-T: Tremolo & Panner 14
....................................................Gain Attenuation and Gain Law! 14
....................................................Haas Delay and Channel Offset! 15
........................................................................Filter Attenuation! 15
..............................................................................No Mix Knob?! 15
....................................................................................Operation! 15
........................................................................................Pattern! 16
..................................................................Two Tips for Uhbik-T! 16
Uhbik-S: Frequency Shifter 17
............................................................Frequency Shifter History! 17
..........................................................Shift and Frequency Range! 18
.............................................................................Channel Offset! 18
............................................Phase, Auto Reset and Manual Reset! 18
.....................................................................................Feedback! 18
.............................................................................................Mix! 18
Uhbik-A: Ambience & Reverb 19
....................................................................................Operation! 19
...........................................................................Mix and Reverb! 19
.............................................................Pre-Delay and HF-Range! 20
..................................................................Early Size and Spread! 20
.......................................................................Decay and Density! 20
..................................................................................Modulation! 20
........................................................Bass, Treble and Treble Freq! 20
Uhbik-D: Delay & Echo 21
.............................................................................1/16, Pan, Vol! 21
...........................................Speed, Depth, Mod Rate, Modulation! 21
......................................................Feedback Knob and Selectors! 22
...................................................High Cut, Low Cut and Soft Clip! 22
.............................................................................................Mix! 22
.............................................................Multi-Channel Operation! 22
.........................................................................Tips for Uhbik-D! 22
! 3
TABLE OF CONTENTS
Uhbik-Q: Semi-Parametric Equalizer 23
.....................................................................Frequency and Gain! 23
...........................................................Band 1 and Band 2 modes! 24
........................................................................................Bottom! 24
..............................................................................................Cut! 24
............................................................................................Gain! 24
..................................................................Other Considerations! 24
Runciter: Distorting Filter 25
...............................................................................About Filters! 25
..................................................................Cutoff and Resonance! 25
........................................................Extern/MIDI and its Selector! 26
.........................................................................Drive and Output! 26
................................................Lowpass, Bandpass and Highpass! 26
.............................................................................................Mix! 26
..........................................................................Fuzz and Colour! 26
......................................................Envelope, Env Rate, Env Sense! 26
.....................................................................................Env Mode! 27
Uhbik-G: Granular Pitch Shifter 28
.....................................................................Pitch Shifter History! 28
....................................................................................Grain size! 29
...............................................................................Pitch Shifting! 29
........................................................................Other parameters! 29
...................................................................Phase Vocoder Mode! 29
! 4

INTRODUCTION
Introduction
About Uhbik
Uhbik is our great collection of effect plug-ins for the discerning audiophile. Each surroundcapable effect comes wrapped in a beautiful, streamlined interface...
Installation
Go to the Uhbik webpage, grab the appropriate installer for your system, double-click on the
downloaded file and follow further instructions. For more information, please refer to the ReadMe
file included with the installer. Note: The only demo restriction is a crackling sound that appears at
irregular intervals.
File Locations
To uninstall, delete the plugin itself, then the associated files from the following directories (the
exact locations depend on your specific installation):
Win:! Preset files! ...\Vstplugins\Uhbik\Presets\Uhbik-[ADFGPQRST]\
!Preferences!...\Vstplugins\Uhbik\Support\
Mac:! Preset files! MacHD/Library/Audio/Presets/u-he/Uhbik-[ADFGPQRST]/
! User Presets! [you]/Library/Audio/Presets/u-he/Uhbik-[ADFGPQRST]/
!Preferences!–/Library/Application Support/u-he/
Online Resources
For u-he news, downloads, support etc., go to the u-he website
For a lively discussion about u-he products (including Uhbik), go to the u-he forum
For friendship and informal news, visit to our facebook page
For video tutorials and much more, go to our youtube channel
For thousands of u-he presets (commercial and free), go to PatchLib
The u-he team 2016
Urs Heckmann (code, strategy, discipline)
Sascha Eversmeier (code, tenacity)
Howard Scarr (HS presets, manuals, grump)
Rob Clifton-Harvey (databases, support)
Sebastian Greger (GUI design, 3D vision)
Jan Storm (more code, framework)
Michael Pettit (video, marketing)
Viktor Weimer (support, TUC presets)
Thomas Binek (QA, TAS presets)
Alexandre Bique (all things Linux)
William Rodewald (even more code)
Oddvar Manlig (everything else!)
Thanks to Brian Rzycki for maintaining PatchLib
contents LFO flanger phaser tremolo f-shifter reverb delay EQ filter granular!3
INTRODUCTION
Common Features
GUI Settings
Right-click anywhere in the background to adjust the size of the window in 10% increments. In the
same menu you can adjust the brightness (gamma) and turn off text anti-aliasing if necessary.
Load
To load a preset in any flavour of Uhbik, click the patches
button (top left corner of the window). Select a folder in
the left pane and a preset in the right panel. To return to
the main window, click on the same button again (now
labeled controls).
If you want to create a new folder or refresh the list, right-click in the left pane. Make a habit of
refreshing the list after presets have been added, deleted or renamed using Explorer/Finder etc.!
Rightclick in the right pane to mark patches as Favourite or Junk. Junked patches will disappear,
but can be retrieved by right-clicking anywhere in the righ pane and selecting show Junk.
Note: The folder called MIDI Programs can contain up to 128 patches (as well as 128 sub-folders
containing up to 128 patches each). If your host application lets such messages through,
patches copied into the root or any sub-folder can be loaded by sending MIDI bank/program
change messages. Changes will only take affect after you have restarted your host software i.e.
MIDI Program patches cannot be added, removed or renamed on the fly.
Save
Use the patches window to select the folder where you want to put your new creation. Then click
on the save button. Give it a name, enter your name (as author) plus any details you would like to
add: description, usage etc.. Finally, confirm via the apply button.
Tip: If there’s a preset called default in the local root, it will be loaded automatically with every
fresh instance. Try this: Load your favourite preset, open the root folder (Local) and save it under
the name ‘default’. Start a new instance of the plug-in and check…
Knobs
Values are adjusted via the usual click-and-drag. Hold down the SHIFT
key on your computer for finer steps. Note that some knobs are bipolar
(i.e. zero is in the center, you can set negative values). Knobs can be reset
to their default values via double-click, or remote-controlled / automated
via the MidiLearn function (right-click on the knob).
Tip for wheel-mouse owners: You don’t even have to click on knobs to
change values: simply move your mouse over any control and roll the
wheel. For fine tuning, hold down a SHIFT key beforehand.
Bypass and Gain
All Uhbiks include a soft bypass button
below the data display, which does a quick
cross-fade for click-free on/off switching.
The slider next to the button adjusts the
wet signal gain (+/- 12dB) so you can e.g.
balance the processed and bypassed levels.
contents LFO flanger phaser tremolo f-shifter reverb delay EQ filter granular! 6

INTRODUCTION
VU Meter and MIDI Indicator
Along the bottom of the data display is a row of 8 small indicators. These are VU meters for the
input levels (upper) and output levels (lower) for all used channels.
To the far right is a MIDI activity indicator (the faint circle of 5 pips) that turns from red to green
whenever MIDI input is recognized.
Surround Processing
All Uhbiks are surround-capable, they can handle up to 8 channels including all popular formats
such as quadrophony, 5.1 and 7.1. The idea was to make Uhbik plug-ins work in surround modes
without adding unnecessary clutter to the GUI, and without the need for dedicated versions. Some
hosts do need dedicated stereo versions, but all Uhbiks already comply with this requirement.
So while the actual handling within all Uhbiks is strictly stereo, you do gain the advantage of fully
surround(ish) sound and control – far superior to the ‘multi-mono’ workarounds that some hosts
offer. Options to keep LFE or Center/LFE unprocessed are included in the context menu.
Right-click (PC) or ctrl-click (Mac) on the data display of any Uhbik for the following options...
auto/surround: This default mode tests the number of output channels, then switches to 1.0,
•
2.0, 3.0, 3.1, 5.0, 5.1, 7.0 or 7.1 accordingly. In this mode you can use ‘no lfe’ or ‘dry c + lfe’ to
leave the center and/or LFE channels unprocessed. The assumed channel order is: left, right,
center, LFE, left surround, right surround, left rear, right rear. This order may deviate from your
host's meters, but you can always check channel activity in Uhbik's own little VU-meter located
immediately below the data display.
multichannel: All channels are treated evenly – the first channel is the furthest left, the last
•
channel is the furthest right. For example, if 4 channels are connected, the assumed channel
order is left rear, left, right, right rear.
stereo a+b: All channels pass through unprocessed except for the selected pair. Use this mode
•
if you want to process a specific pair of channels only.
mono: Processes the first channel (typically ‘left’) as mono, and outputs it to as many channels
•
as are connected. Unlike mono-surround mode, all output channels are processed equally.
stereo-surround: The right and left channel are first copied in pairs to channels 3-8, then
•
processed like in auto/surround mode (see above).
mono-surround: Like stereo-surround, but with mono input. Unlike mono mode, the output
•
channels are processed differently.
When used in multichannel tracks, the modulation plug-ins (Uhbiks F, P and T) have variable phase
offset between the channels – you can e.g. create dramatic effects that rotate around the listener's
head. Note: The pan pots in Uhbik-D are not restricted to stereo, they span all surround channels!
contents LFO flanger phaser tremolo f-shifter reverb delay EQ filter granular! 7

LFO MODULATION
LFO Modulation Effects
Several of the plug-ins in the Uhbik collection are modulation effects which include a low
frequency oscillator (LFO). They all have the same set of controls in the same positions:
Time Unit, Times
Modulation rate is controlled by a combination of the time unit and times parameters. The rate is
continuously adjustable using the times knob, but depending on the selected time unit, it is
either a time/frequency (in seconds or Hertz), a tempo (divisions of the current song tempo), or a
manually set position within the LFO wave...
If quarters is selected, a times value of e.g. 16 means that the LFO wave has precisely the same
length as 16 quarters. In this case, the higher the value of times, the slower the LFO. If 1/x is
selected, 16 times means that the LFO cycle lasts for a 16th (semiquaver). In this case, the higher
the value of times, the faster the LFO.
Similarly, if Seconds is selected, 16 times means 16 seconds. If Hertz is selected, it means 16
cycles per second. In general, the Quarters and Seconds modes are more suitable for slow
modulation, whereas 1/x and Hertz are more suitable for fast modulation.
Manual lets you control modulation via e.g. parameter automation in your sequencer. In this
mode, the LFO is effectively frozen unless you move the phase (see below) – which scans through
the LFO wave manually or via automation. The times value here determines how many LFO cycles
are included in the range of the phase knob. An example: times is set to 4. If you move the phase
from 0 to maximum, you will have scanned through 4 complete LFO cycles.
Phase, Channel Offset
The LFO’s phase is particularly important in time unit modes that depend upon song tempo. The
phase knob effectively shifts the LFO forwards or backwards in time – it adjusts the LFO phase so
that modulation will rise and fall precisely where you want it to.
The channel offset parameter shifts LFO phase(s) between multiple audio channels. The simplest
case would be shifting phases between the channels of a stereo signal in opposite directions. This
is quite a common feature in conventional stereo effects, but Uhbik’s channel offset also works in
other multi-channel modes (quad or 5.1 surround) – in which case the LFO phases are shifted
outwards and to the rear.
contents LFO flanger phaser tremolo f-shifter reverb delay EQ filter granular! 8
LFO MODULATION
Wave, Scale, Symmetry
The wave parameter continually adjusts the basic LFO shape, from triangle to sine.
The scale parameter skews the wave vertically so that the upper half of the wave is shorter and
more pronounced or longer and more subtle than the lower half.
The symmetry parameter skews the LFO wave horizontally so that the rising part is either shorter
or longer than the falling part. For instance, minimum symmetry applied to a triangle wave makes
it more sawtooth-like.
In combination, these parameters give you very fine control over the shape of the LFO. For
instance, you can concentrate most of the effect on the “offbeat”.
Note: wave, scale and symmetry have rather different functions in Uhbik-T, which offers multiple
waveforms and chopped patterns.
contents LFO flanger phaser tremolo f-shifter reverb delay EQ filter granular! 9

Uhbik-F: Flanger & Chorus
FLANGER
For standard LFO parameters, see LFO Modulation Effects
Flanger History
Ever since it first appeared in the ‘70s, flanging has been a popular effect, even defining the
character of several famous recordings. The term “flanging” is often used instead of “phasing”,
although there are significant differences between true flangers and true phasers...
The original flange effect was made during the mid ‘60s by mixing the output of two tape
machines playing back the same recording (or recording the same material). Either tape could be
slowed down slightly by applying pressure to the flange of the reel. When the “earlier” of the two
tapes is then slowed down so that it becomes the “later”, this results in a dramatic effect called
through zero flanging. In extreme cases i.e. using noise or other full-range signals, flanging
sounds like the whoosh of a jet as it flies by. A good early example of flanging can be heard in the
middle of the song Itchycoo Park by The Small Faces (1967). This type of flanging is seldom
realized in software.
Of course a different method is used in guitarists’ stomp-box units: A short delay is fed back into
itself and the delay time is modulated, creating an intense comb filter effect that becomes
increasingly resonant as the feedback is turned up. Although this is less dramatic than through
zero flanging, it does have the advantage of being almost equally effective on lower frequency
material - even bass guitar! This type is closely related to the ever-popular chorus effect, the only
differences being that chorus doesn’t have feedback and generally has a longer delay (typically 10
milliseconds and over). Most modern digital flangers, either as discrete hardware or computer
software, apply the same principles.
Uhbik-F offers not only the delay+feedback method, but also through zero flanging - even both
at the same time! It combines the advantages of the two techniques while keeping the user
interface relatively simple. Note: Uhbik-F can also be used as a chorus effect.
contents LFO flanger phaser tremolo f-shifter reverb delay EQ filter granular! 10

FLANGER
Virtual Tape Machines
Uhbik-F simulates two tape machines (called A and B) per audio channel, with playback and
recording heads that can even occupy the same position (impossible in the real world, of course).
This means that feedback from tape A can be recorded to both tapes A and B while one of them is
“catching up” with the other.
Uhbik applies the principle that only one tape machine needs to be slowed down for through zero
effects - it is only necessary that both audio signals can somehow “meet at zero”. If both virtual
tapes were slowed (as they usually are in real tape flanging), it would be impossible to maintain
precise timing between tracks in a multitrack recording.
In Uhbik-F, tape machine B is slowed down and sped up via the LFO so that the delay between
both machines, and therefore the comb filter effect, is smooth and continuous.
Depth and Delay
The central depth knob controls the amount of LFO applied to Tape B’s playback position effectively how much the speed of Tape B is affected by the LFO. The range is 0 to 20
milliseconds.
The smaller delay knob applies a constant delay of up to 10 milliseconds. This is useful for chorus
and flanging effects that use feedback (see below), but it diminishes the tape-flanging character.
Mix and Automix
The mix knob controls the relative volumes of the virtual tape machines. At 12 o’clock (‘Tape A’
position), the output is practically dry i.e. you should hear no effect. Moving the knob to the left or
right mixes in tape B (the delayed signal) while fading out tape A (the dry signal). The two small
dots mean 50% i.e. an equal mixture of both. If mix at either minimum or maximum, you will only
hear tape B...
The negative half of the mix range inverts tape B, so the delayed signal is subtracted instead of
added. Negative (A-B) values give you a more pronounced jet effect, but will cause total
cancellation at -50% whenever the delay reaches zero: fix it in the automix...
The automix knob controls the amount of LFO modulating the mix. Use this to accentuate the
bottom or top of the wave, or prevent total cancellation when mix is in the -50% position (A-B).
Feedback
The Feedback parameter simulates the typical stomp box flangers - it allows negative as well as
positive values. Note that extreme feedback can lead to self-oscillation, just like in the real thing.
Bass Sanctuary
bass sanctuary (low, mid or high) inserts a highpass filter between A and B so that bass
frequencies can be kept under control – the position (stereo or quad) of bass frequencies remain
stable while higher frequencies are being tossed around by the effect.
Drive
The drive knob adds second harmonic distortion to the signal resulting in a brighter, more
pronounced effect. High values can introduce a significant amount of distortion, which can be
useful for boosting the presence of ‘solo’ instruments.
contents LFO flanger phaser tremolo f-shifter reverb delay EQ filter granular! 11

PHASER
Uhbik-P: Phaser
42 allpass filters deliver more whoosh than a Vogon Constructor Fleet!
For standard LFO parameters, see LFO Modulation Effects
Phaser History
Closely related to tape flanging is the classic phasing effect, which may originally have been an
attempt to simulate tape flanging using electronic circuitry. While flanging is delay-based, phasing
is achieved using a frequency-dependent phase shift. Either method results in a comb filter effect
(multiple peaks/troughs) when mixed with the untreated signal, but there is a difference: In
flanging, any modulation (e.g. from an LFO) changes the distance between the teeth of the comb,
whereas in phasing this distance remains fairly constant.
Frequency-dependent phase shifts are the domain of allpass filters which, although they don’t
affect the timbre of the audio material passing through them, will affect its phase. A rich, deep
phasing effect requires several allpass filter stages arranged in series. The more stages a phaser
has (Uhbik-P has up to 42), the more teeth in the comb. Two stages are required per tooth.
Most phasers have a feedback channel for added resonance, but something special is going on
here: Because the signal is phase-shifted every time it is fed back through the filters, frequencies
are created that were not present in the original signal. That’s why phasers can sound metallic.
Operation
The operation switch selects the number of allpass filters: 14, 28 or 42. Most phasers have fewer
than 10, so even Uhbik-P’s lowest setting (14) can sound quite lush. 28 stages should be enough
for a complex wash of sound, but Uhbik-P’s 42 setting makes it one of the richest-sounding
phasers available. Note that the modulation effect appears deeper the more stages you use. To
counteract this phenomenon, adjust modulation depth and LFO rate.
contents LFO flanger phaser tremolo f-shifter reverb delay EQ filter granular! 12

PHASER
Spectrum and Depth
The spectrum parameter lets you move the comb around the frequency spectrum. Like cutoff in
conventional filters, it defines the center position before any modulation. The Depth knob adjusts
LFO modulation amount.
Note that the actual modulation depth becomes less whenever the spectrum parameter is close to
its lower or upper limit. Maximum depth therefore depends on the available headroom.
Feedback
Adjusts the amount of feedback, either negative (phase inverted) or positive. It not only widens the
cancellation areas (gaps between the teeth of the comb), but also creates more resonant peaks.
As was the case with the flanger, high feedback values can lead to self-oscillation. For the sake of
stability, Uhbik-P has been carefully calibrated so that self-oscillation is short-lived.
Mix
The mix knob controls the relative volumes of the dry and wet signals. The effect is most
pronounced when mix is set to 50%. If higher feedback values are used however, you can remove
the dry signal altogether i.e. set mix to 100%.
Bass Sanctuary
Like in Uhbik-F, bass sanctuary uses a highpass filter to eliminate bass resonance and/or
unwanted panning effects: Bass frequencies remain effectively unprocessed.
contents LFO flanger phaser tremolo f-shifter reverb delay EQ filter granular! 13

TREMOLO
Uhbik-T: Tremolo & Panner
The most common definitions of tremolo involve a regular and repetitive variation in volume, by
whatever means are available to the musical instrument. In electronic-music-speak it usually
means amplitude modulation via LFO. There are a lot of different elements in Uhbik-T, and the
LFO has a lot more to do in this one...
For standard LFO parameters, see LFO Modulation Effects
In parallel with amplitude modulation, the signal can be moved across multiple audio channels
(e.g. for quad panning), and the tone can be modulated using the lowpass filter.
The perceived position can be shifted using a short delay between stereo channels, making use of
the Haas Effect... How we hear position is affected by slight differences in the time it takes for the
sound to reach each ear. Up to about 40ms, the longer the delay between the left and right
channels, the more extreme the panning effect will be.
So Uhbik-T’s LFO can modulate 3 parameters at the same time: volume (conventional tremolo),
stereo or surround position (Haas effect), and tone (cutoff frequency of the lowpass filter).
While the most useful LFO rates for flanging and phasing are quite slow (one cycle often extending
over several bars), tremolo is more musically useful if the LFO is set to a faster rate i.e. several
cycles per second. Also, soft LFO shapes tend to be less interesting than hard ones such as pulse
waves or choppy patterns.
To make all this work in Uhbik-T, it has a much more complex LFO than the other Uhbiks. You
can even set different patterns for each channel (Pattern Y mode - see below).
Gain Attenuation and Gain Law
The gain attenuation knob controls how much the LFO will affect volume. Immediately below this
is the gain law selector which determines the range and response of modulation: either linear, or
exponential at -12dB, -30dB or -96dB.
contents LFO flanger phaser tremolo f-shifter reverb delay EQ filter granular! 14

TREMOLO
Haas Delay and Channel Offset
The haas delay knob controls the maximum delay for each channel. Note that the Haas effect is
only apparent if the LFO phases are shifted apart using channel offset. Also: When summed to
mono, the Haas effect becomes a chorus.
Filter Attenuation
The Filter Attenuation knob controls how much LFO affects the cutoff of a lowpass filter. As well as
making a sound quieter, reducing high frequencies will also give it a less defined position.
No Mix Knob?
A dry/wet mix control wouldn’t make sense in Uhbik-T because adding the dry signal to the Haas
delay would result in an obvious chorus, overpowering the intended effect. However, you can
isolate the dry signal by setting gain attenuation, haas delay and filter attenuation to zero.
Combining all 3 effect modules in Uhbik-T can deliver some very interesting spatial effects. “A bit
of everything” is often more effective than a pure tremolo or rhythmic pan here. Because the
volume stays fairly constant, it is particularly easy to mix into a song.
Operation
The operation switch selects one of four LFO modes:
Wave: the LFO is exactly the same as in the other Uhbik effects.
Wave x2 / x3 / x4: the LFO completes 2, 3 or 4 cycles in the same time as it would otherwise only
complete one. What makes these modes interesting is that the Symmetry parameter still works as
if there was only a single cycle! Consecutive LFO cycles are therefore squashed and stretched,
resulting in a kind of tremolo “swing” - which can be perfect for music with a complex groove.
The two Pattern modes are a bit more involved – but this is where the fun really starts in Uhbik-T!
Click on the pattern button to open the 11 x 16 pattern editor:
contents LFO flanger phaser tremolo f-shifter reverb delay EQ filter granular! 15

TREMOLO
Pattern
The two pattern modes are used for creating complex rhythms or dramatic gate effects. Patterns
are user-definable, so these modes have a special editor (click on the pattern button in the top
left of the Uhbik-T window). You can define up to 11 patterns, with maximum 16 steps. The
description below may seem a little confusing at first – just reading this chapter isn’t enough, you
will have to try it out!
Patterns replaces Uhbik’s standard LFO shapes. For 16 semiquavers, set the LFO to 4 quarters. For
typical gating effects, 2 quarters is enough.
In the Pattern modes, the wave (pattern) knob doesn’t blend LFO shape, it selects a position on or
between the patterns. Setting it to e.g. 5.00 will apply patterns 1 and 2 with equal strength. Note
that intermediate values are particularly useful for accents, like in a drum-machine.
The scale (smooth) knob also takes on a new role (amplitude scaling is redundant for on/off
values). It is a smoothing control – you might find it very useful for avoiding clicks!
The symmetry (swing) knob has no effect in the pattern modes.
The current pattern position is indicated by a small orange line to the right of the grid, and the
phase position is indicated below the grid.
Steps
The length of the pattern. Note that the steps are always spread over the total length of the LFO,
so when you reduce the number here, steps will be played back more slowly. If you would like to
have your new 12-step pattern play back at precisely the same rate as your 16-step pattern did,
you should change times from 4 quarters to 3.
Pattern X vs Pattern Y
In Pattern X mode, the Channel Offset parameter separates the phase position for each channel
(stereo, quad etc.), just as it does in the normal Wave modes. In Pattern Y mode, it separates the
pattern i.e. it lets you use different patterns in different channels (this also works in surround).
Note that in Pattern X mode, channel offset splits the phase position indicator while in Pattern Y
mode, it splits the pattern position indicator.
Two Tips for Uhbik-T
Try Uhbik-T with a complex drum loop, and experiment with all the controls using the various
Wave modes. Then switch over to a pattern mode, enter the pattern editor and activate some
points in the grid. You can click+drag in the grid to “paint” and erase multiple points. Adjust the
Phase and modulation depths to accentuate or soften transients.
While adjusting the LFO rate, Uhbik-T can sometimes get out of step. This can be remedied by
stopping and starting playback in the host application (which resynchronizes the LFO). This also
works in the other Uhbik modulation effects, but is particularly important for Uhbik-T because the
rhythmic content of the processed audio can be so much stronger.
contents LFO flanger phaser tremolo f-shifter reverb delay EQ filter granular! 16

FREQUENCY SHIFTER
Uhbik-S: Frequency Shifter
From serene barber-pole waves to full frequency freak-out
Frequency Shifter History
The origins of the Frequency Shifter go back to the early days of radio technology. Frequency
shifting is related to ring modulation (RM): two signals are multiplied together, resulting in two
so-called sidebands. One of these is the sum of all frequencies in both signals, the other is the
difference. Unlike RM, frequency shifters output a single sideband, shifted down or up by a
constant value. That’s why frequency shifters are sometimes called “Single Sideband Filters”.
Like RM, strong frequency shifting gives the signal a metallic character because all frequencies are
shifted by a constant (e.g. 100Hz) instead of a factor (e.g. 2 times). For instance, when shifted
100Hz upward, 440Hz becomes 550Hz, while its octave (880Hz) becomes 980Hz (which is NOT an
octave above 550Hz). Harmonic relationships are therefore destroyed by frequency shifting.
Frequency shifters are not only only suitable for special effects (e.g. horror-movie voices). Used in
moderation, frequency shifting is similar to chorus or phasing, but without needing an LFO. While
the pleasant beating of mildly detuned oscillators can become irritatingly fast when you play
further up the keyboard, frequency shifting keeps this movement constant. Uhbik-S can
synchronize beating to the song tempo.
There are similarities with phasing, as both cause a comb filter to move around the audio
spectrum. The main difference is that movement in a frequency shifter is constantly downwards or
upwards (like a barber’s pole). Phase cancellations that disappear out of the top will reappear at
the bottom and vice versa. Also like a phaser, resonances can be accentuated via feedback.
Uhbik-S has been designed so that all negative side-effects are minimized or eliminated. Most
other sideband filters have a poor frequency response – perhaps because the lowpass filter cutoff
is set too low, just to be on the safe side. Also, a quality sideband filter needs either a high latency
(e.g. for Hilbert transformation) or clever routines to prevent otherwise inaudible sidebands from
folding back into the audible range.
Frequency shifters should never be confused with pitch shifters, which ideally leave the harmonic
structure intact.
contents LFO flanger phaser tremolo f-shifter reverb delay EQ filter granular! 17

FREQUENCY SHIFTER
Shift and Frequency Range
The Shift knob controls the amount of frequency shift (down or up) relative to the value set by the
Frequency Range switch. There are four “Hz” frequency ranges: 1 Hz, 10 Hz, 200 Hz and 4 kHz.
The latter two are more suitable for extreme effects than for subtlety!
The frequency ranges 1/1 and 1/16 are not absolute values, they are factors relative to the current
song tempo. An example: If the tempo is 120 bpm, 100% of 1/1 is equivalent to 0.5 Hz i.e. the
modulation repeats every 2 seconds. Don’t be put off by this simple arithmetic - it will soon
become second nature!
Channel Offset
Uhbik-S also has a channel offset parameter for channel-independent animation (in this case
frequency shifting). For instance, the phasing effect can continuously rise in one channel while
continuously falling in the other.
Phase, Auto Reset and Manual Reset
Uhbik-S’s phase knob is a unusual for a frequency shifter. It adjusts the phase position of the
frequency-shifted signal, with a range from zero to only one cycle (360°). Although the frequency
shift has effectively disengaged the modulated signal from the dry signal i.e. they are out of phase
anyway, it does open a few interesting doors...
Firstly, it lets you manually adjust the phase when detuning is zero. Secondly, it lets you set the
position of a cyclic effect to e.g. the beginning of a bar (or any position you like).
With auto reset and manual reset, the phase of the effect signal can be synchronized to the dry
signal. A click on manual reset to instantly reset the phase. The auto reset button automatically
resets whenever the signal level drops below a (very low) threshold.
Feedback
Feedback works like phaser feedback i.e. it increases cancellation as well as resonance. Remember
that extreme feedback can lead to self-oscillation.
Mix
Sets the relative volumes of the dry and wet signals. The maximum value (100.00) is suitable for
special effects such as robot voices, while the center position (50.00) is best for phasing.
contents LFO flanger phaser tremolo f-shifter reverb delay EQ filter granular! 18

REVERB
Uhbik-A: Ambience & Reverb
Uhbik-A is an algorithmic reverberation effect. While most of the other effects in the Uhbik family
are geared towards the more synthetic, radical effects, Uhbik-A is the master of understatement.
Good reverb is seldom conspicuous - but when it’s not there, something important is missing
from the sound...
The idea behind Uhbik-A was not to create the most vivid, natural reverb at any expense on CPU,
but rather to create the most pleasant sounding one. Its character should not be as in-your-face
as recent convolution or ray-tracing reverbs tend to be. On the contrary, reverb really should
blend with the dry signal to create a coherent audio “scenery”. To achieve this goal, two concepts
that are rarely seen together were combined: early reflections and plate reverb.
Early reflections are very short echos of the dry signal. They appear only milliseconds later and
determine our immediate perception of room size and structure. The reverb “tail” has a more
chaotic character in which the original sound is less recognizable. It affects our spatial perception.
Operation
Uhbik-A has three basic operation modes: small, direct and open. Although these are very
different algorithms, they all share a common set of controls.
Of course the choice of reverb depends on the source material and its function within the music.
The open setting is probably your best choice for subtle ambience, while direct may be more
suitable when used up-front. The small model is predestined for smaller rooms with prominent
early reflections and relatively short reverb tails.
Mix and Reverb
The reverb knob crossfades between early reflections and the reverb tail. The mix knob controls
the overall amount of reverb. Note that all knobs to the left of the mix knob have to do with input
and early reflections, while everything to the right has to do with the reverb tail and its diffusion.
contents LFO flanger phaser tremolo f-shifter reverb delay EQ filter granular! 19

REVERB
Pre-Delay and HF-Range
The pre-delay knob sets the length of time before the onset of early reflections. Pre-delay can
bring the dry signal forward while causing the reverberating space to appear further away, or even
result in slapback echo effects.
The hf-range knob controls the high frequency content of the early reflections (and therefore the
overall sound). A lowpass filter simulates the absorptive properties of nearby materials (wooden
walls, soft carpeting etc.), which tend to absorb higher frequencies more than low ones.
Early Size and Spread
Early reflections are an irregular series of echos. The number, arrangement and levels of these
echos depend on the selected algorithm (see Operation above).
The early size knob affects the time-span of these echos, and therefore the perceived size of the
immediate surroundings – from about a millisecond (shoebox) to over 60 ms (about 40 meters
between enclosing walls). Of course pre-delay adds to these times.
The spread knob adjusts a channel-independent shift (up to 20 ms) between individual echos.
This is irregular, for different reflection patterns in different channels. Using a lot of spread can
result in rather extreme (but still transparent) spaces. Experiment with these two parameters:
Certain settings can neutralize or even create directionality (the Haas effect – google it!)
Decay and Density
The reverb tail is generated by means of a complex network of short delays, some of which pass
their signal forward while others pass it back to an “earlier” position in the network. The decay
knob controls the level of the feedback channels (and therefore the length of the reverb tail), while
the density knob controls the level of the forward channels (and therefore the diffusion).
For long decays, you would usually set quite a high density, and for short decays a relatively low
density, otherwise the sound can become overly metallic. This is only a rule of thumb, in the end it
really depends on your audio material and the effect you want to achieve.
Modulation
The relative lengths of delays within the network (as well as the network’s structure) were chosen
to produce quite natural-sounding reverb. However, percussive sounds - the true test of quality
reverb - can often sound too metallic. Uhbik-A’s modulation parameter brings subtle movement
to the delay times, warming up the reverb. Note that too much modulation can lead to unwanted
flanging effects.
Bass, Treble and Treble Freq
Absorption also has a significant effect on reverb character. In natural environments, high
frequencies are absorbed more strongly than low frequencies. However, you might like to shorten
the low frequencies to avoid clashing with other tracks, or set up an especially crisp reverb for
vocals. Uhbik-A’s feedback channels include a frequency separation filter with 3 controls:
The treble and bass knobs control their respective decay times, from very short to about twice
normal length. The treble freq knob sets the cutoff position of the high shelf...
Unlike many other reverb units, the filters in Uhbik-A are not highpass and lowpass, but widerange shelves. We believe that this results in more interesting absorption characteristics that are
more suitable for plate-type reverbs.
contents LFO flanger phaser tremolo f-shifter reverb delay EQ filter granular! 20

DELAY
Uhbik-D: Delay & Echo
Uhbik-D is a multi-tap delay resembling a classic tape echo unit, with multiple record and
playback heads. The delay time is a function of tape speed: the slower the tape, the longer the
delay. Like classic echo units, Uhbik-D also feature a regeneration control (feedback) – how much
of the output is mixed back into the input.
Real tape echo has several technical imperfections and limitations. Magnetic tape already has a
limited frequency and dynamic range, tape wears out over time, transport mechanisms become
erratic. But what were previously considered serious drawbacks in need of improvement, such
irregularities (coloration, flutter) have become quite popular in this age of digital perfection!
On the other hand, digital delays do have some significant advantages. For instance precise and
repeatable timing and freely adjustable taps (the digital equivalent of playback heads).
Uhbik-D combines all these concepts, adds synchronization and more. As there are no physical
playback heads, delay times can be extremely short – and tap positions can even cross over!
1/16, Pan, Vol
Uhbik-D has 5 freely adjustable taps. The length/position of each tap can be set (0 to 16
semiquavers) via the upper row of knobs labelled 1/16. Note: the order of taps is irrelevant, they
all work in parallel.
The pan and vol knobs control the panorama position and final volume (not the feedback level!) of
each tap. For details about multichannel operation, see the next page.
Speed, Depth, Mod Rate, Modulation
The large speed knob simultaneously adjusts the length of all taps (by +/- 50%), which is very
handy for changing the overall timing, from straight quaver to dotted or triplet etc..
Of course the speed can be modulated. To the right are 3 smaller controls: modulation depth,
mod rate, modulation type. The modulation type LFO is similar to chorus: all taps are by slightly
detuned, resulting in a more organic sound. The flutter setting is a random modulation source for
more irregular echos - perfect for simulating real tape echo.
contents LFO flanger phaser tremolo f-shifter reverb delay EQ filter granular! 21

DELAY
Feedback Knob and Selectors
The feedback knob controls feedback intensity, effectively how long the echos take to fade away.
The five selectors at the bottom activate/deactivate feedback for each tap, so very complex
feedback patterns are easy to set up. If none are selected, an ‘invisible’ tap at 16/16 is fed back
into the input. Feedback volumes are fixed, feedback is not affected by the vol knobs.
The tape echo paradigm still holds true here: The signal (on tape) is read at several points along
its length by multiple playback heads, feedback signals are ‘re-recorded’ and sent to all taps
again.
If you select feedback for many taps at once, it is possible to generate a delay that builds up
instead of decaying. Fortunately, non-linear processes (limiting and distortion) enforce a ceiling
level. Also, switching on feedback for more taps automatically reduces individual levels in the
feedback signal, which also helps keep feedback under control – so just TURN IT UP and see what
happens!
High Cut, Low Cut and Soft Clip
Uhbik-D includes a few additional sound shaping devices: Two shelving filters (high and low) plus
soft-clipping distortion. These are embedded in the feedback channel so that echos become
increasingly colored and/or distorted as they fade out - typical behavior for real tape echo
machines, and adjustable in Uhbik-D.
Mix
The mix knob controls the relative volumes of the dry and wet signals.
Multi-Channel Operation
Like the other Uhbik models, Uhbik-D works in a multichannel environment. There is one notable
exception: The pan knobs are no longer simple stereo position controls, they ‘scan’ through all
possible positions. For instance in 5.1 surround they go from surround-left to left, center, right,
surround-right. In 7.0 and 7.1, rear-left and rear-right are added.
Note that delays are not sent to LFE channels (the ‘.1’ sub channel). Also, if effects set to stereo
are played on surround systems, they may need to be adjusted so that echos don’t appear e.g. in
one side or the rear only.
Tips for Uhbik-D
Groove delay: As mentioned above, a tap can still contribute to the feedback even if its volume is
set to 0.00: the vol values only affect the final output from each tap. Imagine an echo that repeats
every quaver although precise quavers are not part of the echo signal: simply set one of the taps
to 8.00 with volume at 0.00. Switch on its Feedback. Set two other taps to around (but not exactly)
8 and 4, then adjust their volumes...
Ping-pong delay using the Haas effect: Set up Tap1 as an inaudible (vol = 0.00) feedback delay,
length = 4.00. Set taps 2 and 3 to 2.00 and pan them fully L-R. Similarly, set taps 4 and 5 to 4.00
and pan them fully L-R. Listen to the results with taps 2 to 5 set to maximum volume and
feedback around 50.00. Now slightly spread the lengths of each pair slightly, in opposite
directions like this:
Tap2 = 1.90, Tap3 = 2.10, Tap4 = 4.10, Tap5 = 3.90
Although the left and right panned echoes in each pair (2&3, 4&5) happen almost simultaneously,
one appears to come from the left and the other from the right. This is the Haas effect at work, a
subtle but interesting ping-pong effect that would be impossible using only 2 taps.
contents LFO flanger phaser tremolo f-shifter reverb delay EQ filter granular! 22

EQ
Uhbik-Q: Semi-Parametric Equalizer
You will find semi-parametric equalizers (EQ) in any professional studio. Apart from volume
control and summing, equalization is the most common type of signal processing...
So it is hardly surprising that EQ is a highly controversial topic in the audio world! For some, the
most important factor is the sheer number of frequency bands, for others it is the ease of use.
Equalizer characteristics are often described in highly subjective terms such as ‘transparency’ and
‘warmth’. Heated debates are commonplace – to quote a literary friend, “the altercation is so bitter
because so little is at stake!”
Certain EQ properties CAN be judged objectively. For instance, many digital EQs suffer from overly
steep HF filters, which either leads to irritating artifacts or a lack of high end. Same at the bass
end of the spectrum, where certain algorithms require adequate mathematical precision.
Also, the compulsion to minimize CPU usage at all costs often tempts developers to cut too many
corners and accept lower-quality results, which is especially bad news for an EQ.
How many knobs do we need? Some EQs offer control over so many parameters that operating it
becomes a science unto itself, with diminishing returns per knob. Other designs take it to the
opposite extreme and don’t offer enough control for the job at hand.
The Uhbik-Q design goes for maximum flexibility from a minimum of controls, and lowest
possible CPU-usage without compromising audio quality. It combines freely tunable frequency
bands with presets for other options, and Q-factors automatically adjust to suit the current gain.
Frequency and Gain
Uhbik-Q has two semi-parametric equalizer bands (see image above). This means that the Qfactors, unlike in fully parametric EQs, are not user-definable (they are cleverly taken care of). The
two tunable bands offer a selection of useful modes - low / high shelves as well as bell curves
with various Q-factors.
The frequency knobs are tunable from low mids to beyond the upper limit of human hearing (>20
kHz). The gain knobs determine how much the signal is attenuated or boosted. Despite the rather
wide range of +/- 24 dB, fine adjustments are easy: simply click and drag the label below the
knob instead of the knob itself.
contents LFO flanger phaser tremolo f-shifter reverb delay EQ filter granular! 23

EQ
Band 1 and Band 2 modes
The switches between the frequency and gain knobs select filter characteristic for each band:
off: the filter is deactivated, it does not affect the sound.
lowshelf: classic low-shelf filter. The gain knob controls the amplitude of frequencies below the
value set by the frequency knob.
wide bell: the gain knob controls the amplitude of frequencies around the value set by the
frequency knob. Very low Q-factor!
flex bell: the gain knob controls the amplitude of frequencies around the value set by the
frequency knob. The Q-factor automatically increases with larger gain values (either negative or
positive) so that the perceived volume remains fairly constant.
narrow bell: the gain knob controls the amplitude of frequencies around the value set by the
frequency knob. High Q-factor!
hishelf: classic high-shelf filter. The gain knob controls the amplitude of frequencies above the
value set by the frequency knob.
Bottom
A low-shelf filter specially designed for bass frequencies. It is not fully tunable, but is significantly
more precise than conventional models. Click on the button to select a frequency, then adjust the
attenuation/amplification using the bottom knob (the range is +/- 24 dB).
Cut
In addition to the three classic EQ filter bands, Uhbik-Q has two quasi brick-wall filters, with a
choice of several fixed frequencies below/above which very little of the signal will pass. They are
useful for eliminating e.g. rumble and hiss, leaving the other bands free for other tasks.
Gain
The upper left gain knob normally controls the output level (the range is +/- 24 dB), but you can
use the selector to turn it into the gain of an extra filter instead:
wide mids: A very wide midrange frequency band, covering almost the entire audible spectrum.
Only very low and very high frequencies remain unaffected.
center bell: A bell-shaped band (like the flex bell option of the two semi-parametric bands)
whose frequency is exactly between the band 1 and band 2 frequencies. Of course the width also
depends on bands 1 and 2. Although these dependancies seem limiting, having an extra filter
between the others can be very useful.
Other Considerations
Why are the frequencies of the two main bands freely adjustable, while their Q-factors are not?
Answer: tunable frequency bands can be ‘modulated’ at will via automation. This transforms
Uhbik-Q into a highly flexible creative tool. Early ideas about more bands and more control were
dropped in favour of wider, more promising horizons. Note that several reputable hardware
simulations only switch the frequencies!
contents LFO flanger phaser tremolo f-shifter reverb delay EQ filter granular! 24

Runciter: Distorting Filter
FILTER
About Filters
Filters are very dramatic sound-shaping tools, one reason why they’re still popular after so many
years. Technically related to equalizers, filters are often used much more radically and creatively.
There are several classic designs with different characteristics. The most familiar are the so-called
cascade and state variable filters. Both these types offer multiple modes (lowpass, bandpass and
highpass) as well as a feedback circuit for resonance. Like in equalizers, feedback intensifies
frequencies around the cutoff point, but unlike EQ, the ability to emphasize frequencies to the
point of self-oscillation is considered desirable. Runciter follows the state variable principle, and
can deliver lowpass, bandpass and highpass forms simultaneously, with variable resonance.
Especially lowpass filters are found in practically all analog synthesizers and digital emulations.
Modulating cutoff frequency via an envelope generator is such standard practice that most synths
include a dedicated envelope for this purpose. Cutoff modulation via envelope generator is also
suitable for filter-based effects, so Runciter offers several envelope options.
Another interesting characteristic of filters is overdrive. Depending on the circuit design, some
components can be easily pushed beyond their natural limits, resulting in a strangely pleasing
distortion. Filters were soon designed with post-distortion in mind e.g. the wah-wah pedal.
Runciter follows the very same principle: It not only emulates the overdriven components, but also
includes a powerful distortion stage.
Cutoff and Resonance
The cutoff knob controls filter frequency, with a logarithmic range of 20 Hz to 20 kHz. The rim of
the knob shows the frequency, while the central display shows the same information as octaves
(from 0 to 10). 1 unit corresponds to 1 octave.
The resonance (feedback) in Runciter goes from very mild to a point very close to self-oscillation.
contents LFO flanger phaser tremolo f-shifter reverb delay EQ filter granular! 25

FILTER
Extern/MIDI and its Selector
Apart from manual adjustment via the cutoff knob, filter frequency can be modulated by various
MIDI signals (modulation wheel, note number etc.). This source is scaled by the extern/midi knob,
with negative or positive values. MIDI modulation via this knob can give you much finer control
than if you were to assign a MIDI controller to the frequency knob directly using the MIDI Learn
function (right-click on any knob to see this).
To the right of the knob is its MIDI source selector (set to ModWheel in the above image).
Drive and Output
The drive parameter adjusts the input gain by a generous +/- 48 dB, and has a significant impact
on the amount of distortion the filter circuit delivers. The output level may also be affected - use
the output knob to compensate whenever necessary.
Note: The lower the input level, the louder the resonance can become in comparison. Conversely,
higher input levels reduce the relative amount of resonance, and distortion takes center stage.
Lowpass, Bandpass and Highpass
These knobs mix the output of all three filter types. You can e.g. emphasize the cutoff frequency
of the lowpass (without using resonance) by adding a little bandpass. If the lowpass and highpass
are set to the same value, the result is a so-called peak filter. The height of the peak can be
controlled via the resonance knob.
Mix
The Mix knob cross-fades the output from 100% dry to 100% filtered.
Fuzz and Colour
The fuzz knob adds strong distortion, and its tone is controlled via the colour knob. Of course the
distortion sound is highly dependent upon the audio being processed!
Technical note: The fuzz parameter is actually a level-dependent offset which forces the signal
against a ‘brick wall’ within the non-linear filter circuitry. This method creates even-numbered
harmonics like tube distortion. It is usually considered pleasant, but this type of distortion often
means a loss of bass. You normally wouldn’t need much fuzz for a crunchy sound, but response to
more extreme values is surely a plus!
Envelope, Env Rate, Env Sense
Runciter has a built-in envelope generator, or more precisely an envelope follower: The input
signal is analysed, the data is turned into a control signal that modulates the cutoff frequency.
Cutoff can rise and fall in parallel with peaks and troughs in the input signal, resulting in a sound
similar to an ‘auto-wah’ stomp box.
The large envelope knob controls the modulation amount, either negative or positive. The smaller
env rate knob affects modulation speed by smoothing the envelope. The env sense parameter
determines the threshold of the analysis (like the threshold in compressors).
Envelope movement is displayed in a vertical grey bar above the env sense knob. The best
strategy is usually to set a medium env rate, find the env sense value that delivers maximum
movement in the indicator, then adjust cutoff and envelope to taste.
contents LFO flanger phaser tremolo f-shifter reverb delay EQ filter granular! 26

FILTER
Env Mode
This is a menu/switch with a choice of six different envelope generator modes:
fast - a very short attack time paired with a slow release time. This envelope mode is particularly
good for percussive filter effects.
ride - medium attack and decay times. This mode is suitable for smoothly ‘riding’ the input.
slow - reacts rather slowly to jumps in volume, but falls fairly rapidly during quiet passages.
Suitable for adding motion to long static tones.
transient - the input signal is analyzed for transients (steep flanks in the wave) instead of jumps
in volume. As soon as a transient is found, it triggers the envelope with a short attack and an
exponential decay. Transient mode is particularly good for percussive material such as drums or
dynamic guitar.
midi 1 - similar to transient, but triggered by MIDI note input. The envelope starts at a value
corresponding to the velocity of the note i.e. it is velocity-sensitive. Use the env sense knob to
adjust dynamic response.
midi 2 - also makes use of the MIDI Note On events. However, the resulting envelope does not
start at the velocity value, it moves towards this value at a rate defined by the env rate parameter,
and (assuming there is enough time) remains there until the next Note On. This mode is therefore
smoother than midi 1, and is particularly useful for rhythmic MIDI sequences in environments
where velocity is easier to edit than automation would be. Invites experimentation!
contents LFO flanger phaser tremolo f-shifter reverb delay EQ filter granular! 27

Uhbik-G: Granular Pitch Shifter
GRANULAR
Pitch Shifter History
The ancestor of today’s pitch-shifting and time-stretching devices was developed in Germany by
the conductor Hermann Scherchen (1891-1966), the first Apparatus for Independent Control of
Pitch and Tempo of Audio Recordings (original: Apparat zur unabhängigen Kontrolle von Tonhöhe
und Tempo von Tonaufnahmen). Little information is available, but development is likely to have
been during the 1930s, shortly after the invention of magnetic tape recorders.
Scherchen’s device had four playback heads attached to a small rotating drum which was mounted
between the original playback head and the capstan of a conventional tape recorder. When the
drum is rotated, the heads take turns to read the tape, but unlike fixed playback heads this can
happen at a variable rate. As long as the drum is not rotating, the pitch remains unaffected. If the
drum is rotated in the opposite direction to the tape, very short (smoothly) overlapping samples of
the recording are played back while gaps between them are effectively skipped, resulting in a
higher pitch. The opposite effect happens when the drum is moving in the same direction as the
tape - the pitch is lowered because multiple samples of the same audio material are sent to the
output. The effect turns into time-stretching when the tape itself is slowed down or sped up to
compensate for the pitch change.
This same principle was applied in commercial devices e.g. the Eltro Information Rate Changer
used so effectively for HAL’s death scene in 2001 - A Space Odyssey. There’s a short article
about this device on Wendy Carlos’ website:
http://www.wendycarlos.com/other/Eltro-1967/index.html
Although the contraption may seem bizarre, the same basic principle is applied in modern
granular pitch-shifters, which appeared as hardware in the ‘80s and finally as software in the ‘90s.
Pitch-shifters effectively cut the audio material into small snippets and play them back at a
variable rate, overlapping. The snippets are now called grains, their duration is the grain size. In
the old tape devices, the radius of the drum determines grain size while the length of tape in
direct contact with the drum determines the overlap between grains. Uhbik-G is not bound by the
physical limitations of rotating drums – you can make the ‘drum’ impossibly small!
contents LFO flanger phaser tremolo f-shifter reverb delay EQ filter granular! 28

GRANULAR
Grain size
This parameter is controlled using the grainsize knob, up to about 2 seconds. Unlike conventional
pitch-shifters, it affects the duration of grains as they appear at the output. The input grain size
is adjusted automatically.
Pitch Shifting
There are two parameters controlling pitch:
semitone: adjusts the pitch of grains in semitones (+/- 12), and is therefore suitable for precise
musical intervals.
scale: multiplies the rate of grain playback, with a range of 0 to 4 octaves. A scale value of 1
means the original pitch, values between zero and 1 lower the pitch. At zero, only a single sample
is played back, but because grains still overlap, this results in an effect reminiscent of low-pass
filtered sample-rate reduction. The scale knob is bipolar: negative values play grains backwards,
and this can deliver some very interesting reverse effects.
Semitone and scale can be used at the same time: For instance, play grains backwards (scale = -1)
while transposing them up an octave (semitone = +12).
Like most Uhbik effects, Uhbik-G includes an offset parameter which scales the effect differently
per available channel. For instance, if you set scale to zero and offset to 100, the grains in the
right channel will play back normally while those in the left channel are played in reverse.
Other parameters
The mix parameter determines the relative volumes of the original (dry) and effect (wet) signals.
The reset and auto reset switches are used for synchronizing the start of grains (after a moment
of silence) to suit the audio input material – either manually or automatically. This is quite subtle,
but can be very useful for the timing of effects.
The iteration parameter feeds the output back into the effect input, resulting in multiple detuning
e.g. echos with constantly rising or falling pitch.
Phase Vocoder Mode
Uhbik-G can be switched into a fundamentally different mode called PhaseVoc by clicking on the
operation button. This mode has three quality levels instead of grain size (the knob disappears).
In PhaseVoc mode, pitch shifting is achieved by time-stretching or time-compressing the
spectrum of the input signal. The signal is split into its component sine waves via Fourier analysis,
and the phase and position of these waves are adjusted using the scale and semitone knobs.
In PhaseVoc mode, grains cannot be played in reverse – negative scaling is interpreted as positive.
The result is highly dependent upon the audio material used. While granular often sounds rather
rough (it’s granular!), phase vocoding can often sound mushy because most of the transients are
lost. However, when applied to vocals and pads, this effect can be very impressive!
Like all effects based on FFT (Fast Fourier Transformation), there is a noticeable latency between
the input and output signals. In Uhbik-G, this has intentionally been left uncompensated because
the granular algorithm itself would otherwise have required additional delays. If you want to use
the PhaseVoc mode for rhythmically critical material (despite the loss of transients), you can move
the audio track forward in time by about 2000 samples.
The End
contents LFO flanger phaser tremolo f-shifter reverb delay EQ filter granular! 29
 Loading...