

USER GUIDE
VERSION 1.4.4
10. December 2019!
U-HE - HECKMANN AUDIO GMBH - BERLIN

Table of Contents
Introduction 5
The Spirit of Analogue 5 .........................................
Control Bar 6 ..........................................................
Editing 7 .................................................................
Programming 101 8 ...............................................
Preset Browser 9
Overview 9 .............................................................
Directory Panel 10 .................................................
The ‘Local’ folder 10 .................................................
The ‘User’ folder 11 ..................................................
Smart Folders 11 ......................................................
Directory context menu 11 ........................................
Presets Panel 12 ....................................................
Preset Tagging 13 ..................................................
Search by Tags 14 .................................................
Search by Text 16 ..................................................
Upper Panels 18
Oscillators 18 .........................................................
TRIPLE VCO 18 .......................................................
DUAL VCO 20 ..........................................................
DCO 22 ....................................................................
DUAL VCO ECO 23 .................................................
DIGITAL 24 ...............................................................
High-pass Filters / Feedback 26 ............................
NO HPF (just feedback) 26 ......................................
HPF | POST 26 ........................................................
HPF | PRE 26 ...........................................................
HPF | BITE 26 ..........................................................
Main Filters 27 .......................................................
VCF | LADDER 27 ....................................................
VCF | CASCADE 28 .................................................

VCF | MULTIMODE 29 .............................................
VCF | BITE 30 ..........................................................
VCF | UHBIE 31 .......................................................
Envelopes 32 .........................................................
ADS 32 .....................................................................
ANALOGUE 32 ........................................................
DIGITAL 33 ...............................................................
Lower Panels 34
LFOs 34 .................................................................
Effects 35 ...............................................................
Chorus 35 .................................................................
Phaser 35 .................................................................
Plate (reverb) 36 ......................................................
Delay 36 ...................................................................
Rotary 37 ..................................................................
Tuning 38 ...............................................................
Amplifier & Pan 38 .................................................
Voice 39 .................................................................
Clock & Arpeggiator 40 ..........................................
Modifications 41 .....................................................
VCO 41 ....................................................................
Filter 41 ....................................................................
Feedback 41 ............................................................
Modulation processors 42 ........................................
Trimmers 42 ...........................................................
Scope 43 ................................................................
Configuration 44
MIDI Control 44 ......................................................
Preferences 47 .......................................................
MIDI Specialities 49
Multichannel MIDI 49 ...............................................
Polyphonic aftertouch 49 ..........................................

Tips and Tricks 50
So bite me! 50 ..........................................................
Bass boost 50 ..........................................................
Twin effects 50 .........................................................
Stereo without effects 51 ..........................................
LFO as ramp generator 51 .......................................
Voice map tricks 51 ..................................................
Modulation processor tricks 52 ................................
NKS 53
Troubleshooting 54
List of Modulation Sources 55
Credits 56

INTRODUCTION
Introduction
To get the most out of Diva, you will need a powerful computer
Diva is rather demanding in divine mode, but that’s the price we pay to hear her wonderful voice in
top form. If your computer stutters while trying out presets, switch the accuracy mode to great, fast
or even draft. You will soon learn which one your system can handle. Monophonic presets without
voice stacking should be no problem, even on older computers. If your computer is fairly new, try
the multicore option which distributes voices between the CPU cores. You should generally render
tracks to audio in the highest possible quality, which means setting OfflineAcc to best.
Install / uninstall
Go to the Diva page, grab the appropriate installer for your computer system, double-click on the
downloaded file and follow the instructions. Diva is fully functional in demo mode except for an
intermittent crackling which disappears as soon as the product is registered. To register, right-click
on Diva’s data display and select the first entry. To uninstall, delete the plugin itself plus associated
files from the following file locations (assuming you confirmed the default paths during installation):
Win presets (local) C:\Users\*YOU*\Documents\u-he\Diva.data\Presets\Diva\"
presets (user) C:\Users\*YOU*\Documents\u-he\Diva.data\UserPresets\Diva\"
preferences C:\Users\*YOU*\Documents\u-he\Diva.data\Support\ (*.txt files)"
alternative skins C:\Users\*YOU*\Documents\u-he\Diva.data\Support\Themes\
Mac presets (local) Macintosh HD/Library/Audio/Presets/u-he/Diva/"
presets (user) Macintosh HD/Users/*YOU*/Library/Audio/Presets/u-he/Diva/"
preferences Macintosh HD/Users/*YOU*/Library/AppSupport/u-he/com.u-he.Diva..."
alternative skins Macintosh HD/Library/Application Support/u-he/Themes/"
other resources Macintosh HD/Library/Application Support/u-he/Diva/
Online resources
For Diva support and other u-he products, go to the u-he website"
For lively discussions about u-he products, go to the u-he forum at KVR"
For friendship and informal news updates, go to our u-he facebook page"
For video tutorials and more, go to our u-he youtube channel"
For thousands of u-he presets (commercial and free), go to the u-he patch library
The Spirit of Analogue
Diva captures the spirit of various analogue synthesizers by letting the user select from a variety of
alternative modules. The oscillators, filters and envelopes closely model components found in
some of the greatest monophonic and polyphonic synthesizers of yesteryear.
But what sets DIVA apart from other emulations is the sheer authenticity of her analogue sound.
This comes at the cost of quite a high CPU-hit, but we think it was worth it: Diva is the first native
software synth that applies methods from industrial circuit simulators (e.g. PSpice) in realtime. The
behaviour of our zero-delay-feedback filters when pushed to the limit clearly demonstrates the
advantages of this groundbreaking approach.
About zero delay feedback filters (ZDF)
Most filters in old analogue synths have one or more feedback paths. The input signal passes
through a series of controlled resistors and condensers, and the output is fed back into the input
(or to another point within the signal path). The classic Moog™ ladder filter has four lowpass
filter stages and a resonance control that determines how much of the signal is fed back into the
input. This feedback loop doesn’t introduce any delay, feedback is practically instantaneous.
Digital models attempt to reproduce this behaviour by calculating the result of applying four
simple lowpass filters to an input sample. Feedback means repeating the current calculation
using the results of the previous one.
TOC PRE OSC HPF VCF ENV LFO EFX MODF TRIM ARP CONF TIPS NKS 5
INTRODUCTION
While real circuitry can process a signal within a few nanoseconds, digital models calculate per
sample, adding about a million times as much latency to each iteration. The cumulative effect of
feedback latency in digital emulations is very noticeable. Oversampling and higher sample rates
help reduce the latency, but conventional digital filters always “smear” at high resonance levels.
Methods of addressing the latency have been available for many years, but the implementations
either 1) don’t model the complex distortion inherent in real circuitry, or 2) aren’t suitable for
realtime processing. Common to all methods is that they predict output values and use that
prediction in the current calculation.
Of course we can’t see into the future either, but our routines are fast enough to deliver at least
a few voices in realtime. We calculate the filter with a few test samples and look at the deviation
between the prediction and the result, then we use that deviation to calculate a better prediction.
The goal, of course, is to close the gap as quickly as possible!
Diva applies a classic trial-and-error principle but includes a rather intelligent way (or so we like
to think) of learning from mistakes. As a rule of thumb, Diva’s filters only need to be calculated
once or twice in succession. However, it can take up to 15 cycles if the resonance is very high
and/or the input is very complex, for instance noise.
Accuracy
Click on the MAIN button at the bottom of the window. In the panel above the button are two
selectors called Accuracy and OfflineAcc. These are global parameters, they remain fixed
across all presets per loaded instance:
draft CPU-friendly, but FM will sound rough and resonance is primitive (not ‘zero delay’)"..........
fast Fine for older computers and/or when you need more polyphony in acceptable quality"............
great The best compromise between quality and polyphony on high-power computers"........
divine Top-quality zero delay feedback filters – but can your computer can handle it? .......
OfflineAcc selects the resolution at which Diva instances are rendered to audio (offline). The
two options are same (same as the Accuracy setting) and best. Some hosts have trouble
rendering at the selected accuracy, while the better ones include an “inform plug-ins of offline
rendering status” or similarly named option.
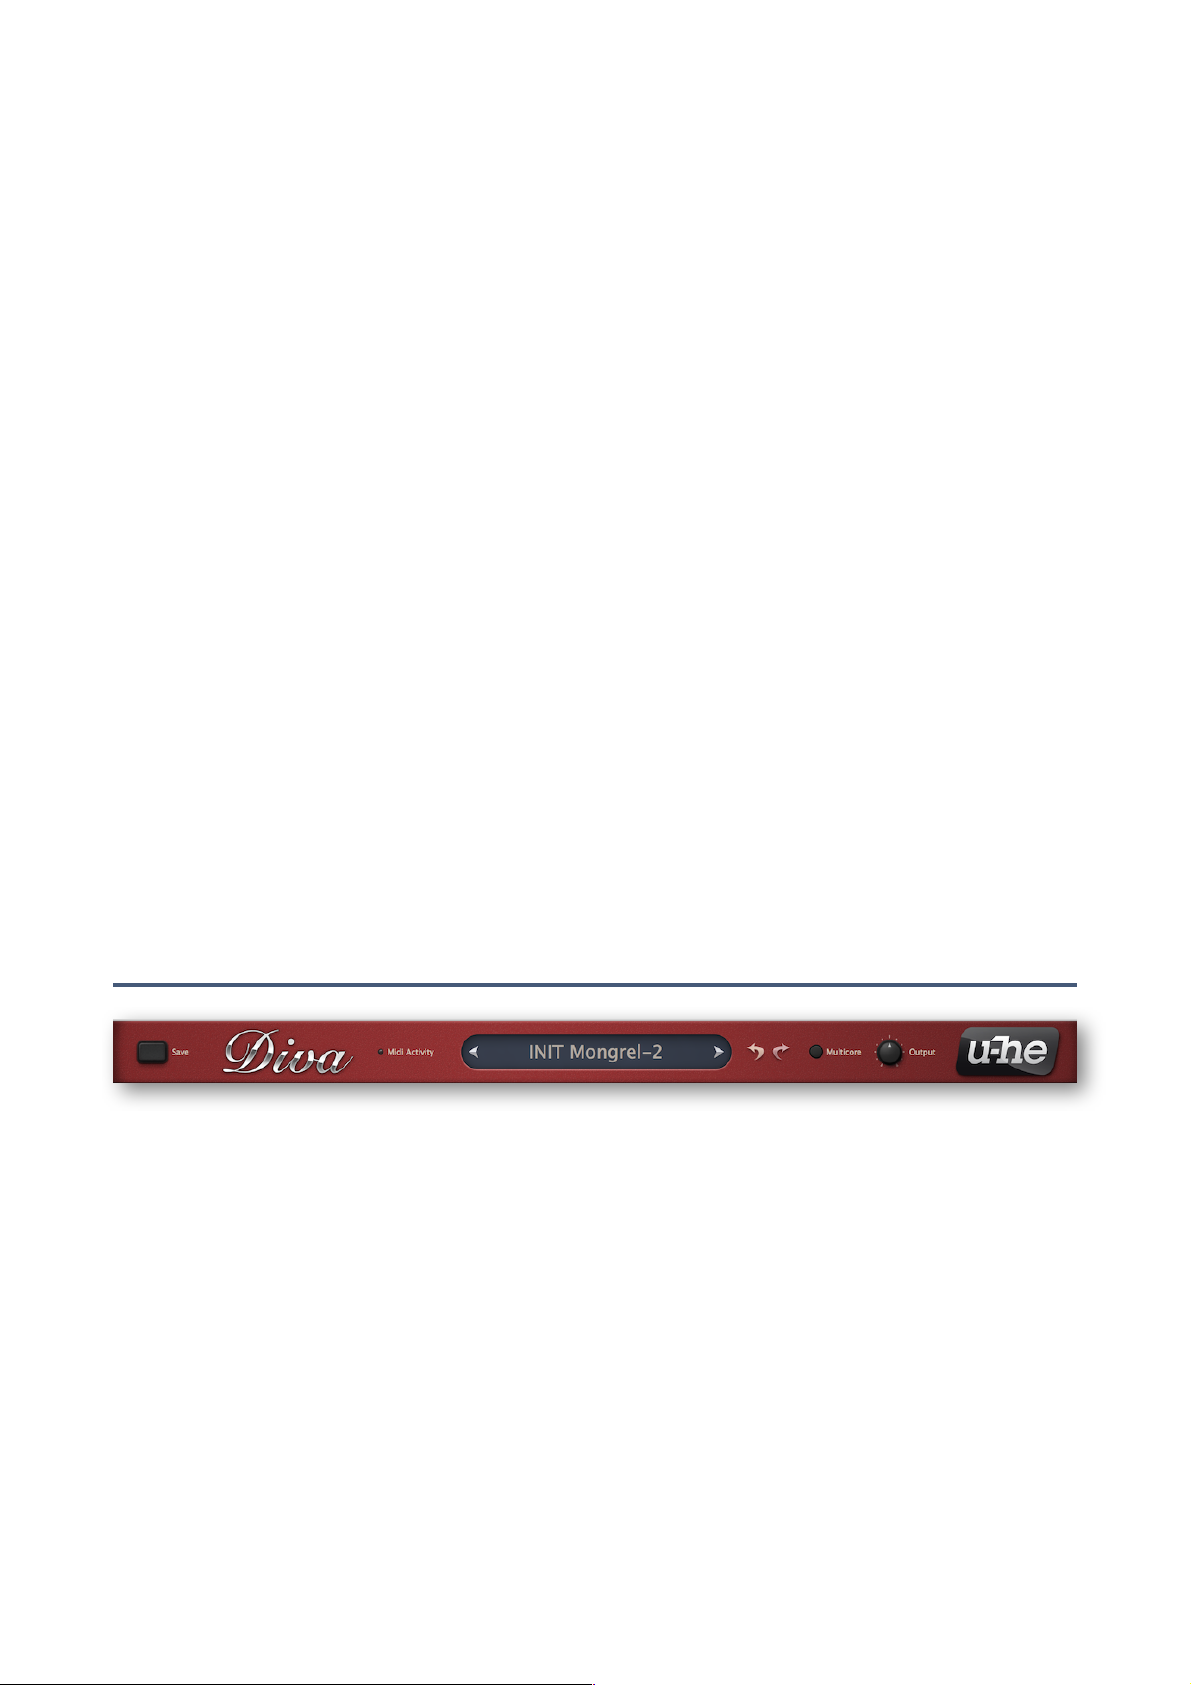
Control Bar
Save
First, right-click on the [save] button to check (or change) the format you will be using. Standard
is .h2p, which has the great advantage of being cross-platform compatible. The .h2p extended
format is the same but also allows per-line comments.
Important: If you have set the Save Presets To preference from the default user folder to the
other option, selected folder, make sure that the folder in which you want to store your preset is
already selected – if not, click on it first.
Click on the [save] button, give your preset a name and enter any other details. Preset
description, playing tips etc. – anything you would like to appear in the PRESET INFO panel of
the browser. Finally, confirm by clicking on the apply button. If you have loaded Diva as VST2,
you will also see the option .nksf. See the NKS chapter.
MIDI activity
Small indicator which flashes whenever MIDI data is received.!
TOC PRE OSC HPF VCF ENV LFO EFX MODF TRIM ARP CONF TIPS NKS 6

INTRODUCTION
Data Display
Primarily, the central display shows the name of the selected preset or the current value of any
element being edited. Clicking on the areas either side of the display steps through presets.
Clicking in the middle opens a drop-down list containing all the presets in the current directory.
Undo/Redo
The two curved arrow symbols call Diva’s undo and redo functions – you can step backwards
(or forwards again) through an unlimited number of edit points.
Multicore
Push this button to distribute voices between all available CPU cores so you can play more
notes without ‘smoking’ your CPU. Multicore works well on recent processors such as the i5 and
i7, but please note that performance can even be reduced if your CPU is older!
Note: Some hosts already offer multicore support, and having both active at the same time can
lead to poorer performance for Diva. In such cases, try switching one or the other off.
Output
The final volume control for the preset. As this control doesn’t affect the tone, use Output (in
preference to amp Volume) to balance the levels between presets.
u-he badge
Clicking on ‘u-he’ at the top right opens a popup menu containing direct links to this user guide,
to our homepage, to our support forum, and to various social networks.
Editing
GUI size
To adjust the size of Diva’s user interface temporarily, right-click in the background and select
from the list. The size is given in percentages and pixels (width times height).
To change the GUI size more permanently, go to the Preferences and change Default UI Size.
knobs
Values are adjusted via the usual click-and-drag, often allowing finer resolution via the SHIFT
key on your computer. Knobs can be reset to their default values via double-click, and remotecontrolled / automated via MIDI CC. Tip for wheel-mouse users: ‘mouseover’ and roll the wheel
to edit values or scroll through a list (use SHIFT for fine tuning).
parameter locking
Clicking with the righthand mouse button on any knob or switch opens a context
menu in which you can select ‘Lock’. A locked parameter can still be adjusted, but the
value doesn’t change when you switch presets. To unlock again, right-click and untick
‘Locked’.
modification indicator
This synbol appears next to a control if it is being modulated in the Modifications panel.
TOC PRE OSC HPF VCF ENV LFO EFX MODF TRIM ARP CONF TIPS NKS 7

INTRODUCTION
Programming 101
Although Diva ships with a whole bunch of presets, she is meant to be tweaked – that’s why the
interface is festooned with all those controls. Here’s a quick and easy tutorial to get you started:
1. Click on the PRESETS button at the bottom of the window, select the Local / 8 TEMPLATES
folder and load the preset called INIT June-60. Click on the SCOPE button – this gives you
access to Diva’s oscilloscope as well as all module panels.
2. Play a fairly low note (you do have a MIDI keyboard attached, right?). The shape you can see
in Diva’s oscilloscope is moving in time with the tone of what you are hearing.
3. Find the TRANSPOSE knob in the lefthand (DCO) panel, and change it from 8’ to 16’. The
oscillator is now an octave lower.
4. To the left of the TRANSPOSE knob are two faders. Double-click on the one labelled LFO2.
The value of that fader (which controls pulse width modulation depth) is reset to the centre
and the sound becomes static. Move the PW fader up and down while playing a low note.
Watch how the shape changes, then leave it at minimum.
5. What you hear (and see) is a 50-50 mixture of 50% PULSE (i.e. a square) and SAWTOOTH.
Click on the first SAWTOOTH option (silence) to isolate the pulse wave. Try the various HPF
values, then leave it at 0.
6. Double-click on the PW fader (resets it to 25% pulse) and take the other fader (pulse width
modulation depth from LFO2) up to maximum. Go to the bottom left of the window, change
LFO2‘s Waveform to saw up and change Sync to 1/4. The result is a slow pulsing sound.
7. Go to the VCF panel and play with the CUTOFF and RESONANCE faders. Then double-click
on both to reset them. Still in the filter panel, take the second cutoff modulation knob (currently
labelled LFO 2) down to about -30.00. You now have a rhythmic sound that will cycle through
the notes in a chord if you play them at different times.
8. Activate the two effects (Chorus and Delay) at the bottom right of the window by clicking on
the small round buttons (they will light up). If you like, experiment with the effects parameters
for a while, especially the Delay controls. Add a bit of NOISE from the DCO panel!
9. In the LFO 2 panel, click on the lower righthand button and select ModWheel (or default). Turn
Depth Mod up to maximum. The depth of all LFO 2 modulation is now 100% controlled by the
mod wheel. Then turn Depth Mod down to minimum so that the wheel has no effect again.
10. Swap the oscillator type: Click on the DCO label and select DUAL VCO instead. Click both
Sawtooth icons to switch them off, and activate both pulse waves instead. Turn MIX to the
centre. Click on the NO MOD label and select LFO 2 instead. Change the value of that knob
to -20. Similarly, replace the VCF CASCADE with BITE. Experiment with the filter controls until
you get a nicely grungy, resonant pulsating sound (note that REV 2 sounds fuller).
11. Start again from step 1, and take more liberties this time - experiment!!
TOC PRE OSC HPF VCF ENV LFO EFX MODF TRIM ARP CONF TIPS NKS 8
PRESETS
Preset Browser
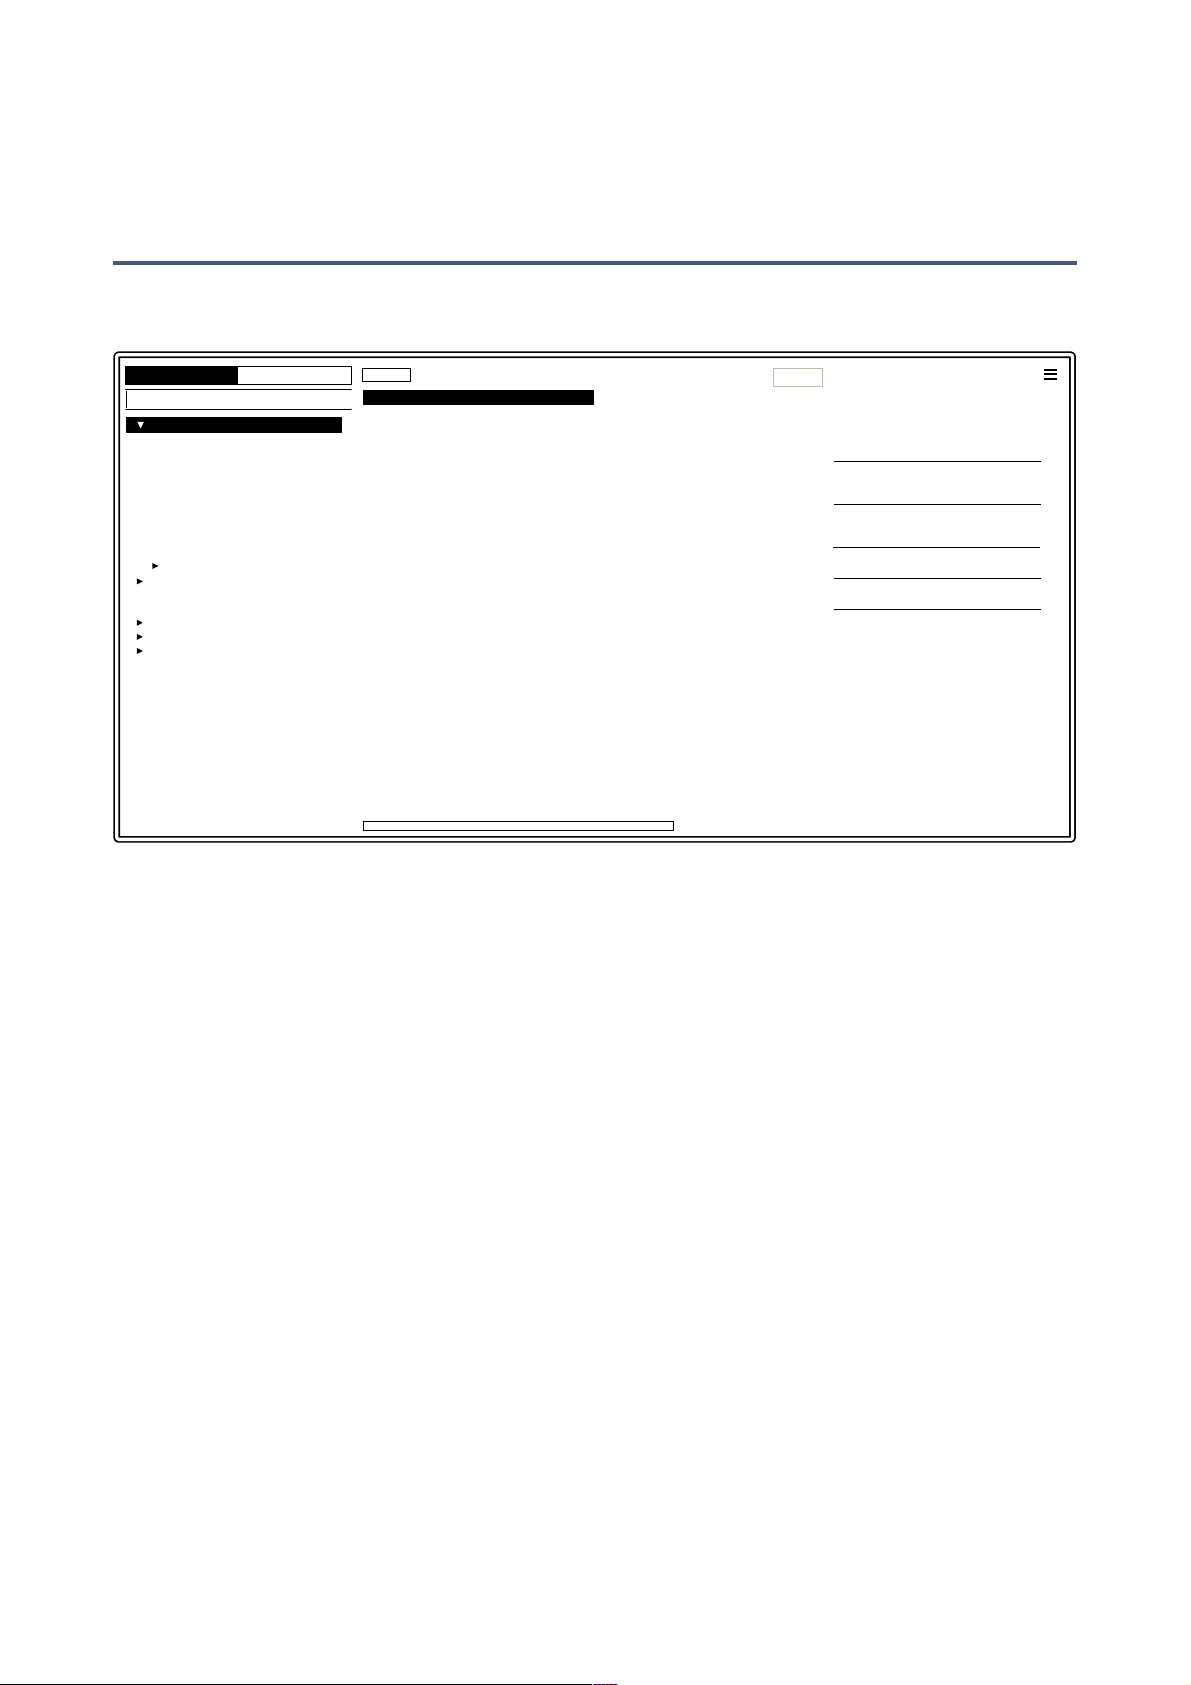
Overview
Click on the PRESETS button at the bottom of Diva’s window – you should see something like this:
Folders appear on the left, presets in the centre and information about the currently active preset
on the right. If you can’t see any presets at all, click on Local. If you don’t see a PRESET INFO
panel, click on the [≣] button in the top right and tick Show Preset Info.
The Local root contains a representative selection of presets copied from the subfolders. Note that
a left-pointing triangle next to a folder name means that the folder is currently in its collapsed state.
If you can’t see the category folders (BASS, LEAD etc.), expand Local by clicking on that triangle.
After loading a preset (click on its name) you can step through all the others using your computer’s
cursor keys, which makes it easy to audition them sequentially
The folders numbered 1 to 7 contain the main factory presets. The TEMPLATES folder contains
some very basic presets for whenever you want to start designing your own sounds from scratch.
THIRD PARTY contains presets kindly submitted by various sound designers, plus a subfolder
called TREASURE TROVE! containing hundreds more sounds.
That’s actually all you need to know for now. Diva’s browser has many more features for users who
want to dig a bit deeper: The file functions include drag&drop, a powerful search engine and more.
For details, read the rest of this chapter!
Default preset
Whenever Diva is started it checks whether the ‘Local’ root contains a preset called default. If this
file exists, it is loaded instead of the demo sound. Note: default will not appear in the browser.!
TOC PRE OSC HPF VCF ENV LFO EFX MODF TRIM ARP CONF TIPS NKS 9
Local
DIRECTORY TAGS
Search
RESTORE
initialize
BS TXSish
BT dotted afterhour 01 (mw)
BT flex butter seq (mw+vel
BT juno hoovered bass (mw)
BT the master himself (at+mw+pb)
HS Albert Hall Mini
HS All Processors
HS Bass Nine
HS Canterbury Creeper
HS Chango Clique
HS Chili Paste duo
HS Divanity
HS Duduwap 1
HS Fatima poly
HS Gammond
HS Hail Bob 1
HS High StraDIVAri
HS House Dust
HS I cant believe its not analogue
HS Kit 1 acoustic
HS Kit 2 electro
HS Kromosaur
HS Lounge Dust
HS Model K12
HS Modular Bells
HS Protocol
HS Sparkle
HS Strumpet
HS Switched On Voicing
HS Sync Hangar
HS Trans-Uranian Express
HS Vulcan Pigs
IW BP Strings Ensemble 1
IW Jump Brass
IW Jupiter High Strings
IW Mini Detuned Saw Lead
IW Poly6 Strings
JA WashingMachine
JS Bud Pluck
MK Bass In Tube
MK Bass Pack Leader
MK Brass Straight Up
MK FX Scaled Resonance
MK FX Wind
MK Joy
MK Pattern Grammaphone
MK Pattern Metal Works
MK Planet Earth
MK Strings Short PWM
MK Syncopat
MM Choir In The Clouds
PAK Karinanthon EP
PG FilterConToUrs
ROY EXPERIMENTAL God Particle
ROY FX Cold December
ROY FX Rewinding the Tape
ROY Old Recipe
SG Chica Go
SG Crackpipe Organ
PRESET INFO
BS Deep Space Diva
BS Deep Space Diva
DESCRIPTION
USAGE
CATEGORIES
FEATURES
CHARACTER
/Local
by Bronto Scorpio
mod wheel = cutoff
1 BASS
2 LEAD
3 POLY SYNTH
4 DREAM SYNTH
5 PERCUSSIVE
6 RHYTHMIC
7 EFFECTS
8 TEMPLATES
MIDI Programs
THIRD PARTY
User
Search History
Saved Searches
Favourites
Tags
Author
push the modulation wheel…
ready

PRESETS
Directory Panel
If you don’t see this panel on the left of Diva’s Presets browser, click on DIRECTORY.
The ‘Local’ folder
Diva’s factory presets are sorted into folders 1 to 8. We recommend that you do not add or remove
any Local presets, but save all your creations and third party soundsets in ‘User’ (see below).
MIDI Programs
‘Local’ also contains a special folder called ‘MIDI Programs’ which is normally empty. When the
first instance of Diva starts, up to 128 presets from that folder are loaded into memory, to be
selected via MIDI Program Change messages. It is a good idea to call those presets e.g. ‘000
rest-of-name’ to ‘127 rest-of-name’, as they are accessed in alphabetical order.
But that’s not all: the ‘MIDI Programs’ folder can contain up to 127 sub-folders, switched via
MIDI Bank Select messages (CC#0). Send Bank Select first, then Program Change. ‘MIDI
Programs’ is bank 0, sub-folders are addressed in alphabetical order starting with bank 1.
Changes to the MIDI Programs folder will only be updated after the host application is restarted.
MIDI Program files cannot be a cannot be added, removed or renamed on the fly!
When Diva receives a program change, it will display the bank and program numbers to the left
of the preset name e.g. “0:0” for the first preset in the first bank. In certain hosts e.g. Ableton
Live, however, the first bank / preset is designated “1” instead of the correct “0”.
To avoid another possible source of cvonfusion, make sure that there are no junked presets in
the MIDI Programs folder. All files there are indexed, whether they are visible or not.!
TOC PRE OSC HPF VCF ENV LFO EFX MODF TRIM ARP CONF TIPS NKS 10
Local
DIRECTORY
Search
User
Search History
Saved Searches
Favourites
Tags
Categories
Features
Character
Untagged (n)
Junk (n)
Author
1 BASS
2 LEAD
3 POLY SYNTH
4 DREAM SYNTH
5 PERCUSSIVE
6 RHYTHMIC
7 EFFECTS
8 TEMPLATES
MIDI Programs
THIRD PARTY

PRESETS
The ‘User’ folder
The best address for your own creations as well as soundsets from other sources. You can either
select User immediately before saving the preset, or set a global preference which ensures that it
will always be saved to this folder – see the preference Save Presets To.
Tip: It’s worth finding out where the User folder actually resides on your computer. Right-click on
User and select reveal in Finder (Mac) or open in Explorer (Win).
Smart Folders
The other folders do not actually contain files, but display the results of querying a database of all
presets. The content is therefore dynamic i.e. it will change whenever the underlying data changes.
Search History
Click on this folder to display the results of past searches (maximum 10). Whenever you need to
make the results of a search more permanent, right-click and select save Search… The entry
will be moved to the ‘Saved Searches’ folder – see below. To remove all searches from the list,
right-click on the ‘Search History’ folder and select clear.
Saved Searches
This folder contains searches that have been saved via right click from ‘Search History’. To
remove individual saved searches, right-click on the search and select delete.
Tip: Entries dragged from ‘Saved Searches’ and dropped onto real folders within ‘Local’ or
‘User’ will create a folder containing copies of all found presets!
Favourites
8 smart folders, one for each Favourite colour. See Presets context menu. Presets dropped
onto one of the Favourites folders will be marked as such.
Junk
A smart folder pointing to all junked presets. See Presets context menu. Presets dropped onto
this folder will be junked, and will therefore disappear from the rest of the browser unless made
visible (see show junk in the Presets context menu).
Tags
Smart folders for each Category/Subcategory, Features and Character tag. Presets dropped
onto these folders will adopt the corresponding tag. Presets dropped onto the Untagged folder
will have all Category/Subcategory, Features and Character tags removed.
Author
Smart folders for each Author. Tip: Instead of signing each of your creations, you could sign just
one of them, then select them all and drag them onto Author/(You)/. As the process cannot be
undone, you should use this feature with caution.
Directory context menu
Right-clicking on any folder within Local or User will open this menu:
refresh: Update the contents of the browser. For Windows users
this will be necessary after you have moved, added, removed or
renamed folders or presets using Explorer.
create new… Insert an empty subdirectory.
rename… Edit the folder name.
reveal in Finder / open in Explorer: Opens a system window for
the clicked folder. Wondows: if you add, remove or rename any
preset files or folders there (i.e. outside of Diva’s browser), you
should always refresh the directory afterwards.
TOC PRE OSC HPF VCF ENV LFO EFX MODF TRIM ARP CONF TIPS NKS 11
refresh
create new…
rename…
reveal in Finder *
move to Trash
on open expand to

PRESETS
on open expand to: These options determine how deeply the browser will open subdirectories
whenever the GUI is opened again or the refresh function is called. The first option (none)
collapses all folders, while the final option (all levels) reveals all nested folders.
Presets Panel
The central, unlabelled area of the browser is where you click to load presets…
Presets context menu
Right-click to open a menu containing functions that can be applied to individual presets.
mark as junk: Instead of deleting any unloved presets, you can mark
them as ‘junk’ so that they (normally) disappear from the browser.
See show junk below.
mark as favourite: Choose one of eight differently coloured dots. To
remove the dot again, right-click on the preset(s) and select unmark
as favourite.
select all, deselect: See Multiple Selection below.
show junk: Activate this option to display junked files (marked with a
STOP symbol), which would otherwise disappear.
rename…: You can change the names of presets using this function.
Note that only the most recently selected preset can be renamed i.e.
you can’t rename multiple files at once.
duplicate / copy to User Folder: The entry here depends on the
status of the preference Save Presets To as well as on whether the
source presets are in the Local or User folder. Selected presets are
copied with a number appended to the name, which increments (just
like the ‘Auto Versioning’ option) so that presets cannot be
overwritten by mistake.
reveal in Finder / open in Explorer: Opens a system window for the
selected preset. Remember: If you change anything there, refresh
the directory (see the the previous page)!
convert to native / h2p / h2p extended / nksf: Converts the
selected preset(s) into the format previously selected via right-click
on the [save] button. For that final option, see the NKS chapter.
move to Trash / Recycle Bin: Moves the selected preset(s) to the system trash.
Restore
While in the browser you can audition as many presets as you like in any folders without losing the
one that was previously loaded: Clicking the Restore button will get you back to where you started.
Scan / Ready
In the top right of the presets panel is a dark rectangle normally labelled ‘ready’. Whenever you
use the refresh function (see the Directory context menu on the previous page), this turns into a
progress indicator showing the preset database being refreshed. The process should only take a
few seconds, even for a very large preset library.
Multiple selection, drag & drop
A block of presets can be selected via shift+click, and individual presets can be added to the
selection via cmd-click (Mac) / alt+click (Win). Presets can be moved to a different folder via drag
& drop. Use SHIFT etc. on your computer keyboard to highlight the files you want to move, click
and drag them from the files area and drop them onto a target folder. To deselect, either click on an
unselected preset or choose deselect from the context menu.!
TOC PRE OSC HPF VCF ENV LFO EFX MODF TRIM ARP CONF TIPS NKS 12
mark as favourite
select all
deselect
show junk
rename…
duplicate *
reveal in Finder *
convert to h2p
move to Trash
mark as junk
mark as favourite
mark as favourite
mark as favourite
mark as favourite
mark as favourite
mark as favourite
mark as favourite
PRESETS
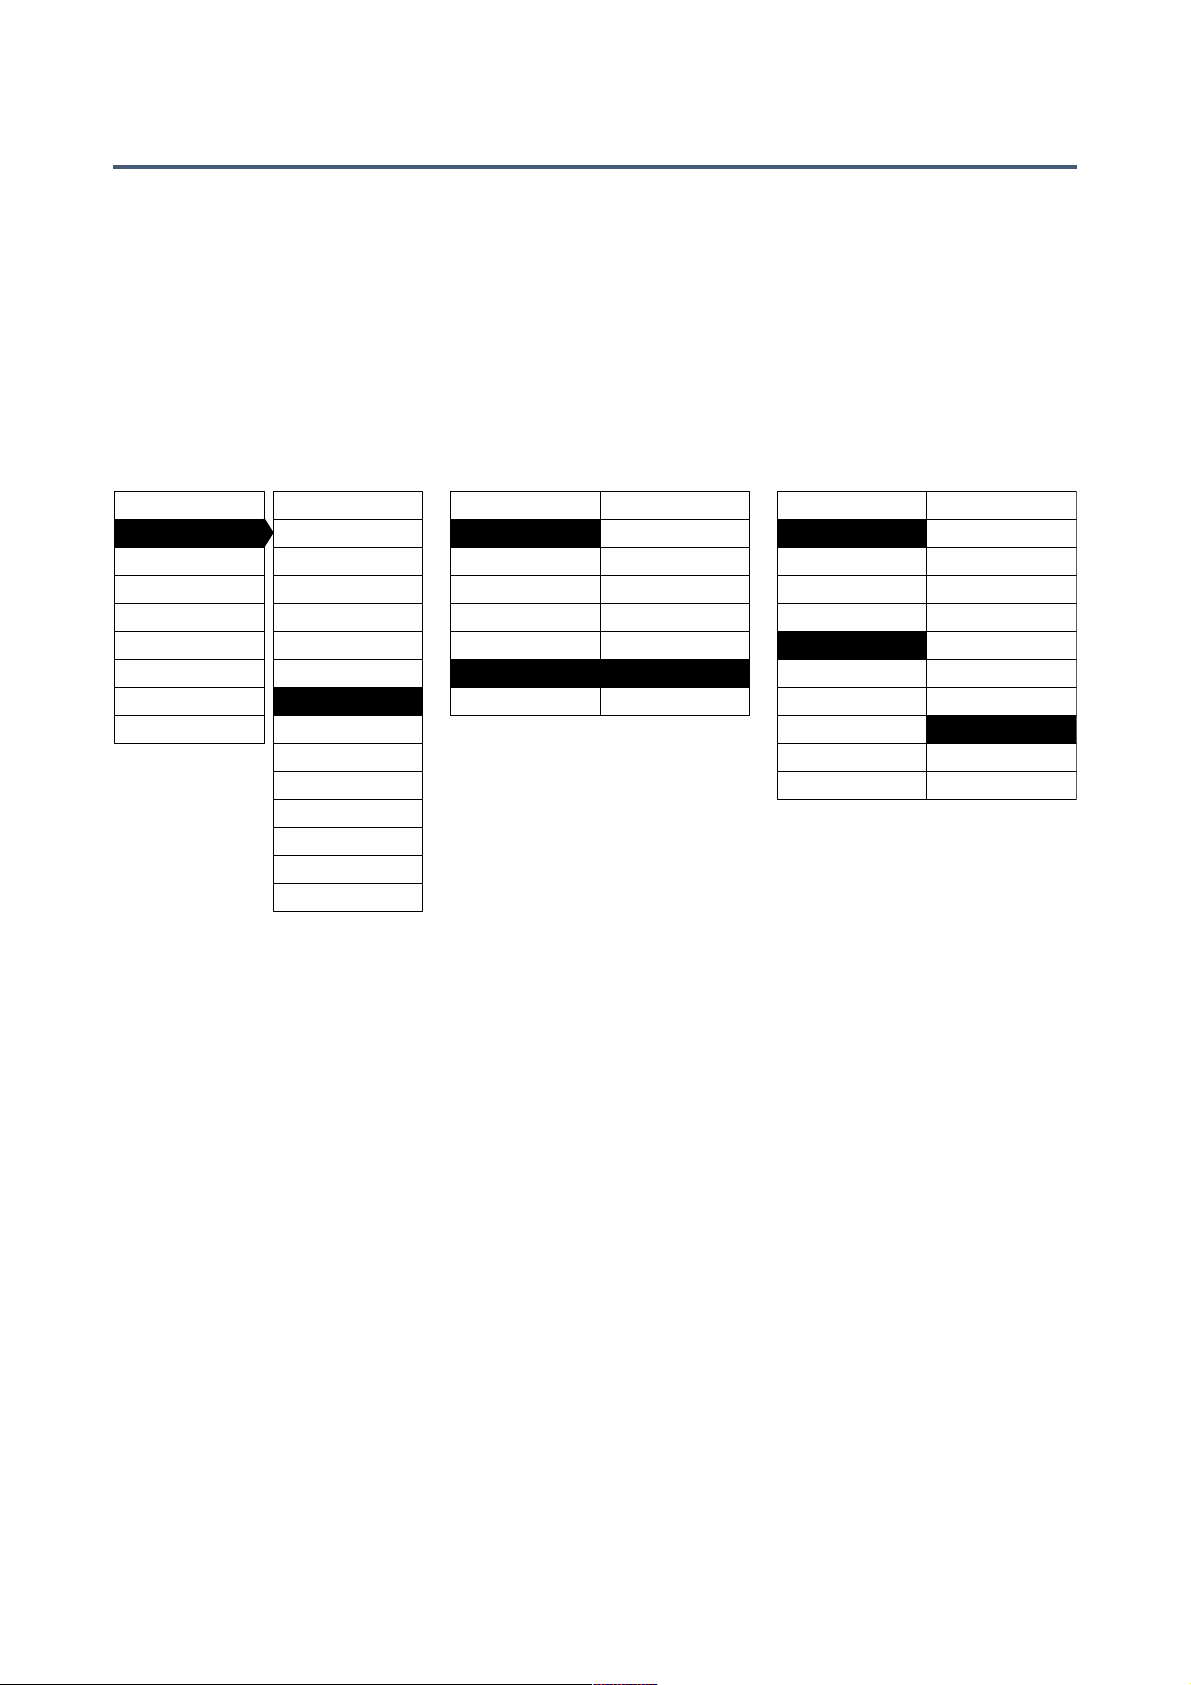
Preset Tagging
Categories“Tags” are elements of metadata i.e. information you can add to presets so that they
can be found according to certain attributes.
IMPORTANT: Clicking on [save] isn’t required, as tags are updated automatically. The obvious
advantage is that presets don’t have to be saved every time you edit tags. The main drawback is
that you should only edit tags after saving your preset. If you edit tags while in the process of
creating a new version of something, you would also be changing the tags in the original preset!
The Tagging Window
Right-click on the [save] button and select Tag this patch:
Categories describe a preset by analogy to instrument types or classic synth genres. Each one
has its own set of subcategories. Features are technical classifications, and Character tags are
pairs of opposites from which you can choose only one.
Tagging via PRESET INFO
Open one of the numbered folders and load any preset. In the PRESET INFO panel, right-click on
CATEGORIES, FEATURES or CHARACTER and select or unselect tags from the menu. Note that
This method only works for individual presets. If you right-click on an existing tag, the first option in
the menu becomes remove tag…
The function create Search from Tags searches for presets with ALL the same tags.
Tagging via the Tags subfolders
You can tag presets by drag & drop onto one of the Tags smart folders. To remove all tags, drag
presets onto the Tags/Untagged/ smart folder.
Auto-Tag Features
In the Preferences page is a setting that can make adding Features tags more comfortable. Auto-
tagging is temporary, but you can make the generated Features permanent using the convert to
function in the context menu of the presets panel – any automatically generated Features tags will
be written into the preset data.!
TOC PRE OSC HPF VCF ENV LFO EFX MODF TRIM ARP CONF TIPS NKS 13
Bass
Leads
Keys
FX
Drums
Stabs
Seq & Arp
Other
Pads
Acoustic
Atonal
Breathy
Distorted
Drones
PWM
Lo-Fi
Rhythmic
Strings
Evolving
Categories
Arp
HostSync
Creative FXChord
Mono
Duo
Poly
Unison
Soft Attack
Percussive
Slow Release
Features
Clean
Wide
Soft
Harmonic
Bright
Constant
Phat
Inharmonic
Thin
Static
Moving
Aggressive
Character
Acoustic
Natural
Electric
Synthetic
Dirty
Narrow
Chords
Soundscape
Synth
Modulated
Dynamic
Modern
Dark
Vintage
Glide
CrossMod
Osc Sync
RingMod
Vocal
Brass

PRESETS
Search by Tags
Click on the TAGS tab to open this view. The buttons here let you set up search criteria according
to tags with just a few mouseclicks:
There are four sets of buttons. The first three correspond to the tags in the tagging window (see
the previous page), and the bottom row lets you find presets tagged as ‘Favourites’. Clicking on the
[^] icon to the right will hide the options for that type of tag.
Categories and Subcategories
Here are just a few bullet points to get you started. Especially for Category tags, following a stepby-step tutorial is much easier than studying a full technical description. Try these:
Each of the Categories has its own set of subcategories. Not selecting any subcategory here
means “show me presets tagged with any subcategory”. Click on [Leads]…
You can select multiple categories without specifying any subcategory if you hold Cmd (Mac) or
Alt (Windows) while clicking on the category. Try that with the [Keys] button.
Selecting the subcategory with the same name as the category means “show me presets tagged
without a subcategory”. You will not find any of these in the factory presets.
Completed category+subcategory tags appear below the subcategories as buttons with ‘off’
switches [X] so you can add other main categories by simply clicking on them.!
TOC PRE OSC HPF VCF ENV LFO EFX MODF TRIM ARP CONF TIPS NKS 14
Search
TAGS
Bass Pads Leads Keys FX Drums Seq & Arp Stabs
Other
CATEGORIES
Leads Brass Chords Distorted Guitar Lo-Fi Plucked
PWM Reeds Rhythmic Sync Strings Synth Vocal
Winds
Mono Poly Duo Chord Arp HostSync Modulated
Unison OscSync RingMod CrossMod Creative FX
Percussive Soft Attack Slow Release Glide
Bright Dark Clean Dirty Modern Vintage Phat Thin
Soft Aggressive Constant Moving Natural Synthetic
Wide Narrow Harmonic Inharmonic Dynamic Static
1 2 3 4 5 6 7 8
FEATURES
CHARACTER
FAVOURITES

PRESETS
Here’s a practical tutorial
•
Click on the DIRECTORY tab, right-click on the Search History smart folder and select clear.
Double-click on Local/2 LEAD to restrict the scope of the search to that particular folder. The
selected path /Local/2 LEAD appears below the Search field instead of preset folders.
•
Click on the TA GS tab. In the Categories, select [Bass]. Subcategory buttons appear and the
preset window is updated to list all presets in 2 LEAD that are tagged as [Bass].
•
Now click on [Pads]. The [Bass] category is switched off, and the preset window is updated to
list all presets in 2 LEAD that are tagged as [Pads] - there are 8 of these. Note that you still
haven’t specified a subcategory yet…
•
Hold Cmd (Mac) or Alt (Win) and select the [Bass] category again. Although no longer outlined,
the previously selected [Pads] remains highlighted and the list shows all 12 presets in the 2
LEAD folder that have either of those tags (disregarding any subcategories).
•
Click on the DIRECTORY tab again: The text #Bass:* #Pads:* appears in the editable field as
well as in the Search History smart folder, which also shows the number of found presets. The
colon separates the category from the subcategory, and the star (*) means “any subcategory,
even none”.
•
Click on the TAGS tab again. Select the [Leads] category without holding down Cmd/Alt this
time… the [Bass] and the [Pads] tags are removed from the search. Select [Chords] as
subcategory. The result is a list of all 10 presets in the 2 LEAD folder that have the Leads:Sync
tag. Immediately below the subcategory options you will see the complete tag in the form
[Category:Subcategory|X].
•
Let’s get more hits by including another subcategory: Click on the [Distorted] subcategory.
[Sync] remains selected, and the list of hits is updated to include presets which have either of
those tags i.e. 45 in total. Click on [Chords] again and the tag search will find only 36 presets –
all those that are tagged as [Leads:Distorted].
•
Click the [Bass] category. Below the subcategories, the [Leads:Distorted|X] switch remains in
place because that tag is complete (category plus subcategory). Check out the category tags in
PRESET INFO by clicking on several presets in turn: Each one will have either a
Leads:Distorted tag or a Bass tag (disregarding subcategory), or both.
•
Click on the DIRECTORY tab. The text #Bass:* #Leads:Distorted appears in the search field
as well as the Search History smart folder. If you are feeling adventurous, you can edit this and
the results will be updated accordingly.
•
To the left of the grey search path is an ‘up’ [^] symbol. Click on this to exit the current folder i.e.
change the search path from /Local/2 LEAD to the /Local root. The list of hits is immediately
updated to 417 presets because the search now includes all of /Local.
•
Another click on [^] exits to the whole preset library i.e. /Local and /User. Clicking on the [X]
symbol to the right of the search path will exit immediately. Try that.
•
Repeat the above a few times if necessary – you’ll soon get the hang of it!!
TOC PRE OSC HPF VCF ENV LFO EFX MODF TRIM ARP CONF TIPS NKS 15

PRESETS
Features, Character
These tag types are simpler. For example, let’s find all thin sounding presets with a slow release:
•
Click on the TAGS tab. If any Categories are still highlighted, click them to disable.
•
Select Features = [Slow Release] and Character = [Thin]. That’s it.
Summary
In the DIRECTORY panel, specify a search path via double-click. In the TAGS panel, select
category tags. Add others if required to extend the search, but remember to hold down the Cmd
(Mac) or Alt (Windows) key if you want to retain category tags that don’t specify a subcategory.
Select Features, Character and/or Favourites tags to refine the search. Exit any search path by
clicking on the [X] to the right.
Search by Text
The editable field immediately below the DIRECTORY and TAGS tabs lets you search for presets
according to a string of characters i.e. text. The search normally looks into the preset name, the
author, the DESCRIPTION and USAGE (see the PRESET INFO panel). It is not case-sensitive,
and quotes are not required unless you need to include spaces in the text.
If you want to restrict the search to a particular path e.g. Local/4 DREAM SYNTH, double click on
that folder. The full path (from Local or User) appears immediately below the Search field, and all
other normal folders are hidden except any subdirectories within that path (there are none in this
example). Note that the smart folders also remain visible.
The grey field in the above image is the Search Path.
The [^] button to the left moves the search path up one level, in this case up to /Local. Alternatively,
you can navigate directly to any higher level by right-clicking on the path.
The [X] button to the right expands the path to include all Hive presets (i.e. either in ’Local’ or in
‘User’), and all the regular preset folders will reappear.
Try a text search: Enter three or four letters then hit Return. For instance, star will find all files
containing the text string star (e.g. mustard or starters). Entering "star wars" (with the quotes)
would find e.g. Battlestar Warship, if such a string existed in the presets.!
TOC PRE OSC HPF VCF ENV LFO EFX MODF TRIM ARP CONF TIPS NKS 16
Search
DIRECTORY
Search History
Saved Searches
Favourites
Junk (0)
Tags
/Local/02 LEAD
Author

PRESETS
Syntax
Scope
You can limit the scope of the search to just the preset name or specific parts of PRESET INFO by
using name (preset name), author, desc (description) or use (usage) followed by a colon. For
instance, author:the finds all presets by sound designers whose author names contain ‘the’.
Similarly, desc:space will find all presets with the word space in the description.
Logic
Important: The following logical operators can only be used between text elements.
AND requires that presets contain both words. It can be written explicitly if you prefer, but is not
necessary. For example, star AND wars (or simply star wars) will find presets that contain both star
and wars.
OR means that presets can contain just one of the words or both. For example, star OR wars will
find presets that contain star as well as presets that contain wars.
NOT excludes presets containing the word. To find all presets that contain star but don’t contain
wars, enter star NOT wars.
Tags
Regular tags can also be entered into the search field if preceded with a ‘#’. For example,
name:"hs " #bass:* will find all presets with "hs " in the name that are tagged as Bass with any or
no subcategory. The colon separates category and subcategory, and the star (*) means “any
subcategory, even none”. Between multiple tags of the same type is an implicit OR, while between
different types is an implicit AND.
Note: In the current version of the browser, tags must appear after any text items!!
TOC PRE OSC HPF VCF ENV LFO EFX MODF TRIM ARP CONF TIPS NKS 17

UPPER PANELS
Upper Panels
While checking out the presets you must have noticed that the main modules can be swapped out.
Simply click on the label at the bottom of each module, then select from the list. You don’t have to
click on the grey triangle – anywhere on the label will do.
Some smaller labels within each panel also have grey triangles. Click on these labels to replace
default modulation sources. Selected sources other than the default appear as Dymo™ tape – call
us crazy, but we rather like the retro-look of sticky labels on custom-modified hardware!
Oscillators
Diva offers five different oscillator types: Triple VCO (morphing oscillators with FM, sync and filter
feedback), Dual VCO (multi-wave oscillators with sync, PWM and cross mod), DCO (single twowave oscillator with PWM and flexible sub-osc), Dual VCO Eco (CPU-friendly, pulse width, ring
modulation) and the newer Digital (‘megasaw’ and much more). All models include a noise source.
Some parameters, although practically the same, have different names in different models.
Note: The output levels of oscillators can have a significant effect on the tonal quality of the filters.
The models that don’t allow complete control over volume might get that in future versions – or the
filters will include input gain controls (yet to be decided).
TRIPLE VCO
The most CPU-hungry oscillator model, Triple VCO stretches across two panels:
The upper switches on the left activate pitch (tune) modulation for each oscillator. To specify a
modulation source other than the ENV2, click on that label and select from the drop-down list.
In this example, modulation wheel is controlling oscillator 2 pitch only, as only the middle switch
is active (indicated by the white dot).
TUNE MOD specifies the amount of pitch modulation. This control is
bipolar i.e. the amount of modulation can be either negative or
positive.
TOC PRE OSC HPF VCF ENV LFO EFX MODF TRIM ARP CONF TIPS NKS 18

UPPER PANELS
Similarly, the lower switches activate waveform (shape) modulation – see WAVEFORM below.
To specify a modulation source other than LFO2, click on the label and select from the list.
In this example, envelope 2 is modulating the waveforms of oscillator
1 and oscillator 2, but not oscillator 3.
SHAPE MOD specifies the amount of waveform modulation. This
knob is also bipolar i.e. the amount of modulation can be negative.
FM 1->2/3 sets the amount that oscillator 1 frequency-modulates oscillator 2
and oscillator 3 (both equally). Frequency modulation is useful for complex,
dissonant or even bell-like sounds.
Note: FM 1->2/3 can be modulated from within the Modifications panel.
The octave switches (32’ to 2’) and DETUNE (oscillators 2 and 3
only) determine the oscillators’ pitches. These controls are selfexplanatory except for one special feature: The DETUNE knob
acts like a 5-turn potentiometer that can also flip the octave over
– try turning it beyond 5 or -5 and see for yourself!
The SYNC switches enable hard-sync for oscillators 2 and 3 (they both synchronize
to oscillator 1). The pitch of a synchronized oscillator should normally be higher than
oscillator 1, or at least modulated upwards via TUNE MOD.
Tip: For the maximum range of sync sounds, set osc 1 to 32’ and Transpose to 24.
Unlike in e.g. a Minimoog™, the WAVEFORM controls are not rotary switches.
They are continuously variable – from ramp through triangle and sawtooth to
square, followed by narrower pulse waves. For maximum PWM (pulse width
modulation), set the waveform to 8.00 (25% pulse), switch on shape modulation
(see above) for the oscillator and set the SHAPE MOD level to 10.00.
The MIXER panel contains volume controls for each oscillator as
well as for the NOISE generator. Below the NOISE volume knob is a
tone switch: PINK noise contains mostly low frequencies, while
WHITE noise is full-range.
The FEEDBACK knob controls the amount of signal taken from
behind the filter and fed back into the mixer – like the age-old trick
of connecting the extra output on the Minimoog™ back into its audio
input. Relatively low feedback values cause a subtle bass boost,
higher values can create subharmonics or even wild howling noises.
A natural side-effect of higher feedback is lower resonance, so you
might have to compensate for that.
Although the mixer panel is an integral part of the Triple oscillator
module, Feedback is also available for all the other oscillator types,
as an alternative to high pass filtering – see there.
Note: The Feedback amount can be modulated from within the
Modifications panel.!
TOC PRE OSC HPF VCF ENV LFO EFX MODF TRIM ARP CONF TIPS NKS 19

UPPER PANELS
DUAL VCO
A slightly simpler model than Triple VCO, but with the advantage of independent (split) pitch
control as well as multiple waveforms within each oscillator...
The two faders to the left both affect the width of pulse waves. PW sets the nominal width from
very narrow through 50% to 100% (silence). The other fader adjusts the depth of pulse width
modulation from the selected source (LFO2 by default), with zero in the centre. The switch
below applies these settings to either VCO1 only or to both oscillators at the same time.
The octave switches (32’ to 2’) and DETUNE knob (oscillators 2 only) determine the oscillator
pitches. Again, DETUNE acts like a 5-turn potentiometer which can also affect the octave range.
The central SYNC button synchronizes VCO2 to VCO1. When switched on, the pitch of VCO2
should be set higher than VCO1 (or at least modulated upwards). Tip: For the maximum ‘sync
sweep’ range, set VCO1 to 32’ and Transpose to 24.
The 4-way switch (1 / BOTH / 2 / SPLIT) specifies pitch modulation targets for a pair of sources
(ENV2 and LFO2 by default). To modulate VCO1 and VCO2 independently, select SPLIT here.
The two vertical rows of buttons select waveforms: Triangle, Saw, Pulse/PWM, Noise (VCO1)
and Sine (VCO 2). Note that selecting multiple waveforms retains the overall volume.
CROSS MOD (cross modulation) is similar to FM 1->2/3 in
the Triple VCO module (see the previous pages). The main
difference here is that the cross-modulation amount can be
modulated directly from within the oscillator panel.
In this example, the amount of cross modulation is being
(positively) controlled from the modulation wheel.
TOC PRE OSC HPF VCF ENV LFO EFX MODF TRIM ARP CONF TIPS NKS 20

UPPER PANELS
MIX balances the volumes of VCO1 and VCO2. Note: As VCO1 includes a noise generator, it
made sense to allow MIX to be modulated in the Modifications panel (via Noise & Dual VCO
Mix). This means you can use e.g. an envelope or LFO to crossfade between the two VCOs.
SHAPE gives you a choice of three Dual VCO ‘hardware revisions’. Although this switch affects
the sound of all waveforms, it is most noticeable with triangles:
ideal (the sweetest triangle)
analog1 (looks like a sine, sounds more like a triangle)
analog2 (brighter – like ‘ideal’ but with a ‘tooth’)
Note: These screenshots were made while playing the note C2. Like real analogue oscillators,
however, the shapes of waves in Diva are not 100% the same at all pitches!
TOC PRE OSC HPF VCF ENV LFO EFX MODF TRIM ARP CONF TIPS NKS 21

UPPER PANELS
DCO
A single oscillator model (with sub-oscillator and noise), DCO delivers a more complex, brighter
sound than the other analogue types...
The left half of this panel is the same as the Dual VCO but without the switches for VCO2.
Cross-modulation is not possible without that second oscillator, but this lack is tempered by the
DCO’s ability to add perfectly synchronized waveforms together.
The output is the sum of four sources: PULSE, SAWTOOTH, SUBOSCILLATOR (each offering
a choice of different shapes) plus NOISE. Even without noise, the result can be quite complex:
+ + =
In the PULSE and SAWTOOTH selectors, the straight line means silence/off, and the 4th option
from the top (in each case) is the one that reacts to pulse width settings:
these two are the only waveforms that react to pulse width settings
Similarly, the SUB-OSCILLATOR offers six different waveforms, all based on pulse waves. The
top four are all one octave below the main oscillator, the others are both two octaves down.
At the top right of the DCO panel are two faders that control sub-oscillator and noise levels.!
TOC PRE OSC HPF VCF ENV LFO EFX MODF TRIM ARP CONF TIPS NKS 22

UPPER PANELS
DUAL VCO ECO
This one is fairly primitive because it emulates primitive hardware. There is no PWM or FM here
but, as its name suggests, ECO has the lowest CPU-hit...
When switched to RING, the regular VCO2 output is replaced by ring modulation between the
selected VCO1 wave and the VCO2 square wave.
Although the two oscillators can be tuned independently, both TUNE MOD sources (ENV2 and
LFO2 by default) are applied to the overall pitch.
Because VCO1 includes noise, its volume can be modulated via Noise & Dual VCO Mix in the
Modifications panel.
One more thing: the shape of the triangle wave is rather interesting...
DUAL VCO ECO triangle wave as seen in Diva’s oscilloscope
TOC PRE OSC HPF VCF ENV LFO EFX MODF TRIM ARP CONF TIPS NKS 23

UPPER PANELS
DIGITAL
This model emulates a well-loved but unashamedly digital-sounding oscillator (including all the dirt
and aliasing of the original) – plus a few extras:
Multisaw mode is 7 stacked sawtooth waves. DETUNE adjusts tuning spread,
MULTI is the balance between the original wave and the detuned waves.
Multisaw is great for fuzzy dance music sounds or for exceedingly rich pads.
TriWrap is a wrapped triangle wave – positive peaks appear at the bottom of
the wave and negative peaks appear at the top. WRAP adjusts the threshold for
the wrap function, BEND adjusts the horizontal symmetry.
Noise is ‘digital’ white noise with a resonant lowpass filter. TUNE adjusts cutoff,
Q adds resonance (with significant loss of low frequencies).
Feedback is a saw sent through a short delay with feedback, creating tones
similar to an electric guitar. TUNE adjusts the length of the delay, FEEDBACK
sets the amount of feedback (also adds lots of digital distortion).
Pulse is a square/pulse mixture. PW adjusts the pulse width while SPIKE UP
first turns the wave into a saw (at 3.00 already), then multiplies the saw for a
complex 'pseudo-sync' effect. SPIKE UP can create some serious aliasing.
Sawtooth is a sawtooth wave plus synchronized sine. HARMONICS adjusts the
level and polarity of the sine wave (set 50.00 for a ‘pure’ sawtooth with no sine
component), BEND continuously shifts the sine up an octave.
Triangle is a triangle plus synchronized sine an octave higher. HARMONICS
adjusts the level of the sine, while BEND adjusts horizontal symmetry. You might
like to watch what happens to the waveform in the ‘scope.!
TOC PRE OSC HPF VCF ENV LFO EFX MODF TRIM ARP CONF TIPS NKS 24

UPPER PANELS
The OCTAVE rotary switch adjusts the pitch of oscillator 1 in octave steps. The TUNE parameter in
oscillator 2 lets you adjust its pitch precisely within a range of +/- 30 semitones (for very fine tuning,
hold down a SHIFT key on your computer keyboard).
The SYNC switch at the bottom of oscillator 2 activates hard-sync (oscillator
2 is synchronized to oscillator 1). To hear the effect, turn up both MIX and
TUNE. Note: In Multisaw mode, sync is only applied to the ‘original’ wave,
and has no effect at all in Noise mode.
The central panel specifies the modulation sources and
amounts for each oscillator. Both oscillators share
common modulation sources (so you can’t modulate the
two pitches independently, for instance).
Example: In this image, the pitch of oscillator 2 is being
negatively modulated by pressure, the second parameter
in oscillator 1 is being positively modulated by KeyFollow,
and the third parameter in oscillator 2 is being positively
modulated by LFO2.
Along the bottom are five more controls:
TUNE MOD lets you modulate the pitch of both oscillators at the same time.
CROSS (cross modulation) adjusts the amount that oscillator 1 frequency-modulates oscillator 2.
RING replaces oscillator 2 output with the result of ring modulation between the two oscillators (like
in the DUAL VCO ECO oscillator model).
MIX adjusts the relative levels of the two oscillators.
HIGH QUALITY reduces aliasing artifacts at the cost of (usually) a bit more CPU…
On the subject of CPU usage: Please note that automating the Digital oscillator’s WAVE switches
(see previous page) can cause massive spikes and is therefore best avoided.!
TOC PRE OSC HPF VCF ENV LFO EFX MODF TRIM ARP CONF TIPS NKS 25

UPPER PANELS
High-pass Filters / Feedback
While the Triple VCO oscillator includes a mixer, all other oscillator models allow the central panel
to be swapped out. There is a choice of filter feedback or one of three high-pass filter models...!
all four feedback / HPF panel options
NO HPF (just feedback)
The same as integrated into the TRIPLE VCO oscillator model (see there). The single knob
controls the amount of signal taken post-filter and fed back into the mixer. Effects range from
mild bass boost to subharmonics / low-frequency howling.
HPF | POST
Although located to the left of the main filter, this model actually comes after the main filter in the
signal path. It doesn’t affect the tone of the main filter by changing its input levels, but either
boosts the bass (BOOST setting) or removes low frequencies from the already filtered signal.
HPF | PRE
A high-pass filter before the main filter, with continuous frequency control. HPF | PRE can affect
the tone of the main filter by sending it fewer low-frequencies to work with. Use this model e.g.
to tame the output of the DCO oscillator, or to thin out a noise source etc..
HPF | BITE
A complete high pass filter before the main filter, with cutoff modulation and resonance control.
Unlike the similar-looking ECO oscillator, this is actually the most CPU-hungry option – so you
can expect some powerful tonal shaping. Note: The resonance control is called PEAK here.
Two REV (revision) models are available, with different characteristics. But be warned: either of
them can BITE…
TOC PRE OSC HPF VCF ENV LFO EFX MODF TRIM ARP CONF TIPS NKS 26

UPPER PANELS
Main Filters
This is where a lot of Diva’s magic happens. The current version offers five main filter models,
each based on a classic hardware filter (or two): Ladder, Cascade, Multimode, Bite and Uhbie...
VCF | LADDER
Classic 24dB per octave ladder filter based on the behaviour of a specific piece of monophonic
hardware (the word on the street is that each unit that left the factory sounded at least slightly
different – the one we borrowed is certainly special).
Either side of the Cutoff and Emphasis (resonance) knobs are three cutoff modulation sources
with bipolar controls: Two user-definable (ENV 2 and LFO 2 by default) plus key-follow (KYBD).
In addition to the original specifications, VCF | LADDER offers bipolar filter-FM from oscillator 1
and a 12dB per octave (2-pole) option.
Note: Emphasis (resonance) and FM amount can be modulated from the Modifications panel.!
TOC PRE OSC HPF VCF ENV LFO EFX MODF TRIM ARP CONF TIPS NKS 27

UPPER PANELS
VCF | CASCADE
A cleaner sounding filter than Ladder, CASCADE offers a very similar set of controls...
Purely in terms of available features, the only difference between Ladder and Cascade is the
Rough/Clean switch. Apart from altering the overall tonal character, it has a noticeable effect on
the amount of resonance at the top end of its range.
Cascade is an all-rounder, and is particularly good for big smooth pads without generating too
much grunge when input signal levels are high.
The 12dB per octave switch (click on the button) removes two of the four poles, resulting in a
brighter sound while still retaining the overall character.!
TOC PRE OSC HPF VCF ENV LFO EFX MODF TRIM ARP CONF TIPS NKS 28

UPPER PANELS
VCF | MULTIMODE
Featuring extra high-pass and band-pass options, the multimode model is based on the filter in
yet another classic polyphonic synthesizer or two...
All controls except the switch in the middle should already be familiar (assuming you have been
reading about the other filter models above).
LP4 is a 4-pole low pass model, LP2 is a brighter 2-pole alternative.
HP is a high-pass (removes low frequencies) and BP a band-pass (removes both high AND low
frequencies i.e. allows only a band of frequencies around the cutoff point to pass through).!
TOC PRE OSC HPF VCF ENV LFO EFX MODF TRIM ARP CONF TIPS NKS 29

UPPER PANELS
VCF | BITE
Although VCF | BITE appears to have no distinguishing features compared to the other models,
it actually sounds very different...
The tone is highly dependent on input signal levels, the selected revision (REV) and the value of
PEAK i.e. resonance. Like the corresponding high-pass module, the lowpass BITE filter is a real
character, able to deliver anything from solid 2-pole to screaming mayhem.
Tip: If you want to hear a lot of resonance (“Peak”), try low oscillator volumes! Even as little as
10% can be just right.!
TOC PRE OSC HPF VCF ENV LFO EFX MODF TRIM ARP CONF TIPS NKS 30

UPPER PANELS
VCF | UHBIE
Another classic, but a latecomer to Diva: Uhbie, a silky smooth 2-pole state variable filter with
crossfade between three different types (low-pass through notch or bandpass, to high-pass):
the Uhbie filter panel
Again, most of the controls should already be familiar (they are the same as in other models):
We have Cutoff with two modulation sources/knobs on the left, resonance and key-follow in the
middle, and the amount of FM from oscillator 1 at the bottom right.
The switch and pair of controls at the top right are what make Uhbie special:
BR / BP switches the central position of MIX to either bandreject (notch) or bandpass...
MIX crossfades from lowpass through bandreject / bandpass to highpass. The source selector
and amount knob are used for modulating the mixture, as indicated by the arrow.!
TOC PRE OSC HPF VCF ENV LFO EFX MODF TRIM ARP CONF TIPS NKS 31

UPPER PANELS
Envelopes
The righthand panel comprises two envelopes one above the other, each with its own model
selector. Note that the curves of envelopes within the same hardware synth (i.e. those used for
amplifiers vs those used for filters etc.) often differ. This important but often overlooked detail has
also been carefully modeled in Diva.
ADS
Simplified ADSR with shared decay and release times. The Release stage can be switched off so
that even a long decay will stop as soon as the note is released.
This envelope was modeled on that same “specific piece of monophonic hardware” mentioned
above, but adapted for polyphonic use.
Tip: Before switching RELEASE on in envelope 1, make sure that DECAY is set to a value that is
also a suitable release time.
VEL (velocity) determines how much the envelope level is modulated (scaled) by MIDI velocity.
KYBD (keyboard follow) scales the attack, decay and release times according to the MIDI note
number. This makes the envelope of high notes shorter and low notes longer.
ANALOGUE
ADSR type modeled on the envelope of another famous but unnamed analogue synthesizer...
TOC PRE OSC HPF VCF ENV LFO EFX MODF TRIM ARP CONF TIPS NKS 32

UPPER PANELS
DIGITAL
Digital ADSR type modeled on a later (and significantly cheaper) successor to the above. The
DIGITAL envelope contains two extra buttons labeled Q and C:
Q (quantize) gives you a slightly steppy sound (think e.g. Alpha Juno, Matrix 1000 envelopes).
C (curve) affects the overall curvature, giving the envelope more of an ‘S’ form...
DIGITAL envelope without / with C (curve) switched on!
TOC PRE OSC HPF VCF ENV LFO EFX MODF TRIM ARP CONF TIPS NKS 33

LOWER PANELS
Lower Panels
LFOs
At the bottom left of all windows except Presets, you will see a pair of low frequency oscillators:
LFO 1 is also used as the direct source of vibrato, and LFO 2 is connected by default to several
parameters in Diva’s other modules (hence the labels in brackets).
The Waveform selector opens a list of all available LFO shapes:
sine typical sine wave"....................
triangle typical triangle wave".............
saw up rising sawtooth "..............
saw down falling sawtooth"........
sqr hi-lo square wave that starts positive / high when Phase is at minimum"............
sqr lo-hi square wave that starts negative / low when Phase is at minimum"............
rand hold steppy random wave"..........
rand glide smooth random wave .........
The Restart selector has four options specifying when the LFOs will be restarted:
sync never restarts. LFOs for all notes are in phase unless modulated apart"...................
gate restarts per note at the specified Phase (see below)"...................
single similar to sync, but restarts at the next note after all notes are released"................
random restarts at a random phase per note .............
Phase adjusts where (within its cycle) the LFO waveform will be restarted whenever a note is
played. Ignored when Restart is set to random.
Delay fades the LFO in, with a range from ‘immediate’ to about 20 seconds.
Rate knob offsets LFO speed (negatively or positively) from the Sync value.
Rate Mod controls the amount of rate modulation from a source specified in the neighbouring
selector (none in the above image – try e.g. ModWheel or KeyFollow here).
Polarity: Diva’s LFOs are normally bipolar, but when this switch is enabled, they become unipolar
– the entire waveform is shifted upwards so that only positive values are possible.
Sync is the rate / synchronization mode: 3 absolute times, plus 24 synchronized to song tempo.
Depth Mod controls the amount of LFO level modulation from a source specified in the neigh-
bouring selector (set to ModWheel in the above image). Tip: If the depth modulation source is set
to none, you can use the knob to reduce the overall LFO level.!
TOC PRE OSC HPF VCF ENV LFO EFX MODF TRIM ARP CONF TIPS NKS 34

LOWER PANELS
Effects
At the bottom right of all windows except Presets you will see a pair of stereo effects. The upper
selector specifies the kind of effect, and the square button at the top left is an on/off switch.
The two effects are arranged in series. This means that you can even set up two reverbs one after
the other (e.g. one for complex early reflections and the other for the main reverb tail).
Chorus
Type Classic, Dramatic, Ensemble are based on real hardware effects. Ensemble is especially rich
– it can turn a raw VCO into a classic ‘string machine’ sound.
Rate is the modulation speed. Use low values for slow stereo effects.
Depth is the modulation amount. Set to zero (with Classic or Dramatic) for static colouration.
Wet is dry/wet mix. Subtle Chorus can add stereo width without making the sound too “washy”.
Phaser
Type Stoned or Flanged – also based on real hardware effects. The Flanged type is more
resonant, and is particularly interesting when applied to bright sounds.
Feedback is the resonance amount control.
Sync synchronize the Phaser’s LFO to song tempo. See Rate below.
Stereo is a bipolar stereo width control. Note that with the Stoned type, maximum stereo width is
at +/- 25.00 (especially obvious if you turn Feedback up).
Rate controls the modulation speed. If Sync (see above) is switched on, the value is measured in
beats (i.e. quarter notes) so the rate actually gets slower as values increase. Example: For one
cycle every 3 bars in 4/4 time, set this to 12.00 (3 times 4).
Phase controls phase offset, from 0° to 360°.!
TOC PRE OSC HPF VCF ENV LFO EFX MODF TRIM ARP CONF TIPS NKS 35

LOWER PANELS
Plate (reverb)
PreDelay is a simple delay before the reverb starts. This is especially useful for retaining the
‘closeness’ of the original signal.
Diffusion adds a subtle chaos to the reverb, thus reducing metallic resonances.
Damp causes higher frequencies to fade more quickly than low frequencies. Damping emulates
the ‘warming’ effect of carpets, curtains, wood etc. in a room.
Decay controls the time it takes for the reverb to fade out
Size ranges from tiny bathroom to huge cathedral. Tip: It is well worth experimenting with all
combinations of Decay and Size!
Dry / Wet are level controls for the untreated and effect signals.
Delay
Left / Center / Right delay times across the stereo field, always relative to host tempo (BPM). "
Integer values are exact semiquavers (quarter-beats), and Center defines the Feedback time. This
configuration is unusual – it lets you set a repeat rate without hearing that particular “tap” (simply
turn down Center Vol to zero).
Dry is the level of the unprocessed signal.
Center Vol / Side Vol are separate levels controls for the center tap and the stereo (L/R) taps.
Wow emulates slow tape ‘wobble’, ranging from subtle/spacey to almost seasick.
Feedback is the regeneration amount. 100.00 will give you an infinite loop if HP is set to minimum
and LP to maximum... well worth trying out!
HP / LP are cutoff controls for highpass and lowpass filters within the feedback path. Lower the
value of LP for typical damping, increase HP to reduce the bass and mid frequencies.!
TOC PRE OSC HPF VCF ENV LFO EFX MODF TRIM ARP CONF TIPS NKS 36

LOWER PANELS
Rotary
A realistic rotary cabinet i.e. Leslie™ emulation, with tube-like distortion.
Mix is a dry/wet balance control
Out attenuates or boosts the output level (whatever the Mix value)
Stereo controls stereo width (you could call this “microphone separation”)
Balance controls the relative volumes of the horn and bass speakers
Mode (unlabeled) selects Normal, SyncBass or NoBass. In Normal mode, the horn and bass
speakers rotate independently, in SyncBass mode they are phase-locked. NoBass mode switches
the bass speaker off – you might have to reduce Mix a little to bring back the bass
Controller determines which of the available modulation sources (mod wheel, control A, Control B
or Pressure) will be used to modulate the speed
RiseTime adds a variable lag to the selected controller
Slow sets the Slow speed, with a range from about 10 seconds to 0.2 seconds
Fast sets the Fast speed, also with a range from about 10 seconds to 0.2 seconds
Drive is the amount of distortion. Note that distortion is also highly dependent upon the input level
– if there is still too much distortion in the signal when Drive is set to minimum, turn down Volume
in the Amplifier & Pan section, then turn up Out (see above)!
TOC PRE OSC HPF VCF ENV LFO EFX MODF TRIM ARP CONF TIPS NKS 37

LOWER PANELS
Note: The following panels are switched via the ‘radio’ buttons at the bottom of Diva’s window...
Tuning
This panel is visible when either Main or Presets is selected:
Vibrato controls the amount that oscillators are pitch-modulated from LFO1 (remember that LFO
levels also depend on the value of Depth Mod).
Glide sets the basic portamento rate. Glide2 is a bipolar offset applied to VCO2 (Dual VCOs and
Triple VCO) as well as VCO3 (Triple VCO). Range is the portamento “strength”, a u-he speciality.
Lower values shift the beginning of the slur closer to the target note, which is great for sloppy
intonation effects! GlideMode has two options:
time however far apart notes are, the glide will take exactly the same amount of time"........
rate when notes are further apart, glide is proportionally slower .........
Fine (fine tune) shifts the pitch over a range of +/- 1 semitone and Transpose shifts the pitch in
semitone steps over a range of +/- 24 semitones. Up and Down set the pitch bend ranges, from 0
to 24, 36 or 48 semitones.
Microtuning: Diva supports the .tun microtuning format. Hundreds of tables are available online,
most of them free. Put all your .tun files into the following folder:
WIN ...\Diva.data\Tunefiles (specifically for Diva)"
MAC MacHD/Library/Application Support/u-he/Tunefiles/ (global for all u-he plugins)
After loading a microtuning file, switch it on by clicking the button.
Amplifier & Pan
This panel is visible when either Main or Presets is selected
VCA selection: either envelope 1 or a simple gate (thus freeing up Env1 for other purposes!)
Volu me is a bipolar gain control. Positive values can subtly overdrive the amplifier. Vol Mod is for
gain modulation via the neighbouring modulation source. Pan shifts the voice(s) towards the left or
right. Pan Mod modulates pan position – to pan stacked voices apart, use StackIndex here.!
TOC PRE OSC HPF VCF ENV LFO EFX MODF TRIM ARP CONF TIPS NKS 38

LOWER PANELS
Voice
This (unlabeled) panel is visible while the Main or Presets tabs are selected:
Mode has five options:
Poly normal polyphonic"..............
Mono monophonic, each new note triggers the envelopes"...........
Legato monophonic, doesn’t retrigger until a space is left between consecutive notes".........
Duo duophonic i.e. split voices. Osc 2 follows the highest note, Note Priority is ignored"..............
Poly2 a variant of Poly in which voices in their release stages are stolen before new ones ...........
Note Priority only applies to Mono and Legato modes. The options are:
last plays the most recent note (digitally controlled synthesizers)"...............
lowest plays the lowest note (most classic USA mono-synths)"..........
highest plays the highest note (EMS as well as most Japanese mono-synths) ........
Accuracy is a very important global parameter, as it determines CPU-hit vs realtime audio quality
(especially resonance). See page 6 for details.
Offline Acc determines the accuracy for offline audio rendering, and is also a global parameter.
Voic es sets the maximum number (2-16) of voices before note-stealing occurs. Mostly used to
guard against audio glitches while running CPU-intensive presets.
Stack sets the number of unison voices. Use Stack Tuning and/or the StackIndex modulation
source to offset voices against each other. Note that stacking will eat up CPU!
TOC PRE OSC HPF VCF ENV LFO EFX MODF TRIM ARP CONF TIPS NKS 39

LOWER PANELS
Clock & Arpeggiator
This (unlabeled) panel is visible whenever the MAIN or Presets tabs are selected:
Clock
Clock selects a clock interval for the arpeggiator (and perhaps future additional features). Note
that Diva’s clock is always synchronized to host tempo, there are no absolute times.
Multiply scales the clock interval from 0.50 (half as long) to 2.00 (twice as long).
Swing factor, 50% = 2:1 (triplet time), 100% = 3:1 (dotted note / strongest shuffle).
Arpeggiator
Arp switches the arpeggiator on/off.
Mode
played in the order the notes were originally played".........
up from lowest to highest".................
down from highest to lowest"............
up+dn 1 normal up & down "......
up+dn 2 up & down, repeating the top and bottom notes"......
random chaotic order .......
Progression determines when the arpeggio will proceed to the next octave:
serial plays all notes, then jumps octaves up (set Octaves to 2 or more)"............
round same as serial, but also jumps octaves down again (set Octaves to 3 or 4)"...........
leap plays a note, jumps octave up for next note etc. (set Octaves to 2 or more)"..............
repeat like leap, but repeats the same note for all octaves before playing the next one ..........
Octaves (1 to 4) transposes the arpeggio according to the Progression setting (see above). The
current octave is indicated by the vertical row of LEDs.
Restart (none, 4 – 10, 12, 14, 16, 24, 32): This sets the number of notes the arpeggiator will play
before it starts from the beginning again, as indicated by the bottom LED in the row. The idea is to
help keep arpeggios musically ‘in meter’ e.g. 4/4 time.
Experiment with the setting ‘8’ first. Note that setting low values here can cause the arpeggiator to
restart before all your notes have been played.
Note that the results of arpeggiation depends on the selected voice mode: multiple overlapping
release phases (poly), single overlapping release phase (poly2), single retriggering of the same
voice (mono) or single trigger i.e. no retrigger (legato as well as duo).!
TOC PRE OSC HPF VCF ENV LFO EFX MODF TRIM ARP CONF TIPS NKS 40

LOWER PANELS
Modifications
Many synth enthusiasts like experimenting for hourson end with the more esoteric features of their
chosen instruments. Diva doesn’t disappoint – click on MODIFICATIONS to open this panel:
The upper half includes options that aren’t available in the module panels (for instance resonance
modulation), plus a few that are only available in certain modules. The lower half contains a bunch
of simple modulation processors with input selectors – see below for details.
VCO
FM & Cross Mod Depth lets you modulate the FM amount in the TRIPLE VCO (and perhaps
future oscillator models) from the selected modulation source. Note that this feature mirrors the
extra Cross Mod parameters in the DUAL OSC model.
Noise & Dual VCO Mix lets you modulate the level of Noise (or the oscillator also responsible for
noise) in all oscillator models, from the selected modulation source. For the Triple VCO and DCO
models, this is easy because the noise generator is a separate audio source in both cases. In Dual
VCO and Eco models, however, it modulates VCO1 level because noise is an integral part of
VCO1. In the Dual VCO (not ECO) model, it does this by modulating Mix – great for cross-fading
between the two oscillators. For the sake of consistency, Mix is also modulated in the DIGITAL
model – although both oscillators are capable of generating noise.
Filter
Resonance Mod lets you modulate Resonance / Emphasis / Peak from the selected modulation
source. There is no equivalent within the main oscillator panels.
Filter FM Mod lets you modulate the amount of filter FM (OSC1) from the selected mod source.
Feedback
Feedback Mod lets you modulate the amount of Feedback from the selected source. This only
applies if the oscillator model is Triple VCO, or Feedback is selected as the central module.
parameters modulated here
This isn’t a button or knob, but a reminder that wherever the (M) symbol appears in the main
panels, the neighbouring parameter is being modulated from within this panel.!
TOC PRE OSC HPF VCF ENV LFO EFX MODF TRIM ARP CONF TIPS NKS 41

LOWER PANELS
Modulation processors
rectify converts all negative values in a modulation source to positive values
invert turns a modulation source upside-down – negative becomes positive, and vice versa
quantize creates discrete steps – the value is a division factor: the lowest value 2.00 means two
steps if the input is unipolar (e.g. envelope), and four steps if it is bipolar (e.g. LFO)
lag slows down abrupt changes in the source e.g. makes square waves more rounded
multiply outputs the product of two modulation sources
add outputs the sum of two modulation sources
Trimmers
The TRIMMERS panels let you detune voices, add a variable degree of ‘slop’ to cutoff frequencies,
envelope times, pulse width and glide times – and more.
OSCILLATOR VOICE DETUNE lets you detune voices (per oscillator!). Double-click to reset.
LEDs indicate which voices are currently being played. They are arranged in pairs (01/09, 02/10,
03/11, 04/12 etc.)
Voice Map Modulator specifies values for the modulation source VoiceMap. Use VoiceMap for
any offsets you like, e.g. panning, cutoff, resonance.
Note: The Oscillator Voice Detune and the Voice Map Modulator have 8 knobs (per row) for all 16
available voices. Presets with more voices than 8 ‘reuse’ those values.
Detune Amt (amount) is a scaling factor for all the OSCILLATOR VOICE DETUNE knobs. Keep
this low for “good tuning”!
Voice Drift is a slow wavering of the overall pitch. Again, keep values low for “good tuning”
Voic es and Stack are the same as in the Main / Voice panel. They are included here for your
convenience while adjusting STACK TUNE.
VARI ANCE applies random offsets (‘slop’) to cutoff, envelope times, pulse widths and glide times.
Similar to OSCILLATOR VOICE DETUNE (see above), but instead of having individual knobs per
voice, each parameter has an associated button which randomizes the 8 values.
TOC PRE OSC HPF VCF ENV LFO EFX MODF TRIM ARP CONF TIPS NKS 42

LOWER PANELS
LED Colour determines the colour of all indicator lights in Diva. An automatable parameter!
RESET PHASE only works if Transient Mode (see below) is set to osc reset. The 3 knobs set the
phases at which the 3 oscillators will be reset every time a note is played. This feature is
particularly useful for sounds in which the attacks need to be very consistent. Tip: the most
percussive setting is seldom zero – you will need to experiment!
Transient Mode options affect how the first few milliseconds of new voices are handled in all voice
modes except Legato. The effect is seldom obvious, but when attack times are set to minimum, the
choice of transient mode can make all the difference between punchy and clicky.
The analog option means that nothing is reset (like in old analogue synths) – oscillators retain any
direct current (DC) component. With the dc reset option, DC offset is removed. The vcf reset option
also causes the filter to reset, ensuring that previously played notes have no effect on the current
voice. The osc reset option also resets the oscillator phases to the RESET PHASE values.
Bipolar Noise is best left switched on. Included for reasons of compatibility with early presets.
STACK TUNE sets the pitch of each stacked voice within a range of +/- 2 octaves. Set Stack (see
above) to a number other than 1, and use these knobs to create ‘megasaws’ (set all values very
close to 0.00), one-finger chords etc..
Scope
Every synth needs an oscilloscope...
Frequency controls horizontal resolution, and Scale controls vertical resolution
Note that Diva’s ‘scope takes its signal from before the effects.
Context menu
Right-clicking anywhere within the oscilloscope window lets you switch the drawing mode. The
options glow, fire and wind add different fade-out effects at the cost of extra CPU. These modes
are also a bit more sluggish than eco or fast. Tip: If you need to keep CPU-usage down to an
absolute minimum, select the eco (economy) option.!
TOC PRE OSC HPF VCF ENV LFO EFX MODF TRIM ARP CONF TIPS NKS 43

CONFIGURATION
Configuration
Clicking on the cogwheel icon opens the global configuration pages where you can adjust the
window size and brightness and connect Diva parameters to MIDI continuous controllers.
The 4 buttons are Close [X], MIDI Learn [L], MIDI Table [≣] and Preferences [tools]."
Tip: Right-click within the button area to set the currently selected page as default.
MIDI Control
MIDI Learn
The MIDI Learn page is where you can connect MIDI CC to Diva parameters. The CC data can be
generated by knobs or sliders on your hardware controller, or by a track in your host sequencer
etc.. Click on the configuration button and select the ‘L’ MIDI icon:
TOC PRE OSC HPF VCF ENV LFO EFX MODF TRIM ARP CONF TIPS NKS 44

CONFIGURATION
The MIDI Learn window is a translucent overlay, with MIDI-learnable elements shown as selectable
outlines. Controls that are already connected appear filled (like 3 sliders and a knob in the image).
The outline of the currently active control is highlighted (like the oscillator ‘MIX’ knob in the image).
You can still select MAIN, MODIFICATIONS etc. here, but not the module panels. As ‘Digital‘ has a
very different parameter set than ‘Triple VCO’ (as an extreme example), to MIDI learn everything in
Diva you will need to exit configuration mode and swap the modules out.
Try this: Click on the CUTOFF knob/slider and send Diva some MIDI CC data (move a knob or
slider on your hardware MIDI controller). Then switch to the MIDI Table and check the list…
MIDI Table
Click on the configuration button and select the lower MIDI icon button to open an editable list of all
current MIDI CC assignments.
Parameter
The first field displays/selects one of Diva’s many parameters, which are sorted into sub-menus
according to module. Click on the ‘Add’ button at the bottom left and experiment with this field, then
delete the assignment again by clicking on the [X] to the right of the line you just created.
Here’s an experimental feature… At the very bottom of the Parameter menu are two extra options.
Select Last Clicked Control, enter a Controller number and exit the configuration pages. The most
recently clicked knob or switch will now respond to that CC! The Fine option is similar, but with a
significantly reduced range.
Channel / Controller
The next two fields are for MIDI channel and CC number. Diva is channel-sensitive, you can map
up to 16 channels of controller assignments.
Mode
Specifies the range and/or resolution of values.
normal full range, continuous .....................
integer full range, whole numbers only .....................
fine 0.01 steps between the two integers closest to the current value ..........................
The next two options are only useful for adjusting oscilllator pitch via a pair of controls:
octaves 5 discrete values ....................
semitone +/- 6 semitones .................
Setting these up isn’t particularly straightforward, but if you have done it once you can easily do it
again – see the next page for a quick “learning-by-doing” tutorial.!
TOC PRE OSC HPF VCF ENV LFO EFX MODF TRIM ARP CONF TIPS NKS 45

CONFIGURATION
Tutorial: Oscilllator pitch control via two CC
•
Load INIT Jupe-6 from the TEMPLATES and set the oscilllator MIX fully clockwise (VCO2 only).
•
Click on the configuration button and enter the MIDI Learn page. Click on VCO2 octave rotary
switch – note that the DETUNE knob will also be highlighted. Move an unused knob on your
controller hardware, preferably one that that has another unused knob next to it (you will be
assigning that one manually).
•
Exit the Configuration pages and test the setup so far. The learned control (CC) will sweep both
rotary knobs smoothly through the entire range. Several users will prefer this behaviour.
•
Click on the cogwheel and open the MIDI Table. The OSC:Tune2 assignment will appear there.
Set its Mode to octaves instead of normal. The learned knob will now only switch the the octave.
•
Use the Add button to create a fresh assignment. Set Parameter to OSC / Tune2 (i.e. the same
as the learned knob), Controller to the CC corresponding to that other unused knob, and the
Mode to semitone. Move the newly assigned knob to its central position.
•
Exit the configuration pages and test the final setup. The first knob (CC #03 here) will only affect
the octave rotary switch, while the second knob (CC #04 here) smoothly adjusts the semitone
offset. Bazinga!
Type
Specifies the type of hardware. By far the most common is Continuous 7-bit.
Encoder 127 unipolar encoder ................
Encoder 64 bipolar encoder ..................
Continuous 7-bit 7-bit MIDI CC (standard resolution, most common) ..........
Continuous 14-bit 14-bit MIDI CC (high resolution, quite rare) ........
Remove
To remove individual assignments, click on the small [x] to the right of the line. To remove all
assignments, use the Delete All button at the bottom.
Control A, Control B
Local versions of the Preference settings Control A Default and Control B Default (see below).
These replace Breath and Xpress used in previous versions of Diva. Note: The assignments
here are saved per instance with the project, not with presets.
!
TOC PRE OSC HPF VCF ENV LFO EFX MODF TRIM ARP CONF TIPS NKS 46

CONFIGURATION
Preferences
To open the Preferences window, click on the ‘tools’ icon:
CONTROLS
Mouse Wheel Raster: If the wheel on your mouse is rastered (you can feel notches as you
roll), activate this. Each notch should then increment any parameter in Diva by a ‘sensible’ step.
APPEARANCE
Default Size: The GUI size for each new instance of Diva. Note that you can temporarily
change the GUI size without entering the Preferences page – right-click in the background.
TOC PRE OSC HPF VCF ENV LFO EFX MODF TRIM ARP CONF TIPS NKS 47

CONFIGURATION
Default Skin: This option will only appear if Diva finds at least one alternative skin when it
loads. Change this to set the global default.
Gamma: The overall brightness of the Diva GUI (brighter, bright, neutral, dark or darker).
Oscilloscope: This setting (eco, fast, glow, fire or wind) affects the appearance of waves in the
oscilloscope. Eco is the most CPU-friendly, wind the most CPU-intensive.
Text Antialiasing: Normally on. In rare cases, switching this off will improve readability.
PRESETS
Auto Versioning: If switched on, an index is appended to the preset name and automatically
incremented each time you save it. For instance, saving ‘Space’ three times in a row would give
you three files: ‘Space’, ‘Space 2’ and ‘Space 3’.
Save Presets To: Choosing the user folder option causes all saved presets to land in the User
folder instead of the currently selected one.
Scan On Startup: Whether the preset library should be scanned and the database recreated
when the first instance of Diva is started, e.g. when you reopen a project.
OTHERS
Auto-Tag Features: Setting this preference to an option other than never can make tagging
presets less of a chore. The on load option causes Diva to generate appropriate ‘Features’ tags
whenever a preset is loaded, hiding any existing tags. The if empty option is similar but doesn’t
hide existing tags. See the NKS chapter a few pages on.
Note that auto-tagging is temporary. To make the automatically generated ‘Features’ permanent,
you can (mis)use the convert to h2p function in the context menu of the presets panel.
Exporting to a different format also writes any generated Features tags into the preset data.
Base Latency: If you are certain that your audio system – hardware as well as software – uses
buffers that are a multiple of 16 samples in size (please refer to the respective documentation),
you can safely disable Diva’s base latency here. Otherwise leave it set to ‘16 samples’ to
prevent crackles. Note that a new Base Latency setting will only take effect when the host
allows e.g. on playback or after switching the sample rate. Reloading Diva will always work.
Control A/B Default: The list of modulation sources in previous Diva versions included the fixed
MIDI controls Breath (CC#02) and Xpress (CC#11). While retaining backwards compatibility, we
replaced them both with the user-definable Control A and Control B sources.
MIDI Control Slew sets the strength of parameter smoothing for all performance controls –
pitch bend, modulation wheel, Control A/B and Pressure. The default setting is ‘fast’.!
ABOUT THOSE BUFFERS
Diva processes audio in chunks of n x 16 samples. This so-called ‘block processing’
method significantly reduces the CPU load and memory usage of all our plug-ins.
If the number of samples to be processed is say 41, Diva processes the first 32 and
keeps the remaining 9 in a small buffer (16 samples is large enough). Those 9 samples
are then processed at the start of the next call… and so on.
The extra buffer is only necessary if either the host or audio driver processes ‘unusual’
buffer sizes. In the many host applications that process buffers of e.g. 64, 128, 256 or
512 samples (all multiples of 16), try switching it off so that Diva can process latency-free.
TOC PRE OSC HPF VCF ENV LFO EFX MODF TRIM ARP CONF TIPS NKS 48

MIDI
MIDI Specialities
Multichannel MIDI
This feature supports a growing class of expressive ‘performance’ instruments (e.g. Haken
Continuum, Eigenharp, Roli controllers, Linnstrument) that can send each note on a separate MIDI
channel. For Diva to respond correctly, your host application must be able to route multiple MIDI
channels to a single instance of a plug-in. Each voice/note will then react individually to the
following performance controls:
Pitch bend
Pressure (aftertouch)
Modulation (MIDI CC #01)
Control A (user-definable MIDI CC)
Control B (user-definable MIDI CC)
If multichannel MIDI is received, the voice modes Poly, Mono and Legato are practically identical.
In each case Diva behaves like several (up to 16) mono synths set to the same preset. The Voices
setting still applies, as voices can be ‘stolen’ across multiple channels.
Note: The Duo voice mode is not ‘channel aware’ i.e. all MIDI channels are merged.
Polyphonic aftertouch
As well as the much more common Channel Aftertouch, Diva recognizes and reacts appropriately
to Polyphonic Aftertouch. Both types are combined in Diva’s ‘Pressure’ modulation source.
Unlike channel aftertouch, poly aftertouch acts on each played note individually (so you can
articulate each note within a chord). Unfortunately, MIDI hardware capable of generating such data
is considered a niche product these days, and is therefore quite expensive.
Caution: Polyphonic aftertouch can cause very dense MIDI data streams, often enough to choke
older systems.!
TOC PRE OSC HPF VCF ENV LFO EFX MODF TRIM ARP CONF TIPS NKS 49

TIPS & TRICKS
Tips and Tricks
So bite me!
The BITE models are based on relatively cheap but (as I only recently started to realize) extremely
characterful Japanese hardware – perhaps BITE stands for “Big In The East”?
Let’s take a look at a preset that uses the BITE highpass: Load POLY SYNTH / HS Ecobite Clav
and play that sound for a while. Use your pitchbender.
One thing you might have noticed is that the HPF cutoff has glide while the oscillator pitch doesn’t.
This is because HPF cutoff is modulated by KYBD2 (keyboard follow 2) with Glide2 set to 32.
Go to the Main page and change the HPF to e.g. POST. The sound has lost all its bite (the main
ladder filter has little to do with the character of this preset). Change the HPF back to BITE.
You can make this sound ‘honk’ a bit more by switching the VCF to 12dB mode. Try that...
Still not gritty enough? Select Rotary in Effect 1 and switch it on. Turn Drive up to maximum and
Balance down to minimum.
Bass boost
The BITE highpass can also be used to boost bass frequencies – see 1 BASS / HS Model K12.
Note that much of the actual ‘bite’ in that preset comes from the lowpass ladder filter.
Twin effects
Diva’s two effects are arranged in series, and they offer the same options... which means you can
even use the same type of effect in both slots:
Twin r everb
Load PERCUSSIVE / MK FX Zapper (if it works with sharp percussion, it works with anything!)
Turn Effect 2 Wet up to 50 and Decay to minimum. Compare by switching Effect 2 off and on. Try
adjusting the Size parameter slightly, but leave it somewhere between 15 and 35.
Select Plate in Effect 1 and switch it on. Take Effect 1 Wet to about 15.
Note that the first effect in the signal chain is responsible for the tail and the second is for the early
reflections – a richer sound than the more obvious “early reflections first”, as long as the tail’s
PreDelay is very fast.
Twin rotary
Load TEMPLATES / INIT Alpha
Take envelope 1 Sustain to zero and adjust the
decay until you get your preferred organ-type click
(even 0 works). Turn Sustain back up to 50 and
Release to zero.
Set up the effects to look just like this image.
Rotary1 is responsible for removing some high
frequencies (via Balance) as well as for the
strong distortion (via Drive). Effect 2 is a typical
stereo Rotary – push your modulation wheel up
while performing.
This preset can be improved by adding vibrato, by
using different waves, adding SUB etc..!
TOC PRE OSC HPF VCF ENV LFO EFX MODF TRIM ARP CONF TIPS NKS 50

TIPS & TRICKS
Stereo without effects
Diva’s signal is basically mono (with pan) until processed by the effects.
However, stacked voices can be panned apart – try this:
•
Load TEMPLATES / INIT Alpha. Go to the TRIMMERS panel and set
Stack to 2. Turn the second (2) Stack Tune knob up to 4.00 – a
major third interval. Play your keyboard and watch the voice activity
LEDs light up in pairs. Note that you can only play 3-note chords
before voice-stealing occurs. If your system can handle it, set Voices
to 16 for 8-note polyphony.
•
In the MAIN panel, click on the selector next to Pan Mod and select
StackIndex as source instead of LFO2. Slowly turn the knob to
maximum and hear how this pans the two notes apart.
StackIndex doesn’t have to be used in such a static manner. It could be
multiplied with an LFO, for instance: Go to the MODIFICATIONS page,
select LFO2 and StackIndex as the two multiplicands. Then go back to
the MAIN panel and replace the Pan Mod source (currently StackIndex)
with Multiply.
Also try modulating cutoff with Multiply instead of LFO2. Your VCF and
Amp panels would then look something like the image here.
LFO as ramp generator
If you don’t need both LFOs for cyclic modulation, you can use one of them as a ramp generator
(a simple envelope). It’s all about the LFO’s Delay parameter:
•
Load TEMPLATES / INIT Jupe-6 and turn the oscillator MIX up to 50.
•
Turn VCO2 pitch modulation (the knob below VCO1 octave range, labelled LFO2) up to exactly
1.00. The pitch of VCO2 now wanders in a drunken stupor around a central pitch. Change the
LFO2 Waveform to sqr hi-lo. VCO2 now jumps a semitone above and below.
•
Turn LFO2 Rate down to minimum and set VCO2 detune to exactly -1.00. Everything is now
back in tune. Finally, turn LFO2 Delay to about 20 – yes, it’s all about the Delay parameter!
Of course it would have been easier to use envelope 2, but it’s good to have that envelope free for
cutoff duties. On the other hand, we could have used LFO2 for cutoff and envelope 2 for VCO2
pitch instead. Hmm... that would have been easier (envelopes are unipolar), and perhaps more
interesting (full-spec ADSR instead of ramp)…
Voice map tricks
Looking through the presets in Diva, the Voice Map Modulator isn’t used very often. Perhaps all the
other ‘slop’ parameters are enough to get by, but to surgically ‘detune’ any modulation target you
like over a wide range, you do need those knobs...
Chord inversions
•
Load TEMPLATES / INIT Jupe-8 and go to the Trimmers page
•
Set the Voice Map Modulator values to -100, 0, 100, 0, -100, 0, 100, 0
•
Use VoiceMap to modulate oscillator pitch, amount = 12.00 (or 7.00 if you like Jazz)
•
Switch the Effects on, adjust filter settings to taste etc. and play simple triads
Cutoff offset
•
Load TEMPLATES / INIT Minipoly, then and change the Voices parameter to 4. Double-click on
Cutoff and turn EMPHASIS up to about 80.
•
Replace the second cutoff modulator (currently LFO2) with VoiceMap and turn it up to about 30.
•
Adjust the first four Voice Map Modulator knobs to taste while repeatedly playing the same note.
TOC PRE OSC HPF VCF ENV LFO EFX MODF TRIM ARP CONF TIPS NKS 51

TIPS & TRICKS
Dual oscillator crossfade
Two of the oscillator models in Diva have a balance (MIX) control instead of individual oscillator
levels – DUAL VCO and DIGITAL. In the Modifications page, modulate Noise & Dual VCO Mix to
crossfade between the two oscillators.
Modulation processor tricks
Mastery of the modulation processors in the Modifications page is the key to making seemingly
impossible sounds in Diva, and a fantastic playground for experimentation. A few examples:
Quantize
•
Load TEMPLATES / INIT Mongrel-2, turn envelope 1 Sustain up to maximum.
•
In the oscillator, turn the lower of the two TUNE MOD knobs up to maximum. You should hear a
cheap “alarm siren” sound caused by LFO2.
•
Open the Modifications page and specify LFO2 as input for the QUANTIZE processor. In the
oscillator panel, replace that LFO2 modulation with Quantize. Change the LFO2 Sync to 1/2.
•
Specify Quantize as input for the LAG processor, go to the oscillator and replace Quantize with
Lag. Turn the Lag time up to about 22.
•
Experiment with different LFO2 waveforms, Sync and Quantize values.
Rectify
Here are a few examples of what you can do with the rectifier – try them out!
•
Double the speed of a triangle or sine LFO
•
Change a saw LFO into a triangle
•
Change a square LFO into a constant (DC)
•
Make your pitchbender unipolar
All processors
Load HS All Processors from the Local folder, and open the Modifications page. This preset uses
all of the modulation processors, but it’s still fairly easy follow:
•
LFO1 > Lag > feedback modulation
•
LFO1 > Lag > Add with Inverted Mod Wheel > cutoff modulation
•
LFO2 > Quantize > shape modulation of VCO1, cutoff modulation
•
LFO2 > Quantize > Rectify > pitch modulation of VCO1
•
LFO2 > Quantize > Multiply with LFO1 > resonance, filter FM
TOC PRE OSC HPF VCF ENV LFO EFX MODF TRIM ARP CONF TIPS NKS 52

NKS
NKS
Diva supports Native Instruments “NKS extensions” format so that it can be integrated into the
Komplete Kontrol software or Maschine environments. Diva’s factory presets are optionally
installed as tagged .nksf files. A few pages of performance controls mapped to common
parameters are automatically generated and saved together with each .nksf preset.
Saving in NKS format
While the native, h2p and h2p extended options cause Diva to save presets into the currently
selected preset directory, nksf files go directly into the preset location used for Komplete Kontrol or
Maschine (so .nksf files do not appear in Diva’s preset browser). To make them visible in Komplete
Kontrol, open its preferences and rescan the preset locations.
Batch conversion
First, right-click the [save] button and set the target format to nksf. Via cmd-click (Mac) or alt-click
(Win), select all presets in the current folder you want to convert, then right-click any of the
selected presets and choose convert to nksf. Note: The original files are not affected.
What to do if Diva doesn't show up in Komplete Kontrol / Maschine.
First of all, make sure your NKS software is up to date: Komplete Kontrol V1.5+ or Maschine V2.4
are the minimum requirements for u-he.
In Windows, Komplete Kontrol must know the Vstplugins folder containing Diva: Open Komplete
Kontrol preferences, go to Locations and add your Vstplugins directory if necessary, hit Rescan
and check whether Diva appears.
Maybe the NKS preset folder is empty? If so, please reinstall Diva with the correct VST path and
the NKS-option checked. Here are the preset folder locations:
Mac Macintosh HD/Library/Application Support/u-he/Diva/NKS/Diva/
Win C:\Users\[you]\Documents\u-he\Diva.data\NKS\Diva\
Perhaps the XML-File is missing from this location:
Mac Macintosh HD/Library/Application Support/Native Instruments/Service Center/u-he-Diva.xml
Win C:\Program Files\Common Files\Native Instruments\Service Center\u-he-Diva.xml
A re-install with the NKS-option checked should also remedy this issue.
What to do if Komplete Kontrol / Maschine is unable to load Diva
Either Diva wasn't installed as VST, or it wasn’t installed with the correct path. The default VST
path is fixed in MacOSX, but can be set during installation in Windows:
Mac Macintosh HD/Library/Audio/Plug-Ins/VST/u-he/
Win <User VST Folder>/ (path for the VST plug-in set during installation)
If Diva’s VST plug-in cannot be found in one of these locations, run the installer again making sure
that you set the correct path and have activated ‘VST’ as installation option.!
Saving as .nksf is only possible in the VST2 version
Mac owners can use – temporarily if necessary – any host application that supports VST2
e.g. Cubase, Ableton Live, Cockos Reaper, Presonus Studio One, Bitwig Studio…
TOC PRE OSC HPF VCF ENV LFO EFX MODF TRIM ARP CONF TIPS NKS 53

TROUBLESHOOTING
Troubleshooting
Intermittent crackling sound?
That’s Diva’s only demo restriction. To purchase a license, go here and click on the shopping cart
symbol. If you already own a license, click on Diva’s data display and select “enter serial number”.
File permission problems?
Windows 10 doesn’t like files and folders being moved around after Diva has been installed, so
please specify suitable paths during installation. If you try to set a “Data directory" path in one of
the Program Files areas, please do not ignore the warning!
Our plug-ins can reside anywhere, but the Data directory must have unrestricted read/write access
(for instance, C:\Users\*YOU*\Documents\u-he\ should be fine). The cure for most file permission
problems is to completely uninstall Diva, then reinstall following the above advice.
CPU overload?
Diva is very demanding, especially in ‘divine’ mode. You will need quite a powerful computer. Even
if your system only delivers one or two voices before the CPU starts complaining, there are still a
few things you can do before thinking about upgrading your hardware:
•
Lower the Accuracy setting – it really doesn’t have to be ‘divine’ all the time!
•
Lower the polyphony and/or switch the Mode (Main panel) to Poly2, then resave the preset.
•
Try activating multicore. This is not an adequate replacement for freezing tracks etc., its main
purpose is to let users play one instance of Diva with as many voices as possible. If a project
includes many instances of Diva, please check that as few as possible have multicore enabled.
In certain combinations of hosts, drivers etc., multicore can even cause drop outs and stalls.
•
Use Diva purely as a monophonic synth, e.g. by locking the ‘legato’ voice Mode. Remember that
many treasured classics are “only” monophonic.
•
Avoid automating the ‘Digital’ oscillator’s WAVE switches, which can cause serious CPU spikes.
Out of tune?
First of all, you have good ears! Diva emulates classic analogue hardware, and many of the
presets (including some of the template files) have been programmed to sound very similar to
wobbly old synthesizers. Some people actually like that...
However, the amount of slop is optional: Go to the Trimmers page and turn down Detune Amt as
well as Voice Drift before saving a sound. Then read all about the Trimmers.
Missing switch automation?
Host automation of several ‘switch’ type parameters in the middle of a track would almost inevitably
cause CPU spikes, crashes, loud noise bursts and other erratic behaviour. So we decided not to
expose these parameters to host automation. Note that you can still MidiLearn the switches.
Other problems?
If you are truly stuck, you can contact us via our support page. You could also help us improve
Diva by sending us a log file: To set this up, create a new text file and name it Diva.log (not
Diva.txt). Once the problem occurs, quit your host application and send a copy of Diva.log to
support@u-he.com together with a short explanation of the problem. Please also state your
operating system and host application. Thanks in advance!!
TOC PRE OSC HPF VCF ENV LFO EFX MODF TRIM ARP CONF TIPS NKS 54

MODULATION SOURCES
List of Modulation Sources
These are divided into two alphabetically sorted lists. The upper half is for regular MIDI data,
envelopes and LFOs, while the lower half is reserved for the more esoteric stuff…
default A modulation source chosen to suit each target... but often “none”.
––––––––––––––––––––––––––––––––––––––––––––––––––––––––––––––––––––––––––––––
Control A User-definable MIDI CC, default is 02 (breath control)
Control B User-definable MIDI CC, default is 11 (expression pedal)
Env1 Envelope 1 (amp envelope)
Env2 Envelope 2 (modulation envelope)
Gate MIDI gate i.e. whenever a note is being played
KeyFollow MIDI note pivoting around E2, including any Glide
KeyFollow2 Ditto, but includes Glide2 offset
LFO1 Diva’s vibrato LFO
LFO2 Diva’s ‘mod’ LFO
ModWheel Modulation wheel, MIDI CC #01
PitchWheel MIDI pitch controller (wheel, stick, ribbon... depending on the hardware)
Pressure Channel pressure or key pressure (aka mono or poly aftertouch)
Velocity MIDI note velocity
––––––––––––––––––––––––––––––––––––––––––––––––––––––––––––––––––––––––––––––
Add Adds two mod sources together
Alternate Flip-flop per voice i.e. two alternating (extreme) values
Invert Inverts the mod source – negative to positive and vice versa
Lag Slows down all changes in the mod source, e.g. makes square waves round
Multiply Multiplies two mod sources together e.g. LFO2 x modulation wheel
Quantise Creates discrete steps – the value is a division factor (try 2.00, 4.00, 8.00...)
Random A random value per played MIDI note
Rectify Converts any negative values within a modulation source to positive values
StackIndex Voice number (use for e.g. Pan). For detuning, use the Stack Tuning knobs "
instead. StackIndex values are evenly spread between +1 and -1
VoiceMap Voice Map Modulator (general-purpose voice offsets – see Trimmers panel)
––––––––––––––––––––––––––––––––––––––––––––––––––––––––––––––––––––––––––––––
none nothing at all!!
TOC PRE OSC HPF VCF ENV LFO EFX MODF TRIM ARP CONF TIPS NKS 55

CREDITS
Credits
Team 2 020
•
Urs Heckmann (boss, concepts)
•
Sebastian Greger (GUI design, 3D stuff)
•
Thomas Binek (QA, bug-hunting, presets)
•
Howard Scarr (user guides, presets, necessary grump)
•
Rob Clifton-Harvey (IT admin, backend development)
•
William Rodewald (student life-support code)
•
Viktor Weimer (support, presets, the voice)
•
Jan Storm (framework, more code)
•
Sascha Eversmeier (code, bad puns)
•
Frank Hoffmann (more framework, new browser)
•
Alexandre Bique (all things Linux)
•
Henna Gramentz (office supervision)
•
Jayney Klimek (office management)
•
Alf Klimek (tagging & repairs)
•
Melina Garbisch (studio attendant)
•
Oddvar Manlig (everything else!)
Special thanks: Clemens Heppner for Diva code. Vadim Zavalishin and Andy Simper for insight into
ZDF methods. Alexander Hacke and Hans Zimmer for lending us some very special analogue
synths. Everyone who contributed presets! Brian Rzycki for maintaining the original PatchLib.
TOC PRE OSC HPF VCF ENV LFO EFX MODF TRIM ARP CONF TIPS NKS 56
 Loading...