


C161 QuiCk Start Guide
5 Commonwealth Ave
Woburn, MA 01801
Phone 781-665-1400
Toll Free 1-800-517-8431
Visit us at www.TestEquipmentDepot.com
BACKED BY
v3
Status
CO/CO2
O2/Eff
Aux
C161
C
o
m
b
u
s
Temp
Exch Test
P
M
E
T
2
O
C
O
C
r
e
z
y
l
a
n
t
i
A
o
n

C161 OVERVIEW
C
o
m
b
u
s
t
i
o
n
A
n
a
l
y
z
e
r
C161
C
O
C
O
2
T
E
M
P
Status
v3
Aux
O2/Eff
CO/CO2
Temp
Exch Test
T2 T1
Power button
Display lines
1 through 6
Status bar line
Navigation
Protective boot with
built-in magnets
CO/CO2 screens
Pump
O2/Eff screens
Auxiliary screen
Status screen
Menu screen
USB charging port
Log & Print
Temperature screen
LED Water Trap Full
Indication
Water Trap Window
K-type temperature inputs
Combustion hose input
Water trap drain plug

C
o
m
b
u
s
t
i
o
n
A
n
a
l
y
z
e
r
C161
C
O
C
O
2
T
E
M
P
Status
v3
Aux
O2/Eff
CO/CO2
Temp
Exch Test
MENU SCREEN - C161 START UP
Press
Button for 2 seconds. The analyzer will
”Power”
perform a 60 second purge. This should be done in fresh
air.
Rotate Selector Dial to MENU to set up or customize
your settings.
Selected parameter are centered, highlighted with arrow
icons on either side.
Use
Press
and buttons to scroll menu options,
to select and edit a parameter.
Press and buttons to change contents of a field.
Press button to scroll fields.
Press to enter content and move to next field.
STATUS SCREEN
Rotate Selector Dial to STATUS to view parameters.
Selected Fuel
Ti = Ambient Temperature
AT
M = Atmospheric Pressure (measured in mbar)
CAL
= Days remaining until calibration
Press
and buttons to scroll Status Bar
options.
Time, Pump Status, Battery Status
Fuel Type
Date
Change Fuel Type in STATUS SCREEN
Press and buttons to the currently selected fuel.
Press and Hold button until arrows indicate fuel
edit mode is activated.
The and to scroll fuel types.
Press to select desired fuel.
CO/CO2
O2/Eff
Aux
Status
v3
Temp
Exch Test
P
M
E
T
2
O
C
O
C
C161
C
o
r
e
m
z
y
b
l
u
a
s
n
t
i
A
o
n
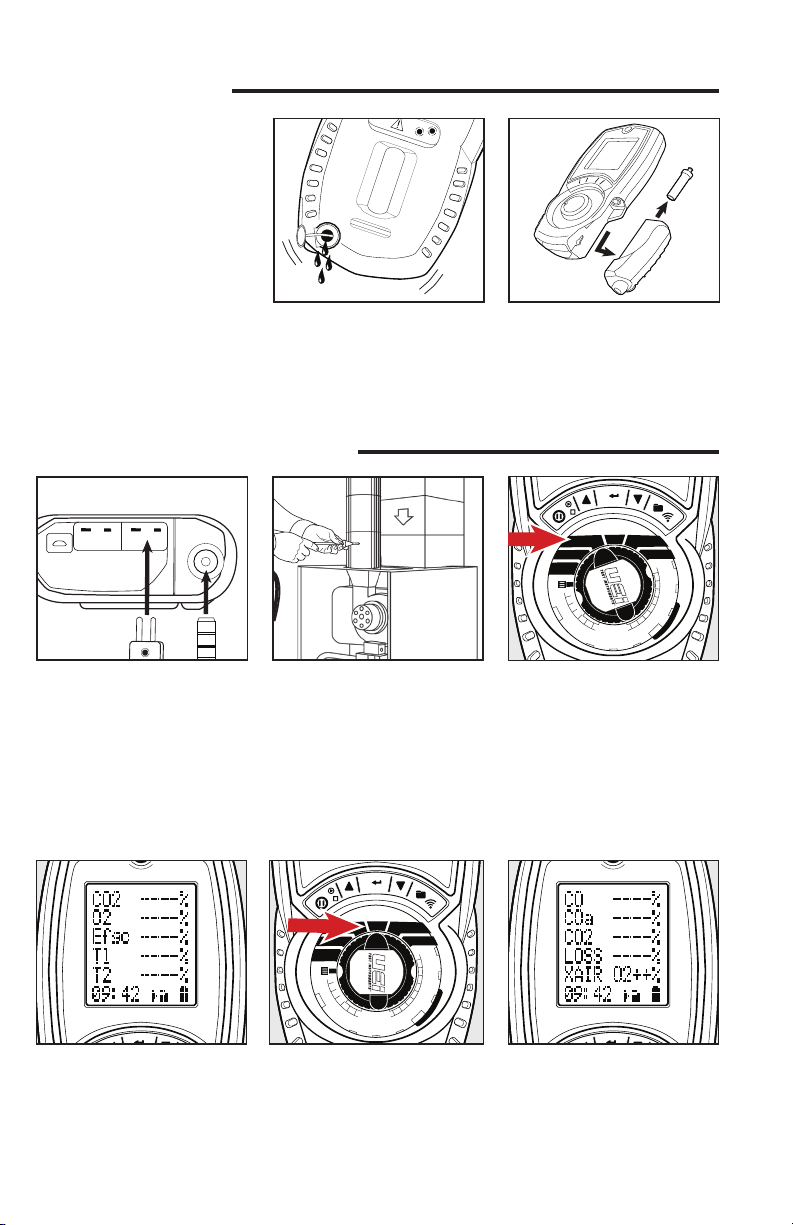
BEFORE TESTING
CHECKLIST
o Clean particle filter
o Water trap and probe line are
free of water
o All hose and thermocouple
connections are properly
secured
o Water trap is fitted correctly
o Power on and zero
o Flue gas probe is sampling
ambient FRESH air
Remove the rubber boot and red
drain plug. Allow the water to
drain out. Re-insert the rubber
plug and replace boot cover.
COMBUSTION ANALYSIS
T2 T1
Remove protective rubber boot.
Remove water trap from analyzer.
Remove particle filter from
spigot and replace with new
one. Reattach trap and boot.
CO/CO2
Temp
O2/Eff
Aux
Status
v3
C
o
Exch Test
P
M
E
T
2
O
C
O
C
C161
r
e
m
z
y
b
l
u
a
s
n
t
i
A
o
n
Insert flue probe into combustion
input. Insert K-type temperature
probe into input T1.
Insert flue probe into stack.
Adjust cone so the probe tip is
approximately at the center of
Rotate function rotary dial
to O2/Eff for Test Screen 1
parameters.
the stack.
NOTE: If there is no hole, check with service and installation instructions of appliance for best testing
method or check with your local authority on best practice
CO/CO2
Temp
O2/Eff displays CO2, O2, Gross
Efficiency, Flue temperature,
Inlet temperature.
O2/Eff
Aux
Status
v3
C
o
Rotate the function rotary dial
to CO/CO2 for Test Screen 2
parameters.
Exch Test
P
M
E
T
2
O
C
O
C
C161
r
e
m
z
y
b
l
u
a
s
n
t
i
A
o
n
CO/CO2 displays CO (ppm),
Losses calculated, Excess air %.
Make any adjustments needed
for proper Combustion and wait
for analyzer to display change in
readings. (Repeat as necessary).
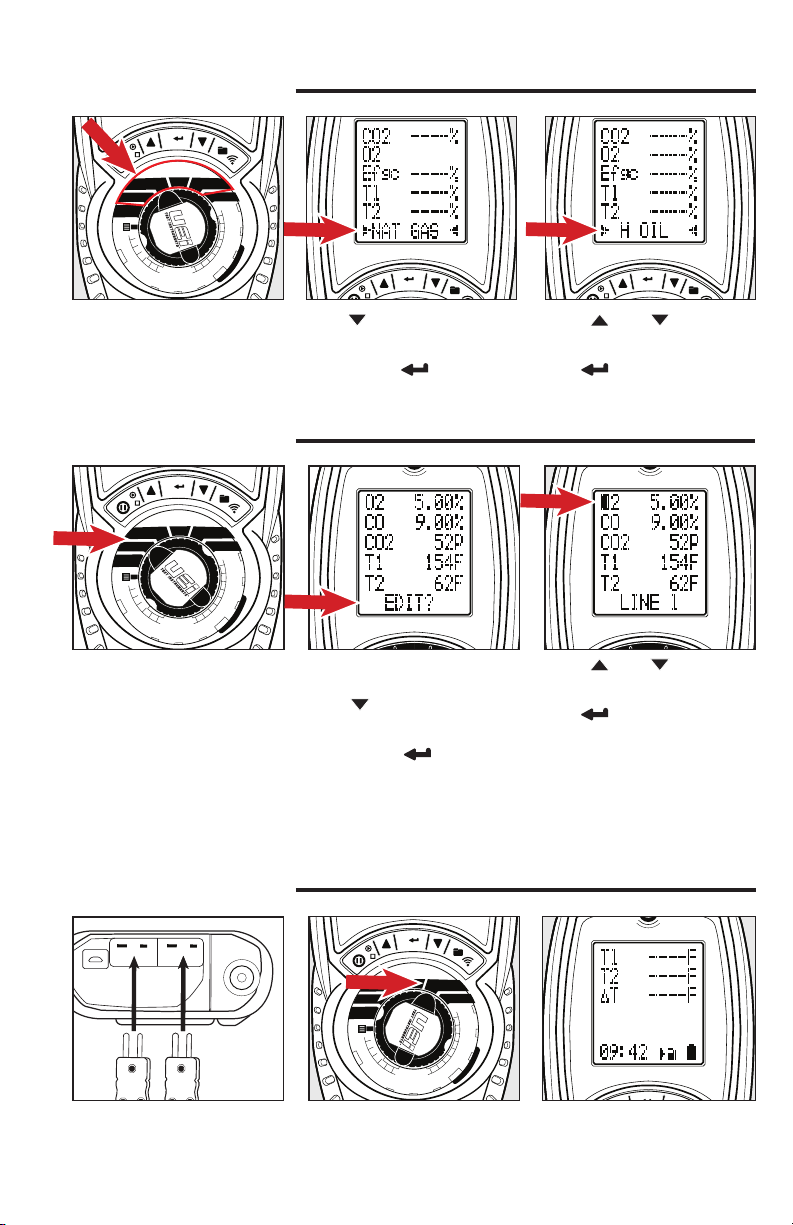
CHANGE FUEL TYPE
CO/CO2
Temp
O2/Eff
Aux
Status
v3
C
o
m
b
C161
u
s
t
i
Exch Test
P
M
E
T
2
O
C
O
C
r
e
z
y
l
a
n
A
o
n
Rotate the dial to either AUX,
O2/Eff, CO/CO2 or TEMP
setting.
Press button until the Fuel
Type displays on the Status Bar.
Press and Hold until two
Press and buttons to
scroll fuel selections.
Press to select fuel.
arrow icons display.
AUXILIARY SCREEN
CO/CO2
Temp
O2/Eff
Aux
Status
v3
C
o
When performing a combustion
Test, Rotate function rotary dial
to AUX to view the Auxiliary
Test Screen’s custom parameters.
Exch Test
P
M
E
T
2
O
C
O
C
C161
r
e
m
z
y
b
l
u
a
s
n
t
i
A
o
n
AUX displays 5 lines of editable
parameters. To edit line values
Press button until Edit?
displays on the Status Bar.
Press and Hold until the
Status Bar reads LINE 1.
Press
scroll parameter selections.
Press
and advance to the next Line.
Continue until cursor is back to
Status Bar to exit.
The AUX screen allows you to assign any of the following parameters on any display line.
O2, CO, Display Fuel Type, CAL, XAIR, LOSS, Efgc, ATM, Ti, ∆T, T2, T1, CO2, COa, or COn
TEMPERATURE TEST
and buttons to
to select a parameter
T2 T1
Insert K-type temperature
probes into input T1 and T2.
CO/CO2
Temp
O2/Eff
Aux
Status
v3
C
o
Exch Test
P
M
E
T
2
O
C
O
C
C161
r
e
m
z
y
b
l
u
a
s
n
t
i
A
o
n
Rotate function rotary dial to
TEMP for Temperature Test
Screen.
TEMP displays T1, T2 and
Differential Temperature.

PRINTING & LOGGING
FLUE 2
FLUE 2
To Print: Align printer (sold
separately) above Analyzer.
VIEW SAVED LOGS
Rotate the dial to MENU.
Press
is selected between two arrow
icons. Press to select.
button until the LOGS
During testing, Press to start
printing.
Press again to abort.
Screen displays all saved LOGS.
With VIEW selected in the Status
Bar, Press to select.
To Log: During testing, Press and
Hold
to log a report.
To view these Logs, see View
Saved Logs section.
Press and buttons to
scroll Test Report categories.
Press to select a category.
Line 1 displays the LOG number
on screen.
To view another LOG, Press
and buttons to NEXT.
Press to advance to next log.
Repeat until you reach desired LOG.
To print the LOG, Press
and buttons until PRINT
is selected between two arrow
icons. Press to select to start
printing.
To EXIT, Press and
buttons until EXIT is selected
between two arrow icons. Press
to EXIT screen.
Repeat until return to MENU screen.
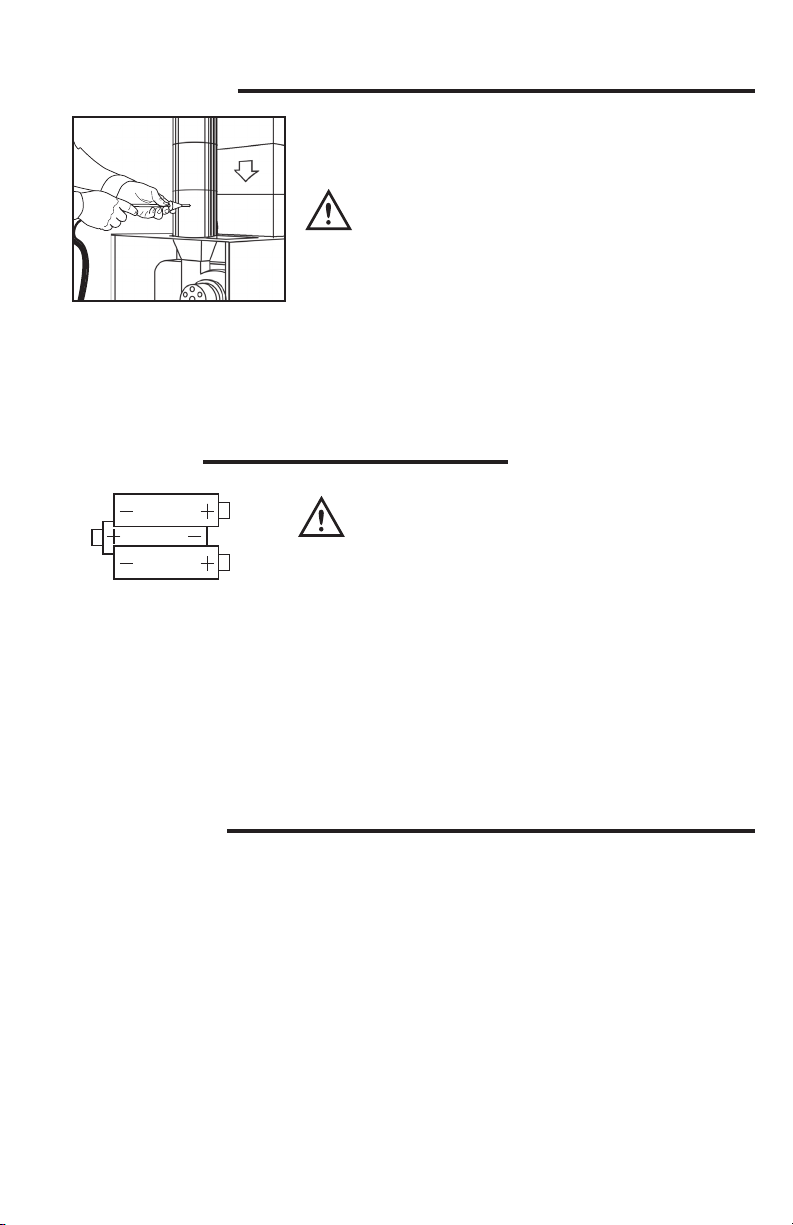
POST TESTING
Remove the probe from the flue
and allow analyzer to purge with
fresh air until readings return to
zero. O2 to 20.9%, CO to Zero
CAUTION: probe tip will be HOT.
BATTERIES
The analyzer is fitted with 3
(AA) size rechargeable batteries. Observe correct polarity
whe n replacing.
Always check operation
immediately after battery
replacement.
Do not leave batteries in unit for
extended periods of non-use.
POWERING OFF
When you power off the C161, there is a 10 second purge.
CAUTION
Make sure you do not exceed the analyzer’s operating specifications.
Do not exceed the flue probes maximum temperature (1112˚F)
•
•
Do not exceed the analyzer’s internal temperature range 112°F (50°C)
Do not put the analyzer on a hot surface
•
•
Do not exceed the water trap’s level
Do not let the particle filter become dirty and blocked
•
WARNING
Do not recharge with Alkaline batteries fitted. Alkaline
batteries are not rechargeable.
Attempting to recharge alkaline
batteries may result in product
damage and create a fire risk.
Time and Date will need to be
reset after changing batteries.
Always dispose batteries using
approved disposal methods that
protect the environment.
WARRANTY
The C161 combustion analyzer is warranted for one year including sensors. If within the warranty period
your instrument should become inoperative from such defects, the unit will be repaired or replaced at
UEi’s option. This warranty covers normal use and does not cover damage which occurs in shipment or
failure which results from alteration, tampering, accident, misuse, abuse, neglect or improper maintenance (calibration). Batteries and consequential damage resulting from failed batteries are not covered
by warranty. Any implied warranties, including but not limited to implied warranties of merchantability
tness for a particular purpose, are limited to the express warranty. UEi shall not be liable for loss
and fi
of use of the instrument or other incidental or consequential damages, expenses, or economic loss, or
for any claim or claims for such damage, expenses or economic loss. A purchase receipt or other proof
of original purchase date will be required before warranty repairs will be rendered. Instruments out of
warranty will be repaired (when repairable) for a service charge. Warranty only covers hardware and
does not extend to software applications. Contact UEi for specific warranty and service information.
T
his warranty gives you specific legal rights. You may also have other rights which vary from state to state.

ANNUAL RECERTIFICATION SERVICES
Complete care for your C160 series combustion analyzer.
When you:
Request Recertification or Service Online
Within 1 Year of Purchase or Service
UEi will:
6-Year Warranty: All UEi combustion analyzers have a standard
1-year warranty. Each recertification includes a 30-point inspection
and extends the warranty for 1 more year for up to 6 years from the
date of warranty.
24-hour Service:
and service through UEi Service+ are shipped back on the next
business day.
Free Shipping: UEi Service+ offers free shipping both to and from
our service center. When customers book their recertifi
receive a prepaid UPS Ground shipping label.
Register Online
Registering you analyzer online is quick and easy. Just log in or setup an account, it only takes
a couple of minutes. Once logged in you can register you analyzer by providing some product
information and uploading a proof-of-purchase.
When it’s time to request recertifcation, just log into your account, select the analyzer, select
the service and place your order.
Test Equipment Depot - 800.517.8431 - 5 Commonwealth Ave, MA 01801
Analyzers received for standard recertification
cation, they
TestEquipmentDepot.com
Copyright © 2021 Kane USA Inc. All Rights Reserved. 201991B 0921
 Loading...