

Congratulations on your new Series 1 3D printer and thank you for choosing Type A Machines.!
Follow along with this guide and your Series 1 should be up and printing in under an hour.
Unpack the Series 1
•
Once the box top is removed, remove the top
foam piece, the four cardboard pillars, and two
vertical foam pieces on the front of the printer.
Tip: Retain the packaging for upgrade or repair.
•
Next, open and pull the plastic moisture bag
down around the printer.
•
Remove the two remaining cardboard pillars by
sliding them toward you.
•
Remove the cardboard box from under the
platform and set it aside for the moment.
•
Next, lift the printer out of the plastic and off of
the base of the box. Lift by the white frame only.
•
Remove the foam piece behind the heated
platform cable and connector. To do so, turn the
foam 90 degrees, then slide it out.!
Ensure the platform cable is firmly connected.
•
Remove the cardboard insert under the sides of
the platform by pulling sideways and rotating.
•
Finally, retrieve the Wi-Fi antenna and power
cable from the cardboard box and attach them to
the rear of the printer.
SERIES 1
SET UP
Attach the Spool Holder & Load Filament
•
Attach spool holder with included washer &
screw, placing it over the nut on frame. Load
spool, feed filament under and through guide.
•
Trim filament end to ensure a clean, pointed tip.
•
Press and hold the lever on the extruder’s right
side and feed filament in approximately 6.5cm.
Power On the Series 1
•
Turn printer on with the power button on right
front panel and confirm it is lit. If not, ensure it is
plugged into a working outlet.
v3.1.2-524-07-11-16
TYPE A MACHINES
Visit our User Forum !
Converse with other Series 1 owners.
forum.typeamachines.com
View our Knowledge Base
Find detailed info or submit a support request.
support.typeamachines.com
Warning: The print bed and extruder can be a burn hazard. Always allow to cool before touching.!
Not recommended for use by those under 12 years of age.
Need Assistance?

Status Indicators
Print status, errors, and progress status
Visualizer
3D model rendering and camera view
Wi-Fi Network Menu
Network selection & Access Point mode
Settings
General printer settings
Tabs
Files: File management and the Cone file
Temperature: Print head & heated bed
Control: Direct print head control & home!
Terminal: Command-line interface
Timelapse: Timelapse video playback
A
B
C
D
E
The Series 1
Interface
SERIES 1
CONNECT
Choose a Connection Type
•
Via Direct Wi-Fi
If no known networks are found when Series 1 turns on, it creates a Wi-Fi network named “Series1-”
followed by 4 or 5 digit serial number on the printer’s front. Join the network on your computer. NOTE:
Network can take a few minutes to appear. Windows requires Bonjour for this connection.
•
Via Existing Wi-Fi Network
Once connected to the Series 1 directly via Wi-Fi, as described above, open a browser and type: !
http://series1-XXXXX.local:5000!
Replace “XXXXX ” with the 4 or 5 digit serial number on the front panel, then press “enter” to access
the interface. Click the Wireless icon in the top right to log in to your network and make the Series 1
available on your network.
•
Via Ethernet Cable
Connect the Ethernet cable to the printer and then to a network router (required) and the printer will
automatically join the network when turned on.
Access the Series 1 Interface
Once connected via Wi-Fi or Network Router, open a browser and type: http://series1-XXXXX.local:5000 !
Replace “XXXXX ” with the 4 or 5 digit serial number on the front panel, and hit enter to access interface.
Tip: Bookmark this address for easy access in the future.
AEB
C
D
00000
v3.1.2-524-07-11-16
TYPE A MACHINES

Check Platform Alignment
The print head and platform must be equidistant
across the bed. If not, filament won’t adhere and
extrusion can be blocked. The printer is factory
aligned, but vibration and impact affect alignment.
•
In the “Control” Tab of the Series 1 interface,
click the platform home button “home” it.
•
Click “Motors Off,” then adjust the platform
using the white knob until the nozzle is just
short of touching the bed.
•
Move the extruder to all corners to confirm !
the distance is consistent at all points.
SERIES 1
ALIGN
Align the Platform
If the distance between the needle and the
platform are inconsistent across different points on
the platform, follow these steps:
•
Loosen the black thumbscrews on the
underside of the platform.
•
Use the plastic thumbscrews to raise or lower
the platform until the tip of the needle is just
touching the platform at each corner.
•
After each time you adjust it, check to see if it’s
in the correct position.
•
When complete, be sure to lock that position in
place by tightening the black thumbscrews.
v3.1.2-524-07-11-16
Removable Build Platform
The build platform is detachable to allow for the removal of prints or surface treatment. !
To replace the platform, reverse these steps.
If the printer is equipped with
a heated platform, disconnect it.
1
Push the platform down onto!
the spring-loaded standoffs.
2
Slide the platform toward you.
3
Lift the platform off the standoffs.!
Be sure the cable is clear.
4
Beware of Damaging Glass: Materials such as PET, PC-Plus, ABS, and BluPrint can permanently bond with glass,
causing damage not covered under warranty. Use a surface treatment, such as blue painters tape, if using
unfamiliar material or use a clean, fresh layer of glue. See material manufacturer for recommendations.
TYPE A MACHINES

Prepare the Build Surface
•
Apply a thin layer of glue stick to the platform to
help material adhere consistently.
First Print
The cone model will print in about 15 minutes.
The bed will not heat for this print.
•
Locate the file “FirstPrintCone.gcode” in the
“Files” tab of the Series 1 interface.
•
Click the “Printer” icon to the right of the file.
This will start printing the model.
•
Pay attention to the first few layers to ensure
filament adheres to the bed. If not, verify the
bed alignment and home position are correct.
The temperature of the extruder and heated bed
can be monitored in the “Temperature” tab.
When complete, use the included spatula to
remove the print. Be careful not to put pressure
on the platform as this can affect alignment.
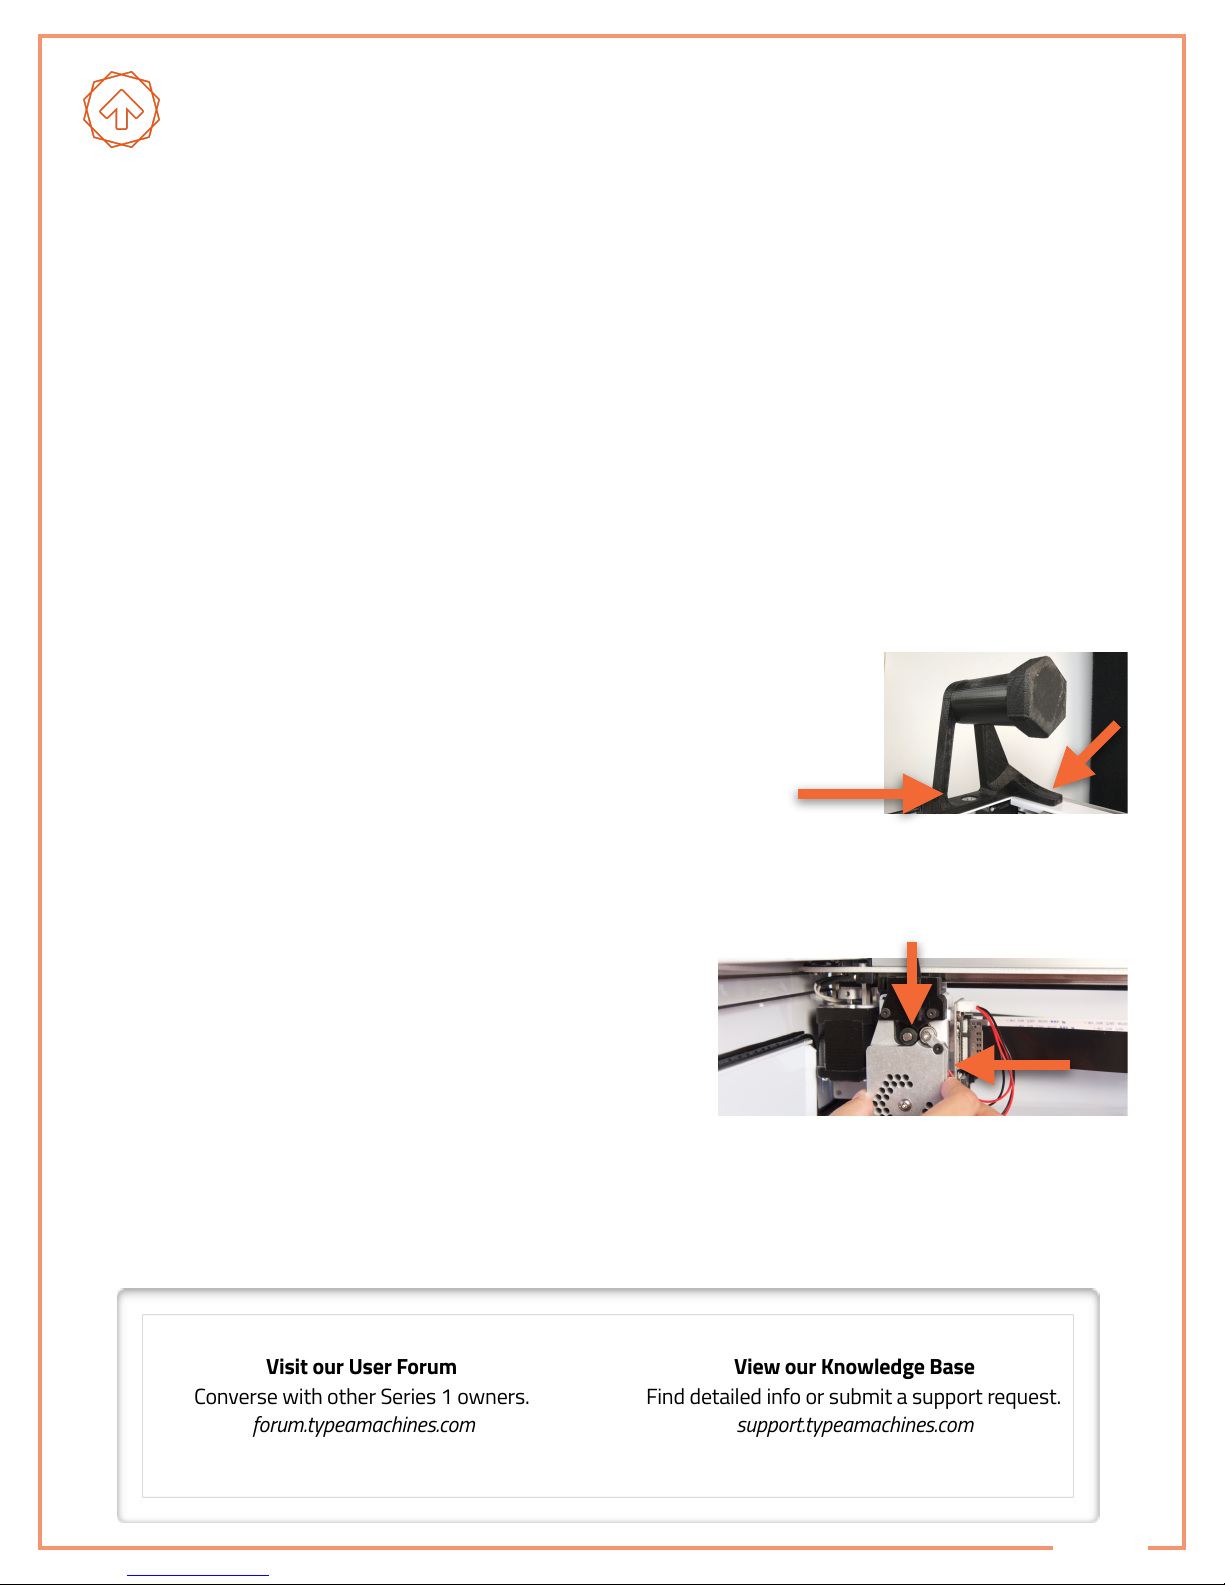
Check the Platform Home Position
The “home position” is the vertical location to
which the platform moves at the start of a print.
You should check this prior to each print.
If the needle is too near the platform, filament
extrusion may be blocked. If the needle is too far
from the platform, filament may not adhere.
When set properly, a sliver of light should be
visible between the clean tip of the needle and
the platform. See below.
Adjust the Platform Home Position
•
To adjust the home position, turn!
the black knob a ¼ turn at a time.!
Turning Clockwise lowers the platform,
increasing the distance from the extruder. !
Turning Counterclockwise raises the platform,
decreasing the distance from the extruder.
•
Press the Platform Home button in the Printer
Interface and the platform will move to this
new home setting.
•
Check the home position after each adjustment
and repeat until it is in the right position.
©2016 Type A Machines, Inc. Products may be covered by US and international patents. Type A Machines is a registered trademark
of Type A Machines, Inc. Any product names mentioned are property of their respective owners.
Do More with Your Series 1
Get more information, visit our forum, !
and learn more about your new printer.
Cura Type A
Download Cura Type A for free
to prepare your own models to print.
Introduce Yourself to New Materials
Visit our web store for exclusive filaments.
Find all that and more at:
www.typeamachines.com/gettingstarted
SERIES 1
PRINT
v3.1.2-524-07-11-16
X
✓
X
TYPE A MACHINES
 Loading...