

Tylo SENSE SPORT USA Installation And User Manual
SENSE SPORT USA
INSTALLATION / USER GUIDE
150408
2900 5240
INSTALLATION GUIDE.......................... 1
BEFORE INSTALLATION ...................................................... 1
Parts ....................................................................... 1
Installation requirements ........................................ 1
Installation tools ...................................................... 1
Planning installation ............................................... 1
INSTALLATION ...................................................................... 2
Sauna heater installation ........................ ................ 2
CONNECTION/WIRING ......................................................... 4
CHECKING INSTALLATION ................................................. 4
USER GUIDE.......................................... 5
GENERAL INFORMATION .................................................... 5
BEFORE USE ........................................................................ 5
The fi rst time you use the heater ............................ 5
Before each use ..................................................... 5
USE ........................................................................................ 5
Setting the temperature .......................................... 5
Setting time ............................................................ 6
Functions ................................................................ 6
MAINTENANCE ..................................................................... 6
Cleaning the fragrance holder and air humidifi er
........ 6
Check the stone compartment ............................... 6
TROUBLESHOOTING ........................................................... 7
Troubleshooting the sauna heater .......................... 7
SPARE PARTS LIST .............................................................. 7
ROHS (RESTRICTION OF HAZARDOUS SUBSTANCES)
.......... 7
HEATER WIRING DIAGRAM
.................................................... 8
WARNING!
• Packing the rocks too tightly may cause the heater high
limit switch to trip.
• Maintain minimum clearance from heater to wooden surfaces (benches, side walls, heater fence etc.). Mounting
brackets supplied. Provides proper clearance from wall
behind heater.
• Use only copper wire of the size and type indicated in the
Heater Specifi cation Chart and the temperature rating
indicated on the heater junction box.
• A guardrail or fence is required around the heater to prevent burns from accidental contact.
• All heaters and controls must be grounded per NEC to
prevent electrical shock in case of unit failure.
• Electrical outlets or receptacle must not be installed in a
sauna room.
• Do not locate benches over heater.
Keep this user guide!
In the event of any problems, please contact the re-
tailer where you purchased the equipment.
© This publication may not be reproduced, in part or in whole, without
the written permission of Tylö. Tylö reserves the right to make changes in
materials, construction and design.
* Hyperthermia occurs when the internal temperature of
the body reaches a level several degrees above the normal
temperature of 98.6° F. The symptoms of hypothermia include
an increase in the internal temperature of the body, dizziness,
lethargy, drowsiness and fainting. The effect of hyperthermia
include:
a) Failure to perceive heat;
b) Failure to recognize the need of exit the room;
c) Unawareness of impending hazard;
d) Fatal damage of pregnant women;
e) Physical inability to exit the room; and
f) Unconsciousness
• Do not take a sauna if using alcohol, drugs or medications.
• Pregnant women or persons with poor health should consult their physician before using any sauna.
• Caution fi re hazard: Do not use the sauna room for drying
clothes, bathing suits, etc. Do not hang towels above
heater or place any object other than the rocks supplied
on the heater. If any darkening of the wall around the
heater is noticed discontinue sauna use immediately.
• Inspect sauna regularly for required maintenance to heater, control and benches. Replace wood surfaces which
show any signs of deterioration.
• The heater gets extremely hot during operation and
should not be touched or burns may result.
• Minors should be adequately supervised whenever near a
hot or warming sauna.
• Fire sprinkler systems used inside any sauna room should
be properly rated for sauna room temperatures.
• Do not pour chlorinated pool or spa water on heater.
Excessive water use on heater may cause damage and
void warranty.
• Electric Shock Hazard - High voltage exists within this
equipment. There are no user serviceable parts in this
equipment. All installation and service to this equipment
should be performed by qualifi ed licensed personnel in
accordance with local and national codes.
• Do not construct sauna room so as to restrict air fl ow
through the bottom of the heater.

1
INSTALLATION GUIDE
BEFORE INSTALLATION
Parts
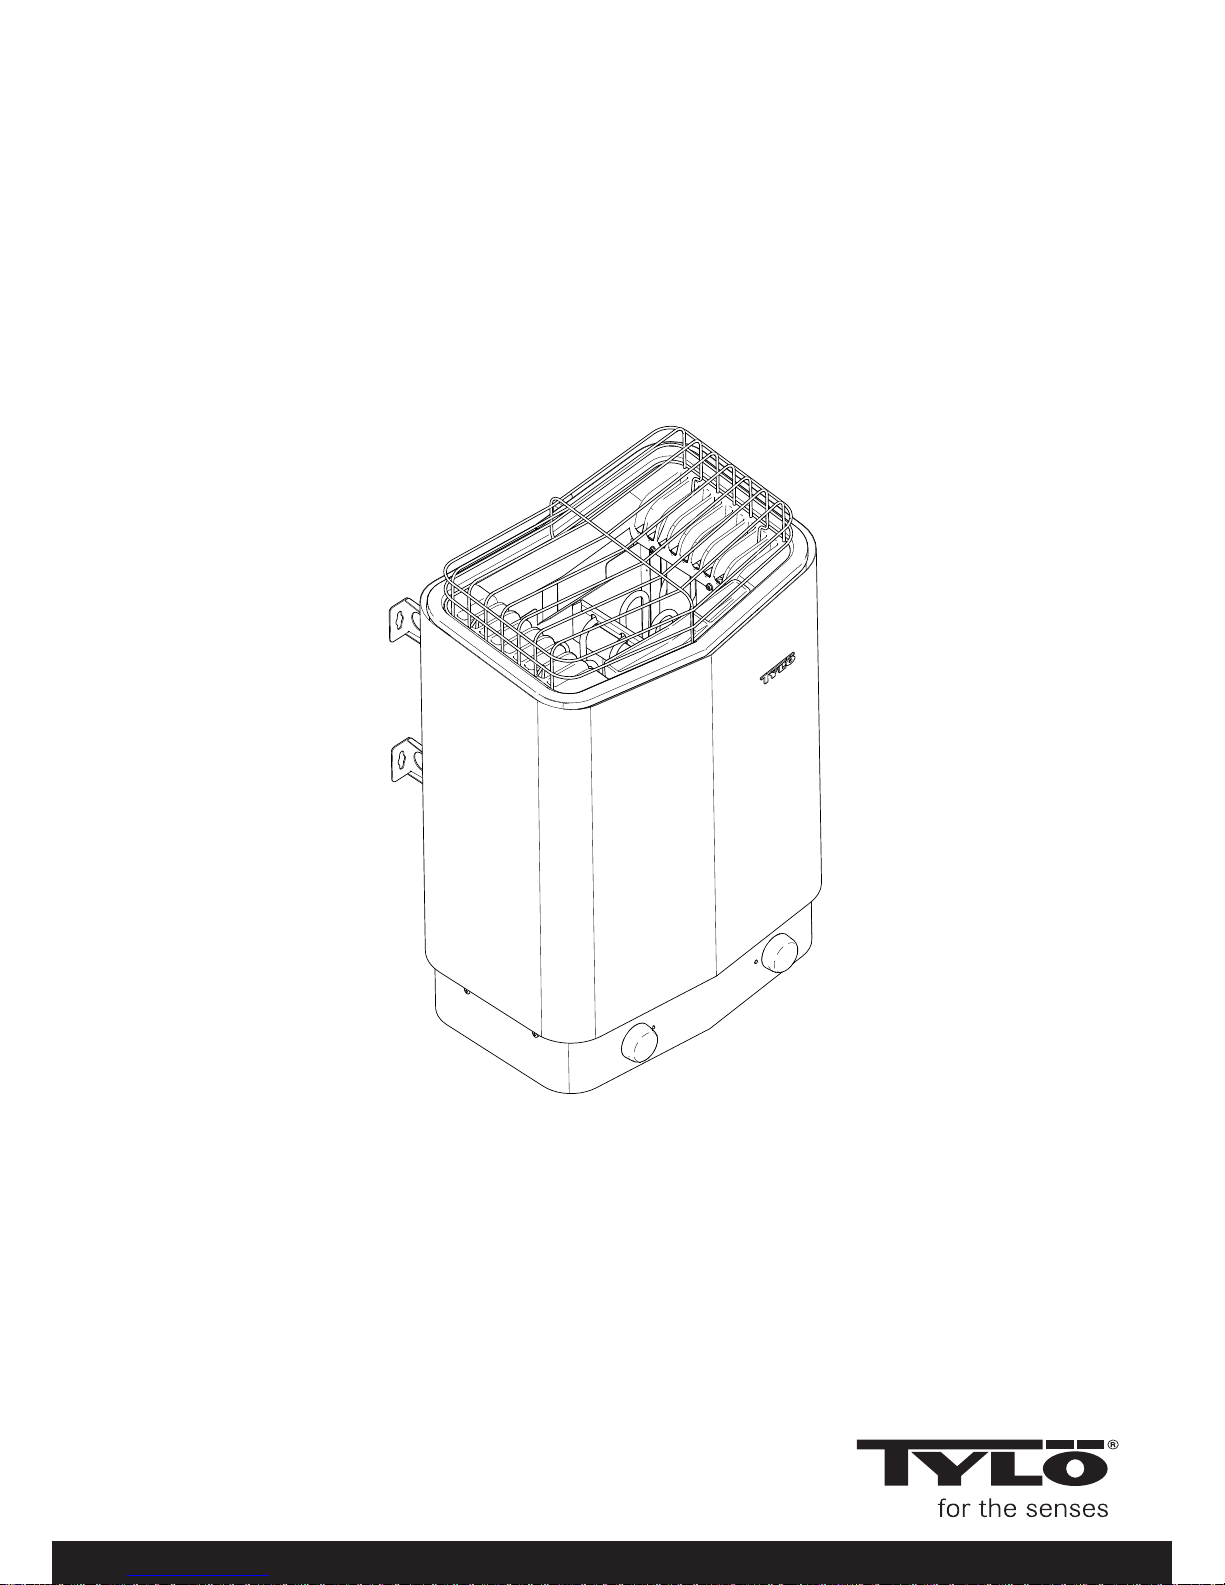
Check that the following parts are included in the packaging:
Figure 1: Sauna heater parts
1. Sauna heater
2. Herb bowl / air humidifi er
3. Heater Mounting Brackets x 4
4. Warning and Caution plates for the room in multiple languages
5. Bracket screws x 4
6. Connectors x 3
7. Lock screw B 8 x 9.5 x 1
8. Screws B 4 x 6.5 x 6 for Warning and Caution plates
Contact your dealer if anything is missing.
Installation requirements
To ensure safe use of the heater, check that the following criteria
are met:
• Electrical wiring should be installed in accordance with NEC
and all state and local codes.
• Fuse size (A) and power cable size (AWG) must be suitable
for the heater (see The section called Connection/wiring
diagram, Page 4.
• The sauna ventilation must comply with the instructions in
this manual (see The section called Positioning the inlet vent,
Page 2, The section called Positioning the outlet vent, Page
2).
• The position of the sauna heater must comply with the instructions in this manual.
• The heater output (kW) must be suitable for the sauna
volume (cu.ft.) (See Table 1, Page 1). The minimum and
maximum volumes must not be exceeded.
Table 1: Output and sauna volume
Output kW Sauna volume min./max. cu.ft.
3.5 - 4.7 100 - 210
5.3 - 7.0 140 - 280
6.3 - 8.3 210 - 420
Installation tools
The following tools and materials are needed for installation and
connection:
• level,
• adjustable spanner wrench,
• electric drill,
• screwdriver.
Planning heater and room installation
Before starting to install your sauna heater:
• Plan where to position the sauna heater (see The section
called Positioning the heater - normal installation, Page 1).
• Position the inlet vent (see The section called Positioning the
inlet vent, Page 2).
• Position the outlet vent (see The section called Positioning
the outlet vent, Page 2).
• Plan the electrical installation (see The section called Connection/wiring diagram, Page 3).
3
8
2
1
6
5
4
7
1
3
6
5
7
4
2
Figure 2: Positioning the heater - normal installation
1. Minimum distance from side wall: 3.0 in
2. Minimum distance from ceiling: 44.0 in
3. Minimum distance from interior fi ttings: 4.0 in
4. Minimum ceiling height: 75.0 in
5. Minimum distance: 1.0 in
6. Minimum distance from interior fi ttings: 2 in
7. Distance from fl oor: 7 in
Positioning the heater in a sauna room
Position the sauna heater:
• On the same wall as the door (or the side wall if very close to
the door wall).
• At a safe distance from the fl oor, side walls and interior
fi ttings (see Figure 2, Page 1).
 Loading...