

Page 1
Elite
1609
SV
EN
DE
FR
NL
PL
RU
Art. nr 2900 5205
IPX5
Page 2
Installation Guide
The control panel can be installed inside or outside the sauna/steam room. If installing inside the
sauna cabin, the upper edge must not be more than 90 cm above the oor, and must be at least 30
cm from the heater.
The unit can be mounted on the wall using the bracket or double-sided adhesive supplied. If using
the bracket, mount the control panel on the bracket using adhesive.
A 30 mm hole through the wall is required if mounting the control panel directly on the wall.
When installing the panel inside the steam room/sauna, installation must be directly to the wall,
using the accompanying adhesive or a Tylö embedding frame (item no. 90001056). The wall must be
smooth and perfectly clean after hole drilling (30 mm) before installation. The bracket must not be
used.
If you have purchased an Elite check the coverage of your wireless network before you nally install
the control panel (see also Conguring: System settings in this guide).
Installation with bracket
Use the bracket as a template to mark up screw holes on the wall. Tighten the screws a little until the
bracket is loosely secured.
EN
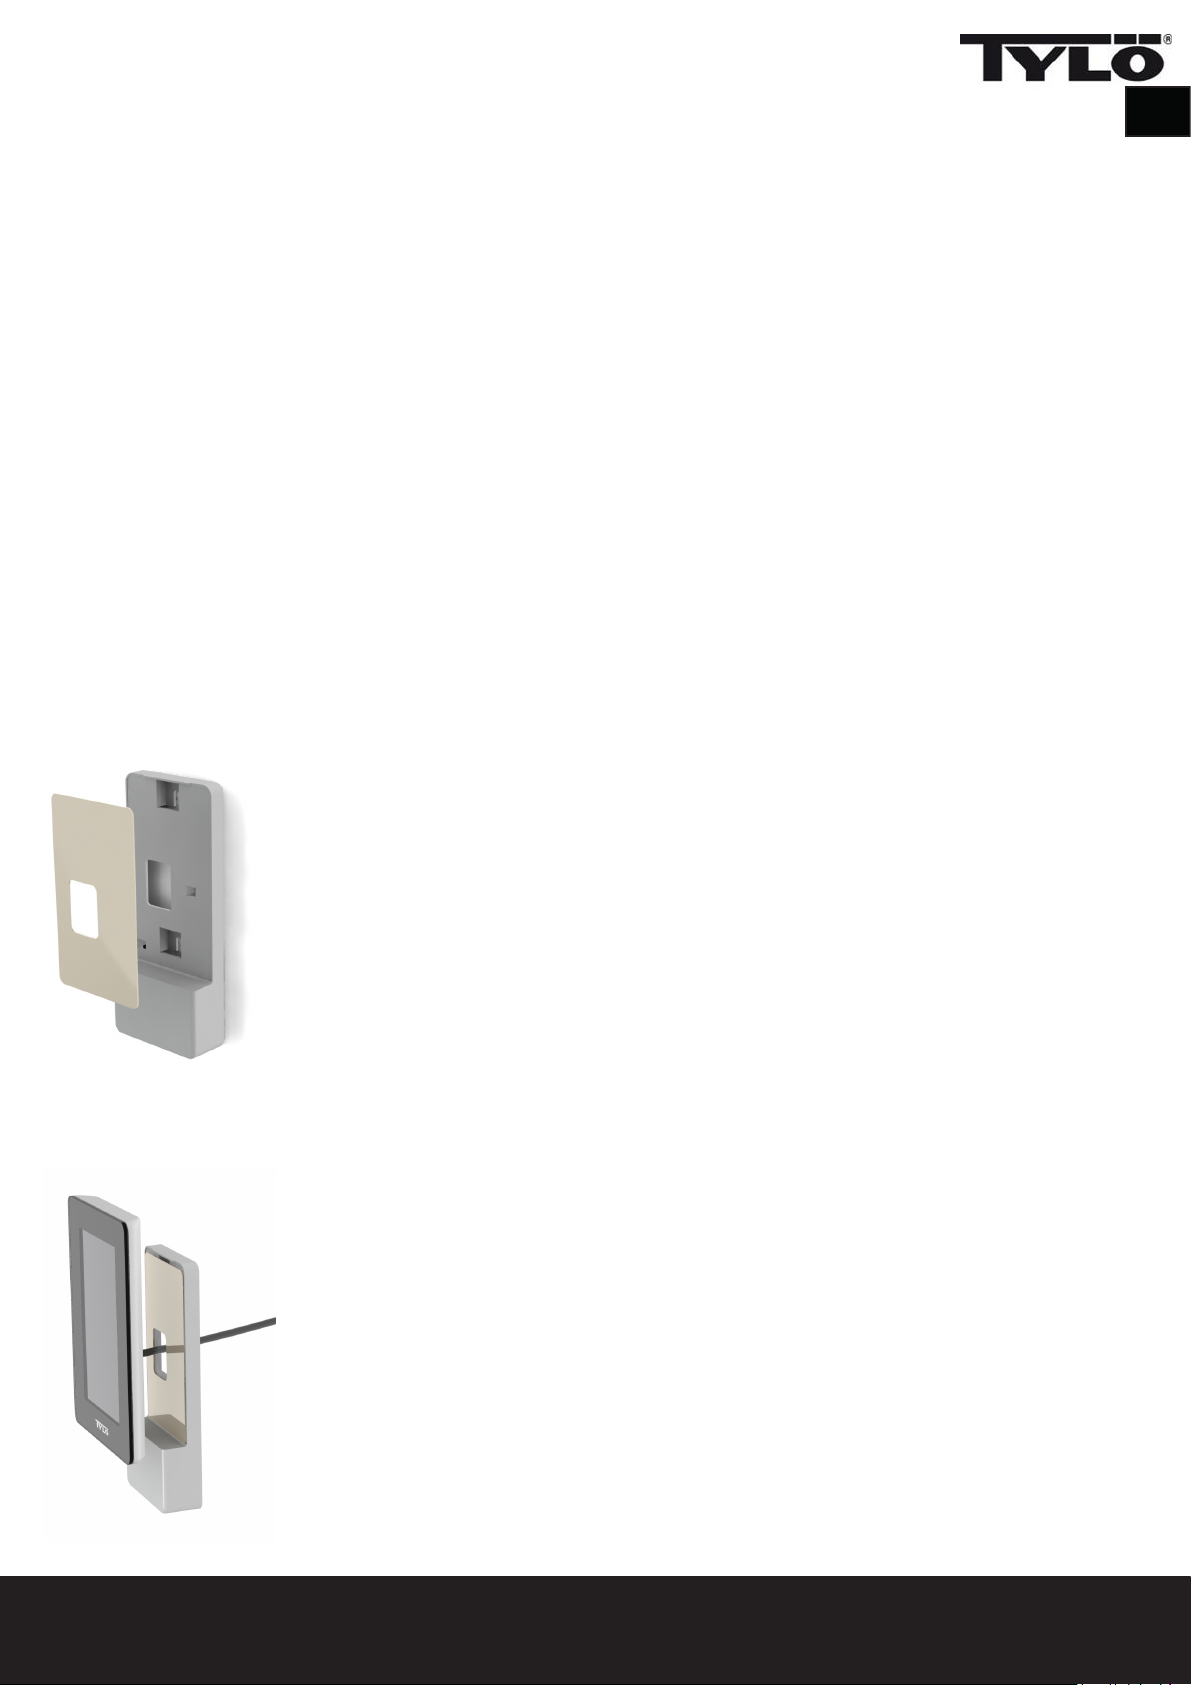
Secure the adhesive to the bracket (see Figure 1).
Fig. 1
Remove the protection from the adhesive and secure the panel to the bracket (see Figure 2).
Fig. 2
Page 3
EN
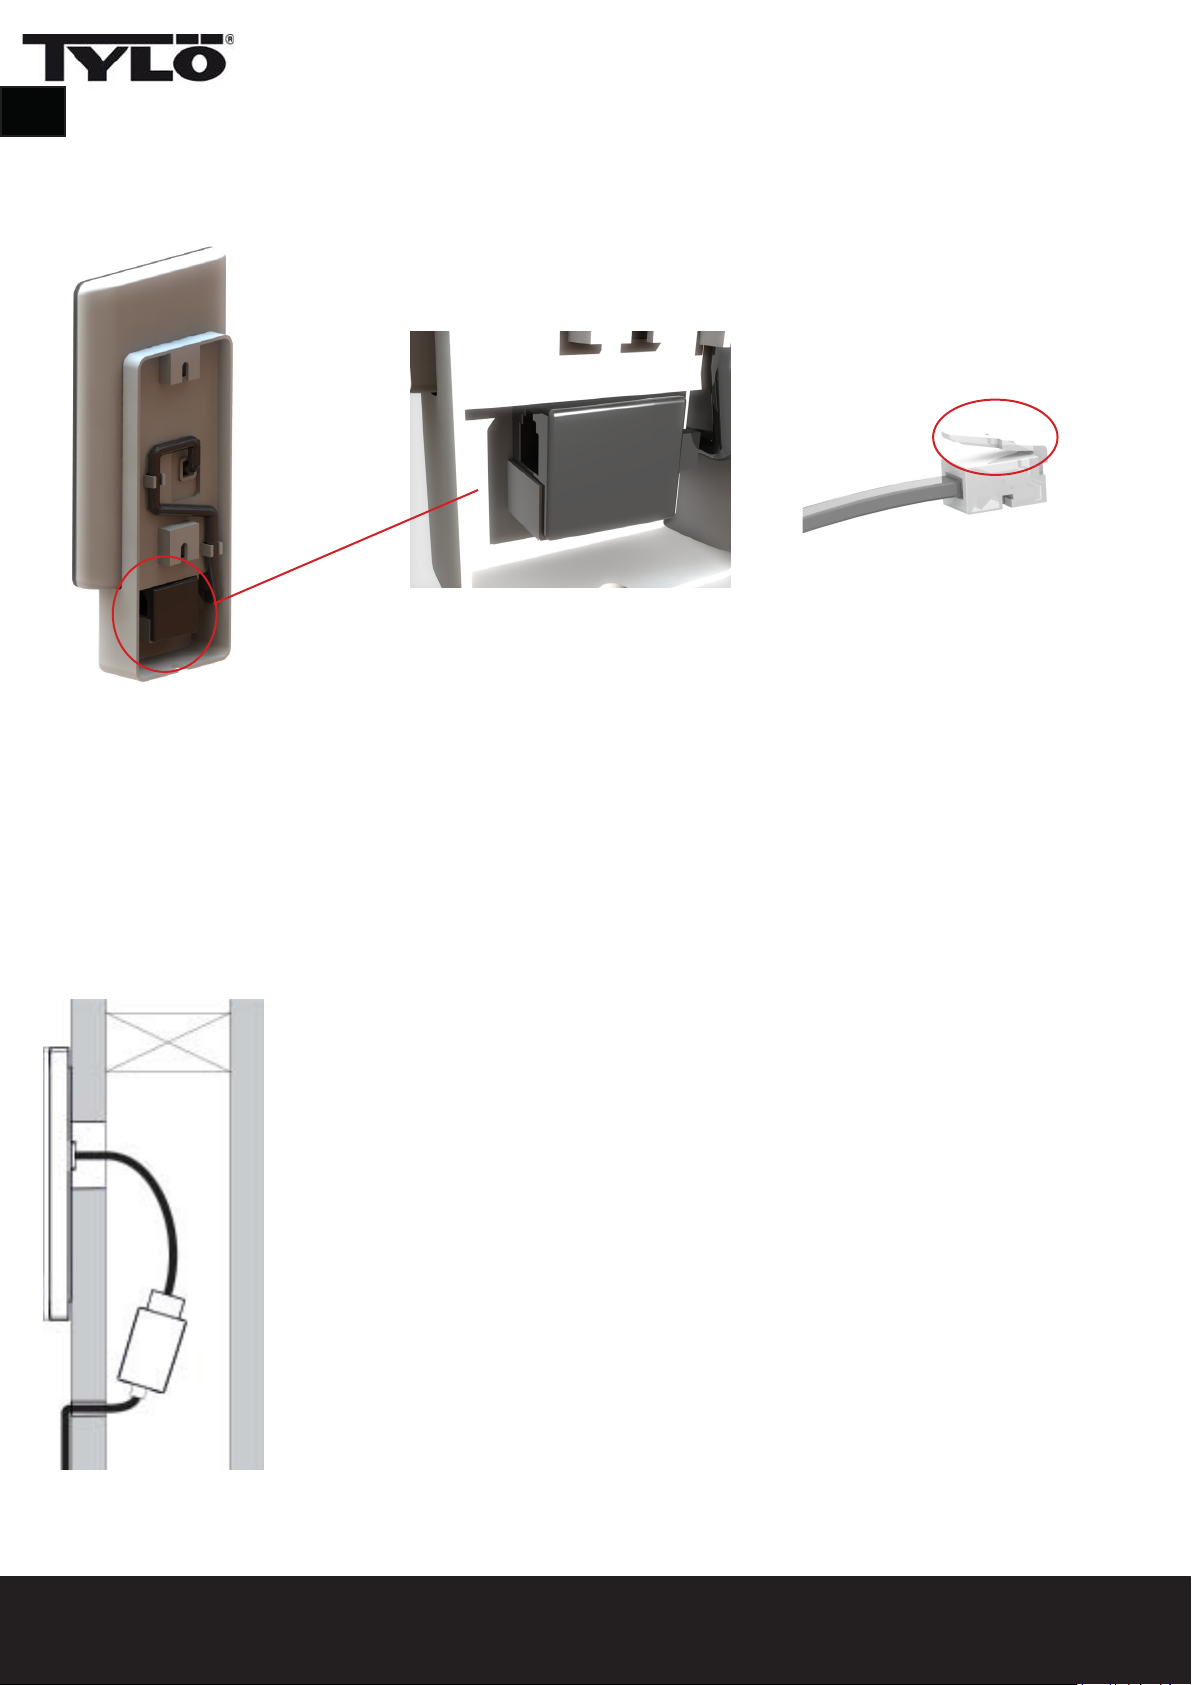
Attach the cable and switch to the bracket (see Figures 3 and 4). Remember to position the switch in
accordance with the illustration (the locking tongue should be at the left side when seen from below). Install
the panel on the wall. Use the supplied control panel cable to connect the panel to the heater. If the cable is
too long, it can be shortened, then use the extra switch supplied. NB: special pliers are required (crimp pliers
for RJ10).
Fig. 3
Installation without bracket
Attach the double-sided adhesive to the control panel. Before attaching the panel to the wall, connect it
to the heater to check that everything works. Remove the protective backing from the adhesive. Connect
the panel wire, pass the contact through the hole in the wall and press the panel rmly against the wall.
If tting the panel without the bracket but it is necessary to run the cable outside the wall, the following
solution can be used (see Figure 6). This only applies to installation inside the sauna cabin. Remember
that the hole through which the contact will pass must be min. 30 mm.
Fig. 4 Fig. 5
Fig. 6
10 11
Page 4

Quickstart guide
In order to quickly get started and use your new sauna or steam room, read the whole of this guide. It
describes the basic operations that you need to know. The complete manual can be downloaded from
www.tylo.se.
Initial set-up
At the rst start, certain basic parameters are set. Touch the screen to indicate your choice and then > (or
<).
EN
Welcome screen
(touch >)
Select the date format Set the date: Set the time:
Select language Select region
Several other parameters are set automatically on the basis of the above settings, and the type of heater.
Any of the parameters can be altered later. They are described in the manual.
Page 5

EN
Overview
The overview screen is shown both when the heater is switched o (Figure 7) and when it is on (Figure 8).
Air humidity setting
Temperature setting
Current temperature
Current relative air humidity
(only shown if the temperature/
humidity sensor is connected on
the Combi and Tylarium models)
Current time
Remaining sauna
time
Water level in the tank (applies to
the Combi model)
Shows that the panel is
connected to Wi (only the
Elite Wi model)
Fig. 7 Fig. 8
Home
Get to the Home screen (g. 9) by touching the screen in the Overview mode or by pressing the Home
button. The Activity buttons are used to start and stop the heater. A Standby button is also shown. When one
of the activity buttons is pressed, the colour changes to indicate the current status.
Activity/Status buttons
On
Standby:
O
Fig. 9
Functions/Settings buttons
12 13
Page 6

Functions/Settings buttons
Home: Show information concerning temperature and humidity, along with activity/status
buttons and Functions/settings buttons.
Setting up: Setting the temperature, sauna time, humidity, etc.
Favourites: Saved favourite settings.
Calendar: Creating a calendar and/or weekly program.
Conguration: System settings.
EN
Settings
Favourites:
Setting temperature
Setting the desired air humidity.
Only on the Combi and Tylarium
models.
Setting the desired sauna
time.
Lighting O/On
Save the settings as a favourite.
In settings, everything is set for
the sauna. These settings can
also be saved to Favourites.
The Favourites that were saved during
setting up are saved with this symbol. In
order to start, delete or edit, press on the
eld with the name of the favourite.
Page 7

EN
Calender
Date and calendar program
Day program
Overview program
When Conguration is touched, the screen shows a menu
with a number of separate sections. IN order to see more
rows, put your nger on the screen and draw it up or
down.
Only the Wi menu is described in this quickstart guide.
In order to be able to use the Calendar
functions for the Sauna and Combi
heaters, and also the Tylarium
installation, a door switch is required,
connected to the door (Tylö part no.
90908035).
While setting the calendar function
you can create programs for individual
dates or programs that repeat every
week.
Conguration: System settings.
During Conguration there is both
information about the system and the
possibility to adapt and set various
functions and parameters. It is also possible
to congure additional equipment (such
as for example fragrance pumps or extra
lighting).
In order to be able to use Wi for the sauna and Combi
installation, a door switch must be connected.
Bear in mind that the position where the control panel
is located aects how well it can communicate with the
wireless network. Many kinds of material disturb the wi
signal. Test rst with a smart phone where you are thinking
to locate the control panel, to ensure good communication.
In order to connect to your local network, rst activate
Wi and press Network. Then press Scan which searches
for the accessible networks. In order to connect, press on
the desired network; if a password is required press on
Password, enter the password and then press Connect. In
order to connect mobile applications or PC applications
refer to the app instructions on the Tylö web site
(www.tylo.com/elite).
Under Name you can name your system. A default name is
present to begin with, and this depends on the system you
have. In order to change or alter the name, press it and a
keyboard will appear for editing.
If you activate Auto connect the Elite Wi will automatically
connect you to the selected network after a power cut.
14 15
Page 8

 Loading...