

Tyger TG-FF8T4178 Installation Manual

Customer Support 1-866-340-3038
TM
FENDER FLARE
READ INSTRUCTIONS CAREFULLY BEFORE STARTING INSTALLATION. ONLY FOLLOW THE APPROVED INSTALLATION ACCORDING TO
THESE WRITTEN INSTRUCTIONS. FAILURE TO DO SO MAY CAUSE
DAMAGE TO YOUR VEHICLE AND INVALIDATE THE WARRANTY.
PRIOR TO INSTALLATION:
• Remove contents from box. Verify all parts are present and free
from any defects or damage.
• Make sure installation is done on a non-abrasive surface to avoid
scratching the flare surface.
• Verify the fit of each flare to the vehicle body to ensure you have
the correct flares for your vehicle.
• Remove existing decals and mud flaps on the vehicle that may
interfere with flare installation.
• Do not use any harsh abrasive detergent to clean the flare.
PAINTING
Painted flares cannot be returned. Test fit before painting. We are
not responsible for any costs that may incur if flares were painted
without test fitting.
• Clean surface to be painted with a good grade degreaser. Do not
use lacquer thinner or any solvent based product.
• Wipe flare surface completely dry with a tack rag prior to paint.
• Application of plastic adhesion promoter for PP plastic as per
your paint system manufacturer’s recommendations is required.
• Use a high quality enamel or polyurethane automotive paint to
paint the flares.
• Not recommend to paint the edge trim, but if desired use a flex
additive.
TG-FF8T4178
Tools Required
Hardware Included
x1
[A]
x1
[E]
[B]
[F]
x34
x34
[C]
[G]
x34
x2
x34
[D]
x1
[H]
WARNING
Dirt or debris may become lodged between flares and vehicle's
fenders causing scratching and paint wear from vehicle vibration.
TYGER is not responsible for any damage, and installation is done
with buyer's understanding that this damage may potentially
occur.
SAFETY INFORMATION
• Before driving, ensure that flare is properly secured to vehicle.
• Do not use automatic “brush-style” car wash.
• Periodically check all components for tightness.
V200720
1/6
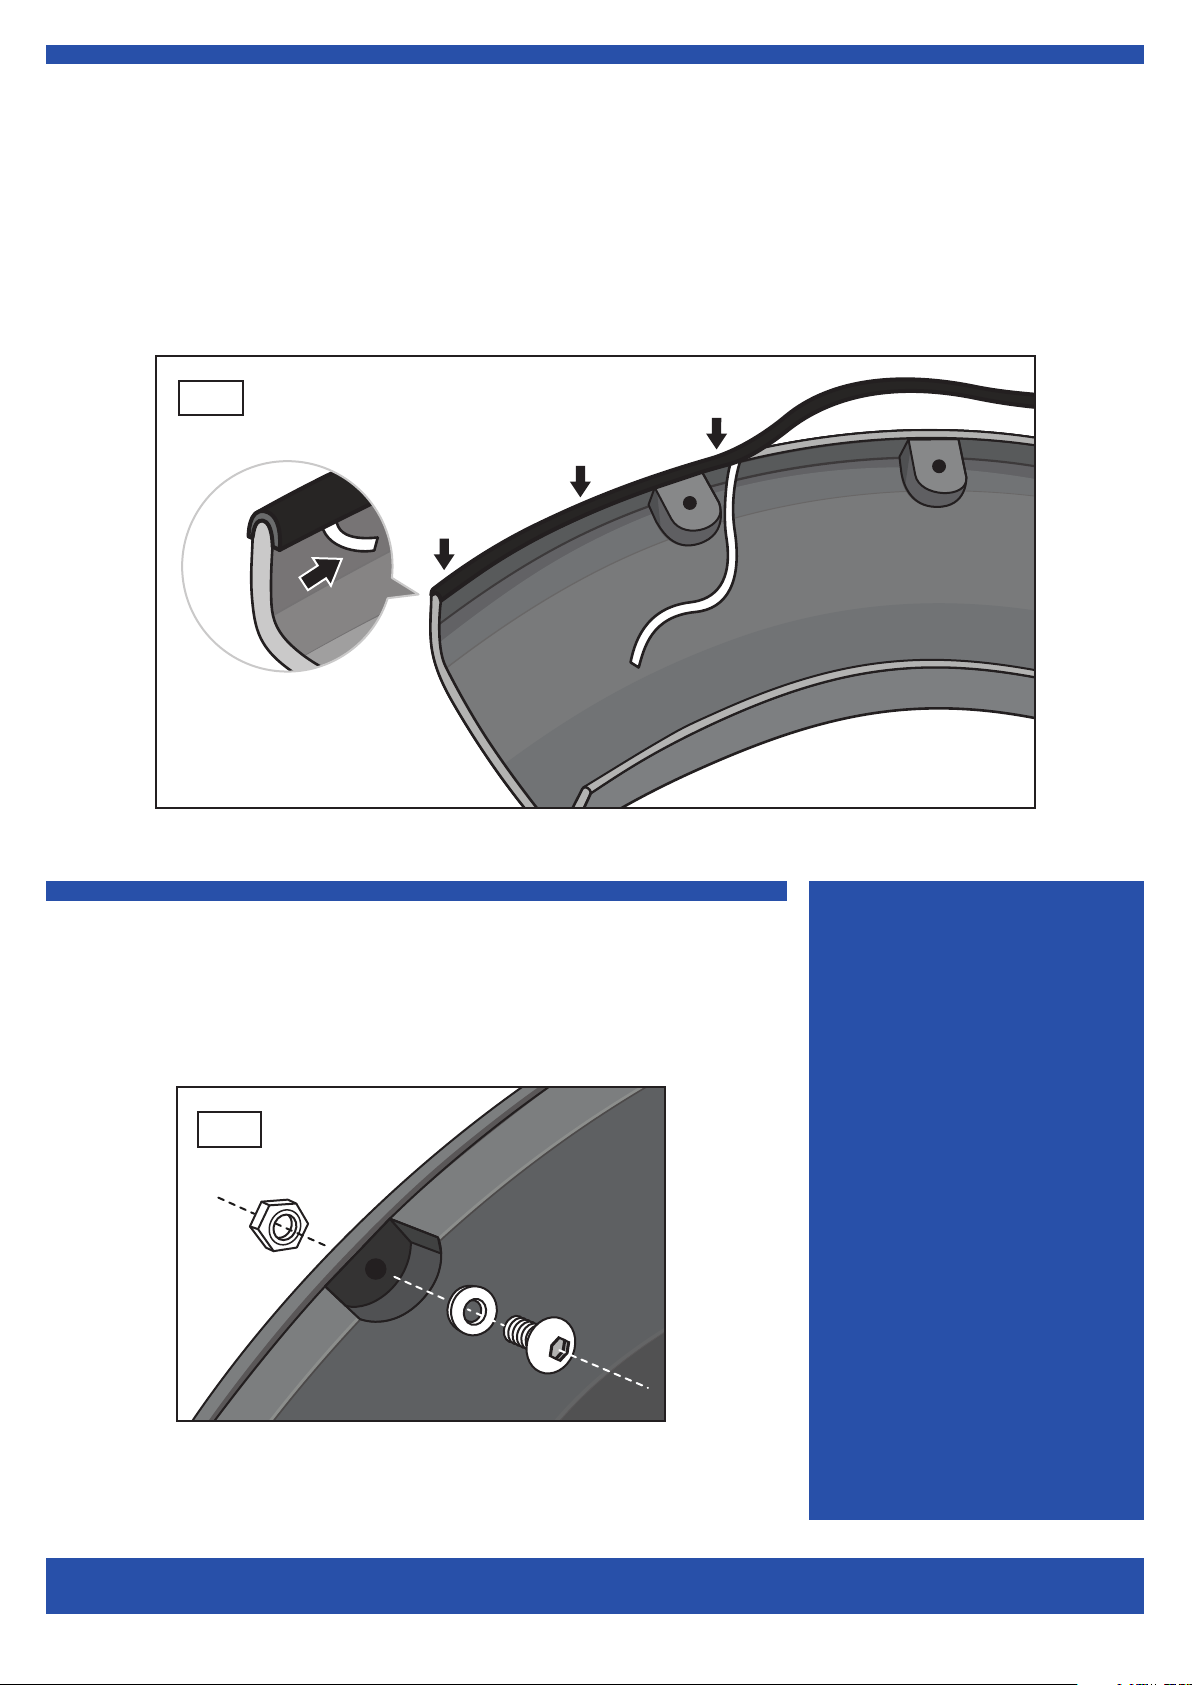
EDGE TRIM INSTALLATION
• Peel 2 inches of red backing away from one end of Edge Trim [A] .
• Apply Edge Trim over top edge of flare with adhesive side contacting inside edge of flare.
• Press Edge Trim into place and apply thumb pressure to ensure good adhesion, pull away red
backing as you work your way around flare edge in one-foot increments. (Fig 1)
NOTE: Do not stretch Edge Trim during application.
Fig 1
DECORATIVE RIVET INSTALLATION
• Install a Torx Bolt [B] with a Washer [C] through each of the top holes around the flare and
secure using a Nylock Nut [D] on the other side. Tighten using a socket wrench and the
supplied Torx Bit [E]. Do not overtighten as this may damage the flare. (Fig 2)
Fig 2
IMPORTANT: Do not drill holes to the vehicle body as rivets are decorative and fasten only to
the flare. Do not attempt to use the bolts to fasten flare to vehicle body.
EXTRA NOTES
• All exposed fasteners and
bare metal should be treated
with rust resistant paint before
installing flares. Spray inner
fender wells with undercoating after flare installation.
• Modifications may be necessary to maintain a minimum 4”
clearance between flares and
exhaust pipes. (Exhaust gases
should not vent directly onto
flares)
• For vehicle with large tires
may require lowering bump
stops and/or installing steering stops to prevent tire from
contacting flare.
2/6
 Loading...