

Tyco Safety Canada 17WS9TCHW Users manual
WS9TCHW Ver 1.0 Touchscreen Installation
Introduction
Refer to the iotega Reference Manual for information regarding the limitations of product use and function and manufacturer's
liability. Use these instructions with the iotega Reference Manual. The WS9TCHW touchscreen is compatible and intended for use
with the iotega Wireless Security System.
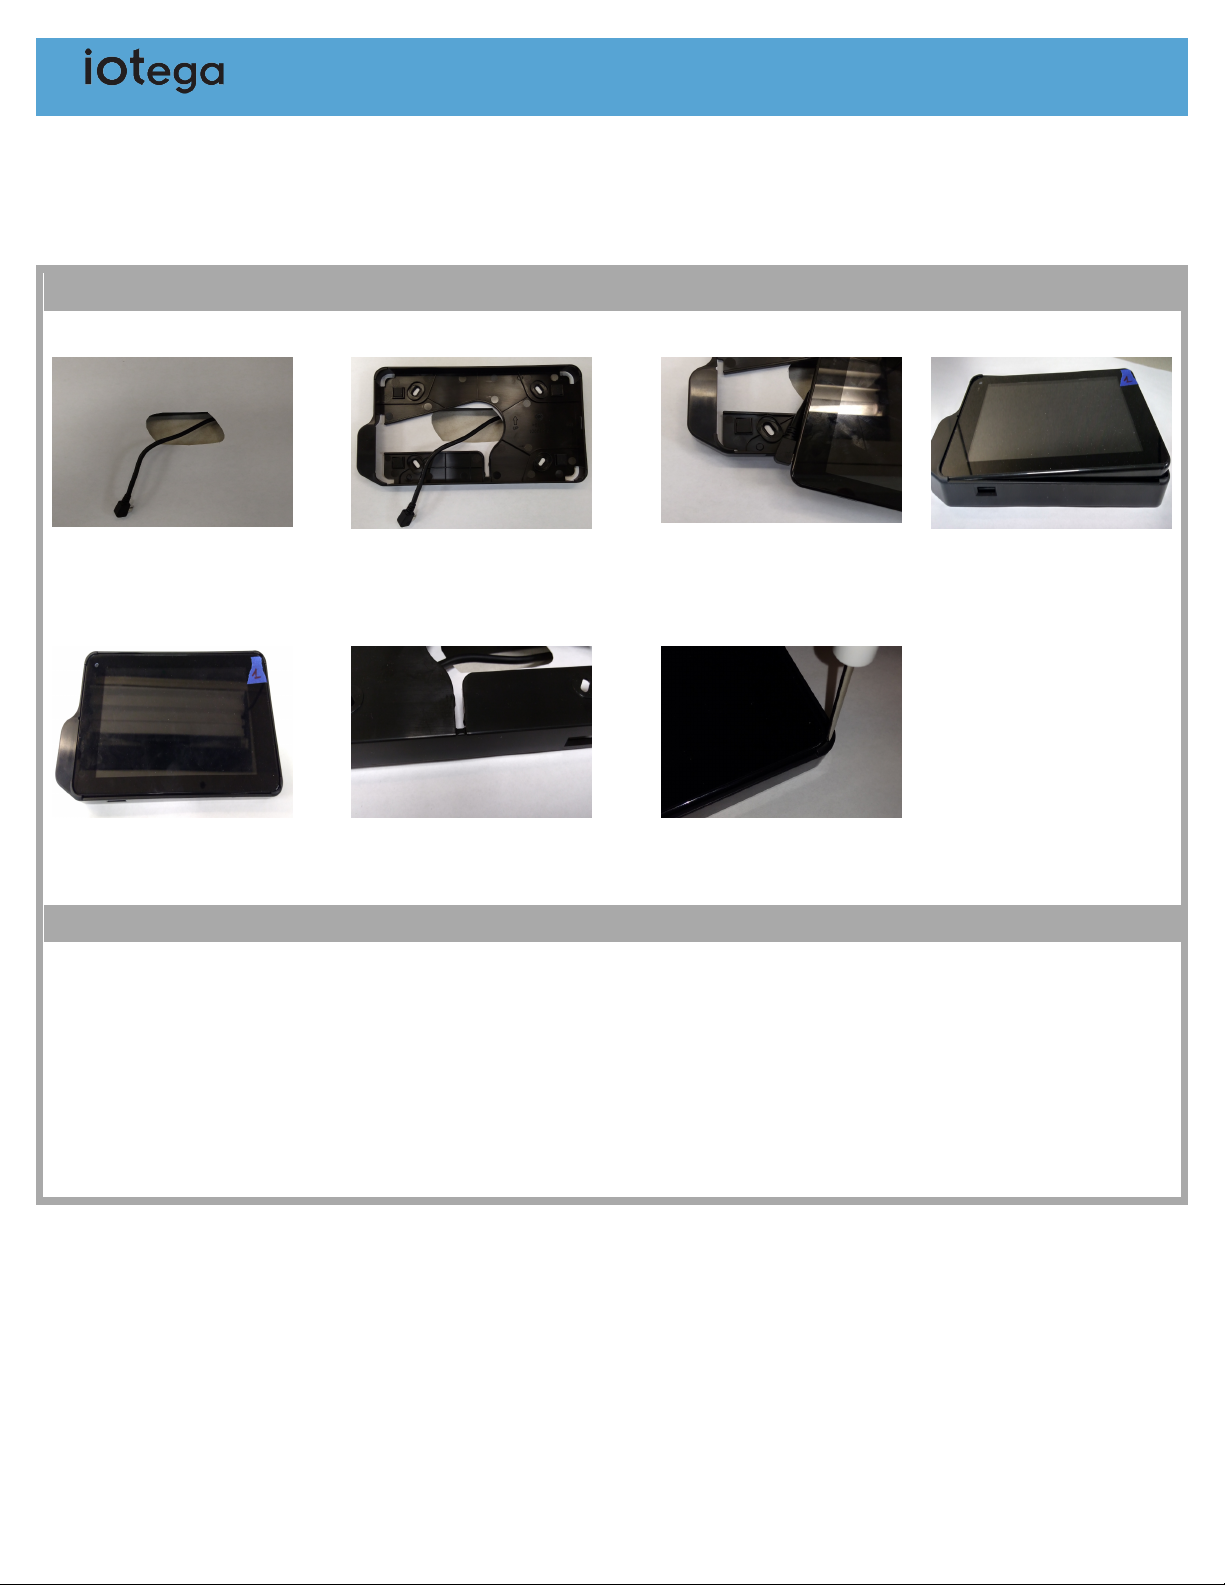
Mounting the hardware
Step 1 Step 2 Step 3 Step 4
Install the wire through the wall for
mounting.
Step 5
Push the right side of the touch-
screen into the mounting brac ket.
Enrolling the touchscreen
Step 1 Step 2 Step 3 Step 4
Power up the touchscreen.
During power up t he following events
occur:
l
The touchscr een keypad
flashes.
l
The Power and Link Speed
LEDs illuminate.
l
The Link A ctivity LED
flashes.
l
The Remote Connection LED
stays on when r eady.
Attach the mounting plate to the wall with the
mounting hardware. If mounting on dry wall, mark
the four installation points, remove the mounting
plate, and install the drywall inserts.
Step 6 Step 7
Remove the breakable tab and place the flush
wire wall mount through the channel.
If it is not enrolled, the serial number and enroll
button appears.
Connect the USB cable. Insert the left side of the touch-
screen into the mounting brac ket at
a sli ght angle.
To remove the touchscreen insert a flat
head screwdriver into one of the rear
slots at a downward angle and push up
to release the touchscreen.
On the Install App go to Enroll devices. Enter the touchscreen serial number
and tap Enroll.

Intended use
Lighting Control
Each light has an On/Off control icon
and a dimmer slider, if supported.
When you enroll multiple lights, you
can turn them on or off
simultaneously.
Video Weather Banner Messages
The video menu shows the c ameras
on the sy stem. You can view vi deos
from a partic ular camera and use the
camera options to rotat e or angle
the image.
Environmental requirements
Locks Thermostat Garage Door
Each lock has a Lock/unlock contr ol
icon. When you enroll multiple loc ks,
you can lock or unlock them sim-
ultaneously .
Tap the weather icon to bring up a
weekly weather forecast menu and
the high and low t emperatures for
each day.
View or change the temperature and
activate predefined schedules or
scenes.
When the system receives a high
priority message, a banner appears
and overr ides the scr eensaver. For
low priority messages, an icon
appears. Tap the icon to see a li st of
available messages.
Each garage door has an Open/Close control icon.
When you enroll multiple garage doors, you can
open or close them simultaneously.
Operating Temperature Humidity Installation Type RoHS
The unit operates normally in a temperature range of -10 °C to 55 °C.
The unit operates with a 5% to 93%
RH non-condensing.
Indoor, non-hazardous locations. This
module is to be installed by service
persons only.
This product is RoHS compliant.
Tablet Specifications
Screen
Type : Capacitive Touch
Size: 7" diagonal
Screen dimensions: 155 x 85 mm
(approx)
Resolution (min): 800 x 480 pixels
(min)
Dot (Pixel) Shape : Square
Response Time (Tr/Tf): 10/15 ms
(Typ.)
Viewing A ngle: Right: 60, Left: 60,
Up: 60, Down: 60 degrees
Brightness: 400 Nit (Typ.) at 25 C
Backlight Colour: White Colour
Contrast Ratio: 400:1
Colours: 256/65 k
Multi -touch: N/A
Ambient Light Sensor: N/A
Sunlight readable: N/A
OS
Android V4.4 or greater
Electrical specifications
Primary power source
Plug in adapter M/N: SEI0502000V
Helms-Man Transformers
Company limited
Energy Efficiency level 6
Note: USB port only for power supply and battery charging, it cannot connect to PC for communication.
Ratings:
Input: 100 - 240 V~ 50 - 60 Hz 500 mA
Output : 5 V - 2000 mA
Standby Battery
4 hour (min) standby, rechargeable
Intended application
100% up time expected
External power control
N/A (power cycle button)
 Loading...