

Page 1

VL VL
VL VL
VL
TT
TT
T
elephone/elephone/
elephone/elephone/
elephone/
VL VL
VL VL
VL
TT
TT
T
elephone pluselephone plus
elephone pluselephone plus
elephone plus
Doc. version 1.2
2. february 2009
ZETTLER
955.80955.80
955.80955.80
955.80
00
00
0
1E1E
1E1E
1E
User guideUser guide
User guideUser guide
User guide
®
Page 2

© Tyco Safety Products 2008, 2009
Contents subject to change without notice.
All rights to this documentation, including the contents of
the online help, are reserved, in particular but not limited to
the rights of copying, distribution and translation.
No portion of this documentation, including the online help,
may be reproduced, edited, copied or distributed in any
form without prior written authorization from Tyco Safety
Products. Use of the data medium provided with this
product is restricted to copying the software for the purpose
of data backup only.
FILNET®, Medicall®, medifon®, ZETADRESS®, ZETFAS®,
ZETTLER® are registered trademarks of
TOTAL WALTHER GmbH.
Echelon®, LON® und LonTalk® are registered trademarks of
Echelon Corporation.
All other trade names are trademarks or registered
trademarks of the respective producers.
Page 3

3
User guide Doc. version 1.2
Content
VL Telephone/VL Telephone plus
1 Guide to this manual ........................... 6
1.1 Signal words and symbols ............................. 6
2 Safety information .............................. 7
2.1 Intended use .................................................. 7
2.2 Installing the telephone ................................. 7
2.3 Emergency call function ................................ 8
3 Operation elements ........................... 10
3.1 Overview ...................................................... 10
3.2 Keys and their functions .............................. 11
3.3 Slide switches for volume adjustments ....... 12
3.4 Symbols in the display ................................. 12
3.5 Special characters in the display ................. 13
3.6 Illumination of key pad and display ............. 13
4 Emergency call .................................. 14
4.1 Sending an emergency call .......................... 14
4.2 Manual interruption of an emergency call ... 15
4.3 Taking of the emergency call by the staff. ... 15
4.4 Vital sign function (confirmation of
presence) ...................................................... 15
5 Making telephone calls ..................... 17
5.1 Manual dialling ............................................ 17
Content
Page 4

4
User guide Doc. version 1.2
VL Telephone/VL Telephone plusContent
5.2 Dialling with off-line call preparation .......... 18
5.3 Dialling via speed dialling keys .................... 18
5.4 On-Hook-Dialling .......................................... 19
5.5 Redialling ..................................................... 19
5.6 Abbreviated dialling ..................................... 20
5.7 Call number chaining (call-by-call function). 21
5.8 Dialling the telephone number transmitted
by the last incoming call .............................. 21
5.9 Ringing signal volume .................................. 22
5.10 Handset volume ........................................... 22
5.11 Loudspeaker volume .................................... 23
5.12 Listening-in .................................................. 23
5.13 Hands-free operation ................................... 24
5.14 Switching between handset and hands-free
operation...................................................... 25
6 Set functions ..................................... 26
6.1 Store speed dialling numbers ...................... 26
6.2 Store abbreviated numbers .......................... 27
6.3 Indication of incoming call by flashlight
ON/OFF ......................................................... 28
7 Extended telephone functions .......... 29
7.1 Dialling via direct call .................................. 29
7.2 Do-not-disturb function ............................... 30
7.3 List of released numbers for ringing signals 30
7.4 List of restricted numbers for ringing
signals .......................................................... 30
Page 5

5
User guide Doc. version 1.2
Content
VL Telephone/VL Telephone plus
7.5 Ringing melody ............................................ 31
7.6 Display contrast adjustment ........................ 31
7.7 Call restriction ............................................. 31
7.8 Support for hearing aid users ...................... 32
7.9 Operation with headset ............................... 32
7.10 Display language .......................................... 32
7.11 Room monitoring ......................................... 33
8 Error messages .................................. 35
9 Cleaning the device ........................... 37
Index ........................................................... 38
Page 6
6
User guide Doc. version 1.2
1 Guide to this manual
VL Telephone/VL Telephone plus
1 Guide to this manual
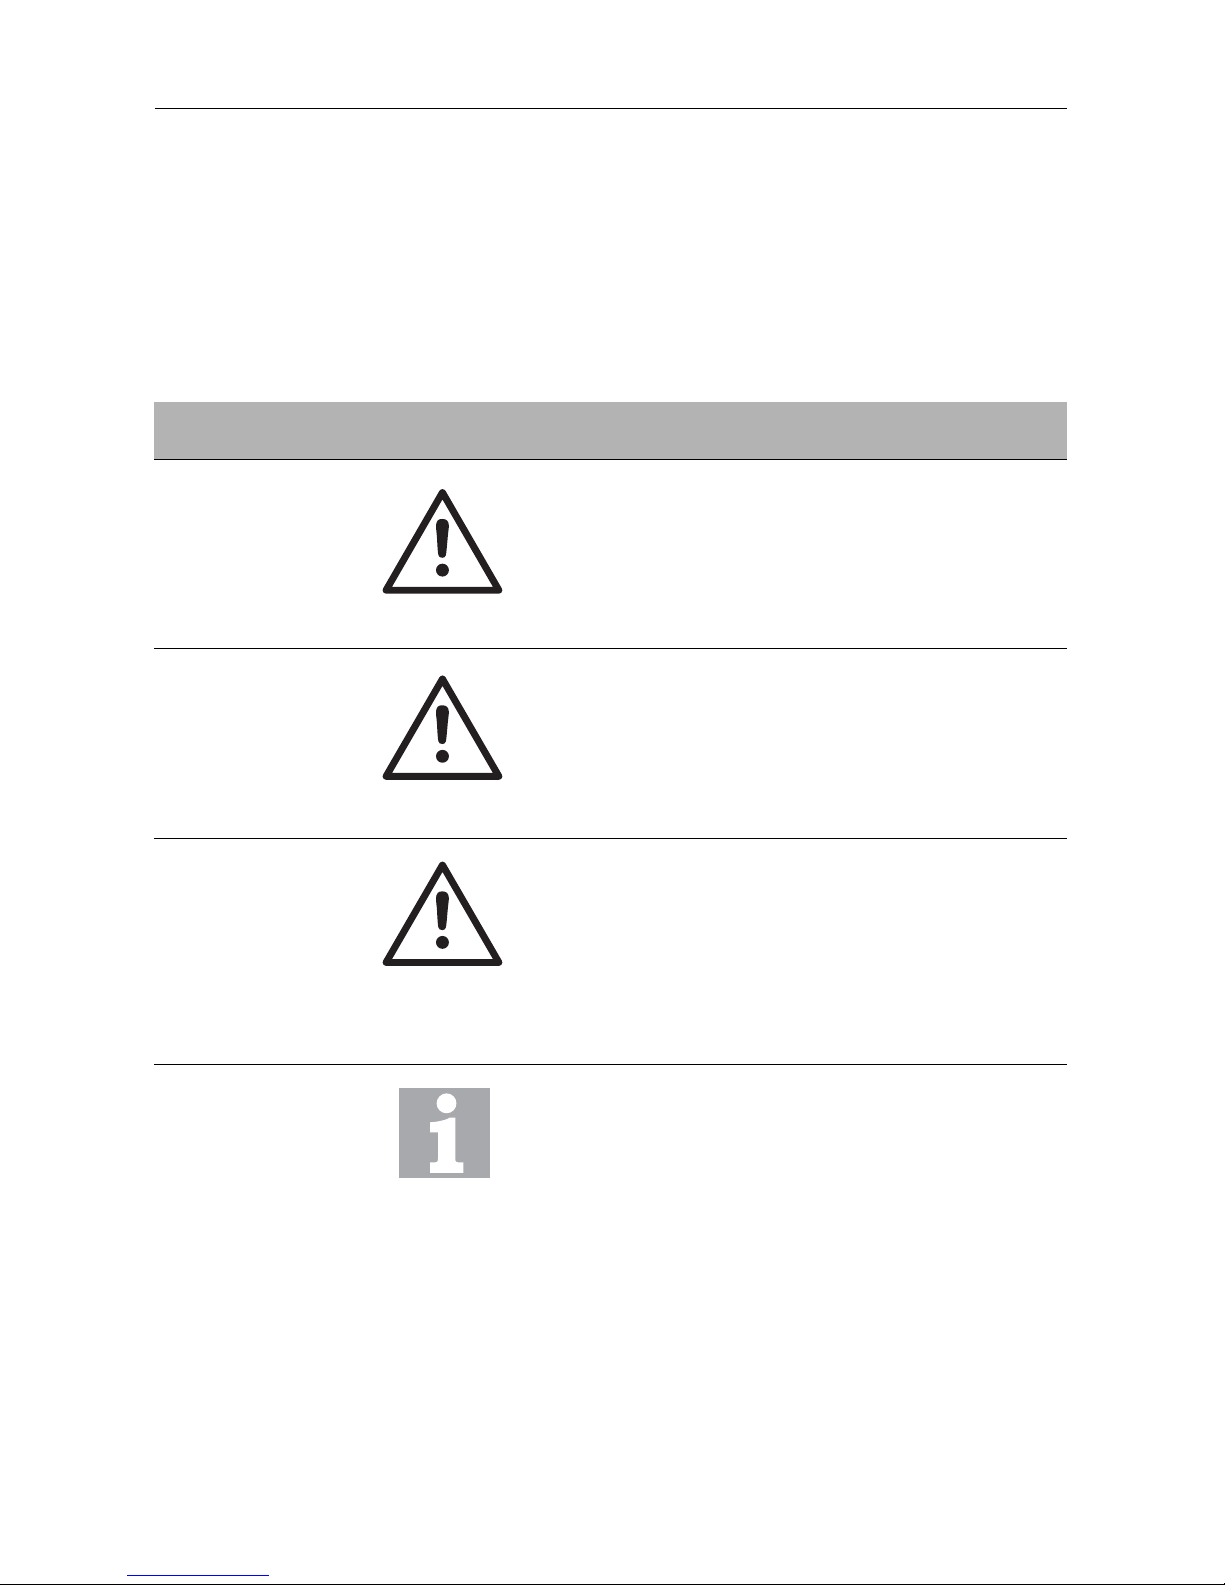
1.1 Signal words and symbols
Signal words and symbols in this guide refer you to warning
advice, information and instructions (see table 1).
Signal word Symbol Explanation
DANGER Warning advice. Direct and
immediate danger. Failure to
comply will result in death or
serious injury.
WARNING Warning advice. Possibly
dangerous situation. Failure
to comply could result in
death or serious injury.
CAUTION Warning advice. Possibly
dangerous situation. Failure
to comply could result in
slight or minor injury or
damage to equipment.
Helpful information.
Table 1: Signal words and symbols in this guide
Page 7
7
User guide Doc. version 1.2
2 Safety information
VL Telephone/VL Telephone plus
2 Safety information
Read this manual carefully. It contains important information
for safe use of your telephone.
2.1 Intended use
This telephone is suited to be connected to analogue line
interfaces of public switched telephone networks.
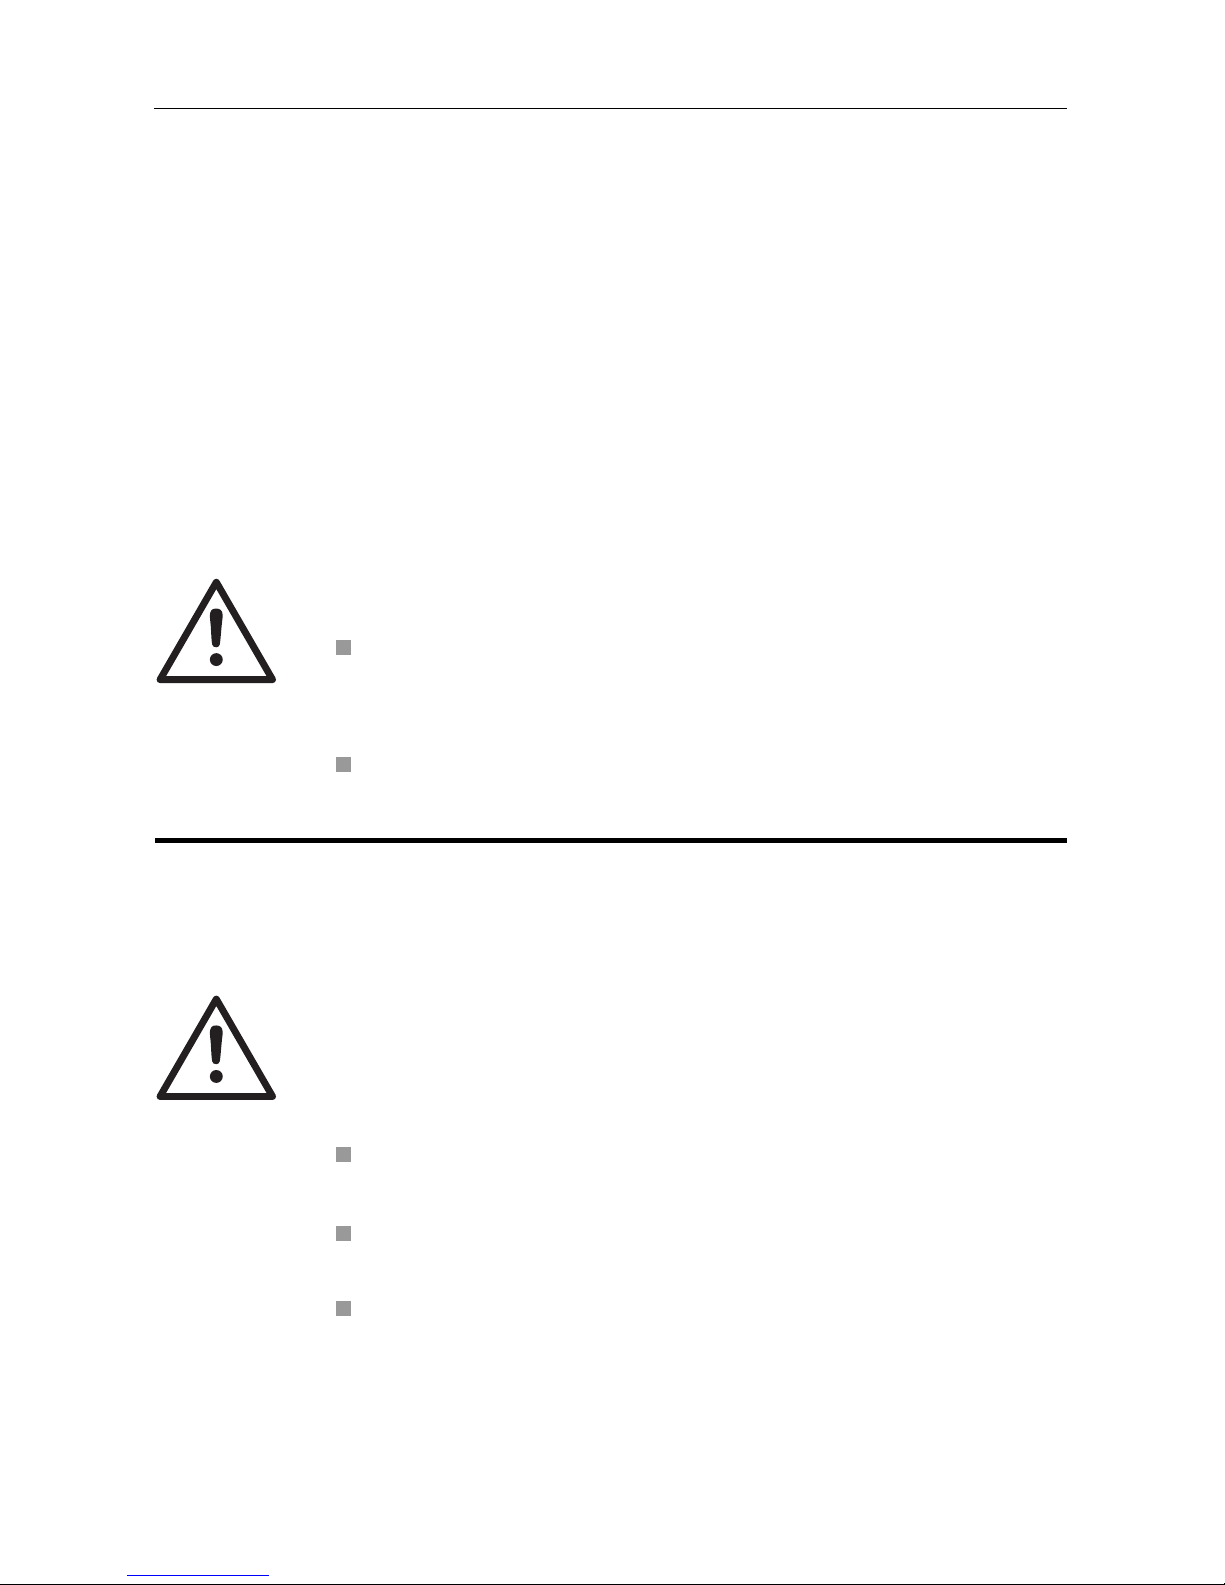
DANGER
Never try to unscrew the screws and open
the device. You could get in contact with
current-carrying parts.
Never touch the connector contacts with
pointed or metallic objects.
2.2 Installing the telephone
WARNING
The telephone was produced for standard use
conditions. Please do not install the device
close to heat sources (air-conditioning,
heater, exposure to direct sunlight),
in humid rooms (no exposure to splashing
water or chemicals),
nearby devices emitting strong magnetic
fields (electrical appliances, fluorescent
tubes, computers, TV sets),
Page 8
8 User guide Doc. version 1.2
VL Telephone/VL Telephone plus
2 Safety information
in dusty rooms,
in rooms where the device is exposed to
vibrations or extreme variations in
temperature.
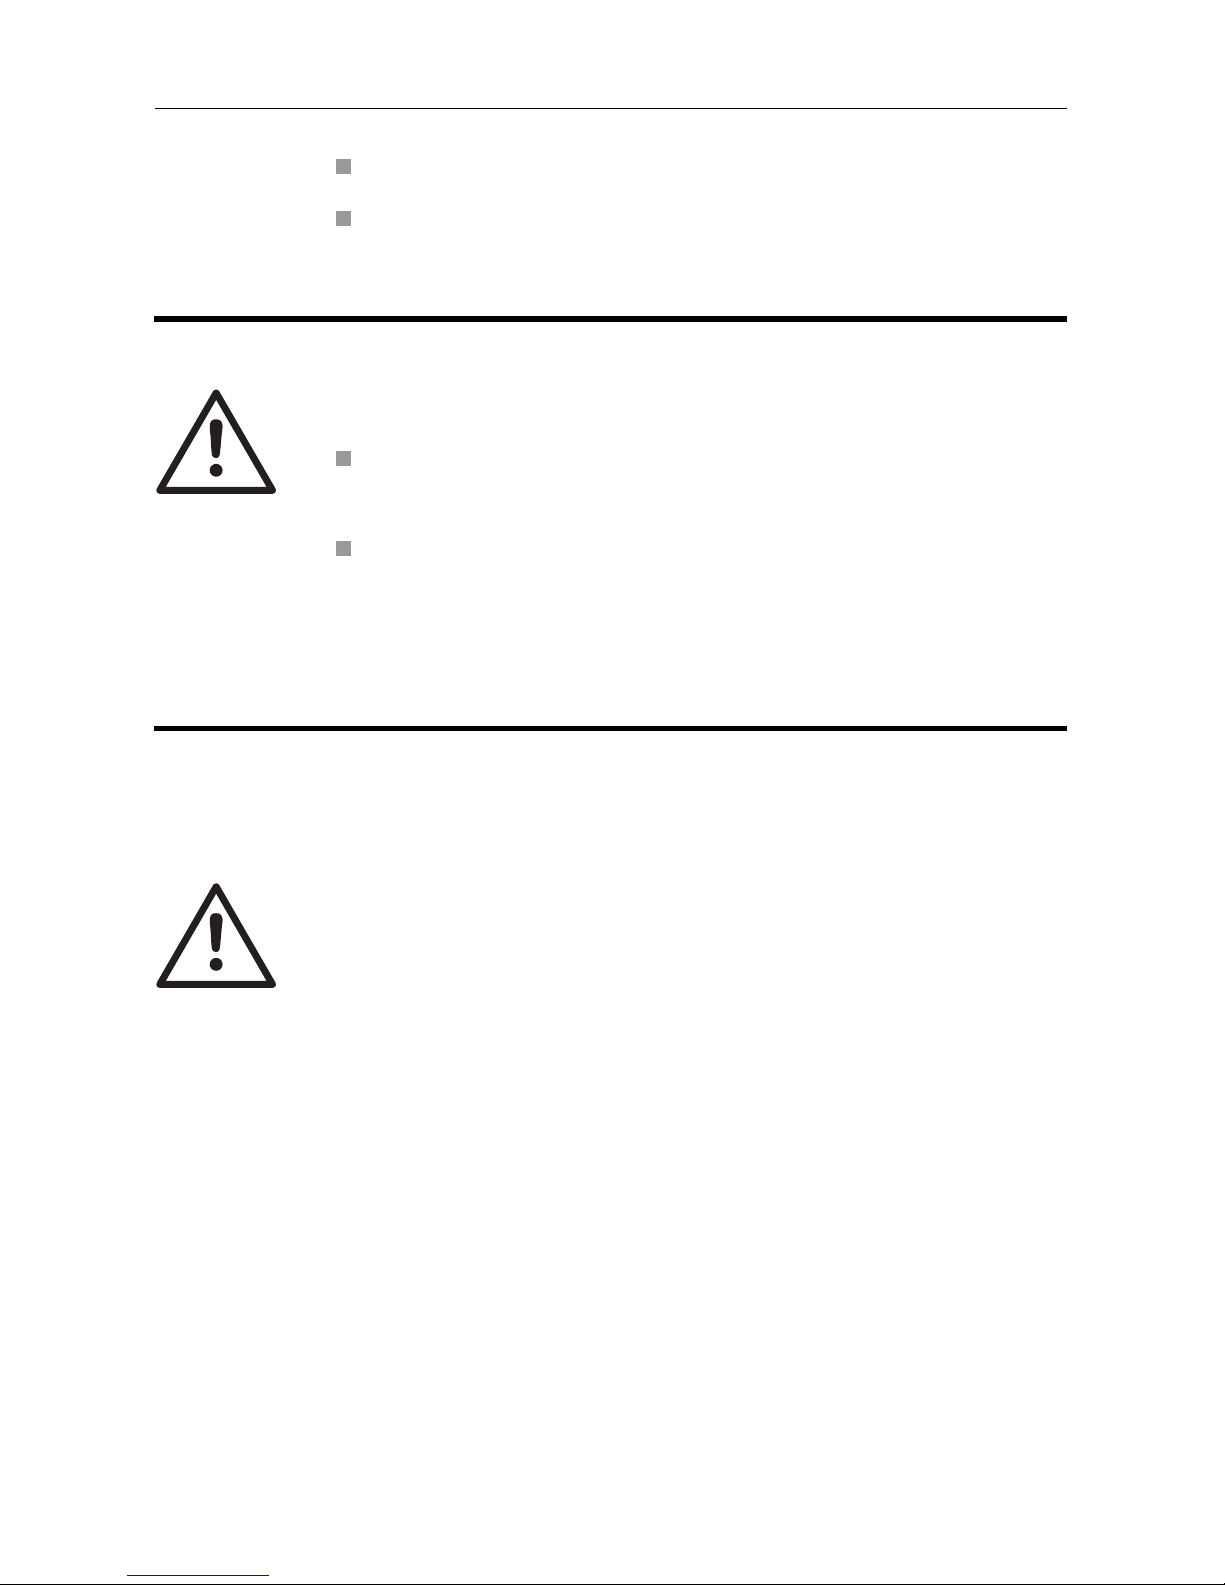
CAUTION
Never carry the telephone at the handset or
the connection cables.
Some furniture lacquers or furniture cleaning
products may attack the rubber at the feet of
the telephone and thus cause patches. In
such cases, please use a non-slip pad under
the device.
2.3 Emergency call function
DANGER
In rare cases, the function of sending out an
emergency call to the call system or to a freelyprogrammable destination cannot be guaranteed.
This might be the case if e. g. the telephone
network fails or if the radio transmission from
the wireless transmitter to the telephone is
subject to interference. If the device is used for
people who are in a critical or life-threatening
health condition, you should not refrain from
additional safety means.
Page 9

9
User guide Doc. version 1.2
2 Safety information
VL Telephone/VL Telephone plus
Wireless pendantWireless pendant
Wireless pendantWireless pendant
Wireless pendant
(variant VL Telephone plus only.)
If the wireless pendant is worn around the neck
by means of the cord, please consider the
following:
The wireless pendant should only be worn in
front of the upper part of the body and above
the clothing. It then can easily be accessed
at any time.
The cord has been developed and designed
to break when exposed to extra ordinary
high mechanical load. Despite of this, a risk
of injury cannot be completely excluded. It is
recommended to wear the wireless pendant
around the wrist when helping laid up
persons.
Only use an original cord to replace a faulty
one. Do not try to repair the cord on your
own (e. g. by making a knot).
Wireless pendant and cord should be kept
out of reach of small children.
Be aware, that a call will be transmitted only
within a certain range to the receiver. Please
ask the installer of your telephone - he will
inform you about the coverage of the
wireless transmitter.
Page 10
10 User guide Doc. version 1.2
VL Telephone/VL Telephone plus3 Operation elements
3 Operation elements
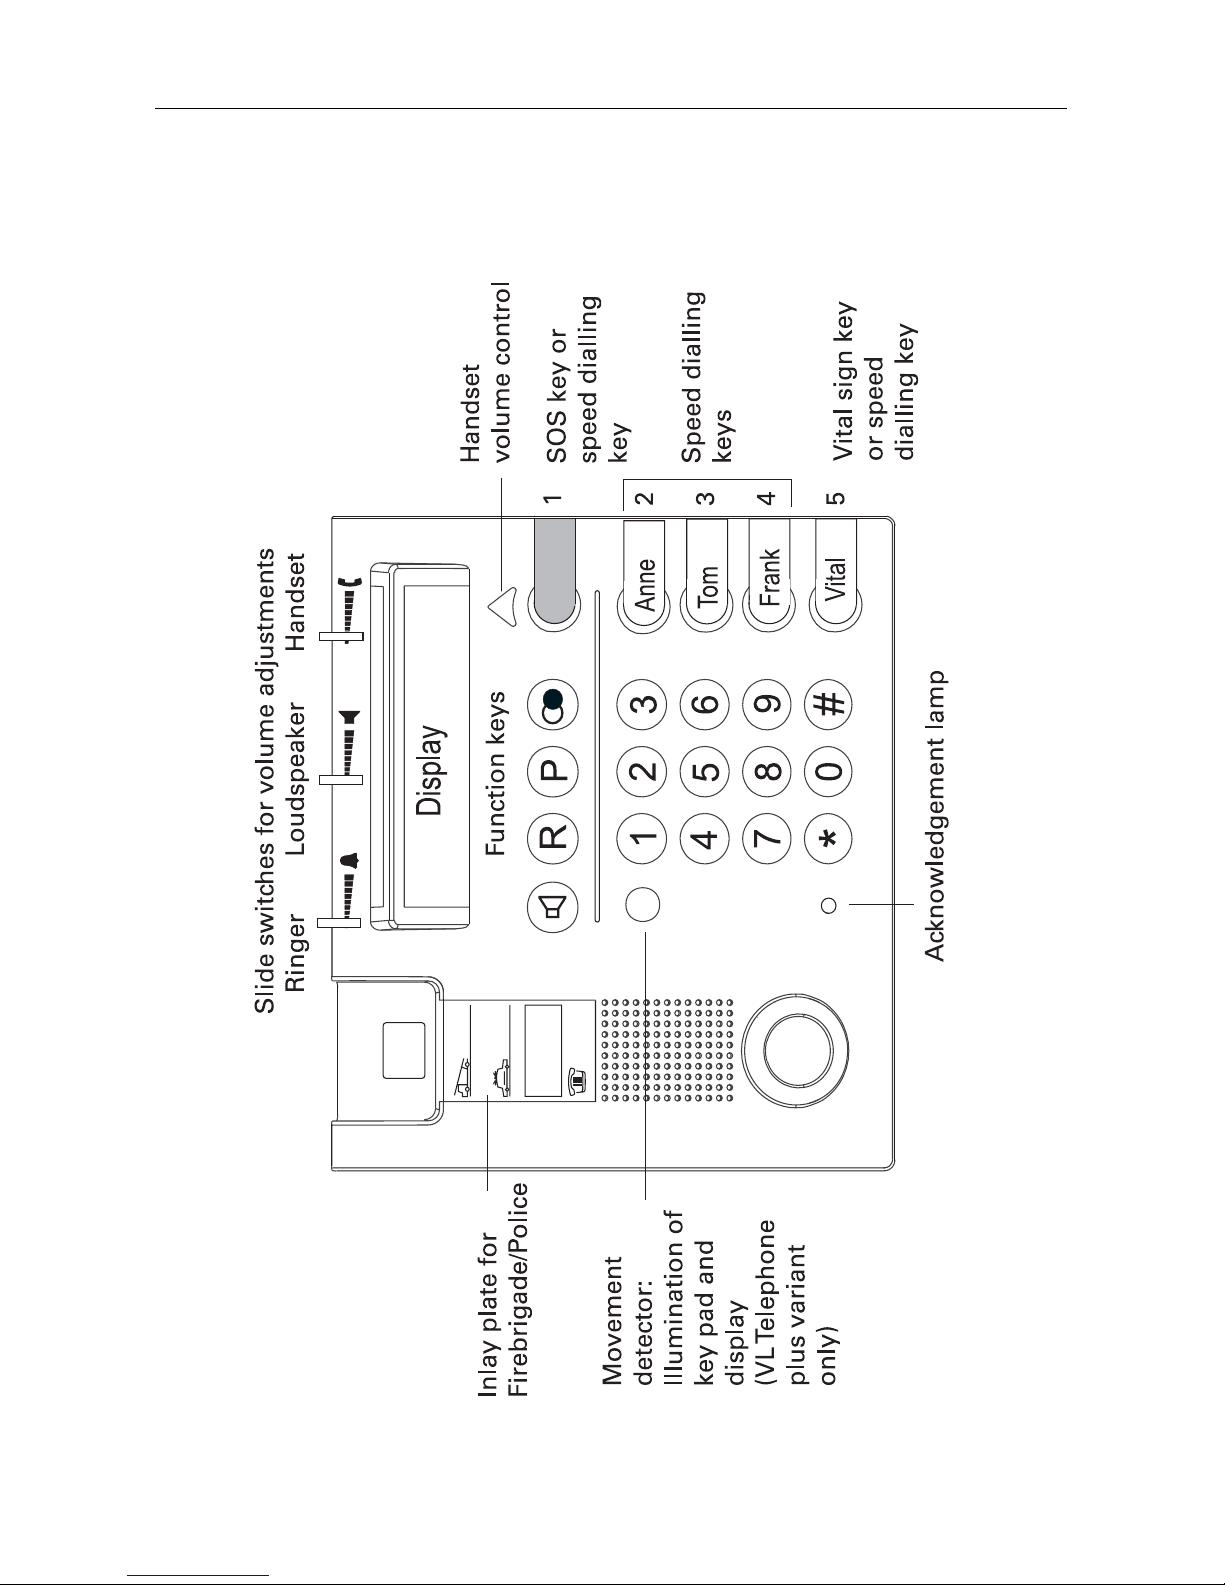
3.1 Overview
Fig. 1: Overview
Page 11

11
User guide Doc. version 1.2
3 Operation elements
VL Telephone/VL Telephone plus
3.2 Keys and their functions
Loudspeaker key:
- ”hands-free operation“: seize line,
disconnect line,
- ”listen-in function“: activation/deactivation
during a call,
- switching between handset and hands-free
operation.
Redial key: A call is established to the subscriber
number dialled last.
Programming key:
- Used to intitate operation steps,
- Used to initiate programming steps, i. e. start
and complete the programming.
Recall key e. g. for call transfers if the device is
connected to a telephone system.
Triangular key: Depending on the basic settings,
the handset volume for the current call can be
either raised or lowered.
SOS (emergency call) key (key on the very top):
direct dialling of emergency numbers - if
programmed.
Interrupt emergency call or distress radio call.
Speed dialling key: direct dialling of a stored
telephone number.
Page 12
12 User guide Doc. version 1.2
VL Telephone/VL Telephone plus3 Operation elements
Vital sign function (if activated):
Press the lower speed dialling key at agreed
times.
Dialling the transferred telephone number of the
last incoming call: press the keys consecutively
and pick up the handset.
0-90-9
0-90-9
0-9 Abbreviated dialling: pick-up the handset, press
the P-key and afterwards, enter the abbreviated
number (number of the memory location).
3.3 Slide switches for volume adjustments
Ringing signal volume.
Loudspeaker volume.
Handset volume. Please note the section ”Hand
set volume” from page 23 onwards.
3.4 Symbols in the display
There is an unanswered call. The transferred
telephone number can be displayed.
A programming step is executed.
Listening-in or hands-free mode is active.
Incoming call indication by flashlight is
activated. (VL Telephone plus variant only.)
The basic setting ”Handset very loud” is turned
on.
Page 13

13
User guide Doc. version 1.2
3 Operation elements
VL Telephone/VL Telephone plus
The batteries of the phone are nearly discharged
and should be replaced.
Headset operation is activated.
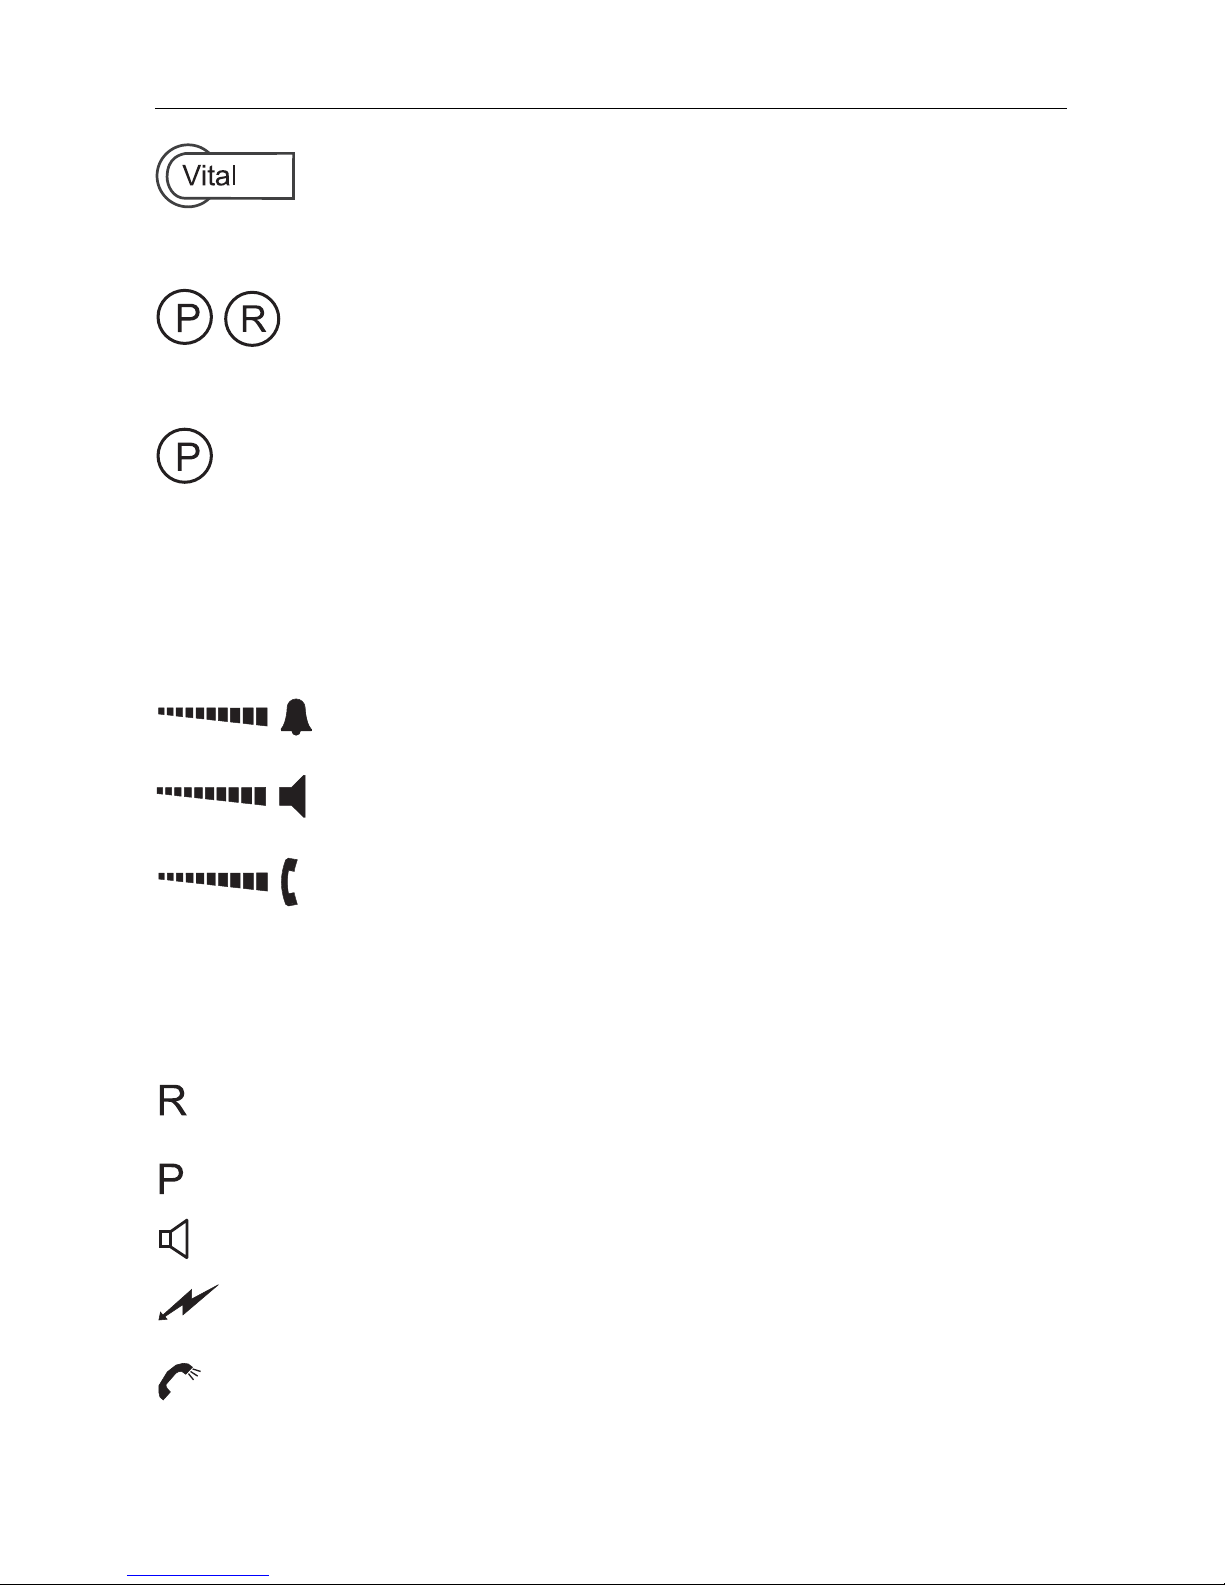
3.5 Special characters in the display
Fig. 2: Description of the special characters in the display.
The special characters are displayed in the upper display
line after pressing the corresponding key. The sequence and
the position is variable.
3.6 Illumination of key pad and display
(VL Telefon plus variant only.)
Illumination on: When there is an incoming call or when
your hand moves to the telephone.
Illumination off: After you have finished a call or if you
leave the telephone 40 sec. without moving.
The numeric key “5” is always lit for better orientation, even
if the display or the key pad light is off.
Page 14

14 User guide Doc. version 1.2
VL Telephone/VL Telephone plus
4 Emergency call
4 Emergency call
If call mode or solitary mode is set, emergency calls can be
triggered using the key or the wireless pendant. Please note
the safety instructions as from page 8.
4.1 Sending an emergency call
4.1.1 Using key on telephone
The staff are called when the red emergency call key on the
telephone is pressed (top key at side).
Press the emergency
call key.
Display on telephone: The number in the left
bracket stands for the initiator, the number on
the right shows the memory location of the
selected call number during solitary operation.
4.1.2 Via wireless pendant (variant VL Telephone
plus only)
The staff are called when the red emergency button on the
wireless pendant is pressed.
Press the red button of the wireless pendant.
Display on telephone: The number in the left
bracket stands for the initiator, the number on
the right shows the memory location of the
Page 15

15
User guide Doc. version 1.2
4 Emergency call
VL Telephone/VL Telephone plus
selected call number during solitary operation.
4.1.3 Holding a conversation with the person
seeking help
If the recipient of the emergency call stays nearby the
person seeking help, he goes to him. If the recipient stays
far away from him, he calls the person seeking help via his
own telephone. He switches the emergency telephone of the
person seeking help into hands-free mode and is able to
speak with him.
4.2 Manual interruption of an emergency call
Should you press the SOS key mistakenly, you can stop the
emergency call procedure by the following key sequence.
Press the P key and press the rhombus key
briefly afterwards.
The emergency call will be interrupted.
4.3 Taking of the emergency call by the staff
The taking of the emergency call by the staff is described in
the programming instructions. See sections 4.2.2 and 5.2.1.
4.4 Vital sign function (confirmation of
presence)
The vital sign function can be switched on or off using the
programming. When it is switched on, press the vital sign
function key regularly at the agreed time in order to prevent
the telephone from issuing an automatic call.
Page 16

16 User guide Doc. version 1.2
VL Telephone/VL Telephone plus
4 Emergency call
Press the bottom key at the side. If you forget
to press the key in time, 10 minutes before the
safety timer runs out you will hear 3 warning
tones every 30 seconds (tone/pause length
approx. 1 second). The word ”time“ appears in
the display. Press the vital sign key at the latest
when you hear these tones - otherwise the
emergency call will be sent auto matically. After
pressing the vital sign key you will hear a short
acknowledgement tone.
Vital sign function: User log-on and log-off
It is useful to log off and log on again if you are leaving the
house for one or several days (for example in order to go on
holiday). When you log off, the safety timer is stopped.
When you return home, you must log on again (the safety
timer starts up again). Logging off and on should be
performed by the staff.
Press the P key and afterwards press the # key
briefly.
Enter
code
8080
8080
80 for logging ON (safety timer on) or
code
8181
8181
81 for logging OFF (safety timer off).
Press the P key. The setting is stored.
Page 17

17
User guide Doc. version 1.2
5 Making telephone calls
VL Telephone/VL Telephone plus
5 Making telephone calls
Normally, you initiate a telephone call by picking up the
handset. This is described in the following paragraphs. As an
alternative, you can also initiate a telephone call by pressing
the loudspeaker key. In this case, the telephone
automatically activates the hands-free operation. This option
is not described further in the following paragraphs.
5.1 Manual dialling
Pick-up the handset, wait for dialling tone.
Dial telephone number, ringing tone or busy
tone.
Start conversation when target subscriber
answers the call.
Replace the handset.
Pick up an incoming call
When an incoming call is indicated by the
ringing signal, you can answer it by either
picking up the handset or pressing the
loudspeaker key
Incoming calls are also indicated optically. If
no telephone number is transmitted, the
display shows:
Page 18

18 User guide Doc. version 1.2
VL Telephone/VL Telephone plus
5 Making telephone calls
5.2 Dialling with off-line call preparation
You can also use the off-line call preparation when making
telephone calls. Just dial the telephone number of the target
subscriber, check the number in the display and seize the
line afterwards.
Dial complete telephone number.
Pick-up the handset. The telephone number is
being dialled.
Replace the handset to finish the call.
Erase digits
When you dial telephone numbers using the offline call preparation, you can erase individual
numbers by pressing the P key.
5.3 Dialling via speed dialling keys
There are 4 speed dialling keys available. If you do not use
the top key as emergency call key (see next paragraph), you
can also use this key as an additional speed dialling key.
Press the desired speed dialling key. The
selected target subscriber number is shown in
the display and will be dialled. The hands-free
mode is activated.
Pick-up the handset when the subscriber
answers the call or stay with the hands-free
mode.
Page 19

19
User guide Doc. version 1.2
5 Making telephone calls
VL Telephone/VL Telephone plus
End of call: Replace the handset or complete the
hands-free operation by pressing the
loudspeaker key.
Store telephone numbers
Please refer to page 26 to see how to store the
telephone numbers for speed dialling.
5.4 On-Hook-Dialling
You do not need to pick-up the handset in order to start the
dialling process. Only as soon as the target subscriber
answers your call, pick-up the handset as usual.
Press the loudspeaker key.
Dial the telephone number.
Pick-up the handset as soon as the subscriber
answers your call. Start conversation.
5.5 Redialling
When the called subscriber does not answer the call as he/
she is having another telephone conversation or is not
present, you can repeat the dialling process by just pressing
one key. The target subscriber number may only have 20
digits as a maximum.
Pick-up the handset.
Page 20

20 User guide Doc. version 1.2
VL Telephone/VL Telephone plus
5 Making telephone calls
Press the redial key.
Hold conversation as soon as the subscriber
answers the call.
Remark:
Each newly dialled telephone number will
overwrite the earlier made entry for redialling.
5.6 Abbreviated dialling
You have the option to store up to 10 frequently used
telephone numbers and thus abbreviate the dialling
process. They are stored under call number memory
stations 0 - 9 (numeric key pad). Each of this numbers you
can dial by pressing only two keys.
Pick-up the handset.
Press the P key.
0 - 9 Press corresponding numeric key (0 - 9) from
the numeric key pad. The telephone number is
dialled automatically.
Hold conversation as soon as the called party
answers the call.
Store telephone numbers
Please refer to page 27 to see how abbreviated
numbers are stored.
Page 21

21
User guide Doc. version 1.2
5 Making telephone calls
VL Telephone/VL Telephone plus
5.7 Call number chaining (call-by-call function)
Your telephone provides the option to chain telephone
number segments which are stored under different memory
stations. This is useful e. g. if you want to dial a telephone
number using a specific destination network code (call-bycall function).
Example: You have stored a telephone number on memory
dialling location 0 and a destination network code on speed
dialling location 2.
Press speed dialling key 2. Wait until the
destination network code has been dialled.
0 Press the P key and numeric key 0 afterwards.
The telephone number is then linked to the
destination network code. The two numbers are
shown in the display and are dialled
sequentially.
5.8 Dialling the telephone number transmitted
by the last incoming call
The ”Transmission of the caller’s telephone number” is a
service provided by the telephone network provider and
possibly has to be applied for and released.
A telephone number transmitted with a call is automatically
stored. You can view the number and dial it.
If there is an unanswered incoming call, ”R” is shown in the
display’s symbol bar. You can then view the telephone
number and will know who had called you. You may then
dial this telephone number directly.
Press the P key.
Page 22

22 User guide Doc. version 1.2
VL Telephone/VL Telephone plus
5 Making telephone calls
Press the R key. The telephone number is shown
in the display.
Pick-up the handset. The telephone number is
dialled automatically.
Call number appears in the display
After having pressed the R key, the telephone
number is displayed for 40 seconds.
5.9 Ringing signal volume
The ringing signal volume can be adjusted by
the left slide switch.
5.10 Handset volume
The telephone can be set to ”normally loud“ or ”very loud“
using programming (see ”commissioning and programming“ on page 57). The handset symbol
appears in the
display as a sign for the activated basic setting.
The volume range can be set using the slider within the
basic range which is set.
Push the right slider to the left: quieter; push to
the right: louder.
The handset volume can be changed during a
conversation.
Press the triangle key during the conversation.
Page 23

23
User guide Doc. version 1.2
5 Making telephone calls
VL Telephone/VL Telephone plus
The volume is lowered if the basic setting is
”Handset very loud”, and increased if the basic
setting is ”Handset normally loud”.
When the handset is replaced, the basic setting
is automatically reinstated.
Recommendation
We recommend setting the handset volume
using the programming and slider so that most
users of the telephone can use it comfortably. If
a person wants to use the telephone with a
different setting, he or she can press the triangle
key during the conversation.
5.11 Loudspeaker volume
The loudspeaker volume can be adjusted by the
slide switch positioned in the middle.
5.12 Listening-in
You can activate the loudspeaker during a call so that the
conversation can be heard in the room.
Activate the loudspeaker
Press the loudspeaker key.
Page 24

24 User guide Doc. version 1.2
VL Telephone/VL Telephone plus
5 Making telephone calls
Deactivate the loudspeaker
Press the loudspeaker key.
Retention of set volume
The loudspeaker volume for listening-in set via
the slide switch is also retained for the next call.
5.13 Hands-free operation
In addition to the listening-in function, the hands-free mode
allows to hold a telephone conversation while the handset is
on-hook.
You receive a call
Press the loudspeaker key. The hands-free mode
is activated.
End conversation
Press the loudspeaker key. The hands-free mode
is deactivated.
You call a subscriber
Dial the telephone number (manually or via
abbreviated numbers)
Press the loudspeaker key. The hands-free mode
is activated and the telephone number is
dialled.
End conversation
Press the loudspeaker key again. The hands-free
mode is deactivated.
Page 25

25
User guide Doc. version 1.2
5 Making telephone calls
VL Telephone/VL Telephone plus
Speed dialling and hands-free
When pressing a speed dialling key, the
telephone automatically switches to the handsfree mode and the telephone number is dialled.
5.14 Switching between handset and hands-free
operation
You are holding a telephone conversation and now intend to
switch from the handset to the hands-free mode.
Press the loudspeaker key and keep it pressed
while replacing the handset. Afterwards, release
the loudspeaker key. The hands-free mode is
activated.
If you want to resume the handset operation,
just pick-up the handset and the hands-free
mode is deactivated.
Page 26

26 User guide Doc. version 1.2
VL Telephone/VL Telephone plus
6 Set functions
6 Set functions
6.1 Store speed dialling numbers
You can assign call numbers to the 4 side keys (2 - 5) for
speed dialling of specific numbers. The upper key 1 at the
side is set as an emergency call key. If key 5 (bottom key on
at the side) is assigned to the vital sign function, this key
cannot be used as a speed dialling key.
Fig. 3: Arrangement of speed-dialling keys
Each of these numbers is restricted to a length of 20 digits
as a maximum.
Press the P key and afterwards press the # key
briefly.
Select code for the desired speed dialling
station and enter it:
code
0202
0202
02 for speed dialling location 2
Page 27

27
User guide Doc. version 1.2
6 Set functions
VL Telephone/VL Telephone plus
code
0303
0303
03 for speed dialling location 3
code
0404
0404
04 for speed dialling location 4
code
0505
0505
05 for speed dialling location 5.
Enter telephone number.
Press the P key. The telephone number is stored.
Erase a number
You can erase a number within the programming process by pressing the redial key.
6.2 Store abbreviated numbers
You can store up to 10 abbreviated numbers under call
number memory stations 0 - 9 (numeric key pad). Each of
these numbers is restricted to a length of 20 digits as a
maximum.
Press the P key and press the # key briefly
afterwards.
Enter code for the desired abbreviated number
key and enter it:
code
11
11
1
00
00
0 for abbreviated number assigned to 0
code
11
11
1
11
11
1 for abbreviated number assigned to 1
code
11
11
1
22
22
2 for abbreviated number assigned to 2.
If desired, continue as described until code
11
11
1
99
99
9 is
assigned for abbreviated number 9.
Enter telephone number.
Press the P key. The telephone number is stored.
Page 28

28 User guide Doc. version 1.2
VL Telephone/VL Telephone plus
6 Set functions
Erase a number
You can erase a number within the
programming process by pressing the redial
key.
6.3 Indication of incoming call by flashlight
ON/OFF
The indication of incoming flashlight is available in VL Telephone plus variant only. In factory pre-set, flashlight
indication is activated.
Press the P key and afterwards press the # key
briefly.
Enter
code
4040
4040
40 for ”Indication of incoming call by
flashlight ON” or
code
4141
4141
41 for ”Indication of incoming call by
flashlight OFF”.
Press the P key. The entry is stored.
Page 29

29
User guide Doc. version 1.2
7 Extended telephone functions
VL Telephone/VL Telephone plus
7 Extended telephone functions
7.1 Dialling via direct call
When the ”Direct call” feature is active, it is possible to dial
a specific stored telephone number by pressing any key
(except for the loudspeaker key and the SOS key). With
”Automatic direct dial“, the telephone number is dialled
directly the handset is lifted.
The activation of the ”Direct call“ function can be identified
in the display:
Pick-up the handset.
Press any key (except for the loudspeaker key
and the SOS key). The programmed direct call
number is dialled.
Information referring the direct call
When the direct call function is active, no
other telephone functions are executable.
Exceptions: The stored emergency numbers
of police and fire-brigade can be called. If the
emergency call mode is activated, the stored
telephone numbers can also be dialled.
Please refer to ”commissioning and programming“ as of page 51 to see how the
direct call function is activated.
Page 30

30 User guide Doc. version 1.2
VL Telephone/VL Telephone plus7 Extended telephone functions
7.2 Do-not-disturb function
The ringing signal can be deactivated. In this case, the
telephone will not ring if there is an incoming call. But, an
incoming call is indicated in the telephone display. See page
57 of ”commissioning and programming“.
7.3 List of released numbers for ringing signals
You can store up to 10 telephone numbers in the list of
released numbers for ringing signals. Then, your telephone
will only ring if there is an incoming call from one of the
stored numbers. All other incoming calls will only be
indicated optically - in the display. The list of released
numbers for ringing signals has to be activated or
deactivated via programming. This function can only be
used if the caller’s number is being transferred. You have
either the option to activate the list of released numbers for
ringing signals or the list of restricted numbers for ringing
signals. If you set none of the two functions, the ringing
signal works according to the standard. See page 58 of
”commissioning and programming“
7.4 List of restricted numbers for ringing
signals
You can store up to 10 telephone numbers in the list of
restricted numbers for ringing signals. Then, your telephone
will not ring if there is an incoming call from one of the
stored numbers. All other incoming calls will be indicated
by ringing signal. If there is an incoming call from one of the
numbers restricted for ringing signals, this incoming call is
only indicated optically - in the display. The list of restricted
Page 31

31
User guide Doc. version 1.2
7 Extended telephone functions
VL Telephone/VL Telephone plus
numbers for ringing signals has to be activated or deactivated via programming. This function can only be used if
the caller’s number is being transferred. You have either the
option to activate the list of released numbers for ringing
signals or the list of restricted numbers for ringing signals. If
you set none of the two functions, the ringing signal works
according to the standard. See page 59 of ”commissioning
and programming“
7.5 Ringing melody
Your telephone provides 10 different ringing melodies. See
page 60 of ”commissioning and programming“.
7.6 Display contrast adjustment
As for wall-mounted devices, the user views the display
from a different angle than this is the case for desktop
operation. The telephone offers the option to adjust the
display contrast so that the optimal view is granted for wallmounting and for desktop operation. See ”commissioning
and programming“ as of page 60.
7.7 Call restriction
Apart from the direct call function, there are two other
options for ”call restrictions“:
FF
FF
F
ull restrictionull restriction
ull restrictionull restriction
ull restriction: It is not possible to dial telephone
numbers and to establish calls (except for the stored
emergency numbers for police and fire-brigade and the
programmed SOS numbers as far as the emergency call
Page 32

32 User guide Doc. version 1.2
VL Telephone/VL Telephone plus7 Extended telephone functions
function is active). You can identify a programmed full
restriction via the display.
RR
RR
R
estricted numberestricted number
estricted numberestricted number
estricted number
ss
ss
s: The dialling procedure is restricted
for individual telephone numbers (e. g. a specific prefix
number). You have to enter restricted numbers in order to
use this function.
See ”commissioning and programming“ of page 50.
7.8 Support for hearing aid users
The ear capsule in the handset creates a magnetic field. As
for hearing aids worn behind the ear, the telephone
conversation is heard louder and clearer due to the
magnetic coupling.
7.9 Operation with headset
Instead of the handset, you can also connect a headset. In
this case, you need to set the telephone to ”headset
operation”. Then, the display shows the symbol . See page
46 of ”commissioning and programming“
During the headset operation, the handset function (”seize
line” by ”picking up” and ”disconnect line” by ”replacing”)
are taken over by the loudspeaker key.
7.10 Display language
You can set the display language to either English, German,
Nederlands, French or Italian. See page 55 of
”commissioning and programming“.
Page 33

33User guide Doc. version 1.2
7 Extended telephone functions
VL Telephone/VL Telephone plus
7.11 Room monitoring
You can monitor a room where your telephone is located remotely.
The function ”room monitoring” has to be activated at the
telephone in the room to be monitored (see page 52 of
”commissioning and programming“.
Tone dialling must be set at the telephone from which you
intend to monitor the room. Pick-up the handset, dial the
telephone number. The telephone in the room to be
monitored rings once and connects the line. After this enter
the four-digit access code (see page 52 of the programming
instructions). Afterwards, the device switches to the
monitoring mode and you can listen to what is happening in
the surroundings, i. e. monitor the room. If you wish to have
a ”silent monitoring” without the earlier ringing signal, you
just need to deactivate the ringing signal (see page 57 of
”commissioning and programming“.
You can switch from the monitoring mode to a ”two-way
communication“ by pressing the following numeric keys:
The telephone switches to hands-free mode.
Two-way-communication: You hear the person
in the monitored room.
Two-way-communication: You speak.
You can switch back and forth by pressing the
keys 4 and 6.
”Replace the handset”. The connection is
disconnected. In the monitored room, no busy
tones are heard via the loudspeaker.
Page 34

34 User guide Doc. version 1.2
VL Telephone/VL Telephone plus7 Extended telephone functions
You can end the room monitoring function by replacing the
handset or pressing key 0.
Data protection
When using the ”silent monitoring”, please
observe the Data Protection Law.
Page 35

35
User guide Doc. version 1.2
8 Error messages
VL Telephone/VL Telephone plus
8 Error messages
Your telephone is supervised on possible technical
disturbances. Depending on the telephone variant the
following messages can occur:
Problem
Wireless
pendant has
failed
Power supply
has failed
The batteries of
the phone are
nearly empty
Display / Warning
tones
Warning clay/tone
(clay/tone length
approx. 1 sec.) per
minute, max. 15
minutes long. Then
automatic call to
staff.
What is to be
done?
You do not need to
do anything. The staff
will be informed.
Check to ensure that
the AC adapter plug
is plugged in (if not,
plug in). You do not
need to do anything
else. The staff will be
informed.
You do not need to
do anything. The staff
will be informed.
Page 36

36 User guide Doc. version 1.2
VL Telephone/VL Telephone plus
8 Error messages
What is to be
done?
Inform the stafInform the staf
Inform the stafInform the staf
Inform the staf
ff
ff
f
immediately immediately
immediately immediately
immediately by other
means that you
cannot be reached by
phone.
Tabel 2: Error messages
Display /
Warning tones
Warning clay/tone
(clay/tone length
approx. 1 sec.) per
half minute, max.
1 1/2 minutes
long.
Problem
The connection
to the telephone
network is
disturbed.
Page 37

37
User guide Doc. version 1.2
9 Cleaning the device
VL Telephone/VL Telephone plus
9 Cleaning the device
Clean the telephone with a soft slightly moist cloth.
CAUTION
Please do not use chemicals, alcohol or
abrasive cleaning products to clean the
device.
Some furniture lacquers or furniture cleaning
products may attack the rubber at the feet of
the telephone and thus cause patches. In
such cases, please use a non-slip pad under
the device.
Page 38

38 User guide Doc. version 1.2
VL Telephone/VL Telephone plus
Index
Index
A
Abbreviated dialling 20, 27
Dialling 20
Store numbers 27
AC adapter 35
B
Batteries 35
C
Call number chaining 21
Call restriction 31
Full restriction 31
Restricted numbers 32
Cleaning the device 37
D
Dialling 17, 29
Abbreviated dialling 20
Call number chaining 21
On-Hook-Dialling 19
Telephone number
transmitted 21
via direct call 29
via speed dialling keys 18
with off-line call preparation
18
Direct call 29
Display 13, 22, 31
Call number 22
Contrast adjustment 31
Language 32
Special characters 13
Symbols 12
Do-not-disturb 30
E
Emergency call 14
Emergency call key 14
Manual interruption 15
Sending 14
Wireless pendant 14
Error messages 35
Extended telephone functions
29
F
Flashlight indication 28
Full restriction 31
H
Hands-free operation 24
Headset 32
Hearing aid 32
I
Illumination 13
Incoming call 17
Indication of flashlight 28
Intended use 7
K
Keys and their functions 11
L
List of released numbers 30
List of restricted numbers 30
Loudspeaker volume 23
Page 39

39
User guide Doc. version 1.2
Index
VL Telephone/VL Telephone plus
M
Making telephone calls 17
Manual dialling 17
Melody 31
O
On-Hook-Dialling 19
Operation elements 10
Keys and their functions 11
Slide switches 12
Symbols in the display 12
Operation with headset 32
P
Pick up an incoming call 17
Power supply 35
R
Redialling 19
Restricted numbers 32
Ringing melody 31
Ringing signals 30
List of released numbers 30
List of restricted numbers 30
Room monitoring 33
S
Safety information 7
Set functions 26
Flashlight 28
Store abbreviated numbers
27
Store speed dialling numbers
26
Signal words 6
Slide switches 12
Speed dialling 18, 26
Dialling 18
Store numbers 26
Support for hearing aid users
32
Switching between handset
and hands-free 25
Symbols 6
Symbols in the display 12
T
Technical disturbances 35
U
User log-on 16
V
Vital sign function 15
User log-on 16
Volume adjustment 12, 22
Handset 12, 22
Loudspeaker 12, 23
Ringing signal 12, 22
W
Warning advice 6
Warning tones 35, 36
Wireless pendant 14, 35
Page 40

Germany
Tyco Fire & Integrated Solutions
TOTAL WALTHER GmbH
Feuerschutz und Sicherheit
Waltherstraße 51
51069 Köln
Phone + 49 221 6785-0
Fax +49 221 6785-207
totalwalther@tycoint.com
www.tycofis.de
Italy
ADT Fire & Security
Wormald Italiana s.p.a.
Strada 4 - Palazzo A10
20090 Assago (Mi)
Phone +390 2 81 80 61
Fax +390 2 89 12 54 12
tycofire.milano@tycoint.com
www.tycofis.it
www.adtitaly.com
Netherlands
ADT Fire & Security
Vesting Woerden
Trasmolenlaan 5
3447 GZ Woerden
Postbus 283
3440 AG Woerden
Phone +31 348 494294
Fax +31 348 431318
adtnl@tycoint.com
www.adtfireandsecurity.nl
Poland
Tyco Fire & Integrated Solutions
Sp.z.o.o.
Ul. Zupnicza 17
03-821 Warszawa
Phone +48 22 5182100
Fax +48 22 5182101
tycofis-pl@tycoint.com
www.tycofis.pl
Portugal
ADT Portugal
Edifício Entreposto
Praça José Queirós 1,
Fracção n.º5 - Piso 3
1801-802 Lisboa
Phone +35 1 21751 0560
Fax +35 1 21751 0589
suportecomercial@tycoint.com
www.adt-pt.com
Switzerland
Tyco Fire & Integrated Solutions AG
ADT Fire & Security
Am Linthli 4
8752 Näfels
Phone +41 55 6184343
Fax +41 55 6184344
info.tis.ch@tycoint.com
www.tyco.ch
Spain
Tyco Fire & Integrated Solutions
División ZETTLER
Ctra. De la Coruña Km. 23,5
Edificio ECU II
28230 Las Rozas (Madrid)
Phone +34 91 6429011
Fax +34 91 6426392
zettlermadrid@tycoint.com
www.tycofis.com/Espana
United Kingdom
ADT Fire & Security PLC
Security House
The Summit
Hanworth Road
Sunbury-on-Thames
Middlesex TW16 5DB
Phone +44 1932 743333
Fax +44 1932 743155
www.adt.co.uk
955.8001E, Doc. version 1.2, 2. february 2009 – Subject to change without notice.
Further information about Tyco
can be found on the website
www.tycofireandsecurity.com
Company stamp
Austria
Tyco Fire & Integrated Solutions GmbH
Wehlistraße 27b
1200 Wien
Phone +43 1 3331515
Fax +43 1 3331515-301
office.tycofis.at@tycoint.com
www.tycofis.at
Belgium
Tyco Fire & Security
Humaniteitslaan 241 A
1620 Drogenbos
Phone +32 2 4677811
Fax +32 2 4660534
tfisbe@tycoint.com
www.tycofis.be
Czech. Republic
Tyco Fire & Integrated Solutions s.r.o.
Novodvorská 994/136
142 21 Praha 4
Phone +420 239043 038
Fax +420 239043 026
tycofis.cz@tycoint.com
www.tycofis.cz
Denmark
Tyco Fire & Integrated Solutions
Teglværksvej 47
5220 Odense SØ
Phone +45 6315 4300
Fax +45 6615 6610
info.tyco.dk@tycoint.com
www.tfis.dk
France
Tyco Fire & Integrated Solutions
1, rue Henri Giffard
Montigny Le Bretonneux
78067 Saint Quentin Yvelines Cedex
Phone +33 1 39307300
Fax +33 1 39307320
tycofis-fr@tycoint.com
www.tycofis.fr
 Loading...