

Page 1

Quick Start .................................................................................. 2
What is the Netscalibur .............................................................. 3
Inside the Box ............................................................................. 3
System Requirements ................................................................. 4
Cable Connection ........................................................................ 4
On-Line Browser Manual ................................................................... 5
ISDN Diagnostic Tool ................................................................. 6
Windows 95 Installation ............................................................. 8
Uninstall the Drivers ................................................................. 12
Windows NT 4.0 Installation .................................................... 13
Install Dial-Up Networking ................................................................. 13
Install Remote Access Service ............................................................. 16
Install Internet Explorer and ISDN Diagnostic Tool ........................ 17
Windows NT 3.51 Installation .................................................. 18
Windows NT 3.51 addendum..................................................... 20
FCC Compliance Statement ...................................................... 21
No part of this manual may be reproduced, transmitted, or stored in any media
form or by any means without the written permission of Tyan Computer
Corporation. Copyright (C) 1996-7 by Tyan Computer Corporation. All Rights
Reserved. The information in this manual is subject to change without notice.
V1.2
Netscalibur is a trademark of Tyan Computer Corporation.
Windows 95 and Windows NT are trademarks of Microsoft Corporation.
Pentium is a trademark of Intel Corporation.
Internet Explorer is a trademark of Microsoft Corporation.
Navigator is a trademark of Netscape Communications Corporation.
Any other trademarks are hereby acknowledged.
Page 2

Windows 95 User
Power off the system and insert the Netscalibur Card.
1
Boot to Windows 95 and select "Do not install a driver (Windows
2
will not prompt you again)."
Insert the Netcalibur CD and click on the SETUP option.
3
Install the modem drivers, ISDN acceleration pack, ISDN
4
diagnostic tool, and Internet Explorer. Add TCP/IP protocol and
Dial-Up Adapter in the Network applet. Next, restart the system.
Select "Disk provided by hardware manufacturer" and browse to
5
the Netscalibur CD's \driver\isdn directory.
Select Netscalibur ISDN-ISA PNP and enter the correct switch
6
type, ISDN phone numbers, and SPID numbers.
Windows NT 4.0 User
In the Control Panel, run the Network applet. Remove the
1
Remote Access Services (RAS) before installing the Netscalibur
drivers.
In the Adapter folder, select Add and click on the Have Disk
2
button. Enter the \driver\isdn directory of the Netscalibur CD.
Choose an IRQ, address, and switch type. Select Multi-Point and
3
enter the SPID numbers with a space between the numbers.
Next, select 64000 bps and enter the ISDN phone numbers with
a space between the numbers (do not include the area code).
Add ISDN1-Netscalibur and ISDN2-Netscalibur ISDN channels
4
and TCP/IP protocol. Finally, restart the system.
How to read the signs
Stop! Read the instructions carefully.
Caution
Please take note here.
Please follow this direction.
2
Page 3

It offers 128Kbps speed through a reliable digital
v
connection, thus increasing productivity.
It supports fast 33.6Kbps analog modem connectivity with a
v
standard phone line.
It runs HTML, VRML, Java, Java scripts, & Active X faster
v
than a 28.8Kbps modem.
It has an easy installation setup and offers an on-line
v
browser manual for troubleshooting and acquiring the latest
drivers and product information.
It is perfect for intranet, internet phone, internet browsing,
v
video conferencing, remote LAN access, and telecommuting
for individuals, small businesses, and corporate enterprises.
ISDN and 33.6K modem connections can be used
v
simultaneously.
qq 1 Netscalibur Internet Accelerator Card
qq 1 Installation Guide
qq 1 Setup CD
qq 1 RJ-45 to RJ-11 ISDN cable
qq 1 RJ-11 to RJ-11 modem cable
3
Page 4
Your system should have the following:
qq Intel Pentium 75Mhz (120Mhz recommended) or Pentium Pro
qq Windows 95 or Windows NT 4.0 or 3.51
qq Motherboard with at least 256K external cache
qq 8MB of DRAM (16MB recommended)
qq CD-ROM drive
qq Sound Card (Wavetable recommended)
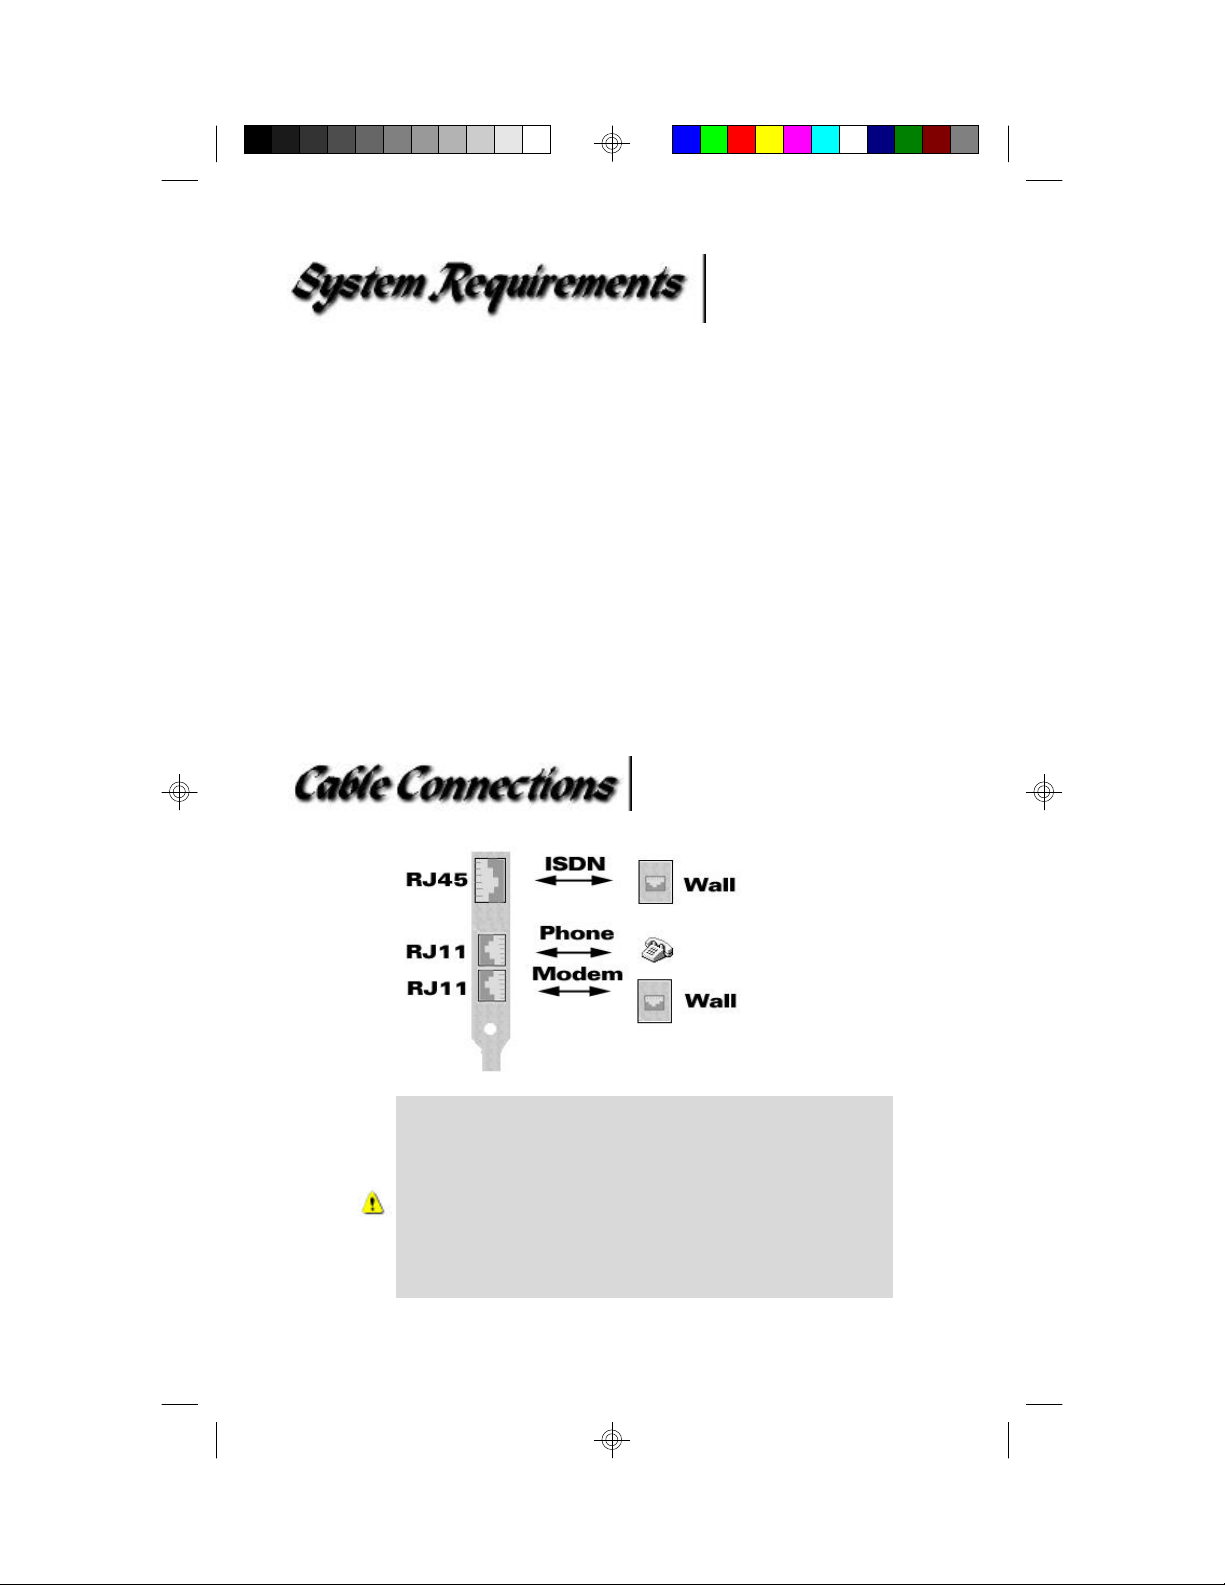
(RJ-45 or RJ-11)
(RJ-11)
If the phone company installs a RJ-45 phone
jack instead of the regular RJ-11 phone jack
for the ISDN line, you can still plug a RJ-11
connector into a RJ-45 phone jack. You can
also request that the phone company install
the RJ-11 phone jack for your ISDN line.
4
Page 5
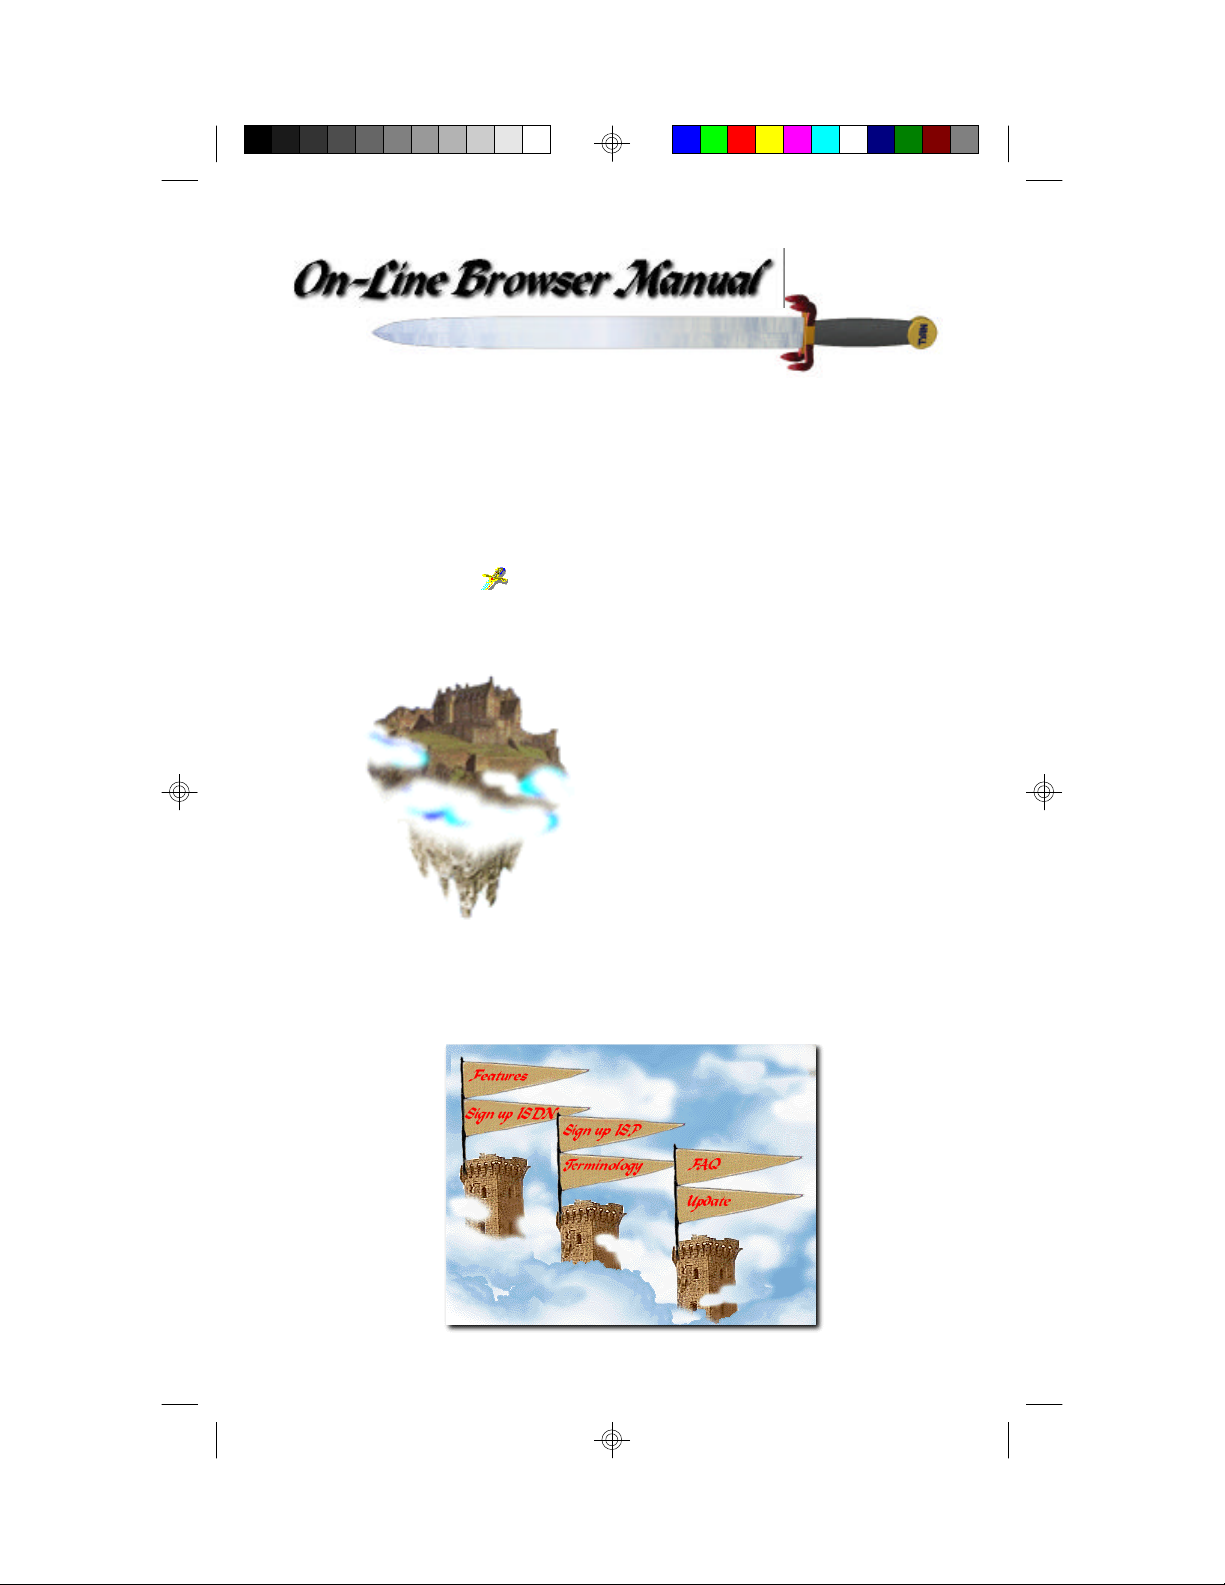
Netscalibur also comes with an easy-to-use browser manual. The
On-Line browser manual is an extension of the printed manual.
You can launch the browser manual by double-clicking the
Netscalibur icon and then selecting the Browser Manual.
Make sure you install Internet Explorer or Navigator before
launching the browser manual.
Netscalibur's browser manual offers
links to technical support and answers
to many frequently asked questions.
Moreover, the browser manual also
comes with an unique video technical
support feature to help you install the
Netscalibur and serve as a quick guide
for surfing the internet. Just click on
the Netscalibur castle to access the
click on me
video clips.
Use the browser manual to get the latest update on drivers and
product information.
5
Page 6
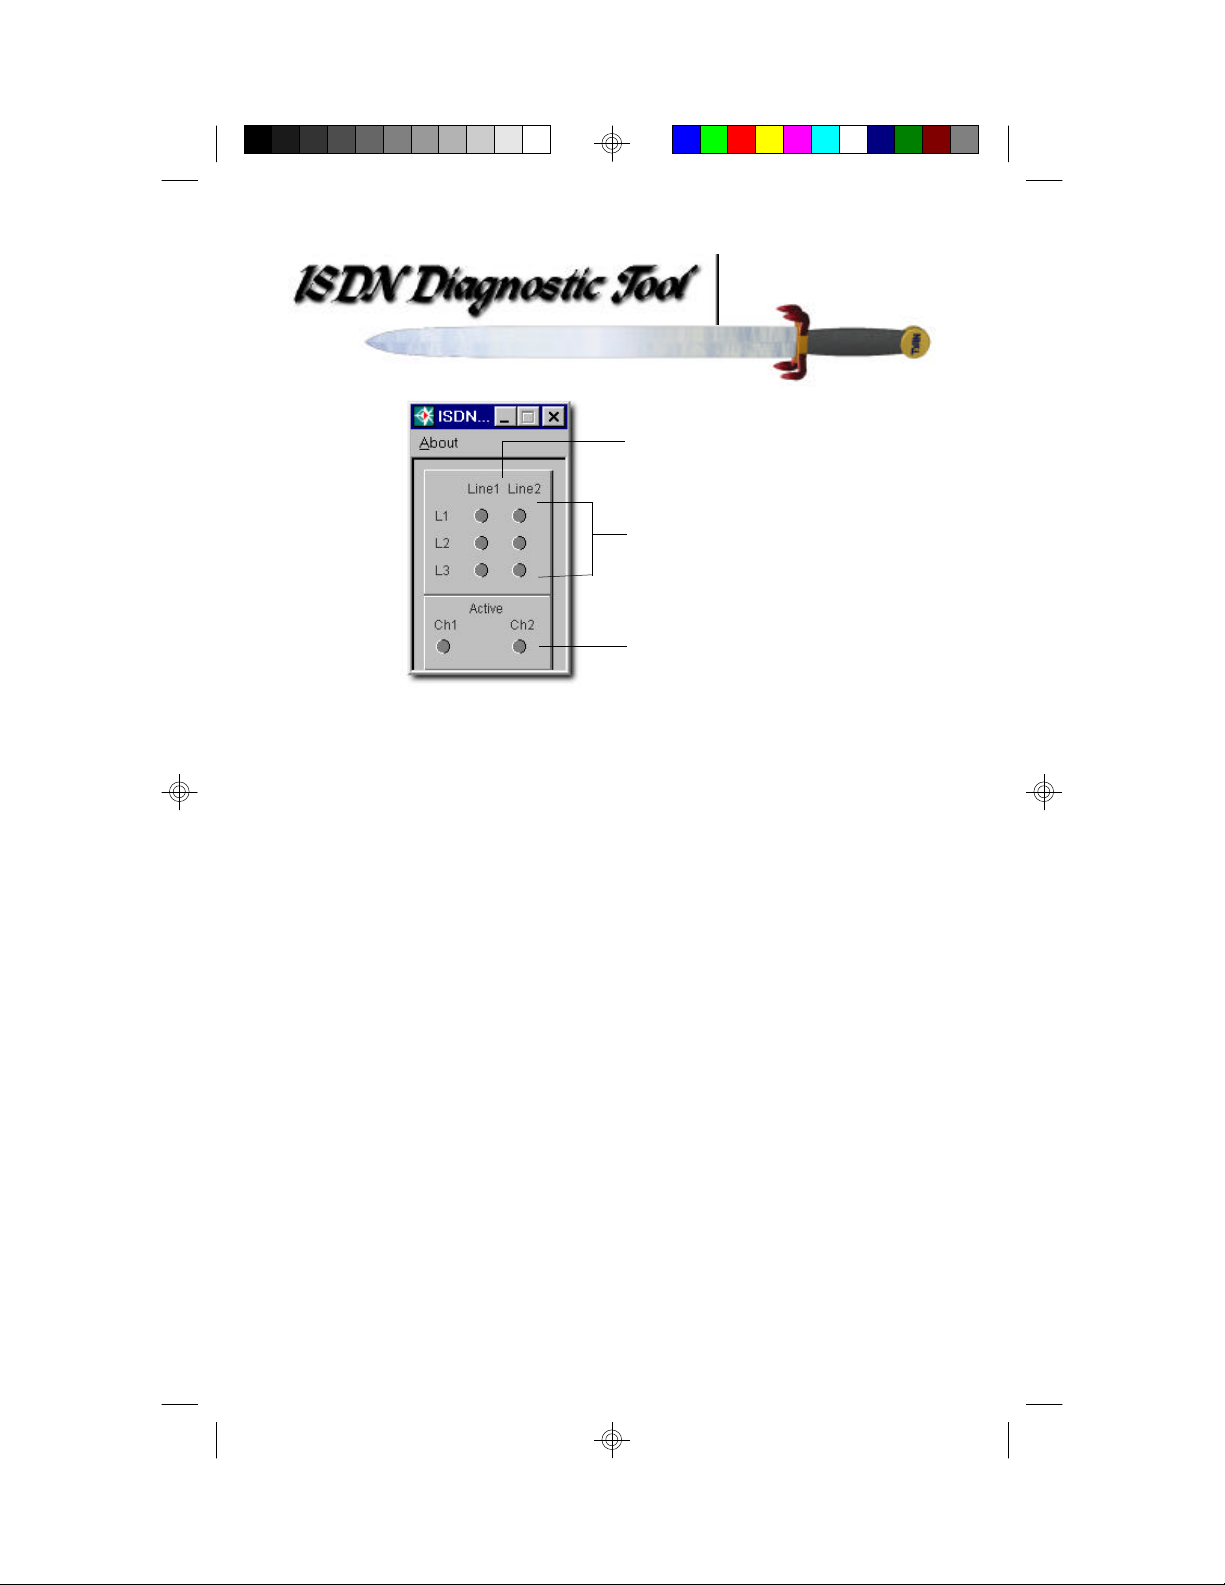
First B Channel or
Second B Channel
ISDN signaling layers
B Channel Activity
The Netscalibur comes with a Virtual LEDs program to help
you diagnose your ISDN hardware and ISDN lines. The setup
program will place the diagnostic tool in the startup group for
easy access. This diagnostic program enables you to verify that
the Netscalibur's ISDN is functioning properly by checking the
ISDN signaling layer lights. If all three signaling layer lights turn
green, it means that the ISDN driver is loaded properly and the
ISDN phone line is synchronized. Occasionally, one of the L3
lights will take longer turning green then the other lights. It may
take up 30 seconds for the line to synchronized with the
telephone company.
For everyday usage, you will find the following information
useful.
L1,L2, and L3 lights turn grey color:
This means that the Netscalibur card is not in your system.
L1,L2, and L3 lights turn green color:
This means that the ISDN is working properly and the driver has
loaded successfully. Normally, this is a good indication that the
Netscalibur card, cable, and the ISDN lines are functioning
properly. However, it does not guarantee that the SPID and
phone numbers are entered correctly.
6
Page 7

L1, L2, and L3 lights turn red:
This means that the driver is not loaded. For Windows 95 users,
first check the Netscalibur's network properties in the Device
Manager for resources conflicts. An interrupt or IO address
conflict will prevent the driver from loading. You can access the
Device Manager by moving the mouse cursor to My Computer
follow by clicking on the right mouse button to bring out the
properties sheet. Afterwards, click on properties to go to
System Properties and then select Device Manager folder. Go
down to network adapters and double-click on Netscalibur
ISDN ISA-PnP to check Resources for conflicts. For Windows
NT users, you should bring up the Windows NT diagnostic in
Administrative tools to check for resource conflicts.
The red lights may also be caused by a bad cable or cable
connection. Check the ISDN RJ-45 to the phone jack and make
sure they are properly inserted.
L1 lights turn green but L2 and L3 remain red: This is
normal if the phone company uses Point-to-Point protocol. The
light will turn green once the connection has been established.
Otherwise, it means that the driver is loaded but the switch type,
SPID numbers, or the phone numbers for ISDN are incorrect.
First check the switch type, SPID numbers, and phone numbers
in the Start -> Programs -> Accessories -> ISDN tools -> ISDN
Configuration Wizard. Make sure you enter the correct SPID
numbers, phone numbers, and switch type. This information is
supplied by the phone company. If you do not know the switch
type, please select AUTO instead.
Ch1 and Ch2 remain red:
This is normal. The B Channel Activity light will turn green
only after the connection has been established. Otherwise, they
will remain red. If Ch1 turns green but Ch2 remains red, it
means that only channel 1 is connected.
The ISDN diagnostic tool does not work under
Windows NT 3.51. It will work under Windows
95 and Windows 4.0.
7
Page 8

95
Power off the system and insert the Netscalibur into an
1.
empty 16-bit ISA slot and remove other modem cards from
the system. Afterwards, power on the system and boot to
Windows 95.
You must install the ISDN accelerator pack v1.1 or above
2.
before installing Netscalibur's ISDN driver. Therefore,
before you install the Microsoft ISDN Accelerator Pack
from the Netscalibur Wizard CD, choose "Do not install a
driver (Windows will not prompt you again)" when
Windows 95 detects the Netscalibur or choose "Cancel" if
you have Windows 95 OEM services release 2 .
If you accidentally select "Disk provided by
manufacturer." then you should do an uninstall as
described in page 6 before continuing with the setup in
step 12.
Perform a Scandisk operation before installing the drivers.
3.
The setup program needs to modify the registry data and
copy files to your hard disk. Scanning the hard disk for
corrupted files will enable the setup program to copy drivers
correctly to the hard disk. The ScanDisk program is located
in Start -> Programs -> Accessories -> System Tools.
8
Page 9

Insert the Netscalibur CD into the CD-ROM drive. The
4.
Netscalibur Wizard should auto-start or you can double click
on the Netscalibur CD-ROM icon to launch the
Netscalibur Wizard.
If your CD-ROM drive does not perform auto-run or
double-clicking the Netscalibur icon does not bring up
the Netscalibur Wizard, then you can run the setup
program by selecting Open from the file menu.
Afterwards, double-click sword.exe to run the setup.
Click on the Installation Video Clip to watch the setup
5.
video clip first before running Setup. The video clip will
show the entire installation process and help you get a better
idea of the installation procedures. The setup process may
vary slightly between different program version.
After finishing watch the setup video clip, click on the Setup
6.
option to install the drivers and ISDN software. You must
install the following software by selecting Yes or No and
then clicking on the Continue button to go to the next step.
Please read the instructions on the monitor carefully. In
addition, please do not restart the system until you
configure the Dial-Up Networking in Part C. You can skip
Part A if you do not wish to install the modem or skip Part B
if you do not wish to install the ISDN. However, Part C is
required for internet access.
9
Page 10

Part B
Install ISDN Acceleration
Pack and
ISDN Diagnostic Tool
Do not restart the system after Part B.
During the setup procedure, please wait for Windows
95 to finish updating the shortcuts before going to the
next step. This step may take a couple of minutes.
Part A
Install Modem
Drivers
10
Part C
Install Dial-up Adapter
and TCP/IP Protocol
Page 11

After adding the Dial-Up Adapter, keep the Client for
7.
Microsoft Networks or Client for Netware Networks if
you want to enable password saving in the Dial-up
Networking. Next, type in a name for the workgroup in the
Identification folder. Click on OK to continue. At this time,
Windows 95 will prompt you for the Windows 95 CD. Place
the original Windows 95 source CD in the CD-ROM drive.
Afterwards, restart the system. Windows 95 will detect new
hardware. Put the Netscalibur CD into the CD-ROM drive.
Select "Disk Provided by hardware manufacturer" and
click on the Browse button to locate your CD-ROM drive
and then find the ISDN driver under the \driver\isdn
directory on the Netscalibur CD and click OK to continue.
Then enter the switch type, ISDN phone numbers, and
SPID numbers of your ISDN line. This information should
be given by the phone company. The easiest place to find
this information is on your phone bill. You can enter any 7
digits for the ISDN phone number and any 10 digits for the
SPID if you do not have a ISDN line yet.
Please do not enter a space, ",", or "-" between numbers
If you still have questions regarding how to use the Dial-up
Network feature to access the Internet, please refer to
Netscalibur's browser manual for the video clip, FAQ, or
your Windows 95 manual.
11
Page 12

Please only perform the uninstall if you wish to
physically remove the Netscalibur from your system or
before updating to a new version of the drivers.
Windows 95
Please perform a SCANDISK operation before uninstalling
the driver. To uninstall the modem and the ISDN drivers for
Windows 95, launch the Netscalibur Wizard by double-
clicking the Netscalibur icon. Then select Uninstall
from the option screen.
Windows NT
In the Control Panel, click on the Network icon and
then select Tyan Computer Netscalibur ISDN Adapter in
the Adapter folder. Next, click on the Remove button to
remove the driver. Finally, restart the system.
If you decide to take the Netscalibur out of your
NT system, you must uninstall the drivers first.
Otherwise, Windows NT may not boot.
12
Page 13

NT
Windows NT 3.51 user go to page 18
Windows NT 4.0 user start here
A. Install Dial-up Networking
Do not install Netscalibur's driver during Windows NT
installation. Please complete the Windows NT installation
first.
In the Control Panel, double click on the
1
network icon.
If you do not have any network components currently installed
2
on your system, answer Yes to install network.
If you already have RAS (remote access service) installed in
the system, please remove RAS and restart the system before
installing Netscalibur's NT driver.
13
Page 14

3
Select the Wired to the network box and click on the Next
button. Next, click on the Select from list button to
continue.
4
Insert the Netscalibur CD and click on the Have Disk button.
Browse to the CD's \Driver\ISDN directory. Next, highlight
Tyan Netscalibur ISDN Modem and click on the OK button to
continue.
5
Click on the Next button to continue setting up. Afterwards
select TCP/IP protocol and click on the Next button.
14
Page 15

6 Click Next to continue installing. From time to time, Windows
NT will prompt you for the location of the Windows NT CD.
Please type in the correct NT CD location.
In this step, you have to select an available IRQ, address, and
7
switch type. Since Windows NT does not support plug and play,
you have to make sure that your selections will not cause any
conflicts.
8
Finally, select Multi-Point and enter the SPID number of the
first and second B channels with a space between the SPIDs.
Then select 64000 bps and type in the phone number of the
first and second B channels with a space between the two phone
numbers.
Please do not enter a space at the beginning of the SPID
and phone numbers. Also, do not enter a "-" or "," between
the numbers.
space
15
Page 16

9
Continue to install RAS (Remote Access Service) in the next
step.
B. Install Remote Access Service (RAS)
1
Pick ISDN1-Netscalibur and click OK. Then click on the Add
button to add the second B channel.
2
Select ISDN2-Netscalibur and click OK. Then click on
Network to configure the dial out protocol.
16
Select TCP/IP protocol for the internet.3
For other network support or advanced RAS setup, please
consult your Windows NT manual for more information.
Page 17

4
Finally, click on the Next button to confirm the choices, then
type in a name for your computer. Next, restart the system.
C. Install Internet Explorer and Diagnostic Tool
This section applies only to Windows NT 4.0 users.
Please refer to the next section if you are using
Windows NT 3.51.
You can double click on the Netscalibur icon and then
select SETUP to install the Microsoft Internet Explorer and
ISDN diagnostic tool.
Notice that the setup options are different from Windows 95.
There is no uninstall for Windows NT and the setup has fewer
options. Also, please refer to the Windows NT manual on how to
use remote access.
17
Page 18

Do not install Netscalibur's driver during Windows NT 3.51
installation. Please complete the Windows NT installation
first.
1
Click on the Network icon in the Control Panel.
If you already have RAS (remote access service) installed in
the system, please remove RAS before installing Netscalibur's
NT driver.
2
When Windows NT 3.51 prompts you to install a network card,
click on the NO button to skip. Then click on the Add Adapter
button to add the Netscalibur. Next, select Requires disk from
manufacturer and type in the \driver\isdn directory of the
Netscalibur CD. Select Tyan Netscalibur ISDN Modem.
3
Afterwards, you have to select an available IRQ, address, and
switch type. Since Windows NT does not support plug and play,
make sure that your selections will not cause IRQ or Address
conflicts.
18
4
Next, select Multi-Point and enter the SPID number of the first
and second B channels with a space between the SPIDs. Finally
select 64000 bps and type in the phone number of the first and
second B channels with a space between the two phone
numbers.
Page 19

Please do not enter a space at the beginning of the SPID
and phone numbers. Also, do not enter a "-" or "," between
the numbers.
5
Pick ISDN1-Netscalibur and click OK. Then click on the Add
button to add the second B channel.
space
6
Select ISDN2-Netscalibur and click OK. Then click on
Network to configure the dial out protocol. Add the TCP/IP
protocol for the internet access.
If you do not have a network card installed in the system,
7
please continue the setup in step 8. Otherwise, click on OK to
close the network settings window and restart the system.
19
Page 20

If you do not have a network card installed in the system, then
8
you need to do this extra step. After configuring the Remote
Access Services, click OK to save the network settings and to
close the network window. Do not restart the system at this
point. Instead, re-open the Network applet and select Yes
when Windows NT prompts you to install a network card.
Afterwards, select Do_Not_Detect and then click on the
Remote button to install additional networking components.
You must have at least the following networking components
installed in the system:
Computer Browser
Remote Access Services
RPC Configuration
Server
TCP/IP Protocol
Workstation
20
You can double click on the Netscalibur icon and then
select SETUP to install Microsoft Internet Explorer 3.0 for
Windows NT 3.51. After installing Internet Explorer, you may
need to run it once before running the Netscalibur's browser
manual.
Notice that the setup options are different from Windows 95.
There is no uninstall for Windows NT and the setup has fewer
options. Also, please refer to the Windows NT manual on how to
use remote access.
Page 21

This device complies with Part 15 and Part 68 of the FCC
Rules. Operation is subject to the following two conditions:
(1) this device may not cause harmful interference, and (2)
this device must accept any interference received, including
interference that may cause undesired operation.
Model: Netscalibur (N1732D)
Type of Product: Internal Data/Fax/Voice PC card
Manufacturer: Tyan Computer Corporation
1753 South Main Street
Milpitas, CA 95035
U.S.A.
21
 Loading...