

TXU Energy iThermostat User Manual

TXU Energy
iThermostat
TM
User Manual

2 iThermostat™ User Manual
Copyright May 2008
Data, drawings, and other material contained herein are proprietary to TXU Energy Retail Company, LLC and may not be reproduced
or duplicated in any form without the prior permission of TXU Energy.
iThermostat is a trademark of TXU Energy Retail Company, LLC.
iThermostat is manufactured in partnership with Comverge and White-Rodgers.
Portions © 2008 TXU Energy Retail Company, LLC. All rights reserved. REP Certificate Number 10004.

Contents
Getting Started with Your iThermostat™ ..........................................................2
Overview.....................................................................................................................................2
iThermostat Buttons ...................................................................................................................3
iThermostat Display ....................................................................................................................4
Selecting Heating or Cooling .......................................................................................................5
Setting the Current Day and Time ...............................................................................................7
Replacing the Batteries in Your iThermostat .............................................................................10
Resetting the FLTR Display .......................................................................................................12
Programming Your iThermostat .......................................................................13
Planning Your Program..............................................................................................................14
Programming Heating and Cooling............................................................................................15
Setting Holds ............................................................................................................................19
Setting Temporary Holds...........................................................................................................19
Setting Permanent Holds ..........................................................................................................21
Setting Timed Holds..................................................................................................................22
Clearing Holds...........................................................................................................................23
Troubleshooting Assistance Guide ..................................................................24

2 iThermostat™ User Manual
Getting Started with Your iThermostat™
Overview
Your iThermostat consists of two main parts: the base and the cover (lower portion of iThermostat front as shown below).
You open the cover to access the buttons to operate and program the iThermostat.
Open the iThermostat cover:
• Pull the cover straight out from the base.
Close the iThermostat cover:
• Push the cover up until it lines up with the base. Press gently until the
cover snaps into place.
Base
Cover
iThermostat™ User Manual 3
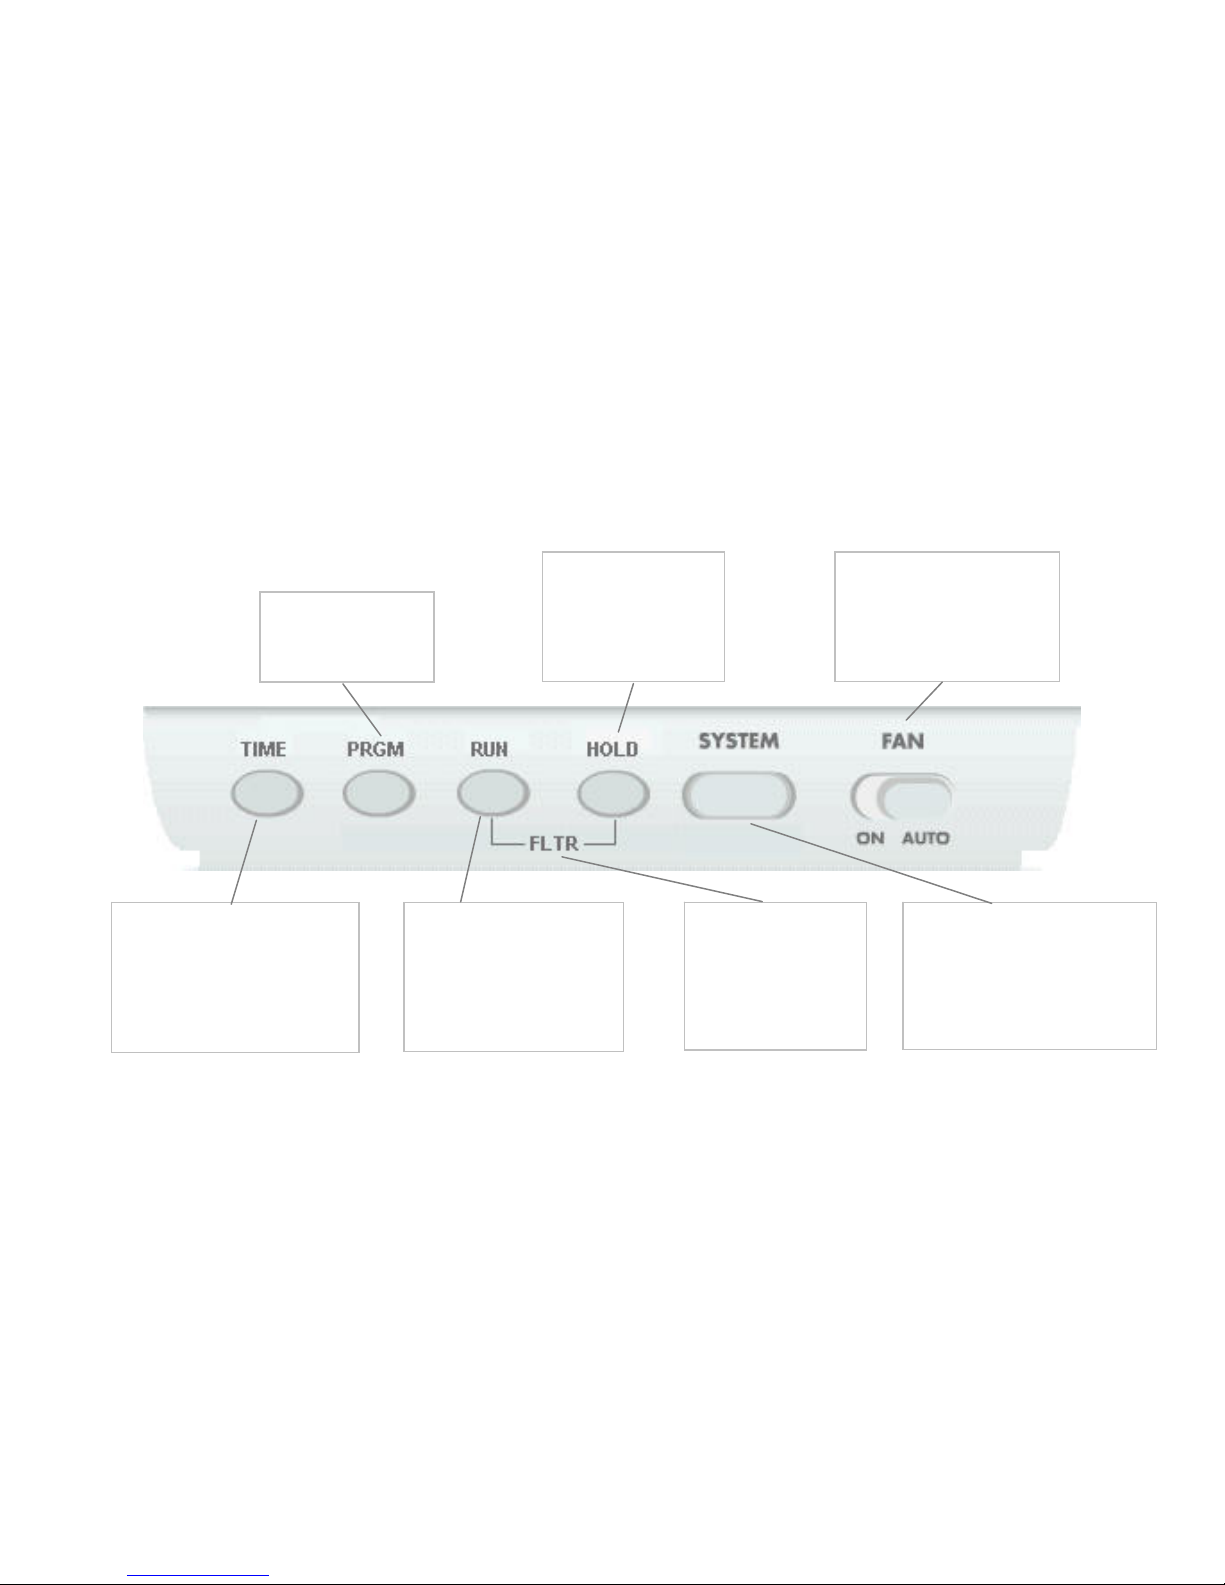
iThermostat Buttons
RUN
• Cancels holds and returns
system to programmed
settings.
• Exits programming and
saves all settings.
HOLD
Holds system at current
temperature setting
until you release by
pressing RUN.
TIME
• Sets current time.
• In programming mode, toggles
between the period start time
and temperature setpoint you
want to program.
PRGM
Allows you to program
your iThermostat
SYSTEM
Selects which system you want to
operate: cooling, heating, autochangeover, emergency heat
(applies to heat pumps only), or
OFF.
FAN
Controls your system’s indoor
fan. For energy efficiency, this
is normally set to AUTO but
can be set to ON.
FLTR
Pressing RUN and HOLD
together resets the
FLTR display on your
iThermostat.
iThermostat™ User Manual 4
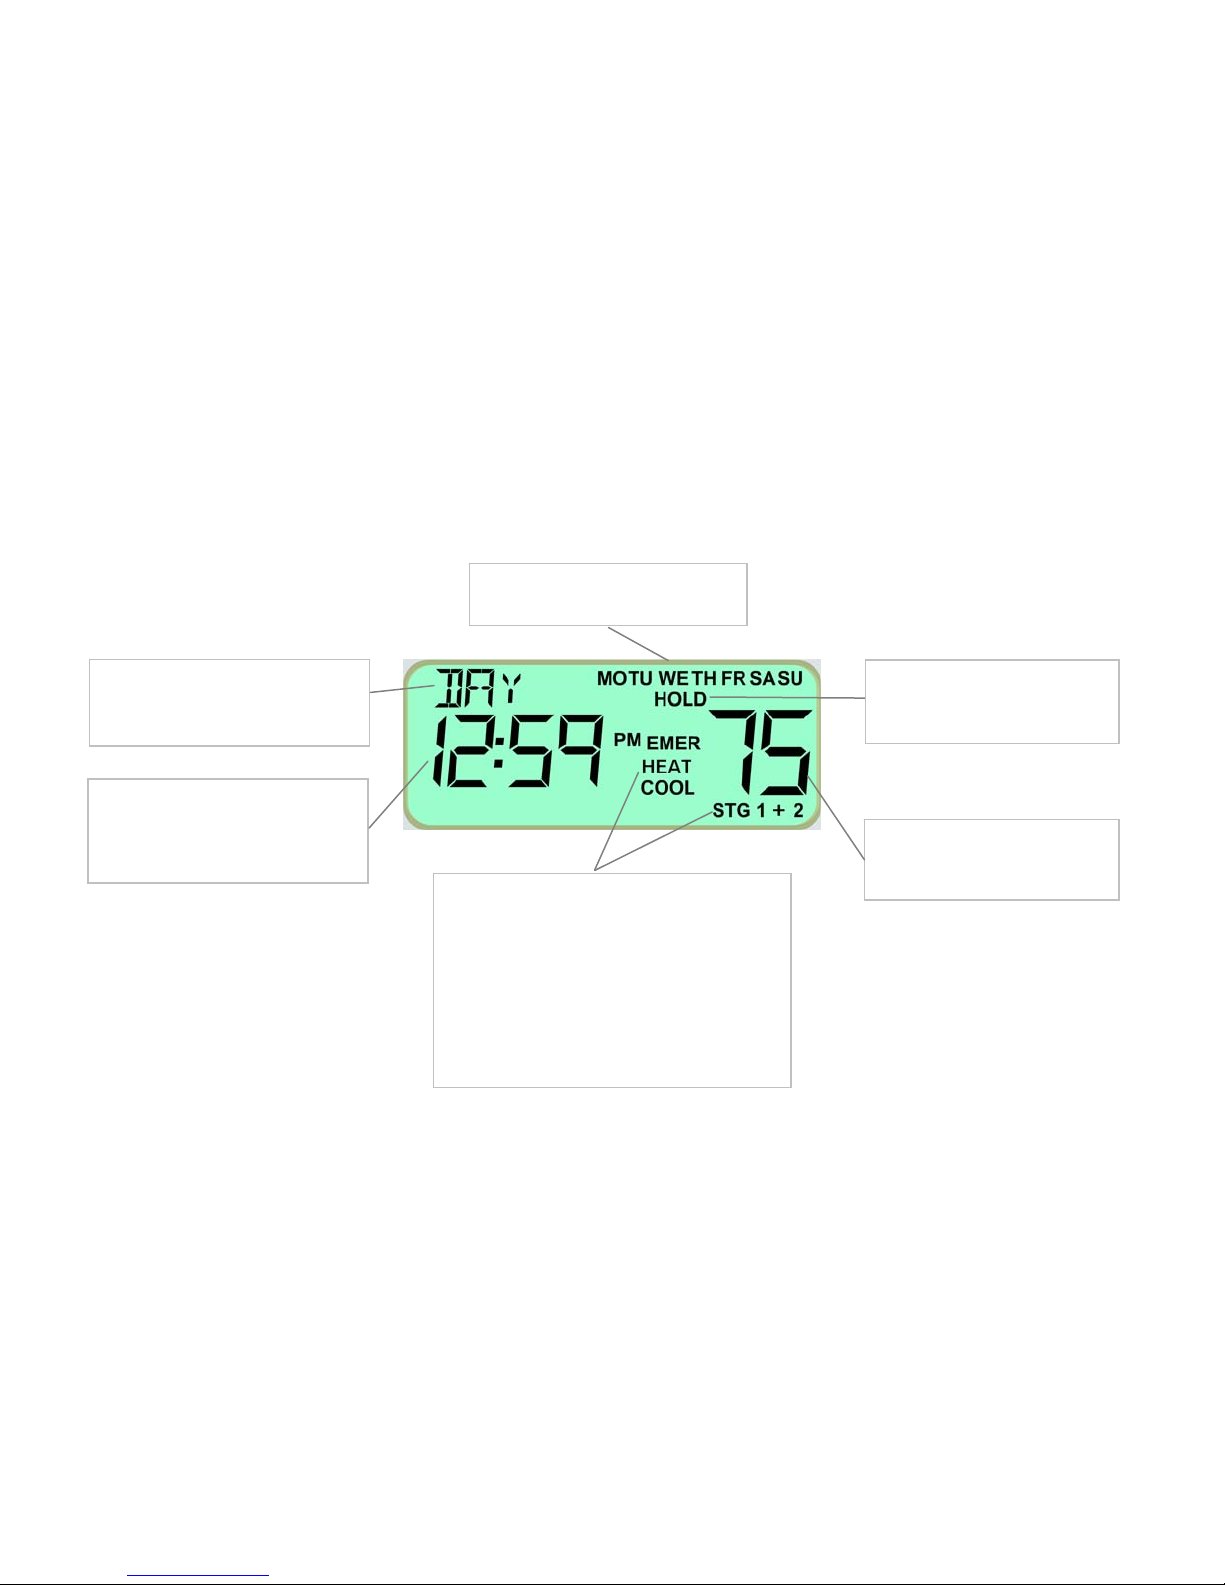
iThermostat™ Display
Period of the Day
Indicates the current period of the day
in programming mode.
Day of the week
Indicates the current day of the week.
HOLD
Indicates a permanent system
temperature hold.
Temperature Setpoint
Displays the current temperature
setpoint.
System indicator
Indicates the current system status:
• COOL – Air conditioning
• HEAT – Heat
• HEAT/COOL – Auto-changeover
• EMER – Emergency heat (heat pump only)
• AUX – Auxiliary heat (heat pump only)
• STG 1 – Low speed of 2-stage compressor
• STG 1+2
–
Hig
h speed of 2-stage compressor
Time / Current Temperature
Display alternates between the current
time and the current room
temperature.

iThermostat™ User Manual 5
Selecting Heating or Cooling
Use the SYSTEM button to select your iThermostat system mode. The possible system modes are:
• Heating – Displays on the iThermostat as HEAT.
• Cooling – Displays on the iThermostat as COOL.
• Auto-changeover (see below) – Both HEAT and COOL icons are on.
• Emergency heat – Displays EMER (flashing) and HEAT.
• Off – Displays on the iThermostat as OFF.
When heating or cooling is called, STG 1 or STG 1+2 will display (depending on how many speeds your heating/cooling
system is capable of using).
Auto-Changeover Mode
When the iThermostat is in auto-changeover mode, it automatically switches between your heating and cooling
programmed schedules to maintain your home temperature within your heating and cooling programs. The iThermostat
will call for heat or cool as needed, but never both at the same time. Auto-changeover is convenient during the fall and
spring when days may be cool in the early morning hours and hot in the afternoons.
Important:
• In auto-changeover mode, the programmed heat setpoint must be 2 degrees lower than the cool setpoint.
• Keep the windows in your home closed when auto-changeover mode is in effect, to avoid wasting heating or cooling
energy.
Selecting Heating or Cooling
6 iThermostat™ User Manual
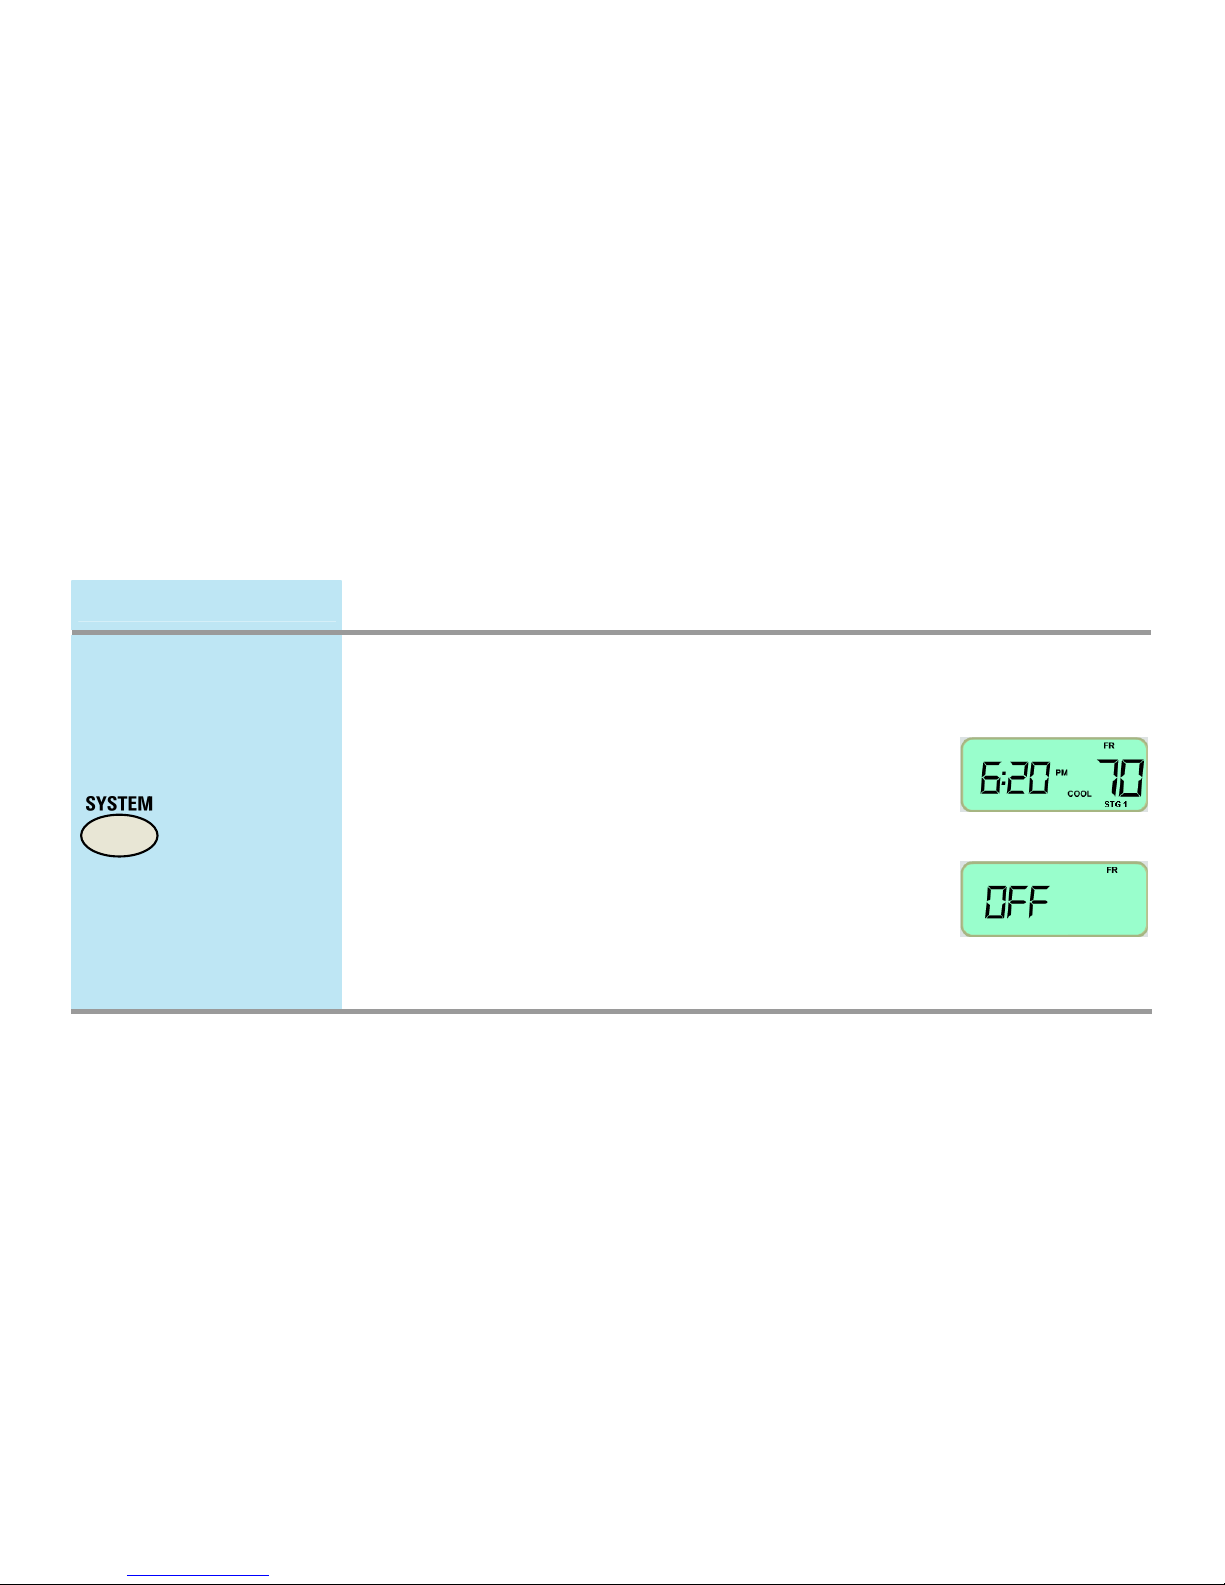
Quick Guide Description IThermostat Display
Press one or more
times to select the
desired mode.
Press the SYSTEM button one or more times to select the desired
mode.
• When heating is selected, HEAT is displayed.
• When cooling is selected, COOL is displayed.
• When auto-changeover mode is selected, both HEAT and
COOL icons are on.
• When emergency heat is selected (heat pump systems only),
EMER HEAT is displayed (EMER flashes).
• When the system is Off, OFF displays to the left.
When heating or cooling is called (compressor turned On), STG 1
or STG 1+2 will display (depending on how many speeds your
heating/cooling system is capable of using).
Cooling On:
System Off:

iThermostat™ User Manual 7
Setting the Current Day and Time
Typically the current day and time on your iThermostat will be set automatically by the system. In case the system does
not set the day and time, you may need to set it yourself manually.
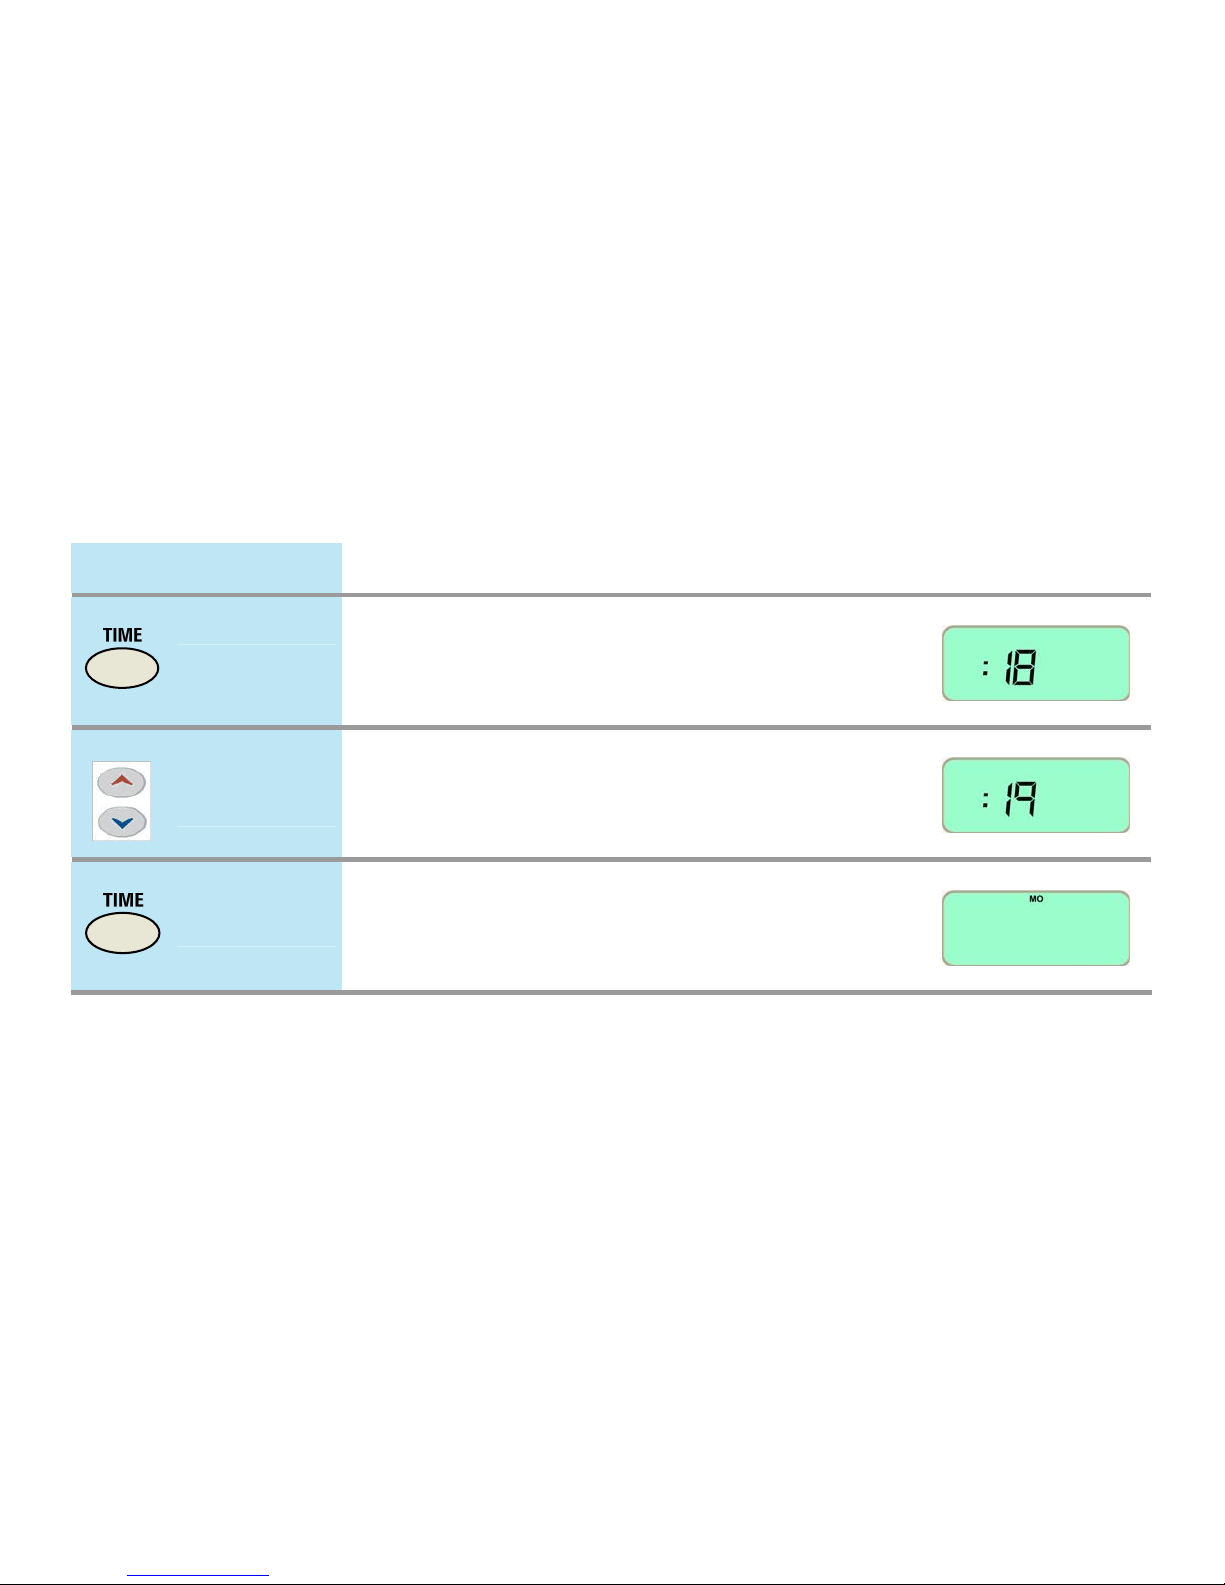
Quick Guide Step Description iThermostat Display
Press once.
1
Press the TIME button. The display shows the hour and AM
or PM.
Press to select the
hour.
2
Press and hold the up arrow or down arrow button until
you reach the correct hour and AM or PM.
Note: AM begins at midnight and PM begins at noon.
Setting the Current Day and Time
8 iThermostat™ User Manual
Quick Guide Step Description iThermostat Display
Press again.
3
Press TIME again. The display shows minutes only.
Press to select the
minute.
4
Press and hold the up arrow or down arrow button until
you reach the correct minute.
Press again.
5
Press TIME again. The display shows the day of week.
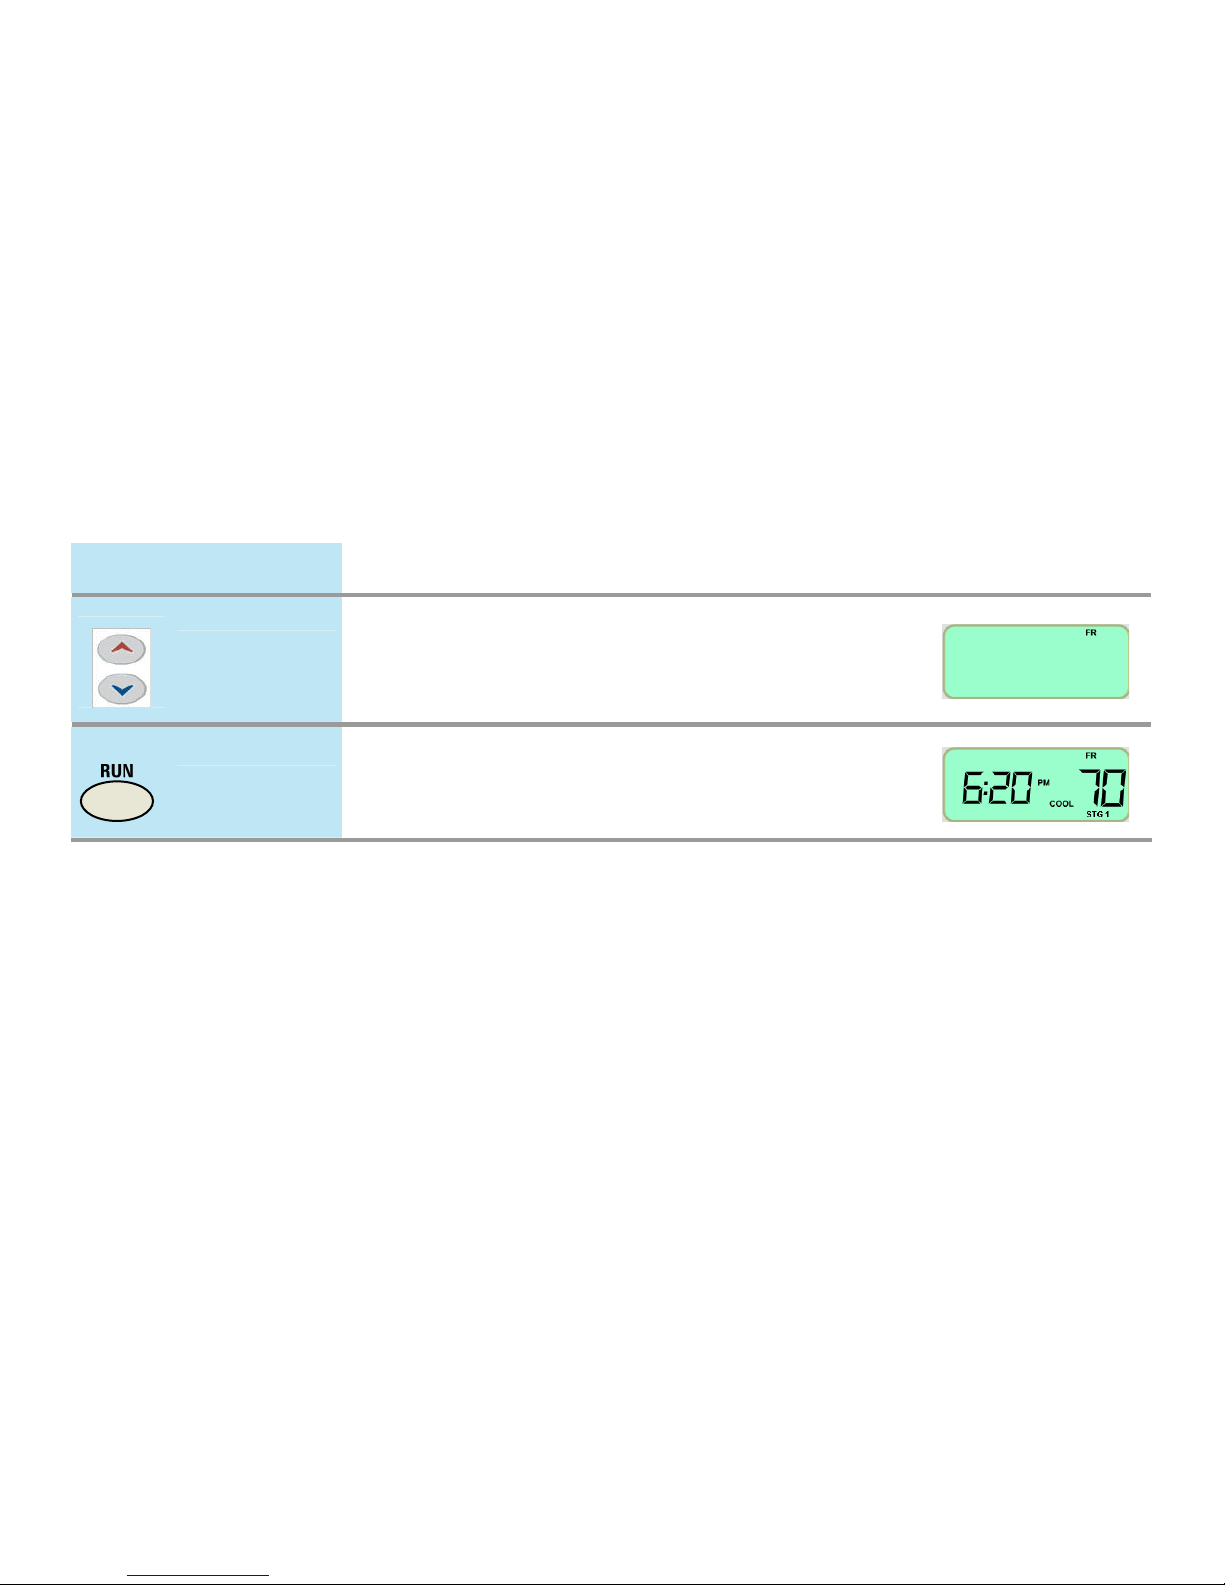
Setting the Current Day and Time
iThermostat™ User Manual 9
Quick Guide Step Description iThermostat Display
Press to select the
day of week.
6
Press and hold the up arrow or down arrow button until
you reach the current day of the week.
Press once.
7
Press RUN. The iThermostat returns to normal display.
iThermostat™ User Manual 10
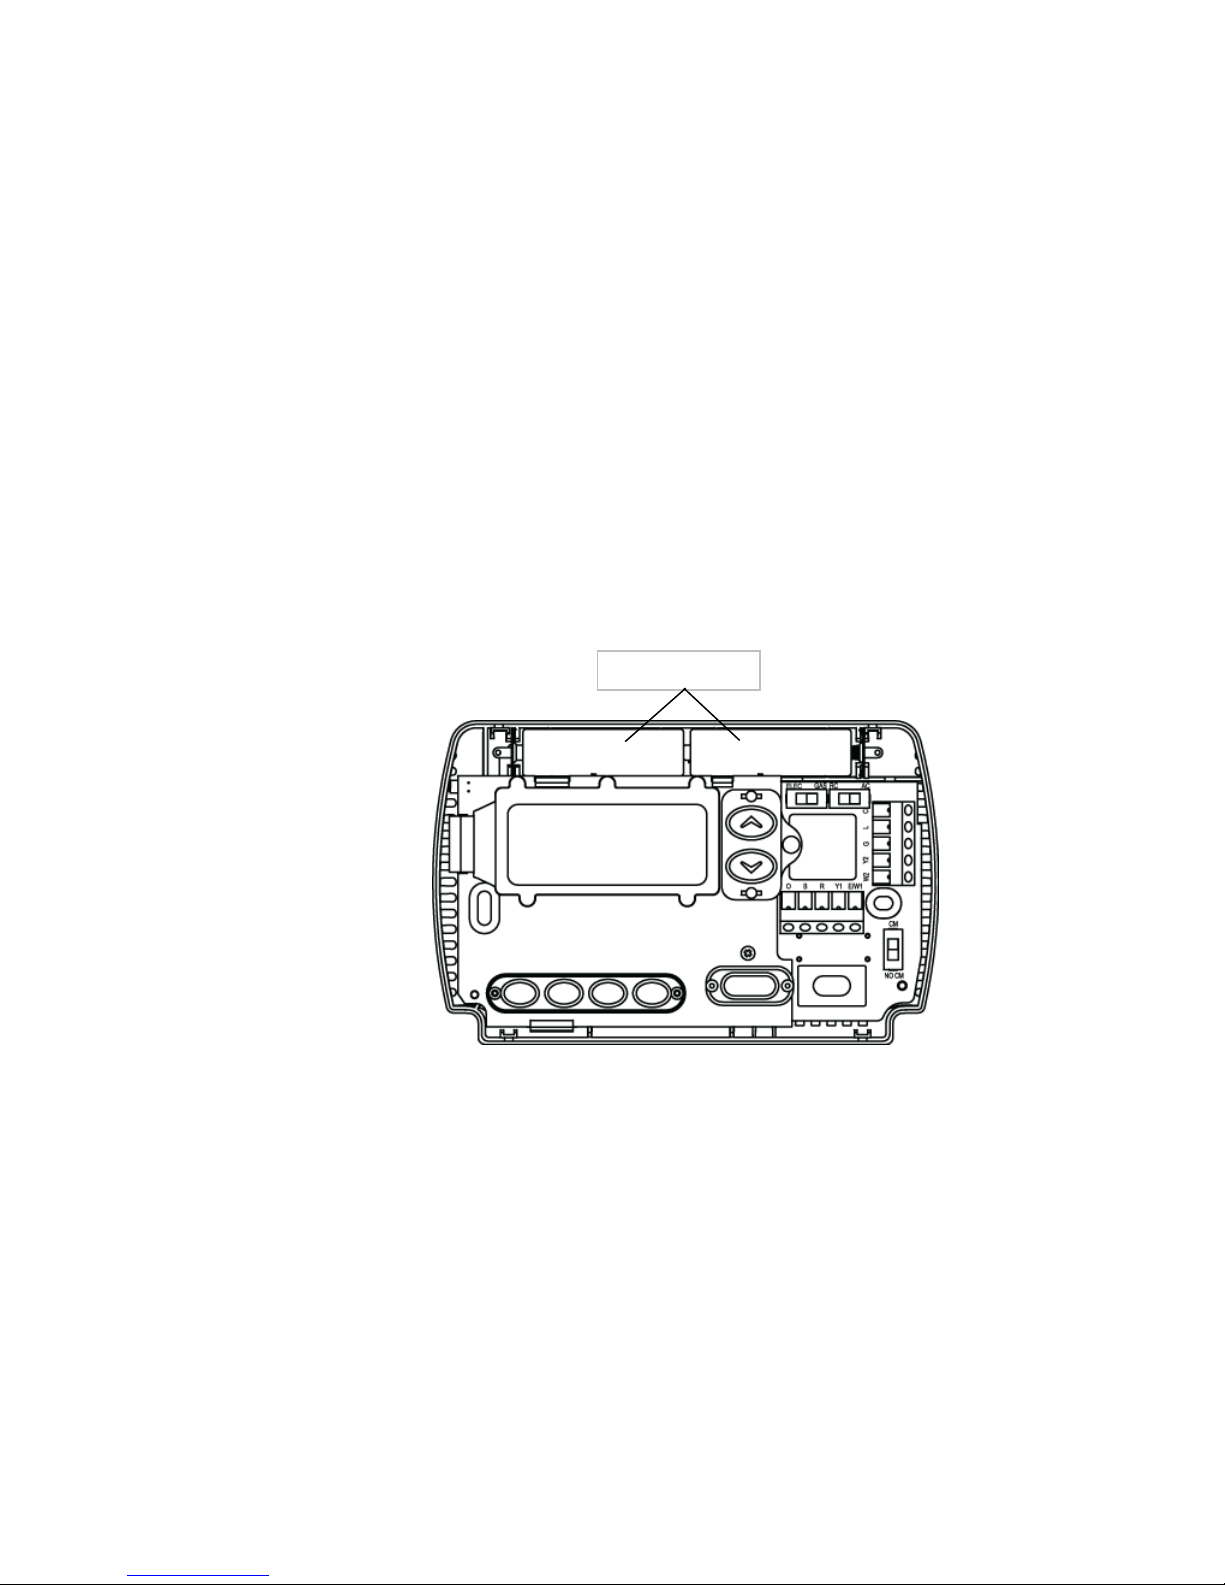
Replacing the Batteries in Your iThermostat™
If BATT appears on your iThermostat display, the batteries are low and need to be replaced.
Batteries are not required to keep your programming or menu data. However, with batteries installed, your iThermostat
will maintain the time and continuously display the temperature during a loss of AC power.
Required Battery Type
AA alkaline batteries
Install batteries here.
 Loading...