

Page 1

USER' S MANUAL
ED-400
COATING THICKNESS GAUGE
FOR NON-FERROUS METALS
TX Testing Instruments Co., Ltd.
35 Changqing Street, Shenhe District,
Shenyang 110015 China
Tel: +86-24-24238668
Fax: +86-24-24230008
http: //www.tianxing.com.cn
E-mail: [email protected]
TX TESTING INSTRUMENTS CO., LTD.
Page 2

READ THE USER ’ S MANUAL BEFORE USING THE GAUGE.
Contents
1. APPLICATION
2. TECHNICAL PARAMETERS
3. STANDARD PACKAGE
4. OPERATION
5. CALIBRATION
6. ADDITIONAL FUNCTIONS-
7. NOTICE
8. ERROR FACTORS
9. TROUBLESHOOTING
10. DAILY MAINTENANCE•••••
Page 3

ED400 COATING THICKNESS GAUGEFOR NON-FERROUS METALS
ED400 COATING THICKNESS GAUGEFOR NON-FERROUS METALS
1. APPLICATION
The ED-400 coating thickness gauge is suitable for
measuring the thickness of the non-conductive coating
on non-ferrous metal. The typical application is to
measure the thickness of the anodic oxide coating of the
aluminium alloy. It can also be used to measure the
thickness of plastic foil and paper.
The ED-400 coating thickness gauge conforms to
international standard ISO 2360-2003.
2. TECHNICAL PARAMETERS
Measuring range:
Accuracy:
0-500 m m ;
0-50 m
m:
± 1 |j m;
50-500 m m: ±2%;
3. STANDARD PACKAGE
• Gauge
• Probe
• Plastic cover
• Standard substrate (6063 aluminum alloy)
• Calibration foil with inspection report
• User,s manual
• Certificate of conformity
• Certificate of warranty
• Carrying case
Spare Parts
• Spare probe
• Standard substrate (6063 aluminum alloy)
• Calibration foil with inspection report
Resolution :
0-50 |J
50-500 m m: 1 m m;
0-500 m m: 1 m m; (Optional)
Operating temperature:
Power supply:
Power consumption:
Dimonsio 门 s:
5-45°C;
9V battery
80mw
150mm x 80mm x 30mm
Weight: 260g
m:
0.1 |J m;
4. OPERATION
Press the "ON/OFF" button and wait until "0" or
"0.0" is shown on the display.
4.1 Measurement
Hold the plastic part of the probe and place it vertically
onto the clean and dry workpiece surface. Hold it steadily
and wait for the measurement to appear in the LCD and a
beep is heard (unless the beeping is disabled). Lift the
probe for at least 10 mm from the workpiece and for at
least two seconds.
Page 4
ED400 COATING THICKNESS GAUGEFOR NON-FERROUS METALS
ED400 COATING THICKNESS GAUGEFOR NON-FERROUS METALS
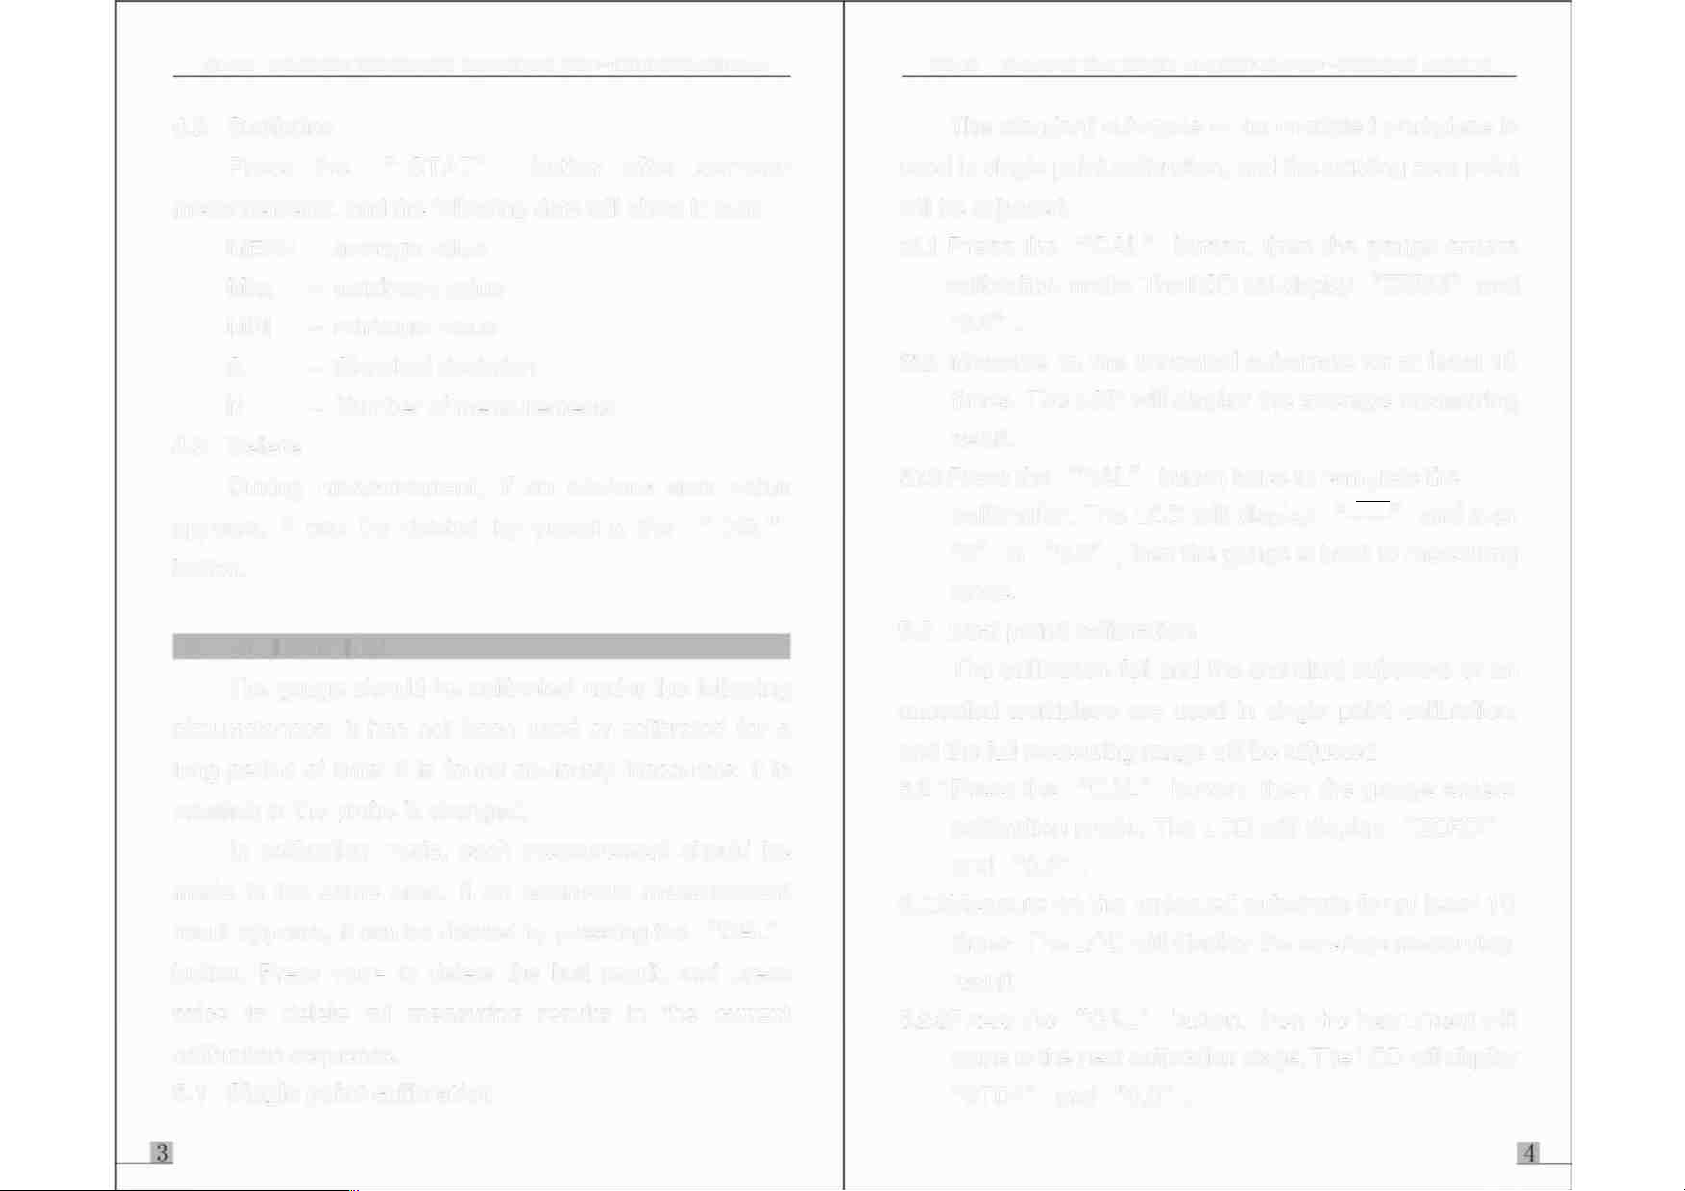
4.2 Statistics
Press the “ STAT" button after serveral
measurements, and the following data will show in turn:
MEAN - average value
Max 一 maximum value
MIN - minimum value
S - Standard deviation
N - Number of measurements
4.3 Delete
During measurement, if an obvious error value
appears, it can be deleted by pressing the “ DEL"
button.
5. CALIBRATION
The gauge should be calibrated under the following
circumstances: it has not been used or calibrated for a
long period of time; it is found obviously inaccurate; it is
reseted; or the probe is changed.
In calibration mode, each measurement should be
made in the same area. If an erroneous measurement
result appears, it can be deleted by pressing the "DEL"
button. Press once to delete the last result, and press
twice to delete all measuring results in the current
The standard substrate or an uncoated workpiece is
used in single point calibration, and the existing zero point
will be adjusted.
5.1.1 Press the "CAL" button, then the gauge enters
calibration mode. The LCD will display "ZERO" and
"0.0".
512 Measure on the uncoated substrate for at least 10
times. The LCD will display the average measuring
result.
5.1.3 Press the "CAL" button twice to complete the
calibration. The LCD will display “ ” and then
“0” or “0.0”,then the gauge is back to measuring
Mode.
5.2 Dual point calibration
The calibration foil and the standard substrate or an
uncoated workpiece are used in single point calibration,
and the full measuring range will be adjusted.
5.2.1 Press the "CAL" button, then the gauge enters
calibration mode. The LCD will display "ZERO"
and “0.0” .
5.2.2Measure on the uncoated substrate for at least 10
times. The LCD will display the average measuring
result.
5.2.3Press the "CAL" button, then the instrument will
calibration sequence.
5.1 Single point calibration
come to the next calibration stage. The LCD will display
"STD1" and "0.0".
Page 5
ED400 COATING THICKNESS GAUGEFOR NON-FERROUS METALS
ED400 COATING THICKNESS GAUGEFOR NON-FERROUS METALS
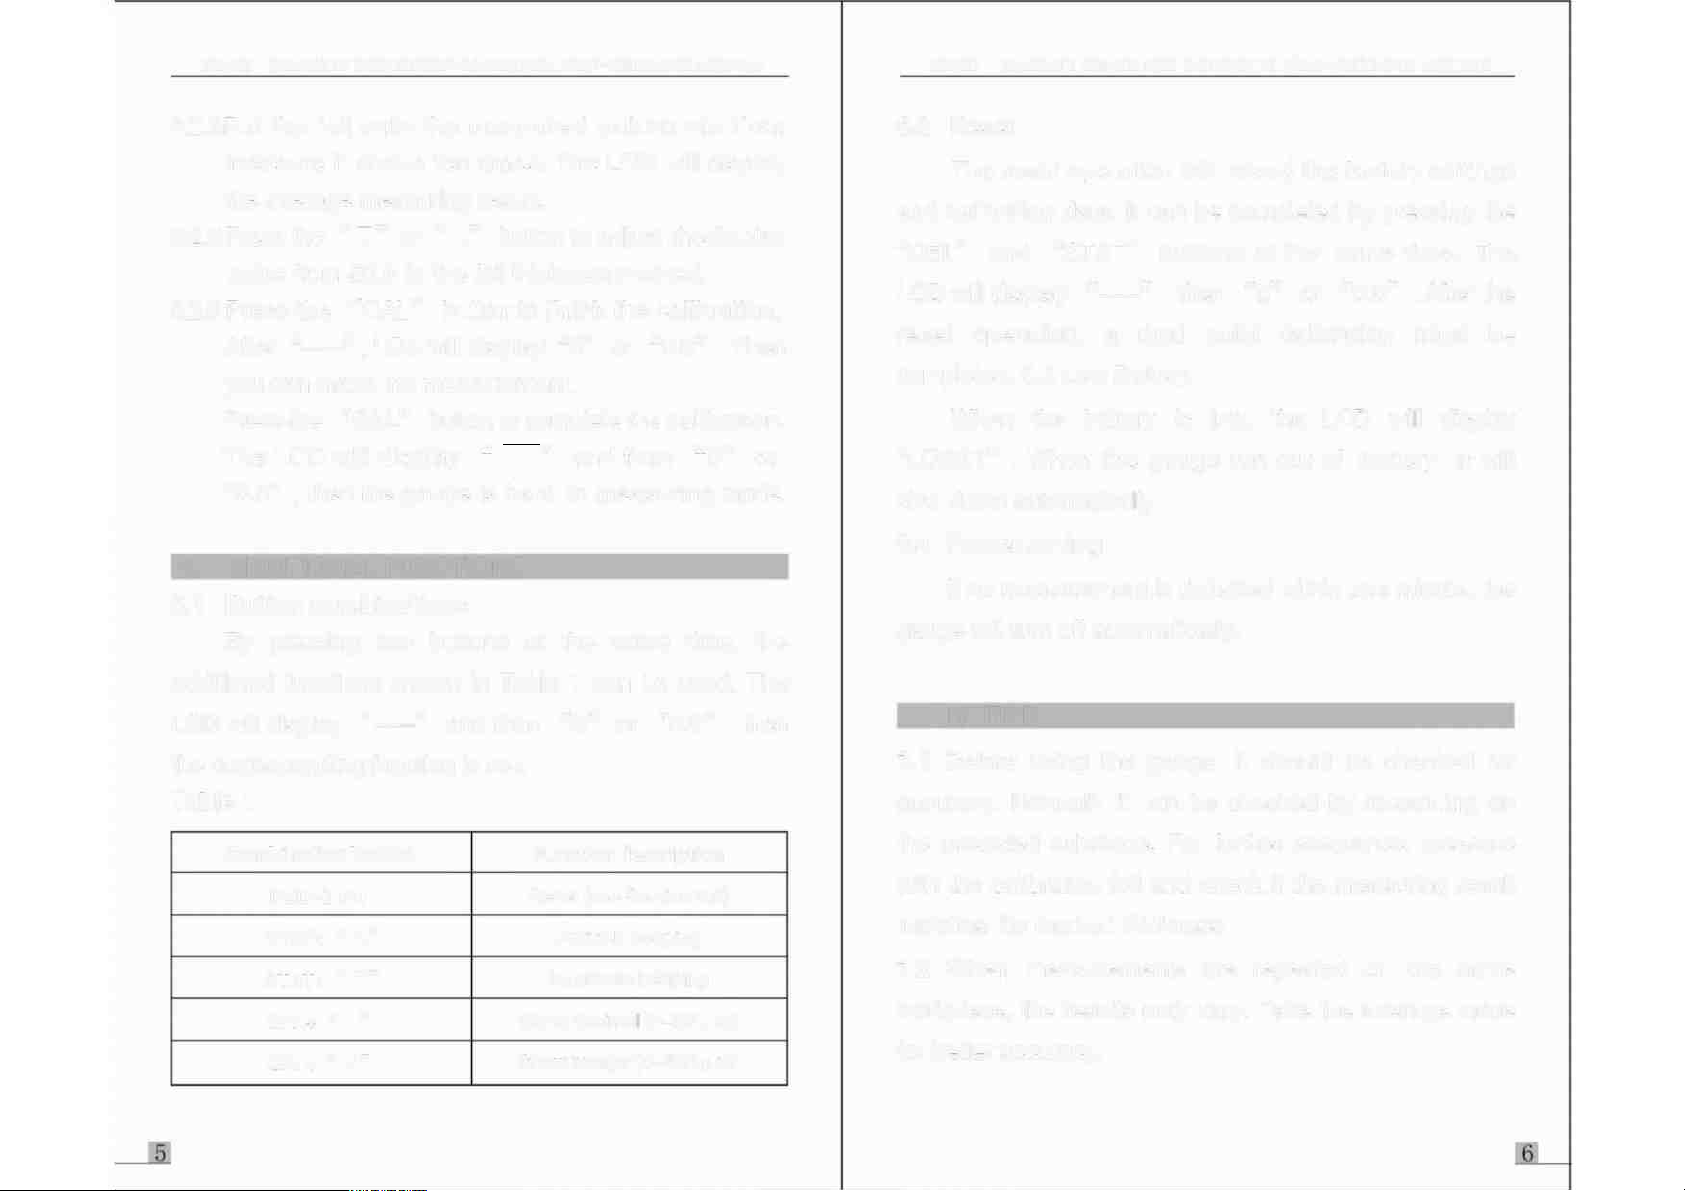
5.2.4Put the foil onto the uncoated substrate then
measure it above ten times. The LCD will display
the average measuring result.
5.2.5 Press the “ •“ or “•” button to adjust thedisplay
value from 50.0 to the foil thickness marked.
5.2.6 Press the "CAL" button to finish the calibration.
After “一一”,LCD will display “0” or "0.0" . Then
you can make the measurement.
Press the "CAL" button to complete the calibration.
The LCD will display “ ” and then "0” or
"0.0",then the gauge is back to measuring mode.
6. ADDITIONAL FUNCTIONS
6.1 Button combinations
By pressing two buttons at the same time, the
additional functions shown in Table 1 can be used. The
LCD will display “一一一” and then “0” or “0.0”,then
6.2 Reset
The reset operation will reload the factory settings
and calibration data. It can be completed by pressing the
"DEL" and "STAT" buttons at the same time. The
LCD will display “一一一”,then “0” or “0.0” . After the
reset operation, a dual point calibration must be
completed. 6.3 Low Battery
When the battery is low, the LCD will display
"LOBAT" . When the gauge run out of battery, it will
shut down automatically.
6.4 Power saving
If no measurement is detected within one minute, the
gauge will turn off automatically.
7. NOTICE
the corresponding function is set.
Table 1
Combination button Function description
DEL+STAT
STAT+ "A" Activate beeping
STAT+ “ •“
CAL+ "•” Show decimal (0-50 m m)
CAL+ "•“ Show integer (0-500 m m)
Reset (see Section 6.2)
Inactivate beeping
7.1 Before using the gauge, it should be checked for
accuracy. Normally it can be checked by measuring on
the uncoated substrate. For further assurance, measure
with the calibration foil and check if the measuring result
matches the marked thickness.
7.2 When measurements are repeated on the same
workpiece, the results may vary. Take the average value
for better accuracy.
Page 6
ED400 COATING THICKNESS GAUGEFOR NON-FERROUS METALS
ED400 COATING THICKNESS GAUGEFOR NON-FERROUS METALS
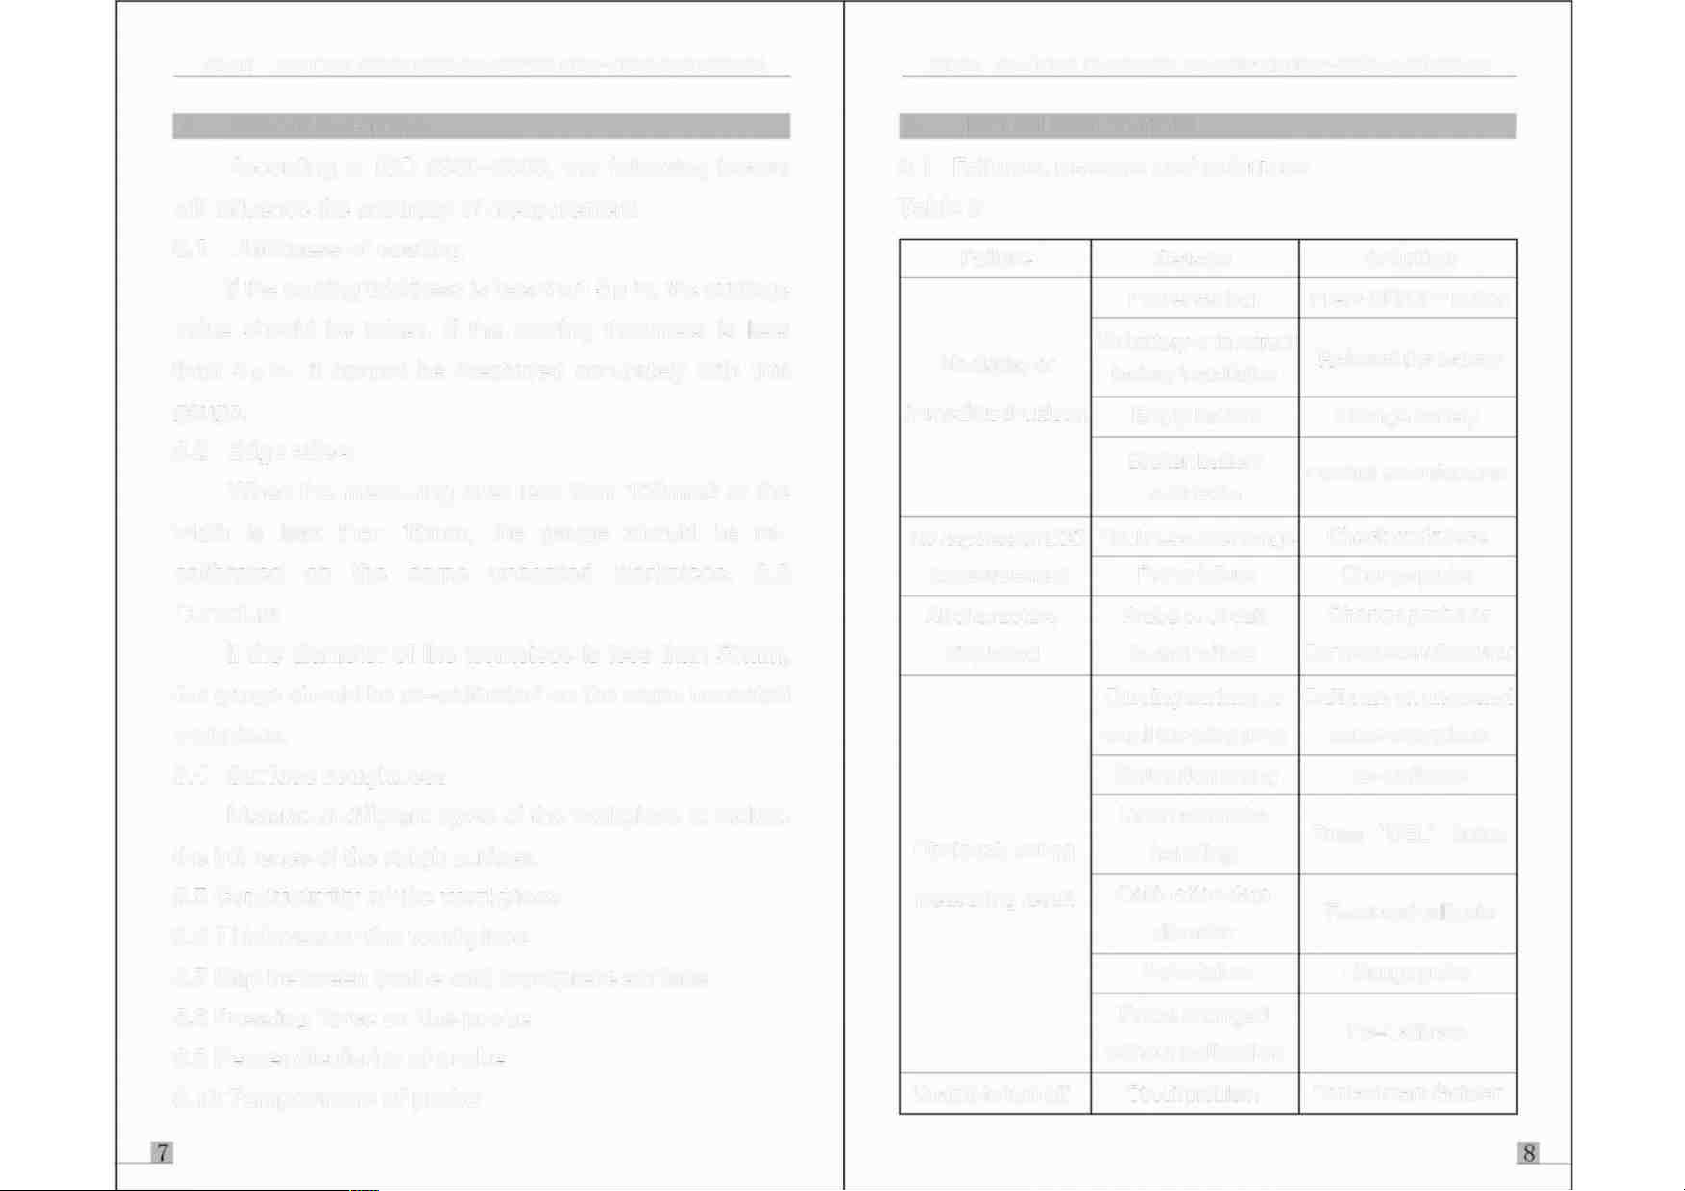
8. ERROR FACTORS
According to ISO 2360-2003, the following factors
will influence the accuracy of measurement.
8.1 Thickness of coating
If the coating thickness is less than 5 m m,the average
value should be taken. If the coating thickness is less
than 3 m m, it cannot be measured accurately with this
gauge.
8.2 Edge effect
When the measuring area less than 150mm2 or the
width is less than 12mm, the gauge should be re-
calibrated on the same uncoated workpiece. 8.3
Curvature
If the diameter of the workpiece is less than 50mm,
the gauge should be re-calibrated on the same uncoated
9. TROUBLESHOOTING
9.1 Failures, reasons and solutions
Table 2
Failure
No display or
immediate shutdown
No response on LCD
to measurement
All characters
displayed board failure
Reason
Power saving
No battery or incorrect
battery installation
Empty battery Change battery
Broken battery
connector
Thickness over range
Probe failure Change probe
Probe orcircuit
Curving surface or Calibrate on uncoated
Solution
Press ON/OFF button
Reinstall the battery
Contact manufacturer
Check workpiece
Change probe or
Contact manufacturer
workpiece.
8.4 Surface roughness
Measure at different spots of the workpiece to reduce
the influence of the rough surface.
8.5 Conductivity of the workpiece
8.6 Thickness of the workpiece
8.7 Gap between probe and workpiece surface
8.8 Pressing force on the probe
8.9 Perpendicularity of probe
8.10 Temperature of probe
Obviously wrong
measuring result
Unable to turn off
small mearing area same workpiece
Calibration wrong Re-Calibrate
Incorrect probe
handling
Calibration data
disorder
Probe failure
Probe changed
without calibration
Circuit problem
Press "DEL" button
Reset and calibrate
Change probe
Re-Calibrate
Contact manufacturer
Page 7
ED400 COATING THICKNESS GAUGEFOR NON-FERROUS METALS
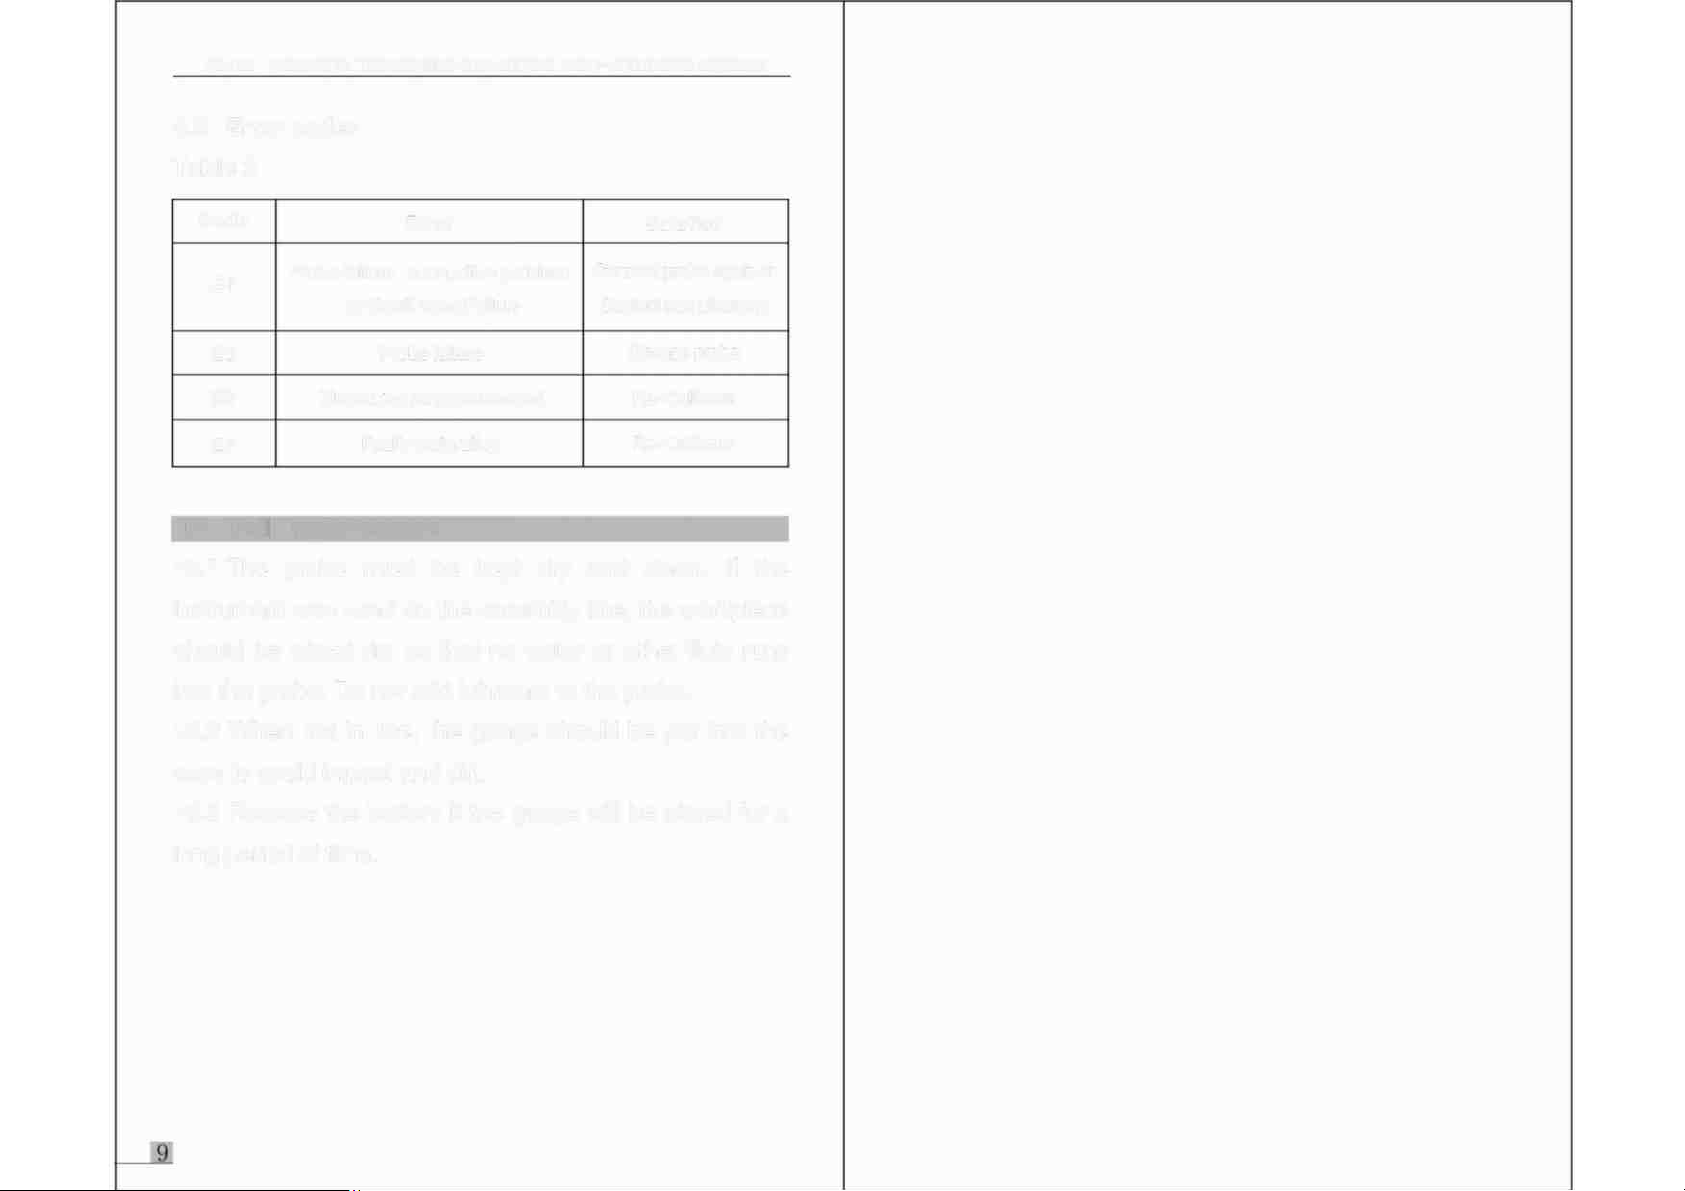
9.2 Error codes
Table 3
Code
E4
E5
E6
E7
Probe failure,connection problem
or circuit board failure
Measuring range exceeded
Error
Probe failure
Faulty calibration
Solution
Connect probe again or
Go门tact manufacturer
Change probe
Re-Calibrate
Re-Calibrate
10. Daily maintenance
10.1 The probe must be kept dry and clean. If the
instrument was used on the assembly line, the workpiece
should be wiped dry so that no water or other fluid runs
into the probe. Do not add lubricant to the probe.
10.2 When not in use, the gauge should be put into the
case to avoid impact and dirt.
10.3 Remove the battery if the gauge will be stored for a
long period of time.
 Loading...