

3110943 A User Manual_Tinyom2_v00_01_01_EN.docx Page 1/104
Tinyom II User Manual
PDF Pro Evaluation

3110943 A User Manual_Tinyom2_v00_01_01_EN.docx Page 2/104
Using this document and its content
TXCOM makes no declarations and offers no warranty regarding the content or use of this manual, and in particular
does not accept any warranties, express or implied, concerning the merchant's authenticity or the fitness of the
product for a particular purpose. Furthermore, TXCOM reserves the right to update this publication and to provide
modifications at any time and without notice.
TXCOM does not accept any liability regarding potential modifications that may have been made to the delivered
equipment.
Use of this equipment is at your own risk. TXCOM will not be held liable for any loss or damage, direct or indirect, that
results from its use.
On the other hand, TXCOM reserves the right to modify its products, in whole or in part, at any time and without
notice.
This manual, supplied in either hard copy or digital format, is intended for the private use of the recipient. It cannot
be modified or duplicated in any way without the written authorisation of TXCOM.
All of the product names cited in this document are trademarks of their respective manufacturers.
Copyright © 2016 TXCOM. All rights reserved
PDF Pro Evaluation

3110943 A User Manual_Tinyom2_v00_01_01_EN.docx Page 3/104
Revision and history
Revision
Date
Description
01
28/07
/2016
Created
PDF Pro Evaluation

3110943 A User Manual_Tinyom2_v00_01_01_EN.docx Page 4/104
Table of contents
USING THIS DOCUMENT AND ITS CONTENT 2
REVISION AND HISTORY 3
ABLE OF CONTENTS 4
DISPOSAL 5
DISPOSAL OF THE SCANNER, CHARGER AND CABLES 5
DISPOSAL OF THE BATTERY 5
BEAM AND LED 6
GETTING STARTED 7
INTRODUCTION 7
TINYOM II PACKAGE CONTENTS 8
OPTIONAL COMPONENTS 9
TECHNICAL FEATURES 10
CHARGING THE BATTERY PACK 11
INSERTING AND REMOVING THE BATTERY FROM THE READER 12
BATTERY CHARGE STATUS 13
PUTTING TINYOM IION THE WRIST STRAP AND TAKING IT OFF AGAIN 14
SWITCHING THE READER ON/OFF 15
READER TRIGGER MODES 17
READING MODES 19
AIMING AT A BARCODE 23
READER STATUSES 25
DEFAULT SETTINGS 26
ESTABLISHING A BLUETOOTH CONNECTION 27
FEATURES OF THE TINYOM II BLUETOOTH MODULE 27
SECURITY LEVELS 27
CONNECTION WITH THE HID PROFILE 28
CONNECTION WITH THE SPP PROFILE 39
CONFIGURATION 55
ACCELEROMETER 55
KEYBOARD EMULATION 64
BLUETOOTH 69
PREVENTING DUPLICATE SCANNING 73
CONFIGURING THE BEAM 75
CONFIGURING THE SOUND SIGNAL 80
CONFIGURING THE LENGTH OF TIME BEFORE AUTOMATIC SWITCH-OFF 82
SETTING THE VIBRATION 84
ENABLING AND DISABLING BARCODE TYPES 86
APPENDICES 94
APPENDIX 1: INSTALLING A BLUETOOTH DONGLE 94
APPENDIX 2: WALL MOUNTING FOR BATTERY CHARGING DOCK 97
APPENDIX 3: GENERATING A CONNECTION BARCODE 100
APPENDIX 4: FINDING THE BDA ADDRESS FOR A TINYOM II 102
APPENDIX 5: IN-CAR AND TRUCK CHARGER 103
APPENDIX 6: TINYOM II / MOTOROLA ZEBRA / HONEYWELL COMPATIBILITY 104
PDF Pro Evaluation

3110943 A User Manual_Tinyom2_v00_01_01_EN.docx Page 5/104
Disposal
Disposal of the scanner, charger and cables
This product, including any accessories, must not be disposed of with your unsorted
household waste. These items must be disposed of at specialist recycling facilities.
Disposal of the battery
Refer to your local authority’s guidelines on battery
disposal. Never dispose of batteries with
ordinary household waste. These items must be disposed of at specialist recycling facilities.
PDF Pro Evaluation
3110943 A User Manual_Tinyom2_v00_01_01_EN.docx Page 6/104
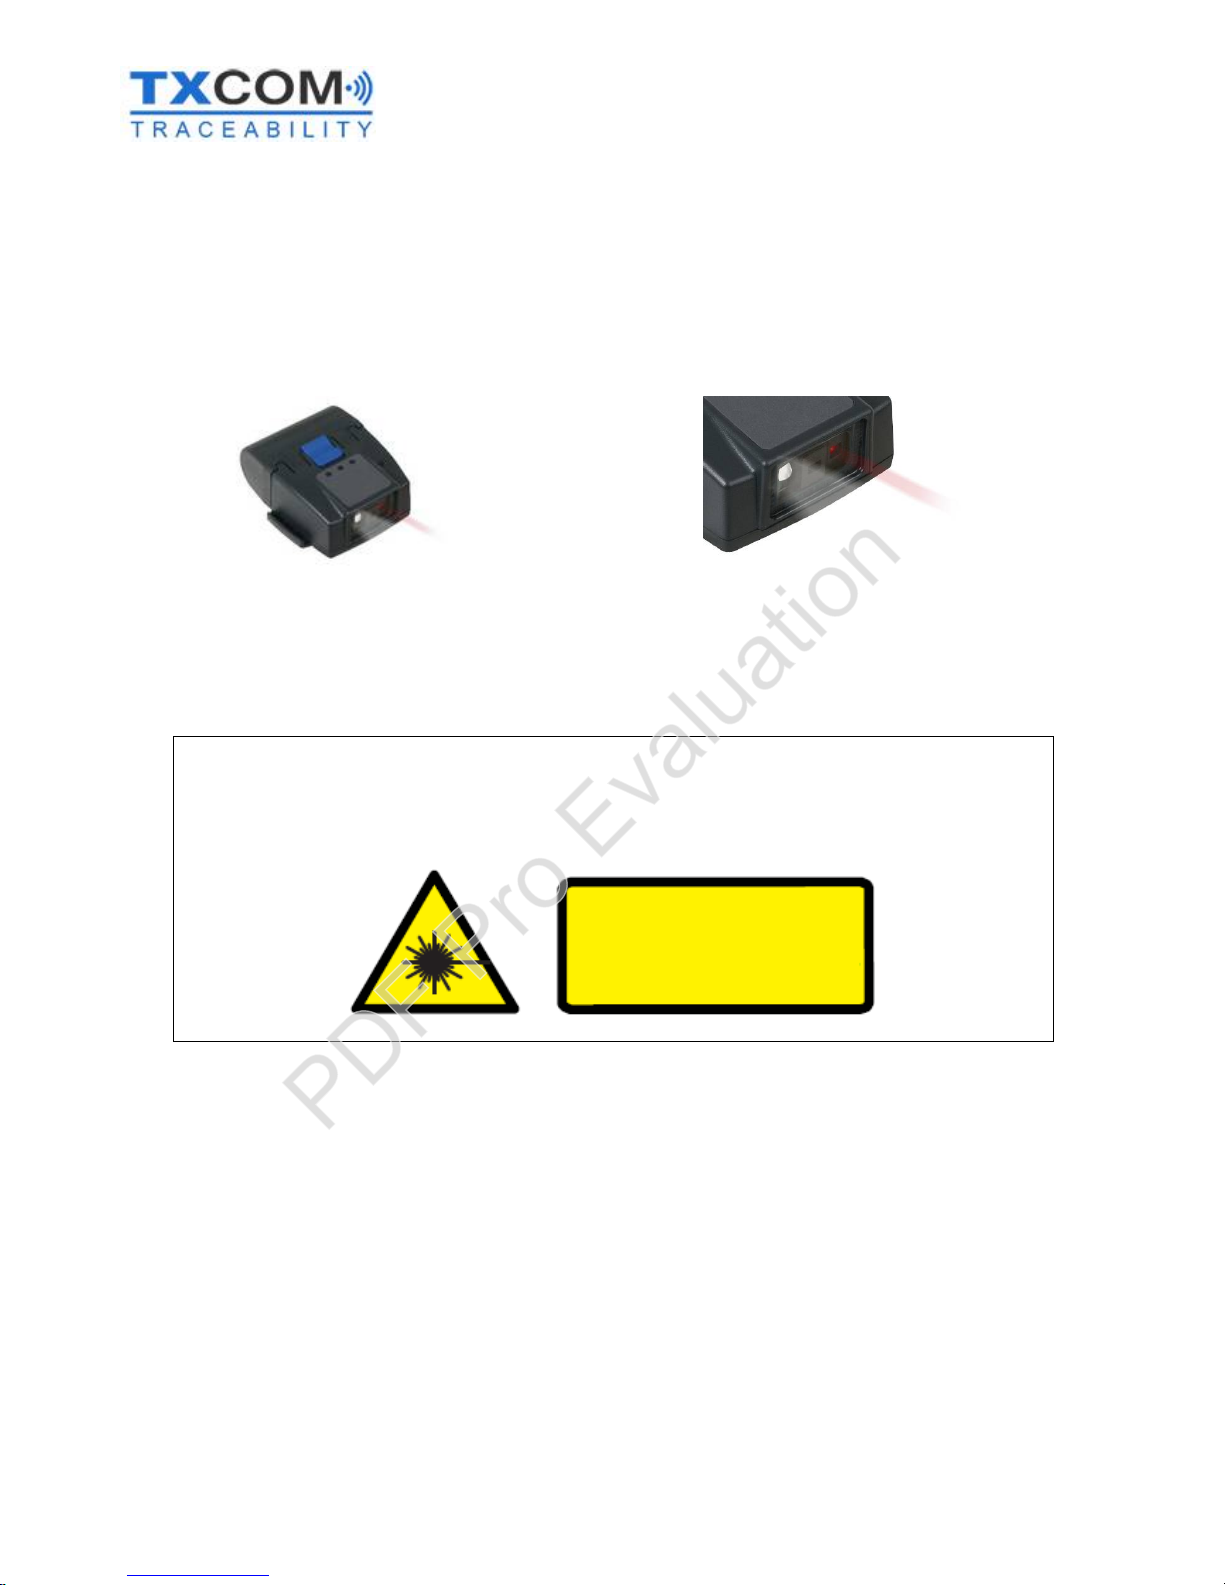
Beam and LED
THE BEAM of TINYOM II is a Class 2 laser (NF EN 60825-1 dated July 1994). This is a low-power laser that emits visible
radiation (wavelength: 400 nm–700 nm) with no significant risk, unless the user employs optics to concentrate the
beam. However, intentional and prolonged ocular exposure may cause glare and momentarily impaired vision.
THE WHITE LED has a light output of 100 lm/W (lumens per watt). As the LED has a maximum consumption of 1 watt,
the maximum light output of TINYOM II is therefore 100 lm. When the beam is at 100% of its light output, it is
equivalent to a 10–15 W incandescent bulb.
The 1D version includes a Class 1 LED. This product is VDE EN60950-1 and EN60825-1 certified.
The 2D version includes a Class 2 laser. This product is VDE EN60950-1 and EN60825-1 certified.
LASER EMISSION DO NOT LOOK AT THE BEAM
CLASS 2 LASER/LED
1 mW 630–680 nm
BEAM
WHITE LED
PDF Pro Evaluation
3110943 A User Manual_Tinyom2_v00_01_01_EN.docx Page 7/104
Getting started
Introduction
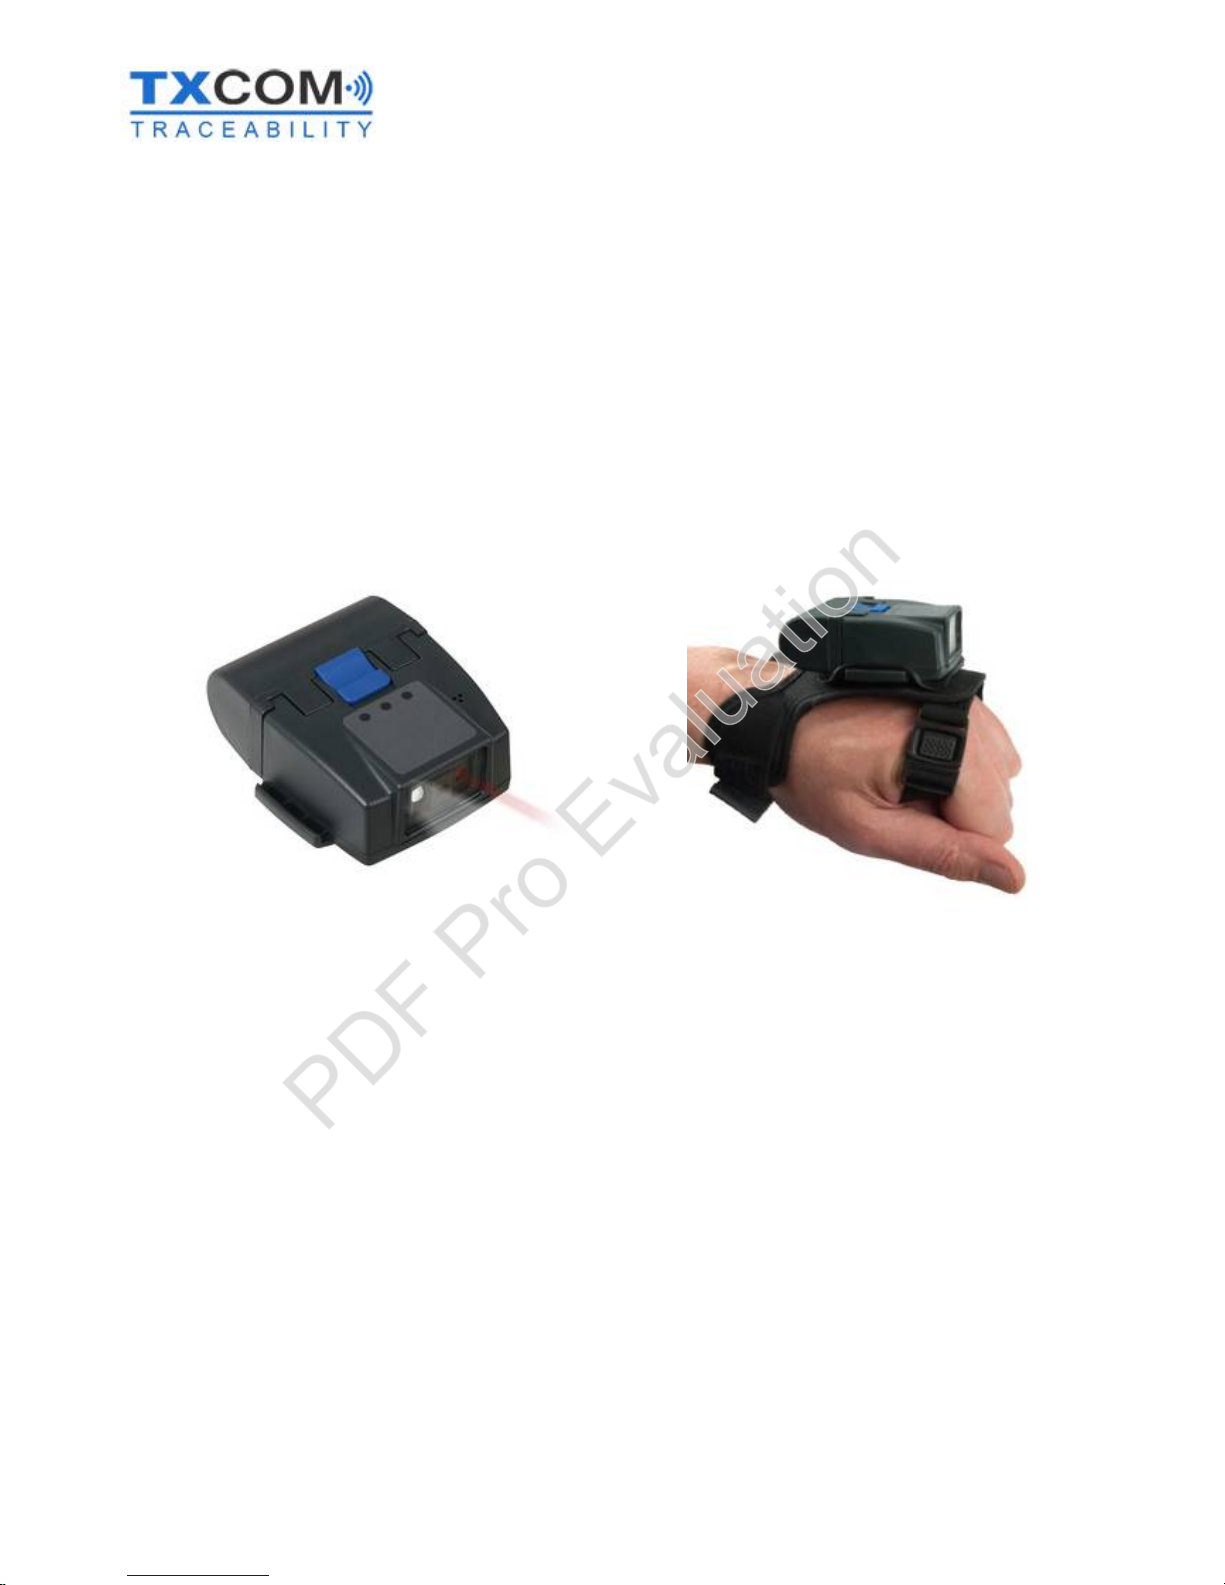
TINYOM II is a hands-free reader, available in a 1D and 1D/2D version. Thanks to its positioning and movement or
Keypad trigger mode, the operator has a greater freedom to handle objects, type on a keyboard or use a PC mouse.
In addition to its light weight (155 g) and its compactness (73 x 57 x 27 mm), this reader is very robust in harsh
environments, for example, in a cold store (-30°C), or repeated falls onto concrete from a height of up to 1.5 metres.
TINYOM II is available in 2 versions:
version 1D/2D (PN: TX7120) version 1D (PN: TX7020)
It can communicate with all devices equipped with Bluetooth, such as PCs, tablets, smartphones, PDAs etc. on Android,
iOS and Windows operating systems.
Two profiles are supported, the SPP (Serial Port Profile) and the HID (Human Interface Device).
The SPP profile establishes a series connection between two Bluetooth devices. The TINYOM II reader works in master
or slave mode.
The HID profile emulates a keyboard via Bluetooth. (For example, a barcode reader will transfer information via
Bluetooth and write it directly into a text editor).
PDF Pro Evaluation
3110943 A User Manual_Tinyom2_v00_01_01_EN.docx Page 8/104
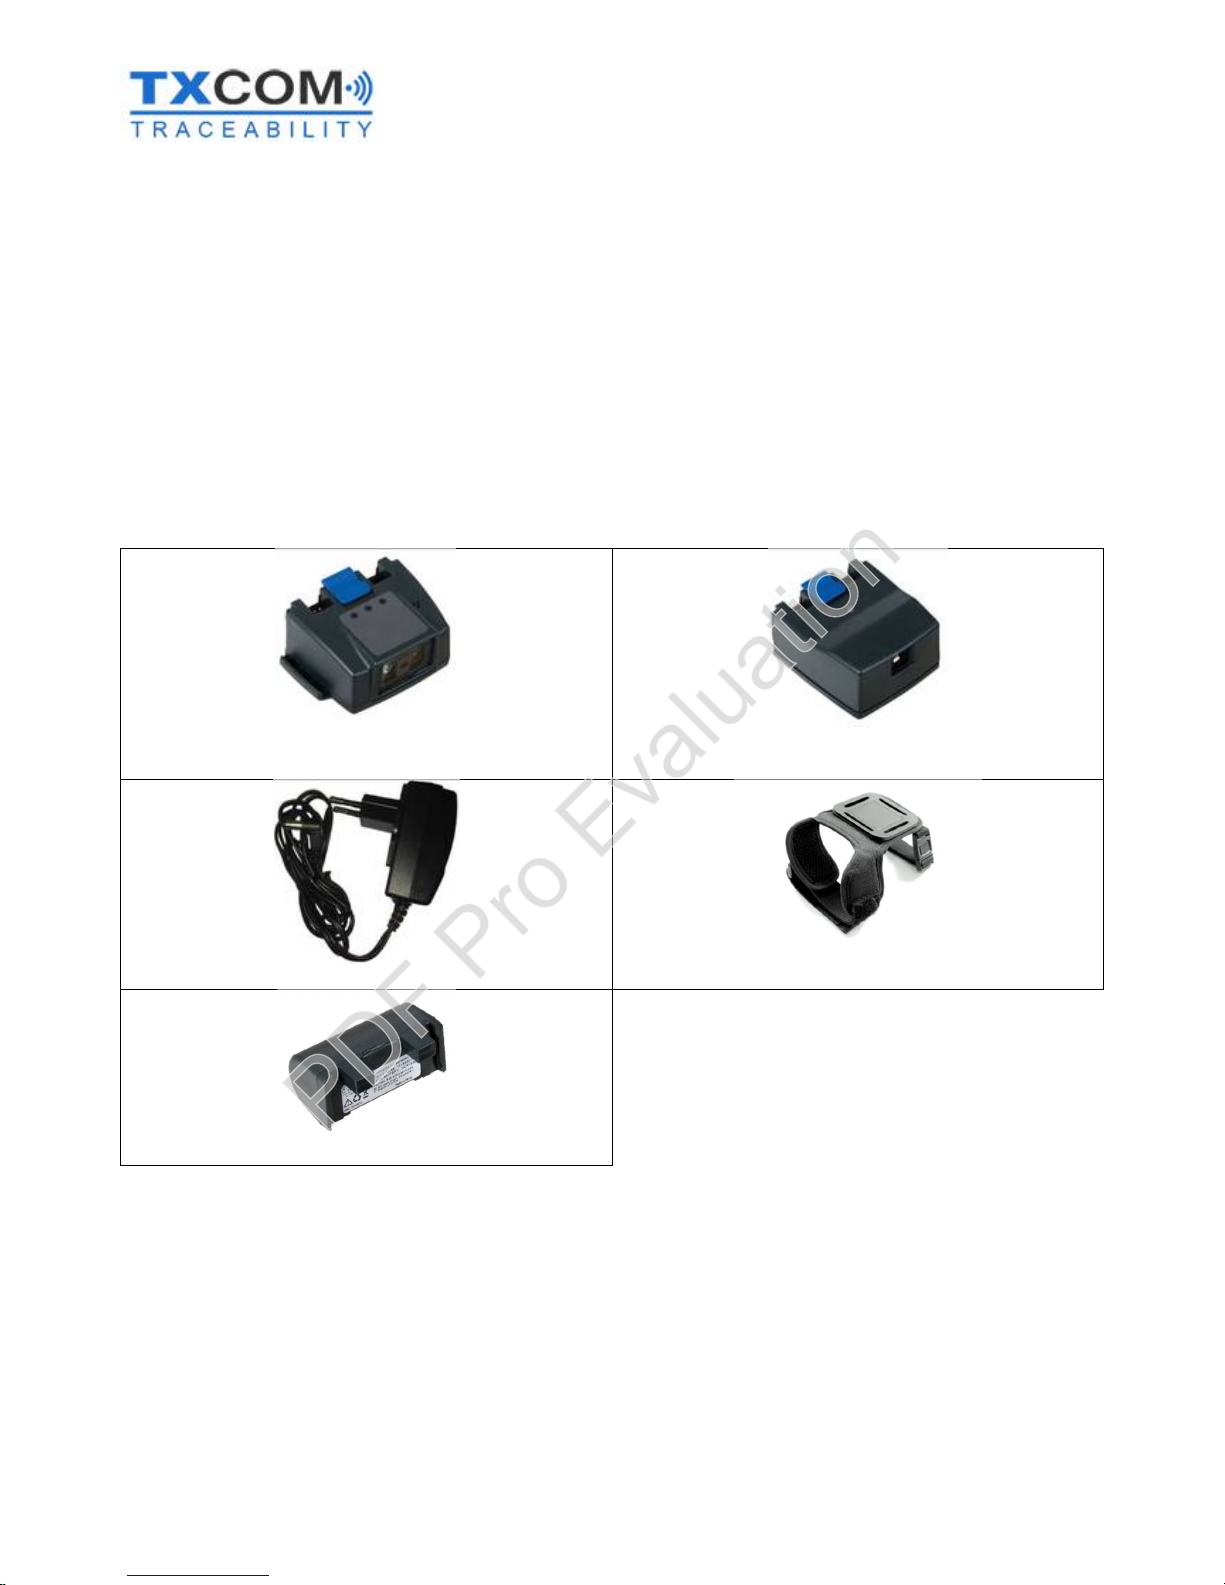
TINYOM II package contents
The TINYOM II package includes all the components needed to set up and start using TINYOM II.
Description
Reference
Quantity
TINYOM II 1D or 1D/2D
TX7020 or TX7120
1
Wrist strap
TX70K1
1
Battery
TX70K2
1
Charging base
TX70CH
1
EU and UK power
adaptor
TX70K7
1
Wall mounting clip
TX70K8
1
Quick Start Up Guide
-
1
TINYOM II 1D/2D ref. TX7120
TINYOM II 1D ref. TX7020
Charging base ref. TX70CH
Power adaptor ref.
3110938
Wrist strap ref. TX70K1
Battery ref. TX70K2
PDF Pro Evaluation
3110943 A User Manual_Tinyom2_v00_01_01_EN.docx Page 9/104
Optional components
Description
Reference
8-point EU power adaptor
TX70K3
8-point UK power adaptor
TX70K4
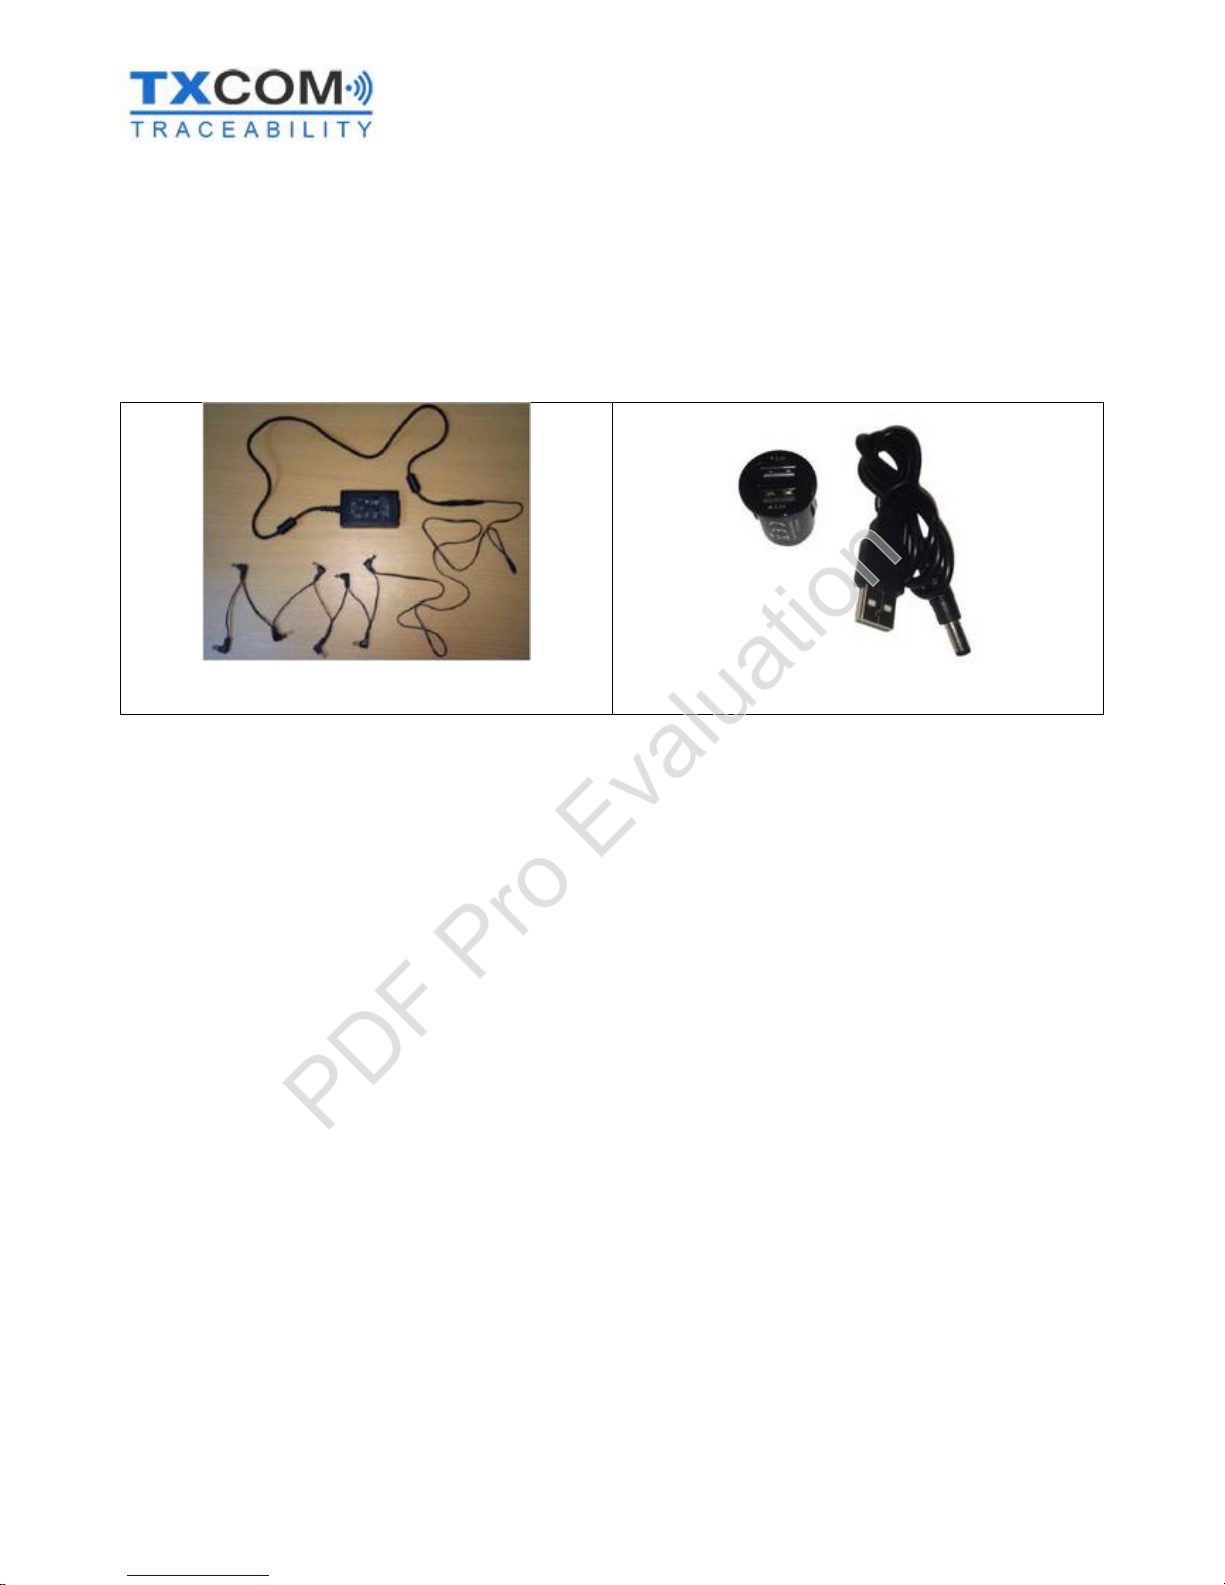
In-car and truck charger
TX70K6
8-point EU power adaptor ref.
TX70K3
8-point UK power adaptor ref. TX70K4
In-car and truck charger ref. TX70K6
PDF Pro Evaluation

3110943 A User Manual_Tinyom2_v00_01_01_EN.docx Page 10/104
Technical features
Physical features
Dimensions of reader with battery
73 x 57 x 27 mm
Weight with battery
155
g
User environment
Operating temperature
-
30°C to +55°C
Number of drops tolerated
40 drops from 1.5
m onto concrete
Protection
rating
IP5x
(IP54 certification in progress)
Imager type
1D or 1D/2D
Performance characteristics
Battery
Removable battery pack, lithium
-
ion 3.7
V, 1600
mAh
Battery life
35,000 scans
Mains adaptor
100–240
VAC / 50
–60Hz / 5
VDC 1.2
A LPS
Bluetooth
module
Class 1, V2.1, SPP and HID profile
Bluetooth range in the open
100
metres
Accelerometer
trigger
Adjustable by 15° increments on two axes
User interface
Audible alarm
85
dBA SPL @ 10
cm
Light-emitting diodes
3 LEDs red, green and blue
Beam
trigger mode
Keypad
Keypad Switch
Accelerometer
Remote software command
MTBF
Controller board
780,000
hours
1D or 1D/2D reader head
250,000
hours
Battery
1100
mAh (70% of the maximum capacity) after 300 charging
and discharging cycles
PDF Pro Evaluation
3110943 A User Manual_Tinyom2_v00_01_01_EN.docx Page 11/104
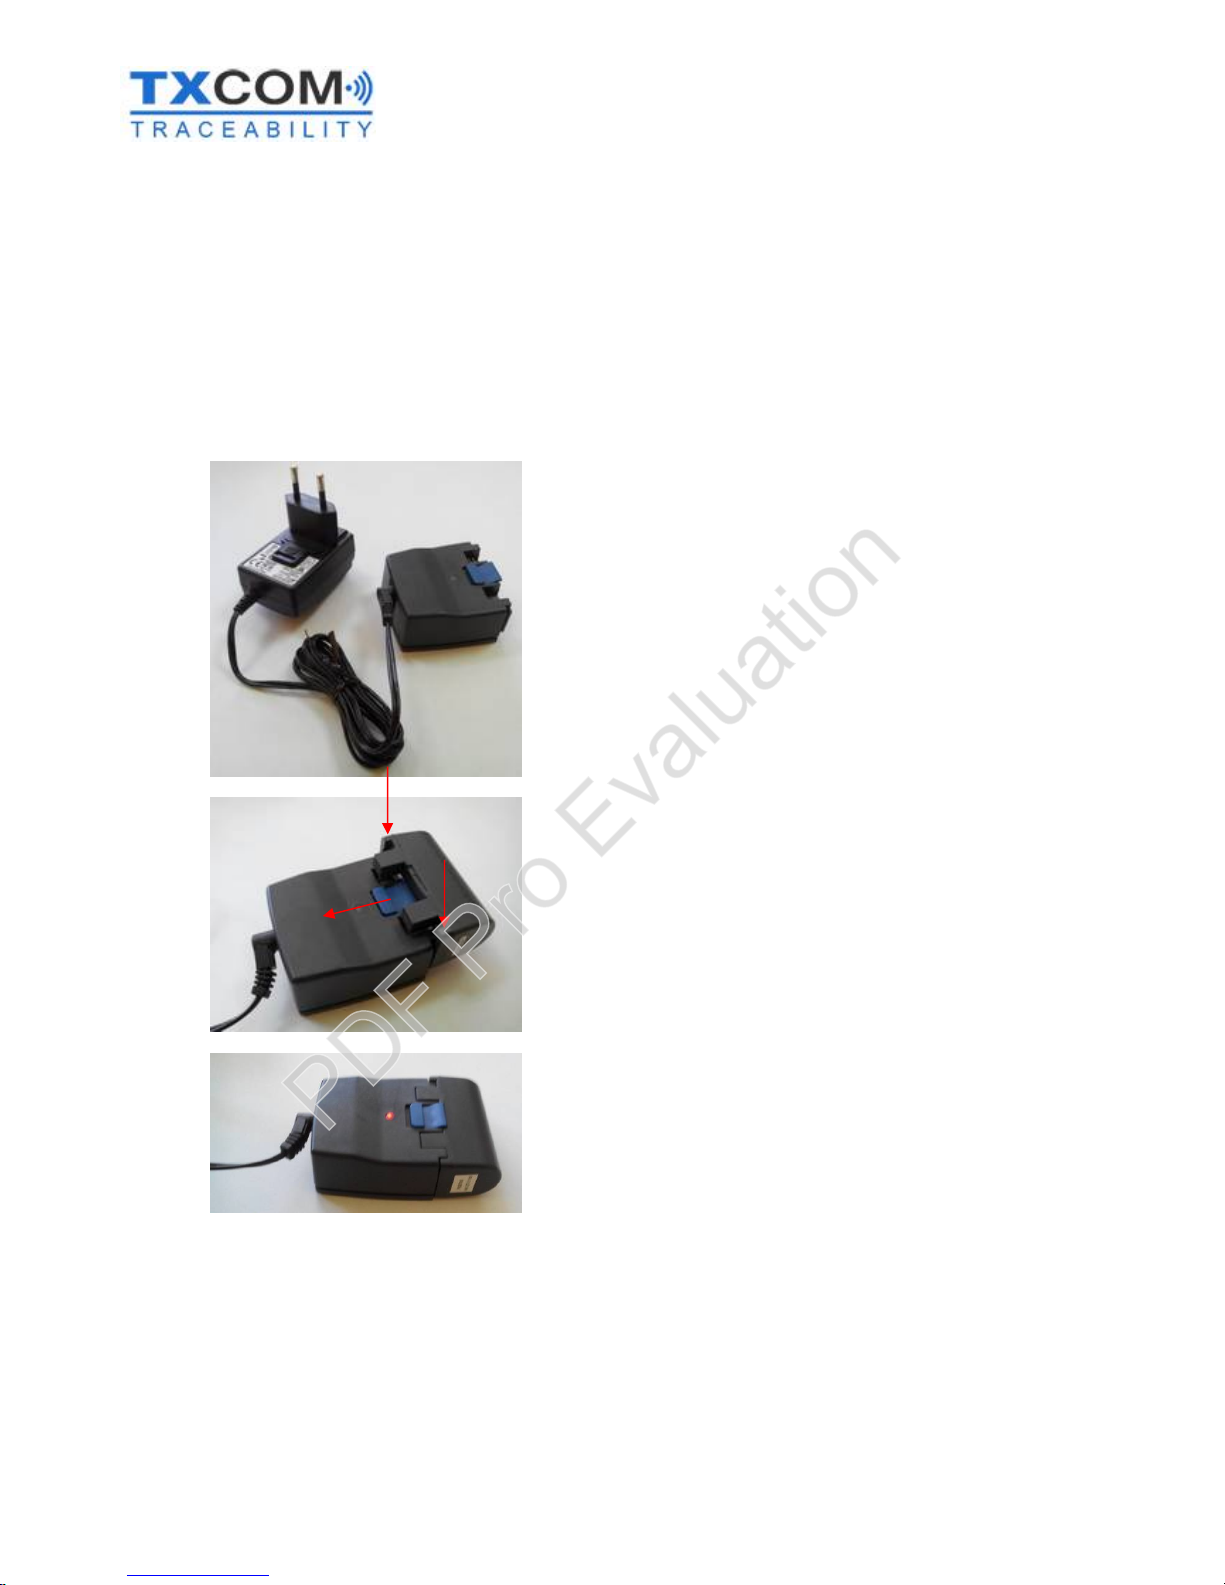
Charging the battery pack
The lithium-ion battery pack is designed to connect to the TINYOM II reader and its charger.
The charger will only function with the mains adaptor ENG Electric, model 3A-068WP05.
Before using your TINYOM II, you must fully charge the battery pack using the charging base. For better battery life,
we recommend that you use the battery until the charge is between 10 and 20%. When the battery is completely
discharged, it can be recharged in approximately 4 hours 30 minutes.
-
Insert th
e 220
V / 5
V mains adaptor into a wall socket.
To switch off the power supply of the charger, the adaptor
must be unplugged from the wall socket
- Insert the 220 V / 5 V plug's female jack connector into the
charger jack.
The operating temperature range for the plug and the
charging base is 0°C to +40°C
- To insert the battery pack, slide the blue clip towards the
inside of the charger.
- Position the battery pack onto the charger runners.
-
If the battery pack is correctly inserted, the
indicator light will
turn red, indicating that the battery is charging, or green,
indicating that the battery is charged.
Red LED: Battery charging in progress
Green LED: Battery fully charged
PDF Pro Evaluation
3110943 A User Manual_Tinyom2_v00_01_01_EN.docx Page 12/104
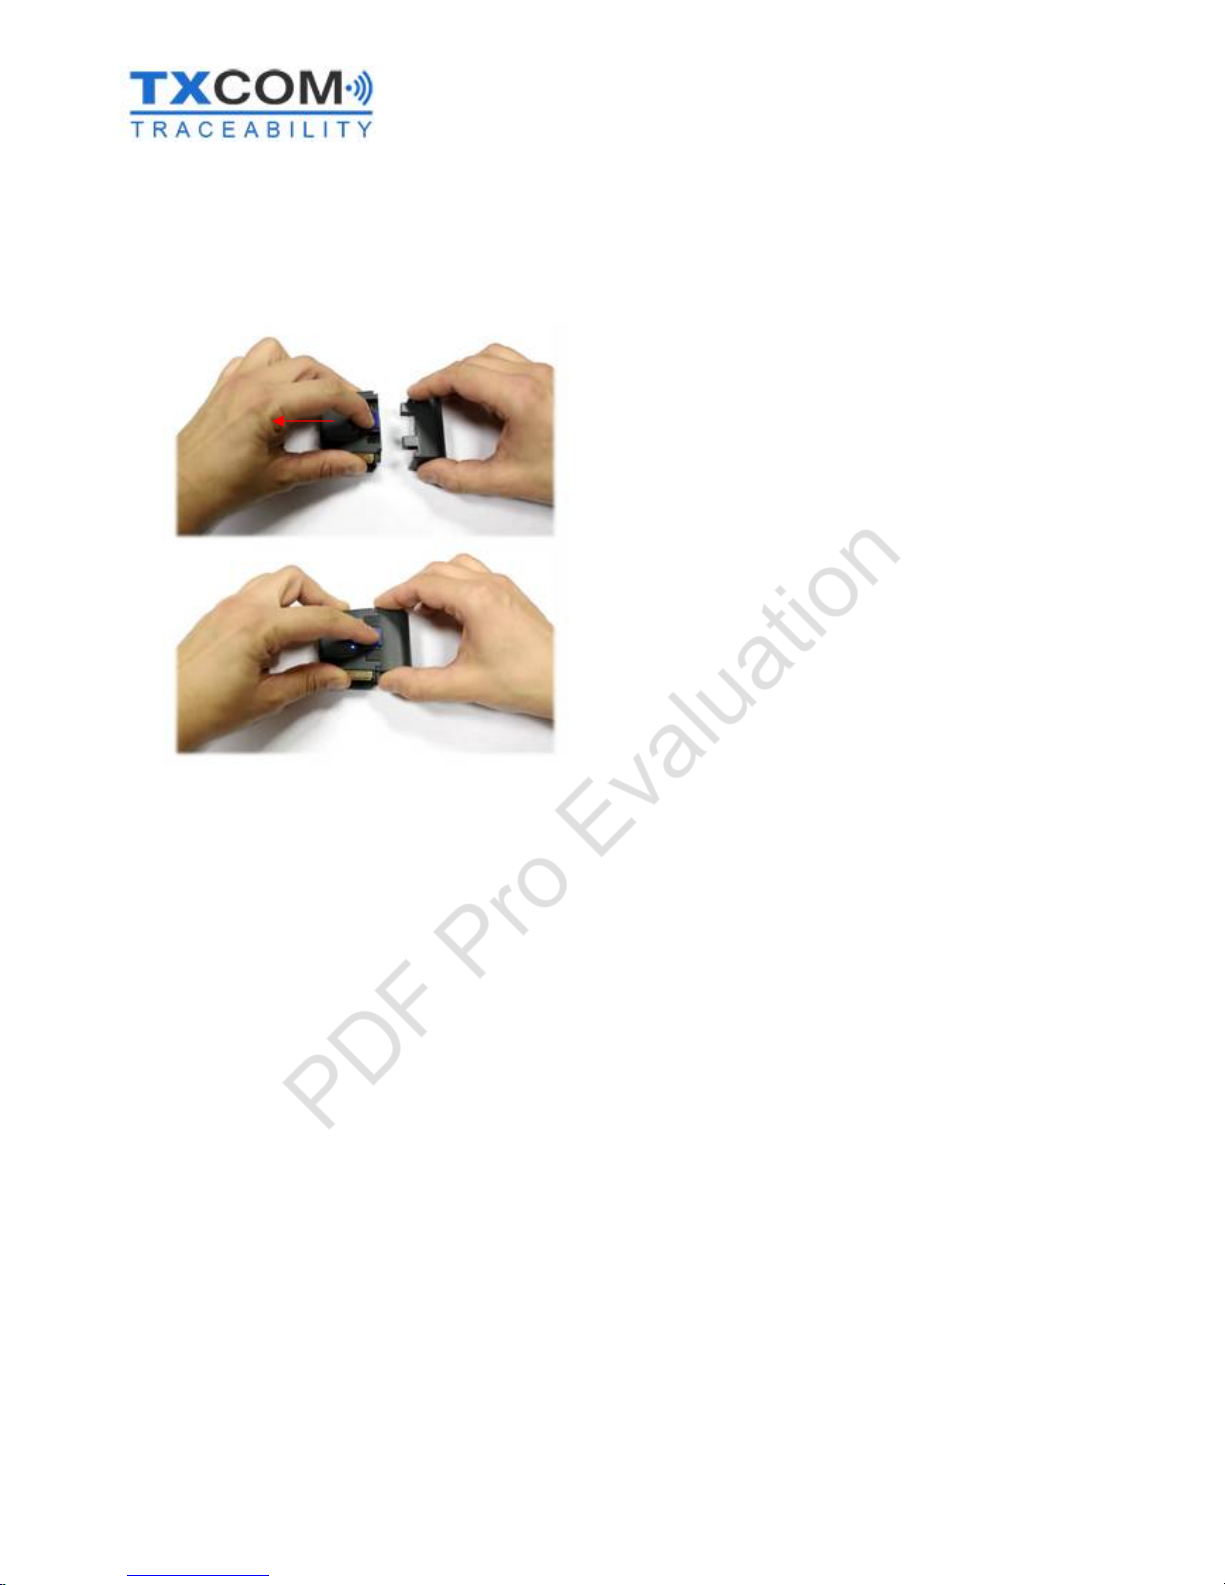
Inserting and removing the battery from the reader
Inserting the battery
- Slide the clip inwards and hold it.
- Slide the battery pack along the TINYOM II runners and
release the clip.
The reader will start automatically
when the battery pack is inserted
The reader has 3 LEDs, a buzzer and a vibration device. After inserting the battery, the scanner will do the following:
- The 3 LEDs will illuminate at the same time for 0.1 seconds.
- The 2 red and green LEDs will indicate the battery level for 8 seconds.
- 2 beeps and the vibration is activated, indicating correct start up.
- If the TINYOM II is Bluetooth enabled, the reader will then connect automatically to the device with which it
has been paired previously. The blue LED will then stop flashing and become a fixed light.
PDF Pro Evaluation
3110943 A User Manual_Tinyom2_v00_01_01_EN.docx Page 13/104
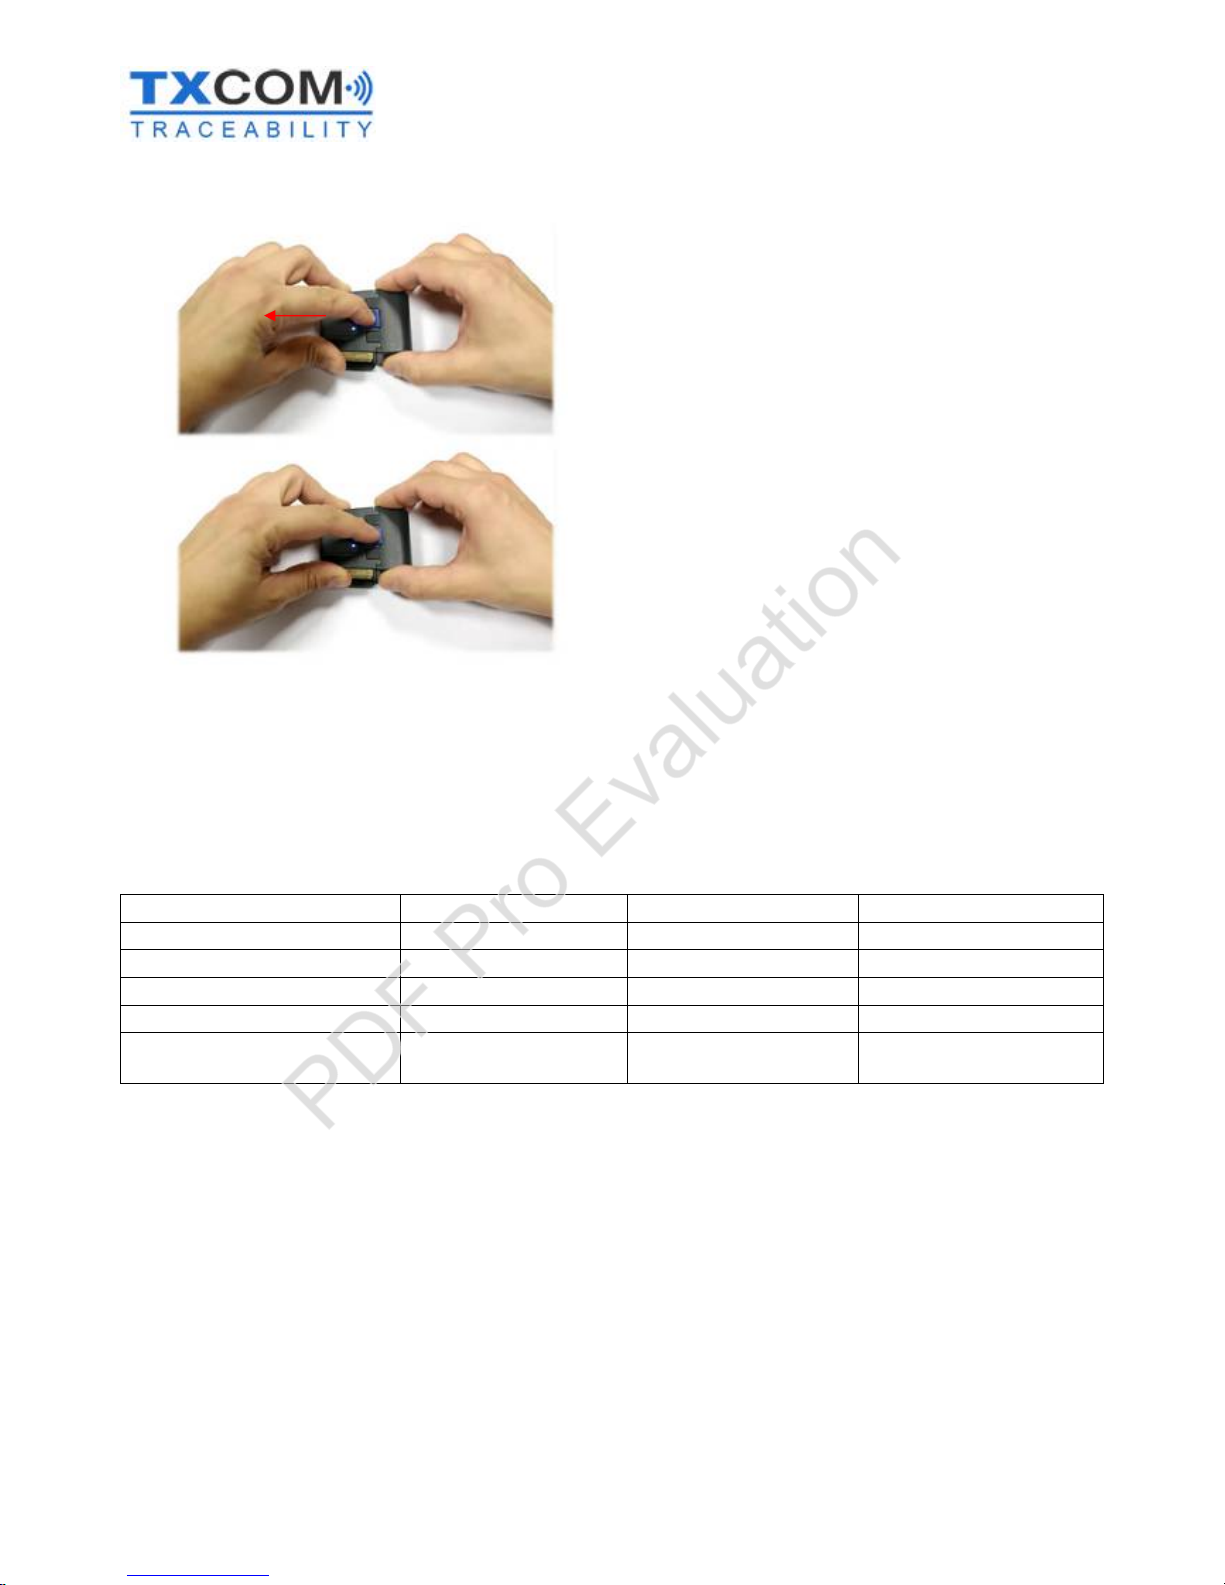
Removing the battery
- Slide the clip inwards and hold it.
- Slide up the battery pack.
Battery charge status
The battery has a fuel gauge to provide information on the battery charge status. When the reader starts up, the red
and green LEDs will indicate for 8 seconds, the battery charge status.
Battery charge status
Green LED
Red LED
> 80%
ON
OFF
full
40% to 80%
flashing
OFF
charged
20% to 40%
Synchronised flashing
Synchronised flashing
4% to 20%
OFF
Flashing
weak
<= 4%
OFFONCritical,
reader shut
-
down is
imminent
Notes
- When the battery level is low, the red LED flashes automatically when the reader is in use.
- The green LED indicator is activated only after the battery has been inserted into the reader for 8 seconds.
- When the battery level is critical and reader shut-down is imminent, the keypad sensor and accelerometer
are deactivated.
PDF Pro Evaluation
3110943 A User Manual_Tinyom2_v00_01_01_EN.docx Page 14/104
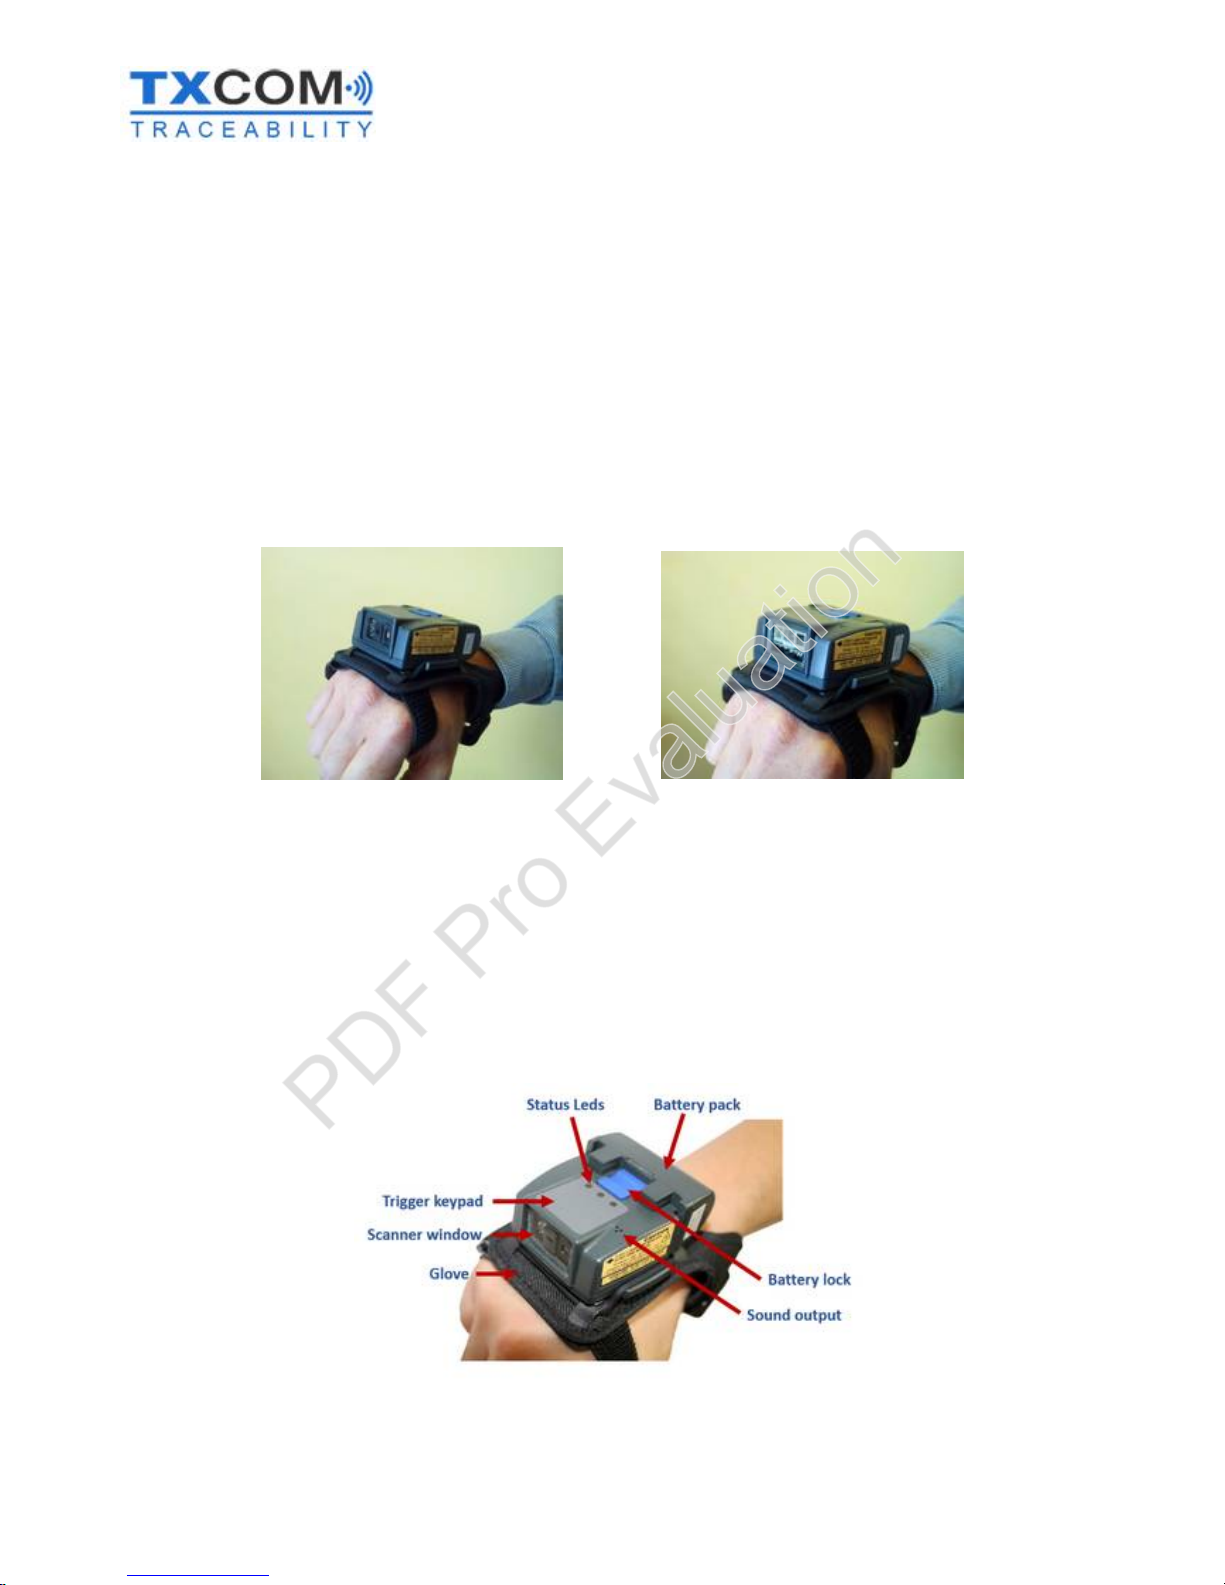
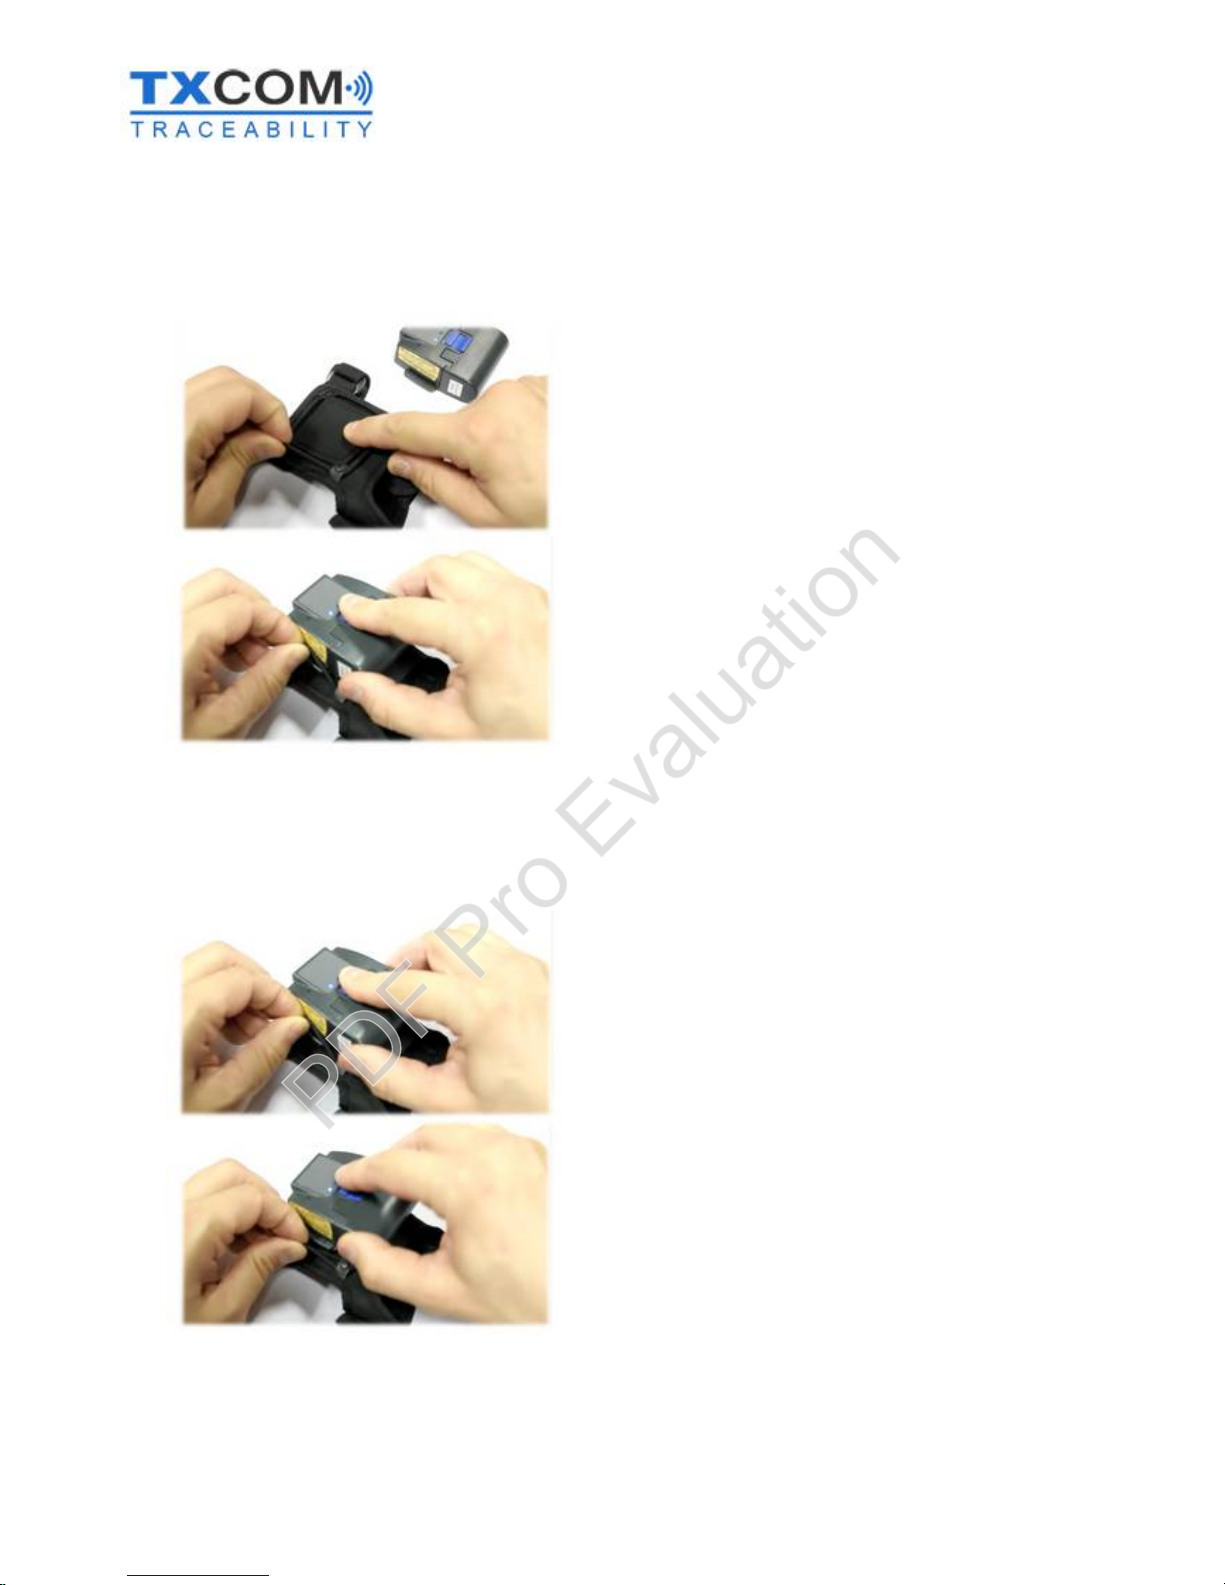
Putting TINYOM II on the wrist strap and taking it off again
Putting TINYOM II on the wrist strap
- Remove the rubber parts at the side of the wrist strap.
- Slide on the small “grips” of the TINYOM II.
Taking TINYOM II off the wrist strap
- Remove the rubber parts at the side of the wrist strap.
- Take off the TINYOM II.
PDF Pro Evaluation
3110943 A User Manual_Tinyom2_v00_01_01_EN.docx Page 15/104
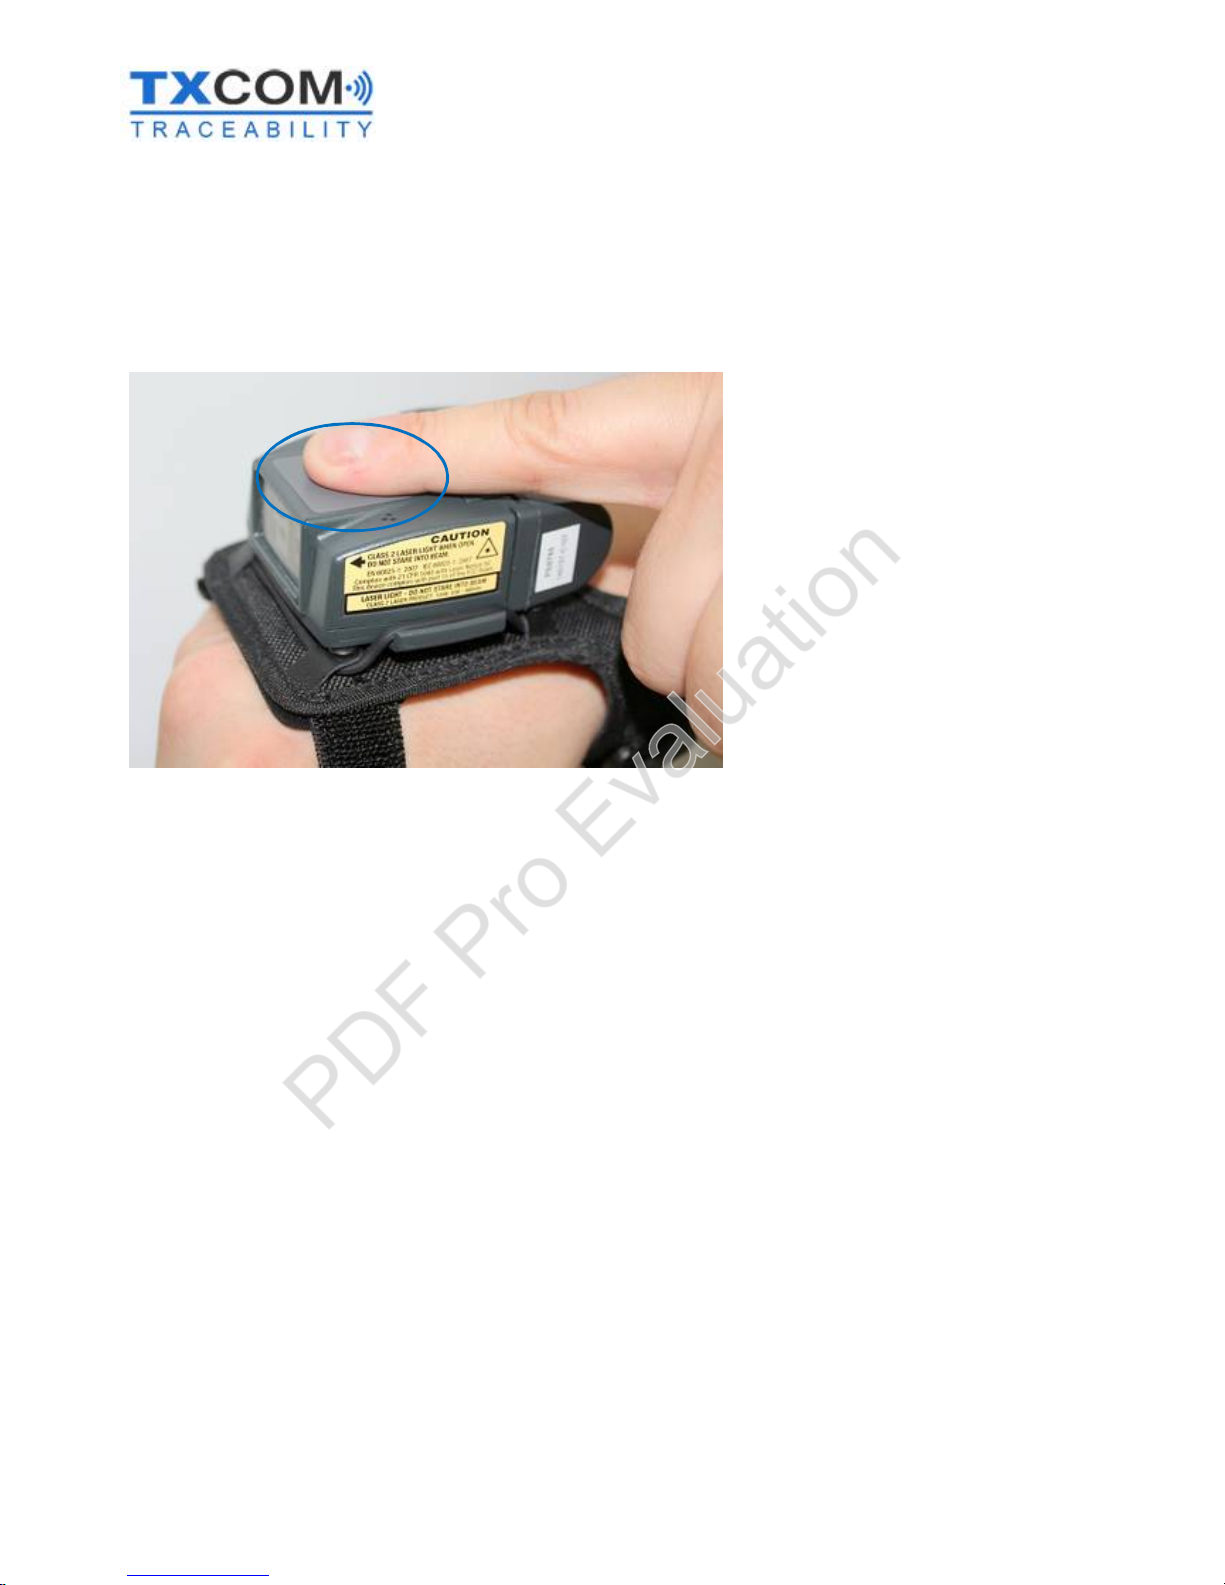
Switching the reader on/off
Switching it on
- Press lightly on the Keypadkeypad sensor
for 1 second. 2 beeps indicate that the reader
is on.
TINYOM II will start automatically when the
battery is inserted.
- The 3 LEDs will illuminate at the same time for 0.1 seconds.
- The 2 red and green LEDs will indicate the battery level for 8 seconds (default setting).
- 2 beeps and the vibration is activated, indicating correct start up.
- If the TINYOM II is Bluetooth enabled, the reader will then connect automatically to the device with which it
has been paired previously. The blue LED will then stop flashing and become a fixed light.
Keypad sensor
PDF Pro Evaluation

3110943 A User Manual_Tinyom2_v00_01_01_EN.docx Page 16/104
Switching it off
The TINYOM II reader switches off:
- When connected via Bluetooth, if there is no activity for an hour (by default).
- When not connected via Bluetooth, if there is no activity for 5 minutes (by default).
- By reading the “off” barcode below.
READER
OFF
<CCMD>3006
PDF Pro Evaluation
3110943 A User Manual_Tinyom2_v00_01_01_EN.docx Page 17/104
Reader trigger modes
The TINYOM II reader can trigger barcode reading in 3 ways:
- By activation of the Keypad sensor.
- By accelerometer.
- By software command via the Bluetooth interface.
When reading a barcode, the Reader uses the LEDs and the buzzer to indicate different statuses.
Reader status
Red LED
Green LED
Blue LED
Buzzer
Barcode read and
transmitted
OFF
Flashing
ON
2 beeps
Barcode read and not
transmitted as no Bluetooth
connection
Flashing
OFF
OFF
6 beeps
Barcode not read
OFF
OFF
ON / OFF
0 beep
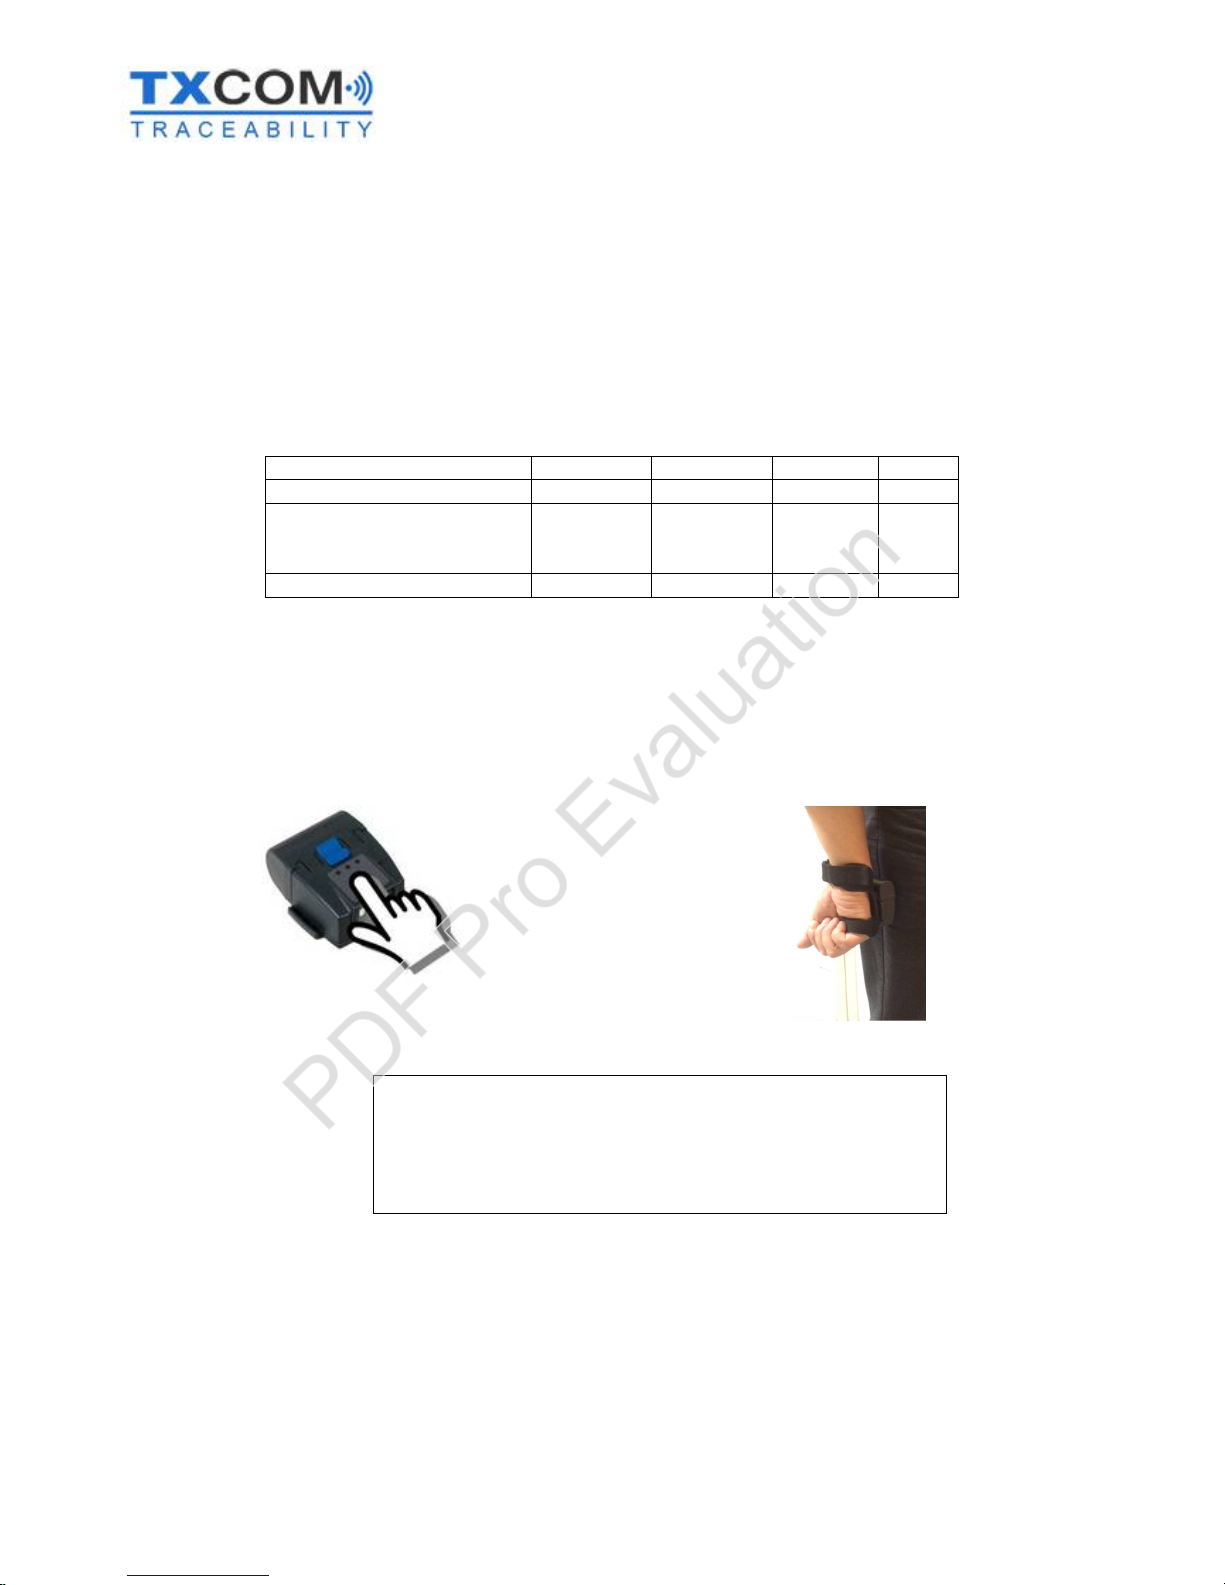
Triggering by keypad sensor
The beam is activated when you touch the Keypad sensor with your finger or any other part of your body, for
example the side of your leg.
Default settings
- The beam remains active for 3 seconds
- Pressing the Keypad sensor turns off the beam
- After reading a barcode, the beam goes off.
PDF Pro Evaluation

3110943 A User Manual_Tinyom2_v00_01_01_EN.docx Page 18/104
Triggering with the accelerometer
Triggering using the accelerometer can be configured on 2 axes with 15° increments.
X axis, side triggering
Y axis, front triggering
There are three phases for using the reader with the accelerometer:
ARMED: The triggering phase indicates that a movement or particular inclination has been detected.
- This phase is indicated by the green LED + 2 beeps.
MOVE: The movement phase indicates reader movement in any direction.
- OFF by default.
STABILITY: The stability phase indicates that no movement has been detected.
- OFF by default.
How triggering works
- The green LED comes on, followed by 2 beeps to indicate that the reader has detected an inclination, "ARMED
phase", and as soon as a movement is made, the beam or laser field triggers for 2 seconds (by default).
- If the reader remains in the same position for too long (2 seconds by default), the green LED goes out and the
red LED comes on for a very short time then goes out with a beep to indicate that it is shut down.
Default settings
- By default, when using the accelerometer to trigger the beam, the reader will be armed when it is tilted
30° upwards, then a movement is needed to activate the beam, for example a return to a horizontal
position.
- The beam remains active for 2 seconds.
- Pressing the keypad sensor turns off the beam.
- After reading a barcode, the beam goes off.
+180°0°
+30°
-90°
+180°0°
+30°
-45°
-180°
-180°
PDF Pro Evaluation

3110943 A User Manual_Tinyom2_v00_01_01_EN.docx Page 19/104
Reading modes
There are several different reading modes for TINYOM II, which can be configured using just the keypad sensor, the
accelerometer or both.
“One shoot” reading mode
- This mode can be used with the accelerometer only.
“One shoot” reading mode is activated by the accelerometer only. You will need to set TINYOM II to ARMED phase and
then make a small movement to turn the beam on. The reader will exit this mode after reading a barcode. This is the
default mode.
ONE SHOOT
READING MODE
<SW>70 FE 00 08 01 05 00 00 00 3C 00 05
Stabilised reading mode
- This mode can be used with the accelerometer only.
Stabilised reading mode is activated by the accelerometer only. This enables activation of the beam when the reader
is stable, without movement. The beam will be switched off when a movement is made. You will need to set TINYOM
II to ARMED phase. Then, when TINYOM II is in a stable position, the beam will switch on to enable reading of the
barcode.
After reading a barcode, the beam will switch off until the reader detects another movement and a period of stability
to activate the beam. It will therefore be necessary to return to the ARMED phase.
ENABLE
STABILISED MODE
<SW>70FE000802050014013C0015
DISABLE
STABILISED MODE
<SW>70FE000801050014013C0015
PDF Pro Evaluation

3110943 A User Manual_Tinyom2_v00_01_01_EN.docx Page 20/104
It is also possible to configure the level of stability needed to switch on the beam.
NORMAL
STABILITY LEVEL
<SW>70 FD 00 05 05 05 05 05 50
EASY
STABILITY LEVEL
<SW>70 FD 00 05 14 14 14 0A A0
DIFFICULT
STABILITY LEVEL
<SW>70 FD 00 05 05 05 05 0A A0
When TINYOM II is not moving, the beam switches on and off alternately until the switch-off time limit is reached. It is
possible to configure the automatic switch-off time for TINYOM II if there is no activity. There are two different cases
here:
- TINYOM II connected to a device via Bluetooth.
- TINYOM II not connected.
To exit stabilised mode, simply touch the keypad sensor.
“Level” reading mode
This mode can be used with the keypad sensor only.
“Level” reading mode is activated by the keypad sensor only. When you press the keypad sensor, the beam switches
on. As soon as you stop touching the sensor, the beam goes off.
LEVEL
READING MODE
<SW>704001
PDF Pro Evaluation

3110943 A User Manual_Tinyom2_v00_01_01_EN.docx Page 21/104
Continuous reading mode
In continuous reading mode, it is possible for the beam to be switched on constantly. To switch off the beam, you will
need to scan the TINYOM II “off” barcode or remove the battery.
CONTINUOUS
READING MODE
<SW>704000
“Pulse” reading mode
This mode can be used with the keypad sensor only.
“Pulse” reading mode is activated by the keypad sensor only. When you touch the keypad sensor, the beam comes on
for a configurable time period (2 seconds by default).
PULSE
READING MODE
<SW>704002
“Flash” reading mode
This mode can be used with the keypad sensor only.
“Flash” reading mode is activated by the keypad sensor only. The beam and decoding is activated for n seconds. The
light begins to flash after this time has elapsed. As soon as a barcode has been read, the light remains on as long as
no other barcode is read. If another activity is detected by the reader head, the light begins to flash again after n
seconds. It is possible to configure the time between the fixed and flashing light.
FLASH
READING MODE
<SW>704003
PDF Pro Evaluation

3110943 A User Manual_Tinyom2_v00_01_01_EN.docx Page 22/104
“Autostand” reading mode
This mode can be used with the keypad sensor or the accelerometer.
“Autostand” reading mode is activated by the keypad sensor or the accelerometer. The beam is on for n configurable
seconds. If the reader does not move, the beam will go off. The beam can be reactivated by pressing the keypad sensor
or moving the TINYOM II.
AUTOSTAND
READING MODE
<SW>704004
“Multiscan” reading mode
This mode can be used with the accelerometer only.
Multiscan reading mode is activated by the accelerometer only. It enables activation of the beam every n seconds (1
second by default). TINYOM II must be in ARMED phase to activate this reading mode.
MULTISCAN
READING MODE
<SW>70 FE 00 08 02 14 00 00 00 3C 00 05
PDF Pro Evaluation
3110943 A User Manual_Tinyom2_v00_01_01_EN.docx Page 23/104
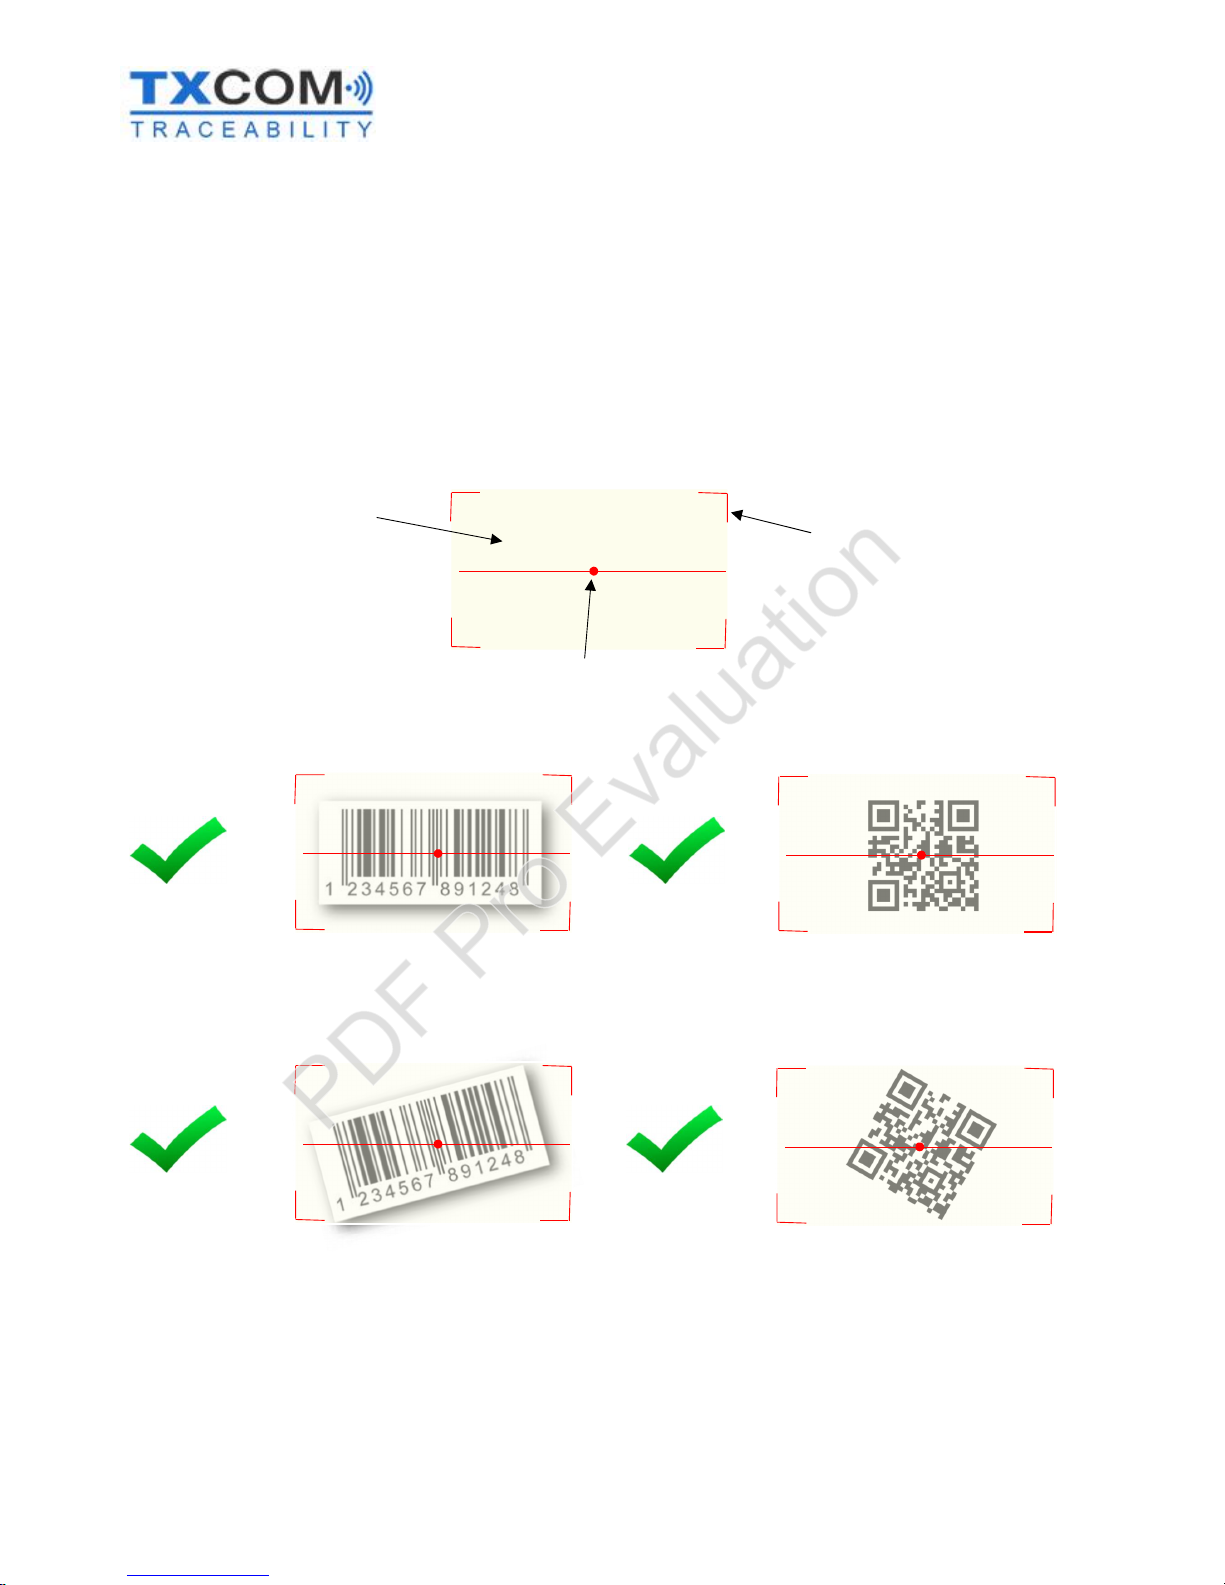
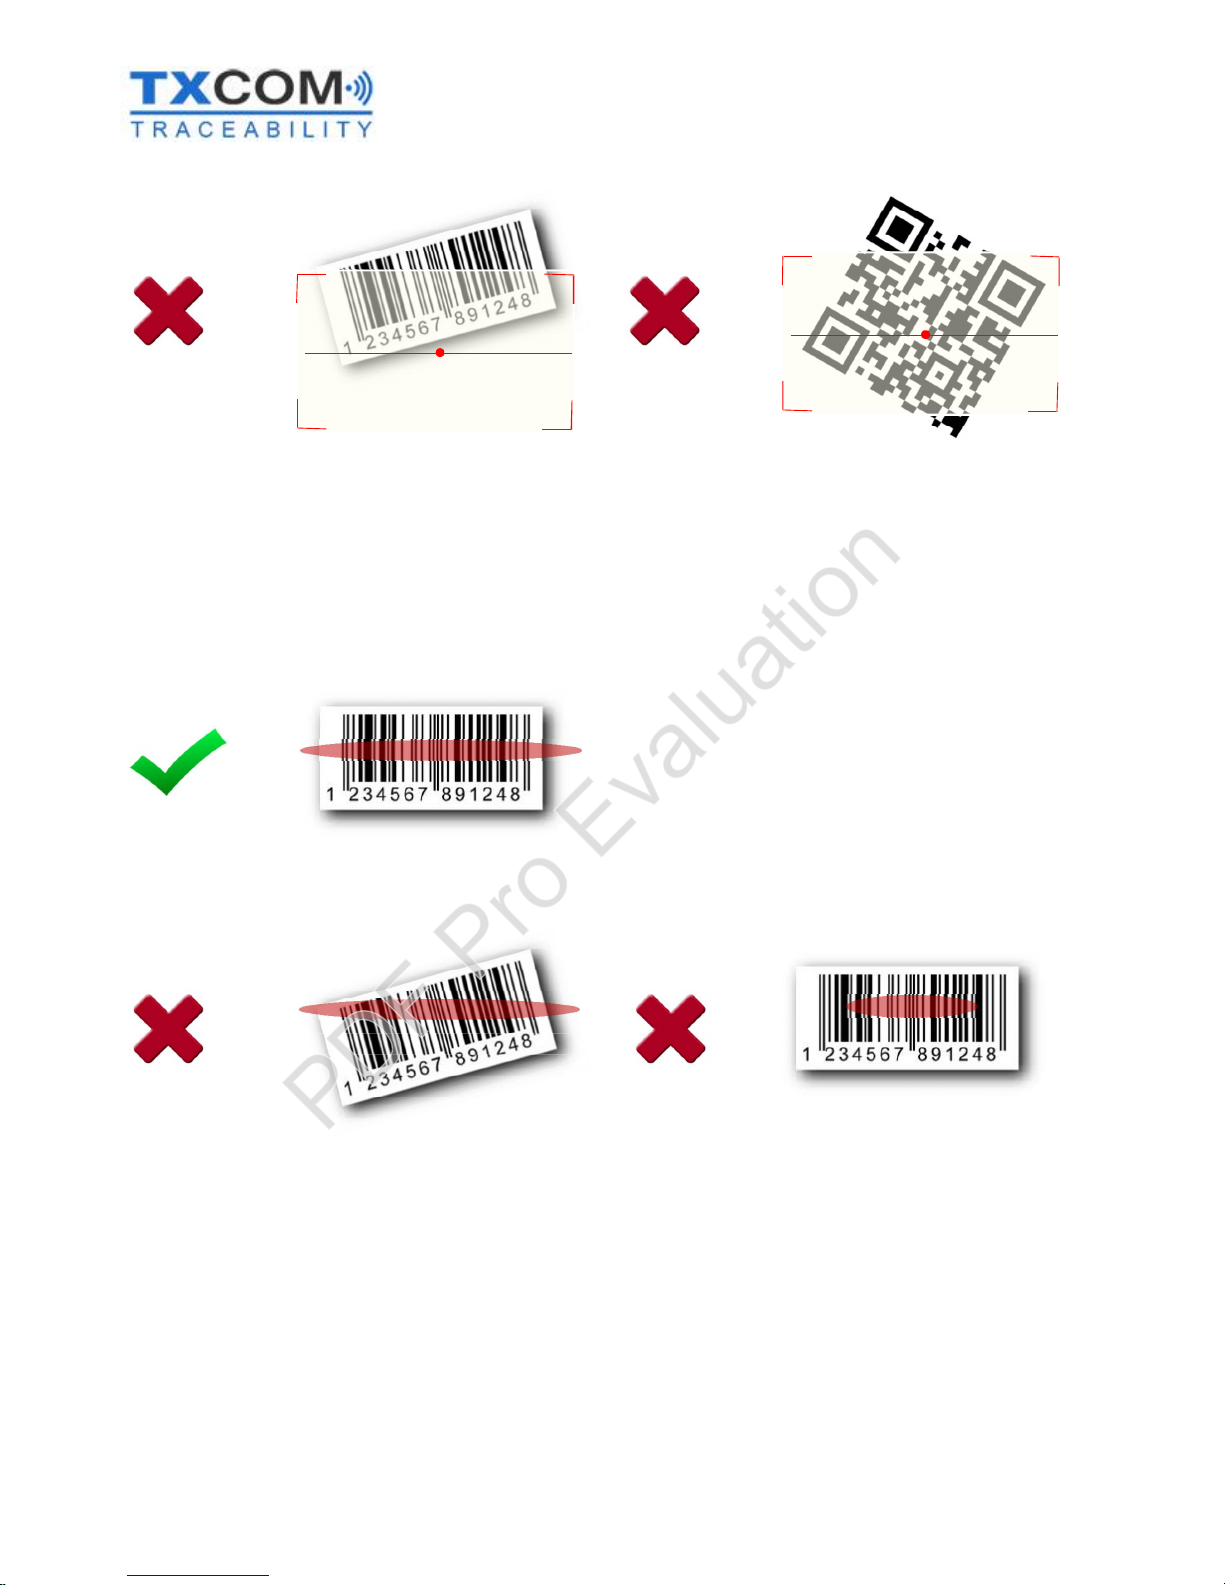
Aiming at a barcode
TINYOM II 1D/2D
1D and 2D barcodes can be aimed at from 360°. The only conditions to remember are:
- The central point of the target must be as close as possible to the centre of the barcode.
- The whole of the red target must be at least the size of the barcode.
Target
Barcode light
Central point of the target
PDF Pro Evaluation
3110943 A User Manual_Tinyom2_v00_01_01_EN.docx Page 24/104
TINYOM II 1D
For 1D barcodes, your aim must be aligned with the barcode.
PDF Pro Evaluation

3110943 A User Manual_Tinyom2_v00_01_01_EN.docx Page 25/104
Reader statuses
When switching on
- The 3 LEDs will illuminate at the same time for 0.1 seconds.
- The 2 red and green LEDs will indicate the battery level for 8 seconds.
Battery charge status
Green LED
Red LED
Description
>
80%ONOFF
full
40% to 80%
flashing
OFF
charged
20% to 40%
Synchronised flashing
Synchronised flashing
4% to 20%
OFF
Flashing
weak
<= 4%
OFFONCritical, reader shut
-
down is
imminent
2 beeps and the vibration is activated, indicating correct start up.
If the TINYOM II is Bluetooth enabled, the reader will then connect automatically to the device with which it
has been paired previously. The blue LED will then stop flashing and become a fixed light.
During operation
When reading a barcode, the reader uses the LEDs and the buzzer to indicate different statuses.
Reader status
Red LED
Green LED
Blue LED
Buzzer
Barcode read and transmitted
OFF
Flashing
ON
2 beeps
Barcode read and not
transmitted as no Bluetooth
connection
Flashing
OFF
OFF6 beeps
Barcode not read
OFF
OFF
ON / OFF
0 beep
PDF Pro Evaluation

3110943 A User Manual_Tinyom2_v00_01_01_EN.docx Page 26/104
Default settings
It is possible to restore the default settings, or factory settings, for the reader by scanning the factory settings barcode.
FACTORY
SETTINGS
<CCMD>4006
The factory settings for TINYOM II are as follows:
Bluetooth interface
Discoverable by Bluetooth devices
Secured using authentication code “0000”
HID connection, North American (QWERTY) keyboard emulation
Data transmission settings
No preamble
Postamble <CR><LF> (carriage return + line feed)
Active symbologies
Code 39
Code 128
GSI 128
Datamatrix
UPC-A
UPC-E
EAN-8
EAN-13
PDF 417
Usage settings
“Level” reading mode active
2 second beam time
Beam switches off after one reading
Targeting active
TINYOM connected to Bluetooth switches off after 3600 seconds without activity
TINYOM not connected to Bluetooth switches off after 300 seconds without activity
Sound volume high
Sound frequency 3190 Hz
Signal on start-up
There will be 1 beep of 80 ms to indicate a correct reading
LEDs remain illuminated for 2 seconds
The blue LED comes on when there is a Bluetooth connection
Vibration on start-up
LED light output 40%
This list of factory settings is not exhaustive and may be subject to modification.
PDF Pro Evaluation

3110943 A User Manual_Tinyom2_v00_01_01_EN.docx Page 27/104
ESTABLISHING A BLUETOOTH CONNECTION
Features of the TINYOM II Bluetooth module
Thanks to the TINYOM II Bluetooth module, the reader can connect to a device using these three connection
profiles:
- HID (Human Interface Device): TINYOM II emulates a wireless keyboard. It is not necessary to enter an
authentication code for this profile.
- SPP Slave: The device to which TINYOM II is paired establishes the connection.
- SPP Master: TINYOM II establishes the connection with a device.
In HID and SPP Slave mode it is possible to connect several TINYOM II readers to the same device.
Connection type
SPP and HID
Protocol version
2.1 + EDR
Class
Class 1
Range in the open
100
m
Security levels
TINYOM II has four Bluetooth security levels for SPP Master and Slave profiles. These security levels are linked to
Bluetooth protocols and operating systems that are not all able to manage all modes.
<SW>664000
Security disabled
“Open” mode. Authentication is not needed.
<SW>664001
Security enabled (default)
This mode protects the device to which TINYOM II connects as it requires
entry of an authentication code, which is “0000”.
<SW>664002
SSP (Secure Simple Pairing) “just works” mode
Not Available on this product
<SW>664003
SSP keyboard I/O mode
If this option is enabled, the host receives an invitation to pair. The host
sends a confirmation message, to which the device always issues a
positive response.
The Bluetooth stacks must be version 2.1 or higher as a minimum.
PDF Pro Evaluation

3110943 A User Manual_Tinyom2_v00_01_01_EN.docx Page 28/104
Connection with the HID profile
The HID (Human Interface Device) profile enables a rapid connection without entering an authentication code on a
device. Once connected, TINYOM II emulates a computer keyboard and behaves as one. This means that, when
reading a barcode, TINYOM II sends the data to the host device using the same communication protocol as data
entered using a keyboard.
This profile has its limits due to the protocol. The data transferred from TINYOM II to the host device is not secured.
Entry using a keyboard is one-way, there is no acknowledgement of receipt of data. The HID profile functions in the
same way. This means that if data is mistransferred between the reader and the host device, no error will be
reported.
This profile is mainly used when distances between the reader and the host device are short.
Depending on the barcode coding, it will be necessary to change the type of keyboard emulated (North America,
Germany, Russia, France etc.).
Depending on the operating system, it is best to adjust the scanner’s HID settings. The following pages show
standard configurations according to the operating system.
Once connected, it is possible to read the content of barcodes scanned in a text editor or any other keyboard data
entry area.
Examples of predefined HID profiles
Scan the disconnect barcode before scanning one of the three profiles below.
DISCONNECT BLUETOOTH
<SW>66C50006000000000000
HID
PROFILE FOR
PC and Linux
<SW.Scanner>664301674500674600674700
HID
PROFILE FOR
Windows CE / Windows Mobile /
Android
<SW.Scanner>664301674502674600674700
HID
PROFILE FOR
iOS and MacOS
<SW.Scanner>664301674502674601674701
PDF Pro Evaluation

3110943 A User Manual_Tinyom2_v00_01_01_EN.docx Page 29/104
HID: TINYOM II configuration for PC / Android / Linux
1
HID CONNECTION 1/2
<SW>66C50006000000000000
2
HID CONNECTION 2/2
<SW>664301
3
AUTO DETECT CAPS LOCK AND NUM KEYS
<SW.Scanner>674500
4
iOS SPECIAL KEYS DISABLED
<SW.Scanner>674600
5
PC TYPE KEYBOARD
<SW.Scanner>674700
6
EMULATE FRENCH KEYBOARD
<SW>674001
OR
EMULATE NORTH AMERICAN KEYBOARD
<SW>674000
7
Take out and refit the battery
PDF Pro Evaluation

3110943 A User Manual_Tinyom2_v00_01_01_EN.docx Page 30/104
HID: Configuration for Windows CE / Windows Mobile 6.x
1
HID CONNECTION 1/2
<SW>66C50006000000000000
2
HID CONNECTION 2/2
<SW>664301
3
CAPS = OFF / NUM = ON
<SW.Scanner>674502
4
iOS SPECIAL KEYS DISABLED
<SW.Scanner>674600
5
PC TYPE KEYBOARD
<SW.Scanner>674700
6
EMULATE FRENCH KEYBOARD
<SW>674001
OR
EMULATE NORTH
AMERICAN KEYBOARD
<SW>674000
7
Take out and refit the battery
PDF Pro Evaluation

3110943 A User Manual_Tinyom2_v00_01_01_EN.docx Page 31/104
HID: Configuration for iOS / Mac OS
1
HID CONNECTION 1/2
<SW>66C50006000000000000
2
HID CONNECTION 2/2
<SW>664301
3
CAPS = OFF / NUM = ON
<SW.Scanner>674502
4
iOS SPECIAL KEYS ACTIVE
<SW.Scanner>674601
5
APPLE TYPE KEYBOARD
<SW.Scanner>674701
6
EMULATE FRENCH KEYBOARD
<SW>674001
OR
EMULATE NORTH AMERICAN KEYBOARD
<SW>674000
7
Take out and refit the battery
PDF Pro Evaluation

3110943 A User Manual_Tinyom2_v00_01_01_EN.docx Page 32/104
HID: Pairing for Android
1
Go to the
Settings
menu.
2
Activate Bluetooth by sliding the cursor to the right.
Then, tap the word Bluetooth.
3
Tap
Search for devices
.4When the device
SW61B
-
xxxxxxxxxx
appears,
select
it.
PDF Pro Evaluation

3110943 A User Manual_Tinyom2_v00_01_01_EN.docx Page 33/104
5
... Pairing in
progress ...
6
TINYOM II is now connected.
TINYOM II will connect automatically whenever the two devices are
both in range.
To stop devices connecting automatically, they must be unpaired.
To check that reading has worked properly, open a text editor and scan
some barcodes. If the text does not correspond to the barcode
scanned, switch the type of keyboard emulation between FRUS.
PDF Pro Evaluation

3110943 A User Manual_Tinyom2_v00_01_01_EN.docx Page 34/104
HID: Unpairing for Android
1
Go to the
Settings
menu.
2
Then,
select
the word
Bluetooth
.3Select
the
symbol with the hammer and spanner.
4
Select
Unpair
.
PDF Pro Evaluation

3110943 A User Manual_Tinyom2_v00_01_01_EN.docx Page 35/104
HID: Pairing for iOS
1
Go to the
Settings
menu.
2
Select
the word
Bluetooth
.3Activate Bluetooth by sliding the cursor to the right.
... Searching for devices ...
Make sure that TINYOM II is switched on.
PDF Pro Evaluation

3110943 A User Manual_Tinyom2_v00_01_01_EN.docx Page 36/104
4
The device
SW61B
-
xxxxxxxxxx
, which corresponds to TINYOM II, is
detected. Press to begin the pairing.
5
TINYOM II is now connected.
TINYOM II will connect automatically whenever the two devices are
both in range.
To stop devices connecting automatically, they must be unpaired.
To check that reading has worked properly, open a text editor and
scan some barcodes. If the text does not correspond to the barcode
scanned, switch the type of keyboard emulation between FRUS.
PDF Pro Evaluation

3110943 A User Manual_Tinyom2_v00_01_01_EN.docx Page 37/104
HID: Unpairing for iOS
1
Go to the
Settings
menu.
2
Select
the word
Bluetooth
.
3
Select the information icon .
PDF Pro Evaluation

3110943 A User Manual_Tinyom2_v00_01_01_EN.docx Page 38/104
4
Select
Forget This Device
.
Confirm the unpairing by selecting Forget This Device or
Disconnect.
PDF Pro Evaluation

3110943 A User Manual_Tinyom2_v00_01_01_EN.docx Page 39/104
Connection with the SPP profile
By default, TINYOM II is configured to use the SPP Slave profile with the security mode activated (authentication code
entry).
Blue LED
Connection status
OFF
None
ON
Connected
Flashing
Searching for a
connection
TINYOM II can connect using two SPP profiles
Master SPP mode: TINYOM II initiates the Bluetooth connection.
- You will need to scan a connection barcode.
- An authentication code is required.
- Increased security.
Slave SPP mode: The host device initiates the Bluetooth connection.
- Multiple devices can be connected to the host device at once.
- It is not necessary to scan a connection barcode.
PDF Pro Evaluation

3110943 A User Manual_Tinyom2_v00_01_01_EN.docx Page 40/104
Windows 7: SPP Slave connection
Allowing TINYOM II to find a PC
In the notification area, right-click the Bluetooth icon and
select Open Settings.
On the
Options
tab, tick the box “
Allow Bluetooth devices to find this PC
” and confirm by clicking
OK
.
PDF Pro Evaluation

3110943 A User Manual_Tinyom2_v00_01_01_EN.docx Page 41/104
Connecting TINYOM II as a slave device
Start TINYOM II.
In the notification area, right-click the Bluetooth icon and select
Add a Bluetooth Device.
Wait while the PC searches for devices.
When the TINYOM II that you wish to connect appears, select it and click the Next button.
If the device has already been connected previously, it will not appear in the list of devices to
add, but will be in the list of Bluetooth devices.
PDF Pro Evaluation

3110943 A User Manual_Tinyom2_v00_01_01_EN.docx Page 42/104
Depending on the level of security chosen for
the TINYOM II and compatibility with the
operating system, select Enter the device’s
pairing code or Pair without using a code
and click Next.
By default, TINYOM II is configured for
authentication code entry. Therefore, select
Enter the device’s pairing code.
The TINYOM II is now connected to the PC as a slave.
PDF Pro Evaluation

3110943 A User Manual_Tinyom2_v00_01_01_EN.docx Page 43/104
Windows 7: SPP Master connection
Checking the BDA address for the Bluetooth module
In the notification area, right-click the Bluetooth icon and select
Open Settings.
Select the
Hardware
tab.
Select the device Generic Bluetooth Radio and click Properties.
The BDA address is made up of 6 pairs of characters.
PDF Pro Evaluation

3110943 A User Manual_Tinyom2_v00_01_01_EN.docx Page 44/104
Creating a connection barcode
You must have the Tinyom II_BDA Generator software.
Double click the
Tinyom II_BDA Generator
icon.
Enter the BDA address you found in the previous step and click
OK.A connection barcode is generated automatically.
For further details on Tinyom II_BDA_Generator, please refer to the appendices.
PDF Pro Evaluation

3110943 A User Manual_Tinyom2_v00_01_01_EN.docx Page 45/104
Connecting TINYOM II as a master device
Scan the connection barcode, which is unique and
specific to each PC.
An infotip opens, indicating that a Bluetooth
device is trying to connect. Click the infotip.
If the infotip does not appear, remove and then
replace the TINYOM II’s battery.
In the “Add a Bluetooth Device” window, enter
the authentication code 0000 and click Next.
Wait for the TINYOM II to be installed.
The TINYOM II is now connected to the PC as a master.
PDF Pro Evaluation

3110943 A User Manual_Tinyom2_v00_01_01_EN.docx Page 46/104
Disconnecting a TINYOM II connected as a master device
Scan the disconnection barcode.
DISCONNECT BLUETOOTH
<SW.Scanner>66C50006000000000000
PDF Pro Evaluation

3110943 A User Manual_Tinyom2_v00_01_01_EN.docx Page 47/104
Windows 7: Identifying, listing and removing a Bluetooth device
Identifying the TINYOM II connection’s COM port
In the list of known Bluetooth devices, right
-
click the
TINYOM II whose COM port number you want to check
and select Properties.
On the
Hardware
tab, look for the associated COM port number for this device in the list.
On the Service tab, check that the service is active (Serial port box ticked).
PDF Pro Evaluation

3110943 A User Manual_Tinyom2_v00_01_01_EN.docx Page 48/104
Identifying a TINYOM II from the list of Bluetooth devices
It is possible to distinguish TINYOM IIs from other
devices in the list by using their names. TINYOM IIs
always use the same naming convention:
SW61 or SW61B followed by the BDA address.*
*BDA address = Unique Bluetooth Device Address
Each TINYOM II has a label that shows its BDA address.
PDF Pro Evaluation

3110943 A User Manual_Tinyom2_v00_01_01_EN.docx Page 49/104
List of known Bluetooth devices
In the notification area, right-click the Bluetooth icon and select
Show Bluetooth Devices.
PDF Pro Evaluation

3110943 A User Manual_Tinyom2_v00_01_01_EN.docx Page 50/104
Removing a Bluetooth device
In the list of known Bluetooth devices, right
-
click on the
TINYOM II to be removed.
Select Remove Device.
Confirm the removal by clicking
Yes
.
PDF Pro Evaluation

3110943 A User Manual_Tinyom2_v00_01_01_EN.docx Page 51/104
Windows CE: Connecting TINYOM II as a master device
Creating a connection barcode
You must have the Tinyom II_BDA Generator software.
Double click the
Tinyom II_BDA Generator
icon.
Enter the BDA address you found in the previous step and click
OK.A connection barcode is generated automatically.
For further details on Tinyom II_BDA_Generator, please refer to the appendices.
PDF Pro Evaluation

3110943 A User Manual_Tinyom2_v00_01_01_EN.docx Page 52/104
Connecting TINYOM II as a master device
Scan the connection barcode, which is unique and
specific to each device.
Enter the authentication code for the TINYOM II, 0000, and click OK.
The TINYOM II is then connected.
To connect
TINYOM II without having to enter the authentication code, you must first connect
TINYOM II as a slave device, and then connect it as a master.
PDF Pro Evaluation

3110943 A User Manual_Tinyom2_v00_01_01_EN.docx Page 53/104
Windows CE: Connecting TINYOM II as a slave device
Go to the menu Start Settings Control Panel Bluetooth.
Then select
File New Connection
Pair with Remote Device
.
... Searching ...
Select TINYOM II,
SW61B
-
xxxxx
.
PDF Pro Evaluation

3110943 A User Manual_Tinyom2_v00_01_01_EN.docx Page 54/104
Wait for the device to pair.
PDF Pro Evaluation

3110943 A User Manual_Tinyom2_v00_01_01_EN.docx Page 55/104
CONFIGURATION
Accelerometer
START
THE ACCELEROMETER
<SW>70FE000801050000003C0005
STOP
THE ACCELEROMETER
<SW>70FE000800050000003C0005
The TINYOM II can be armed using movements along two axes. These axes represent rotation of the wrist upwards
(X axis) or to the side (Y axis). For each of the axes, the arming phase can be configured in increments of 15°.
PDF Pro Evaluation

3110943 A User Manual_Tinyom2_v00_01_01_EN.docx Page 56/104
Positive X axis (+)
X AXIS = 0°, Y AXIS = 0°. RAPID ACTIVATION
<SW>70FB000C0000000023141400283F3710
X AXIS = 0°, Y AXIS = 0°. SLOW ACTIVATION
<SW>70FB000C0000000023141404283F3710
X AXIS = +15° RAPID ACTIVATION
<SW>70FB000C000F000023141400283F3710
X AXIS = +15° SLOW ACTIVATION
<SW>70FB000C000F000023141404283F3710
X AXIS = +30° RAPID ACTIVATION
<SW>70FB000C001E000023141400283F3710
X AXIS = +30° SLOW ACTIVATION
<SW>70FB000C001E000023141404283F3710
PDF Pro Evaluation

3110943 A User Manual_Tinyom2_v00_01_01_EN.docx Page 57/104
X AXIS = +45° RAPID ACTIVATION
<SW>70FB000C002D000023141400283F3710
X AXIS = +45° SLOW ACTIVATION
<SW>70FB000C002D000023141404283F3710
X AXIS = +60° RAPID ACTIVATION
<SW>70FB000C003C000023141400283F3710
X AXIS = +60° SLOW ACTIVATION
<SW>70FB000C003C000023141404283F3710
X AXIS = +75° RAPID ACTIVATION
<SW>70FB000C004B000023141400283F3710
X AXIS = +75° SLOW ACTIVATION
<SW>70FB000C004B000023141404283F3710
X AXIS = +90° RAPID ACTIVATION
<SW>70FB000C005A000023141400283F3710
X AXIS = +90° SLOW ACTIVATION
<SW>70FB000C005A000023141404283F3710
PDF Pro Evaluation

3110943 A User Manual_Tinyom2_v00_01_01_EN.docx Page 58/104
Negative X axis (-)
X AXIS =
-
15° RAPID ACTIVATION
<SW>70FB000C010F000023141400283F3710
X AXIS = -15° SLOW ACTIVATION
<SW>70FB000C010F000023141404283F3710
X AXIS = -30° RAPID ACTIVATION
<SW>70FB000C011E000023141400283F3710
X AXIS = -30° SLOW ACTIVATION
<SW>70FB000C011E000023141404283F3710
X AXIS = -45° RAPID ACTIVATION
<SW>70FB000C012D000023141400283F3710
X AXIS = -45° SLOW ACTIVATION
<SW>70FB000C012D000023141404283F3710
PDF Pro Evaluation

3110943 A User Manual_Tinyom2_v00_01_01_EN.docx Page 59/104
X AXIS = -60° RAPID ACTIVATION
<SW>70FB000C013C000023141400283F3710
X AXIS = -60° SLOW ACTIVATION
<SW>70FB000C013C000023141404283F3710
X AXIS = -75° RAPID ACTIVATION
<SW>70FB000C014B000023141400283F3710
X AXIS = -75° SLOW ACTIVATION
<SW>70FB000C014B000023141404283F3710
X AXIS = -90° RAPID ACTIVATION
<SW>70FB000C015A000023141400283F3710
X AXIS = -90° SLOW ACTIVATION
<SW>70FB000C015A000023141404283F3710
PDF Pro Evaluation

3110943 A User Manual_Tinyom2_v00_01_01_EN.docx Page 60/104
Positive Y axis (+)
X AXIS = 0°, Y AXIS = 0°. RAPID ACTIVATION
<SW>70FB000C0000000023141400283F3710
X AXIS = 0°, Y AXIS = 0°. SLOW ACTIVATION
<SW>70FB000C0000000023141404283F3710
Y AXIS = +15° RAPID ACTIVATION
<SW>70FB000C0000000F23141400283F3710
Y AXIS = +15° SLOW ACTIVATION
<SW>70FB000C0000000F23141404283F3710
Y AXIS = +30° RAPID ACTIVATION
<SW>70FB000C0000001E23141400283F3710
Y AXIS = +30° SLOW ACTIVATION
<SW>70FB000C0000001E23141404283F3710
PDF Pro Evaluation

3110943 A User Manual_Tinyom2_v00_01_01_EN.docx Page 61/104
Y AXIS = +45° RAPID ACTIVATION
<SW>70FB000C0000002D23141400283F3710
Y AXIS = +45° SLOW ACTIVATION
<SW>70FB000C0000002D23141404283F3710
Y AXIS = +60° RAPID ACTIVATION
<SW>70FB000C0000003C23141400283F3710
Y AXIS = +60° SLOW ACTIVATION
<SW>70FB000C0000003C23141404283F3710
Y AXIS = +75° RAPID ACTIVATION
<SW>70FB000C0000004B23141400283F3710
Y AXIS = +75° SLOW ACTIVATION
<SW>70FB000C0000004B23141404283F3710
Y AXIS = +90° RAPID ACTIVATION
<SW>70FB000C0000005A23141400283F3710
Y AXIS = +90° SLOW ACTIVATION
<SW>70FB000C0000005A23141404283F3710
PDF Pro Evaluation

3110943 A User Manual_Tinyom2_v00_01_01_EN.docx Page 62/104
Negative Y axis (-)
Y AXIS =
-
15° RAPID ACTIVATION
<SW>70FB000C0000010F23141400283F3710
Y AXIS = -15° SLOW ACTIVATION
<SW>70FB000C0000010F23141404283F3710
Y AXIS = -30° RAPID ACTIVATION
<SW>70FB000C0000011E23141400283F3710
Y AXIS = -30° SLOW ACTIVATION
<SW>70FB000C0000011E23141404283F3710
Y AXIS = -45° RAPID ACTIVATION
<SW>70FB000C0000012D23141400283F3710
Y AXIS = -45° SLOW ACTIVATION
<SW>70FB000C0000012D23141404283F3710
PDF Pro Evaluation

3110943 A User Manual_Tinyom2_v00_01_01_EN.docx Page 63/104
Y AXIS = -60° RAPID ACTIVATION
<SW>70FB000C0000013C23141400283F3710
Y AXIS = -60° SLOW ACTIVATION
<SW>70FB000C0000013C23141404283F3710
Y AXIS = -75° RAPID ACTIVATION
<SW>70FB000C0000014B23141400283F3710
Y AXIS = -75° SLOW ACTIVATION
<SW>70FB000C0000014B23141404283F3710
Y AXIS = -90° RAPID ACTIVATION
<SW>70FB000C0000015A23141400283F3710
Y AXIS = -90° SLOW ACTIVATION
<SW>70FB000C0000015A23141404283F3710
PDF Pro Evaluation

3110943 A User Manual_Tinyom2_v00_01_01_EN.docx Page 64/104
Keyboard emulation
Configuration of type of keyboard emulated with HID connection only.
Keyboard type
PC TYPE KEYBOARD
<SW>674700
APPLE TYPE KEYBOARD
<SW>674701
Apple keyboard special keys
ENABLE iOS SPECIAL KEYS
<SW>674601
DISABLE
iOS SPECIAL KEYS
<SW>674600
PDF Pro Evaluation

3110943 A User Manual_Tinyom2_v00_01_01_EN.docx Page 65/104
PC keyboard special keys
AUTO DETECT CAPS AND NUM KEYS
<SW>674500
CAPS = OFF, NUM = OFF
<SW>674501
CAPS = OFF, NUM = ON
<SW>674502
CAPS = ON, NUM = OFF
<SW>674503
CAPS = ON, NUM = ON
<SW>674504
ALT KEY ENABLED
<SW>674301
ALT KEY DISABLED
<SW>674300
CONTROL CHARACTER CONVERSION ENABLED
<SW>674401
CONTROL CHARACTER CONVERSION DISABLED
<SW>674400
PDF Pro Evaluation

3110943 A User Manual_Tinyom2_v00_01_01_EN.docx Page 66/104
International keyboards
With a HID connection, you will need to indicate the type of keyboard emulated.
NORTH AMERICA
<SW>674000
FRANCE
<SW>674001
GERMANY
<SW>674002
CANADIAN FRENCH WINDOWS 95/98
<SW>674003
CANADIAN FRENCH WINDOWS XP/2000
<SW>674004
SPAIN
<SW>674005
ITALY
<SW>674006
SWEDEN
<SW>674007
UNITED KINGDOM
<SW>674008
JAPAN
<SW>674009
PDF Pro Evaluation

3110943 A User Manual_Tinyom2_v00_01_01_EN.docx Page 67/104
BRAZILIAN PORTUGUESE
<SW>67400A
IBM / NCR TERMINALS
<SW>67400B
CZECH
<SW>67400C
SLOVAK
<SW>67400D
HUNGARIAN
<SW>67400E
SWISS GERMAN
<SW>67400F
SWISS FRENCH
<SW>674010
DANISH
<SW>674011
NORWEGIAN
<SW>674012
HUNGARIAN
<SW>674013
DUTCH
<SW>674014
PDF Pro Evaluation

3110943 A User Manual_Tinyom2_v00_01_01_EN.docx Page 68/104
PORTUGUESE
<SW>674015
BELGIAN FRENCH
<SW>674016
PDF Pro Evaluation

3110943 A User Manual_Tinyom2_v00_01_01_EN.docx Page 69/104
Bluetooth
Discoverable
It is possible to configure TINYOM II so that it is either visible or invisible to other Bluetooth devices.
INVISIBLE
<SW>664100
VISIBLE
<SW>664102
Authorisation request for pairing
AUTHORISATION REQUEST FOR PAIRING DISABLED
<SW>664600
AUTHORISATION REQUEST FOR PAIRING ENABLED
<SW>664601
Preamble
When TINYOM II sends a SSP message to a device, the scanner adds a character to the header.
NO PREAMBLE
<SW>60C00000
PREAMBLE: STX
<SW>60C0000102
PDF Pro Evaluation

3110943 A User Manual_Tinyom2_v00_01_01_EN.docx Page 70/104
Postamble
When TINYOM II sends a SSP message to a device, the scanner adds a character to the end of frame.
NO POSTAMBLE
<SW>60C10000
POSTAMBLE: CARRIAGE RETURN + LINE FEED
<SW>60C100020D0A
POSTAMBLE: ETX
<SW>60C1000103
All possible preamble and postamble combinations can be created using the data in the table below. For a preamble
or postamble that is not listed below, please contact technical support.
PDF Pro Evaluation

3110943 A User Manual_Tinyom2_v00_01_01_EN.docx Page 71/104
Inserting characters at the beginning and end of frame
AUTOMATICALLY INSERT <STX> (02H) AT THE START
OF FRAME
BEWARE OF DUPLICATION WITH THE PREAMBLE
<SW>704302
<SW>704403
AUTOMATICALLY INSERT <ETX> (03H) AT THE END OF
FRAME
BEWARE OF DUPLICATION WITH THE POSTAMBLE
All possible character combinations to insert at the start and end of frame can be created using the data in the table
below. For a start of frame or end of frame that is not listed below, please contact technical support.
PDF Pro Evaluation

3110943 A User Manual_Tinyom2_v00_01_01_EN.docx Page 72/104
Delay between two messages
Setting a delay between two messages helps avoid overlapping messages if the host system is slower than the
TINYOM II.
0
ms
<SW>60810000
10
ms
<SW>6081000A
30
ms
<SW>6081001E
50
ms
<SW>60810032
80
ms
<SW>60810050
100
ms
<SW>60810064
200
ms
<SW>608100C8
500
ms
<SW>608101F4
PDF Pro Evaluation

3110943 A User Manual_Tinyom2_v00_01_01_EN.docx Page 73/104
Preventing duplicate scanning
This feature helps to avoid reading the same barcode twice. After enabling the feature, you must then set the period
of time for which it will remain active after a scan. A time of zero will disable the feature.
Enabling and disabling
DOUBLE SCAN PREVENTION ENABLED
<SW>705001
DOUBLE SCAN PREVENTION DISABLED
<SW>705000
Period of time between 2 identical consecutive barcodes
0
ms
<SW>71800000
100
ms
<SW>71800064
200
ms
<SW>718000C8
500
ms
<SW>718001F4
PDF Pro Evaluation

3110943 A User Manual_Tinyom2_v00_01_01_EN.docx Page 74/104
1000
ms
<SW>718003E8
1500
ms
<SW>718005DC
2000
ms
<SW>718007D0
PDF Pro Evaluation

3110943 A User Manual_Tinyom2_v00_01_01_EN.docx Page 75/104
Configuring the beam
Light intensity
The below barcodes allow you to set the brightness of the LED depending on the environment, in order to optimise
battery life.
NORMAL LIGHTING MODE
USE CONFIGURED LIGHT OUTPUT
<SW>7B4500
<SW>7B4501
LIGHTING MODE WITH AUTOMATIC
ADJUSTMENT DEPENDING ON THE
ENVIRONMENT
LIGHT INTENSITY OFF
<SW>7B4600
LIGHT INTENSITY 5%
<SW>7B4605
LIGHT INTENSITY 10%
<SW>7B460A
LIGHT INTENSITY 15%
<SW>7B460F
PDF Pro Evaluation

3110943 A User Manual_Tinyom2_v00_01_01_EN.docx Page 76/104
LIGHT INTENSITY 20%
<SW>7B4614
LIGHT INTENSITY 25%
<SW>7B4619
LIGHT INTENSITY 30%
<SW>7B461E
LIGHT INTENSITY 35%
<SW>7B4623
LIGHT INTENSITY 40%
<SW>7B4628
LIGHT INTENSITY 80%
<SW>7B4650
LIGHT INTENSITY 100%
<SW>7B4664
PDF Pro Evaluation

3110943 A User Manual_Tinyom2_v00_01_01_EN.docx Page 77/104
Beam illumination time
You can use the barcodes below to configure the time the beam is on for when reading barcodes.
BEAM TIME 2 SECONDS
<SW>70800002
BEAM TIME 5 SECONDS
<SW>70800005
BEAM TIME 10 SECONDS
<SW.Scanner>7080000A
BEAM TIME 15 SECONDS
<SW>7080000F
BEAM TIME 20
SECONDS
<SW>70800014
BEAM TIME 30 SECONDS
<SW>7080001E
BEAM TIME 60 SECONDS
<SW.Scanner>7080003C
BEAM TIME 120 SECONDS
<SW>70800078
PDF Pro Evaluation

3110943 A User Manual_Tinyom2_v00_01_01_EN.docx Page 78/104
Beam on or off after scanning
With this option, the beam can be set to light on or go off after reading a barcode. The time the beam stays on is the
same as when it is first switched on.
BEAM ON AFTER SCANNING
<SW>704600
BEAM OFF AFTER SCANNING
<SW>704601
Configuring the target and the light
It is possible to configure the target so that it comes on at the same time as the light or at a different time.
TARGET AND LIGHT ACTIVATED AT THE SAME TIME
<SW>704500
<SW>704501
TARGET ACTIVATED, THEN LIGHT ACTIVATED AFTER A
DEFINED TIME
TARGET ACTIVATED ON THE FIRST TRIGGER, THEN
LIGHT IS ACTIVATED ON THE SECOND TRIGGER WITHIN A
DEFINED TIME
SET THE TIME TO AT LEAST 500 MS
<SW>704502
PDF Pro Evaluation

3110943 A User Manual_Tinyom2_v00_01_01_EN.docx Page 79/104
Configuring the time between the target and the light
0
ms
<SW>70810000
200
ms
<SW>708100C8
500
ms
<SW>708101F4
1000
ms
<SW>708103E8
1500
ms
<SW>708105DC
2000
ms
<SW>708107D0
PDF Pro Evaluation

3110943 A User Manual_Tinyom2_v00_01_01_EN.docx Page 80/104
Configuring the sound signal
Enabling / disabling the sound
SOUND ENABLED
<SW>724401
SOUND DISABLED
<SW>724400
Sound frequency
Use the below barcodes to configure the sound frequency.
SOUND 1010
HZ
<SW>728003F2
SOUND 1230
HZ
<SW>728004CE
SOUND 1800
HZ
<SW>72800708
SOUND 3000
HZ
<SW>72800BB8
SOUND 3190
HZ
<SW>72800C76
SOUND 5000
HZ
<SW>72801388
PDF Pro Evaluation

3110943 A User Manual_Tinyom2_v00_01_01_EN.docx Page 81/104
Sound volume
Use the below barcodes to configure the sound volume.
MINIMUM VOLUME
<SW>724500
AVERAGE VOLUME
<SW>724502
MAXIMUM VOLUME
<SW>724501
Enabling and disabling the sound signal on start-up
SOUND SIGNAL ENABLED
<SW.Scanner>724001
SOUND SIGNAL DISABLED
<SW.Scanner>724000
PDF Pro Evaluation

3110943 A User Manual_Tinyom2_v00_01_01_EN.docx Page 82/104
Configuring the length of time before automatic switch-off
It is possible to configure the automatic switch-off time for TINYOM II if there is no activity. There are two different
cases here:
- TINYOM II connected to a device via Bluetooth.
- TINYOM II not connected.
Switch-off time with a Bluetooth connection
NO SWITCH OFF
<SW>75820000
SWITCH OFF AFTER 5 MIN.
<SW>7582012C
SWITCH OFF AFTER 10 MIN.
<SW>75820258
SWITCH OFF AFTER 20 MIN.
<SW>758204B0
SWITCH OFF AFTER 30 MIN.
<SW>75820708
SWITCH OFF AFTER 60 MIN.
<SW>75820E10
PDF Pro Evaluation

3110943 A User Manual_Tinyom2_v00_01_01_EN.docx Page 83/104
Switch-off time without a Bluetooth connection
NO SWITCH OFF
<SW>75810000
SWITCH OFF AFTER 1 MIN.
<SW>7581003C
SWITCH OFF AFTER 2 MIN.
<SW>75810078
SWITCH OFF AFTER 5 MIN.
<SW>7581012C
SWITCH OFF AFTER 10 MIN.
<SW>75810258
SWITCH OFF AFTER 20 MIN.
<SW>758104B0
SWITCH OFF AFTER 30 MIN.
<SW>75810708
SWITCH OFF AFTER 60 MIN.
<SW>75810E10
PDF Pro Evaluation

3110943 A User Manual_Tinyom2_v00_01_01_EN.docx Page 84/104
Setting the vibration
For a correct reading
VIBRATION ON FOR A CORRECT READING
<SW.Scanner>724801
VIBRATION OFF FOR A CORRECT READING
<SW.Scanner>724800
VIBRATE FOR 500
ms
<SW.Scanner>728301F4
VIBRATE FOR 1000
ms
<SW.Scanner>728303E8
VIBRATE FOR 2000
ms
<SW.Scanner>728307D0
VIBRATE FOR 3000
ms
<SW.Scanner>72830BB8
VIBRATE FOR 4000
ms
<SW.Scanner>72830FA0
VIBRATE FOR 5000
ms
<SW.Scanner>72831388
PDF Pro Evaluation

3110943 A User Manual_Tinyom2_v00_01_01_EN.docx Page 85/104
For an incorrect reading
VIBRATION ON FOR AN INCORRECT READING
<SW.Scanner>724E01
VIBRATION
OFF FOR AN INCORRECT READING
<SW.Scanner>724E00
VIBRATE FOR 500
ms
<SW.Scanner>728401F4
VIBRATE FOR 1000
ms
<SW.Scanner>728403E8
VIBRATE FOR 2000
ms
<SW.Scanner>728407D0
VIBRATE FOR 3000
ms
<SW.Scanner>72840BB8
VIBRATE FOR 4000
ms
<SW.Scanner>72840FA0
VIBRATE FOR 5000
ms
<SW.Scanner>72841388
PDF Pro Evaluation

3110943 A User Manual_Tinyom2_v00_01_01_EN.docx Page 86/104
Enabling and disabling barcode types
DISABLE ALL BARCODE TYPES
<CCMD>4003
Australian post
Australian Post
-
ACTIVE
<SW>344001
Australian Post
-
DISABLED
<SW>344000
Aztec
Aztec
-
ACTIVE
<SW>534001
Aztec
-
DISABLED
<SW>534000
British Royal Mail BPO
British Royal Mail BPO
-
ACTIVE
<SW>324001
BPO -DISABLED
<SW>324000
Canada post
Canada Post
-
ACTIVE
<SW>334001
Canada Post
-
DISABLED
<SW>334000
Codabar
Codabar
-
ACTIVE
<SW>404001
Codabar
-
DISABLED
<SW>404000
PDF Pro Evaluation

3110943 A User Manual_Tinyom2_v00_01_01_EN.docx Page 87/104
Codablock A
Codablock
-
Codablock A
-
ACTIVE
<SW>4D4001
Codablock
-
Codablock A
-
DISABLED
<SW>4D4000
Codablock F
Codablock
-
Codablock F
-
ACTIVE
<SW>4D4101
Codablock
-
Codablock F
-
DISABLED
<SW>4D4100
Code 11
Code 11
-
ACTIVE
<SW>4A4001
Code 11
-
DISABLED
<SW>4A4000
Code 39
Code 39
-
ACTIVE
<SW>424001
Code 39
-
DISABLED
<SW>424000
Code 93 / Code 93i
Code 93 / Code 93i
-
ACTIVE
<SW>414001
Code 93
/ Code 93i
-
DISABLED
<SW>414000
Code 128
Code 128 / GS1
-
128 -Code 128 ACTIVE
<SW>434001
Code 128 / GS1
-
128 -Code 128 DISABLED
<SW>434000
PDF Pro Evaluation

3110943 A User Manual_Tinyom2_v00_01_01_EN.docx Page 88/104
GS1-128
Code 128 / GS1
-
128 -GS1-128 ACTIVE
<SW>434201
Code 128 / GS1
-
128 -GS1-128 DISABLED
<SW>434200
DataMatrix
DataMatrix
-
ACTIVE
<SW>544001
DataMatrix
-
DISABLED
<SW>544000
Dutch Post
Dutch Post
-
ACTIVE
<SW>364001
Dutch Post
-
DISABLED
<SW>364000
UPC-A
EAN/UPC
-
UPC-A ACTIVE
<SW>4B4001
EAN/UPC
-
UPC-A DISABLED
<SW>4B4000
UPC-E
EAN/UPC
-
UPC-E ACTIVE
<SW>4B4101
EAN/UPC
-
UPC-E DISABLED
<SW>4B4100
EAN-8
EAN/UPC
-
EAN-8 ACTIVE
<SW>4B4201
EAN/UPC
-
EAN-8 DISABLED
<SW>4B4200
PDF Pro Evaluation

3110943 A User Manual_Tinyom2_v00_01_01_EN.docx Page 89/104
EAN-13
EAN/UPC
-
EAN-13 ACTIVE
<SW>4B4301
EAN/UPC
-
EAN-13 DISABLED
<SW>4B4300
UPC-E1
EAN/UPC
-
UPC-E1 -ACTIVE
<SW>4B4C01
EAN/UPC
-
UPC-E1 -DISABLED
<SW>4B4C00
GS1 Composite - CC-A/B
GS1 Composite
-CC-
A/B -ACTIVE
<SW>564001
GS1 Composite
-CC-
A/B -DISABLED
<SW>564000
GS1 Composite - CC-C
GS1
Composite
-CC-
C -ACTIVE
<SW>564101
GS1 Composite
-CC-
C -DISABLED
<SW>564100
GS1 DataBar (RSS) - Omni-directional
GS1 DataBar (RSS)
-
Omni
-
directional
-
ACTIVE
<SW>4F4001
GS1 DataBar (RSS)
-
Omni
-
directional
-
DISABLED
<SW>4F4000
GS1 DataBar (RSS) - Limited
GS1 DataBar (RSS)
-
Limited
-
ACTIVE
<SW>4F4101
GS1 DataBar (RSS)
-
Limited
-
DISABLED
<SW>4F4100
PDF Pro Evaluation

3110943 A User Manual_Tinyom2_v00_01_01_EN.docx Page 90/104
GS1 DataBar (RSS) - Expanded
GS1 DataBar (RSS)
-
Expanded
-
ACTIVE
<SW>4F4201
GS1 DataBar (RSS)
-
Expanded
-
DISABLED
<SW>4F4200
HanXin
HanXin
-
ACTIVE
<SW>5A4001
HanXin
-
DISABLED
<SW>5A4000
Infomail
Infomail
-
ACTIVE
<SW>394001
Infomail
-
DISABLED
<SW>394000
Intelligent mail
Intelligent mail
-
ACTIVE
<SW>3A4001
Intelligent mail
-
DISABLED
<SW>3A4000
Interleaved 2 of 5
Interleaved 2 of 5
-
ACTIVE
<SW>444001
Interleaved 2 of 5
-
DISABLED
<SW>444000
Japan Post
Japan Post
-
ACTIVE
<SW>354001
Japan Post
-
DISABLED
<SW>354000
PDF Pro Evaluation

3110943 A User Manual_Tinyom2_v00_01_01_EN.docx Page 91/104
Matrix 2 of 5
Matrix 2 of 5
-
ACTIVE
<SW>454001
Matrix 2 of 5
-
DISABLED
<SW>454000
MaxiCode
MaxiCode
-
ACTIVE
<SW>524001
MaxiCode
-
DISABLED
<SW>524000
MicroPDF417
MicroPDF417
-
ACTIVE
<SW>4C4201
MicroPDF417
-
DISABLED
<SW>4C4200
MSI Code
MSI Code
-
ACTIVE
<SW>464001
MSI Code
-
DISABLED
<SW>464000
PDF417
PDF417
-
ACTIVE
<SW>4C4001
PDF417
-
DISABLED
<SW>4C4000
Planet
Planet
-
ACTIVE
<SW>314001
Planet
-
DISABLED
<SW>314000
PDF Pro Evaluation

3110943 A User Manual_Tinyom2_v00_01_01_EN.docx Page 92/104
Plessey Code
Plessey Code
-
ACTIVE
<SW>474001
Plessey Code
-
DISABLED
<SW>474000
Postnet
Postnet
-
ACTIVE
<SW>304001
Postnet
-
DISABLED
<SW>304000
QR Code
QR Code
-
ACTIVE
<SW>554001
QR Code
-
DISABLED
<SW>554000
Standard 2 of 5
Standard 2 of 5
-
ACTIVE
<SW>484001
Standard 2 of 5
-
DISABLED
<SW>484000
Sweden Post
Sweden Post
-
ACTIVE
<SW>374001
Sweden Post
-
DISABLED
<SW>374000
Telepen
Telepen
-
ACTIVE
<SW>494001
Telepen
-
DISABLED
<SW>494000
PDF Pro Evaluation

3110943 A User Manual_Tinyom2_v00_01_01_EN.docx Page 93/104
TLC 39
TLC 39
-
ACTIVE
<SW>4E4001
TLC 39
-
DISABLED
<SW>4E4000
PDF Pro Evaluation

3110943 A User Manual_Tinyom2_v00_01_01_EN.docx Page 94/104
APPENDICES
APPENDIX 1: Installing a Bluetooth dongle
If a Bluetooth device is already installed on the PC, uninstall it before installing a Bluetooth
dongle.
If Bluetooth management software, such as BlueSoleil, is installed, uninstall it.
Checking and uninstalling
Start menu Right-click on
Computer Properties
Open the Device Manager menu.
Another way of opening the device
manager:
Start menu Control Panel System
Device Manager
PDF Pro Evaluation

3110943 A User Manual_Tinyom2_v00_01_01_EN.docx Page 95/104
Right-click on the Bluetooth device
Select uninstall
In the window confirming that you want to uninstall
the device, tick the box “Delete the driver software
for this device” and click the OK button.
Once the device has been uninstalled,
it will disappear from the device
manager.
PDF Pro Evaluation

3110943 A User Manual_Tinyom2_v00_01_01_EN.docx Page 96/104
Installing a Bluetooth dongle
Switch off the PC.
Insert the dongle in a USB port.
Switch on the PC.
When the PC has started up, the dongle will be detected and installed automatically.
When all the flags are green, this means that the
Bluetooth dongle is correctly installed.
Check that the installation has been successful by
verifying that the Bluetooth settings are active in the
Device Manager.
PDF Pro Evaluation

3110943 A User Manual_Tinyom2_v00_01_01_EN.docx Page 97/104
APPENDIX 2: Wall mounting for battery Charging Dock
The charging dock for TINYOM II batteries can be fitted to a DIN rail.
Features of the DIN rail
The rail can be solid or perforated. To make it easier to mount the rail, it is best to use a perforated rail.
We recommend using rails that are 7.5 mm or 15 mm thick.
Dimensions of a 7.5-mm DIN rail Dimensions of a 15-mm DIN rail
Fitting a wall mounting clip to the back of the charging dock
- Remove and keep the mounting screw for the plastic charging dock stand.
- Fit the wall mounting clip and screw it in fully. Be aware of the mounting direction (see photo below).
PDF Pro Evaluation

3110943 A User Manual_Tinyom2_v00_01_01_EN.docx Page 98/104
Attaching the charger to the DIN rail
After fitting the wall mounting clip to the back of the charging dock, the charging dock can then simply be clipped
onto the rail.
Attaching the DIN rail to the wall
The person fitting the rail is responsible for deciding where to position it, and for the mounting screws.
Positioning chargers on the rail
There must be a minimum distance of 5 mm between each charging dock.
The chargers must be connected from underneath, meaning that batteries will be placed in the top part of the
charging docks.
PDF Pro Evaluation

3110943 A User Manual_Tinyom2_v00_01_01_EN.docx Page 99/104
Connecting to a multi-charger kit
Each charging dock must be connected in sequence to
an outlet in the chain for its power supply.
Multi-charger kit (supplied with a power cord)
Status LED
Red Battery charging in progress
Green Battery charged
Off No battery
Dock not powered
PDF Pro Evaluation

3110943 A User Manual_Tinyom2_v00_01_01_EN.docx Page 100/104
APPENDIX 3: Generating a connection barcode
You must have the Tinyom II_BDA Generator software.
Double click the
Tinyom II_BDA Generator
icon.
Enter the BDA address you found previously and click
OK.A connection barcode is generated automatically.
PDF Pro Evaluation
 Loading...