

TV2 Room Pressure Monitor Quick Start Guide
1.
The Care and Use guide for your TV2 Room Pressure Monitor can be downloaded here:
www.e2di.com/usersguides.html
Please print out the Users Guide.
Although you should use the Users Guide to familiarize yourself with the TV2 installation
and use, you can use the quick-start instructions below, if you are in a hurry.
Your TV2 room pressure monitor comes with free software to copy the logged data from your TV2
to your computer. To download the free TView software go to the download page under support at
www.e2di.com and click on TView 6.3 link Room Pressure Monitor Software, copy the software to
your desktop, unzip it and click on 'Setup' to install.
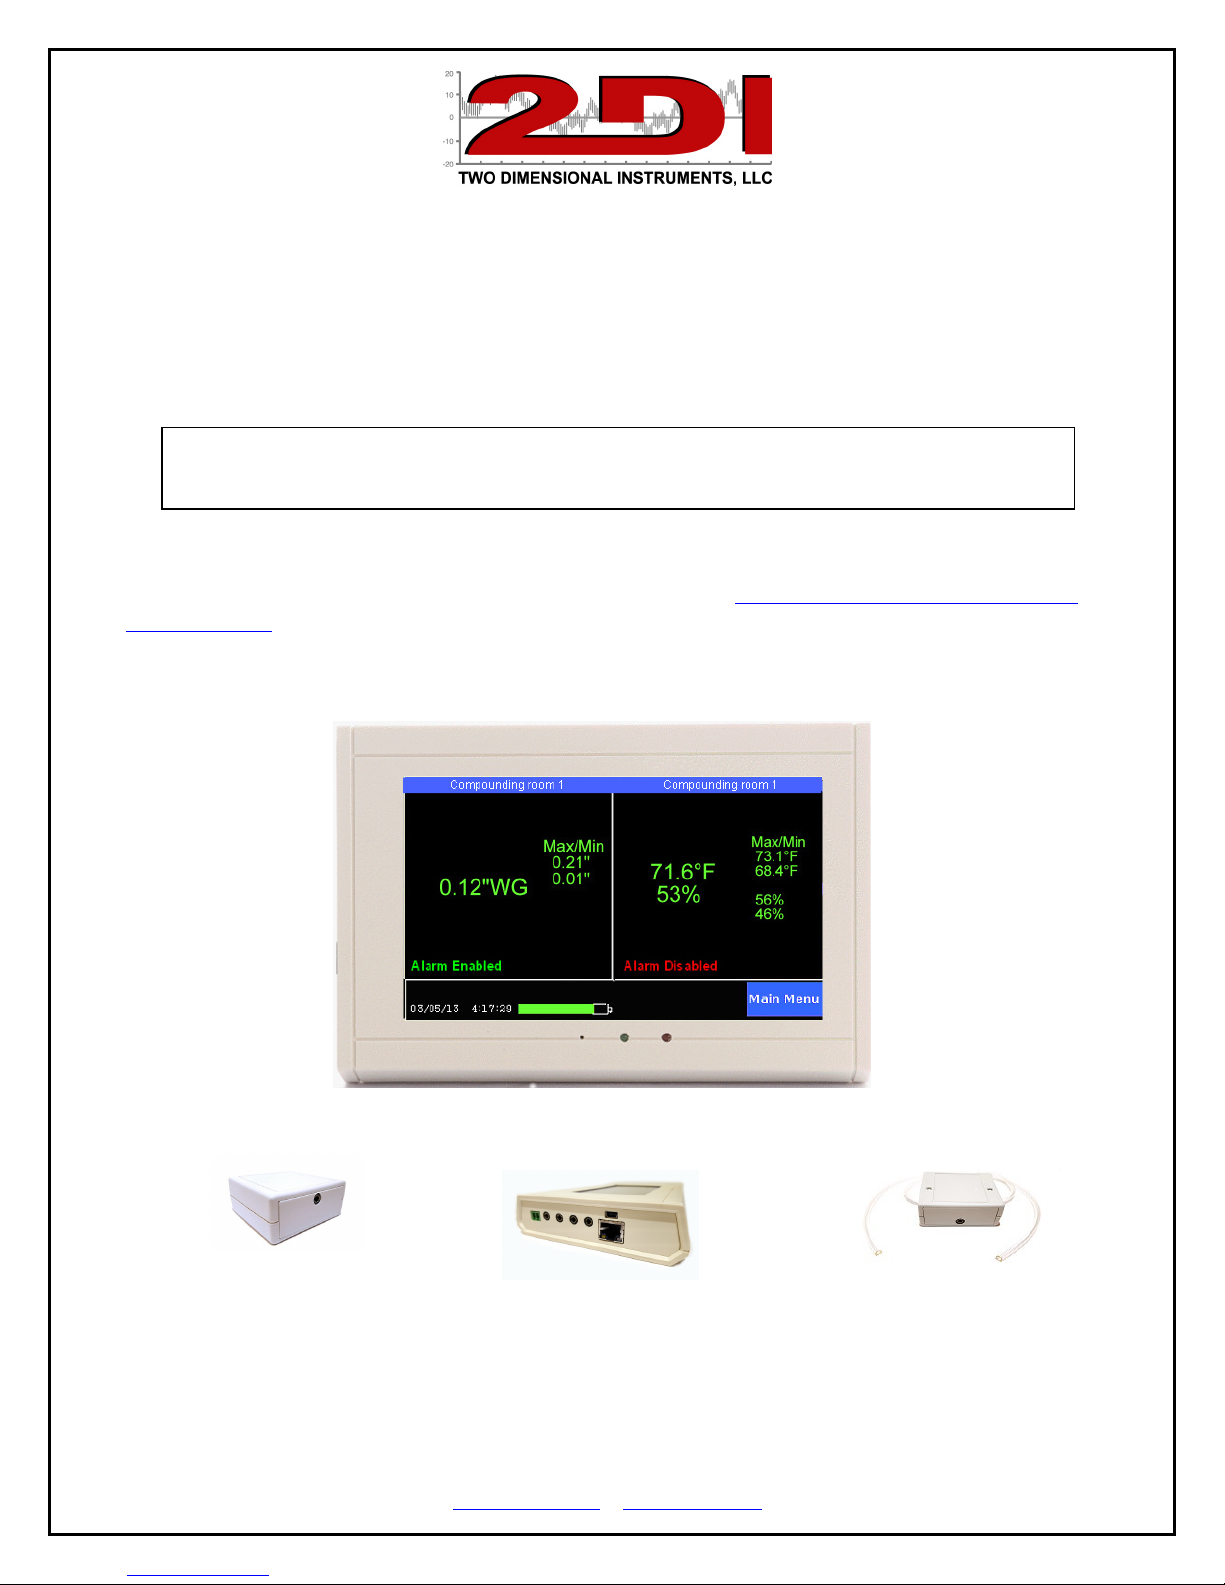
Temperature/RH Sensor TV2 sensor sockets Pressure Sensor
P O Box 159 • Crestwood, KY 40014 • (502) 243-0042 • (502) 243-0039 fax
www.e2di.com • info@2di.com
QUICKSTART
Your TV2 can be installed and operating in just a few minutes by following these simple steps.
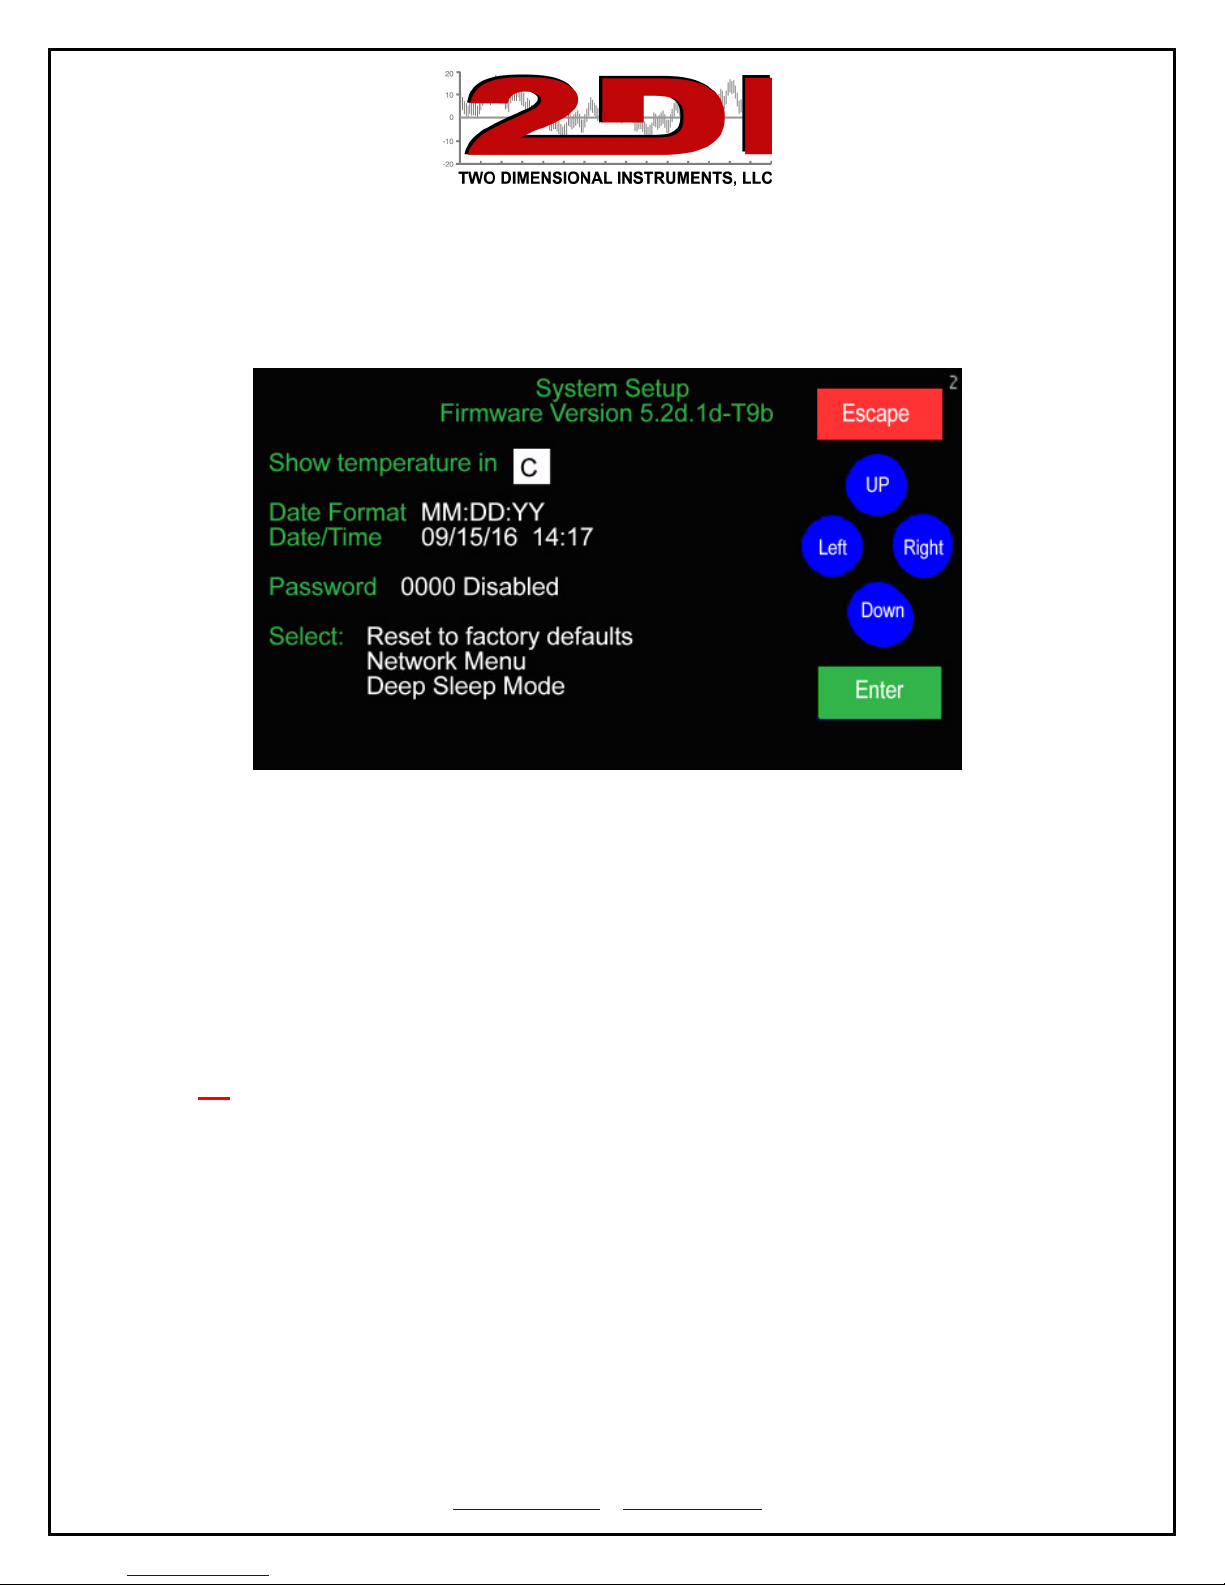
1. Connect the USB cable to a PC or wall plug and the System Parameter display will appear.
2. Touch ‘Up’ or 'Down' to select C° or F° and touch ‘Enter’.
3. Touch ‘Up’ to select the date format (MM/DD/YY, DD/MM/YY or YY/MM/DD) and then
'Enter'. The date format defaults to the US style (MM/DD/YY).
4. Set the day, month, year, hour and minute in the appropriate field by scrolling through the
possible values with 'Up' or 'Down' after moving to the appropriate field with 'Enter'.
(Note: It is possible to move to another field with the ‘Right’ button but your entries will
not be recorded).
5. Touch ‘Escape’. You will be asked to verify that you want to erase all data. Use ‘Right’ to
highlight YES and touch 'Enter'.
6. Touch 'Escape' to return to the previous menu.
The TV2 Room Pressure Monitor is now operational
P O Box 159 • Crestwood, KY 40014 • (502) 243-0042 • (502) 243-0039 fax
www.e2di.com • info@2di.com

Setting up sensors
1. Plug the pressure sensor into the socket next to the small green relay on the end of the TV2
display and the temp/RH sensor next to it. Position the pressure sensor so that the positive
and negative clear plastic tube openings are in different rooms to see the pressure
differential.
2. After a few seconds, the QuickCheck Monitor will recognize the pressure sensor and change
the display to the Sensor Setup menu. Move the cursor to the Sample Data field by touching
‘Right’.
3. This is how often you want the sensor to log a pressure reading. Scroll to any value
between 1 min and 24 hrs with 'Up' or 'Down', touching 'Enter' to move to the minute and
second field, or accept the default by touching 'Enter'. The default value is ten minutes
(00:10:00). For pressure sensors we recommend you set it for 15 seconds (00:00:15).
4. The averaging is set to Medium which is fine for almost all applications.
5. Set the chart display (Y axis) with ‘Up’ and ‘Down’. This does not set the alarm. These
setting have no effect on the alarm, what data is collected, or what is stored. It simply sets
the upper and lower point of the Y-axis of the data chart shown on the TV2.
6. Enter the Calibrate Sensor menu and press enter to auto calibrate the pressure sensor. This
‘zeros’ out the sensor to remove any position error. This may have to be repeated once the
pressure sensor is placed in its location.
P O Box 159 • Crestwood, KY 40014 • (502) 243-0042 • (502) 243-0039 fax
www.e2di.com • info@2di.com

Setting the sensor alarms
5. Set Alarms, if needed, by highlighting the ‘Set Alarm’ button on the Sensor Setup screen
with 'Left' or 'Right' and touching ‘Enter’.
6. Enable the alarm by touching 'Up' and then 'Enter'.
7. Set the trigger-alarm-time to any value between 0:00 and 99:00. This controls how long
the audible alarm and the relay will be activated.
Note: If you are using a dialer set it for at least 00:30 (30 seconds) but not longer
than 06:00 (Six minutes).
8. Scroll in the upper alarm data limit and delay time and then the lower alarm limit and
delay with 'Up’ and ‘Down’ touching 'Enter' to move to each field in turn.
Note: The delay time is how long the condition must continue before the alarm occurs.
9. Touch 'Escape' until you return to the QuickCheck display.
10. Repeat these steps for each sensor.
You are done!
P O Box 159 • Crestwood, KY 40014 • (502) 243-0042 • (502) 243-0039 fax
www.e2di.com • info@2di.com

QuickCheck
The QuickCheck screen indicates the safe/unsafe condition of room pressure, temperature and
humidity at all times. If all the numbers are green the room is safe, but if any of them appear red
the clean room should not be used that condition is corrected.
Condition If Green If Red
Pressure OK Do not use room until positive pressure is restored
Temperature OK Adjust thermostat
Humidity OK Check humidity control
Alarm Alarms set Enable alarms (sensor setup menu)
Max/Min OK Condition was unsafe in the past – Reset by touching
Battery Icon Charged No action required – it will charge itself
If any condition (pressure, temperature or
humidity) is red, it is outside the safe
conditions and the room should not be
used.
Safe limits are set in the alarm menu of
each sensor.
P O Box 159 • Crestwood, KY 40014 • (502) 243-0042 • (502) 243-0039 fax
www.e2di.com • info@2di.com

If the Minimum pressure setting is red
the pressure dropped below the safe
conditions at some point in the past. As
long as the current pressure is green it is
ok. Check the logged data to see what
happened
.
If the Alarm is disabled the quick check
will be unable to display red conditions.
It should be enabled and alarm conditions
set in the sensor setup menu.
P O Box 159 • Crestwood, KY 40014 • (502) 243-0042 • (502) 243-0039 fax
www.e2di.com • info@2di.com
 Loading...