

Page 1
V.A.L.E.
2007-09
V A R I A B L E A X I S L O C K I N G E X H A U S T
Kawasaki Z750
Slip-O n Exhaust System with M -2 Canister
Part # 0 05-2640406V / 005-26 40407V / 0 05-2640408V
Parts List
Qty. Description Part Number
1 Muffler Canister M-2 Varies
1 Slip-On Tube 005-26404S
1 Muffler Clamp Varies
1 HARDWARE KIT 005-264-3
2 V.A.L.E.™ X-Lite Ring half 005-7-2-3
4 6x14mm Socket Head Cap Screw 005-SH614
4 Split Lock Washer 005-WL6
1 10x60mm Socket Head Cap Screw 005-SH1060
1 10mm Flange Nut 005-FN10
1 11.5mm Aluminum Spacer 005-S-11-10
1 5mm Long Handle Ball end hex key 005-9-18610
1 T20 Torx Screw key 005-9-15820
1 TBR sticker Kit 015-10212
IMPORTANT - PLEASE READ CAREFULLY
1. Make sure the bike is completely cool before starting
the installation. Make sure the bike is secure on the
sidestand or ideally a service lift.
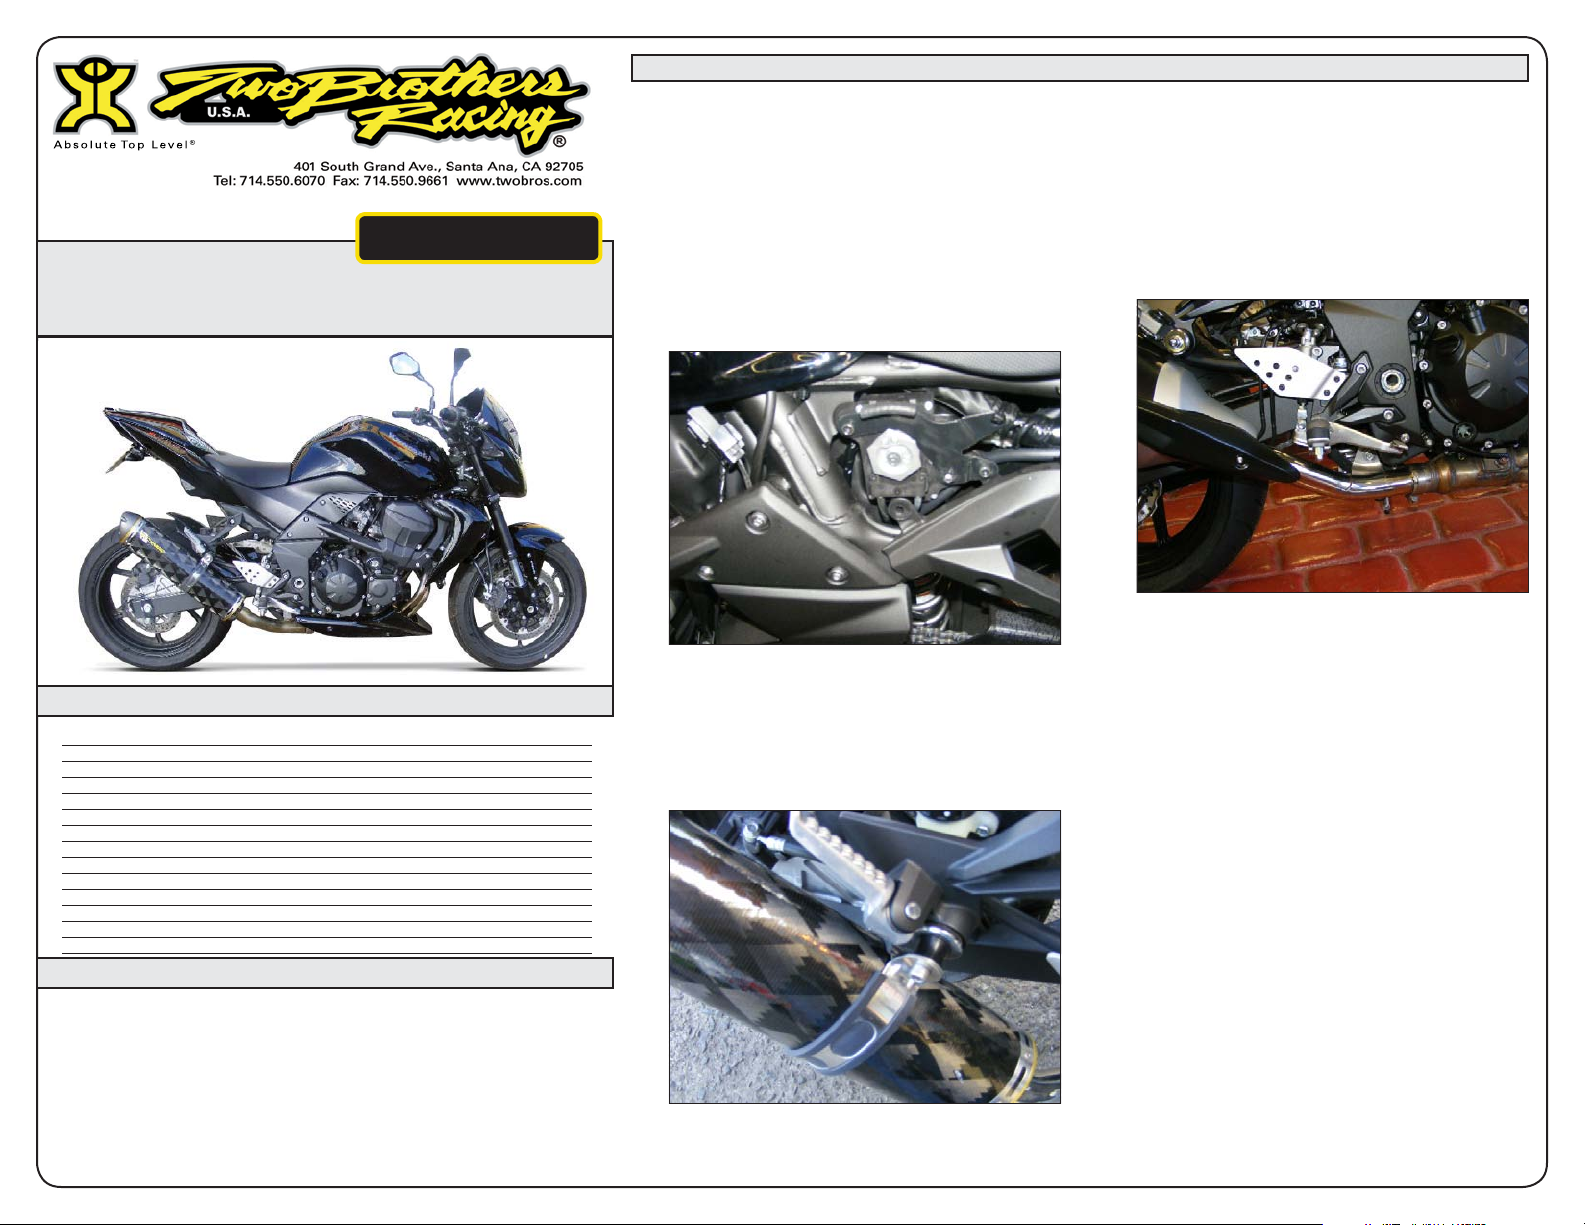
2. Remove OEM muffler assembly by removing
the two mounting bolts on the muffler assembly
and removing the exhaust valve cables from the
TM
servo motor which is located on the left side.
* If you remove te servo wheel you must hold it in place
with a suitable tool before loosening the retaining bolt
to be sure not to damage the servo motor. The servo
motor must remain plugged into the harness to keep
the engine light from turning on.
3. Attach the TBR slip-on tube to the TBR muffler using the
4 6x14mm socket head cap screws and lock washers
provided. Leave loose for now.
4. Slide rubber lined muffler clamp over muffler assembly
and install on motorcycle using the supplied bolt/spacer
and nut with OEM washer. The spacer will go between
the muffler clamp and OEM mounting bracket.
Installation Instructions
5. Install OEM mid-pipe bracket hardware to secure mid
section to motorcycle.
6. Check muffler alignment and tighten the 4 X-Ring bolts
in a cross pattern.
7. Tighten joint clamp.
8. Re-install any removed parts.
9. Check for clearance and make adjustments if needed.
10. Before you run the bike, clean off all fingerprints and
dirt, as any oily residue will etch the metal and become
somewhat permanent when the system gets hot. Run
the bike and enjoy. It is normal for some white smoke to
appear the first time you start the bike. This is packing/
manufacturing oil from inside the pipe burning off. After
50 to 100 miles, recheck all fasteners for tightness.
We recommend that this performance part be installed by a qualied
motorcycle technician. If you have any doubts as to your ability to
install this performance part, please consult with your local motorcycle
dealer. Read all instructions rst before starting installation. Make sure
the motorcycle and exhaust system are completely cool before starting
the installation. Also, make sure the bike is secure on a centerstand
or ideally a service lift during installation. Be sure to save all stock
components for possible use later.
Page 2
V.A.L.E.
V A R I A B L E A X I S L O C K I N G E X H A U S T
TM
2007-09
Kawasaki Z750
Slip-O n Exhaust System with M -2 Canister
Part # 0 05-2640406V / 005-26 40407V / 0 05-2640408V
Care & Cleaning / Warranty
Care & C leaning
Keep sys tem free of dirt and mo isture. Sto re in a coo l, dry plac e. For clea ning
use a m ild spray c leaner. Always ap ply cleaner or polish w ith a soft, clean cloth.
Stainle ss Header Sy stem: Polished stainless s teel pipes will turn a light golde n
hue afte r a few hea t cycles, t his is a nor mal character istic of hig h quality
stainle ss steel.
Carbon Fiber Muffle rs: Always mak e sure the fiberglass p acking inside is in
good co ndition and not burned out, as ex haust heat i nside an em pty caniste r
will de teriorate t he Carbon F iber sleeve . TBR sells repa ck kits (TBR part # 005-
10038) that include new rivet s and repack m aterial as well as a d rill bit (# 30),
making it easy to do yoursel f. Also, NEVER dyno test y our bike wi th carbon
fiber mu fflers inst alled - the intense he at and lack of cooling ai r can quickly
cause t he CF mater ial to burn . Two Brot hers Racing does not p rovide a warra nty
for bur ned carbon fiber.
Aluminum Mufflers: Use an aluminum or mag wheel polish such as Mother’s to
restore the bright finish to f actory spec .
Warranty Info rmation
Two B rother s Rac ing pr oducts are intend ed fo r clos ed co urse c ompet ition purpos es on ly,
and there fore a re so ld “as is” withou t war ranty. Two Bro thers Racin g spec ifica lly di sclai ms an y warr antie s of m ercha ntabil ity o r fitn ess f or a p articu lar p urpose and discla ims
all respo nsibil ity f or con seque ntial and i nciden tal d amages or an y oth er los ses a rising
from the use of thes e prod ucts or par ts.
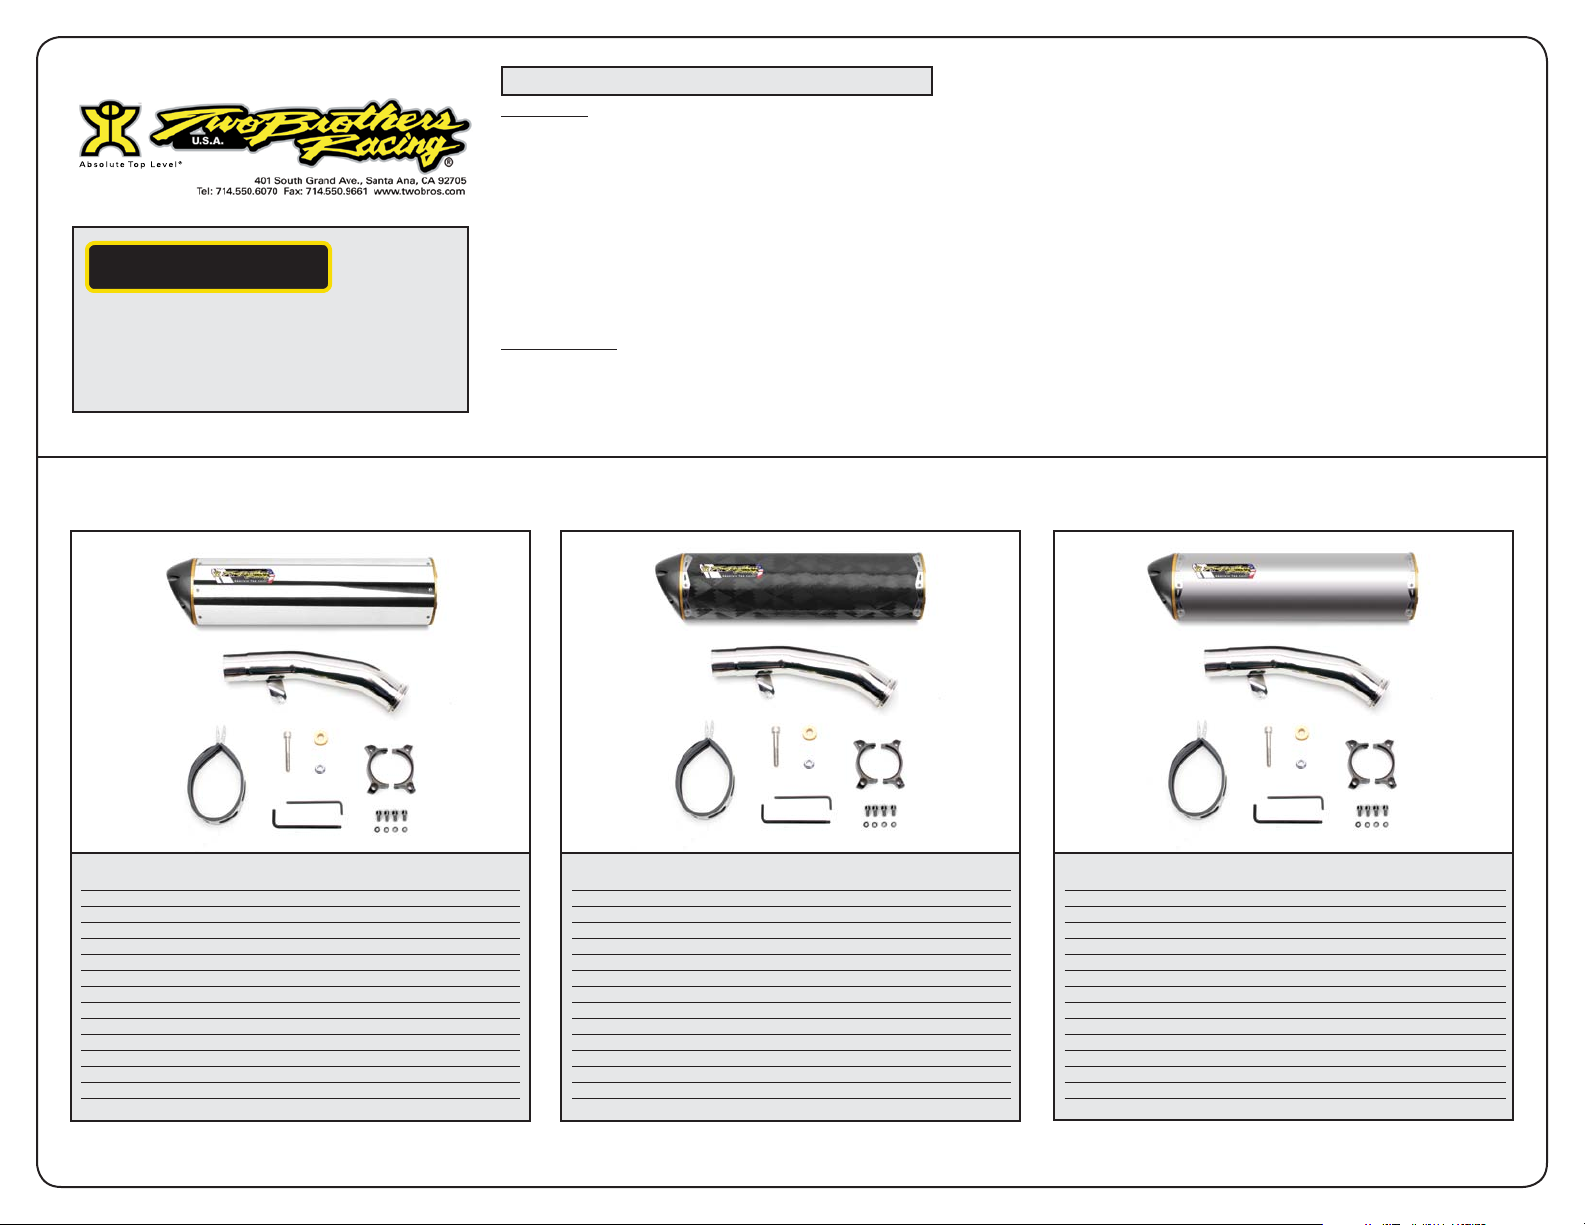
005-2640407V005-2640406V 005-2640408V
Qty. Description Part Number
1 Muffler Canister M-2 005-206M
1 Slip-On Tube 005-26404S
1 Muffler Clamp 005-2C
1 HARDWARE KIT 005-264-3
2 V.A.L.E.™ X-Lite Ring half 005-7-2-3
4 6x14mm Socket Head Cap Screw 005-SH614
4 Split Lock Washer 005-WL6
1 10x60mm Socket Head Cap Screw 005-SH1060
1 10mm Flange Nut 005-FN10
1 11.5mm Aluminum Spacer 005-S-11-10
1 5mm Long Handle Ball end hex key 005-9-18610
1 T20 Torx Screw key 005-9-15820
1 TBR sticker Kit 015-10212
Qty. Description Part Number
1 Muffler Canister M-2 005-207M
1 Slip-On Tube 005-26404S
1 Muffler Clamp 005-2C1
1 HARDWARE KIT 005-264-3
2 V.A.L.E.™ X-Lite Ring half 005-7-2-3
4 6x14mm Socket Head Cap Screw 005-SH614
4 Split Lock Washer 005-WL6
1 10x60mm Socket Head Cap Screw 005-SH1060
1 10mm Flange Nut 005-FN10
1 11.5mm Aluminum Spacer 005-S-11-10
1 5mm Long Handle Ball end hex key 005-9-18610
1 T20 Torx Screw key 005-9-15820
1 TBR sticker Kit 015-10212
Qty. Description Part Number
1 Muffler Canister M-2 005-208M
1 Slip-On Tube 005-26404S
1 Muffler Clamp 005-2C2
1 HARDWARE KIT 005-264-3
2 V.A.L.E.™ X-Lite Ring half 005-7-2-3
4 6x14mm Socket Head Cap Screw 005-SH614
4 Split Lock Washer 005-WL6
1 10x60mm Socket Head Cap Screw 005-SH1060
1 10mm Flange Nut 005-FN10
1 11.5mm Aluminum Spacer 005-S-11-10
1 5mm Long Handle Ball end hex key 005-9-18610
1 T20 Torx Screw key 005-9-15820
1 TBR sticker Kit 015-10212
 Loading...