

Two Brothers Racing RZR-S User Manual
Installation Instructions
1. Make sure the UTV is completely cool before starting the
installation. Make sure the quad is secure on a level surface
and the wheels are chocked to prevent the quad from rolling.
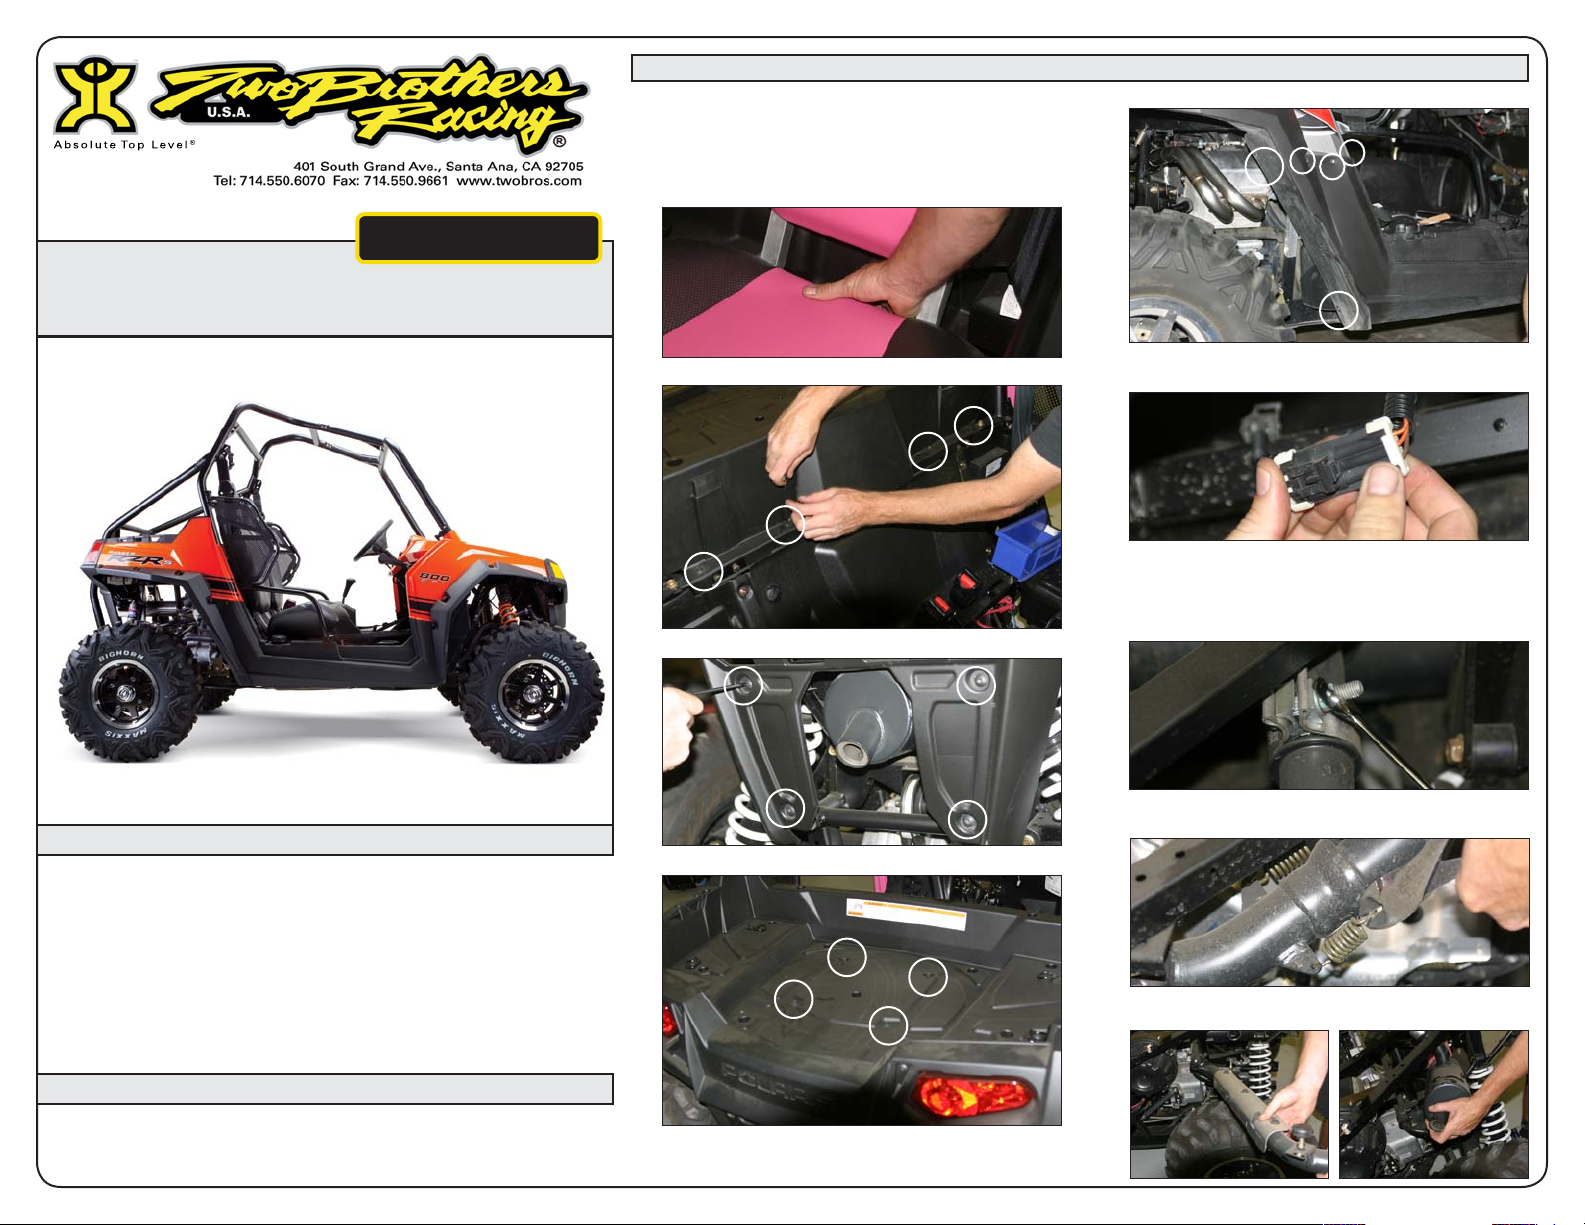
2. Remove the rear bed assembly:
- Remove the rear cage (8) bolts.
- Remove the seats.
- Remove 1 push pins and 4 screws per side.
TM
2009-10 Polaris
V.A.L.E.
V A R I A B L E A X I S L O C K I N G E X H A U S T
RangeR RZRS 800
V.A.L .E .™ S li p- on E xh au st S ys te m wi th M -7 Alu mi nu m Ca ni st er
Par t # 00 5- 27 50 40 6V
IMPORTANT - PLEASE READ CAREFULLY
We recommend that this performance part be installed by a qualied
motorcycle technician. If you have any doubts as to your ability to install this
performance part, please consult with your local motorcycle dealer. Read all
instructions rst before starting installation. Make sure the motorcycle and
exhaust system are completely cool before starting the installation. Be sure
to save all stock components for possible use later.
**This product has not been tested with all available accessories and some
items may cause excessive heat. Excessive heat may cause damage to your
vehicle. Two Brothers Racing will not be responsible for damaged parts.
- Remove the screws (4) behind the seats.
- Remove the screws (4) around the tail pipe.
- Remove the bolts (4) in the bed.
- Unplug lights from wire harness (1) under drivers side
of bed.
- Carefully lift bed assembly off.
Remove OEM muffler and mid-pipe (you may need to
temporarily remove heat sheild and bed rest):
- Loosen OEM clamp.
- Remove header joint springs. Retain for later.
- Remove mid-pipe tension spring. Retain for later.
- Remove mid-pipe.
- Remove muffler assembly.
Warranty
Two Brothe rs Racing p roducts are intended fo r closed co urse compet ition purpo ses only, and therefore are sold “a s is”
without warranty. Two B rothers Rac ing specifi cally discla ims any war ranties of merchantabi lity or fit ness for a particular
purpose and discla ims all res ponsibility for conseq uential and incidental damages or any other losses aris ing from the use
of thes e products or parts.
Installation Instructions
TM
2009-10 Polaris
V.A.L.E.
V A R I A B L E A X I S L O C K I N G E X H A U S T
RangeR RZRS 800
V.A.L .E .™ S li p- on E xh au st S ys te m wi th M -7 Alu mi nu m Ca ni st er
Par t # 00 5- 27 50 40 6V
Installation Instructions
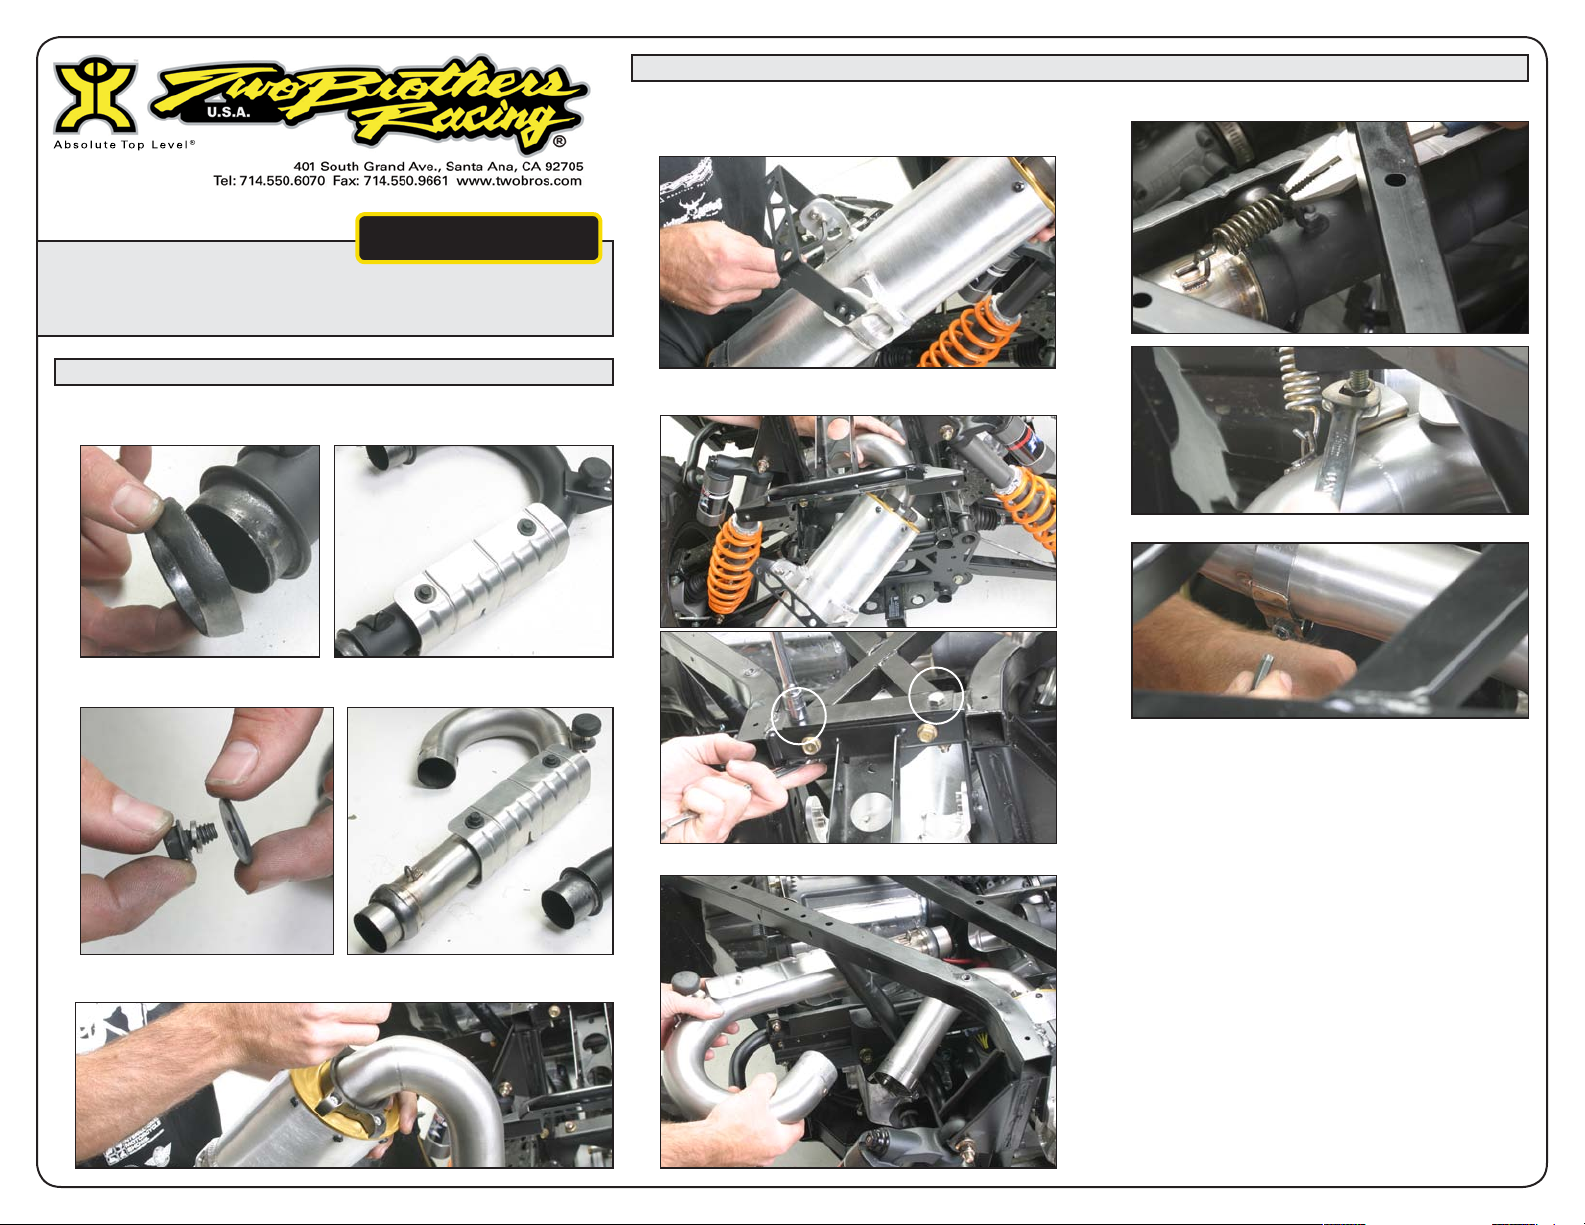
3. Remove OEM heat shield from Stock mid-pipe. Un-screw bumper stop and
gasket for install on TBR mid-pipe.
4. Using the two OEM bolts and washers, install a lock washer as shown and
install OEM heat shield on TBR mid-pipe. Re-install bumper stop.
6. Attach the hanger bracket to the TBR muffler using the
four 6x20mm socket head cap screws and split lock
washers provided.
7. Install TBR muffler assembly to the UTV frame using
OEM bolts and nuts.
9. Re-install OEM tension springs, adjust bumper stop.
10. Tighten muffler mount, barrel clamp, X-ring bolts.
5. Attach slip-tube to TBR muffler using the two-piece X-ring and four
6x20mm socket head cap screws and split lock washers provided.
8. Install barrel clamp on end of slip-tube. Install mid-pipe.
11. Re-install bed assembly and heat shield.
12. Re-install seats and rear cage.
13. Double check to make sure that all hardware is securely
tightened and re-check hardware after 10 hours.
14. Before you run the quad, clean off all fingerprints and
dirt, as any oily residue will etch the metal and become
somewhat permanent when the system gets hot. Run
the quad and enjoy. It is normal for some white smoke to
appear the first time you start the quad. This is packing/
manufacturing oil from inside the pipe burning off.
Check for gaps or leaks. If you find a leak, a little high
temperature silicon sealant should fix it. After 50 to 100
miles, recheck all fasteners for tightness.
 Loading...