

Page 1

Dynatek Coil Kit DCK 1-6
Honda Ruckus 50cc Scooter 2005+
Congratulations on your purchase of a Dynatek Ignition Coil Kit. Please take a moment to read these instructions
completely before installing the ignition coil. The installation will take about 1 hour.
This kit includes: (1) Dynatek Ignition 0. 5ohm Mini-Coil, single output (2) M6 x 45 long bolts
(1) 90° Spark plug wire, 15” (2) M6 locking nuts
(2) Cable ties 8” (2) Mounting Spacers
(4) Flat washers
This is a complete kit, and includes everything needed to install the ignition coils.
Note: Th
Note: Route all wires carefully. Secure wires in factory loops or use cable ties to ensure electrical wires do not chafe or
touch anything hot. Pay close attention to the wiring detail and wire crimping, successful installation depends on this.
Tools Required: Metric socket/ wrench set
Screw driver set
Drill, Center punch, and .25” drill bit (1/4”)
Installation
1) Remove seat with frame work, panel covering battery (below handle bars), and plastic floor (engine cover).
2) The coil is located on engine, near spark plug.
3) Disconnect the two primary wires from the coil. (Black/Yellow wire & Green wire) Change wire routing so coil
4) The Dyna coil will be fastened, under the plastic floor, near the large coolant hole. This requires drilling two
5) Mount Dyna coil, so that spark plug tower points away from coolant hole. The aluminum spacers go between
6) Attach primary wires to the Dyna coil. Bend one coil tab slightly, so that both wire terminals plug on. Green
7) Use cable ties to fasten primary wires together with harness near right side of frame. Keep wires away from
8) The Dyna spark plug wire length is sufficient. Trim length, only if required. Attach the original spark plug cap
9) Check that all wires are routed and held securely with cable ties.
10) Replace engine covers, and seat.
11) Start the engine. Installation is complete!
e stock sparkplug boot will be reused in this application.
wires reach back to coolant tank. Unplug the spark plug cap. Remove the mounting screw and the coil. Hold
the stock sparkplug wire near the cap and unscrew the cap counterclockwise. This cap will be used with the
Dyna coil.
1/4” holes. Find the plastic rib that is near coolant hole. Use drill template. Mark the hole centers 0.5” from
rib, and 3.0” apart. Then drill thru using .25” bit. (see pictures, Step 4) (Use drill template)
the coil and the plastic floor. Fasten using long M6 bolts with flat washers under the heads and flat washers
under the locknuts. Tighten all bolts securely so Dyna coil is not loose (see pictures, Step 5)
wire to tab without a dot. Black/Yellow wire goes to tab with a RED dot. (see pictures, Step 5, 6)
moving part. (Carburetor and throttle cable pivots)
to the Dyna wire. Screw factory cap clockwise onto new wire until bottomed. Then press cap onto spark plug.
Route wire along left frame near carburetor. Attach rubber end with 90° boot to the Dyna coil. (see pictures,
Step 8)
DYNATEK
164 S. Valencia St., Glendora, CA 91741 800-928-3962 www.dynaonline.com
Page 2
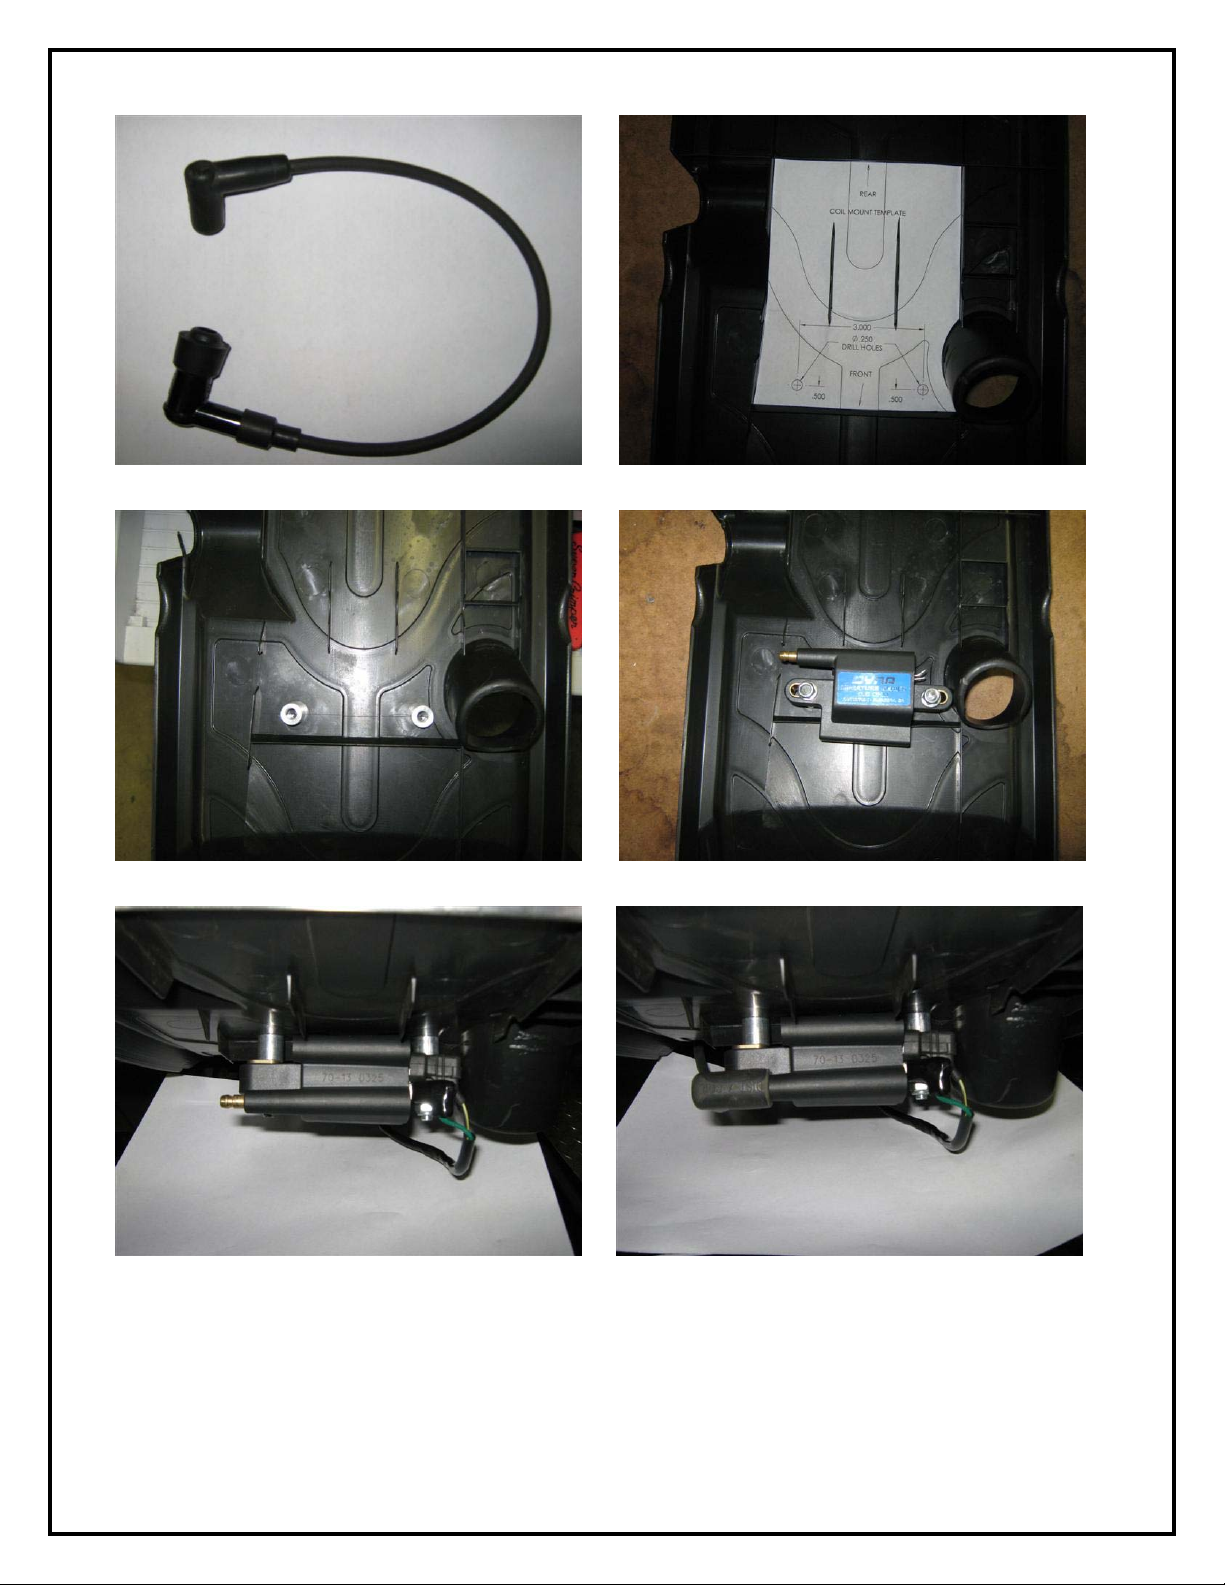
Step 3, 8: Attach spark plug cap to wire. Step 4: Drill 2 holes, 1/4 inch (Use template)
Step 5: Place coil spacers. Step 5: Mount Dyna coil.
Step 6: Attach coil primary wires Step 8: Attach spark plug wire
393A REV. 12-17-08
2801
DYNATEK
164 S. Valencia St., Glendora, CA 91741 800-928-3962 www.dynaonline.com
 Loading...