

Twister T4 Operation Manual

Version 1.1
CONGRATULATIONS ON YOUR PURCHASE OF THE
TWISTER T4 - the most advanced and
maintenance-free trimming system on the planet.

Table of Contents
Safety, Warnings and Disclaimers
Initial Setup
Controls
Adjustment
Operation
Maintenance and Cleaning
Tips & Tricks
Troubleshooting
Specifications
Warranty Statement
2
5
11
12
14
15
23
24
25
26

Important Safety Information
This document refers to the Twister T4 leaf trimming machine as the T4.
Because this machine is a high speed cutting unit, special safety precautions
must be observed to reduce the risk of personal injury. Careless or improper
use may cause serious or even fatal injury. Please read and understand these
precautions thoroughly before using the machine.
Do not lend or rent your machine without the instruction manual. A first
time operator should obtain practical instruction before using the machine.
SAFETY PRECAUTION
Operating the machine without reading the instructions that accompany a “Danger”
symbol may result in fatal injury.
General
→
Do not expose this machine’s electrical components to water
while being plugged in.
Operation
→
Do not wear loose clothing or jewellery when operating the machine. Sleeves should be rolled past the
elbows and long hair confined. Do not wear loose-fitting gloves.
→
Do not operate the machine with protective covers removed.
→
Keep body parts away from fast moving parts.
SAFETY PRECAUTION
Operating the machine without reading the instructions that accompany a “Warning”
symbol may result in serious bodily injury or fatal injury.
Connection
→
Do not overload outlets or extension cords as this can result in fire or electric shock.
→
Do not change or modify any part of the machine or accessories.
Operation
→
Safety glasses must be worn when operating the machine.
→
Do not operate the machine while tired or under the influence of drugs, alcohol or other medication.
Maintenance
→
Do not attempt to service electrical components on this machine yourself, as opening or removing covers
may expose you to dangerous voltage and possible fire or electric shock.
2
www.twistertrimmer.com

SAFETY PRECAUTION
Operating the machine without reading the instructions that accompany a “Caution”
symbol may result in bodily injury or property damage.
General
→
Do not move, install, connect or inspect the machine while power is supplied to the machine.
→
Replacement parts must be specific to this machine and supplied by the manufacturer only.
Unauthorized substitutions may result in bodily injury or equipment damage.
→
Do not allow lubricants or mineral oils to collect on the ground around the machine. This could cause
a slipping hazard for the operator and others.
→
Keep visitors a safe distance from work area. Keep children away.
→
Do not remove safety labels from the machine. Replace safety labels if they become obscured or removed.
Installation
→
Refer to the machine labeling to determine correct electrical requirements.
Connection
→
Machine must be used with a properly grounded receptacle.
→
Never plug in the machine with protective shrouds removed.
Operation
→
Do not put objects into the tumbler that cannot be processed by the machine as this may cause bodily
harm or property damage.
→
Never let the machine run unattended.
Maintenance
→
The T4 must be unplugged before any protective covers can be removed.
→
Turn off and unplug machine before cleaning.
SAFETY PRECAUTION
All users should retain instructions for future reference to ensure safe use.
General
→
Damage requiring service must be referred to qualified service personnel.
→
If the machine does not operate normally by following operating instructions, adjust only those controls
that are covered in the instructions. Improper adjustment may result in damage and may require extensive
work by qualified service personnel to restore the unit back to its normal operation.
Connection
Do not overload outlets or extension cords as this can result in fire or electric shock.
→
For safe use of your machine, DO NOT change or modify any part of the machine or accessories.
→
Do not use an extension cords over 15m (50ft) in length to power the machine – longer cords increase
→
electrical resistance, which will interfere with the T4’s efficiency.
Operation
→
Keep unit well ventilated to prevent overheating.
www.twistertrimmer.comwww.twistertrimmer.com
3
Warnings and Disclaimers
The T4 is intended for use on legal aromatic herbs and hops. Please check all municipal, provincial/state, and
federal laws and regulations before using the T4. Keirton® does not promote or condone the use of the T4
in any way that may be deemed illegal.
Allow only persons who understand this manual to operate the T4.
Keirton® claims no liability for any damage or injury that result from the use of the T4 by persons who have
not read and understood the cautions contained in this manual, or through any misuse of the T4. You are
responsible for your safety while operating this machine - please keep yourself safe!
To receive maximum performance and satisfaction from the T4, it is important that you read and understand the safety and maintenance precautions before using the machine.
4
www.twistertrimmer.com

Initial Setup
Congratulations on your purchase of a Twister T4!
You’ll need to perform the following steps before you can start up your new T4 for the first time.
If you have not already read the Safety section yet, please do so now before proceeding!
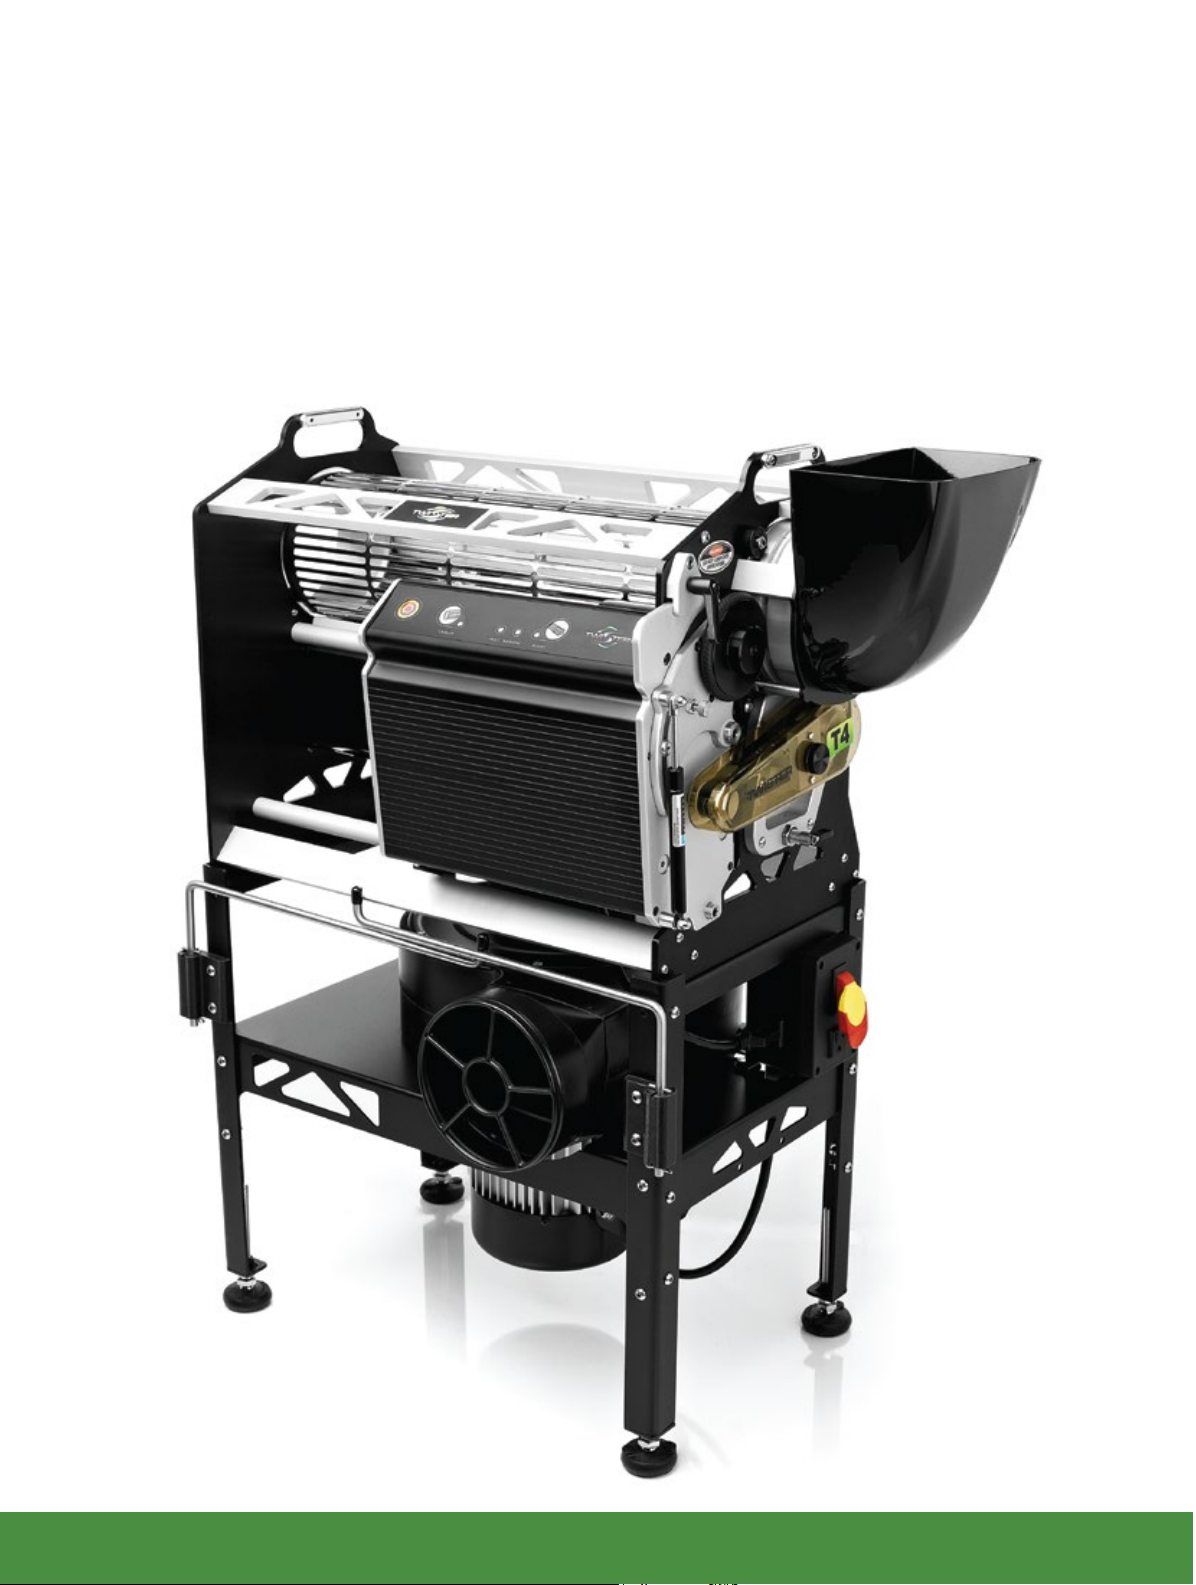
You’ll first need to unpack the T4 and its components (Figure 1). Remove the T4 from its box. Inside the
machine is a smaller box that contains the T4’s hopper, drive belt, and belt cover.
Figure 1 : Unpacking the T4
www.twistertrimmer.com
5
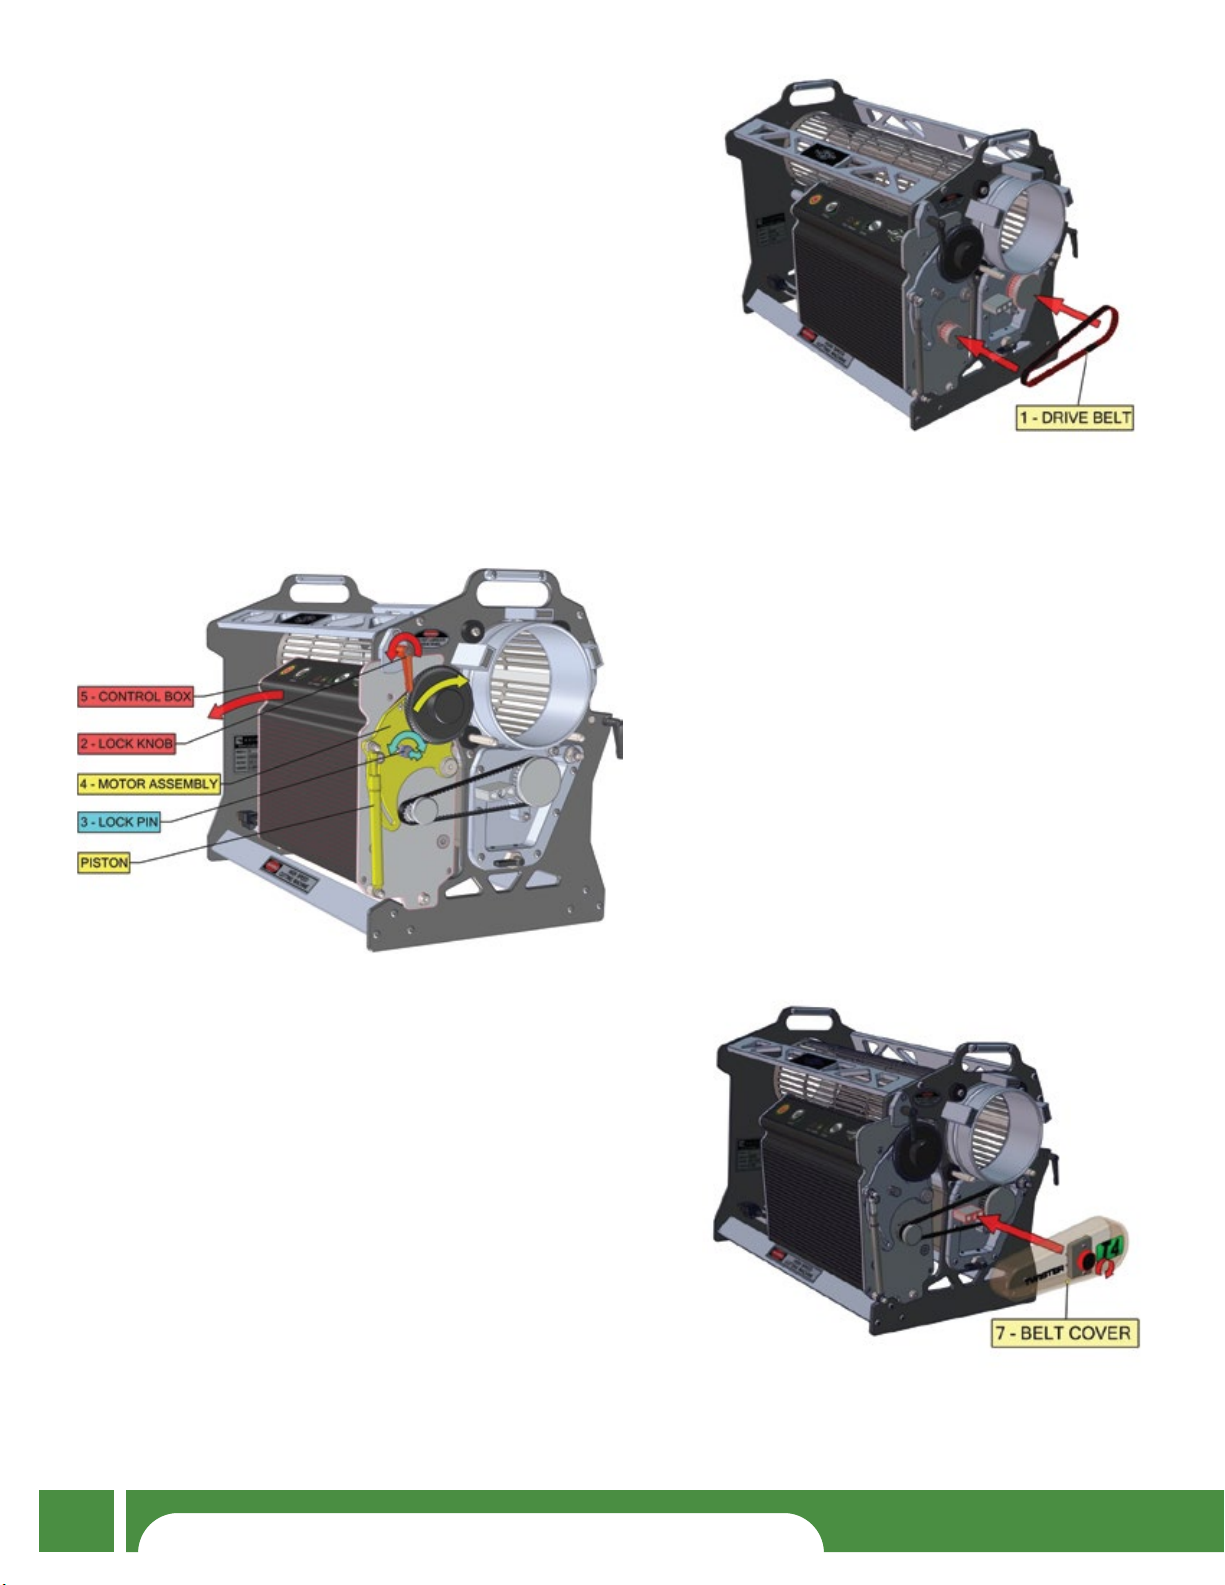
The T4 is shipped with the control box pushed in to its
minimum position to save space; you’ll now need to
install the drive belt, and tilt the control box out to
allow it to fully engage the drive belt.
1. Install the drive belt (Figure 2), aligning the
belt between the two sprockets as shown.
It’s normal for the belt to be loose on the
sprockets at this point.
2. Loosen the lock knob to unclamp the control
box (Figure 3).
Figure 2: Installing the drive belt
3. Pull the lock pin and twist it to lock it in the
open position.
Figure 3: Tilting the control box into position
6. When the control box is correctly positioned,
re-tighten the lock knob to lock it in place.
4. Pressure from the piston will push the motor
assembly, causing it to rotate clockwise; this
will tilt the control box out from the machine.
5. Pull lightly on the control box to make sure it
swings all the way out, until it’s stopped by the
drive belt, and make sure the drive belt is
properly seated on the control box’s sprocket.
Failure to do so may damage or destroy the
drive belt.
7. Install the belt cover (Figure 4), screwing in the
knob until tight.
6
www.twistertrimmer.com
Figure 4: Installing the belt cover
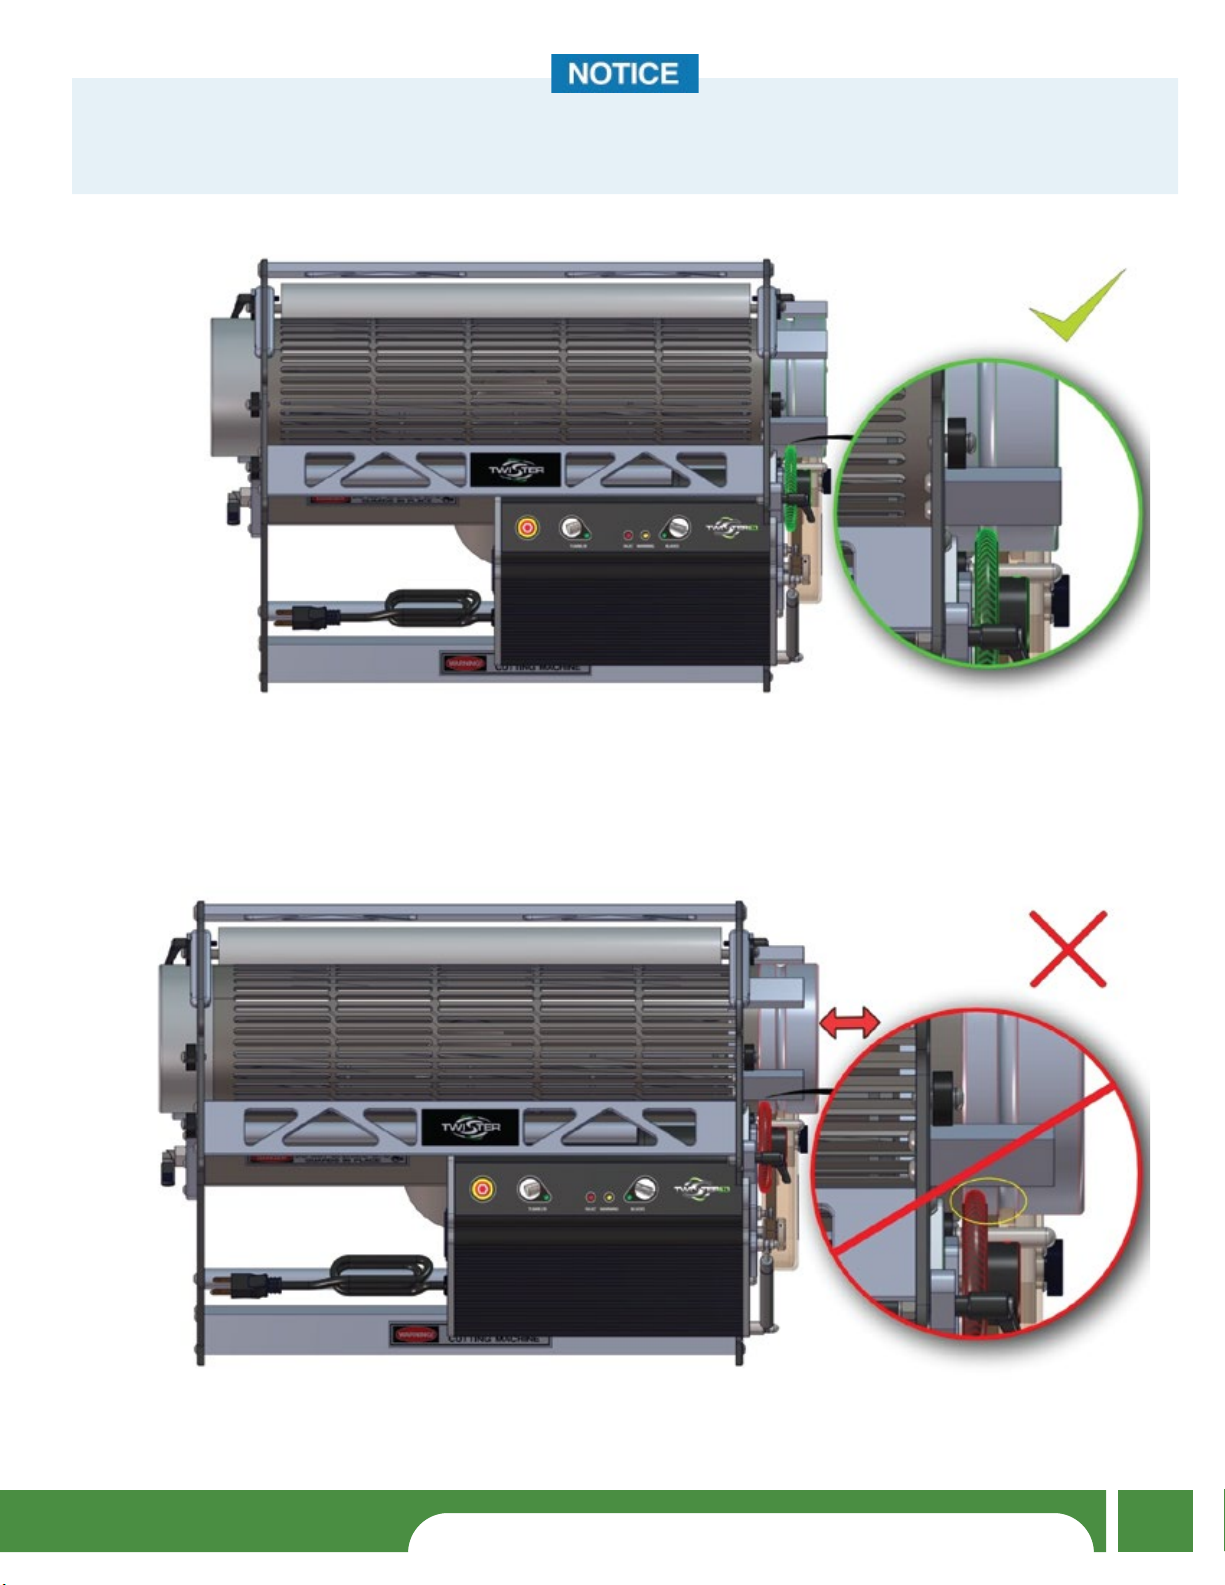
Make sure to align the control box’s rubber drive wheel in the center of the groove of the tumbler (Figure 5);
misalignment (Figure 6) will result in poor performance, or the tumbler may slip out of place within the T4.
The tumbler may be slid back and forth to put it in the right position to engage control box’s drive wheel.
Figure 5: Proper drive wheel position
Figure 6: Improper drive wheel position
www.twistertrimmer.comwww.twistertrimmer.com
7
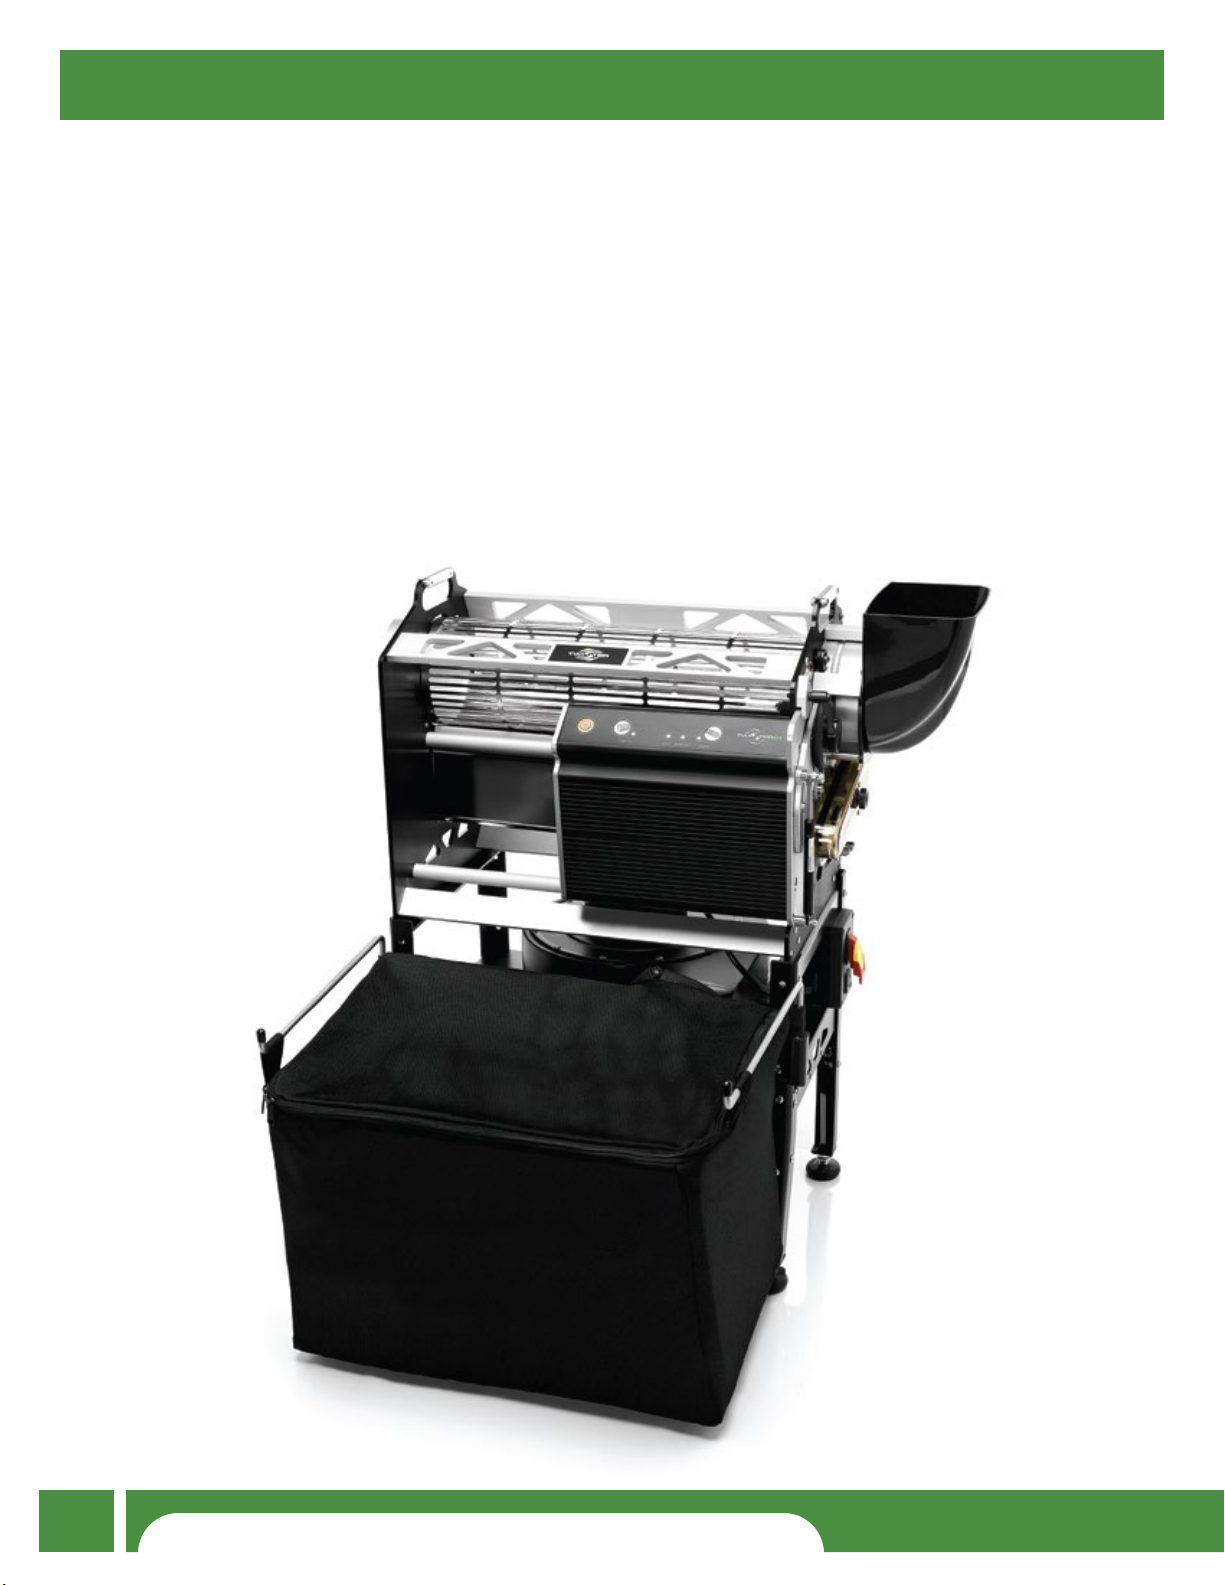
The T4 can operate with or without lubricant on the brush
frequent cleaning. If you choose to not use lubrication, you may skip the lubrication portions of the
following steps. See the lubrication section for more detailed information.
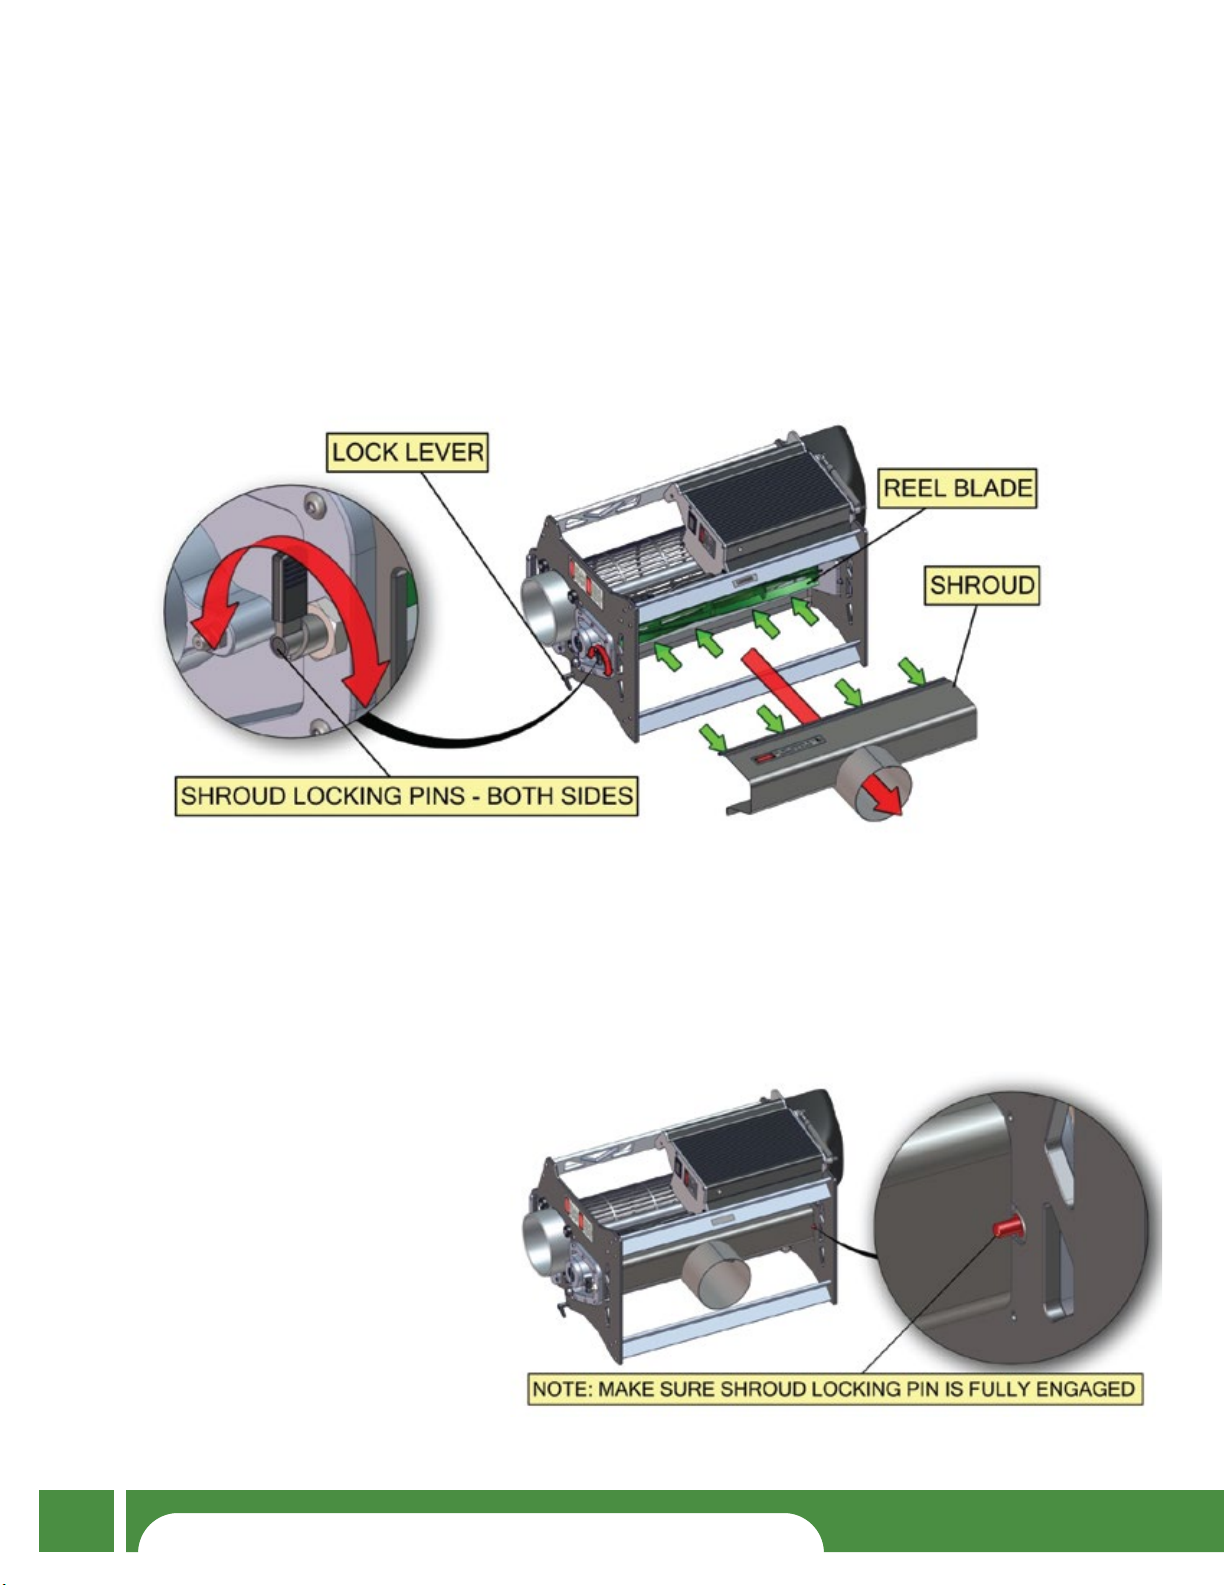
Carefully tilt the T4 on its back (Figure 7) after making sure that the two lock levers are NOT pointed
outwards – if they are pointed outwards when you tilt the machine, the machine will rest on the levers and
may break them. To change their angle, just pull them outwards and twist to set them in a new position.
Next, twist the shroud locking pins on the sides of the machine to retract the detent pins, so you can remove
the shroud - twist the levers 180° in either direction to lock them in the open position, and then pull the
shroud straight out.
. Using the T4 with no lubricant will require more
Figure 7: Removing the shroud
Replace the shroud, and lock it back in place
by twisting the shroud locking pins again,
making sure that the pins have fully
engaged in holding the shroud in place
(Figure 8); if not, you will need to push on
the shroud to press it in slightly before you
push the locking pins in to hold it in place.
Now stand the T4 back on its base.
Figure 8: Replacing the shroud
8
www.twistertrimmer.com
 Loading...