

TwinStar Telescopes 90mm Cassegrain, 90mm Cassegrain Telescope Assembly Manual
Assembly Guide : 90mm Cassegrain Telescope
INTRODUCTION
Congratulations! You have bought a wonderful telescope. This is a precision optical instrument, and
you have many wonderful evenings of observing the night sky ahead of you. This guide is to help
you assemble your telescope properly.
We know that many people are visually oriented and that pictures of the assembly process are
helpful. We have put this guide together to help you assemble your telescope for your first night of
observing.
Once your telescope is assembled and ready to go, the rest is up to you. Learning astronomy is all
the fun anyhow! So let's get started . . .
ASSEMBLING THE TELESCOPE
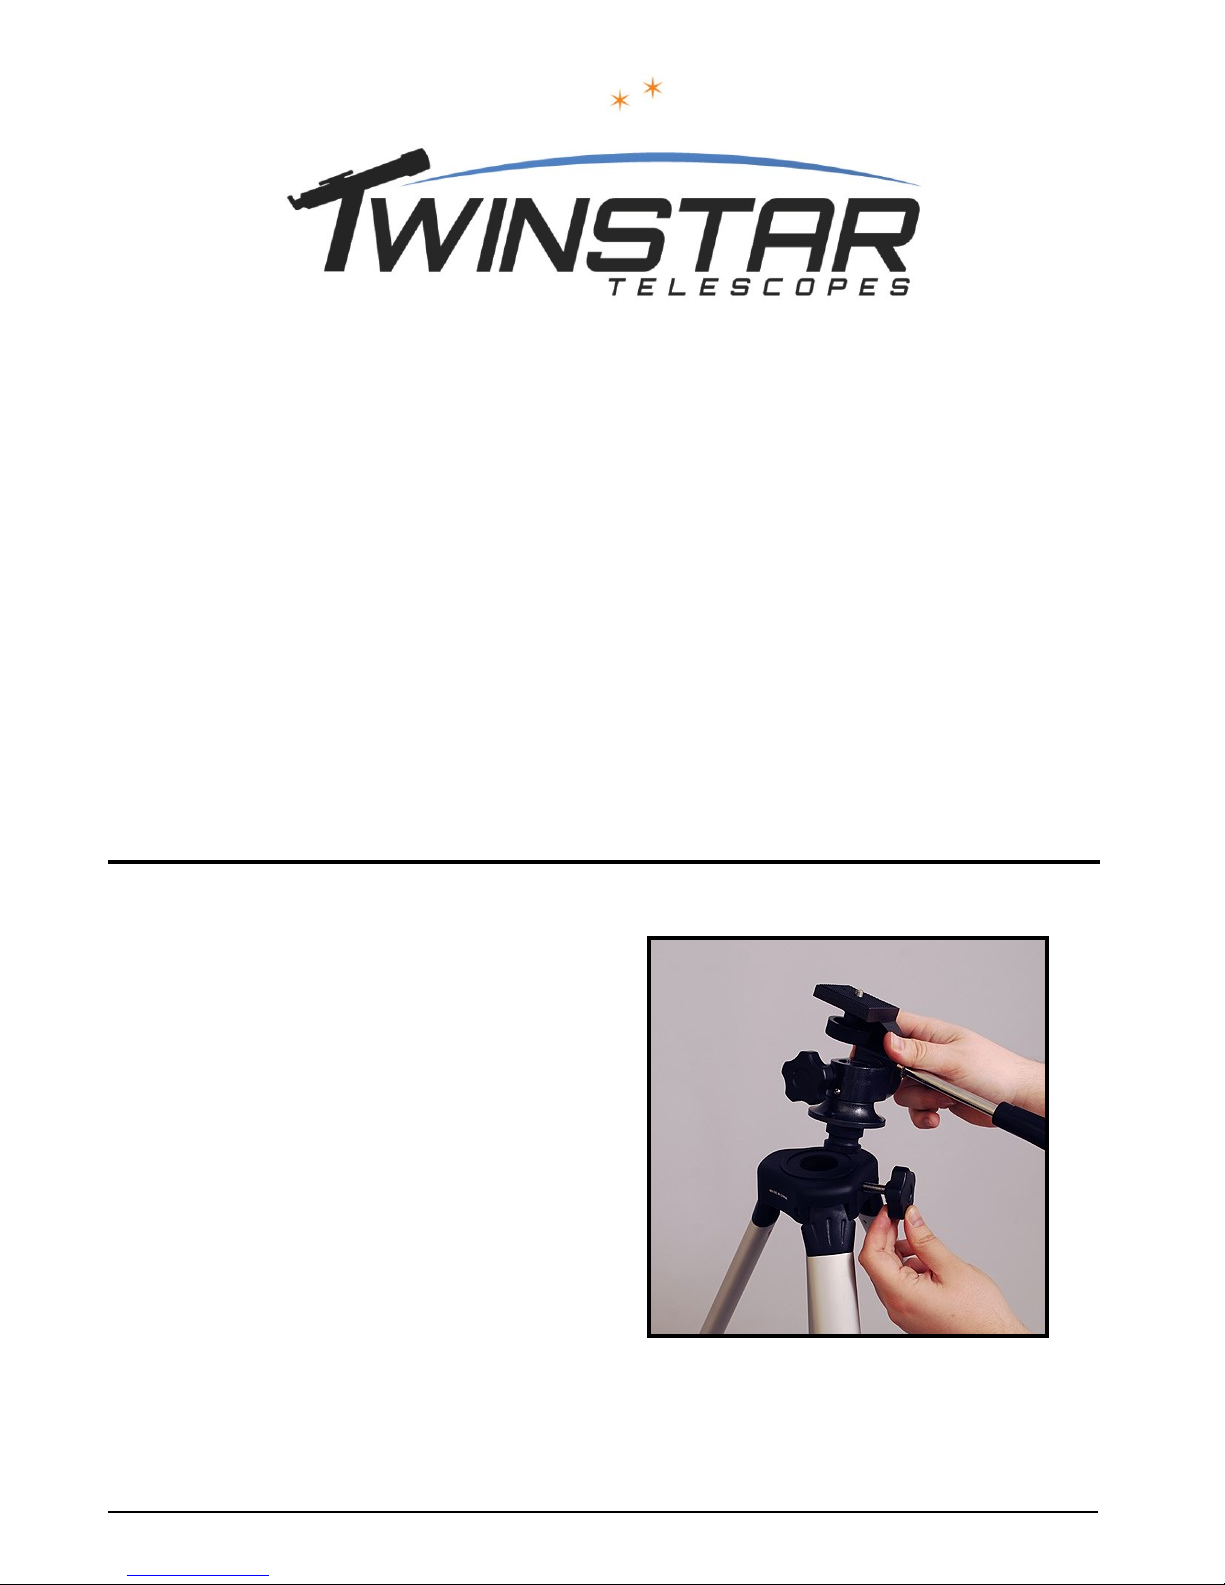
Step 1
Attach the Alt-Azimuth mount to the
tripod and tighten with the set screw as
shown in Figure 1.
Figure 1 – Attaching the Alt-Azimuth mount.
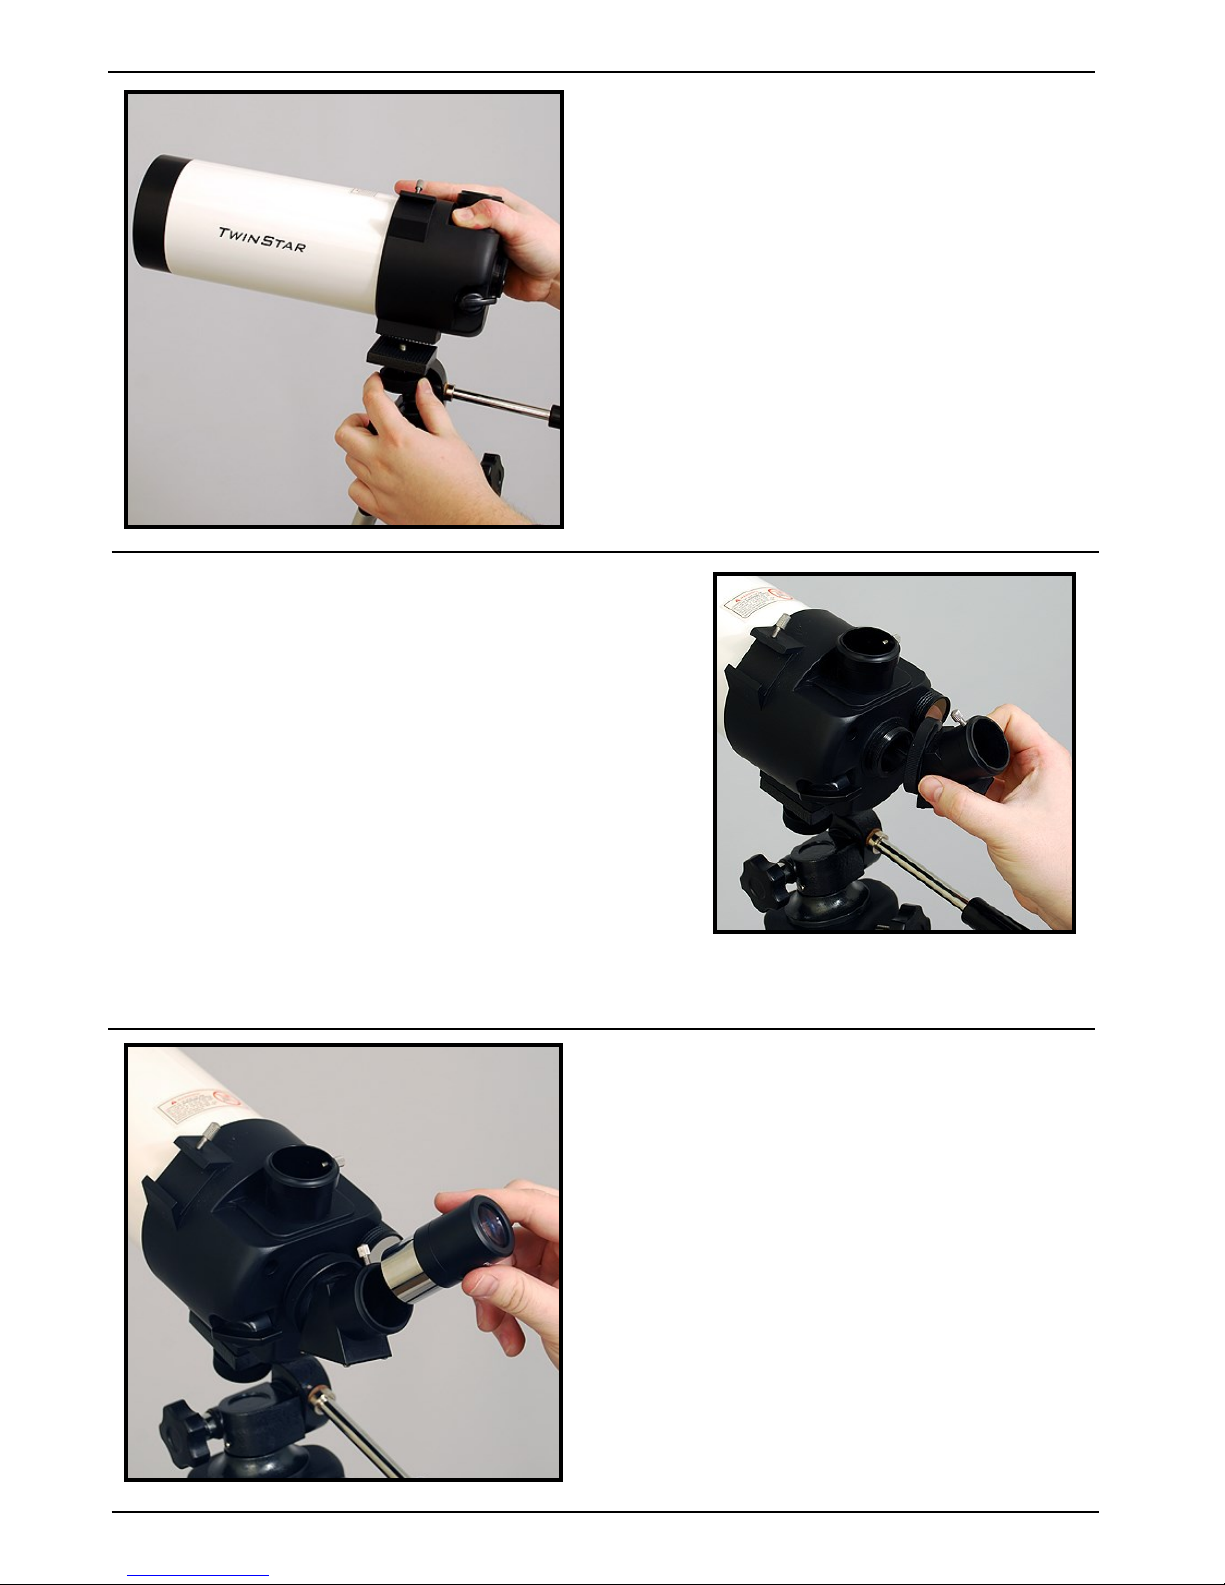
Step 2
Attach the main telescope tube to the
tripod head using the photo bolt screw
as shown in Figure 2.
Figure 2 – Attaching the Telescope tube.
Step 3
Screw the angle prism into the back of
the telescope.
Step 4
Figure 3 – The angle prism screws into
the back of the telescope tube.
Finally, insert one of your eyepieces into
the focusing tube, as shown in Figure 4,
and you are ready to begin observing. Be
sure to tighten the set screw that holds
the eyepiece in place. IMPORTANT:
There is a small flip lever next to the
eyepiece assembly. This lever lets you
observe using an eyepiece either (a)
through the back of the telescope (as
shown) or, (b) through the top of the
telescope (not pictured). Make sure the
flip lever is set parallel to the telescope
tube as shown in Figure 4 to use observe
through the back of the telescope.
Figure 4 – An eyepiece goes in the angle prism.
 Loading...