

Twin-Star International 23WM137 Assembly Instructions Manual

ATTENTION
IF YOU HAVE ANY PROBLEMS OR QUESTIONS, EMAIL
OR CALL CUSTOMER SERVICE BEFORE YOU RETURN
THIS PRODUCT TO THE STORE WHERE IT WAS PURCHASED.
For Customer Service: email: parts@twinstarhome.com
in English Call: 866-661-1218
in Spanish Call: 866-661-1218
in French Call: 866-374-9203
ATENCIÓN
SI TIENE ALGÚN PROBLEMA O PREGUNTAS,
ENVÍE UN MENSAJE DE CORREO ELECTRÓNICO O LLAME AL SERVICIO
DE ATENCIÓN AL CLIENTE ANTES DE DEVOLVER
ESTE PRODUCTO A LA TIENDA EN LA QUE LO COMPRÓ.
Servicio de atención al cliente: Correo electrónico: parts@twinstarhome.com
Línea para llamadas en inglés: 866-661-1218
Línea para llamadas en español: 866-661-1218
Línea para llamadas en francés: 866-374-9203
STOP
STOP
PARE
PARE
ATTENTION
SI VOUS AVEZ DES PROBLÈMES OU QUESTIONS,
ENVOYEZ UN COURRIEL AU SERVICE À LA CLIENTÈLE OU APPELEZ LE
SERVICE À LA CLIENTÈLE AVANT DE RETOURNER
CE PRODUIT OÙ VOUS L’AVEZ ACHETÉ.
Pour le service à la clientèle : courriel : parts@twinstarhome.com
pour le service en anglais, composez le 866-661-1218
pour le service en espagnol, composez le 866-661-1218
pour le service en français, composez le 866-374-9203
ARRET
ARRET
INSTRUCTION MANUAL ENCLOSED
MANUEL D’INSTRUCTION Á L’INTÉRIEUR
MANUAL DE INSTRUCCIONES ADJUNTO
INSTRUCTION MANUAL ENCLOSED
MANUEL D’INSTRUCTION Á L’INTÉRIEUR
MANUAL DE INSTRUCCIONES ADJUNTO
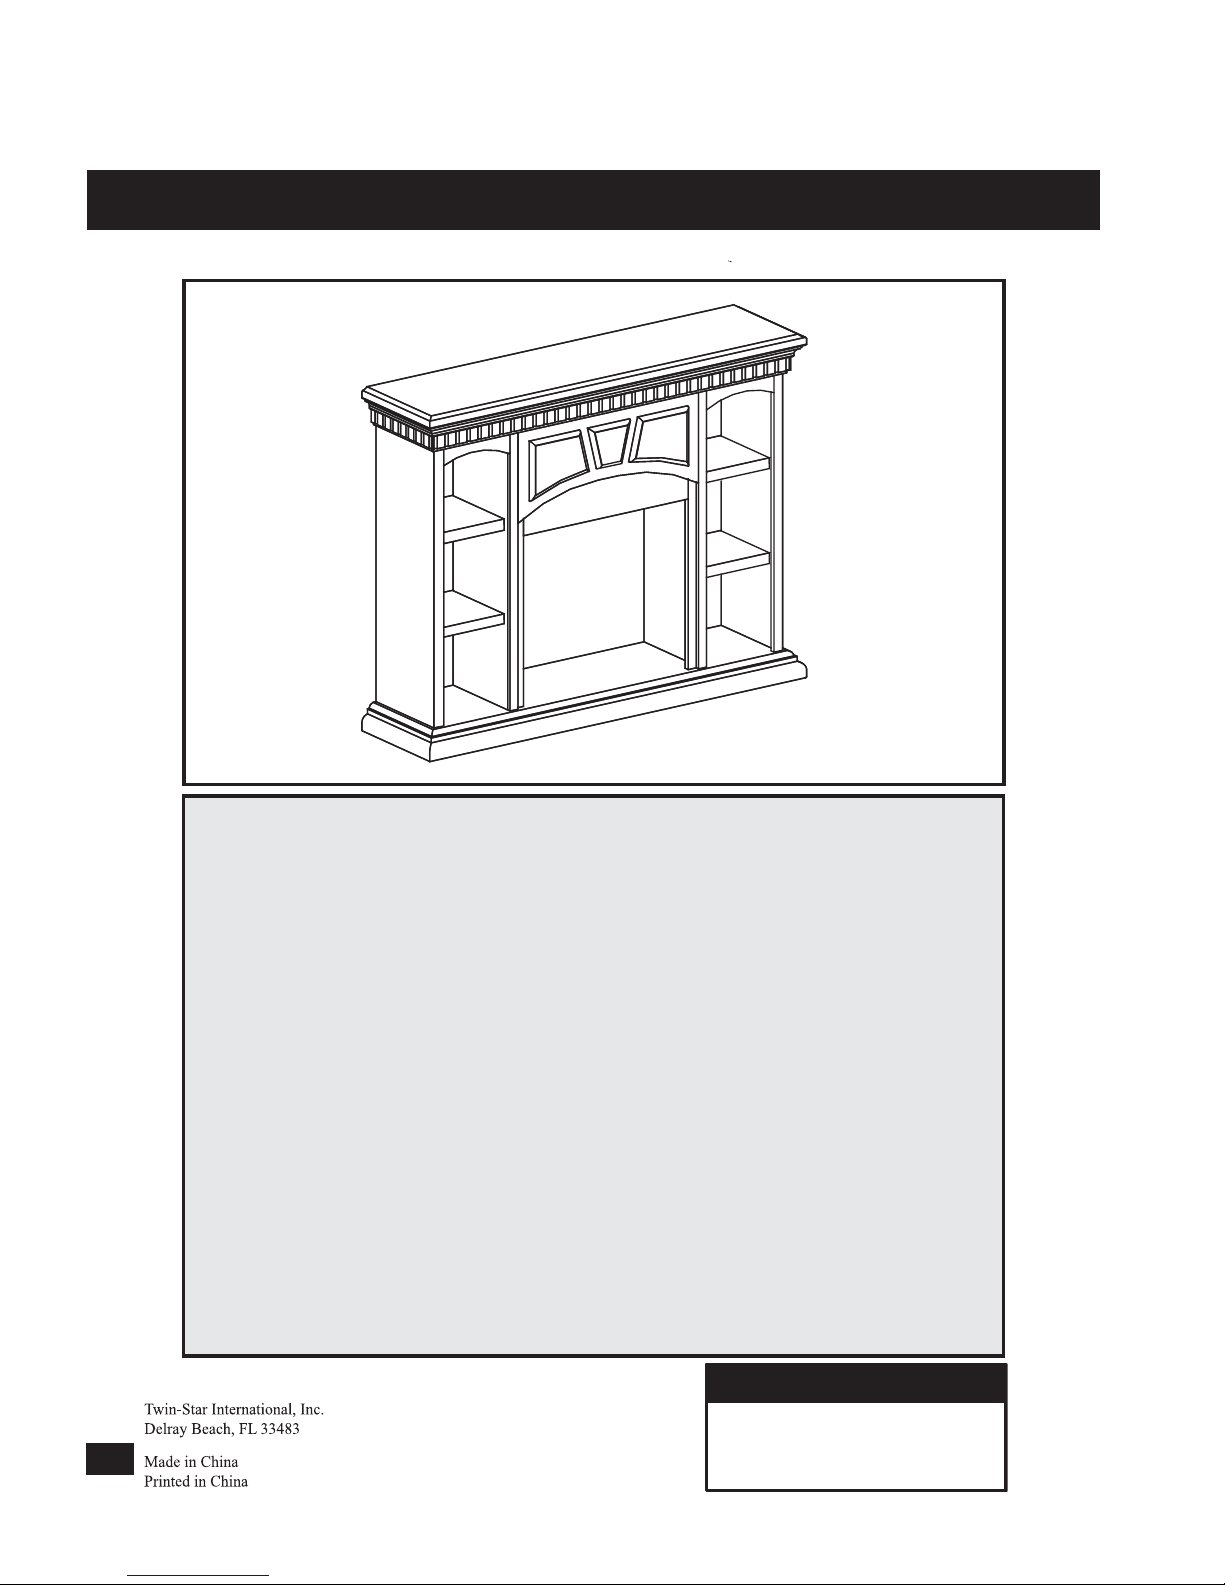
WOOD MANTEL ASSEMBLY INSTRUCTIONS
WOOD FIREPLACE MANTEL
23WM137
(
Part
Description
Quantity
PARTS
A Hearth/Base 1
B Center Left Side Panel 1
C Center Right Side Panel 1
D Center Front Panel 1
E Left Side Panel 1
F Right Side Panel 1
G
H
I
J
Mantel/Top
Left Connect Panel
Right Connect Panel
Wood Shelf
1
1
1
4
K Left Back Panel 1
S Right Back Panel 1
HARDWARE
L Bolt 1/4” x 1 1/4” 10
M
Washer
18
N
O
P1
P2
Q
Wood Dowel
Shelf Pins
Bolt 1/4” x 1 3/4”
Nut
Screw
20
16
8
8
36
PARTS LIST
E-mail: parts@twinstarhome.com
In English call: 866-661-1218
In French call: 866-374-9203
In Spanish call: 866-661-1218
For Customer Service:
PLEASE READ AND FOLLOW ALL SAFETY TIPS
For a complete tight fit every bolt
should have a flat washer. First slide a
flat washer onto the bolt. Your bolt is
now ready for use.
Now it is time to assemble your Fireplace. All
panels are labeled Left and Right as viewed
from the front of unit.
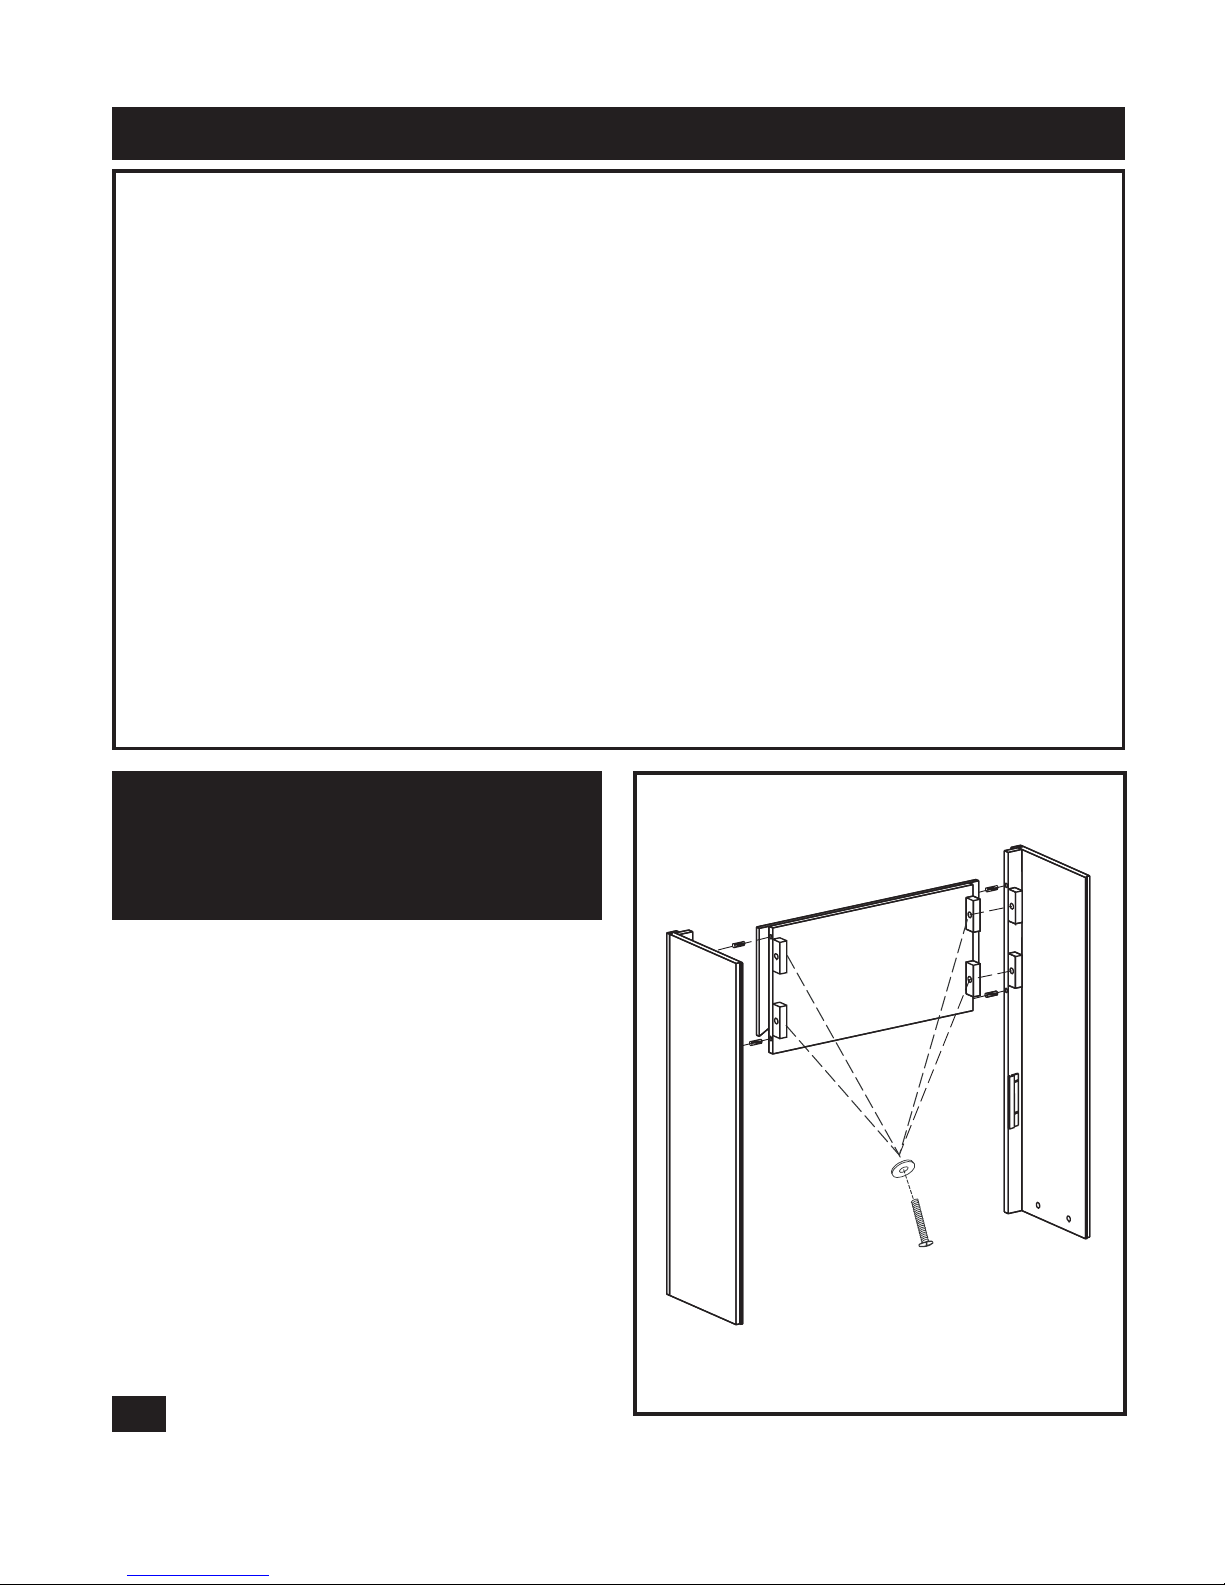
1. Locate the Center Front Panel (D), Center Left Side
Panel (C) and Center Right Side Panel (B) and set
out face down on the scratch free surface.
2. Insert one Wood Dowel (N) into each of the pre drilled holes.
3. Push the Center Left Side Panel and Center Right
Side Panel snug to the Center Feont Panel. Make
sure the Wood Dowels are seated in the pre-drilled
holes. Insert Bolt (L) and Washer (M) into the
holes in the mounting blocks.
HAND TIGHTEN ONLY .
E-2
GETTING STARTED
1. Before assembly, CAREFULLY use scissors or utility knife to cut and unwrap all parts. Make sure
you do not discard the hardware.
HELPFUL HINTS
• Some steps are more easily handled with two adults.
• Attach the fireplace insert to the completed wood mantel last. INSTALL INSERT IN FROM THE
BACK OF THE FIREPLACE SO AS NOT TO SCRATCH THE HEARTH/BASE.
• Use care in assembling your new fireplace, take your time and use the hardware provided and a qual-
ity Phillips head screwdriver. NEVER OVER TIGHTEN BOLTS.
CARE & CLEANING
1. Dust your fireplace regularly with a soft non-lint producing cloth or household dusting product.
2. You can clean your fireplace with a gentle non-abrasive household cleaner. Make sure to dry your
fireplace immediately with a soft cloth or towel.
N
N
Center Front
Panel
D
C
B
L
M
Center Right
Side Panel
Center Left
Side Panel
2. Make sure that you have all the parts listed. If you are missing any parts please email Customer
Service: parts@twinstarhome.com, or call 1-866-661-1218 in English,1-866-374-9203 in French,
1-866-661-1218 in Spanish. Please identify the parts you need,and model number . Make sure to
include your name and address.
• Do not sit on top of the mantel.
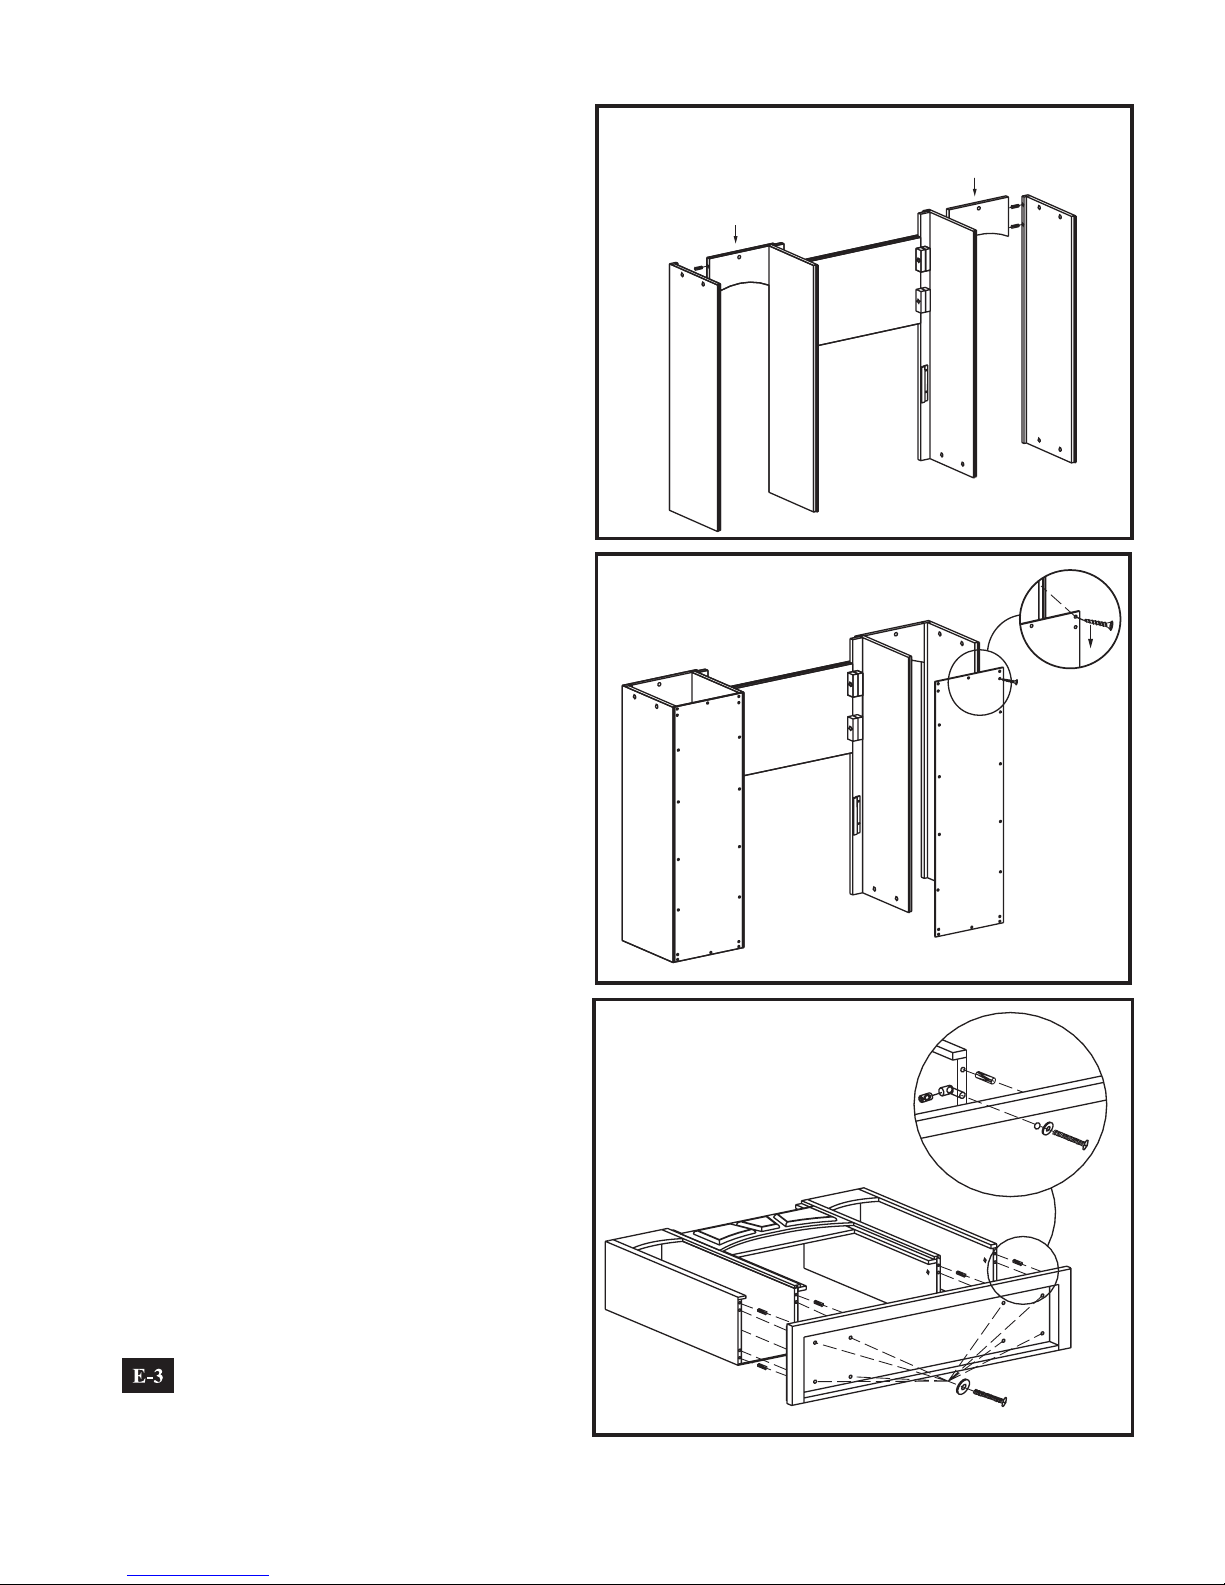
4. Locate Left Connect Panel(H) and Left Side
Panel(E),Insert one Wood Dowel (N) into each
of the pre-drilled holes, Attached the Left
Connect Panel to the completed assembly from
step 3 and the Left Side Panel.
5. Locate Right Connect Panel(I) and Right Side
Panel(F),Insert one Wood Dowel (N) into each
of the pre-drilled holes, Attached the Right
Connect Panel to the completed assembly from
step 3 and the Right Side Panel.
6. Locate Left Back Panel (K), attached to the left
back of the completed assembly from step 5,
using a Phillips Head screw driver, screw screws
(Q) through the pre-drilled holes in the Back Left
Panel to the completed assembly.
7. Locate Right Back Panel (S), attached to the right
back of the completed assembly from step 5,
using a Phillips Head screw driver, screw screws
(Q) through the pre-drilled holes in the Back
Right Panel to the completed assembly.
8. Locate the completed assembly from step 7 and
set out face down on the scratch free surface,
then attached the Hearth/Base and lay finished
side towards the completed assembly as drawing.
9. Insert one Wood Dowel (N) into each of the pre drilled holes, then insert Nut(P2) into each of the
pre-drilled holes in bottom of all side panel,
attached Hearth/Base to the completed assembly
with Bolt (P1) and Washer(M) through the pre drilled holes in the Hearth/Base to Nut. Using
Phillips head screwdriver tighten all Bolts.
E
F
N
N
H
I
K
K
Screw
(Q)
S
Right
Connect
Panel
Back
Left
Panel
Back
Right
Panel
Left
Side
Panel
Right
Side
Panel
Left
Connect
Panel
Hearth/Base
M
M
P2
Nut
L
L
N
N
N
N
A
 Loading...