

TwinHan VisionDTV PCI-Ter User Manual

VisionDTV PCI-Ter
User’s Manual Ver2.4

2
Copyright Notice
This document is copyrighted, 2003, by TwinHan Technology Co., Ltd.
All rights are reserved. TwinHan Technology Co., Ltd. reserves the right
to make improvements to the products described in this manual at any
time. Specifications are thus subject to change without notice.
No part of this manual may be reproduced, copied, translated, or
transmitted in any form or by any means without the prior written
permission of TwinHan Technology Co., Ltd.
Information provided in this manual is intended to be accurate and reliable.
However, TwinHan Technology Co., Ltd., assumes no responsibility for
its use nor for any infringements upon the rights of third parties which
may result from its use.
All the product names or trademarks are the properties of their respective owners.

3
Table of Contents
Page
Chapter 1 VisionDTV PCI-Ter Introduction 4
1.1 Introduction
5
1.2 Package Content
5
1.3 System Requirements
5
1.4 Features
6
1.5 Specifications
6
Chapter 2 Installation Introduction 8
2.1 Hardware Installation
9
2.2 Software Installation
10
Chapter 3 System Setup 15
3.1 DTT – Setup
17
3.2 Program
19
3.3 Recording Setup
21
Chapter 4 VisionDTV Application Program 22
4.1 Control Panel
23
4.2 Functions
24
Clock
Channel Title Displaying
Turn the sound on and off
Video Recording
Multi-Channel Preview
Electronic Program Guide (EPG)
Multi-Language
Snap Shot
Teletext
4.3 Right Click Menu
26
4.4 Keyboard Shortcuts
27
Chapter 5 Trouble Shooting 28

4
CHAPTER
VisionDTV PCI-Ter Introduction
This chapter provides you a brief introduction about
the package, hardware, and software of VisionDTV.
And also includes something you need to know
before you start to set the whole system up.
Sections include:
z Introduction
z Package Content
z System Requirements
z Features
z Specifications

5
Chapter 1 VisionDTV PCI-Ter Introduction
1.1 Introduction
VisionDTV PCI-Ter Card allows you to watch digital TV & Radio programs via a PCI
interface Card. With VisionDTV PCI-Ter Card, users are able to watch, record & play
back high quality digital TV program on their PC Monitors. Today, a vast array of
entertainment media is not only found on TV set top boxes, but also available on your
home PC.
1.2 Package Content
z VisionDTV PCI-Ter board
z Infrared remote control with AAA batteries
z Infrared remote control receiver
z Quick installation guide
z Driver CD (Multi-language Software and User’s Manual)
1.3 System requirements
z IBM or IBM compatible computer
z OS: Windows 98SE/ME/2000/XP
z CPU: 500 MHz or better
z Memory: 128MB or more
z VGA card with at least 8 MB Memory
z Sound card
z Microsoft DirectX 8.1 or above
z Terrestrial antenna
z Microsoft Media Player 7.0 or above

6
1.4 Features
z Support DVB protocol
z Digital Terrestrial TV and Radio Program Receiving
z Real time Digital Video Recording and Schedule Recording
z Time-shifting
z Electronic Program Guide (EPG)
z Multi-Channel Preview (FTA Channels Only)
z Auto Scan
z Viewing and Recording Different Channels simultaneously in the same transponder
z MPEG-II Software Decoding
z Software Upgradeable
z Still Frame Capture
z Favorite List
z Teletext
1.5 Specifications
Tuner
Input Terminal: 75 Ohm
Receiving frequency: 51~858 MHz tuning range
Support MCPC and SCPC
COFDM & FEC
2K or 8K FFT Size
Punctured Codes: 1/2, 2/3, 3/4, 4/5, 5/6 and 7/8
Bandwidth: 6, 7 or 8 MHz
Reed-Solomon Decoder (204,188)
PCI Interface
PCI bus: PCI 2.2 compliant
Host bus burst rate: 132 MB/S
Host bus width: 32 bit
De-multiplexing
Max No. Section filtering: 32PIDs
Engine: software
Descrambler: DVB descrambler

7
Stream capture: PES & TS
Syntax Error: CRC or Parity
A/V Format
Video format: MPEG-II Main Profile& Main Level
Audio format: MPEG-II Audio layer I & II
Board Size and Weight
About 125mm×102mm
About 340g

8
CHAPTER
Installation Introduction
This chapter tells how to install VisionDTV in
hardware and software with the easiest way!!
Sections include:
z Hardware installation
z Software installation
9
Chapter 2 Installation Introduction
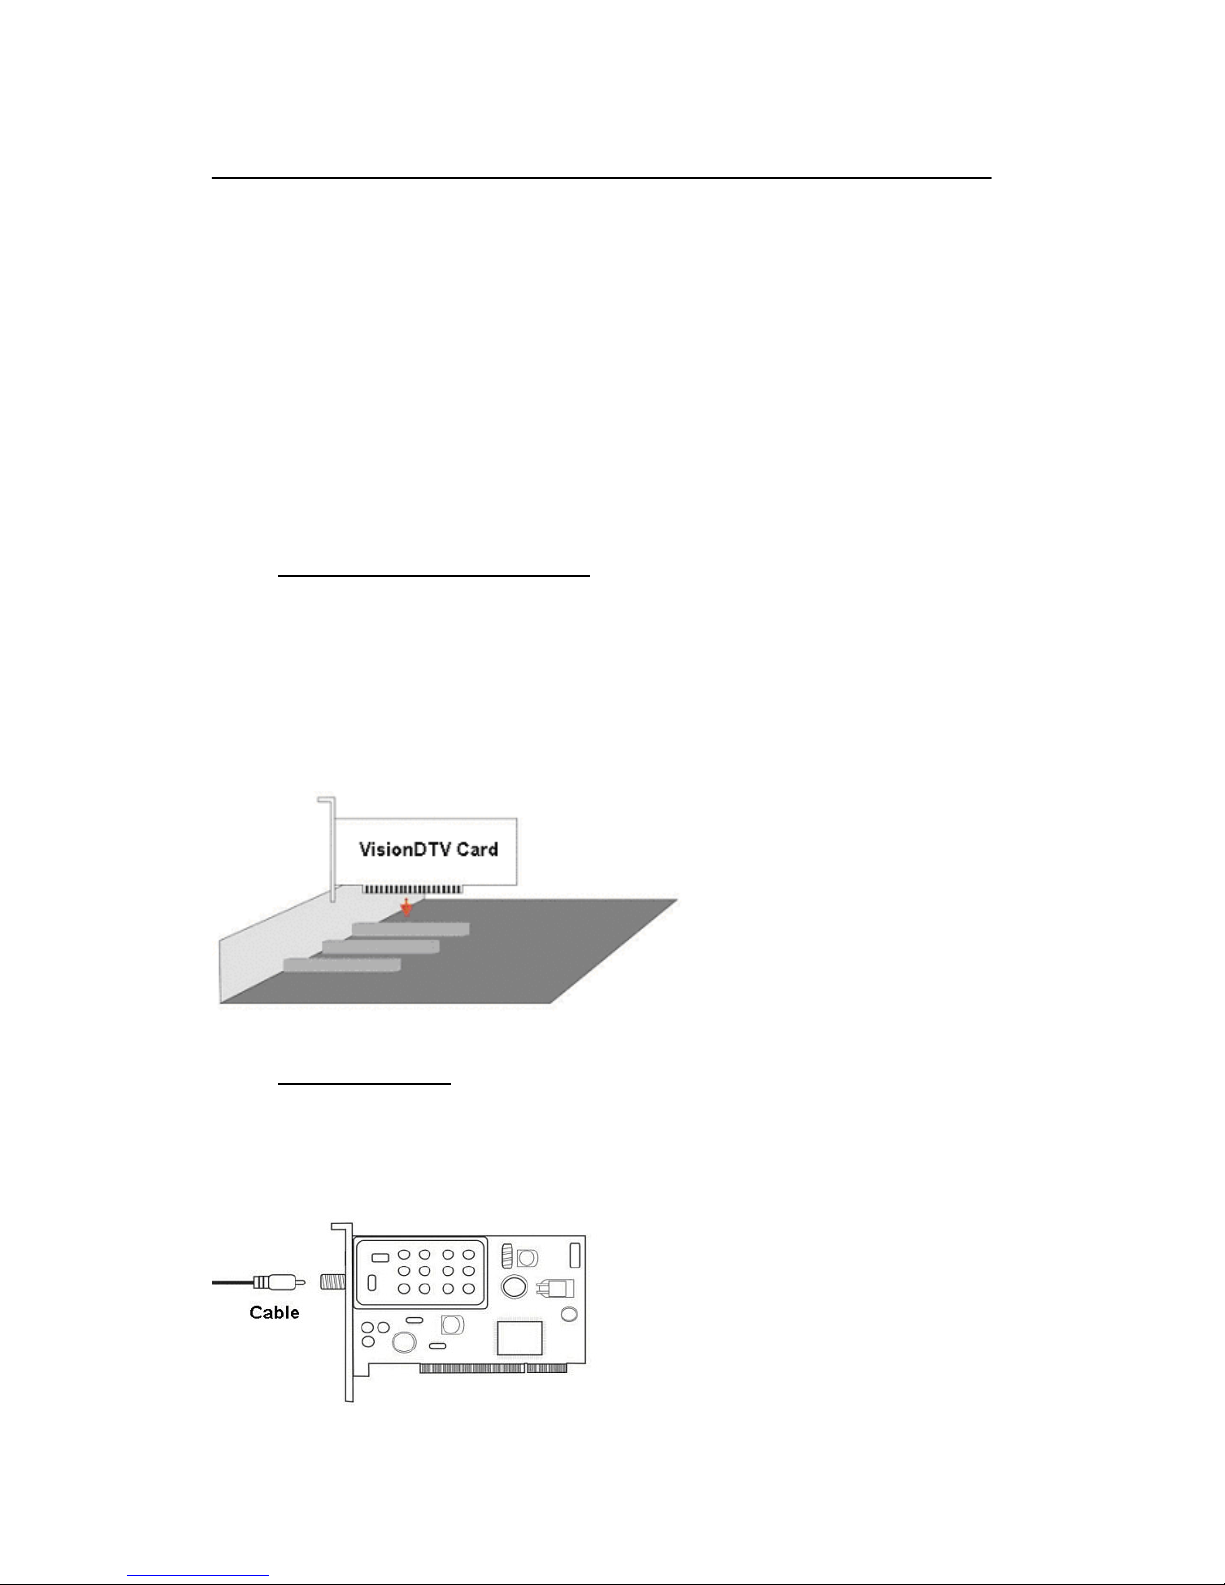
2.1 Hardware Installation
Before You Begin
Make sure your computer system meet the system requirements
Make sure the computer and all related equipments are power off
Please note that VisionDTV can’t be inserted with the analog TV tuner card at the
same system. Please remove the analog TV tuner card or other PCI card that with
Conexant BT878 on board and their drivers before install VisionDTV.
Step1: Insert VisionDTV PCI-Ter Card
Remove the cover of the slot you intend to use and unscrew the mounting bracket
Pick up the VisionDTV PCI-Ter Card and position it over the expansion slot you
have chosen
Push the card firmly and evenly, confirm it seated in the slot entirely
Screw the bracket of the VisionDTV PCI-Ter Card onto the computer chassis
Step2: Cable Connection
Make sure the cable correctly connected with terrestrial antenna
Connect the cable to the LNB-in connector and fasten the plug
 Loading...