

®
TWIN EAGLES, INC.
Defining the Art of Outdoor Cooking
®
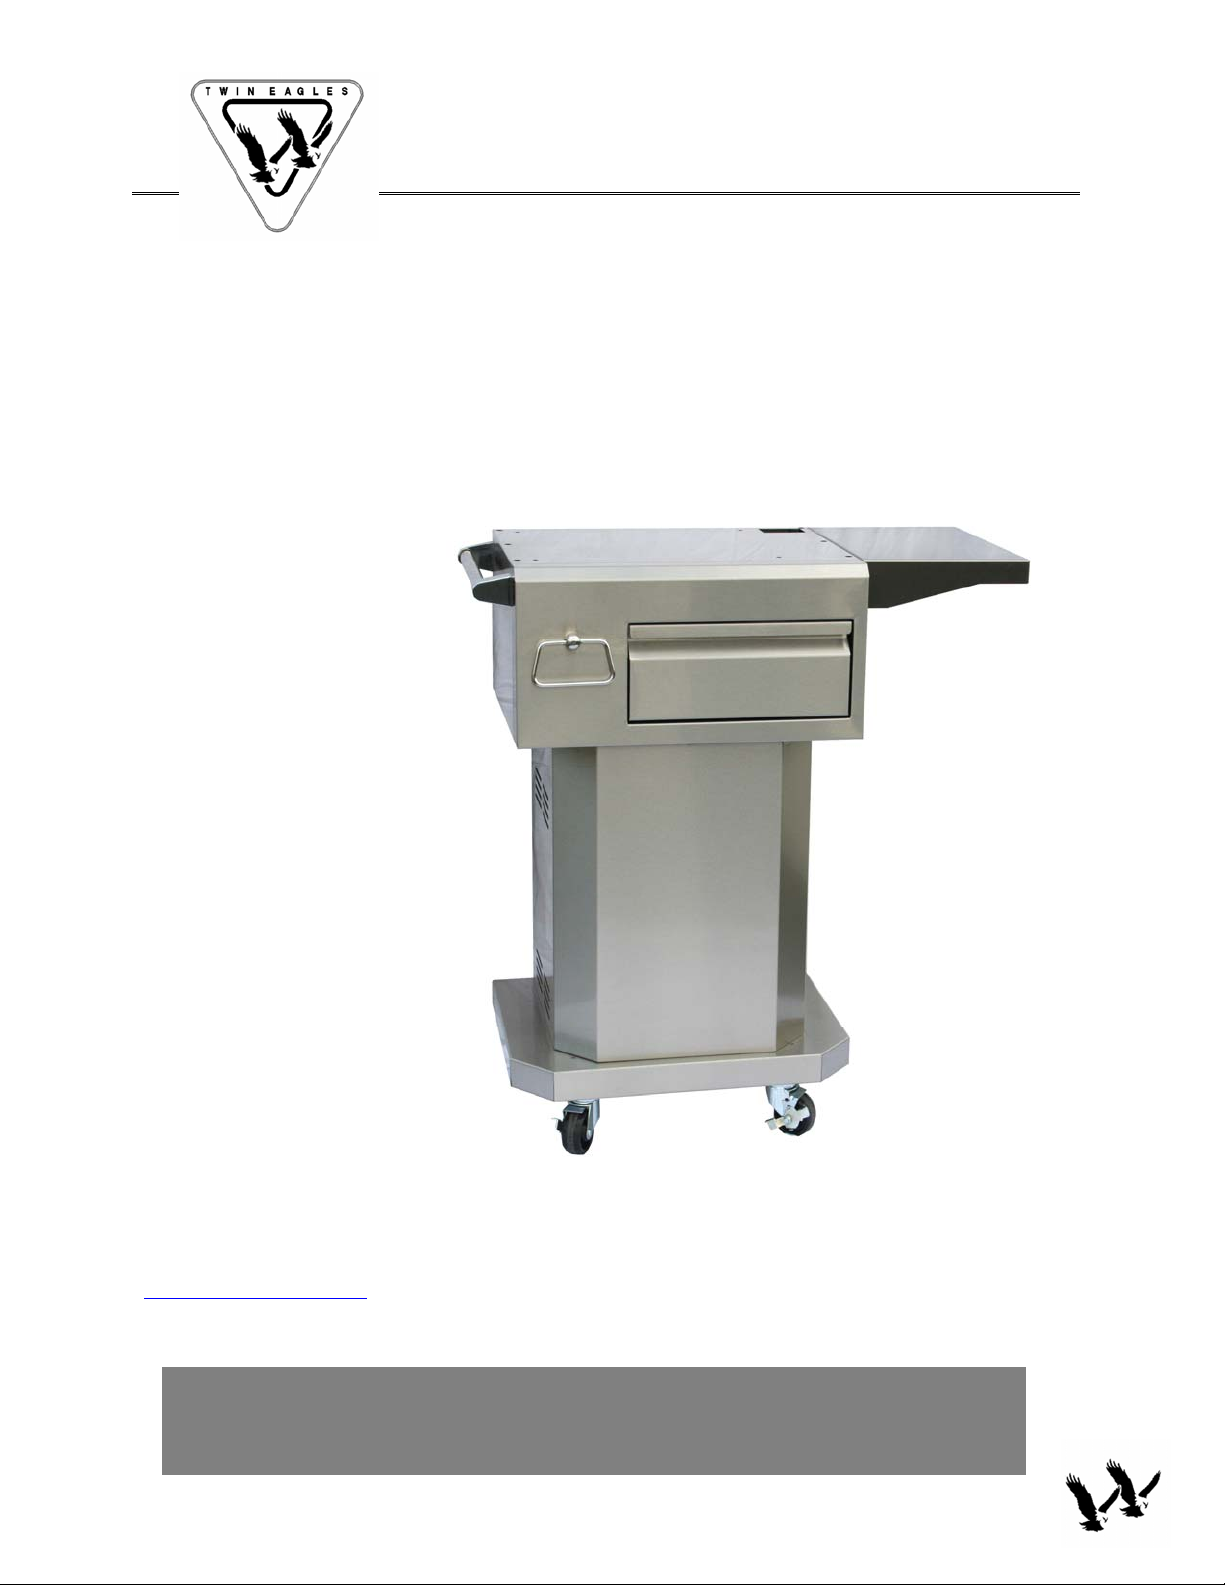
SALAMANGRILL BASE CART
ASSEMBLY INSTRUCTIONS
TWIN EAGLES
th
13231 East 166
Cerritos, CA 90605-1944
1(800) 789-2206
www.twineaglesbbq.com
St.
SAVE THIS INSTRUCTIONS FOR FUTURE REFERENCE
NEED ASSISTANCE? PLEASE CALL:
(800) 789-2206
P/N 18604 (11/ 06) Made in U.S.A.
MODEL TSGB-24
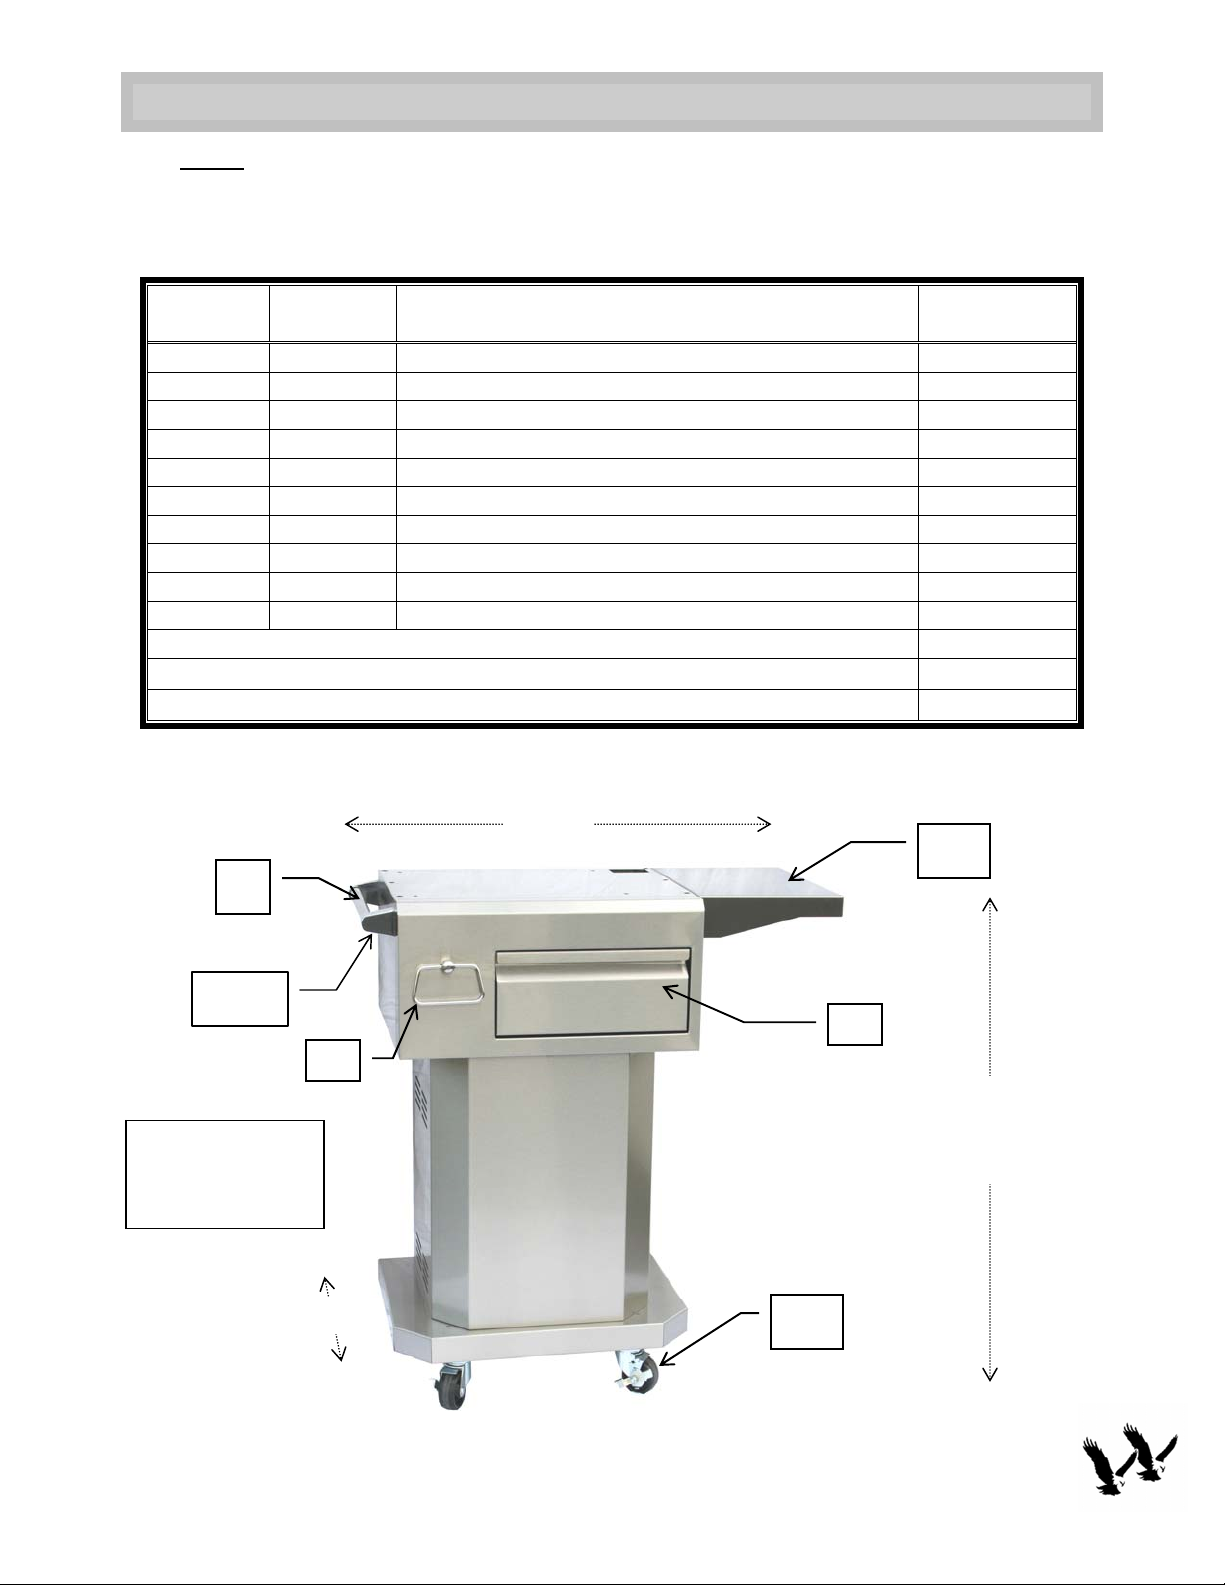
PARTS CHECKLIST – SALAMANGRILL
®
BASE CART
NOTE:
Before assembling the base cart make sure you got all the parts listed on the table below.
This is a list of all the parts that are shipped with the product, some are loose and some of
them are already installed.
Item
Number
Part
Number
Part Description Qty
1 12330 Handle bar, s/s (1” x 15 1/8” – 18 GA) 1
2 13113 Handle brackets 2
3 14125 Hex screws, s/s (Cap ¼-20 x ½) 20
4 20770 Side shelf 1
5 14144 Philip screw, #10-32 x ½” 4
6 14409 Towel Ring 1
7 20769Y Storage Drawer Assembly 1
8 14404 Caster with brakes 4
9 14129 Bushing, snap on 2
Unit Weight (assembled) 70
Shipping Weight 85
For ordering parts, contact Twin Eagles. Toll free No. (800) 789-2206.
9; (Not shown)
1
2, 3
1- side
1- Right rear
6
19 ½”
39”
4, 5
7
55” with
Salamangrill
8, 3
Lbs.
38”
®
1

®
)
)
b
)
BASE CART
NOTE:
ASSEMBLY INSTRUCTIONS – SALAMANGRILL
a. Twin Eagles Salamangrill Base Cart is shipped with the handle bar, side shelf and casters
uninstalled to prevent any damage during shipping.
b. Remove the protective plastic film from the components as you are assembling them.
1) HANDLE BAR:
a. Remove the rear panel
b. Bolt
(11mm or 7/
”) on one of the handle brackets…slide in the handle bar…slide in the other bracket
16
(4-philips heads screws).
and bolt tight.
2) SIDE SHELF
:
a. Align the shelf to the 4 insert nuts and screw in snug, once all screw holes align, tighten them.
3) CASTERS
:
a. Turn the base cart up-side-down and bolt down a caster to the holes of the base bracket. Repeat
for the other 3 casters. Turn the cart right-side-up.
b. Lock and unlock the casters as shown on the bottom pictures
1a)
1b)
(4b).
1
2a
Drawer
3a)
Caster Base
Bracket
3b
CONTINUE ON NEXT PAGE
2

INSTALLATION OF SALAMANGRILL
)
)
d
)
)
d
)
)
CONTINUATION FROM PREVIOUS PAGE
®
TO THE BASE CART
4) GAS INLET CHANGE:
Before installing the Salamangrill, the gas inlet must be relocated from the back to the bottom.
a. Remove the back cover of the Salamangrill
(6-philips heads screws plus 2 for gas inlet).
b. Remove the 1” hole plug from the bottom hole and save it you will need it for rear hole.
c. Bend the flex tubing from the rear direction to the bottom to match the bottom hole opening and
screw in from the bottom using the philips screw that were taken off the back.
d. Place the rear cover back on the unit and place all 6 screws back on. Snap in the 1” hole plug.
5) SALAMANGRILL MOUNTING:
a. Completely remove the protective plastic film from the base cart top.
b. Take off the 4 legs at the bottom of the Salamangrill by hand turning counter-clockwise. Careful
not to damage the gas inlet fitting.
c. Place the Salamangrill on the base cart and align it to the hole-pattern on the base cart top.
d. Secure the Salamangrill onto the cart using the legs as screws. Screw on the 4 legs from the bottom
up…push the drawer forward to create more arm room.
e. Run the LP hose and regulator supplied through the hole of the base and connect to the
Salamangrill. Connect regulator to LP tank and with the LP tank valve open conduct LEAK TEST
using soapy water solution. If gas leak is found, re-tighten connection. Once no leak is found
replace cart rear cover
(4 screws).
f. To turn on Salamangrill:
i. Open LP tank valve.
ii. Push and turn knob to HI. Push and hold igniter button for about 4 seconds or until burner is
lit…you will hear continuous clicking.
iii. If burner does not ignite within 4 seconds turn off valve, wait for 5 minutes and repeat
procedures.
4a
4c
To be re-used.
4d) 1” hole
plug
Change bended
direction down.
5b)
5
5c
5e
5a)
Gas Inlet
towards
right-rear
5
Open the
drawer
Spark Igniter
Bottom View
5f)
HI
3
 Loading...