

Page 1

Get Started Guide
© 2011 TVTextbook Limited. All rights reserved.
TVTextbook support hotline: Toll-Free 1-855-TVT-BOOK (1-855-888-2665)
Page 2
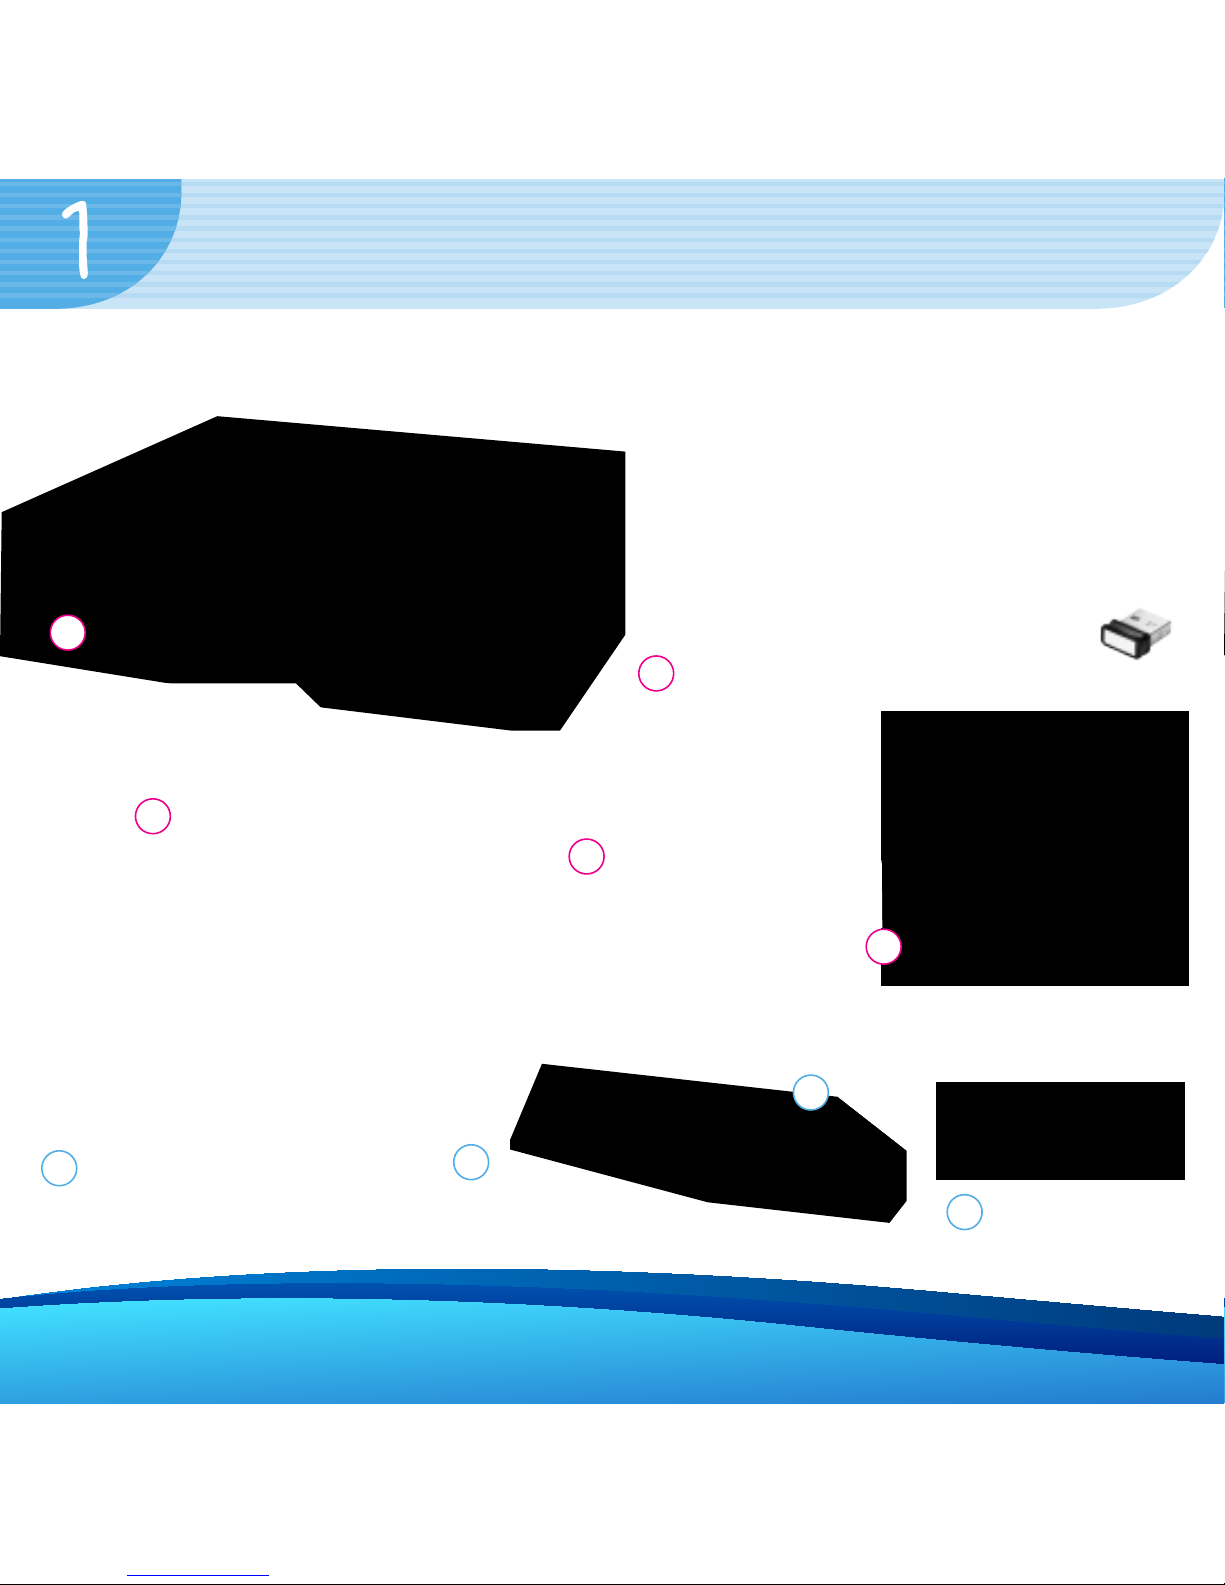
Your TVTextbook Kit
AV jacks
HDMI Cable
Your T-Kit contains the following:
Optional Accessories:
WiFi
Adapter
Ethernet Cable
TVTextbook
Power
Adapter
1
2
3
1
5
4
3
TVTexbook
USB key
4
3G USB
Modem
2
Wireless Keyboard & USB Receiver
Page 3
Setting Up your TVTextbook
2
Step
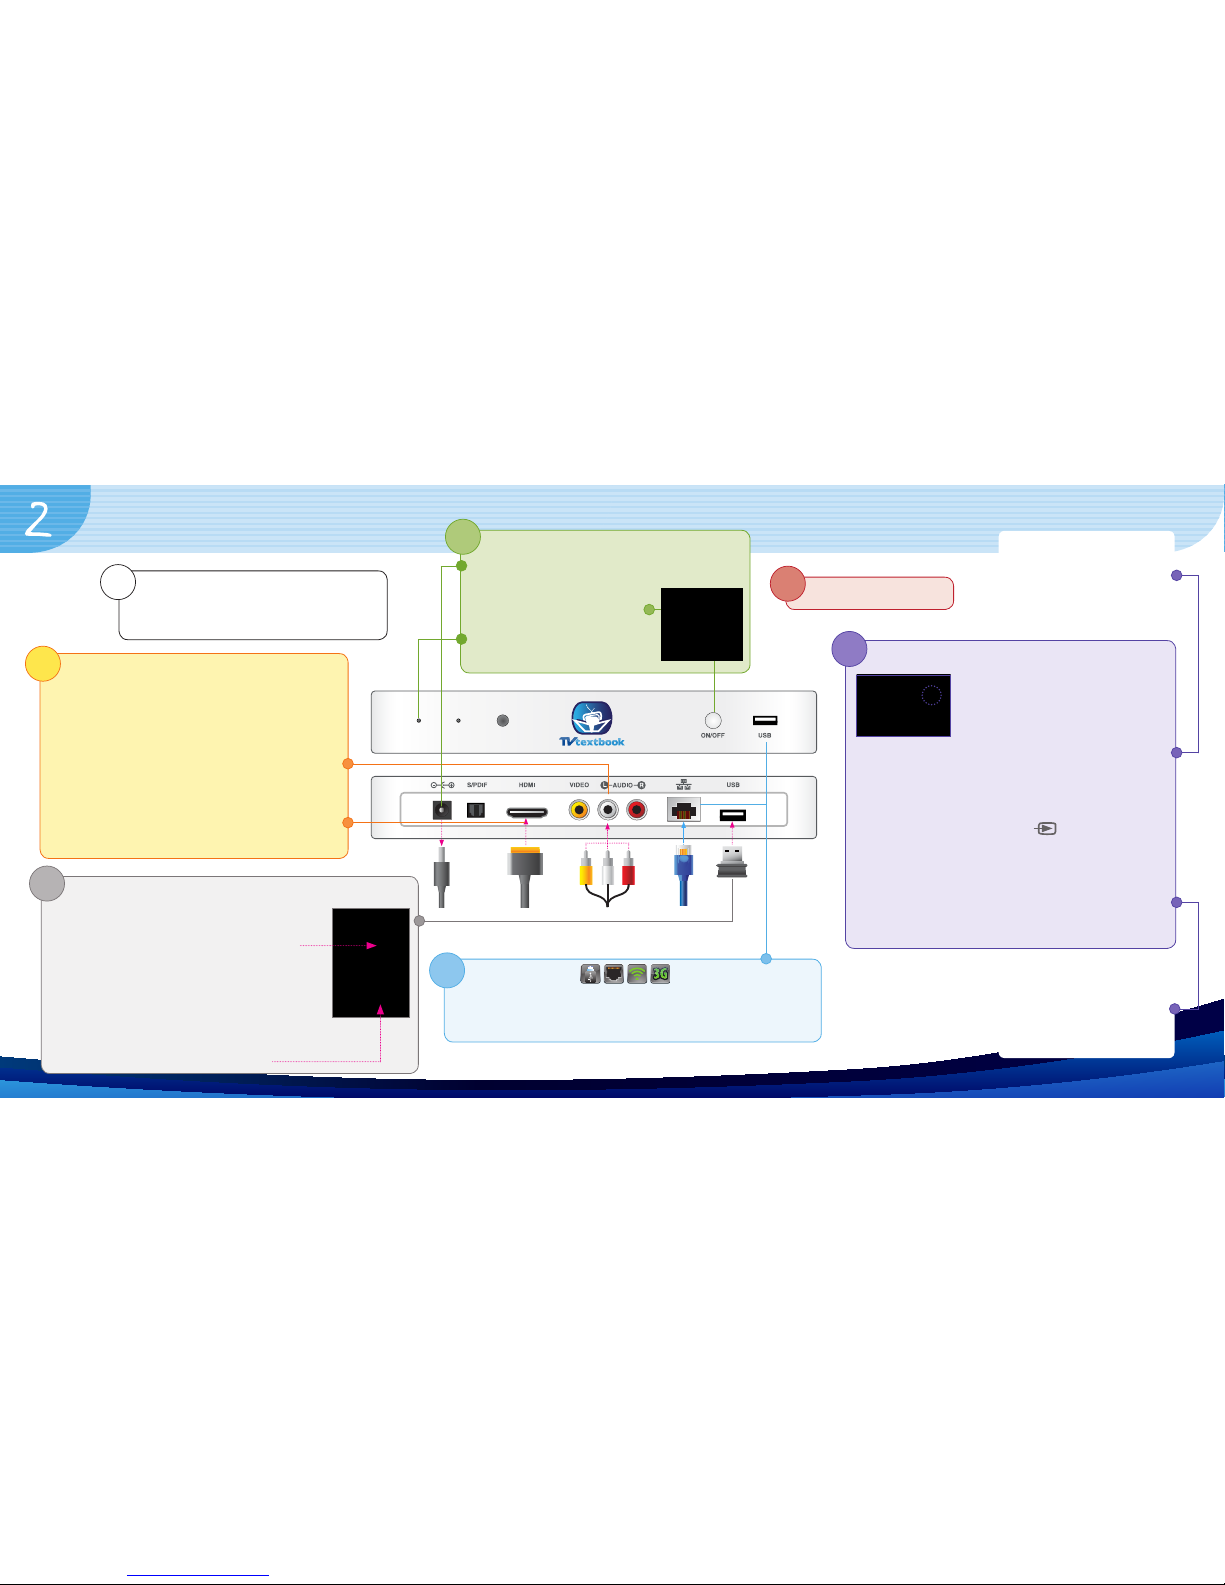
Connect your TVTextbook to your TV
To connect your TVTextbook to your TV use the
following cables:
Use the AV jacks to connect your Standard TV
(SD TV) to your
TVTextbook
. Connect the yellow,
white, and red AV jacks on the
TVTextbook
with
the corresponding yellow, white, and red AV jacks
on the TV.
Use the HDMI cable to connect your HD T V to
your TVTextbook. Connect the HDMI port on the
TVTextbook with the HDMI port on the TV.
Power off your TVTextbook and TV
Ensure your T VTextbook power adapter is
unplugged and the TV is powered Off.
1
Step
6
Step
Power On your T V
Power on your T VTextbook
Plug the TVTextbook power adapter
into the TV Textbook & the wall socket.
Press the On/Off button on
the front of your TVTextbook.
The Power On light on the front
of the TVTextbook should be green.
5
Step
Connect your T VTextbook keyboard
a.
The keyboard is used to interact with TVTextbook. The Keyboard receiver can be found in
a slot on the underside of the Keyboard.
b. Plug the Keyboard receiver into the rear USB
port of your TVTextbook.
c. Ensure that the batteries supplied have been
inserted into the Keyboard.
d. Connect the Keyboard to the receiver by pressing the
‘Connec t’ button on the underside.
3
Step
Select the Input on your T V
Using the TV remote control, press
the AV Input button (or equivalent)
and select the corresponding input
on your TV.
The TVTextbook boot screen should be displayed on
your TV.
Note: The AV or Sour ce button is usua lly found on
your TV remote control. The button will either b e
labele d with “AV”, “Source” or . If you are having
trouble g etting the TV Tex tbook app to displ ay on the
TV, refer to the instruction book let that came with your
TV for information on selecting AV input modes.
It may take a few moments for the TVTextbook app
to load. When the TVTextbook has loaded, the Log In
screen will be displayed on your TV.
7
Step
Get Connected
Refer to section 3 to connect TV Textbook using one of the
following: ethernet cable, WiFi Adaptor, 3G USB modem or
TVTextbook USB Key.
4
Step
Page 4
Get Connected
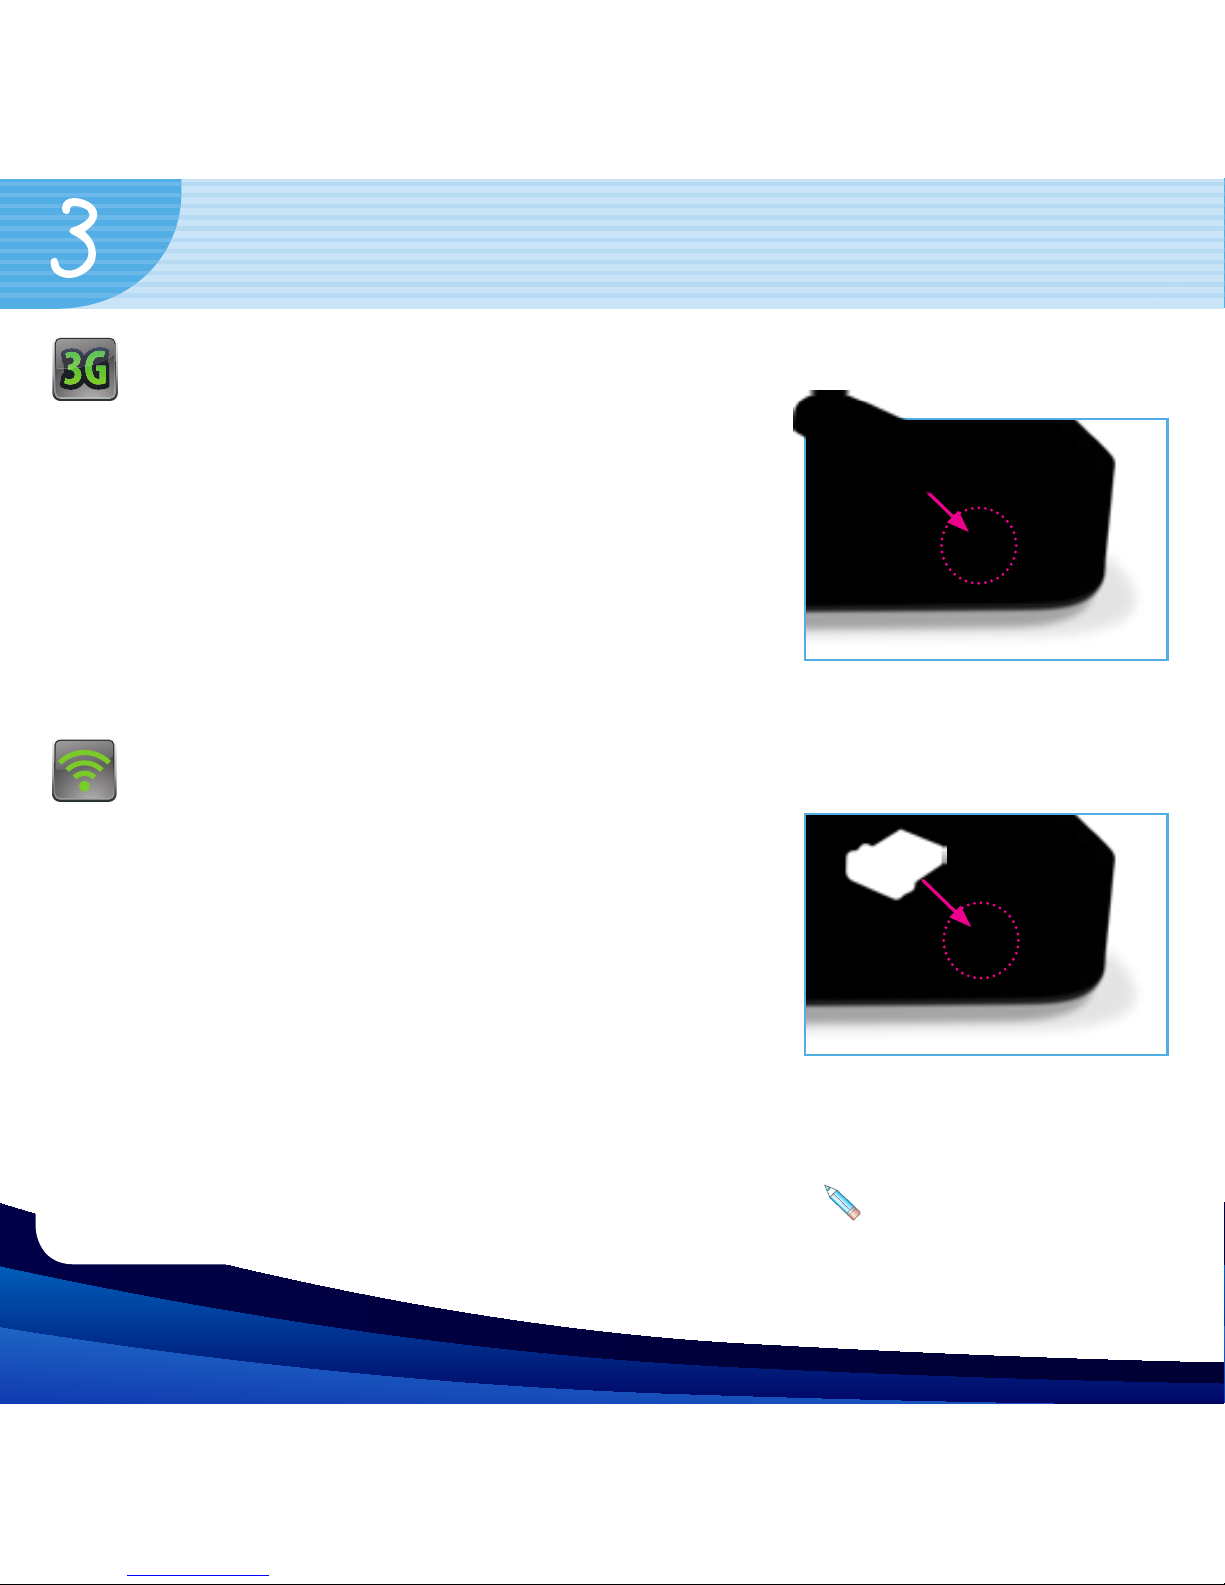
1. Connect to the internet via 3G:
If your TVTextbook is supplied with a 3G Modem, you may
use this to connect your TVTextbook to the internet. Only 3G
Modems supplied by TVTextbook will be supported by your
TVTextbook. Do not attempt to connect unsupported 3G Modems to your TVTextbook.
1. Plug the supplied 3G Modem into the USB port at the front
of the TVTextbook.
2.
Proceed with Step 5 to 7 of the TVTextbook Setup (Section 2).
Your TVTextbook is now connected to the internet.
Please choose only one of the following 4 connectivity methods:
2. Connect to the internet via WiFi:
If your T
VTextbook
is supplied with the optional Wi Adapter,
you may use this to connect your T
VTextbook
to the internet.
Only Wi Adapters supplied by TVTextbook will be supported by
your T
VTextbook
. Do not attempt to connect unsupported Wi
Adapters to your T
VTextbook
.
1. Plug the supplied WiFi Adapter into the USB port at the
front of the T
VTextbook
.
2. Proceed with Step 5 to 7 of the T
VTextbook
Setup (Section 2).
3. The rst time you power on your T
VTextbook
for WiFi access, you will be required to choose
your Wi network on your TV screen.
4. To select your network, use your keyboard to move the pointer
over the network you
wish to connect to, and click to select it using the ‘Left Button’.
Page 5
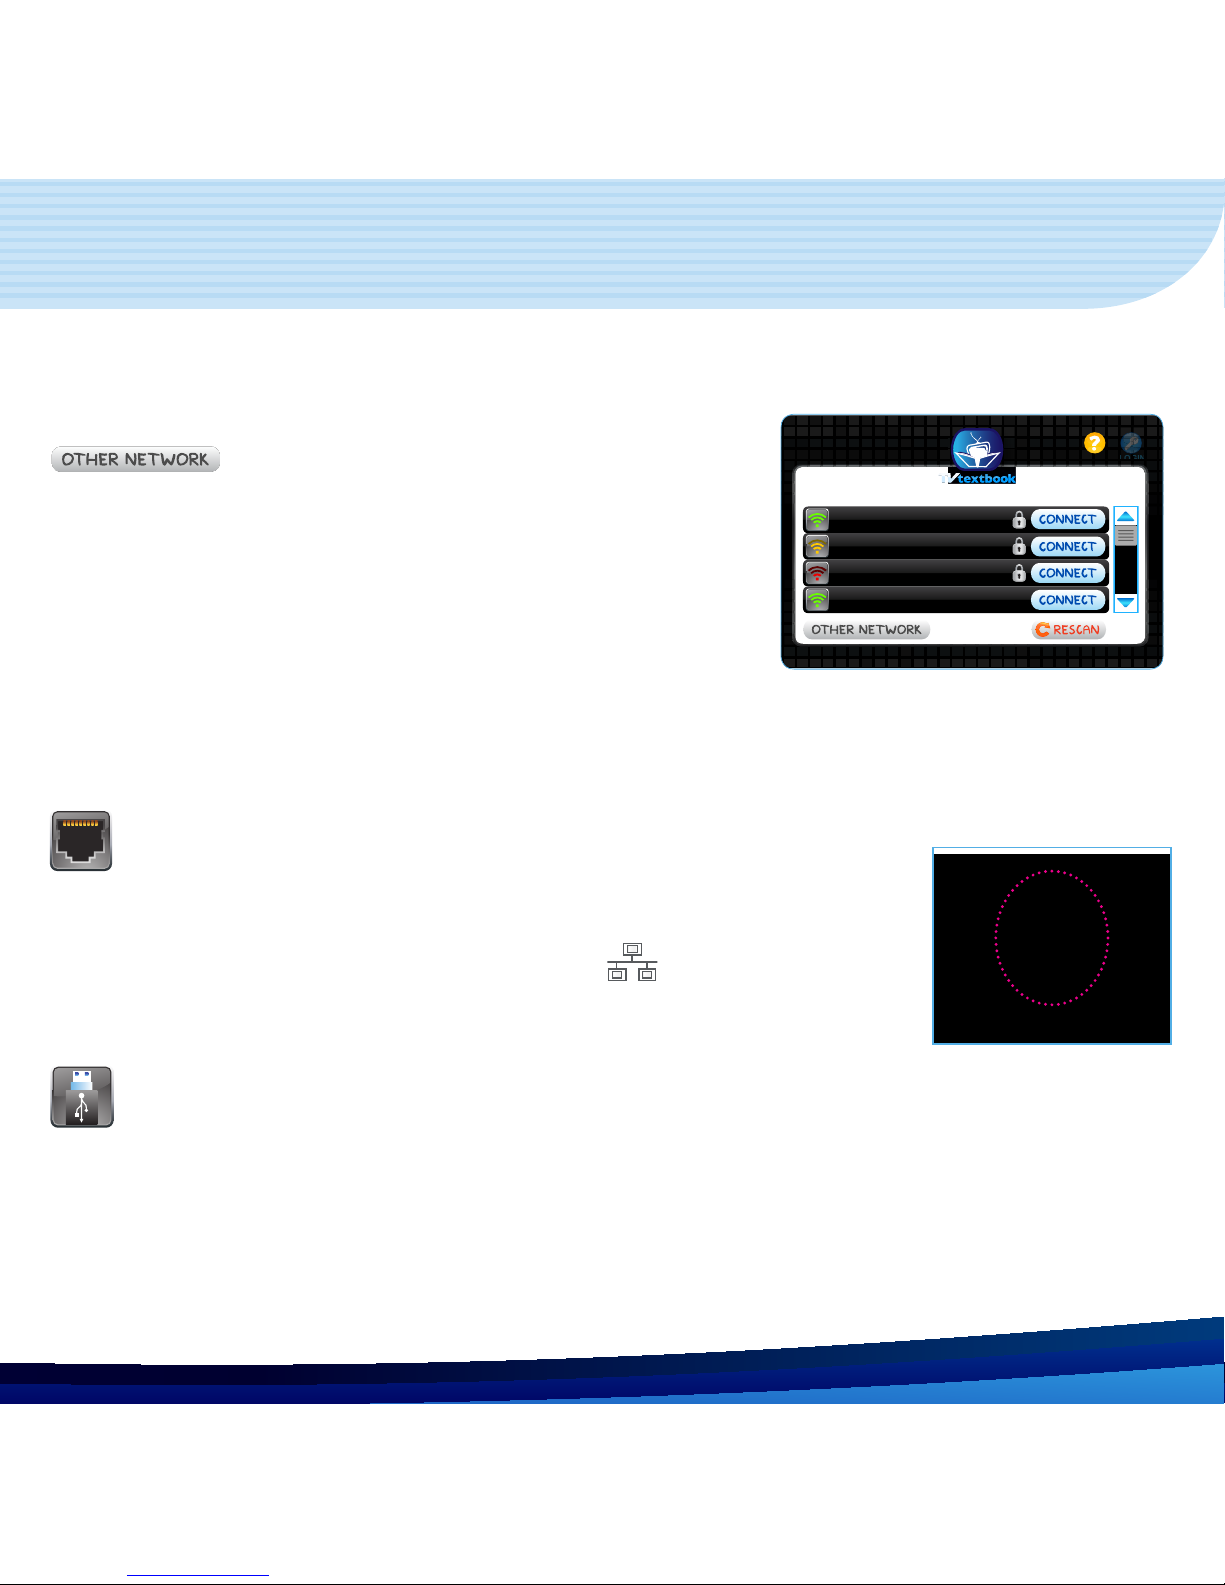
If the network you wish to connect to is hidden, click on the
LOGIN
HELP
Select your WiFi Network
Belkin54g
NETGEAR-2.4-G
crushbone
Guest
button. If the network requires a password,
you will be asked to type your password using your TVTextbook keyboard or the virtual keyboard displayed on your TV
screen. On entering your password click on the
HELP
button on the TV screen.
Your TVTextbook is now connected to the internet.
Note: For hidden networks, you will always be prompted for a password, even if none is required. In this circumstance, just enter a blank password by selecting the space
bar on your keyboard. When turning on your TVTextbook in the future you will bypass the network settings
as your TVTextbook will remember your WiFi network and automatically connect to it. You can change the
network you are connecting to via your TVTextbook Settings.
LOGIN
HELP
Select your WiFi Network
Belkin54g
NETGEAR-2.4-G
crushbone
Guest
3. Connect to the internet via Ethernet:
1. Ensure that the supplied WiFi Adapter is not plugged into your
TVTextbook.
2. Plug your Ethernet cable into the port labeled at the back of your
TVTextbook. Ensure the other end of the LAN cable is plugged into your
home network. Your TVTextbook is now connected to the internet.
4. Connect the TVTextbook USB key to your TVTextbook:
If there’s no internet connection available you can use the
TVTextbook USB key to use TVTextbook.
1.
Plug the TVTextbook USB key
into the USB port at the front of the TVTextbook.
2. Proceed with Step 5 to 7 of the TVTextbook Setup (Section 2).
 Loading...