

Page 1
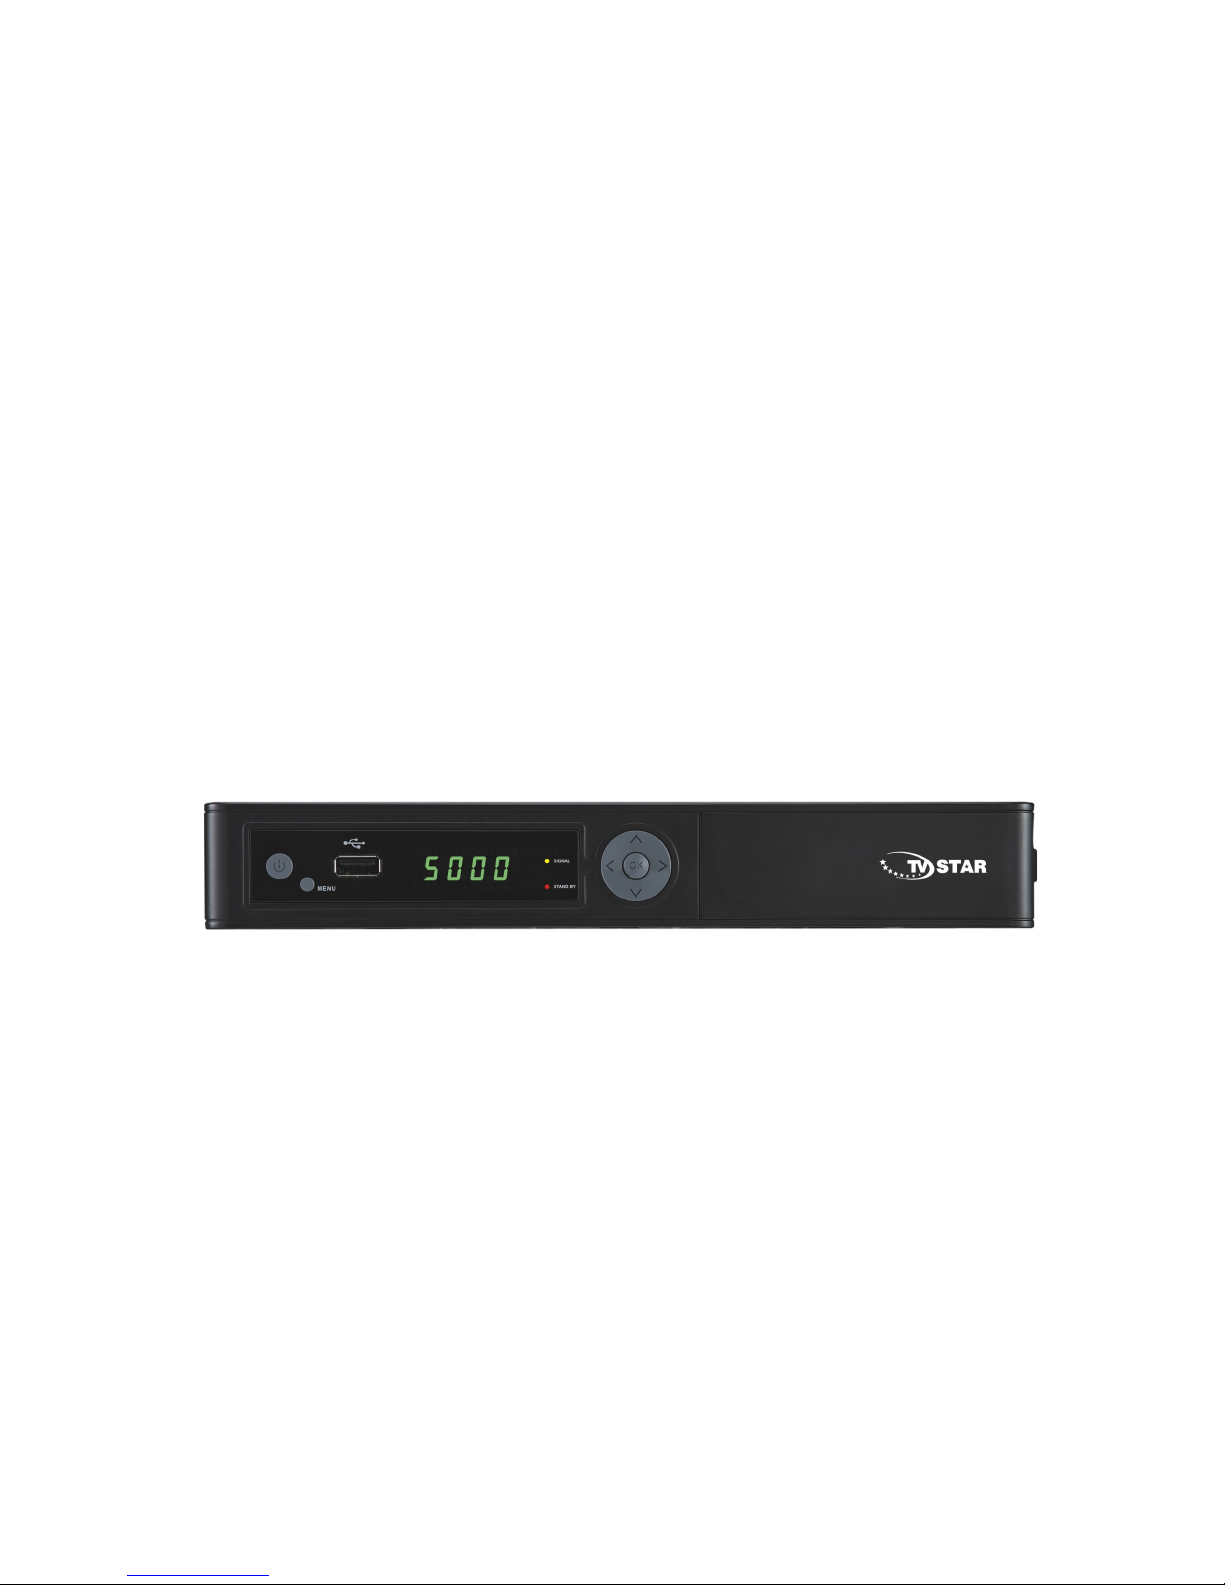
DIGITAL CABLE TV RECEIVER
Set Top Box (STB)
TV STAR C101
USER MANUAL
1
Page 2

Table of contents
Safety………………………………………………………………………….……4
General Introduction…………………………………………………………..…6
Front Panel / Rear Panel…………………………………………………………....8
Remote Control Unit………………………………………………………….……. 10
S.T.B Connection……………………………………………………………….......13
Digital TV…………………………………………………………………………...16
1. Installation………………………………………………………………………...16
1.1 Manual Search………………………………………………………………….…...16
1.2 Auto Search……………………………………………………………. …..17
2. Channel Manager…………………………………………………………………….18
2.1 Channel Origanizer…. ……………………………………………………….………19
2.2 Channel Grouping………. ………………………………………………….………...19
2.3 Delete all channels………………………………………………………….……..….19
3. Configuration…….…………………………………………………………….………..19
4. Factory Default…………………………………………………………………………..22
5. Version………..…….……………………………………………………………....22
6.Conax CAS7………………..………………………………………………………….…22
7. USB……….……………………………………………………………………...23
7.1 Movie…………….………………………………………………………………....24
7.2 Music……………..…………………………………………………………………..24
7.3 Photo…….……………………………………………………………………………24
2
Page 3

Table of contents
8.0 PVR……….……………………………………………………………………25
8.1 PVR Instruction………………………………………………………………26
9.0 TIMESHIFT…………………………………………….……………………………27
Trouble Shooting………………………………………………………………….…28
Glossary……………………………………………………………….……………...29
Specification………………………………………………………………………….31
3
Page 4

Safety Instructions
This STB has been manufactured to satisfy the international safety standards.
Please read the following safety precautions carefully.
MAIN SUPPLY
:AC 220/240V, 50/60Hz, max 20W.
OVERLOADING
:Do not overload a wall outlet, extension cord or adapter as this may result in fire
or electric shock.
Ensure that the power source (socket) is easily accessible.
LIQUIDS
:This STB shall not be exposed to dripping or splashing and that no objects filled
with liquids, such as vases, shall be placed on the STB.
CLEANING
:Disconnect the STB from the main supply before cleaning. Do not use any kind
of solvents to clean the STB, only use a soft-dry cloth.
VENTILATION
:The slots on top of the STB must be left uncovered to allow proper airflow to the
unit.
Ensure a minimum distance of 5cm around the apparatus for sufficient
ventilation.
Ensure that the ventilation is not impeded by covering the ventilation openings
with items such as newspapers, table-cloths, curtains, etc.
Do not stand the STB on soft furnishings or carpets.
Do not expose the STB to direct sunlight or do not place it near a heater.
Do not stack electronic equipments on top of the STB.
Do not place naked flame sources, such as lighted candles on the apparatus.
ATTACHMENTS
:Do not use any unrecommended attachments as these may cause hazard or
damage to the STB.
4
Page 5

Safety Instructions
CONNECTION TO Cable TV Network
:Disconnect the STB from the main supply before connecting or disconnecting
the cable from the CATV Network
CONNECTION TO THE TV
:Disconnect the STB from the main supply before connecting or disconnecting
the cable from TV.
FAILURE TO DO SO CAN DAMAGE THE TV.
EARTHING
:The STB cable MUST BE EARTHED to the CATV system earth,
Please follow the instructions from your CATV Operator.
LOCATION
:Place the STB indoor in order not to expose to lightening , rain or Sunlight.
Use the apparatus only in moderate climates (not in tropical climates).
Battery handling
:Batteries may contain toxic agents that are hazardous to the environment.
Therefore, dispose of the batteries immediately according to the prevailing
statutory regulations. Never throw the batteries in normal household waste.
5
Page 6

General Introduction
INTRODUCTION
This manual will help you learn basic functions such as installation, selecting
channels and many other functions of the STB. All functions can be operated by the
remote control. You can easily install it by selecting ” Installation” function and
upgrade its software through communication cable.
The remote control is designed for easy access to all the functions at once and for
comfortable grab for your hand. It is programmed to control all functions and to easily
watch TV and Radio programs via the STB.
WARNING
Any problems can be caused by the use of unofficial software. The use of software
versions other than dealers or distributors official software will void the
manufacturer’s warranty. It is advised that only the formal software released from
dealers or distributors should be used.
6
Page 7

General Introduction
UNPACKING
Unpack the unit and check to make sure that all of the following items are included in
the packaging.
1 x Remote Control Unit (RCU)
1 x User Manual
2 x AAA batteries
1 x Digital Cable TV Receiver
1 x A/V Cable
We hope you enjoy using your digital receiver!
7
Page 8
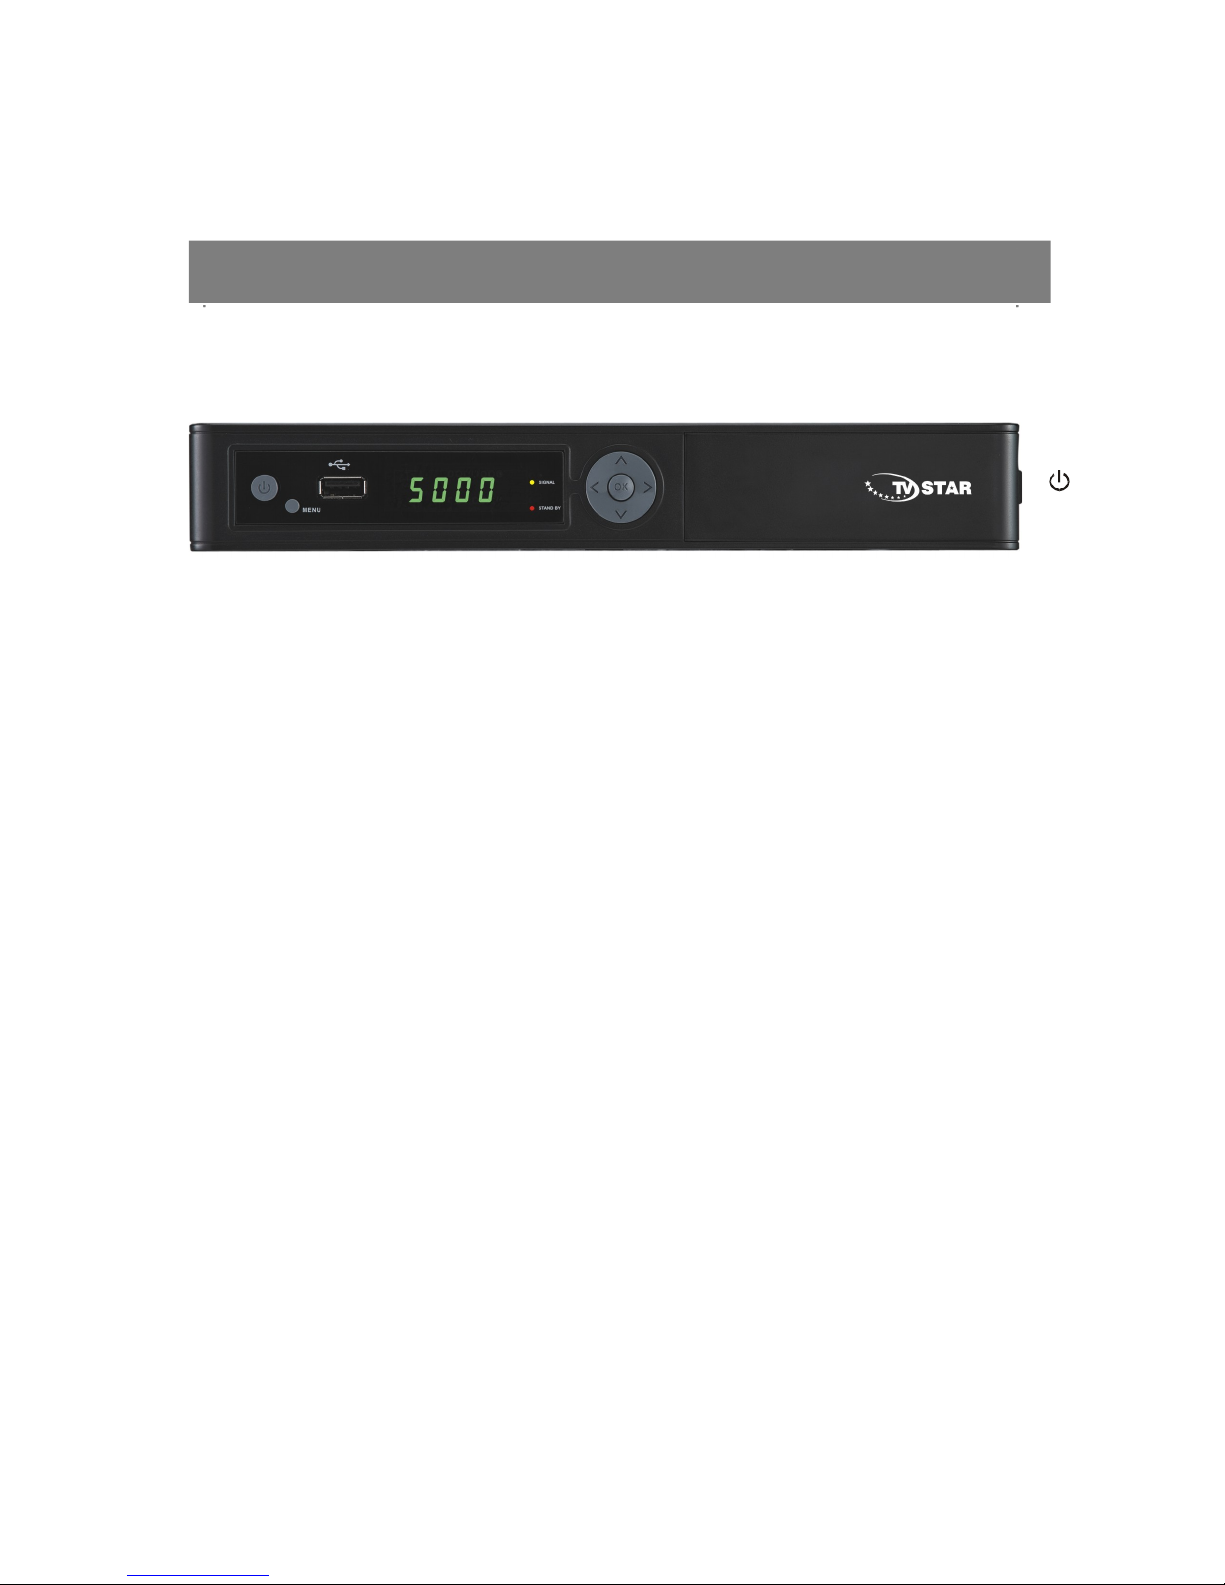
Front Panel/ Rear Panel
Front Panel
:
Press to switch between Operation and Standby modes.
CH: Change channels or items from top to bottom on the menus.
VOL: Increase or Decrease the volume of sound.
OK: Press to proceed of confirmation.
Dimension: 250x 175x 38 (W x D x H )
8
Page 9

Front Panel/ Rear Panel
Rear Panel
No. Symbol Function
1
RF IN Use to connect an antenna.
2
LOOP OUTPUT Use it when connecting to another STB.
3
TV SCART For the video/audio input of the TV.
4
S/PDIF Digital audio output.
5
A/V RCA
To connect the Audio/Video RCA output to TV.
6
POWER Power ON/OFF switch.
9
Page 10

Remote Control Unit
10
Page 11
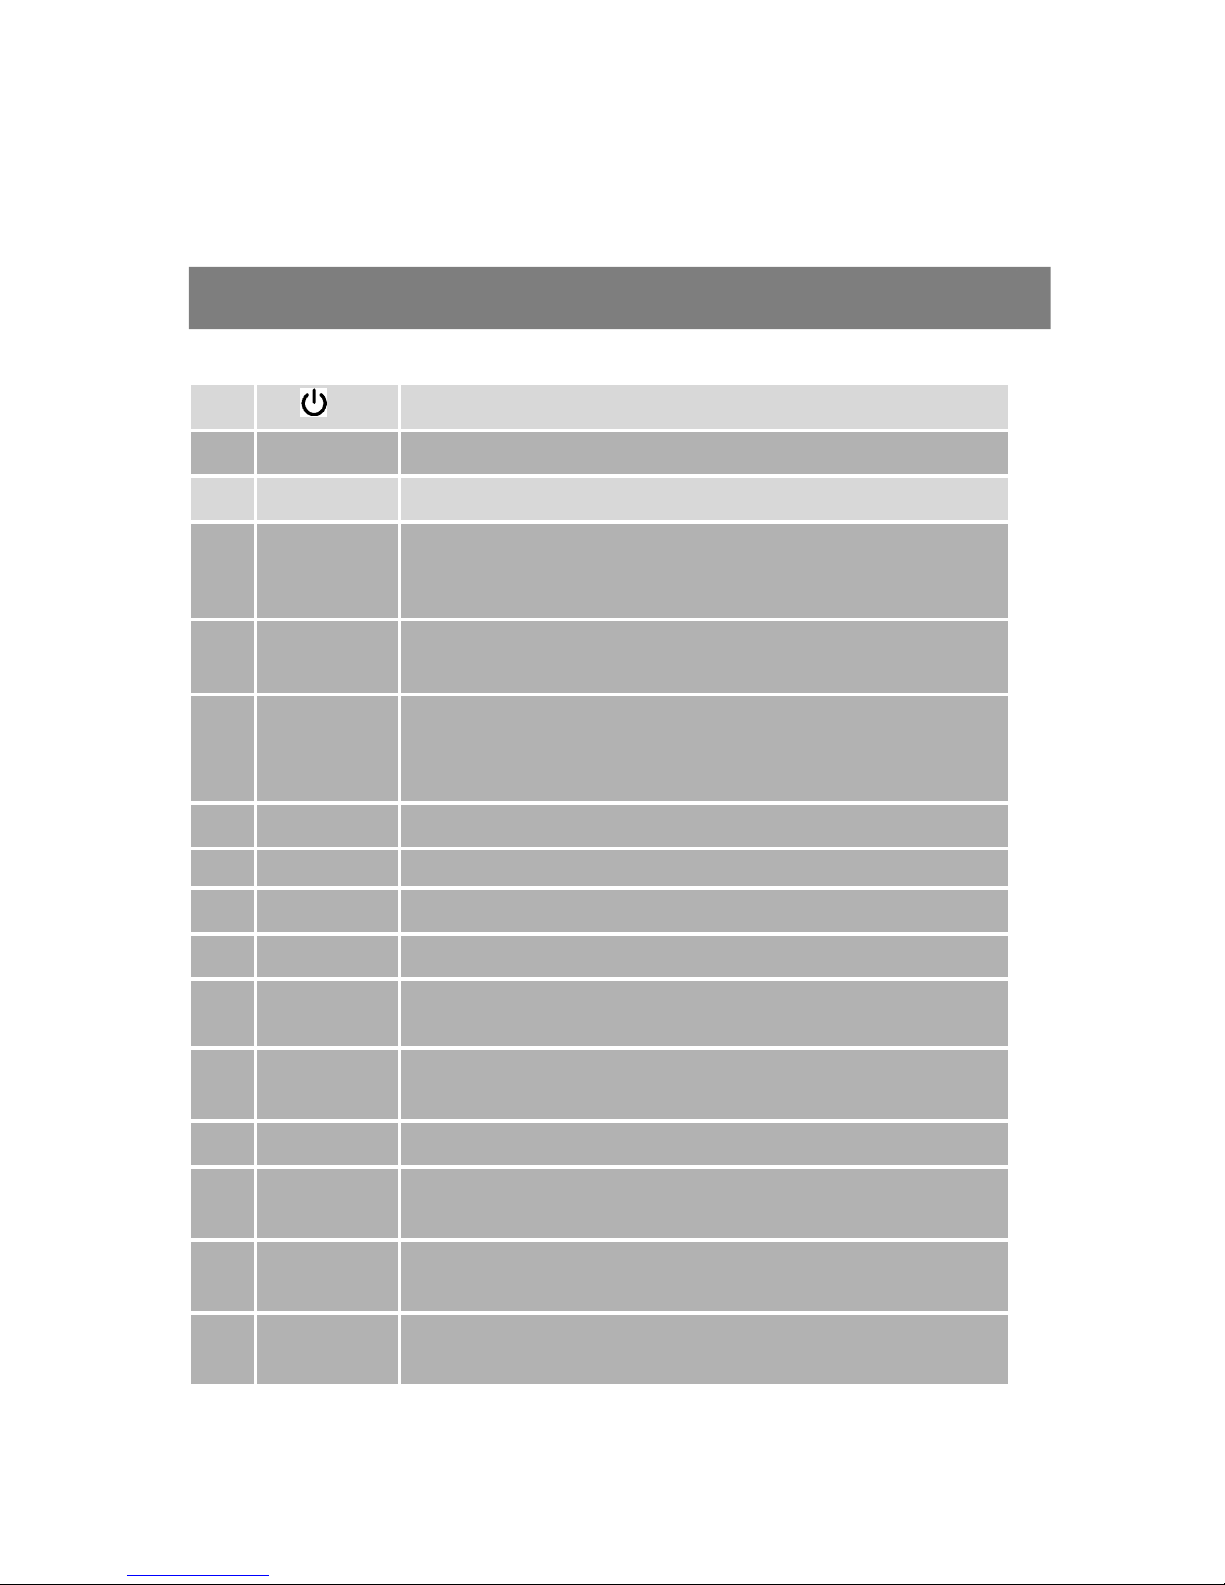
Remote Control Unit
1
Switches between Operation and Standby modes.
2 0–9
Changes channels or selects the menu options.
3 SUBTL
Subtitle functions
4 FAV
Selects favorite channel list or current channel list in the
view mode. In Edit Channel mode’s“Add favorite”menu it
changes the right window’s channel list.
5
CH (▲/▼) Changes channels or items from top to bottom on the
menu.
6 VOL(◄/
►)
Turns up/down volume.
7 MENU
Moves to main menu during TV viewing.
8
INFO Displays the program in formation box on the screen.
9 TXT
Displays TXT information broadcasting from satellite.
10 AUDIO
Changes audio mode to left right and stereo.
11 EPG
Electronic Program Guide button displays the TV/Radio
program guide broadcasting by Satellite TV provider.
12 Disk
Man
To display Disk Manager Menu
13 ZOOM
Press to Zoom-in and Zoom-out picture.
14 BACKW
ARD
Press to make playing file backward as speed of x2, x4,
x8, and x20 of normal.
15 FORWA
RD
Press to speed playing to be x2, x4, x8, and x20 of
normal.
16 FORME
R
Presiona para seleccionar archivo”media” anterior.
11
Page 12

Remote Control Unit
17 NEXT
Press to skip the playing file to play the next file
18 MUTE
Turns sound on or off.
19 Timer
List
Press to display Timer Menu
20 RCL
Press to jump to previous channel watched.
21 OK
Displays the channel list and selects the item on the
menu.
22 EXIT Press to exit the current menu.
23 PAGE
UP
Press to jump one page up or change EPG program list
up.
24 PAGE
DOWN
Press to jump one page down or change EPG program
list down.
25 MULTI
PICTUR
ES
MULTI –PICTURE
26 TV/RAD
IO
Switches between TV and Radio modes.
27 PAUSE
Pauses to freeze the screen
28 STOP
Press to stop file playing.
29 PLAY/R
EC
Press to play the media files from USB disk, or to start
recording TV program.
30 PAUSE
Pauses to freeze the screen.
31 SLOW
Slow down playing speed to be 1/2, 1/4 of normal.
12
Page 13

S.T.B Connection
Various equipment and TV/VCR can be connected to STB.
This manual will explain common ways to connect to the equipment.
If you experience any problem, please contact your sales agency.
1. How to connect the STB to a TV set
(1) Connect one end of the SCART cable to the TV SCART socket on the back of the
STB and the other end to the SCART input socket on your TV.
(2) Connect A/V RCA cable to A/V output on the STB, and the other end to A/V input
socket on your TV.
(3) Connect the antenna cable to the ANT IN input connector of STB.
13
Page 14

S.T.B Connection
2. How to connect to CATV Network
Connect the RF IN socket on STB to a Cable TV network, for the local①
television broadcasting signal.
Connect the TO TV socket to input socket on TV using the coaxial cable.②
Adjust the Tuning setting of TV to get the Satellite TV program.③
14
Page 15
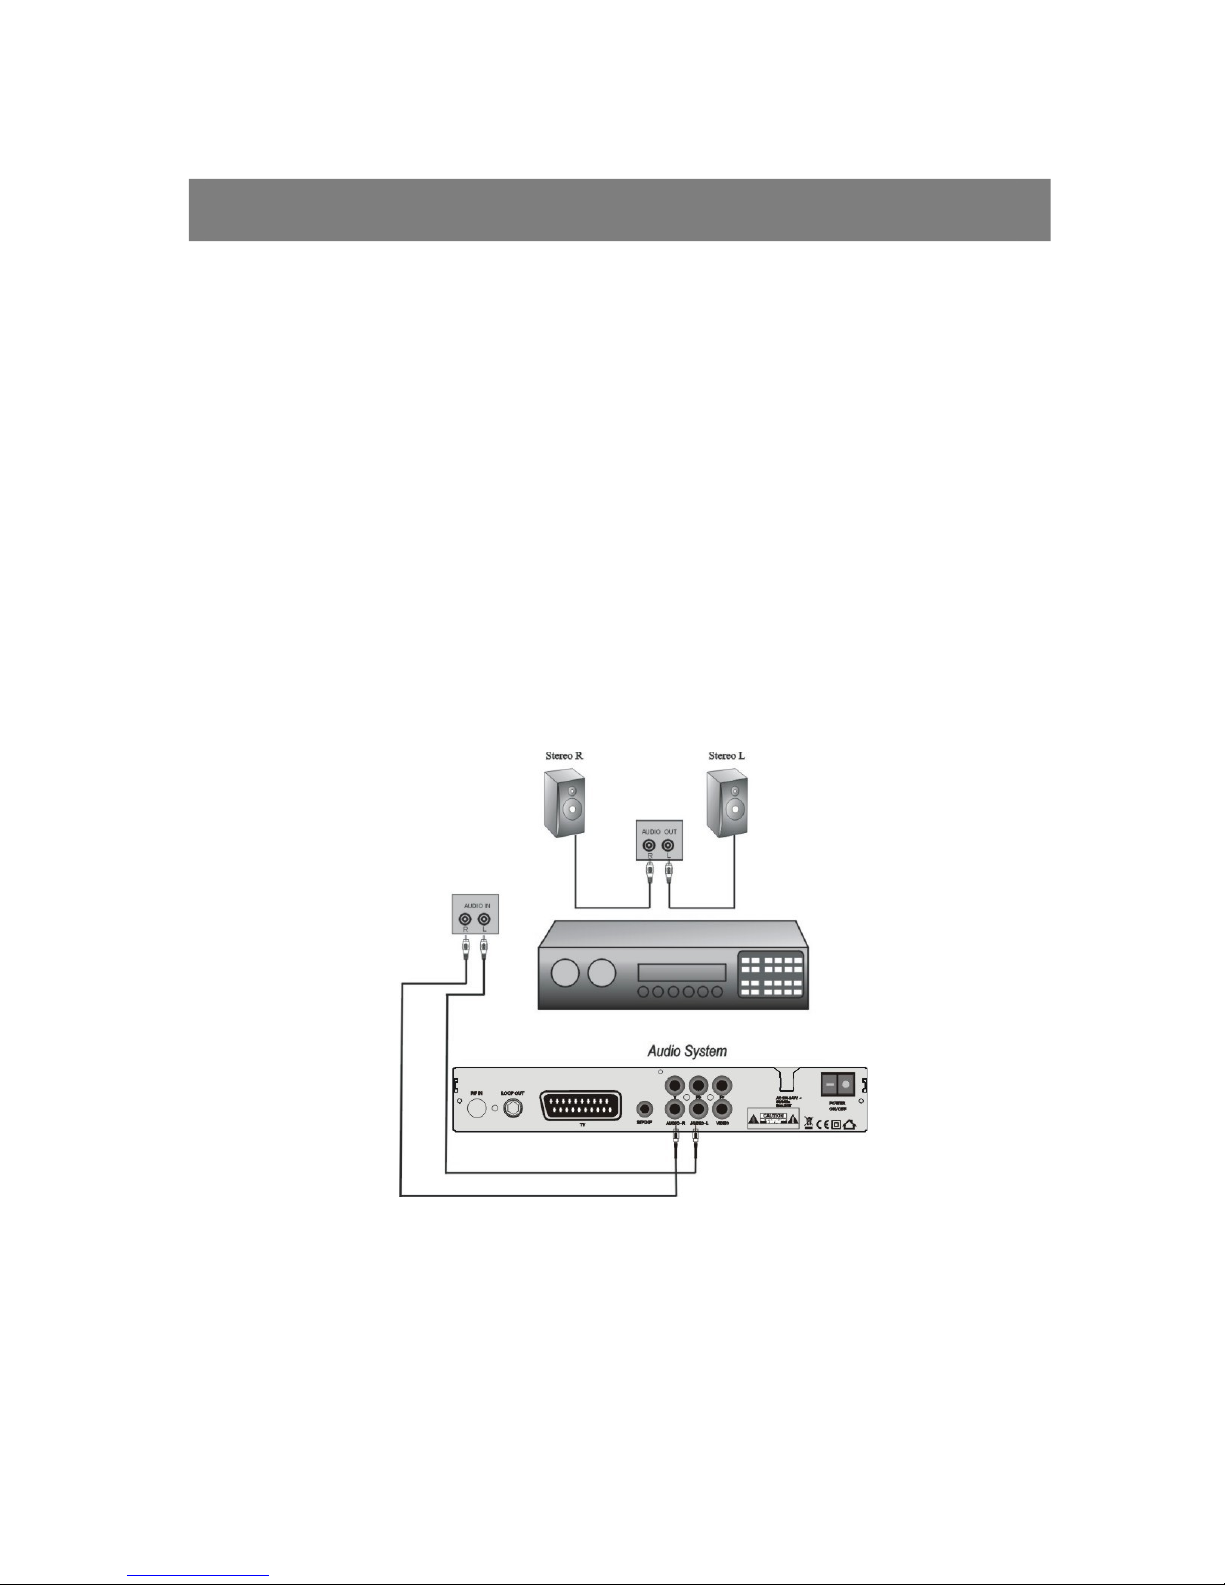
S.T.B Connection
3. How to connect the Audio system
Connect the AUDIO R, L socket of the STB to the Audio System like HI-FI,①
Amplifier, etc..
Audio System must capable of stereo audio ability.②
If Digital Audio or S/PDIF Optical output are available on STB, you can get better③
stereo experience.
15
Page 16
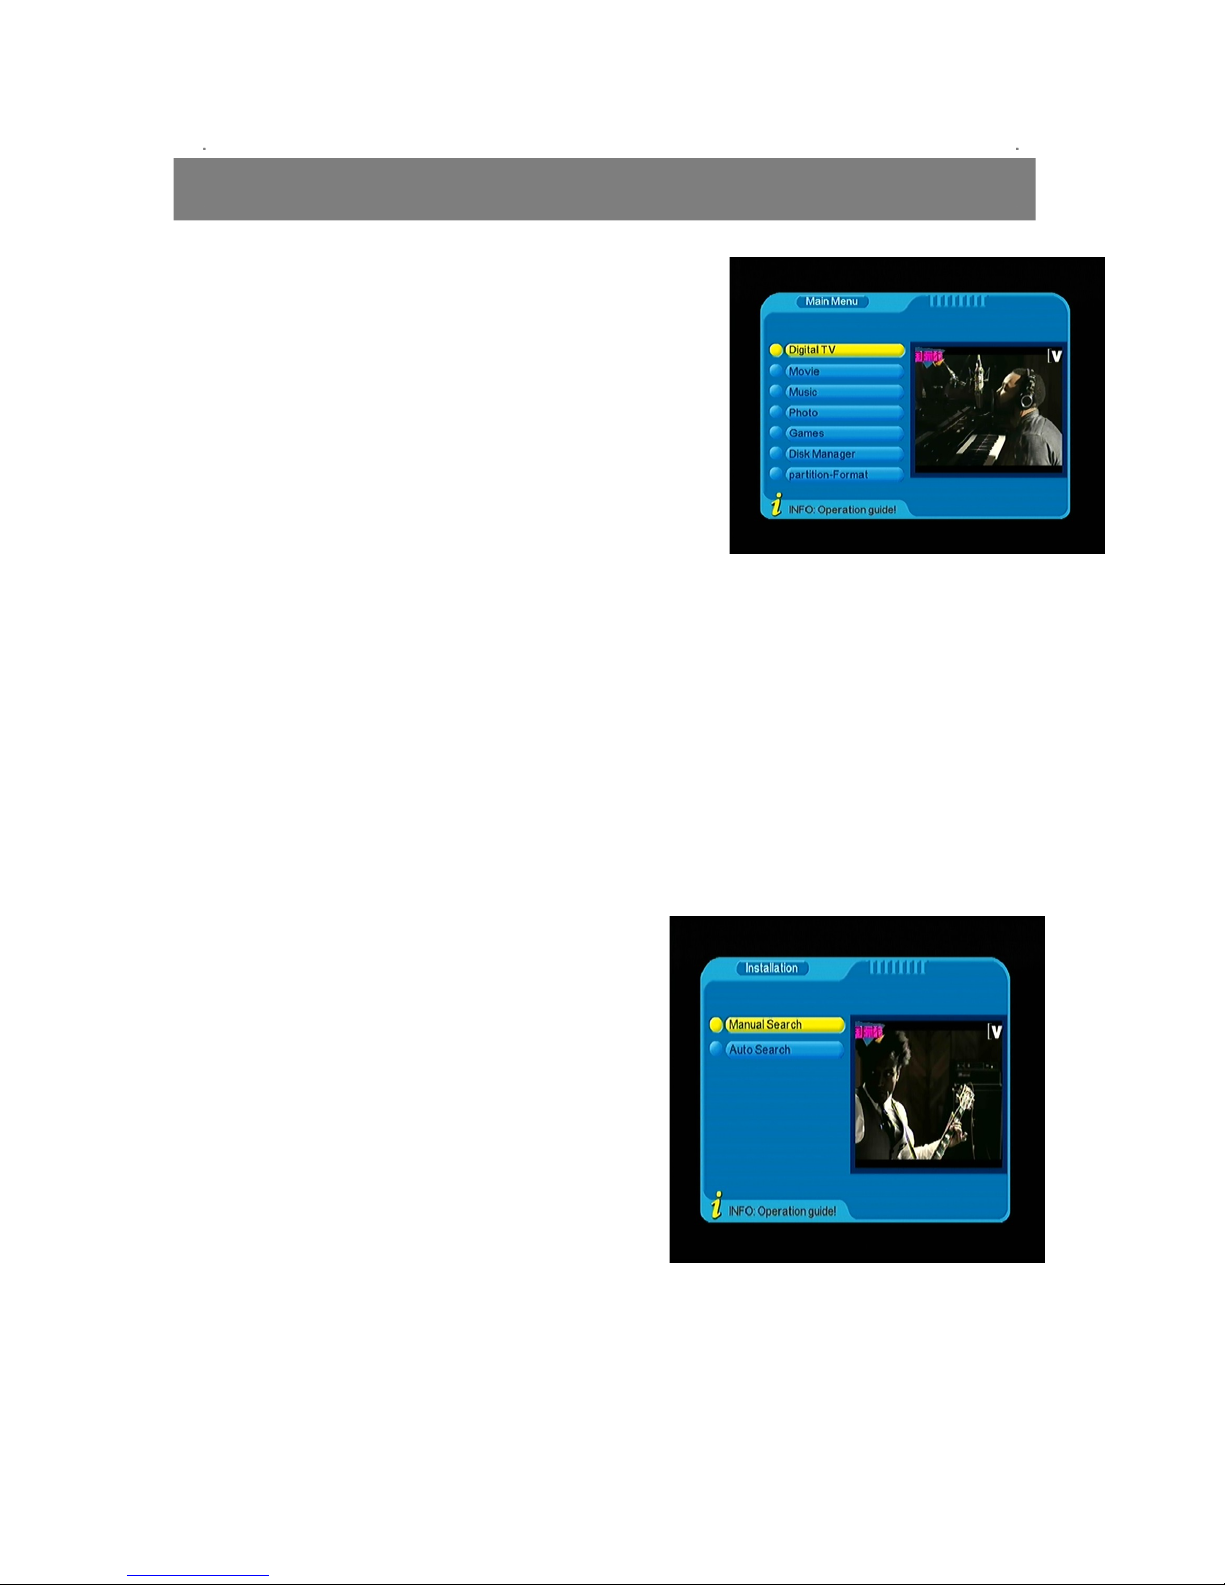
Digital TV
Plug in the STB. Then press the “power” button
on the remote control or the “Standby” button
on the STB Front Panel. The Main Menu screen,
the beginning of the OSD screen, will appear as
shown in the following picture. The Main Menu
displays various functions of the STB or you can
select with “CH” buttons and the numeric
buttons on the remote control. To proceed to the
next stage, press the “OK” button on the remote
control.
1. Installation
Plug in the STB, and power on, there are foreign languages for your choice, choose
the one you prefer. Then, pls press “Menu” on the remote control to get started.
To get start the STB, please go to installation menu by pressing “Menu” button on
the remote control (default lock code: 0000). The installation menu allows you to set
the Digital TV and various functions, and customize service. Use the ”CH” buttons
on the remote control to select an option and press the ”OK” button to proceed to
enter. To move backwards to the previous stage, press the ”Exit” or ”Menu” button.
1.1 Manual Search
Your STB can be easily installed by using
“Installation” Menu.
Select Installation Menu and press OK,
Enter the LOCK password and choose
Manual Search.
16
Page 17

Digital TV
ALL + NIT: To Search out all the Free
Channels + Scrambled Channels
available in CATV Network broadcasted by
the Cable TV Service Provider.
Please enter the search frequency
recommended by the Cable TV Operator.
Then press ”OK” button to start
searching, while the related menu shows a
details info of the scanning status.
1.2 Auto Search
Press “OK” button to select the Automatic
Search .
The STB will perform the search on all
available frequencies and list the
programs found.
The search may take several minutes.
17
Page 18

Digital TV
2. Channel Manager
You can easily access to any TV and
Radio programs by the variable functions
available from this STB, and enjoy your
digital entertainment TV fun.
2.1. Channel Organizer
You can organizer the channel list as you
want, using color coded function keys on the remote control to operate your TV
programs.
Lock: Press OK button to select the channel you wish to Lock, then press blue
button, you can lock the selected channel from authorized watching.
FAV: Press red button and the channel
gets to favorite list
Move:Press OK button to select the
channel you wish to move, then press
Yellow button to pop-up Move-To menu
and input channel numbers you wish to
move, and press OK button again to insert.
Delete:Press OK button to select the channel you wish to delete, then press green
button to delete the selected channel from STB.
18
Page 19
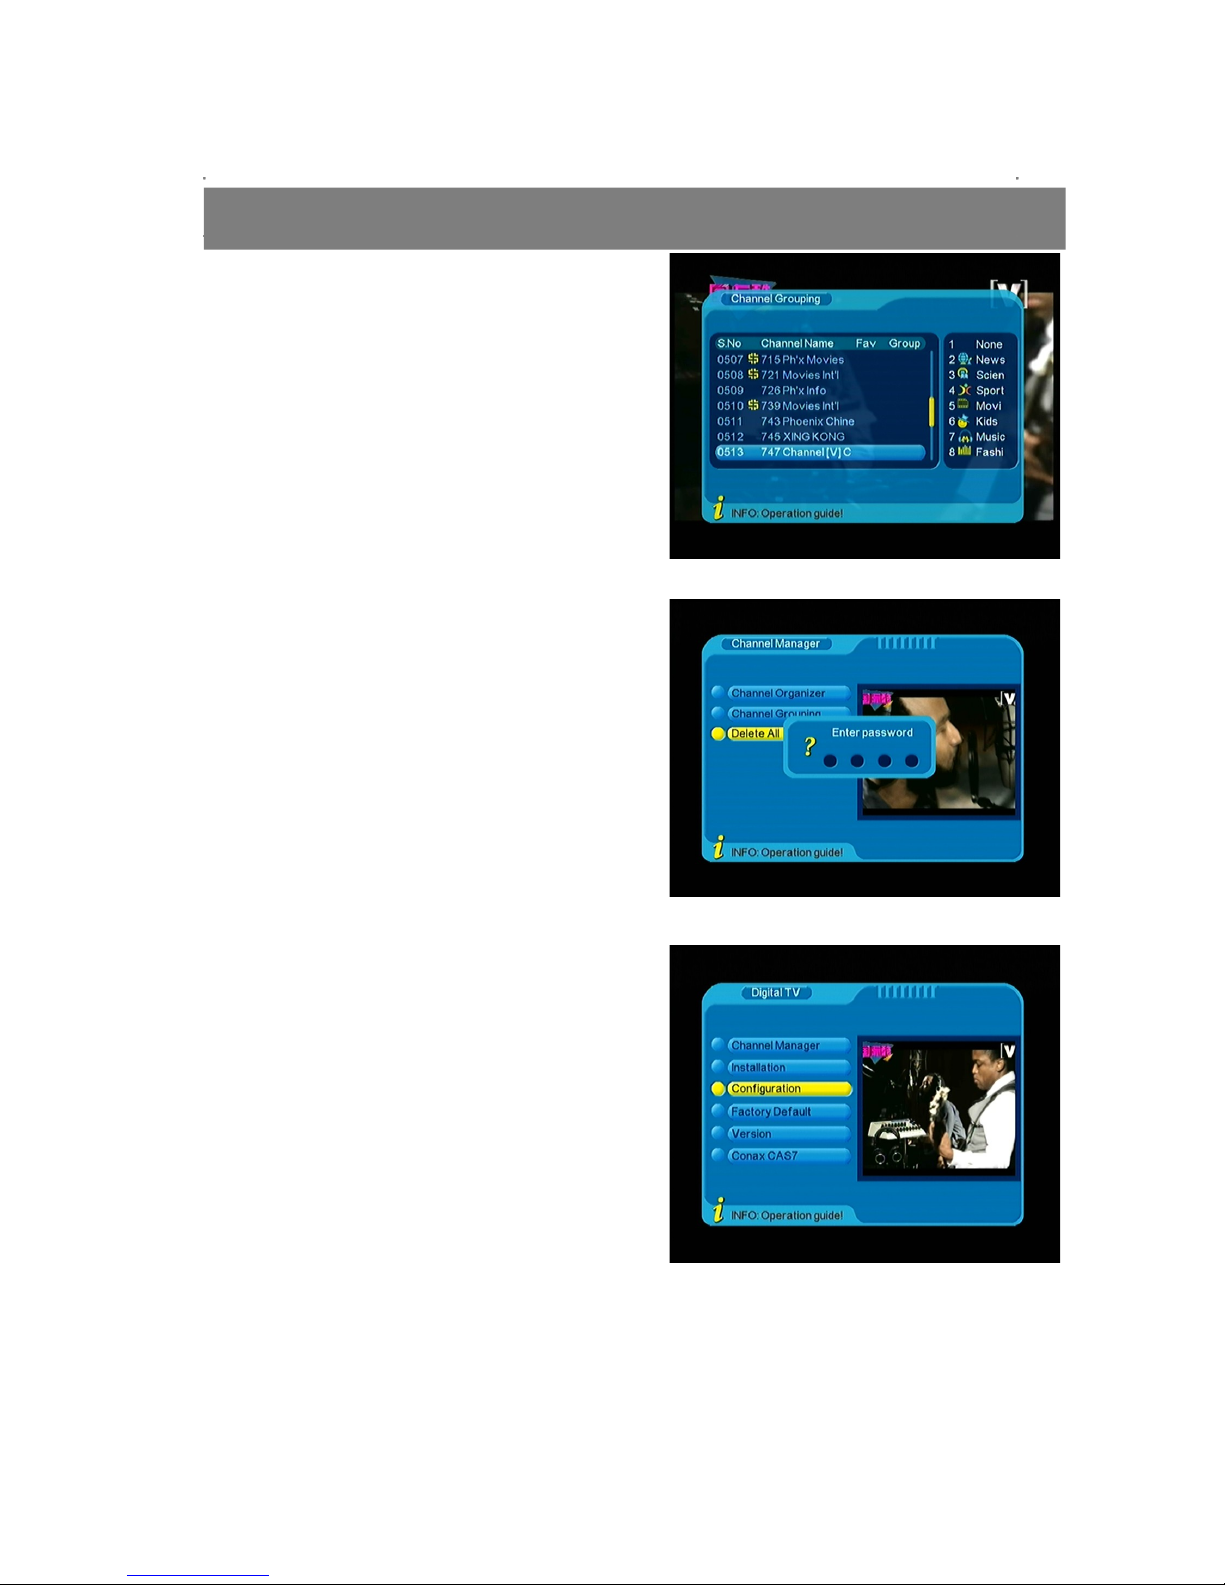
Digital TV
2.2 Channel Grouping
In this menu,you can group your TV
programes to news, scien, sport, movie,
kids, music ,fashi and etc.
2.3 Delete all channels
Here you can delete all channel settings
before, but you have to input your
password in order to protect the channels
data.
3.Configuration
With system menu, you can set whatever
you want the features and specifications of
your STB to be most suitable for your
watching programs.
It is very friendly setting for your OSD,TV,
System setup, TIME, Wakeup timer and ParentalLcok, all this setting can be set up
easier in this men.
19
Page 20
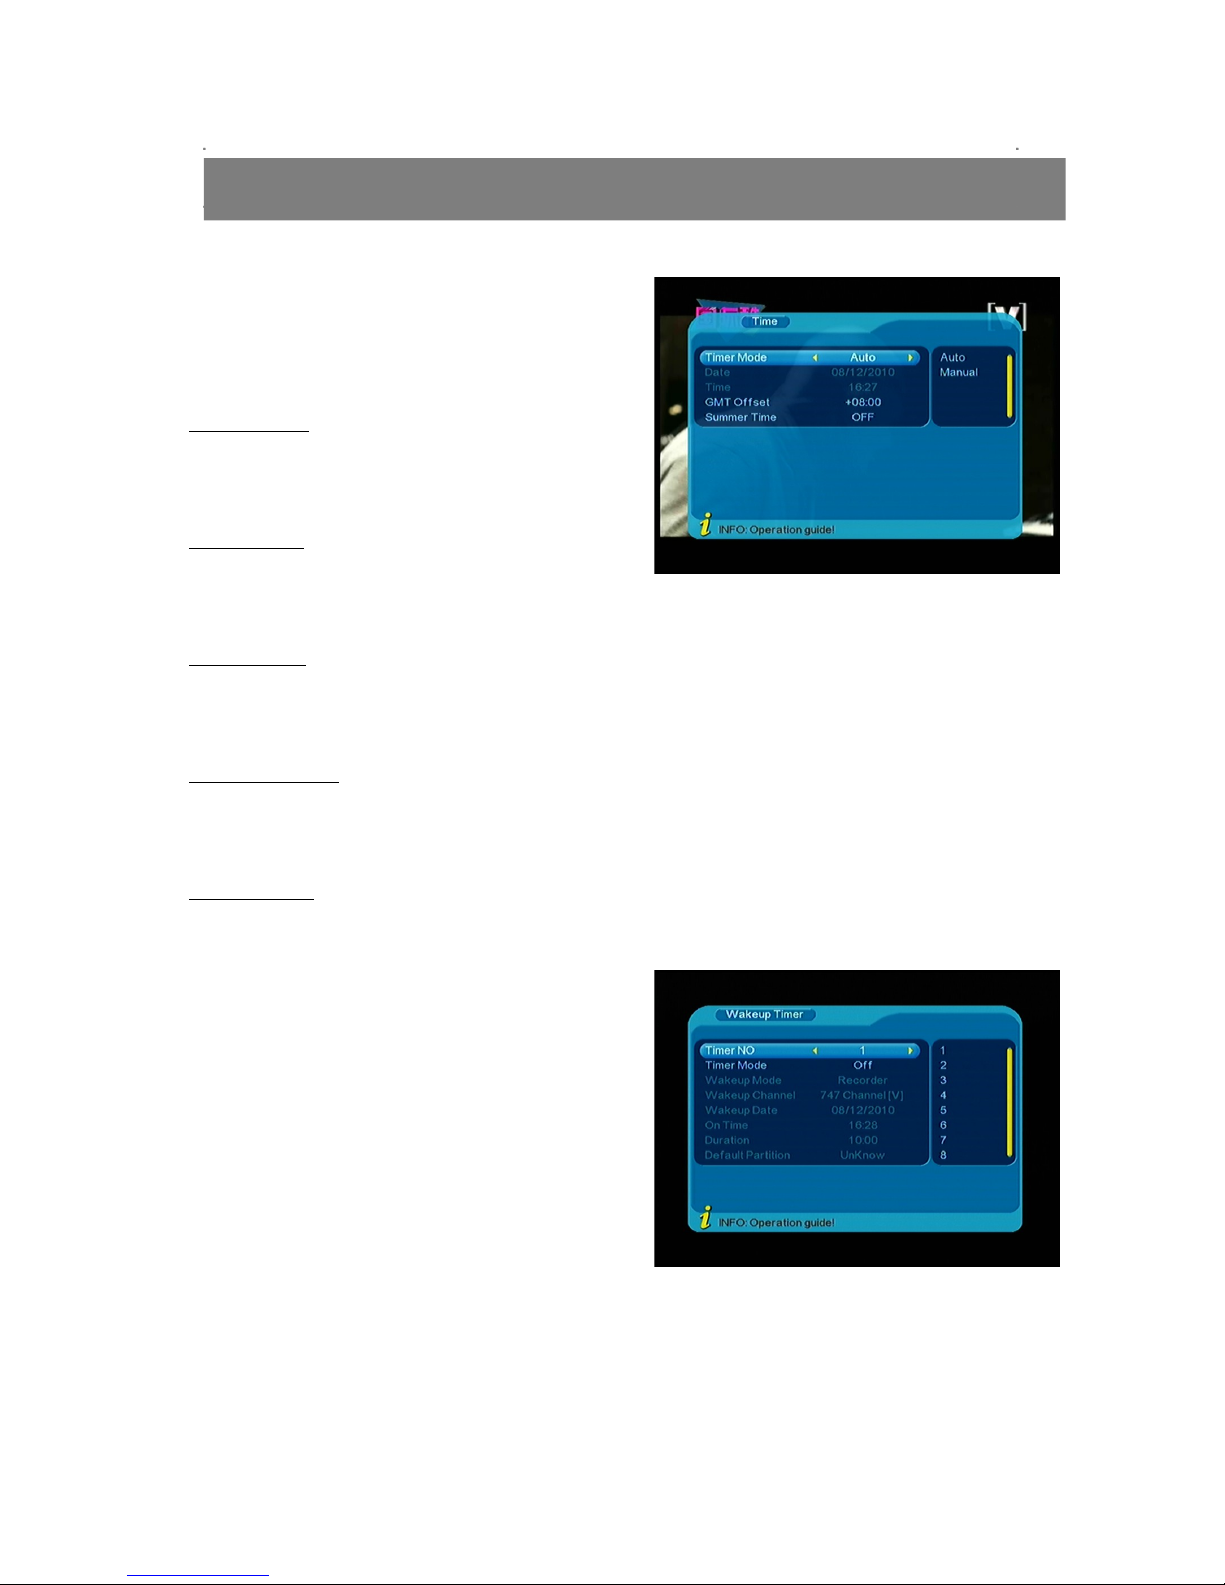
Digital TV
Time:To set the local time and date to
your STB, then save it.
Time Mode
Choose the time mode of you like to.
Local Date
Set the Local Date.
Local Time
Set the Local Time.
Summer Time
If you set summer time to “ON”, then your local time should add one hour more.
GMT offsett
Choose the format to display the Date.
Wakeup Timer:In this function, you can
setting your Wakeup timer. Such as
timer No., timer mode, wakeup mode,
wakeup channels, wakeup date and so
on.
20
Page 21

Digital TV
Parental Control: To prevent the
unauthorized Accessing of your STB, you
can set the Parental control password to
you receiver. (Default password: 0000)
Channel Edit Lock: To lock the Channel
Edit menu to prevent unauthorized
adjusting of Channel.
Installation Lock: To lock the installation menu to prevent unauthorized adjusting of
Installation.
System Setting Lock: To lock the System Setting menu to prevent unauthorized
adjusting of System Setting.
Utility Lock: To lock the Utility menu to prevent unauthorized adjusting of Utility.
Channel Lock: To lock the channels to prevent the channels that are not suitable for
Children.
Receiver Lock: To lock the receiver to
prevent from unauthorized watching.
Factory Default Lock: To lock the Factory
Default menu to prevent unauthorized
operation.
You can also change the password by input numeric key for NEW Password, and
then repeat again to VERIFY Password.
21
Page 22
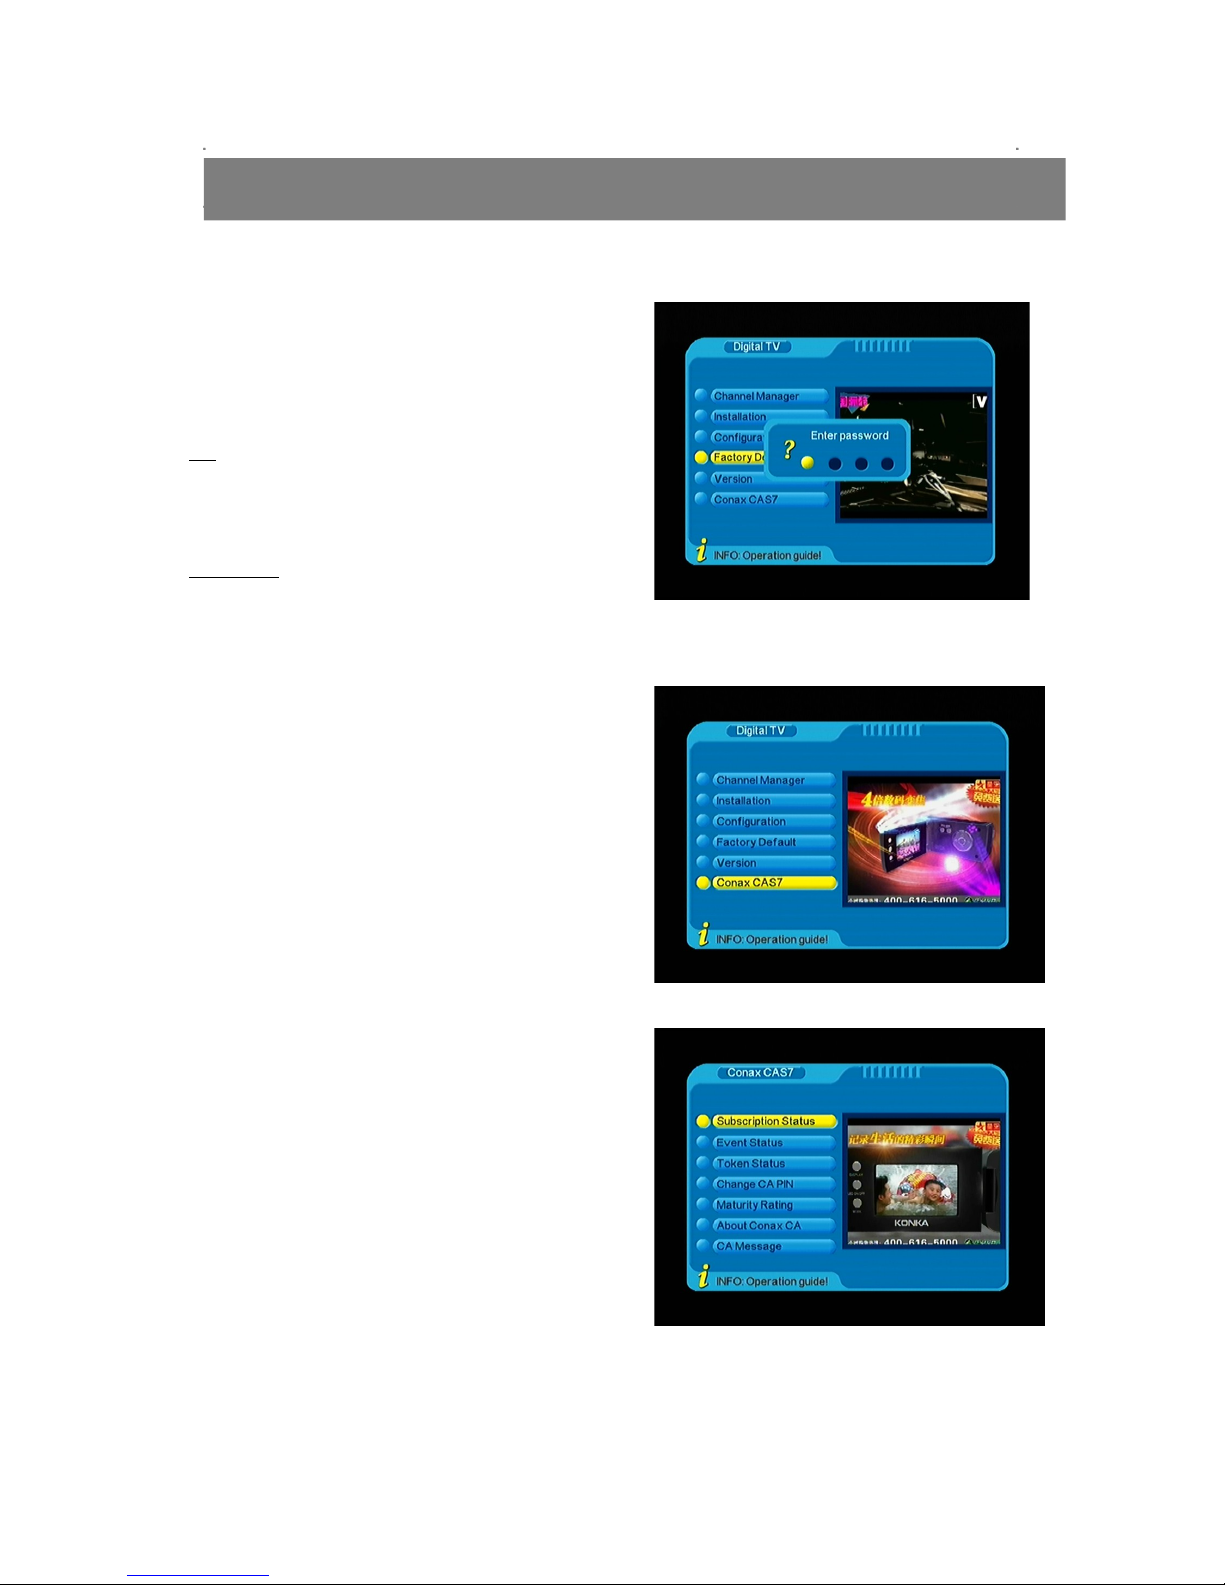
Digital TV
4. Factory Default
To default the factory settings, by
choosing ALL or CHANNELS, and press
”OK” button to proceed.
All
To default software settings and channels to
be factory settings.
Channel
To default only channel to be factory
settings.
5 Version
In this menu, you can check your STB
information, like HW/SW information.
6. CONAX CAS7.0
You can easily watching Conax CAS7.0
programs by you digital cable receiver.
First, pls insert your Conax CAS to CA
slot on front panel, you can saw Conax
cas7.0 in your Digital TV menu. And then
you can check or delete all your CAS
information here.
22
Page 23

USB
To play multimedia files, games, record program, update software through USB port.
7.1 Movie
Go to USB movie menu, choose path to
video files, select one and press “USB
Play” or “OK” button to start full screen
play. Press “Exit” or “USB Stop” to stop
and back to movie menu.
Format supported
AVI, VOB, MPG, DAT
Backward and forward
Press “Previous”/“Forward” to play backward/forward at max x20 speed.
7.2 Music
Go to USB music menu, choose path to
music files, select one and press “USB
Play” or “OK” button to start play. Press
“Exit” or “USB Stop” to stop and back to
music menu.
Format supported
MP3
Backward and forward
Press “Previous”/“Forward” to play backward/forward at max x20 speed.
Skip
Press “Previous” or “Next” button, when playing, to skip to play previous or next
music file.
Pause
Press “USB Pause” to freeze music playing, and “USB Play” to resume.
23
Page 24

USB
7.3 Photo
Go to USB photo menu, choose path to photo files, for the picture selected, there is
preview in right side, and use “OK” button to full screen display. Press “Exit” or “USB
Stop” to stop and back to picture menu.
Format supported
JPG
Skip
When display the picture in full screen, use “previous” /“next” buttons to skip to
display previous/next picture.
Slide play
When in full screen display, use “USB play” to start slide play. Use “USB pause” to
stop, “USB stop” or “Exit” to quit full screen and back to picture menu.
Skip
Press “Previous”/“Next” button, when playing, to skip to play previous/next video file.
Pause
Press “USB Pause” to freeze playing, and “USB Play” to resume.
7.4 USB Game
Go to USB game menu, choose path to
Native32 game files, select one and
press “ “OK” to play. Press “Exit” or “USB
Stop” to stop and back to USB Game
menu.
Format supported
Native32 games (SMF)
You can go to www.native32.com to
download more free USB game.
USB Game become Black and White ?
Solution: Make sure the STB TV type set to the same system ( PAL; NTSC; AUTO,
etc.. ) of TV Color system.
24
Page 25
USB
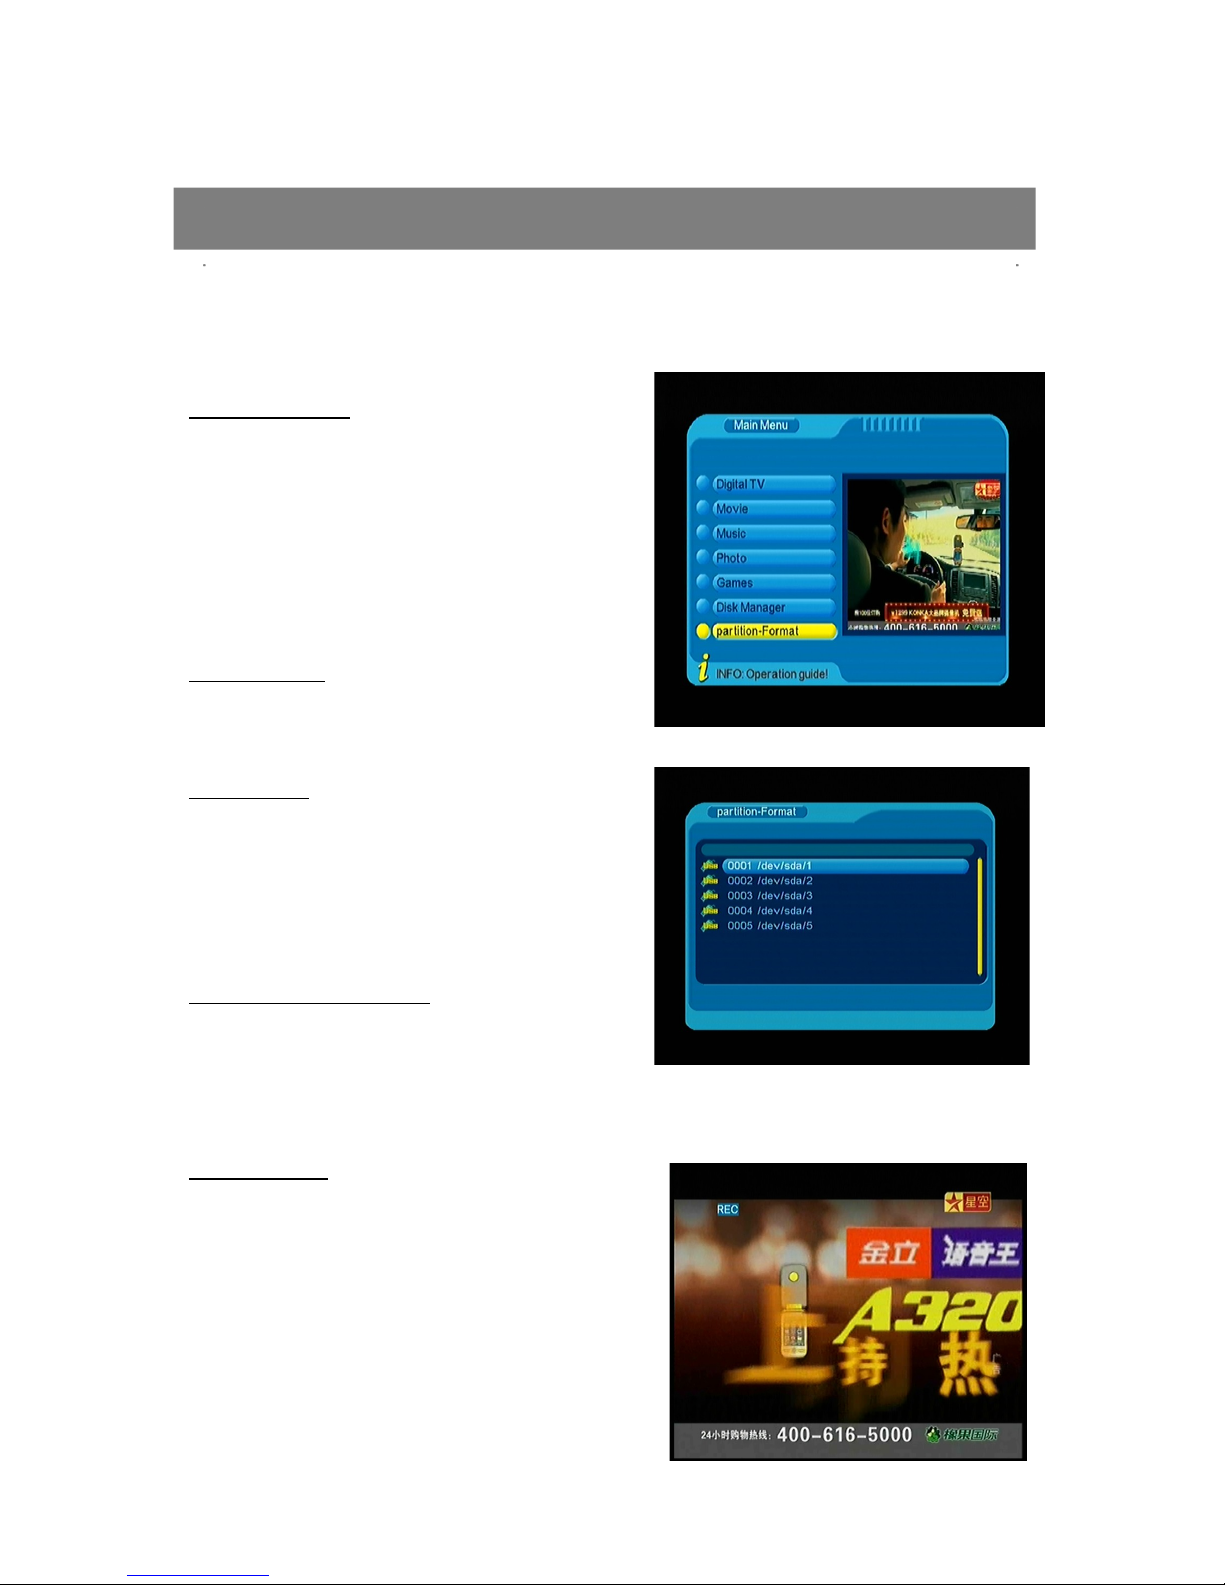
8.0 PVR
Record favorite TV program to USB device, and review it at anytime in future.
Partition Select
Before to record TV program, connect
hard disk to receiver, and go to PVR
partition select menu, choose disk
partition, where the recorded file is
supposed be saved. Only root directory is
available, can’t set path to folders.
Start and stop
Press “USB Play” to start recording,
“USB STOP” to finish.
Information
Press “Info” button to check details
information when recording, such as
recorded time, available free memory
size etc.
Format of recorded file
Recorded file will be saved in format of
MPG.
PVR preview
In PVR preview menu, select recorded file,
and press “OK” to preview. Press Yellow
button turn to full screen.
In preview menu, the operations of skip,
pause, forward, backward, previous, next etc,
are not available.
25
Page 26

PVR Instruction
Supported Device:
1) Most of popular USB2.0 Hard Drive Disk can be supported by our STB, however
due to there are too many types of HDD available in the market, if you find one
particular HDD can not work with our STB, please kindly provide it to us, and we
will be happy to solve it for you in shortest time.
2) System required: FAT32
3) Speed required: 5400rpm
Instructions to TV program
1) Any SD TV program (Standard Definition) with a bit rate lower then 6Mbps can
be recorded by this STB.
2) During recording, EPG; TXT; Multi AUDIO functions can not be operated.
3) Recorded TV program will not support EPG: TXT: Multi AUDIO.
Recording Capacity
1) Our STB can support up to 4 partition of one HDD, and theoretically each
partition can allow up to 2TByte (2,000Gb), however, we suggest to use one
HDD with each partition not bigger than 120Gb
2) Each recorded video file will not bigger than 3.8Gb (Approx 4 hours), the STB
will automatically create new video file to continue recording your TV program if
the recorded video file is bigger than 3.8Gb.
How to choose and set different partition from my HDD ?
Usually there are several partition available in HDD, and our STB can allow
you to choose different partition for recording purpose, choose from PVR
partition menu, menu of Device List will pop-up, it lists all partitions your HDD
has, choose the one you want, and press OK button to save. Then the
recorded video file will be stored into this partition.
WARNING
USB1.1 or USB2.0 Key or Stick (Including MP3 player)
1) We strongly suggest not to record any TV program by USB Key or Stick,
because a huge of different USB Key or Stick are indeed available in the market
with different quality level, we do not guarantee any damage of your USB Key or
Stick from the attempting recording.
2) Do not remove your USB device from STB while it is in use of any
USB multimedia function.
26
Page 27

TIMESHIFT
9.0 TimeShift
Never miss an Excellent moment of your favorite LIVE Sports or Movie scene, now
with C101 you can easily enjoy it with just
one press of button.
TIMESHIFT MODE:
Make sure you have USB device plugged
into the STB, and there are free storage.
Press TIMESHIFT to pause, the video
screen will freeze, and recording will begin.
Press TIMESHIFT again, to continue watching TV show from the point at which it
was paused.
Press EXIT to stop TIMESHIFT mode, and return to live program.
TIMESHIFT FUNCTION
During TIMESHIFT mode, you can pause; backward; forward; slow the TV content.
The bigger USB device free storage, the more TV content it can record.
USB Device Speed Checking
Press PAGEDOWN to pop up the Device List, where you can find the speed of your
USB Device, RED means it can read, YELLOW means it can RECORD, GREEN
means it can TIMESHIFT, it is suggest to use the match speed USB Device to
operate each function, otherwise, the function may not performed normally.
27
Page 28

Troubleshooting
When you found some problems about this STB, please check the table as below.
Because these may not be any serious problems:
Tips: If you refer to this troubleshooting, but no resolve that problem you
encountered. Please contact the local dealer or technical support instantly, do not
open the machine, because that is very dangerous to you or to the machine in that
cases.
28
Fault Phenomenon probably reasons Resolve
Power on, but no
display on screen
Please carefully check the
power plug, to see it is in
socket of wall or not? Is
power interrupted?
Put firmly the power plug to the
socket on
the wall.
Power on this STB,
then that screen
displays
”No signal”
Is the cabler install
correct?
Reinstall thecable and calibrate
it
The transmit station turns
off
Attempt until the signal coming
again
The sky wave disturbs the
device
Attempt again later
The program setups are
incorrect
Set the proper
parameters of received program
in the system
settings menu
STB plays a strange
sound
Due to the channel contain
more audio tracks or audio
languages
User can use the “Audio” button
on the RCU to select the correct
audio track or audio languages
USB Game Become
Black and White
The TV color sysem
setting is not same as STB
TV type
Make sure the STB TV system
set to the same system ( PAL;
NTSC; AUTO ) of TV system.
Page 29

Specification
Demodulator
Waveform
16 QAM,32 QAM,64 QAM,128 QAM,256
QAM
Symbol Rate 3.0-7.0MS/s
Audio
Decoder
Standard ISO/IEC 13818-3
Decoding MPEG2&MPEG1 layer I&II
Mode Mono, Dual,Stereo,Joint Stereo
Bit Rate Max 384kbps
Sampling
Fre.
32,44.1,48KHz
Video
Decoder
Standard ISO/IEC 13818-2
Profile Level MPEG-2 MP@ML
Output level 1.0 Vp-p
Aspect Ratio 4:3/16:9
Output NTSC/PAL
Active Pixel
729*480@30fps(NTSC);20*567@25fps(PAL
)
Tuner
Standard DVB-C EN300 429
Input
Frequency
50MHz to 860MHz
Input Level -10dBV~20dBV
Input Socket F type ,FemaleX1
Output
Socket
OUT-IEC 169-1 male
Output
Connector
RCA 3x RCA
Mian System
CPU 350Mhz
Flash 8MB/16MB(serial)
DDR 64MB
Front panel
Led
display
4 xLED
IR 38Khz
Smart card ISO7816, for
Rear panel
RF input F type,female
Loop OUT-IEC 169-1 male
Rs232 Male, 9pin
Switch On/off
29
Page 30

Accessory
Power cord 1.2m
RCA cable 3x RCA, 1.2m
Battery 1.5vx2
Book manual 1
General
Supply
Voltage
220~240VAC 50/60Hz
Power
Consumption
30 watts Max
Standby
Power
3 watts max.
Operation
Temperature
+5°C to +40°C
Storage
Temperature
-20°C to 70°C
Dimension 220mm X124mmx32mm
30
 Loading...