

Tvone 1T-MV-8474 Api Document
API Document
1T-MV-8474
4K Multiviewer

2
Liability Statement
This product is intended for professional use. This product is not intended for use in a medical environment and
does not have the required certifications for such use. Similarly, use aboard any aircraft or spacecraft while in
flight or as an adjunct to any surface, airborne or marine navigation system or any offshore marine activity,
including control of any watercraft, or any use similar to those specifically herein mentioned is prohibited. Use in
the aforementioned circumstances would require additional testing and certification.
No warranty is made either expressed or implied including but not limited to any implied warranties of
merchantability or fitness for a particular purpose. In no event shall the supplier or manufacturer of this product
be liable for errors found within, or be liable for any direct, indirect or consequential damages or loss in
connection with the purchase or use of this hardware, software or manual. The sole and exclusive liability to the
supplier and manufacturer regardless of the form of action shall not exceed the replacement cost of the materials
described herein.
tvONE reserves the right to revise any of its hardware and software products following its policy to modify and/or
improve its products where necessary or desirable. This statement does not affect the legal rights of the user in
any way.
By using this equipment you have indicated that you have agreed to the terms listed above. If you do not wish to
agree or the above terms are contrary to your conditions of purchase you may return the equipment, unused, to
your supplier.
All third party trademarks and copyrights are recognized. The tvONE logo, Magenta logo, CORIO word and the
CORIO logo are registered trademarks of tvONE. All other trademarks are the property of their respective
holders.
E&OE
Safety Precautions
Please read all instructions before attempting to unpack, install or operate this equipment and before connecting
the power supply.
Please keep the following in mind as you unpack and install this equipment:
Always follow basic safety precautions to reduce the risk of fire, electrical shock and injury to persons.
To prevent fire or shock hazard, do not expose the unit to rain, moisture or install this product near water.
Never spill liquid of any kind on or into this product.
Never push an object of any kind into this product through any openings or empty slots in the unit, as you
may damage parts inside the unit.
Do not attach the power supply cabling to building surfaces.
Use only the supplied power supply unit (PSU). Do not use the PSU if it is damaged.
Do not allow anything to rest on the power cabling or allow any weight to be placed upon it or any person
walk on it.
To protect the unit from overheating, do not block any vents or openings in the unit housing that provide
ventilation and allow for sufficient space for air to circulate around the unit.

3
Table of Contents
Liability Statement ................................................................................................................................... 2
Safety Precautions ................................................................................................................................... 2
Introduction ................................................................................................................................................... 5
API Guide .................................................................................................................................................. 5
Software .................................................................................................................................................... 5
Series Command List API Descriptions ................................................................................................ 5
General Control ............................................................................................................................................. 6
Window Layout Mapping: ........................................................................................................................ 6
Mapping Window Layout ......................................................................................................................... 6
Front panel Button Lockout .................................................................................................................... 7
Video Set – Window A ............................................................................................................................. 7
Video Set – Window B ............................................................................................................................. 7
Video Set – Window C ............................................................................................................................. 7
Video Set – Window D ............................................................................................................................. 8
Audio Set - Audio input select ................................................................................................................ 8
Audio Set - Audio input config ............................................................................................................... 8
Audio Set – Get Audio Input Config State ............................................................................................. 9
Audio Set – Audio volume control ......................................................................................................... 9
Ratio Set – Windows Select A............................................................................................................... 10
Ratio Set – Windows Select B............................................................................................................... 10
Ratio Set – Windows Select C............................................................................................................... 10
Ratio Set – Windows Select D............................................................................................................... 11
Timing Set – Output Timing .................................................................................................................. 11
Advanced Control ....................................................................................................................................... 11
Power Control ......................................................................................................................................... 11
Power Saving .......................................................................................................................................... 12
Audio Mute .............................................................................................................................................. 12
Audio Delay ............................................................................................................................................ 12
VGA input Auto Position ....................................................................................................................... 13
OSD control ............................................................................................................................................. 13
HDMI output audio control .................................................................................................................... 13
Restore Default Setting .......................................................................................................................... 13
Set Baud Rate: ........................................................................................................................................ 14
HDCP ....................................................................................................................................................... 14
Set priority EDID when Auto-scaler and mirror output ...................................................................... 14
Other ........................................................................................................................................................ 14
Source Remove ...................................................................................................................................... 15
Audio Configuration: .................................................................................................................................. 16
Audio Config set: ................................................................................................................................... 16
Basis EDID Management ............................................................................................................................ 16

4
Basic EDID management:...................................................................................................................... 16
Copy the EDID of output to assign it to the EDID of input: ............................................................... 17
Read the EDID data: ............................................................................................................................ 17
Assign preset EDID to certain port: ................................................................................................... 18
Assign user define EDID to certain input port: ................................................................................... 19
Advanced EDID management .................................................................................................................... 21
EDID Assign ............................................................................................................................................ 21
EDID upload and Download .................................................................................................................. 22
EDID Names ............................................................................................................................................ 22
EDID commands list ................................................................................................................................... 23
Write EDID Name (EEPROM) ................................................................................................................. 23
Read EDID Name (EEPROM) ................................................................................................................. 24
Write EDID (EEPROM) ............................................................................................................................ 24
Copy Preset EDID to Port_1 .................................................................................................................. 25
Copy EEPROM EDID to Port 1 .............................................................................................................. 25
Copy Preset EDID to Port_2 .................................................................................................................. 25
Copy EEPROM EDID to Port_2 ............................................................................................................. 26
Copy Preset EDID to Port_3 .................................................................................................................. 26
Copy EEPROM EDID to Port_3 ............................................................................................................. 26
Copy Preset EDID to Port_4 .................................................................................................................. 27
Copy EEPROM EDID to Port_4 ............................................................................................................. 27
Copy Preset EDID to Port_5 .................................................................................................................. 27
Copy EEPROM EDID to Port_5 ............................................................................................................. 28
Copy Preset EDID to Port_6 .................................................................................................................. 28
Copy EEPROM EDID to Port_6 ............................................................................................................. 28
Copy Preset EDID to Port_7 .................................................................................................................. 29
Copy EEPROM EDID to Port_7 ............................................................................................................. 29
Read EDID from Port .............................................................................................................................. 29
EDID copy ............................................................................................................................................... 30
5
Introduction
The 1T- MV-8474 is a 4K Multiviewer designed for easy collaboration in huddle rooms, conference facilities,
medical, education, government applications or control rooms – anywhere that single or multiple inputs are
required, whatever the resolution, to be displayed on a single 4K screen. Control is quick and simple either using
the front panel, a remote control or a fully featured web interface.
The 1T- MV-8474 supports native 4K inputs (resolutions up to 3840x2160@30 on HDMI and 3840x2160@60 via
DisplayPort) together with up/down conversion, audio breakaway and selectable audio delay. Offering seven
multi-format video inputs (4x HDMI, 2x DisplayPort, 1x VGA/YPbPr) the system can display up to four video
windows simultaneously via sixteen different fixed layouts which can be simply recalled to present your content
in a variety of combinations. The sixteen layouts include Quad split, Picture-In-Picture, Triple, Side-By-Side, Full
screen and other, more complex, layouts with multiple layers. A single scaled HDMI output is capable of
supporting resolutions up to 3840x2160@30. In addition, seven independent stereo analog inputs and outputs,
allow you to switch audio separately from the HDMI stream and also integrate 7.1 audio with external equipment.
The on board web interface gives access from your PC to system setup, Full EDID management and audio control
including delay and volume adjustments , making it easy to integrate the 1T-MV-8474 into complex systems.
Control is via a Web interface, RS232, Ethernet, Infrared remote or from the front panel buttons.
The 1T-MV-8474 is an extremely flexible Multiviewer and a capable Presentation Switcher making it an excellent fit
for many different user applications.
API Guide
This document outlines the application programming interface (API) required to integrate the 1T-MV-8474
with other third party control devices.
Software
Please use a third party control system or terminal emulator.
Series Command List API Descriptions
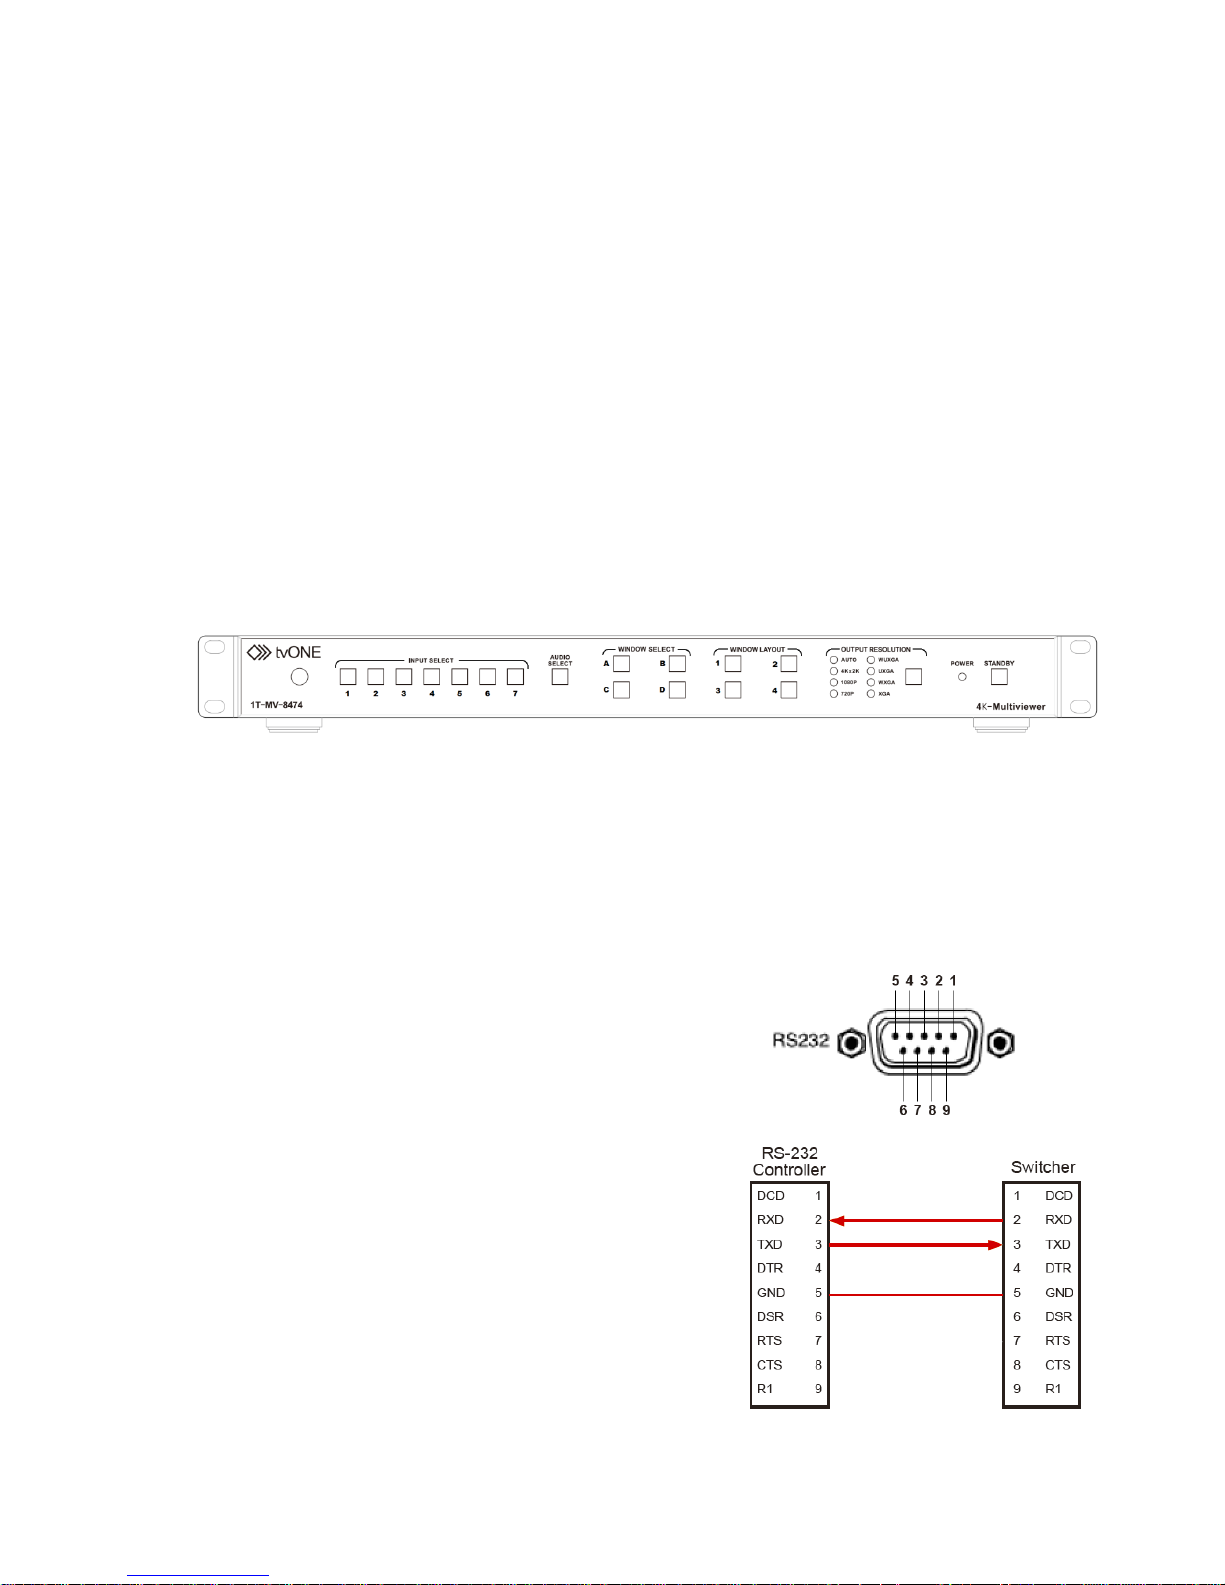
This RS-232 communication protocol uses four bytes of
information as defined below. This protocol commands
description is partial and additional command will be add
later. RS-232 connection parameters between Matrix and
controller are:
Data rate is 9600 baud
No parity bit
8 data bits
1 stop bit.
Note: This is a description about the series
commands Command head: ATM
Length: <=255
Command: xxxxxxx
Read/Write: W/R
Parameter data : xx (N byte)
Connect to RXD, TXD, GND only
6
General Control
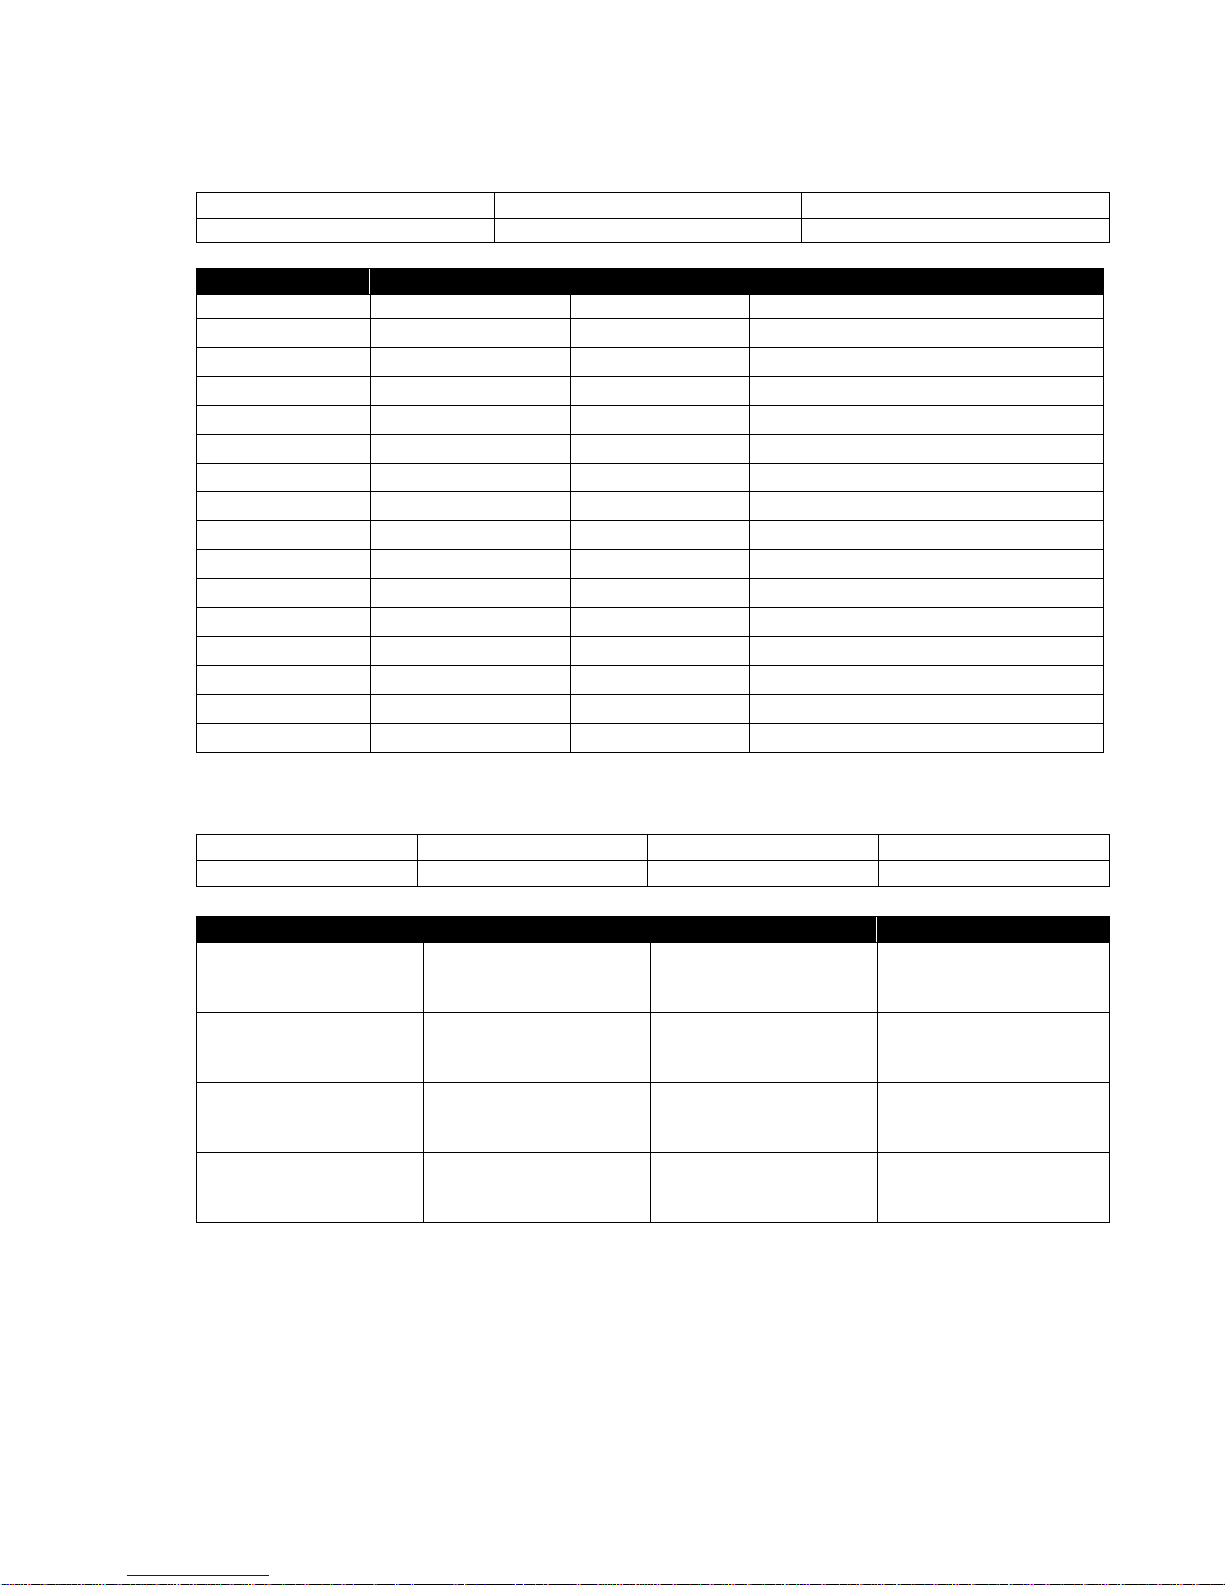
Window Layout Mapping:
Instruction: Switch to screen layout#1
Command:
ATM 0A TVO_LYT W xx
xx range 01 – 16
Feedback:
09 SCR_LYT W y
y range 1-16
Item
Command
Feedback
Description
Layout#1
ATM 0A TVO_LYT W 01
09 SCR_LYT W 1
Switch to window layout#1
Layout#2
ATM 0A TVO_LYT W 02
09 SCR_LYT W 2
Switch to window layout#2
Layout#3
ATM 0A TVO_LYT W 03
09 SCR_LYT W 3
Switch to window layout#3
Layout#4
ATM 0A TVO_LYT W 04
09 SCR_LYT W 4
Switch to window layout#4
Layout#5
ATM 0A TVO_LYT W 05
09 SCR_LYT W 5
Switch to window layout#5
Layout#6
ATM 0A TVO_LYT W 06
09 SCR_LYT W 6
Switch to window layout#6
Layout#7
ATM 0A TVO_LYT W 07
09 SCR_LYT W 7
Switch to window layout#7
Layout#8
ATM 0A TVO_LYT W 08
09 SCR_LYT W 8
Switch to window layout#8
Layout#9
ATM 0A TVO_LYT W 09
09 SCR_LYT W 9
Switch to window layout#9
Layout#10
ATM 0A TVO_LYT W 10
09 SCR_LYT W 10
Switch to window layout#10
Layout#11
ATM 0A TVO_LYT W 11
09 SCR_LYT W 11
Switch to window layout#11
Layout#12
ATM 0A TVO_LYT W 12
09 SCR_LYT W 12
Switch to window layout#12
Layout#13
ATM 0A TVO_LYT W 13
09 SCR_LYT W 13
Switch to window layout#13
Layout#14
ATM 0A TVO_LYT W 14
09 SCR_LYT W 14
Switch to window layout#14
Layout#15
ATM 0A TVO_LYT W 15
09 SCR_LYT W 15
Switch to window layout#15
Layout#16
ATM 0A TVO_LYT W 16
09 SCR_LYT W 16
Switch to window layout#16
Mapping Window Layout
Instruction: Map window layout buttons 1 to 4
Command:
ATM 0B TVO_MAP W x yy
x = button 1 to 4
yy= layout 1 to 16
Feedback:
0B TVO_MAP W x yy
x = button 1 to 4
yy= layout 1 to 16
Item
Command
Feedback
Description
Map to Screen layout
Button 1
ATM 0B TVO_MAP W 1 XX
0B TVO_MAP W 1 XX
Change which layout XX
((01-16, total 16) is
mapped to button #1
Map to Screen layout
Button 2
ATM 0B TVO_MAP W 2 XX
0B TVO_MAP W 2 XX
Change which layout XX
((01-16, total 16) is
mapped to button #2
Map to Screen layout
Button 3
ATM 0B TVO_MAP W 3 XX
0B TVO_MAP W 3 XX
Change which layout XX
((01-16, total 16) is
mapped to button #3
Map to Screen layout
Button 4
ATM 0B TVO_MAP W 4 XX
0B TVO_MAP W 4 XX
Change which layout XX
((01-16, total 16) is
mapped to button #4

7
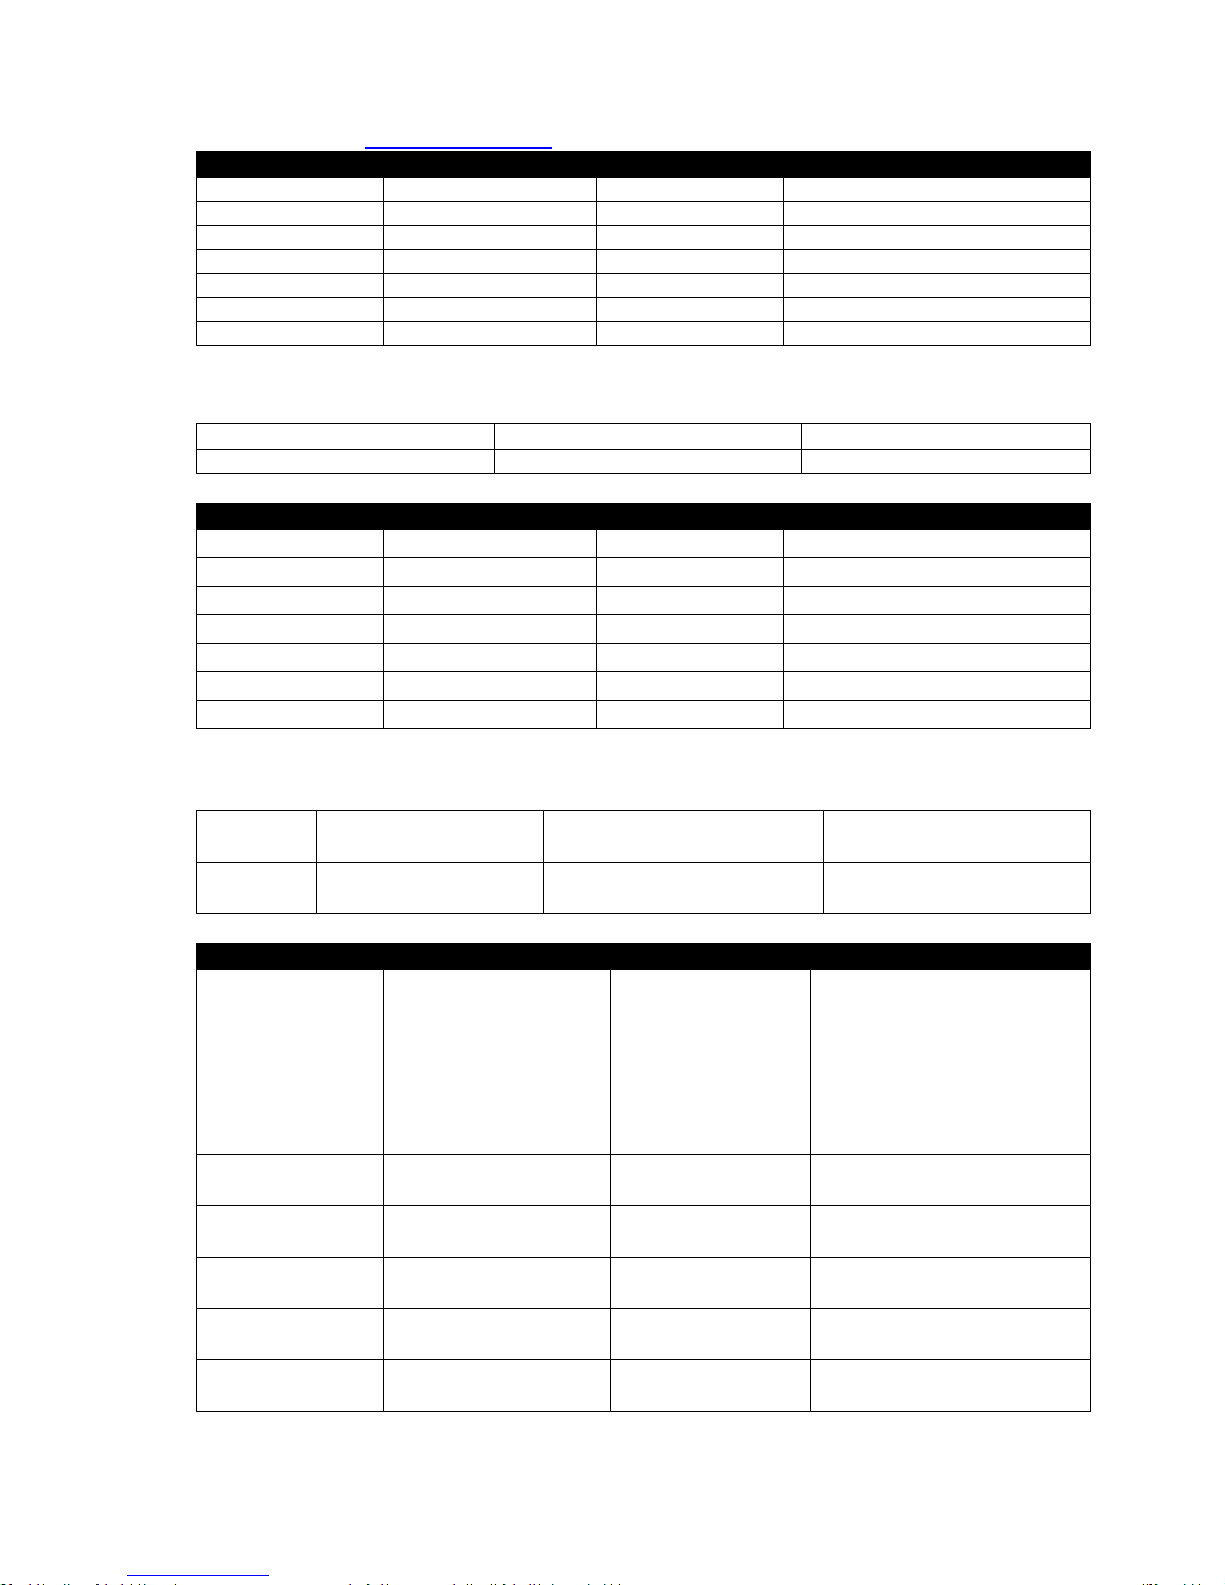
Front panel Button Lockout
Instruction: Lock front panel
Command:
ATM 09 KEY_LOK W x
x= 0: Unlock; 1: Admin lock (only
resolution and stand button); 2:
Complete lock (all front panel
buttons)
Instruction: Unlock front panel
Command:
ATM 08 KEY_LOK R
Item
Command
Feedback
Description
Lock
ATM 09 KEY_LOK W X
X: 0: Unlock; 1: Admin lock
(only resolution and stand
button); 2: Complete lock
(all front panel buttons)
Unlock
ATM 08 KEY_LOK R
Read the lock status
Video Set – Window A
Instruction: Map a video input (1 to 7) to a window select (A to D)
Command:
ATM 0A VDO_IPT W x y
x = window A to D
y= video input 1 to 7
Feedback:
0A VDO_IPT W x y
x = window A to D
y= video input 1 to 7
Item
Command
Feedback
Description
Select input #1
ATM 0A VDO_IPT W 1 1
0A VDO_IPT W 1 1
Video input of Window A is set to 1.
Select input #2
ATM 0A VDO_IPT W 1 2
0A VDO_IPT W 1 2
Video input of Window A is set to 2.
Select input #3
ATM 0A VDO_IPT W 1 3
0A VDO_IPT W 1 3
Video input of Window A is set to 3.
Select input #4
ATM 0A VDO_IPT W 1 4
0A VDO_IPT W 1 4
Video input of Window A is set to 4.
Select input #5
ATM 0A VDO_IPT W 1 5
0A VDO_IPT W 1 5
Video input of Window A is set to 5.
Select input #6
ATM 0A VDO_IPT W 1 6
0A VDO_IPT W 1 6
Video input of Window A is set to 6.
Select input #7
ATM 0A VDO_IPT W 1 7
0A VDO_IPT W 1 7
Video input of Window A is set to 7.
Video Set – Window B
See Instructions for Video Set – Window A for details.
Item
Command
Feedback
Description
Select input #1
ATM 0A VDO_IPT W 2 1
0A VDO_IPT W 2 1
Video input of Window B is set to 1.
Select input #2
ATM 0A VDO_IPT W 2 2
0A VDO_IPT W 2 2
Video input of Window B is set to 2.
Select input #3
ATM 0A VDO_IPT W 2 3
0A VDO_IPT W 2 3
Video input of Window B is set to 3.
Select input #4
ATM 0A VDO_IPT W 2 4
0A VDO_IPT W 2 4
Video input of Window B is set to 4.
Select input #5
ATM 0A VDO_IPT W 2 5
0A VDO_IPT W 2 5
Video input of Window B is set to 5.
Select input #6
ATM 0A VDO_IPT W 2 6
0A VDO_IPT W 2 6
Video input of Window B is set to 6.
Select input #7
ATM 0A VDO_IPT W 2 7
0A VDO_IPT W 2 7
Video input of Window B is set to 7.
Video Set – Window C
See Instructions for Video Set – Window A for details.
Item
Command
Feedback
Description
Select input #1
ATM 0A VDO_IPT W 3 1
0A VDO_IPT W 3 1
Video input of Window C is set to 1.
Select input #2
ATM 0A VDO_IPT W 3 2
0A VDO_IPT W 3 2
Video input of Window C is set to 2.
Select input #3
ATM 0A VDO_IPT W 3 3
0A VDO_IPT W 3 3
Video input of Window C is set to 3.
Select input #4
ATM 0A VDO_IPT W 3 4
0A VDO_IPT W 3 4
Video input of Window C is set to 4.
Select input #5
ATM 0A VDO_IPT W 3 5
0A VDO_IPT W 3 5
Video input of Window C is set to 5.
Select input #6
ATM 0A VDO_IPT W 3 6
0A VDO_IPT W 3 6
Video input of Window C is set to 6.
Select input #7
ATM 0A VDO_IPT W 3 7
0A VDO_IPT W 3 7
Video input of Window C is set to 7.
8
Video Set – Window D
See Instructions for Video Set – Window A for details.
Item
Command
Feedback
Description
Select input #1
ATM 0A VDO_IPT W 4 1
0A VDO_IPT W 4 1
Video input of Window D is set to 1.
Select input #2
ATM 0A VDO_IPT W 4 2
0A VDO_IPT W 4 2
Video input of Window D is set to 2.
Select input #3
ATM 0A VDO_IPT W 4 3
0A VDO_IPT W 4 3
Video input of Window D is set to 3.
Select input #4
ATM 0A VDO_IPT W 4 4
0A VDO_IPT W 4 4
Video input of Window D is set to 4.
Select input #5
ATM 0A VDO_IPT W 4 5
0A VDO_IPT W 4 5
Video input of Window D is set to 5.
Select input #6
ATM 0A VDO_IPT W 4 6
0A VDO_IPT W 4 6
Video input of Window D is set to 6.
Select input #7
ATM 0A VDO_IPT W 4 7
0A VDO_IPT W 4 7
Video input of Window D is set to 7.
Audio Set - Audio input select
Instruction: Audio output is set to audio input x (1 to 7)
Command:
ATM 09 ADO_IPT W x
x = audio input 1 to 7
Feedback:
ATM 09 ADO_IPT W x
x = audio input 1 to 7
Item
Command
Feedback
Description
Select input #1
ATM 09 ADO_IPT W 1
ATM 09 ADO_IPT W 1
Audio output is set to audio input 1
Select input #2
ATM 09 ADO_IPT W 2
ATM 09 ADO_IPT W 2
Audio output is set to audio input 2
Select input #3
ATM 09 ADO_IPT W 3
ATM 09 ADO_IPT W 3
Audio output is set to audio input 3
Select input #4
ATM 09 ADO_IPT W 4
ATM 09 ADO_IPT W 4
Audio output is set to audio input 4
Select input #5
ATM 09 ADO_IPT W 5
ATM 09 ADO_IPT W 5
Audio output is set to audio input 5
Select input #6
ATM 09 ADO_IPT W 6
ATM 09 ADO_IPT W 6
Audio output is set to audio input 6
Select input #7
ATM 09 ADO_IPT W 7
ATM 09 ADO_IPT W 7
Audio output is set to audio input 7
Audio Set - Audio input config
Instruction: Audio input configuration (1 to 7)
Command:
ATM 0A AUD_MOD W x y
x = External audio Input
number 1 to 6
y= 0 HDMI auto audio, 1
external audio
Feedback:
0A AUD_MOD W x y
x = External audio Input
number 1 to 6
y= 0 HDMI auto audio, 1
external audio
Item
Command
Feedback
Description
Select ext. audio on
input #1
ATM 0A AUD_MOD W 1 1
0A AUD_MOD W 1 1
ATM 0A AUD_MOD W M N
M: input number; N: 0/1, 0-
HDMI auto audio, 1-external
audio
E.g. This item is “Set external
audio on input No. 1”
Select ext. audio on
input #2
ATM 0A AUD_MOD W 2 1
0A AUD_MOD W 2 1
Set external audio on input No. 2
Select ext. audio on
input #3
ATM 0A AUD_MOD W 3 1
0A AUD_MOD W 3 1
Set external audio on input No. 3
Select ext. audio on
input #4
ATM 0A AUD_MOD W 4 1
0A AUD_MOD W 4 1
Set external audio on input No. 4
Select ext. audio on
input #5
ATM 0A AUD_MOD W 5 1
0A AUD_MOD W 5 1
Set external audio on input No. 5
Select ext. audio on
input #6
ATM 0A AUD_MOD W 6 1
0A AUD_MOD W 6 1
Set external audio on input No. 6

9
Audio Set – Get Audio Input Config State
Instruction: Check audio input configuration set on input (1 to 6)
Command:
ATM 0A AUD_MOD R x y
x = External audio Input
number 1 to 6
y= 0 HDMI auto audio, 1
external audio
Feedback:
Portx Audio: y
x = External audio Input
number 1 to 6
y= 0 (Auto), 1 (External)
Item
Command
Feedback
Description
Check audio set on
input #1
ATM 09 AUD_MOD R 1
Port1 Audio: 0 (Auto) /
1 (External)
ATM 09 AUD_MOD R M
M: input number; N: 0/1, 0-
HDMI auto audio, 1-external
audio
E.g. This item is “Check audio
input configuration set on input
No. 1”
Check audio set on
input #2
ATM 09 AUD_MOD R 2
Port2 Audio: 0 (Auto) /
1 (External)
Check audio input configuration
set on input No. 2
Check audio set on
input #3
ATM 09 AUD_MOD R 3
Port3 Audio: 0 (Auto) /
1 (External)
Check audio input configuration
set on input No. 3
Check audio set on
input #4
ATM 09 AUD_MOD R 4
Port4 Audio: 0 (Auto) /
1 (External)
Check audio input configuration
set on input No. 4
Check audio set on
input #5
ATM 09 AUD_MOD R 5
Port5 Audio: 0 (Auto) /
1 (External)
Check audio input configuration
set on input No. 5
Check audio set on
input #6
ATM 09 AUD_MOD R 6
Port6 Audio: 0 (Auto) /
1 (External)
Check audio input configuration
set on input No. 6
Audio Set – Audio volume control
Instruction: Set audio volume value (Mute, 1-10, increase and decrease by one increment)
Command:
ATM 09 VOL_CRL W x
x = The volume level 0=Mute, 1 to 9, A=10, E=
increase by one value, F= decrease by one value
Feedback:
09 VOL_CRL W x
x = The volume level 0=Mute, 1 to 9, A=10, E=
increase by one value, F= decrease by one value
Item
Command
Feedback
Description
Set audio Mute
ATM 09 VOL_CRL W 0
09 VOL_CRL W 0
Set the program audio to MUTE
Set audio volume
value at “1”
ATM 09 VOL_CRL W 1
09 VOL_CRL W 1
Set program audio output volume
value at 1
Set audio volume
value at “2”
ATM 09 VOL_CRL W 2
09 VOL_CRL W 2
Set program audio output volume
value at 2
Set audio volume
value at “3”
ATM 09 VOL_CRL W 3
09 VOL_CRL W 3
Set program audio output volume
value at 3
Set audio volume
value at “4”
ATM 09 VOL_CRL W 4
09 VOL_CRL W 4
Set program audio output volume
value at 4
Set audio volume
value at “5”
ATM 09 VOL_CRL W 5
09 VOL_CRL W 5
Set program audio output volume
value at 5
Set audio volume
value at “6”
ATM 09 VOL_CRL W 6
09 VOL_CRL W 6
Set program audio output volume
value at 6
Set audio volume
value at “7”
ATM 09 VOL_CRL W 7
09 VOL_CRL W 7
Set program audio output volume
value at 7
Set audio volume
value at “8”
ATM 09 VOL_CRL W 8
09 VOL_CRL W 8
Set program audio output volume
value at 8
Set audio volume
value at “9”
ATM 09 VOL_CRL W 9
09 VOL_CRL W 9
Set program audio output volume
value at 9
Set audio volume
ATM 09 VOL_CRL W A
09 VOL_CRL W A
Set program audio output volume

10
value at “10”
value at 10
Increase audio
volume by one value
ATM 09 VOL_CRL W E
09 VOL_CRL W E
Increase program audio output by a
increment of 1 value
Decrease audio
volume by one value
ATM 09 VOL_CRL W F
09 VOL_CRL W F
Decrease program audio output by
a increment of 1 value
Ratio Set – Windows Select A
Instruction: Set the Ratio in Windows (A to D)
Command:
ATM 0A WIN_RAT W x y
x = Windows A (1), B (2),
C (3), D (4)
y= 1 (Original aspect), 2
(Entire screen), 3 (16:9), 4
(4:3)
Feedback:
0A WIN_RAT W x y
x = Windows A (1), B (2),
C (3), D (4)
y= 1 (Original aspect), 2
(Entire screen), 3 (16:9), 4
(4:3)
Item
Command
Feedback
Description
Set viewer#1 input as
“NORMAL” ratio
ATM 0A WIN_RAT W 1 1
0A WIN_RAT W 1 1
Set the picture in Window
A(1) as the original aspect
ratio
Set viewer#1 input as
“FULL” ratio
ATM 0A WIN_RAT W 1 2
0A WIN_RAT W 1 2
Set the picture in Window
A(1) to fill the entire window
Set viewer#1 input as
“16:9” ratio
ATM 0A WIN_RAT W 1 3
0A WIN_RAT W 1 3
Set the picture in Window
A(1) as the 16:9 aspect ratio
Set viewer#1 input as
“4:3” ratio
ATM 0A WIN_RAT W 1 4
0A WIN_RAT W 1 4
Set the picture in Window
A(1) as the 4:3 aspect ratio
Ratio Set – Windows Select B
See Instructions for Ratio Set – Window Select A for details.
Item
Command
Feedback
Description
Set viewer#2 input as
“NORMAL” ratio
ATM 0A WIN_RAT W 2 1
0A WIN_RAT W 2 1
Set the picture in Window
B(2) as the original aspect
ratio
Set viewer#2 input as
“FULL” ratio
ATM 0A WIN_RAT W 2 2
0A WIN_RAT W 2 2
Set the picture in Window
B(2) to fill the entire window
Set viewer#2 input as
“16:9” ratio
ATM 0A WIN_RAT W 2 3
0A WIN_RAT W 2 3
Set the picture in Window
B(2) as the 16:9 aspect ratio
Set viewer#2 input as
“4:3” ratio
ATM 0A WIN_RAT W 2 4
0A WIN_RAT W 2 4
Set the picture in Window
B(2) as the 4:3 aspect ratio
Ratio Set – Windows Select C
See Instructions for Ratio Set – Window Select A for details.
Item
Command
Feedback
Description
Set viewer#3 input as
“NORMAL” ratio
ATM 0A WIN_RAT W 3 1
0A WIN_RAT W 3 1
Set the picture in Window
C(3) as the original aspect
ratio
Set viewer#3 input as
“FULL” ratio
ATM 0A WIN_RAT W 3 2
0A WIN_RAT W 3 2
Set the picture in Window
C(3) to fill the entire
window
Set viewer#3 input as
“16:9” ratio
ATM 0A WIN_RAT W 3 3
0A WIN_RAT W 3 3
Set the picture in Window
C(3) as the 16:9 aspect
ratio
Set viewer#3 input as
“4:3” ratio
ATM 0A WIN_RAT W 3 4
0A WIN_RAT W 3 4
Set the picture in Window
C(3) as the 4:3 aspect ratio
 Loading...