

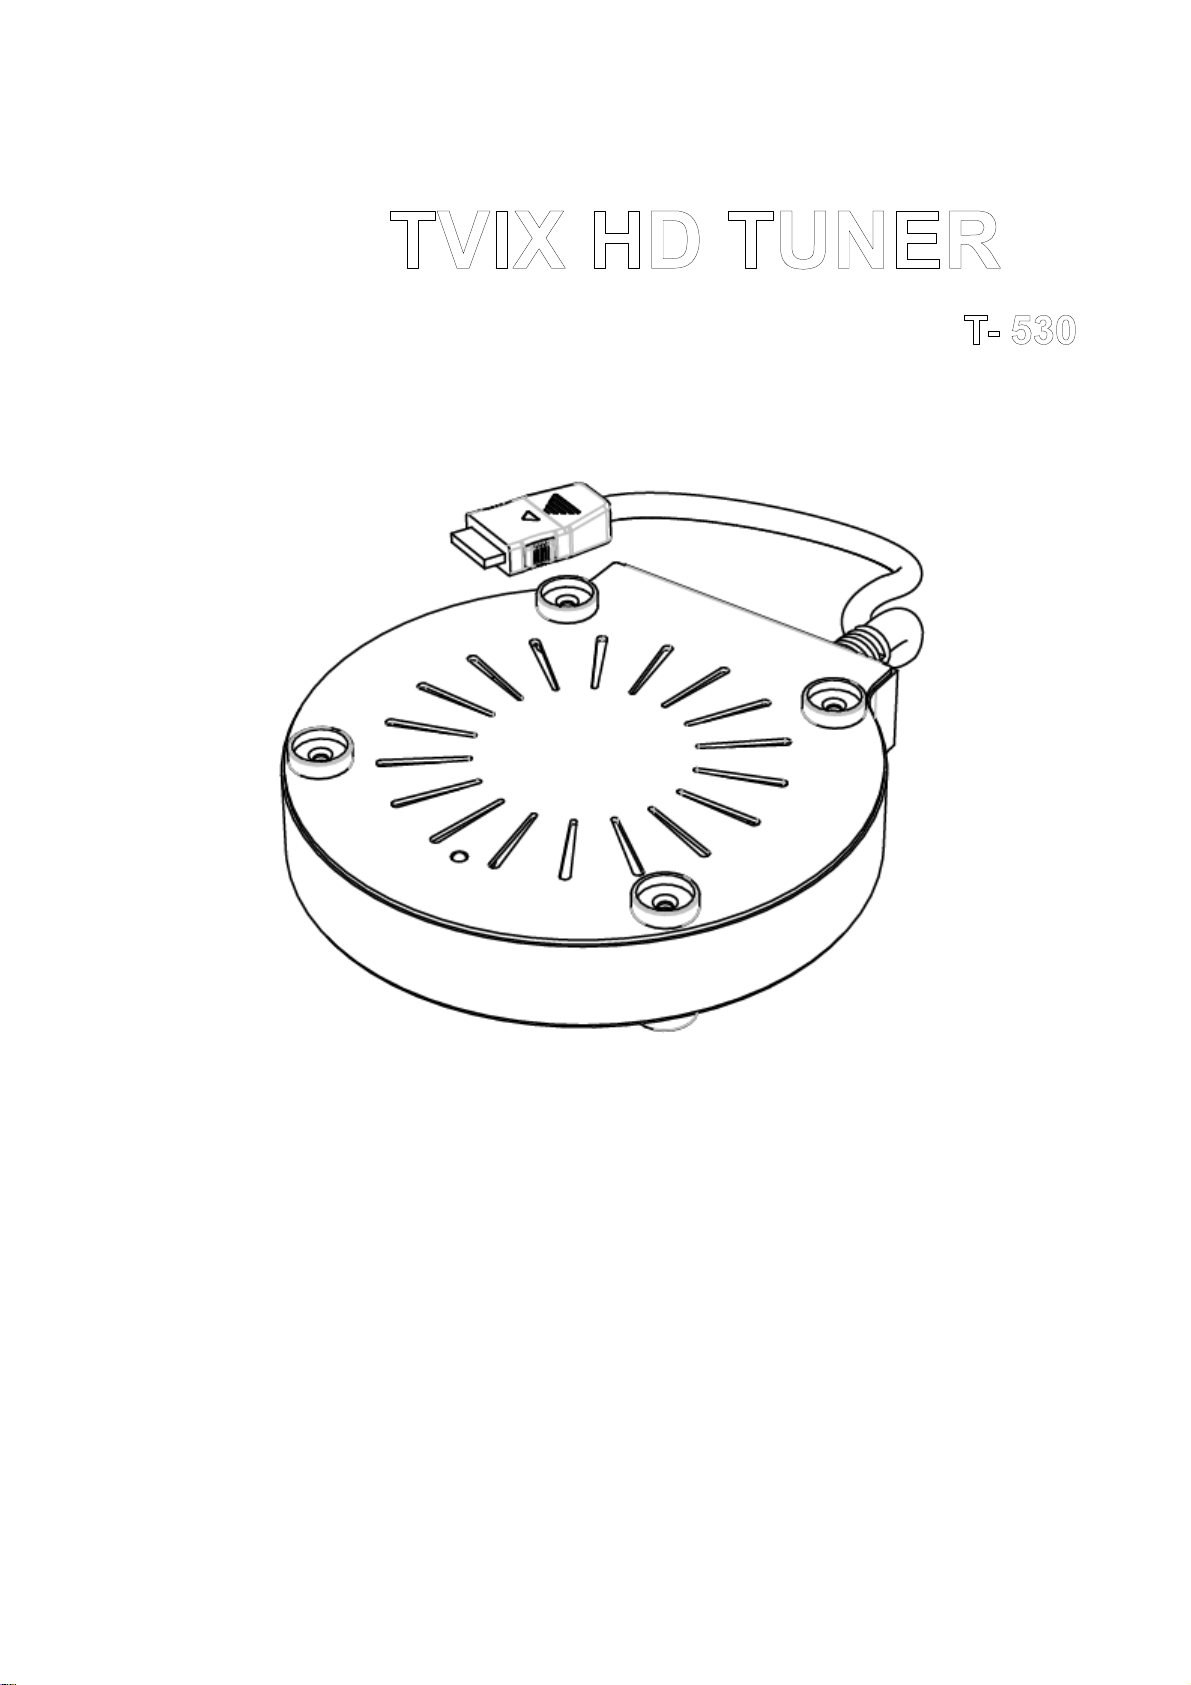
TVIX HD TUNER
T- 530
• All specifications and information are subject to change without further notices.
TVIX HD TUNER Introduction
1. Features
• TVIX HD TUNER can play HDTV without a digital TV set-top box with excellent and super-clear display
on HDTV screens .
• TViX Tuner has the various recording features like direct recording/scheduled recording and repeated
manual recording, so you cannot miss single program of digital TV. It's a completely different type of
PVR since you can easily upgrade and expand the capacity of HDD by themselves like PC upgrading.
And you can backup the recorded file to/from the PC.
• TViX Tuner implements all the DVB-T features like EPG/scheduled recording/ PC-connectivity and this
will let user enjoy all the fruits of the digital broadcasting as well as the supreme audio and video
qualities.
• When using the HDTV mode, you can configure the sleep time. If the sleep time is reached when the
recording is in progress, the TViX will shut down after finishing the recording.
• is available with the TViX HD M-5000 series. (M-3100U does not support this HD TUNER.)
• You must upgrade to the latest M-5000 firmware if you want to use the Tuner. Old firmware versions do
not support this tuner.
• TVIX HD TUNER does not support analog (PAL) broadcasting.
2. Specifications
MODEL TVIX TUNER T430
TUNER Xceive XC3028
Resolution Resolutions up to 1920 * 1080i
Internal Power Via connecting cable to M-5000 (included)
Power 3.7 (W)
Input over-the-air Digital TV (DVB-T)
Size Cylindrical (Diameter 13 1 m m , Height 30mm )
Weight 400g
2

Usage Precautions and Notes
Do not drop the device. It may cause critical damage to the hard drive.
Do not touch the power plug with wet hands or use defective power cables & electric outlets. It may cause electric
shocks or fire.
Keep all magnetic materials away from the TViX. Magnetic materials such as speakers or magnets may erase or
cause damage to the data stored in the hard disk.
Do not try to disassemble or remodel the device. It may cause malfunction or fire.
Starting TViX HDTV mode can take about 12~13 seconds.
Do not detach the 24 pin cable when the TViX is working. It may damage the TViX or the tuner and void
your warranty.
Do not detach the tuner box when the TViX is working. It may damage the TViX or the tuner and void
your warranty.
We recommend using a threaded-type antenna connector.
TV out, ZOOM, and default volume depend on the TViX’s setting.
Checking Digital signal Reception
• Press the INFO button on the remote control. The Signal strength meter will appear on the left-bottom.
• If signal strength meter indicates less than 14.9db, adjust your antenna to increase the signal strength.
Continue to adjust the antenna until you find the best position with the strongest signal.
You can resolve the following problems by pressing O.K button.
• When the audio and video are not synchronized.
• When there is noise on the audio.
• When there are video-freezing problems.
Record Notice
• The first partition of the internal hard disk must use the NTFS format. FAT32 format can cause an error
message.
• When the signal is weak or unstable, recording cannot work properly.
• When the hard disk is unstable, recording cannot work properly. So you must run Check Disk
sometimes.
• Hard disk requires the Check Disk, you must run the Check Disk sometimes
Unplug this apparatus when they are lightening storms or unused for a long time.
Do not connect the USB host or network when the HDTV mode is active.
These can be cause stuttering or jerky motion. We recommend connecting the USB host or network only
in the file mode.
3
About the TViX HD Tuner
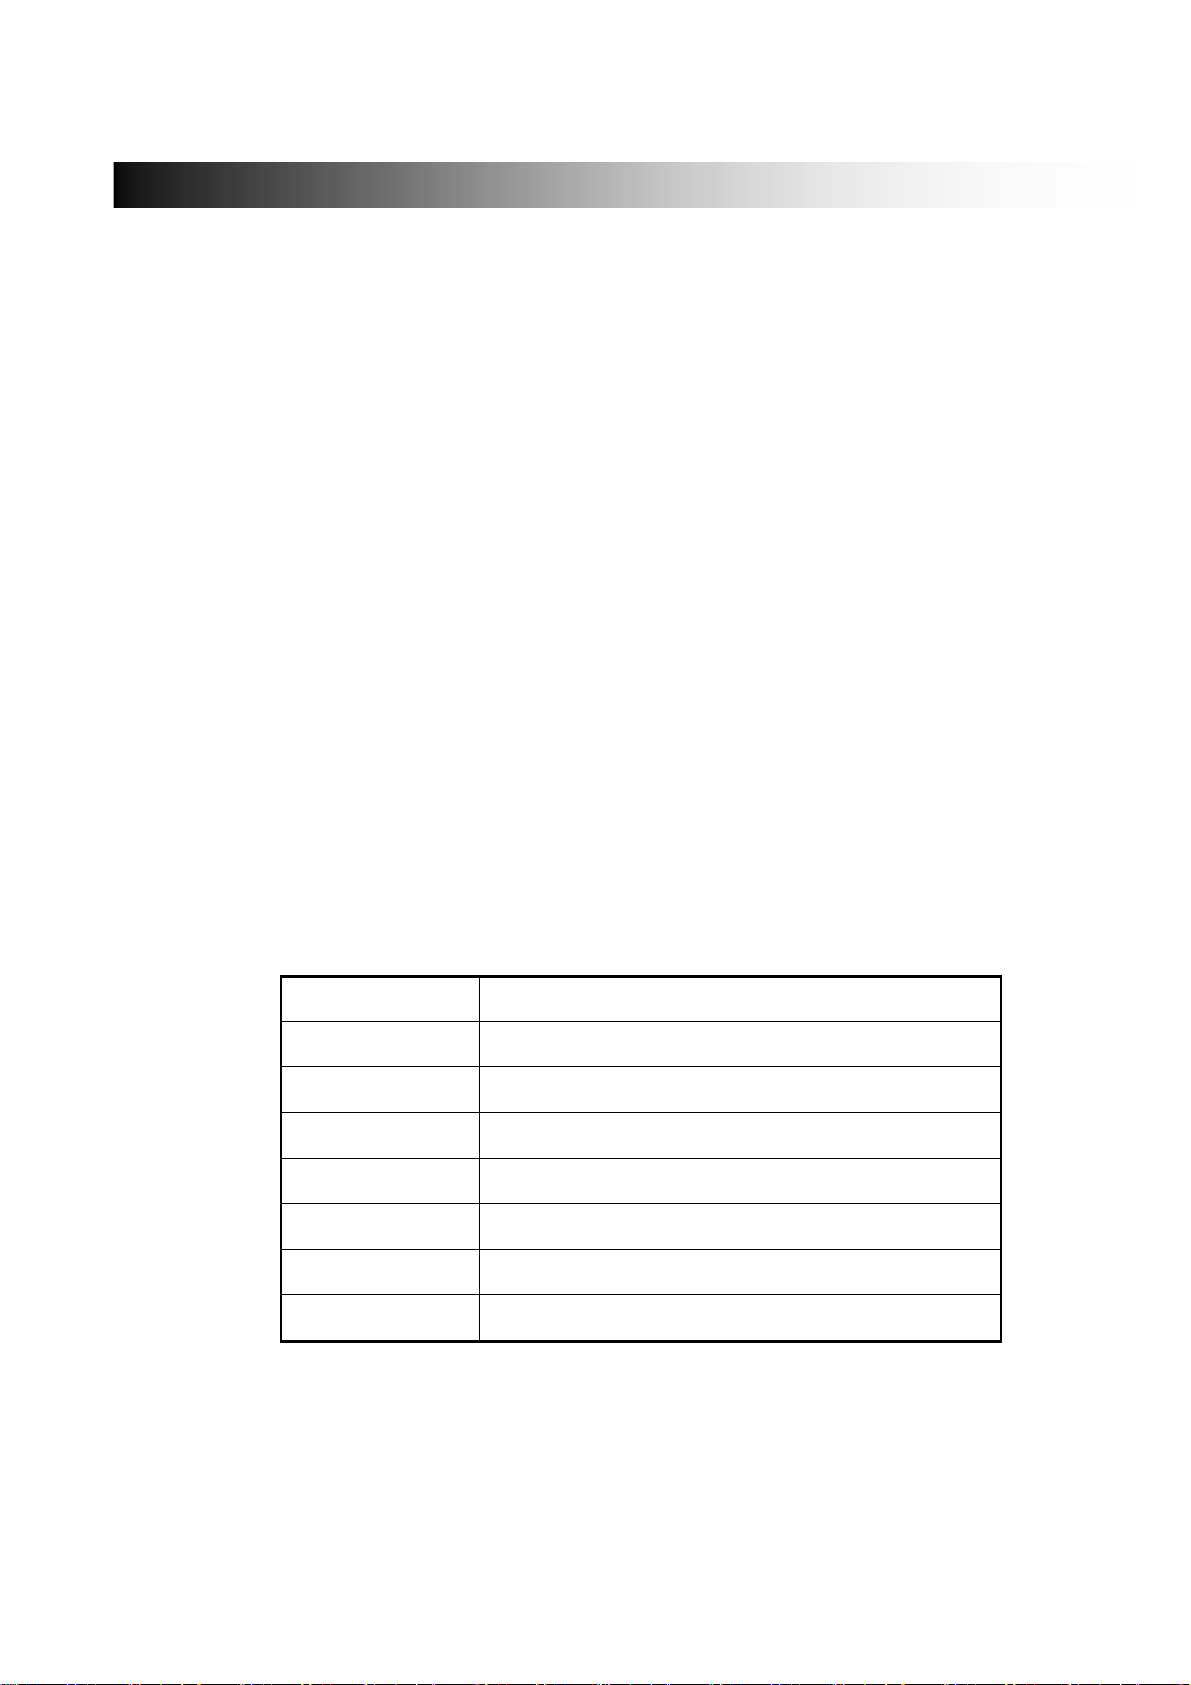
3. Name of Each Part
• Power LED : Displays blue LED when the HDTV mode is active.
• 24 pin connector : Connects to the TViX 5000 main unit.
• Air Antenna : Connects to the terrestrial TV antenna signal
• Test only Port : This port is not available. Do not use this port.
Power LED
24pin connector
Air Antenna
Test only
4. Package Contents
The TViX HD TUNER package contains the following items.
Some packages may change depending on other conditions.
TUNER BOX unit Manual LED diffusion Magnetic coupler
4
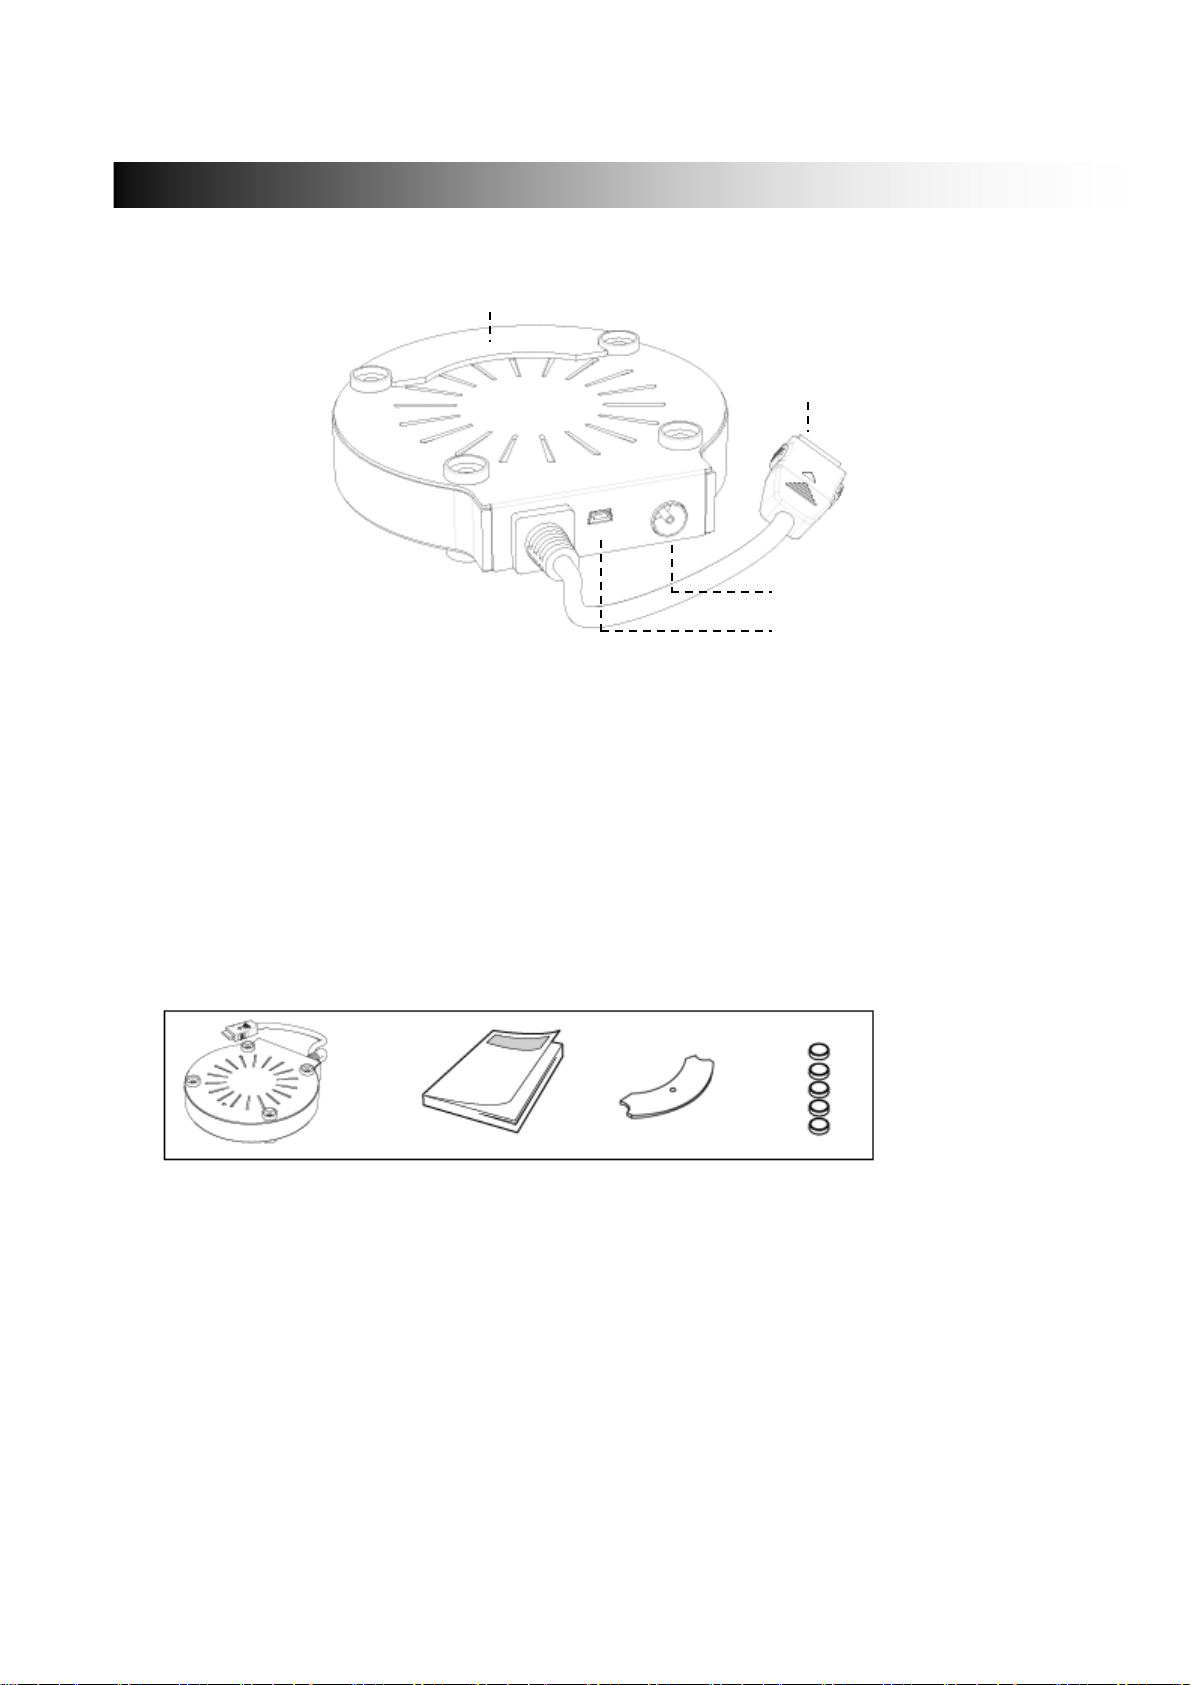
Installation and Connection
1. TUNER Connection
Before the TViX is connected to the tuner, the power of TViX should be turned off. Connecting the tuner
when the power of TViX is "ON" will damage the TViX or the tuner and void your warranty.
① Place the LED diffusion panel on the tuner box. (LED lights when the HDTV mode is active.)
② Detach the TViX’s
The Magnetic coupling is useful when you move the TViX.
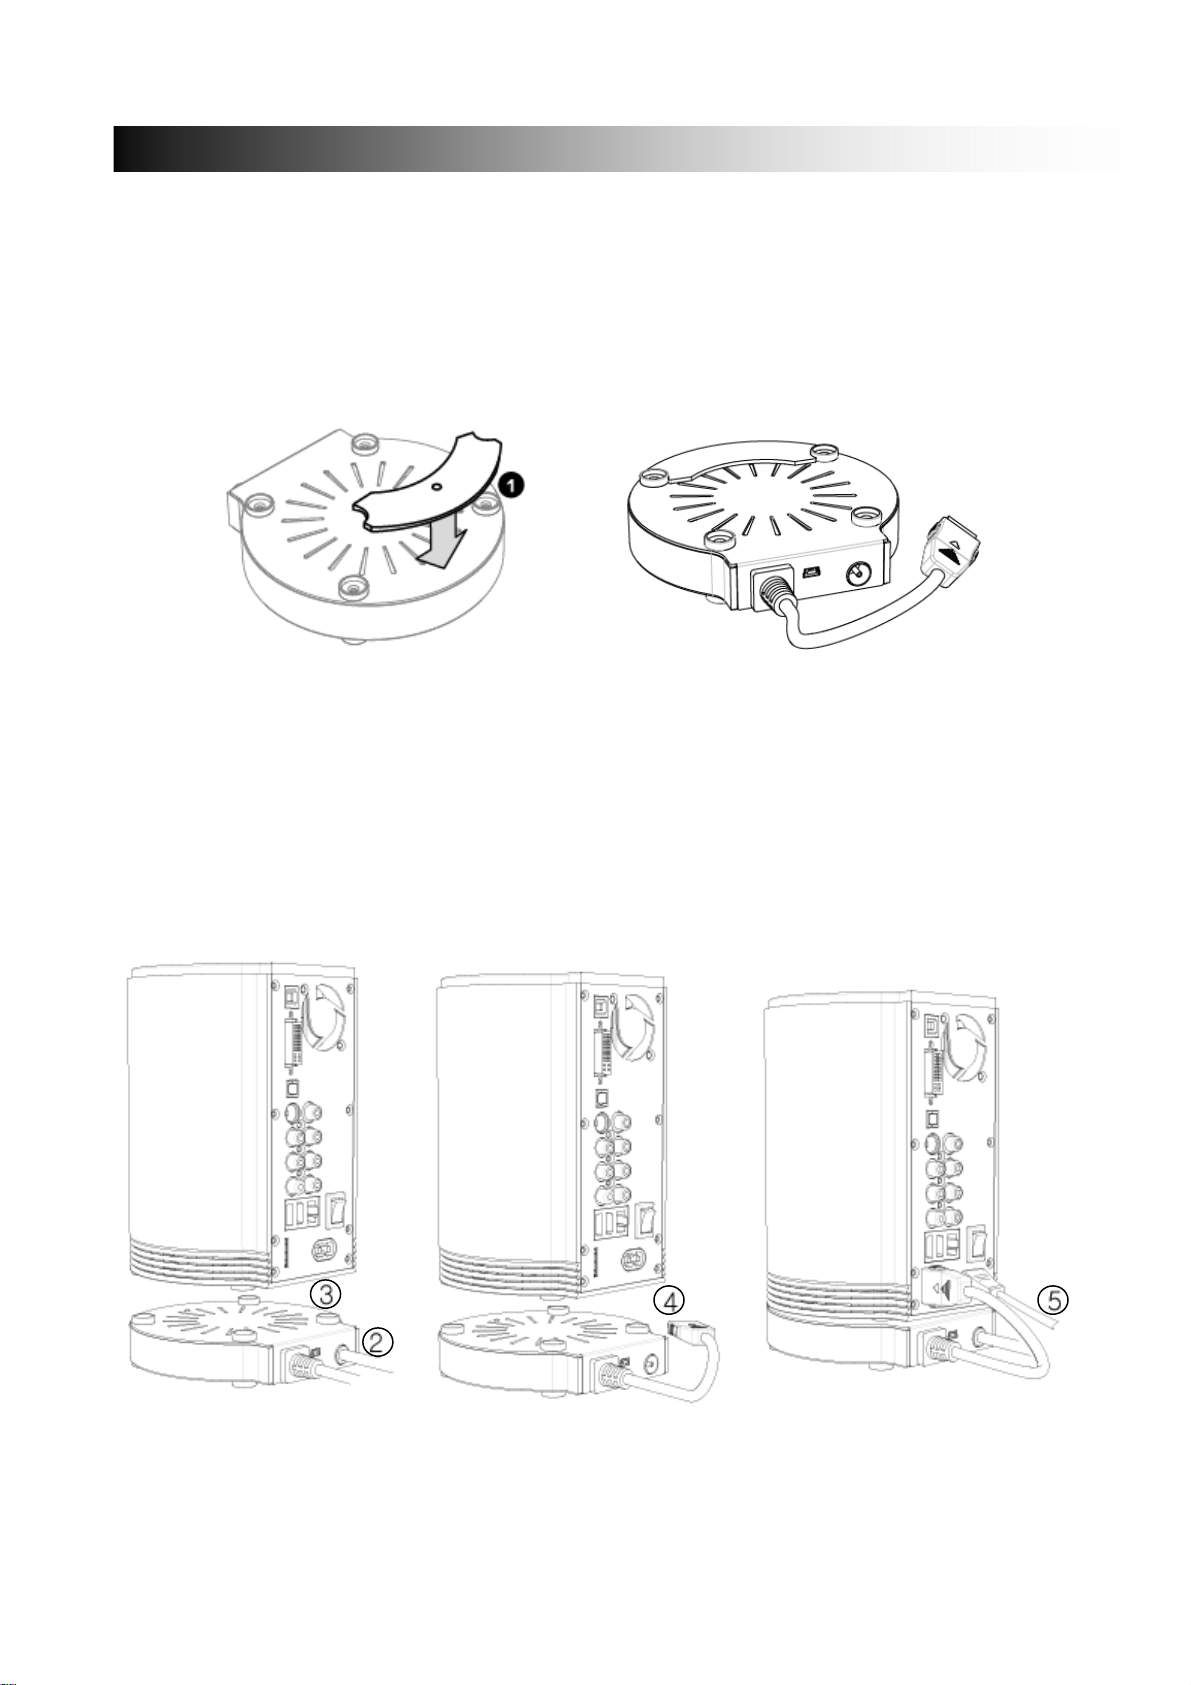
③ Connect the Antenna cable to the tuner ’s input. Move clockwise to tighten.
To improve the DTV quality in a poor signal area, please purchase a signal amplifier and install properly.
④ Place the TViX unit on the tuner box.
⑤ To use 24 pin connector jumper, connect the tuner to the TViX unit. Insert the connectors until you hear a
“
click” sound.
⑥ Connect the power cable.
rubber feet and then attach enclosed Magnetic couplers in their place on the TViX’s bottom.
Double check your 24 pin connection. If you plug the connector into an incorrect position, your TViX may not
start or otherwise function improperly.
5
 Loading...